dungeon crawl classics #51: castle whiterock3 dungeon crawl classics #51 castle whiterock...
TRANSCRIPT
1
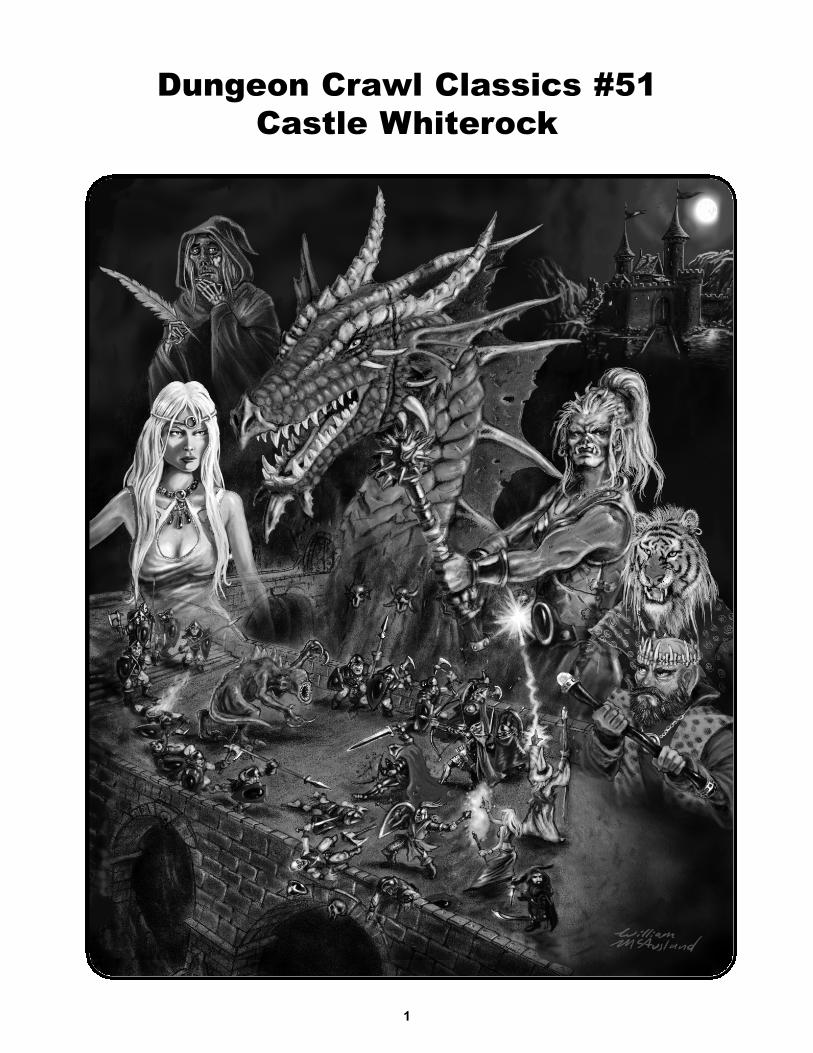
Dungeon Crawl Classics #51Castle Whiterock

Introduction .................................................................3
Level 1: The Upper Ruins of Castle Whiterock.........26
Level 2: The Slave Pits of Despair ...........................40
Level 3: The Lower Dungeons of the White Roc Orcs.........60
Level 3a: The Ruins of the Cloud Giant Tower .........74
Level 4: Between a (White) Rock and a Hard Place.....78
Level 4a: The Clockwork Academy...........................92
Level 5: The Submerged Ruins of Castle Whiterock .......102
Level 6: Smells Like Trouble ...................................119
Level 6a: Ruined Chapel of Bobugbubilz................139
Level 6b: The Halls of Forgotten Lore ....................145
Level 7: The Watery Way........................................154
Level 7a: The Hidden Fane of Justicia ...................176
Level 8: The Far Garden.........................................185
Level 8a: The Glade of Farewell.............................223
Level 9: Denizens of The Immense Cavern ...........230
Level 9a: The Tomb of Anhkhotep ..........................253
Level 9b: The Inverted Tower..................................267
Level 9c: Peduncle’s Retreat ..................................289
Level 10: The Bleak Theater...................................297
Level 10a: Koborth’s Tomb .....................................336
Level 10b: Money for Nothing.................................346
Level 11: Narborg – Outer Defenses ......................357
Level 11a: The Lightless Gate ................................388
Level 11b: Carapace Fissure ..................................402
Level 12: Narborg – Inner Keep..............................411
Level 12a: The Wizard’s Redoubt...........................449
Level 13: The Demonhold.......................................457
Level 14: The Burning Maze...................................483
Level 15: The Dragon’s Lair....................................506
Appendix A: The Inn of The Slumbering Drake ......526
Appendix B: Character Options ..............................538
Appendix C: New Monsters ....................................543
Appendix D: New Equipment/Magic Items .............566
Appendix E: New Unique Magic Items ...................570
Appendix F: Pregenerated Characters ...................579
Appendix G: Mercenaries .......................................587
Appendix H: DCC Tie-Ins........................................593
Appendix I: The Keys..............................................595
Appendix J: Third-Party Monsters and Templates.......597
2
Table of Contents
The page numbers below are spread between the four books that collectively comprise Castle Whiterock: the red
book, blue book, green book, and black book. Page numbers are continuous from one book to the next.
Original Concept: Chris
Doyle and Joseph Goodman
Dungeon Writers: Chris
Doyle and Adrian M.
Pommier
Gazetteer Writers: Jeff
LaSala and Harley Stroh
Box Cover Artist: William
McAusland
Dungeon Books Cover
Artist: Chuck Whelon
Interior Artists: Ian
Armstrong, Chris Arneson,
Diesel, Stacy Drum, Jason
Edwards, Tom Galambos,
Nick Greenwood, Friedrich
Haas, Alex Kosakowski,
Doug Kovacs, Cliff Kurowski,
William McAusland, Brad
McDevitt, Jesse Mohn, Erol
Otus, Mark Parsons, Jim
Roslof, Chad Sergesketter,
Chuck Whelon, Mike Wilson
Cartographer: Jeremy
Simmons
Graphic Designer: Joseph
Goodman
Editors: Ken Hart and Aeryn
“Blackdirge” Rudel
Line Editor: Harley Stroh
Publisher: Joseph
Goodman
Playtesters: Chris Beemer,
Jason Fiedler, Nolan Brown,
Jeffrey Burchell, JP
Charpentier, Lisa Doyle,
Mike Ferguson, Joseph
Frenia, Terri Frenia, Justin
Georgi, Melissa Georgi, Carl
Hall, Andrew Jennings,
Stephen Glicker, Keith
LaBaw, Jeff LaSala, Seth
Lipton, Jennie Mar, Robert
Markee, Devin McCullen,
David McFarland, Dee Mike,
Jim Miller, Scott Moore,
Brian O’Neil, Chris Pettit, CJ
Pommier, Dave Shea, Ray
Teetsel, William Westoven
Credits
Chris’s Dedication: This boxed set is dedicated to my wife and best friend, Lisa. Thank you for your limitless patience,
complete understanding, and your stalwart support while I craft challenges in an attempt to stump the finest DCC players.
Adrian’s Dedication: For CJ, who shaded maps, poked holes in plots, and weathered the storm that was the writing of Castle
Whiterock with poise and patience above and beyond the call of wifery.
3
Dungeon Crawl Classics #51Castle Whiterock
INTRODUCTION
Remember the good old days, when adventures were
underground, NPCs were there to be killed, and the
finale of every dungeon was the dragon on the 20th
level? Those days are back. The “Dungeon Crawl
Classics” series of adventures features no new magic
items, no new monsters, and NPCs that are meant to be
killed. Each adventure is 100% good, solid dungeon
crawl, with the monsters you know, the traps you
remember, and the secret doors you know are there
somewhere.
Castle Whiterock is designed as an extended campaign
for four to six 1st-level PCs. While the PCs can be of
any class, a good mixture – including at least two fight-
ers, a cleric, a rogue, and a wizard – is recommended.
Castle Whiterock and its numerous dungeons should take
months of game time to explore and conquer. Each level
and associated sub-levels are designed to challenge PCs
of the same level as the dungeon. That is, level 4 of the
dungeon is designed for 4th-level heroes. PCs that com-
plete the adventure from start to finish should reach at
least 15th level. The beginning of each level contains
Scaling Information on how to alter the dungeon for par-
ties of different levels, sizes, or composition.
Just as the levels can be altered to suit a particular
party, the entire dungeon can be altered to suit a GM.
Two sections below, Whiterock as a Campaign and
Making It Work for You, help a GM get the most out of
this boxed set, whether for a sweeping campaign or for
a one-off game.
The adventure of Castle Whiterock is tremendous in
scope, incorporating several levels, dozens of NPCs
(friend, foe, and otherwise), and a handful of factions
vying for power. The section below titled Dungeon
Levels, Handouts, and Appendices is intended to
help a new GM quickly become familiar with the physi-
cal terrain of Castle Whiterock (as well as provide a
glimpse of what further resources are available in the
appendices). The section titled Inhabitants of Castle
Whiterock introduces the GM to the most important
NPCs (historical or current) of the adventure, their fac-
tions, and their agendas.
The remainder of the Introduction offers a general
overview of the adventure, provides the Background
Story, describes the encounter tables in each level, and
proposes several plot hooks to get the players involved.
Adventure Summary
In the course of adventuring in the 15 levels and 14 sub-
levels of Castle Whiterock, the heroes will uncover
secrets from the module’s backstory as they seek out
fortune and glory. In order to best the dungeon, the
party will have to explore many strange locations, such
as orcish mines, underwater ruins, a forested demi-
plane, a “tower” carved from a giant stalactite, a duer-
gar fortress, and the volcanic heart of the mountain.
Along the way, they will have the opportunity to partake
in several sub-quests that could net them extra wealth
and XP.
Perhaps they will find powerful allies and lost artifacts to
help them against Benthosruthsa, the great red dragon
dwelling at the bottom of the dungeon. It’s also likely
they will make powerful enemies. Many of the adver-
saries of Castle Whiterock don’t stand around waiting
for the heroes to come to them – they go looking for the
heroes!
Background Story
Castle Whiterock’s history spans more than 1,200
years. Most of the events described here are long-
forgotten facts, but the adventurers can learn some
details by exploring the ruins and interacting with resi-
dents of Castle Whiterock and Cillamar.
The history makes use of names and situations from
DCC #35: Gazetteer of the Known Realms. GMs wish-
ing to place their games elsewhere should feel free to
change or ignore any details they wish.
–1,222 years: The original site of Castle Whiterock is
settled by an order of monks called the Order of the
Dawning Sun. Their monastery, called Clynnoise, con-
sisted of the tower and adjoining living quarters, plus a
small stone library set against the caldera’s wall (which
was later converted to a small keep). This order of
monks, dedicated to the preservation of lore, erected a
vast, hidden library called the Halls of Forgotten Lore in
the natural caves under the site.
Over the next 200 years, Clynnoise was sacked 13
times by orcs, barbarians, and once by dwarves. Each
time, at least one monk survived, usually by retreating
to the concealed Halls of Forgotten Lore, and emerged
later to reestablish the monastery.
–1,015 years: A huge force of orcs from the Broken
Tusk tribe attacks Clynnoise and, through more
luck than skill, manages to slay all of the
monks. Most of the monastery is destroyed
and the orcs construct a crude permanent
keep. Although they locate their caves below
the site, they never discover the Halls of
Forgotten Lore.
–962 years: The gnomes from the surrounding
foothills unite and, with the aid of dwarven allies,
manage to rout the orcs. The gnomes settle in the
keep and alter the caves below into finished dwelling-
spaces, founding both the Clockwork Academy and,
nearby, a small settlement named Stoneham.
–860 years: The Clockwork Academy builds the
Incomprehensible for Elbertus “Hazard” Haversham. It
is lost on its maiden voyage.
–804 years: Remnants of the Broken Tusk tribe return
for revenge, bringing cloud giant allies and a flying cas-
tle. While orc footmen swarm Stoneham, the cloud
giants pelt the gnomish keep with boulders, overwhelm-
ing the gnomish defenders. The orcs resettle the site
and, with their giant allies, rebuild the castle. In so
doing, they use a white stone common to the architec-
ture of cloud giants.
The cloud giant leader bestows a powerful gift to the orc
chieftain, the figurine of the White Roc, as a symbol of
their alliance. In return, the orcs rename themselves the
tribe of the White Roc. From their cloud-castle-defended
stronghold, the orcs terrorize the surrounding lands, draw-
ing more tribes to their banner. In time, the orcs come to
worship the figurine and the creature it summons.
–684 years: Members of drow House Forlorna emerge
from the lower dungeons and form an uneasy alliance
with the White Roc orcs. In less than a year, they
unleash a devastating disease on the orcs and use
powerful magic to rout the giants. During the battle, one
of the cloud castle’s towers plunges into Castle
Whiterock, destroying the upper structures and collaps-
ing the lower levels. During the rout, the figurine of theWhite Roc is lost.
Over the next few decades, House Forlorna uses the
ruins to stage daring attacks on the surface world. The
upper levels fall into disrepair while the drow fortify and
expand the depths, eventually building an arena to sat-
isfy their perverse bloodlust and the stronghold of Nalas
Div, the Inverted Tower, to guard it.
–647 years: A party of adventurers called the Company
of the Black Osprey spends several months cleaning
the dungeons of all dangerous creatures. After numer-
ous clashes, the company manages to defeat the drow
garrison and claim the castle for their own. After discov-
ering Orcish graffiti mentioning “whiit rok,” they mistak-
enly believe it a reference to the material of the
outer walls, so they dub their new home “Castle
Whiterock,” the name by which it is known
today.
The adventurers spend years and a fortune
restoring the castle. They also added a few
touches of their own, such as a private library
and research space, a prison for demons, a
gate to a forested demiplane, and personal
tombs.
–628 years: With the area stabilized by the Company of
the Black Osprey, gnomish and human traders resettle
the ruins of Stoneham. The small wilderness town is
eventually renamed Cillamar, after its first mayor, a
kind, charismatic leader.
–589 years: The last member of the Company of the
Black Osprey, Lythe Abysstalker, disappears, and the
site falls into disuse.
–555 years: The Empire of Crieste expands northward,
bringing with it trade and an army. The empire claims
the abandoned Castle Whiterock and uses it to house a
garrison protecting the nearby trade route. The lower
levels are sealed while the upper levels are fortified.
Buoyed by the implied security of a nearby military post,
Cillamar swells in population, providing services to
Castle Whiterock and the numerous caravans passing
through the region.
Around this time, Castle Whiterock begins to gain some
notoriety as a kind of “dead zone” for summoners. Many
conjuration spells that call forth allies from other planes
seem to fail in the vicinity of the Imperial garrison.
–412 years: The empire decides that the garrison at
Castle Whiterock is no longer worth maintaining. The
land rights are sold to a dwarven outfit, Deepearth
Mining Interests. The group, in search of mithril deposits
in the mountain’s heart, expands the lower levels and
finds the old drow arena. There is no mithril, however.
–396 years: An aggressive band of duergar, led by Vitr
Vejik, secretly wipes out Deepearth Mining Interests.
Using surface agents, they make it appear as if the
dwarves went out of business and moved on.
Meanwhile, the duergar fortify the lower levels, eventu-
ally remodeling the arena, now named the Bleak
Theater. A fortress, Narborg, is built to defend the
arena, and the Lightless Gate is constructed to keep out
attacks from the Underdeep. Vitr crowns himself the first
Thane of Narborg.
4
–351 years: Volcanic activity increases in the region,
and earthquakes collapse the west wall of the caldera,
linking the volcanic basin to a freshwater lake. The
changing water table submerges the lower keep and
causes widespread destruction both above and below
the ruins. Vitr Vejik is crushed in a collapsing tunnel,
and his son Feigr becomes thane.
–319 years: Benthosruthsa, a red dragon of noble line-
age, explores the ruins using his polymorph ability to
assume human form. He finds the lower levels suitable
for his new lair, especially given the recent volcanic
activity. Over the next few decades, Cillamar is razed as
the evil dragon extends his rule and pads his hoard.
Few dare to confront the powerful wyrm. His power thus
asserted, Benthos begins taking occasional long “naps”
traveling the planes, always eventually returning to his
lair in the volcanic heart of Castle Whiterock. He
secures his position by making an alliance with Thane
Feigr Vejik of Narborg.
During his travels, Benthosruthsa offends a very young
black dragon named Silhouette. He quickly forgets the
slight, but she never does.
–313 years: While expanding the Bleak Theater, the
duergar locate the tomb of General Koborth of the
Company of the Black Osprey. They loot it, angering the
ghost of Elweiss, who is eventually sealed in a glass
coffin.
–100 years: Hrolad Vejik assassinates his father, Feigr,
becoming the third Thane of Narborg. He strikes a deal
with a distant dwarven monarch, the Mountain King, for
the mutual defense of his fortress home, but paranoia
soon takes seed in his heart.
–88 years: After several centuries without a single drag-
on sighting, the town of Cillamar grows and prospers as
trade routes are reopened in the region. Most now
believe that old Benthos has moved on or was slain.
During this time, Benthos enters an affair with
Hasna’azhar, a fiendish lamia. Yet dragons do not
understand love, only ownership, so Benthos takes to
keeping Hasna’azhar trapped in an iron flask – but not
before he bids her to use a scroll to cast a greater sleepof ages spell on Agmenelious, a silver dragon and a
dear enemy.
–38 years: The Fellowship of the Humbled Hen, an
adventuring company, enters Castle Whiterock to loot
the dungeon. Shortly thereafter, they have a falling out
and part ways. One of their number, Peduncle Hilspek,
finds an underground grotto and moves in.
–36 years: A man known as Most Bloated Muthren
founds a cult of Bobugbubilz, the Toadfiend. The cult is
based out of a small chapel carved into the side of the
mountain.
–31 years: Paladins of the Order of the Sundered
Scale, acting on information given them by the mysteri-
ous sorceress Lady Chauntessa, swear an oath to
destroy Benthosruthsa. They establish a secret fane
just off an underground river beneath Castle Whiterock.
–30 years: The Order of the Sundered Scale is nearly
wiped out by the Pack of the Night-Wolf, assassin mer-
cenaries hired by Thane Vejik of Narborg. Most Bloated
Muthren captures the sole survivor, Knight-Chaplain
Benden Talbusk, and sacrifices him to Bobugbubilz. In
divine vengeance, Justicia, goddess of paladins, buries
the chapel in a landslide. Muthren reanimates the bod-
ies of parishioners, then dies, returning as a ghast.
–11 years: The enigmatic Lady Chauntessa arrives in
Cillamar and constructs the Inn of the Slumbering
Drake. She often hires adventurers to explore the ruins
of Castle Whiterock. She is secretly the silver dragon
Chauntessmilkasia, mate of Agmenelious. She seeks
Benthosruthsa’s iron flask, knowing that only
Hasna’azhar can break the spell cursing her mate.
–3 years: Descendants of the orcs of the White Roc,
led by a charismatic, giant-touched adept named
Drugila, quietly return to the ruins. They begin estab-
lishing a base of operations, seeking the lost figurine ofthe White Roc.
–2 years: Sossank, a toadspawn mountain troglodyte,
leads his tribe to Castle Whiterock, eventually discover-
ing Most Bloated Muthren’s buried chapel.
–1 year: The Slavers of the Iron Manacle, disguised as
monks of the Dawning Sun order, arrive at the ruins and
reestablish their shattered organization.
Their arrival, and close relationship with the orc brute
Kaernga, causes the White Roc orcs to split into two
factions. The loyalists, under Drugila, continue to
search for the figurine of the White Roc. The others,
now called the White Talon, are led by Kaernga. They
quickly make an arrangement with the slavers, who
capture locals from Cillamar and sell them to the orcs
for manual labor in their quartz mines. The orcs, in turn,
sell some slaves to the duergar of Narborg.
Finally, Benthosruthsa is forced to pay for past crimes.
Silhouette, who has grown up hating him, enlists sever-
al allies to help her destroy the old red. “Sil” uses an
earthquake to cause the underground river to flood
Benthosruthsa’s volcanic lair. After a pitched battle, Sil
and her confederates overcome the red dragon and
assume control of Castle Whiterock. But Benthos is not
ready to give up his hoard so easily....
5
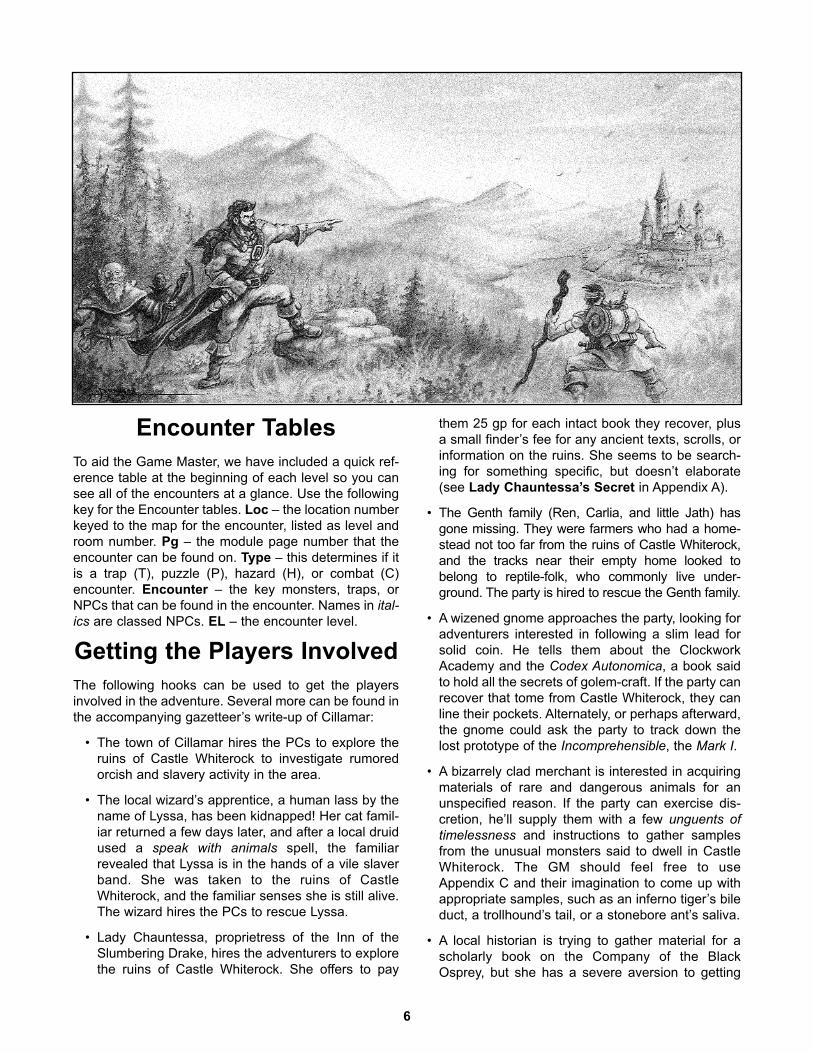
Encounter Tables
To aid the Game Master, we have included a quick ref-
erence table at the beginning of each level so you can
see all of the encounters at a glance. Use the following
key for the Encounter tables. Loc – the location number
keyed to the map for the encounter, listed as level and
room number. Pg – the module page number that the
encounter can be found on. Type – this determines if it
is a trap (T), puzzle (P), hazard (H), or combat (C)
encounter. Encounter – the key monsters, traps, or
NPCs that can be found in the encounter. Names in ital-ics are classed NPCs. EL – the encounter level.
Getting the Players Involved
The following hooks can be used to get the players
involved in the adventure. Several more can be found in
the accompanying gazetteer’s write-up of Cillamar:
• The town of Cillamar hires the PCs to explore the
ruins of Castle Whiterock to investigate rumored
orcish and slavery activity in the area.
• The local wizard’s apprentice, a human lass by the
name of Lyssa, has been kidnapped! Her cat famil-
iar returned a few days later, and after a local druid
used a speak with animals spell, the familiar
revealed that Lyssa is in the hands of a vile slaver
band. She was taken to the ruins of Castle
Whiterock, and the familiar senses she is still alive.
The wizard hires the PCs to rescue Lyssa.
• Lady Chauntessa, proprietress of the Inn of the
Slumbering Drake, hires the adventurers to explore
the ruins of Castle Whiterock. She offers to pay
them 25 gp for each intact book they recover, plus
a small finder’s fee for any ancient texts, scrolls, or
information on the ruins. She seems to be search-
ing for something specific, but doesn’t elaborate
(see Lady Chauntessa’s Secret in Appendix A).
• The Genth family (Ren, Carlia, and little Jath) has
gone missing. They were farmers who had a home-
stead not too far from the ruins of Castle Whiterock,
and the tracks near their empty home looked to
belong to reptile-folk, who commonly live under-
ground. The party is hired to rescue the Genth family.
• A wizened gnome approaches the party, looking for
adventurers interested in following a slim lead for
solid coin. He tells them about the Clockwork
Academy and the Codex Autonomica, a book said
to hold all the secrets of golem-craft. If the party can
recover that tome from Castle Whiterock, they can
line their pockets. Alternately, or perhaps afterward,
the gnome could ask the party to track down the
lost prototype of the Incomprehensible, the Mark I.
• A bizarrely clad merchant is interested in acquiring
materials of rare and dangerous animals for an
unspecified reason. If the party can exercise dis-
cretion, he’ll supply them with a few unguents oftimelessness and instructions to gather samples
from the unusual monsters said to dwell in Castle
Whiterock. The GM should feel free to use
Appendix C and their imagination to come up with
appropriate samples, such as an inferno tiger’s bile
duct, a trollhound’s tail, or a stonebore ant’s saliva.
• A local historian is trying to gather material for a
scholarly book on the Company of the Black
Osprey, but she has a severe aversion to getting
6
killed, so she hires adventuring parties to do the
gathering for her. She occasionally watches the
party with a crystal ball and uses sending spells to
point them in the right direction from time to time.
• A cabal of conjurers is looking to hire adventurers to
investigate why Castle Whiterock and its surround-
ing territory is a “dead zone” for summoning crea-
tures of the upper and lower planes. They are will-
ing to supply a small cache of scrolls of mid-level
summon monster spells to any party willing to
explore the ruins, with promises of greater riches if
the cause of the disturbance can be determined.
But are these conjurers more than they seem?
The Dungeon Levels,
Handouts, and Appendices
Castle Whiterock consists of 15 levels and 14 sub-lev-
els. In the boxed set, these are broken down into four
booklets: red, blue, green, and black. The adventure
proceeds in that order.
Each book, and all its levels and sub-levels, is listed
below, along with general notes on geography,
denizens, relevant handouts (if any), and its author.
Red Book: “Ruins of Castle
Whiterock”
In the beginning of the adventure, the party runs afoul
of slavers and orc miners, but they begin to hear rumors
of a power deeper in the dungeon that actually pulls the
strings. Traveling through corridor, mineshaft, tunnel,
and under water, clever parties will find three well-hid-
den areas (a library, a chapel, and a construct factory)
that reveal some of the secret history of Castle
Whiterock.
Level 1: The Upper Ruins of Castle
Whiterock
The first level of the dungeon is the upper ruins of the
castle. Originally the monastery Clynnoise, it has also
been a gnomish outpost, an orcish stronghold, and an
imperial garrison. The Slavers of the Iron Manacle cur-
rently inhabit these buildings.
Handouts: A (symbol of Iron Manacle)
(author: Chris Doyle)
Level 2: The Slave Pits of Despair
The second level of the dungeon is inhabited by the
separatist White Talon orcs, and features an active
quartz mine. These orcs have a brisk trade with the
Slavers of the Iron Manacle and with the Bleak Theater.
Handouts: B (symbol of White Talon orcs)
(author: Chris Doyle)
Level 3: The Lower Dungeons of the White
Roc Orcs
The third level of Castle Whiterock is inhabited by the
White Roc orcs, who operate a mine while looking for
artifacts of their ancestors. Part of this level is flooded
from the mountain’s caldera lake.
Handouts: C (Clockwork Academy flyer), D (picture of
Aquil’iya), E (model of Castle Whiterock)
(author: Chris Doyle)
Sub-level 3A: The Ruins of the Cloud
Giant Tower
Drugila, leader of the orcs of the White Roc, lives in this
tower, which crashed into the mountain during the
attack by joint orcish and cloud giant forces. She des-
perately seeks an artifact of her ancestors, a figurine ofwondrous power that summons the White Roc.
Handouts: F (symbol of White Roc orcs)
(author: Chris Doyle)
Level 4: Between a (White) Rock and a
Hard Place
A tribe of troglodytes inhabits the fourth level of Castle
Whiterock, a network of natural caves. Although they
once enjoyed the protection of Benthosruthsa, these
troglodytes are preyed upon by human slavers, orc
brutes, and Sossank’s tribe.
(author: Chris Doyle)
Sub-level 4A: The Clockwork Academy
Once a gnomish construct factory/school managed by
Headmaster Ergus Silverheel, the Clockwork Academy
was destroyed when the cloud giant’s tower crashed into
Castle Whiterock. Only one wing of the campus sur-
vives, but it includes the headmaster’s vault, including
the Codex Autonomica, the book that contains all the
academy’s blueprints and secrets of golem construction.
Handouts: G (door to Clockwork Academy), H (laun-
dress’ reminder), I (laundress’ nasty note)
(author: Adrian M. Pommier)
Level 5: The Submerged Ruins of Castle
Whiterock
The hidden fifth level of Castle Whiterock is the (former)
lower courtyard, which flooded when the water table
increased after earthquakes in the region. Now com-
pletely submerged, this area is home to several dan-
gerous and large creatures.
7
(author: Chris Doyle)
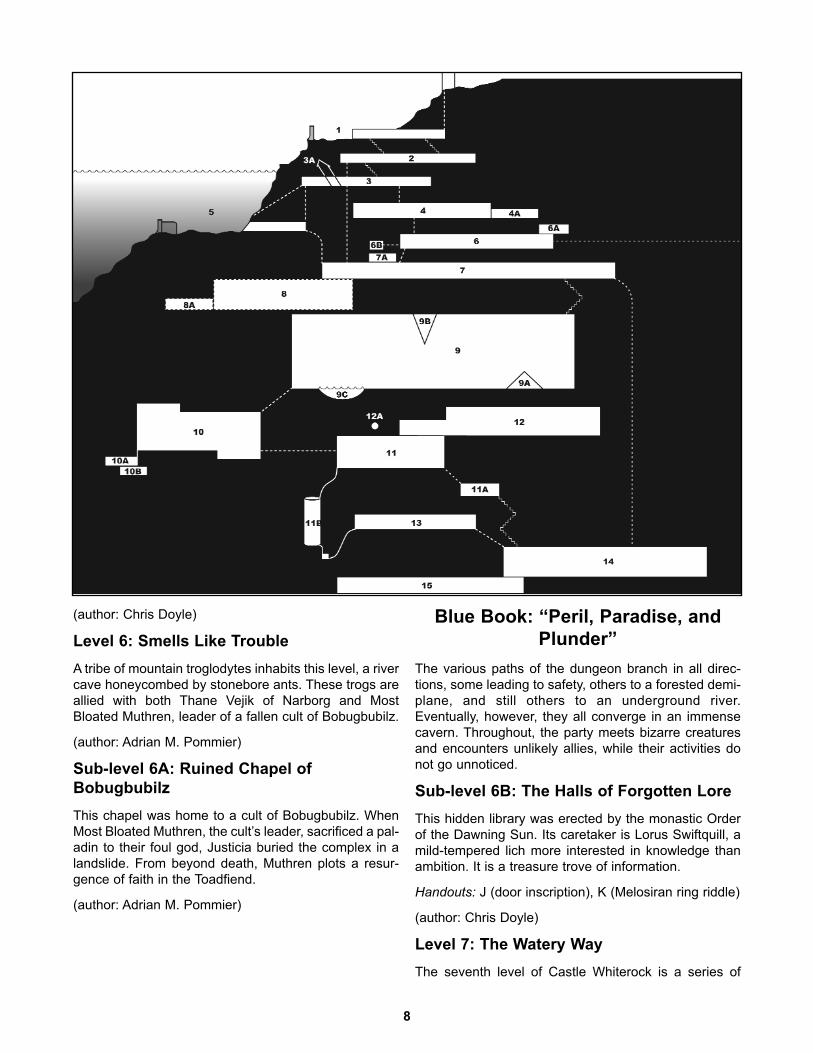
Level 6: Smells Like Trouble
A tribe of mountain troglodytes inhabits this level, a river
cave honeycombed by stonebore ants. These trogs are
allied with both Thane Vejik of Narborg and Most
Bloated Muthren, leader of a fallen cult of Bobugbubilz.
(author: Adrian M. Pommier)
Sub-level 6A: Ruined Chapel of
Bobugbubilz
This chapel was home to a cult of Bobugbubilz. When
Most Bloated Muthren, the cult’s leader, sacrificed a pal-
adin to their foul god, Justicia buried the complex in a
landslide. From beyond death, Muthren plots a resur-
gence of faith in the Toadfiend.
(author: Adrian M. Pommier)
Blue Book: “Peril, Paradise, and
Plunder”
The various paths of the dungeon branch in all direc-
tions, some leading to safety, others to a forested demi-
plane, and still others to an underground river.
Eventually, however, they all converge in an immense
cavern. Throughout, the party meets bizarre creatures
and encounters unlikely allies, while their activities do
not go unnoticed.
Sub-level 6B: The Halls of Forgotten Lore
This hidden library was erected by the monastic Order
of the Dawning Sun. Its caretaker is Lorus Swiftquill, a
mild-tempered lich more interested in knowledge than
ambition. It is a treasure trove of information.
Handouts: J (door inscription), K (Melosiran ring riddle)
(author: Chris Doyle)
Level 7: The Watery Way
The seventh level of Castle Whiterock is a series of
8
water caves that can be traversed via boats or magic.
Derro in the employ of the Bleak Theater man an out-
post here to funnel slaves through the caves and down
below. Acanthus, an aboleth lairing in this area, con-
ducts abominable experiments with new forms of skum,
while a minyad druid, Vulgaris, supplies customers with
a variety of poisons and fungi.
Handouts: L (command words for folding boat)
(author: Chris Doyle)
Sub-level 7A: The Hidden Fane of Justicia
The Order of the Sundered Scale used this hidden fane
as a base camp during their campaign against
Benthosruthsa. It contains the record of their quest and
a minor artifact of the order, the Basin of Cleansing.
Handouts: M (dream-image of paladins), N (the Hall of
Worship)
(author: Adrian M. Pommier)
Level 8: The Far Garden
This level is a demiplane that connects with and is
coterminus to all temperate forestland in the world,
accessible via two gates: the original, located in Castle
Whiterock, and a copy in the goblin-infested Grand
Duchy of Leherti. (A third, forgotten gate lies sealed
underneath an ancient oak near Cillamar.) Goblinoids
have invaded this pristine forest and are burning it
down. This level is a break from the underground
adventuring of Castle Whiterock.
Handouts: O (first view of the Far Garden), P (the
Gloaming Bridge)
(author: Adrian M. Pommier)
Sub-level 8A: The Glade of Farewell
This is a private realm where unicorns go to die, only
accessible through a Gloaming Bridge located in the
Far Garden. Hyelnevyuir, a unicorn paragon, guards it,
but the actions of the redcap Forst have started to cor-
rupt this peaceful place.
(author: Adrian M. Pommier)
Level 9: Denizens of the Immense Cavern
This level is a gigantic hollow below the Watery Way. All
who progress deeper into Castle Whiterock must pass
through this level, which includes lairs of numerous
creatures, such as a stirge broodmother, some particu-
larly militant trolls, and a few rowdy stone giant youths.
Handouts: Q (cave paintings)
(author: Chris Doyle)
Sub-level 9A: The Tomb of Anhkhotep
An obsidian pyramid situated in the Immense Cavern,
this is the tomb of Anhkhotep and his spurned wife
Nef’meruti. Pelltar of the Company of the Black Osprey
teleported it to Castle Whiterock, intending to claim it as
his own burial site, but instead it brought about his
doom.
Handouts: R (passage on door to pyramid), S (hiero-
glyphs on wall), T (ancient door inscription), U (the
Rhyme of Betrayal)
(author: Chris Doyle)
Sub-level 9B: The Inverted Tower
The last refuge of House Forlorna, this watchtower was
carved inside a giant stalactite. Matron Chaliax, a
descendant of the legendary Devil-Lich, presides over
the slow death of her house.
Handouts: V (view of the Inverted Tower and behir)
(author: Adrian M. Pommier)
Green Book: “The Crown of Bone”
A great coliseum and the duergar fortress that defends
it block the way ahead. The party must rely on stealth,
guile, or force to proceed into the heart of the mountain
and their date with destiny. There are many wrongs to
set right here, though, and perhaps destiny can wait a
bit more.
Sub-level 9C: Peduncle’s Retreat
Peduncle Hilspek, a member of the defunct Fellowship
of the Humbled Hen, resides in this sealed grotto. The
Incomprehensible (Mark I), a powerful device made by
the Clockwork Academy, washed up here after
Silhouette caused an earthquake on level 7.
Handouts: W (the riddle door), X (appearance of the
Incomprehensible (Mark I))
(author: Adrian M. Pommier)
Level 10: The Bleak Theater
House Forlorna originally built this coliseum, but it is
now occupied by the duergar of Narborg. The
Impresario manages the arena for Thane Vejik, and he
has expanded its activities to include slave trade and
clandestine meetings in addition to bloodsport.
Handouts: Y (Minia’s note), Z (Bleak Theater flyer), AA
(“Projects and Completion”), AB (arena floor)
(author: Adrian M. Pommier)
9
Sub-level 10A: Koborth’s Tomb
This crypt was the not-so-final resting place of General
Koborth of the Company of the Black Osprey. The ghost
of his lifelong friend, Elweiss, had guarded it, but now
it’s a tour stop for the duergar at the Bleak Theater.
Handouts: AC (Gora-khan on the ceiling), AD (main hall
of tomb)
(author: Adrian M. Pommier)
Sub-level 10B: Money for Nothing
This series of puzzle-rooms is where Nimboltin Softstep
of the Company of the Black Osprey (and his wealth) is
buried. A vexing person in life, the halfling hasn’t
allowed death to hamper him.
Handouts: AE (ethereal filcher), AF (Thunder-Boom
Scales), AG (phasm), AH (Nimboltin’s Rhyme)
(author: Adrian M. Pommier)
Level 11: Narborg – Outer Defenses
This level consists of the defenses of a duergar fortress
that guards the Bleak Theater and controls traffic
between the Lightless Gate and the surface, manned by
clansmen of Thane Vejik and the mercenaries of the
Halved Helm.
Handouts: AI (Narborg causeway approach)
(author: Adrian M. Pommier)
Sub-level 11A: The Lightless Gate
The cavern exiting Narborg leads eventually to the
Lightless Gate, an immense construct that defends the
fortress and an approach to the lair of Benthosruthsa. A
derro potionworks is located along this path, which is
patrolled by the duergar deep watch.
Handouts: AJ (derro torture chamber), AK (derro plans),
AL (the Lightless Gate)
(author: Adrian M. Pommier)
Sub-level 11B: Carapace Fissure
This vermin-infested, two-hundred-foot-deep pit is used
as a garbage dump by the duergar of Narborg.
Unknown to the dwarves, it connects to the Demonhold.
Handouts: AM (fissure wasp hive)
(author: Adrian M. Pommier)
Level 12: Narborg – Inner Keep
This level is the clan-hold of the duergar fortress com-
manded by Thane Hrolad Vejik. Paranoid beyond rea-
son, the thane has seen fit to move the women, chil-
dren, and wealth to another of his holdings for safety.
Those who remain have sworn their lives to defend the
thane.
Handouts: AN (carved faces in wall), AO (duergar
behind barricade), AP (orc map), AQ (assassination
options)
(author: Adrian M. Pommier)
Sub-level 12A: The Wizard’s Redoubt
These chambers were created by Pelltar’s magic long
ago when he desired a private place to study, reflect,
and work. Pelltar died here, his remains still occupying
his favorite chair. If the party finds this location, they will
have access to many magic items and the conjurer’s
spellbooks.
Handouts: K (Melosiran ring riddle)
(author: Chris Doyle)
Black Book: “The Fiery Gauntlet”
The heat gets turned up as the party traverses a series
of lava tubes on their way to the final reckoning with
Benthosruthsa, the red dragon master of Castle
Whiterock. Along the way, they may discover first-hand
the truth of one of the area’s most enduring mysteries ...
not that it will save them from the dragon’s fury!
Level 13: The Demonhold
This elaborate “prison” constructed by Pelltar of the
Company of the Black Osprey was supposed to redirect
any summoned, evil outsiders to its tunnels, but it
doesn’t work quite right. Instead, it snares any outsider
with an alignment subtype summoned in or near Castle
Whiterock (even good ones).
Handouts: AR (Pelltar’s book), AS (Balfosa and his
court)
(author: Adrian M. Pommier)
Level 14: The Burning Maze
This series of active and inactive lava tubes inter-
weaves between Narborg, the Demonhold, and the lair
of Benthosruthsa; it even contains a rift to the Plane of
Elemental Fire. Silhouette flooded part of the Burning
Maze when she killed Benthos, and installed her con-
federates Baghamaya and Scithia as its guardians.
(author: Adrian M. Pommier)
Level 15: The Dragon’s Lair
The final level of Castle Whiterock: the former lair of the
ghostly Benthosruthsa, currently occupied by his slayer,
Silhouette. The iron flask containing Hasna’azhar and
10
sought by Lady Chauntessa is located here amid the
fantastic wealth.
Handouts: AT (appearance of Benthosruthsa), AU (poly-morphed into a toad), AV (the dragon’s lair), AW
(appearance of Silhouette)
(author: Adrian M. Pommier)
Appendix A: Inn of the Slumbering Drake
This appendix gives the GM all the details he or she
needs for this key Cillamar location, owned by the enig-
matic Lady Chauntessa.
Appendix B: Character Options
In here, the GM and players can find a new NPC class
and new skills, feats, and spells for their campaign.
Several monsters inhabiting the dungeons of Castle
Whiterock are outfitted with these options.
Appendix C: New Monsters
This section details the new hazards and monsters cre-
ated especially for Castle Whiterock. Creatures of near-
ly every type are represented across a spectrum of
CRs.
One important aspect of several new monsters and
hazards is that specific body parts (or leaves) can be
used to modify or enhance certain spells. Monsters: not
just for XP anymore!
Appendix D: New Items
An adventurer without gear is a sad adventurer indeed.
In this appendix, the GM and players can find new items
magical, alchemical, or mundane. From the primitive
carapace armor to the delightful pouch of endless cal-trops, from the utilitarian apron of the master to the
cursed spellseal ring, there’s a little something for
everyone in here.
Appendix E: Unique Items
Castle Whiterock has seen its share of unique and
enormously powerful inhabitants, and several of them
have left equally singular items behind, such as General
Koborth’s dragon-slaying sword Scalemar, the Basin ofCleansing of the Order of the Sundered Scale, and
Aquil’iya, one of the Melosiran rings.
As is explained in more detail elsewhere, many of these
potent items have special limitations or require certain
tasks to be fulfilled before they can achieve their full
measure of strength.
Each of these one-of-a-kind items is described in this
appendix, along with their history and, perhaps most
importantly, how to access their powers.
11
Appendix F: Pregenerated Characters
So you just bought this snazzy boxed set and your
friends want to jump right in? No worries: We’ve provid-
ed six 1st-level pregenerated characters.
Appendix G: The Mercenaries
This appendix lists the members of the Pack of the
Night-Wolf, a company of mercenaries the duergar
thane hires to harass and murder the heroes.
The GM is encouraged to use these mercenaries to
mercilessly stalk and threaten the adventurers in loca-
tions they would not normally expect. The appendix
includes their stats, stories, and typical tactics.
Appendix H: DCC Tie-Ins
Although this boxed set can be used in any campaign,
it includes references to many modules of the Dungeon
Crawl Classics line, from #0 to #35B, with #44, #48, and
#49 thrown in for good measure. This appendix lists
these references.
This was not merely done as a kind of easter egg for
fans of the DCC line (although finding all the references
would make a fine scavenger hunt!). Instead, the writers
wanted to emphasize that Castle Whiterock, large as it
is, can exist in an even larger setting. All a GM has to
do to tie this adventure to his or her campaign is tweak
a few of references (change a name here, alter an
NPC’s allegiances there, etc.).
Alternately, if a GM already owns modules in the DCC
line, Castle Whiterock can easily be introduced to the
home campaign through the references as written.
Appendix I: The Keys
For the GM’s convenience, all of the keys found in
Castle Whiterock have been listed in this appendix,
including where they are found and what they unlock. In
some cases, the term “key” is used broadly (for exam-
ple, a specific mace unlocks a door on level 9A).
Appendix J: Third-Party Monsters and
Templates
The writers of Castle Whiterock used creatures that
originally appeared in several third-party books (some
published by Goodman Games, some not). For the con-
venience of GMs looking for more information on these
monsters, they are listed alphabetically in Appendix J,
along with source, page number, the printed descriptive
text (or, if one was not provided in the source material,
a description has been extrapolated), and where the
creature or template is found in the dungeon.
Inhabitants of Castle
Whiterock
The Company of the Black Osprey
For a short time, a party of mighty adventurers called
the Company of the Black Osprey laid claim to Castle
Whiterock. Within that brief span, they left an indelible
mark on the ruins, changing or even adding entire lev-
els as they saw fit. For the most part, they are long
gone, but their stamp is everywhere. Of course, clever
and thorough parties may just meet up with some of the
Company of the Black Osprey, in the flesh or other-
wise....
Pelltar: A male human 16th-level conjurer/3rd-level
archmage. Pelltar specialized in teleportation and sum-
moning magic, and erected the strange obelisks that
can be found in the countryside surrounding Castle
Whiterock.
Pelltar was fatally wounded – ironically – exploring the
edifice he had intended to use as his own tomb (level
9A). Astute PCs can locate his body in his hidden
redoubt (level 12A) and plunder his spellbooks and per-
sonal trove of magic items.
Nimboltin (“Nim”) Softstep: A male halfling 17th-level
rogue. Nim was a master trapmaker and an impish sort,
who delighted in antagonizing the stuffy Pelltar.
Nimboltin is entombed in Castle Whiterock (level 10B)
along with his remaining wealth, and he “returns” to
help/taunt the party from beyond the grave.
Lythe Abysstalker: Lythe was a female aasimar 18th-
level cleric dedicated to Justicia, the goddess of justice.
As befitting her surname, Lythe had a penchant for
hunting down fiends and other outsiders. Her unforgiv-
ing, relentless nature led to a fracture with the rest of the
Company over Pelltar’s Demonhold (level 13).
Lythe’s final fate is undetermined.
Vallisneria Forestfriend: A half-elf 18th-level druid who
eventually became a cleric of Ildavir. Keenly interested
in the creation of the world, Vallisneria created a per-
manent gate to the fabled Far Garden (level 8).
After her death, she was reborn as a unicorn paragon.
In this form, she protects the Glade of Farewell, the uni-
corn graveyard (level 8A).
General Koborth: A male human 19th-level fighter and
leader of the Company. Koborth was mighty in battle
and uncommonly faithful to his companions. When he
was made a general, he helped clear out the Northlands
for human habitation and brought civilization to the wild.
12

His physical prowess and tactical genius was eventual-
ly overcome by the plots of a will-o’-wisp named As’x,
and Koborth died with a broken heart, refusing to accept
resurrection. His body was interred with honor (level
10A), but it was plundered by duergar and his remains
were reanimated (level 12).
Factions
Several factions, alternately cooperating with each
other and vying for power, currently inhabit the caves,
fortresses, and dungeons of Castle Whiterock. The
major influences and players in the adventure are pre-
sented below, more or less in the order in which they
appear.
The Iron Manacle: This cabal of slavers came to Castle
Whiterock after being nearly wiped out in the south.
They have since learned the merits of operating in
secrecy, and Ikenvar, their leader, has taken steps to
disguise his operation as monks of the Dawning Sun,
going so far as to insert an agent in Cillamar in the guise
of the undertaker.
The slavers conduct a brisk business with the Thane of
Narborg through the orcs of the White Talon.
Ikenvar is desperate to not have his organization threat-
ened, but if subterfuge fails, he will scarcely hesitate to
use force.
White Talon Orcs: These orcs are a faction split from
the White Roc tribe, and like their cousins they have a
faint measure of cloud giant heritage. Kaernga, their
leader, led the insurrection that founded this splinter
tribe, but was only able to battle Drugila to a standstill.
The White Talon orcs operate a blue quartz mining oper-
ation using slaves bartered from the Iron Manacle. Some
of these slaves, the strongest, are funneled to the Bleak
Theater, a holding of the duergar Thane Hrolad Vejik.
Kaernga is kept charmed by agents of the duergar,
keeping him content to manage the mine and act as
middleman in the slave deals, but the duergar plan to
cut him out of the equation – permanently – soon.
Orcs of the White Roc: This tribe of orcs is blessed
with a trace of giantish blood in their ancestry. They
have held sway in Castle Whiterock on two separate
occasions, but each time were expelled. They returned
three years ago under the guidance of Drugila, whose
personal quest is to reclaim an artifact of the tribe, the
figurine of the White Roc. A recent schism in the tribe
forced Drugila’s followers deeper into the mountain.
The White Roc orcs recently discovered the ruins of a
cloud giant’s tower that had collapsed into the moun-
tainside centuries ago. Believing this to be a sign,
Drugila has ordered more excavation to find the
figurine.
Benthosruthsa’s Followers: The old red dragon
Benthosruthsa seeded Castle Whiterock with minions
and defenders in his time. Foremost was a small cult
that worshipped the dragon as a god; they were all
killed when Silhouette invaded and have returned as
dread wraiths. Additionally, the dragon had sired a son,
Benthoc, to lead a small tribe of troglodytes in the upper
caves. Finally, the fiendish lamia shadowdancer
Hasna’azhar, she who cast the greater sleep of agesspell on Lady Chauntessa’s lover, was a captive thrall of
the dragon, owing him no real loyalty.
Since the dragon’s death, the troglodytes have dimin-
ished in power, and Benthoc has gone mad.
Hasna’azhar has remained trapped in an iron flasklocated in the dragon’s lair.
The Clockwork Academy: Ages ago, this was a
gnomish school that specialized in the creation of
advanced technology and constructs. Thought to be
only a legend, part of the campus remains intact, and
the degenerate descendants of the Silverheel clan still
haunt some caves adjacent to the dungeons (DCC#51.5: The Sinister Secret of Whiterock). Additionally,
Peduncle Hilspek is in possession of the prototype of
one of their more powerful – and unusual – creations,
the Incomprehensible (Mark I).
Sossank’s Tribe: A tribe of mountain troglodytes origi-
nally from the mountains near Castle Whiterock, they
have followed their leader, a toadspawn named
Sossank, into the caves beneath the ruins. They now
prey on what remains of Benthoc’s tribe of troglodytes,
and have gained two allies: the Thane of Narborg and a
ghast named Muthren. From the duergar they have
weapons of iron and the services of Gunrolz, an earth
mephit trapmaker. Similarly, from the undead cultist
they have been given a clutch of Children of
Bobugbubilz eggs, and are breeding the monstrous
toads.
Sossank plans to use his strong mountain trogs, armed
with metal weapons and the Children, to completely
wipe out Benthoc’s troglodytes and establish himself as
a power in Castle Whiterock. He is unaware that Most
Bloated Muthren is expecting the unmanageable
Children to wipe out his tribe.
Cult of Bobugbubilz: This cult, dedicated to the toad-
fiend god Bobugbubilz, operated a small chapel in the
side of the mountain for several years until their leader,
Most Bloated Muthren, sacrificed a paladin-cleric of
Justicia to his god. In retribution, Justicia triggered a
landslide that buried the chapel and killed most of the
cult. Muthren returned as a ghast, and has been manip-
ulating Sossank’s tribe into caring for (and eventually
being food for) a clutch of Children of Bobugbubilz
eggs.
13
Muthren plans to use the Children to foster a resur-
gence of the faith of his loathsome god.
Order of the Sundered Scale: Based in Galaron, cap-
ital of Morrain, the Order of the Sundered Scale is a sect
of paladins dedicated to the eradication of evil dragons.
Several years ago, six of their members came to Castle
Whiterock to slay Benthosruthsa. They constructed a
hidden chapel in the mountain and waged their cam-
paign against Benthosruthsa’s followers. Their activities
eventually drew the ire of the dragon’s ally, the Thane of
Narborg, who sent the Pack of the Night-Wolf to slay
them. The sole surviving member, Knight-Chaplain
Benden Talbusk, was subsequently captured and sacri-
ficed by the Cult of Bobugbubilz.
The party can use the Order’s secret base as they
explore Castle Whiterock.
House Forlorna: This drow household was once the
preeminent clan among the evil elves, but they suffered
a dramatic reversal of fortunes. Now all that remains is
a small contingent of outcasts, vainly plotting for a
return to power from their small fortress, Nalas Div, the
Inverted Tower.
These drow, led by Matron Chaliax, are interested in
maintaining secrecy and gathering information about
the outside world. They are terrified of being discovered
by House Ereluc.
Narborg: Thane Hrolad Vejik commands this duergar
fortress, which controls the Lightless Gate and the
Bleak Theater. The crafty thane trades slaves with the
Iron Manacle and the White Talon orcs, trades weapons
with Sossank’s tribe, and has a mutual defense pact
with Benthosruthsa (he is unaware of the dragon’s
death). Thane Vejik also has at his beck and call the
mercenaries of the Pack of the Night-Wolf (Appendix
G). Despite his power, he is consumed by paranoia.
The duergar of Narborg are primarily interested in con-
trolling traffic to and from the Underdeep, in the contin-
ued operation of the Bleak Theater, and in maintaining
their power.
House Ereluc: The drow of House Ereluc maintain a
permanent emissary to Thane Vejik’s court.
Ambassador Geviss Ereluc resides at the Bleak
Theater, often visited by his estranged daughter, Liaa.
As is often the case with the deceitful drow, House
Ereluc cultivates several plots alongside their stated
diplomatic presence in Castle Whiterock.
Silhouette’s Confederates: In order to wreak her
vengeance on Benthosruthsa, the black dragon
Silhouette knew she would need an unparalleled cadre
of allies and servitors. Most of them were slain by her
adversary’s followers, although Sil betrayed some. Of
her original confederates, only two remain among the
living: the rakshasa archmage Baghamaya, who rules
the Burning Maze, and his lover, the medusa assassin
Scithia, who is the black dragon’s “handmaiden” and
agent in the surface world.
Adversaries
What is an adventure without memorable villains?
Without a nemesis to test their mettle against, “heroes”
are just that much less heroic. Twenty-one adversaries
living in Castle Whiterock are listed below along with
their location and a few notes.
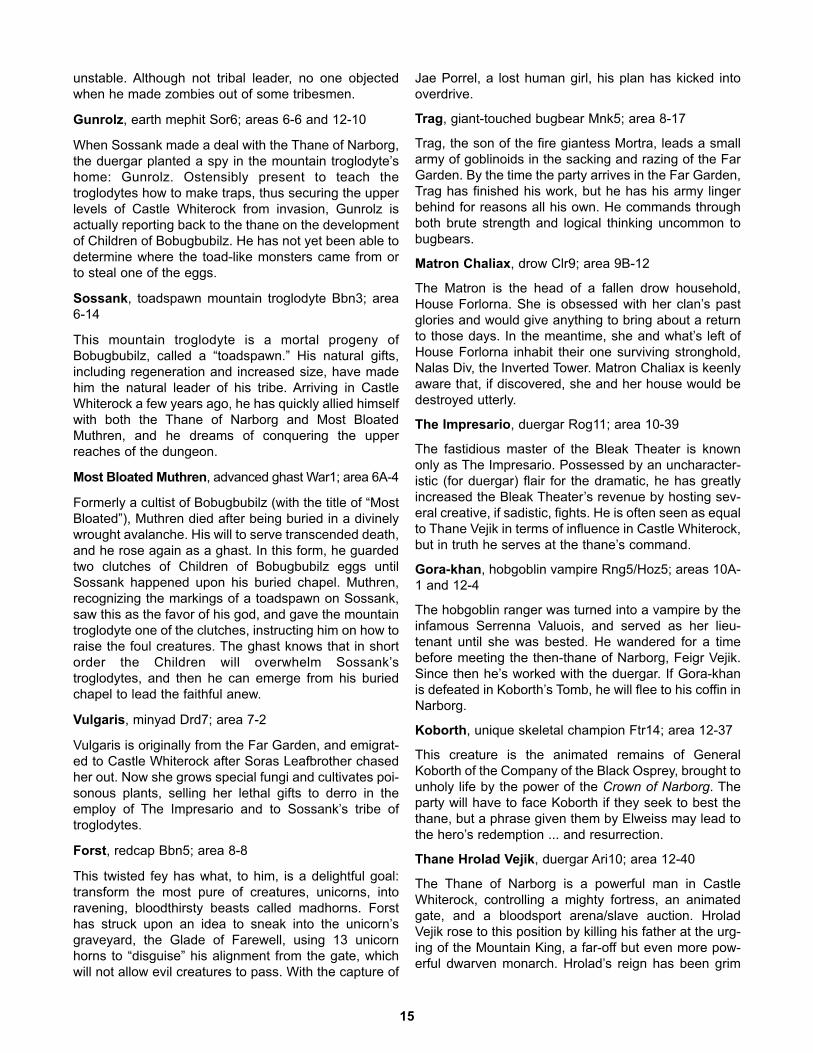
Ikenvar, half-orc Ftr2/Rog1; area 1-8
This man leads the Slavers of the Iron Manacle in their
repulsive business enterprises. He has gone to great
lengths to keep his new operation a secret. Ikenvar is
old friends with Kaernga. He is a surprisingly effective
leader for being a half-orc.
Kaernga, orc Bbn3; area 2-11
Kaernga used to be a lackey of Drugila, but when his
old friend Ikenvar showed up at Castle Whiterock, the
brute led a coup that resulted in the creation of the
White Talon orcs. Being made leader, however, has led
to Kaernga becoming soft in body and mind. While his
troops work, he plays with his harem, and the wizards
of The Impresario charm him regularly.
Grime, dust mephit; areas 2-15 and 10-36
Grime was sent to the orc mines by The Impresario to
spy in Kaernga and report when he’s in need of being
re-charmed. The dust mephit plays pranks on the orcs
and takes the time to skim some profit for himself. He
and Gunrolz are fiercely competitive, and try to under-
mine each other’s work constantly. If Grime escapes or
leaves level 2, he can be encountered again on level
10, this time with some extra bard levels.
Drugila, giant-touched orc Adp6; area 3A-1
This female orc leads the tribe of the White Roc in their
search for the figurine of the White Roc, from which they
take their name. She and her tribe have some giant
blood, and they even found a crashed cloud giant’s
tower to use as a refuge. Drugila believes she is on a
holy quest to unite all orc tribes under the White Roc,
but so far she has failed to even keep her own tribe
whole.
Benthoc, half-dragon troglodyte Clr6; area 4-13
This creature is the son of Benthosruthsa and a
troglodyte, sired for the express purpose of creating
allies for the red dragon. While his father was alive,
Benthoc could communicate with Marandracotha, a
goddess of evil dragons. Since the death of the old red,
Benthoc has been cut off and has grown increasingly
14
unstable. Although not tribal leader, no one objected
when he made zombies out of some tribesmen.
Gunrolz, earth mephit Sor6; areas 6-6 and 12-10
When Sossank made a deal with the Thane of Narborg,
the duergar planted a spy in the mountain troglodyte’s
home: Gunrolz. Ostensibly present to teach the
troglodytes how to make traps, thus securing the upper
levels of Castle Whiterock from invasion, Gunrolz is
actually reporting back to the thane on the development
of Children of Bobugbubilz. He has not yet been able to
determine where the toad-like monsters came from or
to steal one of the eggs.
Sossank, toadspawn mountain troglodyte Bbn3; area
6-14
This mountain troglodyte is a mortal progeny of
Bobugbubilz, called a “toadspawn.” His natural gifts,
including regeneration and increased size, have made
him the natural leader of his tribe. Arriving in Castle
Whiterock a few years ago, he has quickly allied himself
with both the Thane of Narborg and Most Bloated
Muthren, and he dreams of conquering the upper
reaches of the dungeon.
Most Bloated Muthren, advanced ghast War1; area 6A-4
Formerly a cultist of Bobugbubilz (with the title of “Most
Bloated”), Muthren died after being buried in a divinely
wrought avalanche. His will to serve transcended death,
and he rose again as a ghast. In this form, he guarded
two clutches of Children of Bobugbubilz eggs until
Sossank happened upon his buried chapel. Muthren,
recognizing the markings of a toadspawn on Sossank,
saw this as the favor of his god, and gave the mountain
troglodyte one of the clutches, instructing him on how to
raise the foul creatures. The ghast knows that in short
order the Children will overwhelm Sossank’s
troglodytes, and then he can emerge from his buried
chapel to lead the faithful anew.
Vulgaris, minyad Drd7; area 7-2
Vulgaris is originally from the Far Garden, and emigrat-
ed to Castle Whiterock after Soras Leafbrother chased
her out. Now she grows special fungi and cultivates poi-
sonous plants, selling her lethal gifts to derro in the
employ of The Impresario and to Sossank’s tribe of
troglodytes.
Forst, redcap Bbn5; area 8-8
This twisted fey has what, to him, is a delightful goal:
transform the most pure of creatures, unicorns, into
ravening, bloodthirsty beasts called madhorns. Forst
has struck upon an idea to sneak into the unicorn’s
graveyard, the Glade of Farewell, using 13 unicorn
horns to “disguise” his alignment from the gate, which
will not allow evil creatures to pass. With the capture of
Jae Porrel, a lost human girl, his plan has kicked into
overdrive.
Trag, giant-touched bugbear Mnk5; area 8-17
Trag, the son of the fire giantess Mortra, leads a small
army of goblinoids in the sacking and razing of the Far
Garden. By the time the party arrives in the Far Garden,
Trag has finished his work, but he has his army linger
behind for reasons all his own. He commands through
both brute strength and logical thinking uncommon to
bugbears.
Matron Chaliax, drow Clr9; area 9B-12
The Matron is the head of a fallen drow household,
House Forlorna. She is obsessed with her clan’s past
glories and would give anything to bring about a return
to those days. In the meantime, she and what’s left of
House Forlorna inhabit their one surviving stronghold,
Nalas Div, the Inverted Tower. Matron Chaliax is keenly
aware that, if discovered, she and her house would be
destroyed utterly.
The Impresario, duergar Rog11; area 10-39
The fastidious master of the Bleak Theater is known
only as The Impresario. Possessed by an uncharacter-
istic (for duergar) flair for the dramatic, he has greatly
increased the Bleak Theater’s revenue by hosting sev-
eral creative, if sadistic, fights. He is often seen as equal
to Thane Vejik in terms of influence in Castle Whiterock,
but in truth he serves at the thane’s command.
Gora-khan, hobgoblin vampire Rng5/Hoz5; areas 10A-
1 and 12-4
The hobgoblin ranger was turned into a vampire by the
infamous Serrenna Valuois, and served as her lieu-
tenant until she was bested. He wandered for a time
before meeting the then-thane of Narborg, Feigr Vejik.
Since then he’s worked with the duergar. If Gora-khan
is defeated in Koborth’s Tomb, he will flee to his coffin in
Narborg.
Koborth, unique skeletal champion Ftr14; area 12-37
This creature is the animated remains of General
Koborth of the Company of the Black Osprey, brought to
unholy life by the power of the Crown of Narborg. The
party will have to face Koborth if they seek to best the
thane, but a phrase given them by Elweiss may lead to
the hero’s redemption ... and resurrection.
Thane Hrolad Vejik, duergar Ari10; area 12-40
The Thane of Narborg is a powerful man in Castle
Whiterock, controlling a mighty fortress, an animated
gate, and a bloodsport arena/slave auction. Hrolad
Vejik rose to this position by killing his father at the urg-
ing of the Mountain King, a far-off but even more pow-
erful dwarven monarch. Hrolad’s reign has been grim
15
but prosperous, befitting a duergar ruler. His web of
influence extends from the very top of Castle Whiterock
to its lowest chambers (although he’s unaware his ally,
Benthosruthsa, is dead).
Baghamaya, rakshasa Sor7/Acm2; 14B-7
Arrogant beyond compare, Baghamaya rules the
Burning Maze for his ally, Silhouette. The rakshasa has
great plans for the network of lava tubes, and is consid-
ering making a formal alliance with the padishah of the
efreet, Fa’al’zaqan, whose domain in the Plane of
Elemental Fire is connected to the Burning Maze by a
rift. Baghamaya spends his time indolently, and often
hosts conclaves of powerful wizards and sorcerers.
Scithia, medusa Rog5/Asn5; area 14B-8
Scithia serves Silhouette as her “handmaiden,” which in
this terminology means the medusa is the dragon’s
agent in the wider world. She has made many trips to
Cillamar, and is looking for ways to topple the local
thieves’ guild. Scithia is the lover of Baghamaya, and
convinced him to join the black dragon’s crusade
against Benthosruthsa.
Benthosruthsa, old red dragon ghost; area 15-2
The deposed ruler of Castle Whiterock, “Benthos” has
not taken to death very well. He has spent the last year
lurking near his old lair, searching for a way to kill
Silhouette in such a way that can’t be traced back to
him (lest she also become a ghost). The arrival of the
heroes presents him with just such an opportunity, and
he won’t interfere with them unless they try to take
Hasna’azhar away from him.
Silhouette, adult black dragon Ftr2; area 15-11
“Sil” is the secret master of Castle Whiterock, having
slain Benthosruthsa just over a year ago for some
slight. Since then she has been consolidating her hold
on the lower levels and laying low. She plans to rule
from the shadows through a network of agents, and has
her eyes set on Cillamar.
Hasna’azhar, fiendish lamia Rog1/Shd8; area 15-14
The object of Lady Chauntessa’s obsession is
Hasna’azhar, the former slave of Benthosruthsa. The
fiendish lamia cast the greater sleep of ages spell (from
a scroll) that has ensorcelled the lady’s lover, and only
she knows how to break it. Hasna’azhar spends most of
the adventure trapped in an iron flask unless freed by
the party.
Allies
Sometimes a party needs a little help, and town is just
too far away. Castle Whiterock includes seven ready-
made NPC allies that the heroes can encounter, save,
assist, or otherwise win over (should they choose to do
so). These potential allies may offer to join the heroes
indefinitely, may magically appear for just one battle, or
may only help out under certain circumstances.
Each NPC ally is presented below, along with their loca-
tion and a few notes about their conditions for assis-
tance. GMs should feel free to alter the NPCs to match
their own game.
Hugin, human Ftr1; area 2-3
If the party frees Hugin from the orcs of the White Talon,
he will offer his services and swordarm in thanks. After
a few weeks, he will move on, perhaps settling in
Cillamar, unless the party offers to pay him to remain (or
offers him a full share of treasure).
Soras Leafbrother, centaur Rng12; area 8-4
If the party completes all sub-quests in the Far Garden
and manages to defeat the giant rhinoceros beetle in a
timely manner, this centaur gives them a special
bracelet of friends that is keyed to him and works across
planar boundaries. If the single token is used, Soras
appears and fights alongside the party for 15 rounds
before disappearing.
Galdeira Goldmoon, half-celestial elf Pal10; area 9-7
This paladin needs a bit of assistance before she can
join the party; the details are given in the section on
sub-quests.
If the party is able to help Galdeira, she is willing to join
them as long as they work toward the goal of defeating
Benthosruthsa.
Urgus Spellsmith, mountain dwarf Wiz9; area 10-35
The party finds Urgus held captive in the Bleak Theater.
The dwarf is capable but somewhat unfriendly, more
comfortable with maps than with people.
Before he lends the party any aid, he will demand that
the heroes help him recover some stolen property, a
map to the Golden Palace of Zahadran. Afterward, he
can be persuaded to join the party as a member, or,
alternately, he could make magic weapons, rods, armor,
or scrolls for the party (with proper recompense, of
course).
Talladay Arrowmelt, halfling Rog1/Ftr6/Due6; area 11-
28c
This halfling is equally adept with a rapier and a kitchen
knife, and is encountered as the unwilling master chef
16
of Narborg. Talladay won’t join the party for the monot-
ony of dungeon-crawling, but a final battle against a
dragon does capture his interest. If the party seeks him
out before going after Benthosruthsa, he’ll gladly join
them.
General Koborth, human Ftr18; area 12-37
Returning the legendary General Koborth to life is a
possible goal of the adventure’s most demanding sub-
quest, “The Hero and the Sword.” It is explained in
detail in the section on sub-quests.
Koborth is not interested in the day-to-day grind of
adventuring (now is a time for the next generation of
heroes to arise), but he may be willing to assist their
final assault on Benthosruthsa, either by temporarily
joining the party or by lending them his dragon-slaying
sword, Scalemar.
Fthirya, ghaele; area 13-6
This eladrin was accidentally called to the Demonhold
(level 13) and has waged a guerilla war against the
demons and devils contained therein since. If the party
saves her from a hezrou ambush, she gives them a per-
sonal scroll of planar ally that summons only her. She
warns, however, that unless the power of the
Demonhold is thwarted by toppling Pelltar’s obelisks,
using the scroll only returns her to the prison.
Fthirya considers payment for most tasks already ren-
dered by saving her, but she refuses to perform or
assist in acts that run contrary to her alignment.
Others
Every now and then there’s an NPC who isn’t exactly an
ally, but neither is she overtly hostile. Perhaps the line
between adversary and ally, at least in their case, is
determined by a random die roll or by the actions of the
party, or perhaps these NPCs have their own agendas
and cannot dedicate themselves to the cause of the
adventuring party. Such NPCs are listed below, with
area located and general notes.
Nemoura Shimmerscale, nixie Sor3; area 3-12
Nemoura went exploring and ended up trapped
between a mine full of orcs and a fantastically huge and
hungry crayfish. She has been stuck for weeks and is
desperate to escape. She doesn’t attack the party
unless they refuse to help her, at which time she tries to
charm some of them. In thanks, Nemoura gives the
party her ring, actually one of the Melosiran Rings,
Aquil’iya. Activating the ring is a complicated but
rewarding sub-quest. After being freed, Nemoura has
had enough of the adventuring life, and goes home.
Aeralith, invisible stalker; area 4-4
This unfortunate invisible stalker was imprisoned in a
giant pipe organ by a drow bard. He gives the party the
sub-quest that liberates him, which involves gathering
and playing the Sorrowsong Instruments. Once free,
Aeralith will perform a service for the party and then
return to his home plane.
Lorus Swiftquill, lich Mnk2/Div7/Lor7; area 6B-7
This lich librarian has been absorbed in his studies for
the last few centuries and is eager for news of the world
beyond his book-laden walls. He may attack the party,
depending on how they behave toward him and in his
library. If contacted peacefully, he assists the adventur-
ers in conducting research that can assist them through-
out their exploration of Castle Whiterock. Lorus became
a lich to guard his library, and will not abandon it.
Grisby, advanced faerie dragon; area 8-4
Grisby acts as an advisor to Soras Leafbrother in Dawn-
on-Stream, and ferries messages back and forth
between the centaur and Hyelnevyuir. If he determines
that the party is trustworthy, he may give them a short
series of sub-quests. Grisby does not attack the party
unless they run afoul of Hyelnevyuir. Grisby will flit back
and forth from the Far Garden to the Glade of Farewell,
but otherwise isn’t interested in adventuring.
Hyelnevyuir, advanced unicorn paragon; area 8A-1
This creature is the reborn spirit of Vallisneria
Forestfriend of the Company of the Black Osprey. She
now guards the Glade of Farewell at its entrance, but is
forbidden to enter the glade itself. She does not attack
unless she determines that one or more of the party are
evil. If they are respectful, and if Grisby speaks up for
them, she may help them with a sub-quest. Hyelnevyuir
will not abandon her post.
Peduncle Hilspek, gnome Brd6/Exp12; area 9C-2
Once a member of the defunct Fellowship of the
Humbled Hen, Peduncle has become a hermit living in
a grotto (in an underwater house, no less!). He is the
current owner of the Incomprehensible (Mark I), and
has some information about the Immense Cavern.
Problem is, he wants to be left alone, and his encounter
is likely to end in bloodshed. Peduncle spent some time
in Haverthold Asylum, and is a little unbalanced.
Peduncle will not leave his grotto.
Elweiss, human ghost Ari2/Rog13; area 10A-2
The squire and lifelong friend of General Koborth
returned as a ghost to guard the hero’s tomb.
Unfortunately, he was bested by Thane Vejik’s priests
and imprisoned in a glass coffin, serving as a tour
attraction ever since. If he’s freed, Elweiss gives the
party two of the most difficult sub-quests in the game.
He will not leave the tomb.
17
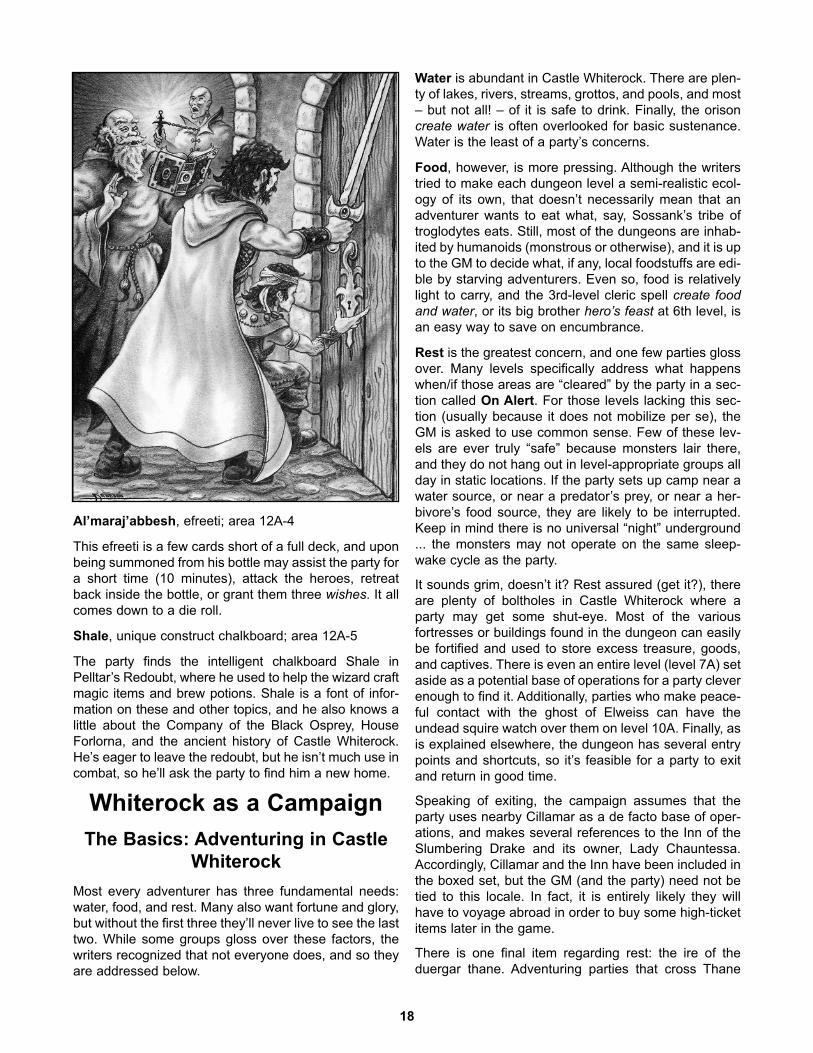
Al’maraj’abbesh, efreeti; area 12A-4
This efreeti is a few cards short of a full deck, and upon
being summoned from his bottle may assist the party for
a short time (10 minutes), attack the heroes, retreat
back inside the bottle, or grant them three wishes. It all
comes down to a die roll.
Shale, unique construct chalkboard; area 12A-5
The party finds the intelligent chalkboard Shale in
Pelltar’s Redoubt, where he used to help the wizard craft
magic items and brew potions. Shale is a font of infor-
mation on these and other topics, and he also knows a
little about the Company of the Black Osprey, House
Forlorna, and the ancient history of Castle Whiterock.
He’s eager to leave the redoubt, but he isn’t much use in
combat, so he’ll ask the party to find him a new home.
Whiterock as a Campaign
The Basics: Adventuring in Castle
Whiterock
Most every adventurer has three fundamental needs:
water, food, and rest. Many also want fortune and glory,
but without the first three they’ll never live to see the last
two. While some groups gloss over these factors, the
writers recognized that not everyone does, and so they
are addressed below.
Water is abundant in Castle Whiterock. There are plen-
ty of lakes, rivers, streams, grottos, and pools, and most
– but not all! – of it is safe to drink. Finally, the orison
create water is often overlooked for basic sustenance.
Water is the least of a party’s concerns.
Food, however, is more pressing. Although the writers
tried to make each dungeon level a semi-realistic ecol-
ogy of its own, that doesn’t necessarily mean that an
adventurer wants to eat what, say, Sossank’s tribe of
troglodytes eats. Still, most of the dungeons are inhab-
ited by humanoids (monstrous or otherwise), and it is up
to the GM to decide what, if any, local foodstuffs are edi-
ble by starving adventurers. Even so, food is relatively
light to carry, and the 3rd-level cleric spell create foodand water, or its big brother hero’s feast at 6th level, is
an easy way to save on encumbrance.
Rest is the greatest concern, and one few parties gloss
over. Many levels specifically address what happens
when/if those areas are “cleared” by the party in a sec-
tion called On Alert. For those levels lacking this sec-
tion (usually because it does not mobilize per se), the
GM is asked to use common sense. Few of these lev-
els are ever truly “safe” because monsters lair there,
and they do not hang out in level-appropriate groups all
day in static locations. If the party sets up camp near a
water source, or near a predator’s prey, or near a her-
bivore’s food source, they are likely to be interrupted.
Keep in mind there is no universal “night” underground
... the monsters may not operate on the same sleep-
wake cycle as the party.
It sounds grim, doesn’t it? Rest assured (get it?), there
are plenty of boltholes in Castle Whiterock where a
party may get some shut-eye. Most of the various
fortresses or buildings found in the dungeon can easily
be fortified and used to store excess treasure, goods,
and captives. There is even an entire level (level 7A) set
aside as a potential base of operations for a party clever
enough to find it. Additionally, parties who make peace-
ful contact with the ghost of Elweiss can have the
undead squire watch over them on level 10A. Finally, as
is explained elsewhere, the dungeon has several entry
points and shortcuts, so it’s feasible for a party to exit
and return in good time.
Speaking of exiting, the campaign assumes that the
party uses nearby Cillamar as a de facto base of oper-
ations, and makes several references to the Inn of the
Slumbering Drake and its owner, Lady Chauntessa.
Accordingly, Cillamar and the Inn have been included in
the boxed set, but the GM (and the party) need not be
tied to this locale. In fact, it is entirely likely they will
have to voyage abroad in order to buy some high-ticket
items later in the game.
There is one final item regarding rest: the ire of the
duergar thane. Adventuring parties that cross Thane
18
Hrolad Vejik are likely to be plagued by nightmares and
attacked at the most inconvenient times by a party of
mercenaries, the Pack of the Night-Wolf (see Appendix
G). See the Consequences section at the end of level
10 for details on the thane’s revenge.
Rumors
At the start of a Whiterock campaign, each PC should
know 1d3 rumors from the table below. The GM can
assign specific rumors or roll to determine them ran-
domly. The validity of the rumor is described in paren-
theses following the entry. A successful Gather
Information check (DC 15) also provides a random
rumor, as long as the adventurers visit an establishment
or interact with an appropriate and informed NPC.
Castle Whiterock Rumor Table (roll 3d6)
3 A terrible lake monster inhabits the lake border-
ing Castle Whiterock. The massive serpent
often lumbers onto land to feed on nearby live-
stock herds maintained by roaming herdsmen.
(True; there is a lake monster, but it remains
confined to the depths of the lake.)
4 The mountain isn’t volcanic any more, and
there is a vast forest growing inside it with a
magical sun giving it life. (False; it is still vol-
canic, but there is a gate in the lower depths
that leads to an enchanted forest – see level 8,
the Far Garden.)
5 Word has it that the famed Clockwork
Academy, a famous gnomish engineering
school that specialized in golem creation, was
established near Castle Whiterock. (True; see
level 4A.)
6 An ancient order of monks maintained a
monastery on the site where Castle Whiterock
now sits. (True.)
7 A traveling potion salesman can often be found
hawking his magical elixirs in a booth at the Inn
of the Slumbering Drake (True; Quintus from
Appendix A.)
8 Cillamar has been established on the ruins of
an ancient gnomish city called Stoneham.
Numerous gnomish catacombs riddle the
sewer system, infested by gnome wererats who
secretly rule the city. (All true, except for the last
part about the gnomish wererats.)
9 An order of monks returned to Castle Whiterock
about a year ago. They have established a
base camp in the upper ruins, and are search-
ing for artifacts. (True, but the monks are actu-
ally the Iron Manacle – see level 1.)
10 “I’m telling yah; those goblins from the moun-
tains are on the move. I’ve caught them on my
property twice this last month.” (False; orc
activity has increased around Castle Whiterock,
but the goblinoid population remains quite low.)
11 Lady Chauntessa, the proprietress of the Inn of
the Slumbering Drake, has a strange interest in
Castle Whiterock. She often sends explorers to
the ruins, and pays top coin for any artifacts or
information gleaned. (True.)
12 The symbol of a pewter swan is used by the
local thieves’ guild in Cillamar. (False; this is the
symbol of the Sorority of the Swan.)
13 You best not pay attention to the drunken ram-
blings of Arien. For a few coins, the town drunk-
ard will often spin fanciful yarns on how he was
captured by slavers. (True; Arien was captured
by slavers, and managed to escape.)
14 Spellcasters cannot summon any creatures
near Castle Whiterock or the mountain it lies
on. (Mostly false; spells that summon outsiders
with an alignment subtype have the creature
redirected to the Demonhold, but other crea-
tures can be summoned normally.)
15 A secretive league of arcanists congregates at
the castle ruins on moonless nights to conduct
terrible rituals. (False, but Baghamaya, a mem-
ber of the Tome, sometimes receives guests
from that arcane order.)
16 The reason there are so many bizarre creatures
near Castle Whiterock is because Ghorrene the
Black Eagle conducted foul experiments here,
and the beasts are still breeding. (False, but
see Chapter 7 of the Gazetteer in DCC #35 for
a few details on Ghorrene.)
17 “Those castle ruins are haunted, I tell yah. The
unquiet spirits of an old adventuring band stalks
dungeons for sure.” (False.)
18 In the depths below the castle, there is a place,
a “neutral ground,” where you can conduct
shadowy business with the denizens of the
Underdeep. (True; the Bleak Theater.)
Conjuration and Whiterock
Pelltar, the conjurer of the Company of the Black
Osprey, knew all too well that his adventuring troupe
had made powerful demonic enemies in the course of
their careers. When they settled into Castle Whiterock,
he set about fortifying it against extraplanar intrusion.
This led to the erection of basalt obelisks in the coun-
tryside around the castle and the construction of the
19
Demonhold. Although intended to only “capture” wicked
outsiders, Pelltar eventually discovered, to his surprise,
that his demonic prison also snared archons, eladrin,
and angels.
It works thusly: Any outsider with an alignment subtype
(Chaotic, Evil, Good, or Lawful) affected, created, or
called by a calling, summoning, or teleportation spell or
effect within a few miles of Castle Whiterock is redirect-
ed to the Demonhold. Once there, the outsider is
trapped and cannot leave by magical means, even if the
spell or effect that conjured or called them in the first
place expires. See the Demonhold (level 13) for more
information.
Introducing New PCs
Sometimes PCs die off. Sometimes new people want to
join an existing game. It’s a problem that faces every
adventuring troupe eventually: how to seamlessly intro-
duce a new PC.
Given the length of Castle Whiterock, it is highly likely
that either or both of the above situations will come to
pass before the party shakes Silhouette’s blood from
their weapons. Accordingly, the adventure was written
with this in mind.
Several levels feature the liberation of slaves; a new PC
could easily be found in the slave pits of area 2-3, the
larder of the troglodytes in area 4-8, the Bleak Theater’s
mass pens in area 10-6, or even in the fortress of
Narborg prison cells (areas 11-10b, 11-22, or 12-15).
Perhaps a new hero was being kept for an even more
nefarious purpose. They could be sacrificial victims (to
Bobugbubilz in area 6A-4 or to Sodoutym in area 12-
26), kept as playthings for the amusement of derro
(11A-6e), demons (area 13-18), or rakshasa (area 14B-
6c), fed to beasts (Children of Bobugbubilz in area 6-13
or ebuul lizards in area 12-24), or could even just be
part of the scenery (assimilated into the fissure wasp
hive in area 11B-6).
It’s even possible that a new PC was just passing
through when they met the party. This can happen eas-
ily in Dawn-on-Stream (area 8-4). If the new PC hap-
pens to be an outsider with an alignment subtype, they
can appear at any time in any location in the
Demonhold (level 13).
Alternately, the GM may decide to replace any of the
possible NPC allies (see above) with a new PC.
Gaining Levels, Skipping Ahead,
and Treasure
The XP awards have been designed to allow a party of
four to six PCs to advance one level for each level of the
dungeon they explore. In truth, each level contains
slightly higher XP awards since most groups will not find
all encounters on any given level. If the party consists of
fewer than four PCs (or more than six), be sure to adjust
the encounters appropriately. Unless stated otherwise,
the listed bonus awards are for the whole party, to be
divided among its members.
Sub-levels are not factored into the “one-level-per-level”
formula because they are hidden or provide few oppor-
tunities to gain experience. In general, however, astute
and thorough heroes will likely end up ahead of the dun-
geon’s curve. Accordingly, each level includes Scaling
Information that the GM can use keep the encounters
appropriately challenging.
Throughout the dungeon, there are opportunities to skip
entire levels. For example, an elevator connects level 2
and level 7, and a set of stairs runs from level 11A to
level 14A. These short cuts can prove disastrous for
low-level PCs that get in over their heads, but are a
boon to high-level PCs returning to the depths from a
visit to town. The GM is encouraged to use clues, hints,
and statements by any handy NPCs to prevent a fool-
hardy party from rushing into disaster, and don’t forget
the Scaling Information, which can also be used to tone
down the encounters.
Similar to XP, slightly more treasure has been placed on
each dungeon level because some of it is well hidden or
too bulky to transport. If a GM ends up scaling up or
down encounters for a dungeon level, he or she should
account for a commensurate increase or decrease in
treasure.
Finally, several powerful unique magic items (notably
Aquil’iya, Scalemar, and the figurine of the White Roc)
can be found in this adventure. These items are rare
and expensive, and some may be worth many times the
entire haul that a level should properly contain, but they
are included because they are story elements.
Additionally, they are well hidden and may possess
drawbacks or limitations to their use. Scalemar requires
the completion of one or more sub-quests before any-
one knows how to use it, the Crown of Narborg only
functions for duergar, and the figurine of the White Rocis in an entirely innocuous location.
As always, the GM is free to substitute less powerful
items to maintain control over their campaign. Caution
should be always used when bestowing powerful items
upon the heroes.
20
Learning New Spells
Not all gaming groups pay the strictest of attention to
the means by which wizards acquire new spells, but
some do, so the writers were sure to include a plethora
of spellbooks for PC wizards to learn from.
Most spellbooks in the adventure list their contents, but
not all. This should allow the GMs plenty of leeway to
insert spells they would like the party to have. Note that
the list below only refers to spellbooks; there are also
plenty of scrolls throughout the dungeon that an adven-
turing wizard could use to learn a new spell.
Area 2-10 has Katanya Glimer’s spellbook, area 4-10
has the spellbook of an unknown abjurer slain by
Grizzlisk, and area 9B-10 contains the spellbook of
House Forlorna’s Magus Revesk.
The spellbooks of Lorus Swiftquill and Pelltar are found
in their respective retreats, specifically in areas 6B-7
and 12A-2.
The Far Garden has three spellbooks. The one tem-
porarily used by Verdivis, the greatest transmuter who
ever lived, can be found in area 8-5, and the spellbooks
of the goblin wizard twins, Erga and Noog, are both
located with them in area 8-15.
Visitors to the Bleak Theater can find four spellbooks.
The Impresario’s junior wizards (areas 10-1 and 10-41)
and senior wizard (area 10-38) each carry their own
spellbooks, and Ambassador Geviss Ereluc keeps his
spellbook handy in area 10-37.
There are five spellbooks in the vicinity of Narborg: that
of the mercenary enchanter in area 11-9, that of the
derro potion master in area 11A-6d, that of the cultist
diviner in area 12-22, the one belonging to the junior
wizard in area 12-11, and that of the thane’s Master
Wizard in area 12-19.
Finally, Acanthus the aboleth has learned how to use
strange runes scribed on the walls of his cave (area 7-
12) as a kind of spellbook.
Sub-Quests
This adventure is as much a campaign setting as it is a
dungeon crawl. In addition to the larger goals of fame,
wealth, vanquishing evil, and slaying a dragon, there
are smaller quests in which the party may choose to
participate. Electing to take on these sub-quests will
grant the party greater insight to the castle’s backstory,
and it takes the heroes to many of its hidden areas (as
well as granting extra XP!).
Most of the sub-quests are given by a specified NPC in
the dungeon, and in all cases the details are provided in a
nearby sidebar. For convenience, the 16 sub-quests are
presented below in the order in which they can be found.
Since a few of the sub-quests are essentially scavenger
hunts that may involve some backtracking, the heroes
may encounter a key item before they actually have the
appropriate sub-quest. GMs should take careful note of
what the party does with a key item ... if it is sold, they
may be able to buy (or steal) it back, or they may end
up tracking the item down as a plot hook to an entirely
unrelated adventure!
“Breaking the Iron Manacle” – Level 1
It is assumed that most Castle Whiterock campaigns
will begin with this quest, given by an NPC of the GM’s
choosing from their home setting or from Cillamar.
To complete this sub-quest, the party must capture or
kill all the slavers on level 1, allowing none to escape.
Completing this sub-quest earns the party bonus XP.
“Reuniting the Glimers” – Level 2
Findle Glimer (or his sister, Katanya, depending on who
gets freed first) gives the party this quest.
The key “items” for this quest are Katanya Glimer (area
2-3) and Findle Glimer (area 2-10). To complete it, the
party must free both siblings from the orcs of the White
Talon.
This quest earns the party some extra wealth and XP.
21
“Activating Aquil’iya” – Level 3
Unlike most sub-quests, the party can fulfill this one’s
conditions without being aware of it. If the party spends
time conducting research in the Halls of Forgotten Lore
(level 6B) or in Pelltar’s Redoubt (level 12A), they can
get clues about the ring Aquil’iya’s special properties
and how to access them.
The only key item for this quest is the ring Aquil’iya(area 3-12).
Aquil’iya is a unique, but dormant, intelligent ring ofwater elemental command. By exposing it (and its
wearer) to certain elemental conditions, the ring regains
its power. More information on activating Aquil’iya is
presented in Appendix E. As the party adventures
through Castle Whiterock (and beyond, if they leave the
dungeon), the GM should remain aware of conditions
that may trigger the ring’s awakening.
For completing this quest, the party earns bonus XP
and gains a powerful item.
“Releasing Aeralith” – Level 4
Aeralith, an invisible stalker bound to a drow-made
organ, gives this quest if a hero can understand Auran,
either as a known language or through magical means.
The three key items needed for this quest are the
Sorrowsong Instruments, musical instruments made of
jade. They are a jade flute (area 3-6), the jade harp-
strings (area 4-14), and the jade drum (area 6-10). To
complete this sub-quest, the party must simultaneously
play three notes with the Sorrowsong Instruments (each
instrument requires a DC 15 Perform (woodwinds,
strings, or percussion) check). This ends the binding
spell and frees the invisible stalker.
Completing this sub-quest earns the party bonus XP
and an additional reward granted by the invisible stalk-
er, as determined by the GM.
“Bonds of Fellowship” – Sub-level 7A
This sub-quest is given through a dream image of the
Order of the Sundered Scale (which occurs the first time
the party sleeps in the hidden fane) or by reading the
Testimony of the Order (area 7A-10).
The key item for this quest is the collected bones of
Knight-Chaplain Talbusk (area 6A-3). Returning them to
the ossuary (area 7A-9) and placing them in the pre-
pared space completes this sub-quest.
Once this sub-quest is complete, the hidden fane of
Justicia receives several “upgrades” to its abilities, as
detailed on level 7A. The party also earns bonus XP.
“Finder of Lost Children” – Level 8
Soras Leafbrother gives the party this quest if they hear
out Dalen Porrel (area 8-4).
The key “items” for this quest are Dalen’s sisters, Jae
Porrel (area 8-8) and Ninia Porrel (random encounter).
Jae is being held captive by the demented redcap Forst,
and Ninia has been “adopted” by a friendly, but over-
protective cete of dire badgers. To complete this sub-
quest, the party must find the sisters and escort them to
the fey tent city of Dawn-on-Stream (area 8-4).
Completing this sub-quest earns the party bonus XP
and some wealth from the grateful Soras Leafbrother.
“The Unicorn Slayer” – Level 8
If the faerie dragon Grisby (area 8-4) determines the
party to be of the trustworthy and goodly sort, he may
give them this sub-quest. Alternately, if the dryad druid
Selistimme (area 8-13) does likewise, she may do the
same.
The key items of this sub-quest are the 12 unicorn
horns Forst (area 8-8) has collected, and he’s not sur-
rendering them without a fight. The horns must be
returned to Grisby.
Completing this sub-quest earns the party bonus XP
and an additional sub-quest.
“Easing the Dead” – Level 8
Grisby’s second sub-quest involves taking the unicorn
horns gathered from Forst (area 8-8) across the silver
bridge (area 8-4, but only at dawn or dusk) to
Hyelnevyuir in the Glade of Farewell (8A-1).
The party already will have the key items if they were
given this sub-quest. When they speak with
Hyelnevyuir, it will ask them to take the horns into the
glade itself (area 8A-2) and deposit them next to the
pools.
Completing this sub-quest earns the party bonus XP.
“Taking the Gate” – Level 8
After the party has defeated the bugbear general, Trag
(area 8-17), Soras Leafbrother (area 8-4) may give
them this sub-quest.
The key “item” for this sub-quest is the giant rhinoceros
beetle that guards the Scourgelands gate (area 8-18).
Unless that gate is closed, more goblinoids will eventu-
ally pass through, and the Far Garden (level 8) will be
threatened anew. The party is to slay the titanic vermin.
How quickly the party manages to defeat the gate’s
guardian determines both their reward and, possibly,
the fate of Soras Leafbrother. The most favorable reso-
22
lutions mean that the party will be able to call on Soras
to aid them in a future battle, and in most cases they
earn magic items, wealth, and bonus XP.
“Returning Galdeira to Her True Form” –
Level 9
This sub-quest concerns Galdeira Goldmoon, a half-
celestial elf paladin polymorphed into a kobold by
Benthosruthsa’s lackeys. She has been a kobold so
long she believes herself one, but there is evidence to
indicate otherwise, including her dead body if she’s
killed.
The key “item” to this quest is Galdeira herself (area 9-
7). It can be resolved by dispelling the spell that has
changed her shape, or by killing her and, upon seeing
that she was actually a half-celestial, subsequently
bringing her back to life.
If she is restored and determines that she can trust the
party, they may gain her as an ally.
“Eyes of the Drow” – Level 10
Ambassador Geviss Ereluc (area 10-37) gives the party
this sub-quest. He hires them to seek out the remnants
of drow House Forlorna (level 9B).
There are no specific key items for this sub-quest, but
the party must be able to convince Geviss that they’ve
found House Forlorna. The standard of evidence is left
to the GM’s discretion, but it should be pointed out both
that Geviss wants to believe.
For completing this sub-quest, the party earns some
wealth and bonus XP, and they are given another task
by the ambassador.
“Fist of the Drow” – Level 10
Geviss Ereluc (area 10-37) tasks the party with deliver-
ing the deathblow to drow House Forlorna (level 9B).
Again, there are no key items for this sub-quest, but the
head of Matron Chaliax (area 9B-12) and/or her arach-nid armor would suffice nicely.
For completing this sub-quest, the party earns some
wealth and bonus XP, as well as that dirty feeling you
get for working with the drow.
“Mouth of the Drow” – Level 10
The ambassador’s daughter, Liaa Ereluc (area 10-37),
gives out this sub-quest to parties interested in making
some extra money.
The key item for this sub-quest is the note from “Nirrec
Ereluc” (area 11A-6e) in the possession of the derro
zealot at the potionworks near the Lightless Gate (level
11A). The party is to obtain this letter, by any means
necessary, and return it to Liaa.
Completing this sub-quest earns the party some wealth
and bonus XP, as well as the possibility for future
employment with Liaa.
“Fangs of the Drow” – Level 10
Once the party has proven it can handle delicate situa-
tions, Liaa Ereluc (area 10-37) hires them to assassi-
nate her father.
There is no key item for this sub-quest save the ambas-
sador’s corpse.
Unfortunately, the only reward for completing this sub-
quest (other than the XP for killing Geviss) is more trou-
ble, as Liaa calls in Bleak Theater security forces to
deal with the “assassins.” That’s what you get for work-
ing for drow.
“Spoils of War” – Sub-level 10A
The ghost of Elweiss (area 10A-2) gives this quest to
the party after he is freed from his coffin of glass.
The four key items of this sub-quest are the Spear ofElweiss (area 6-9), the Skullcap of Umgoot (area 9C-4),
the Thrice-Cursed Blade (area 10-39), and Wulfrun’s
contract (area 11-9). The party must gather all four
items and return them to Koborth’s Tomb (level 10A),
each in its proper place.
Completing this quest is worth bonus XP, and Elweiss
will give the party his next quest, “The Hero and the
Sword.”
“The Hero and the Sword” – Sub-level 10A
This is potentially the most difficult sub-quest in CastleWhiterock. After completing “Spoils of War,” Elweiss tells
the party about Scalemar, the general’s dragon-slaying
sword, which can only be drawn by Koborth or Pelltar.
The key items for this sub-quest are Scalemar’s scab-
bard (area 10A-7) and either Pelltar’s dead hand (area
12A-1) or Koborth’s living hand.
To get Pelltar’s hand, the party merely needs to venture
to Pelltar’s Redoubt (level 12A) and use the dead limb
to “draw” Scalemar. This is the easy way.
The hard way is complicated, but ultimately more
rewarding. First, Koborth (as a skeletal champion) must
be encountered in area 12-37, and the party must use
a phrase Elweiss gives them at the beginning of this
sub-quest, which unshackles the general’s soul from
despair and makes him willing to return to life. Then, if
the party has completed the “Bonds of Fellowship” sub-
quest, Koborth’s bones (either their rubble or the walk-
ing skeleton) can be placed in the Basin of Cleansing(area 7A-3) along with 5,000 gp worth of coins or gems.
23
This resurrects the hero, who can then draw his sword.
Completing this quest the easy way earns the party
some bonus XP and Scalemar. Completing it the hard
way earns the party additional bonus XP and a leg-
endary ally who is knowledgeable of Castle Whiterock’s
history.
Making It Work for You
Not Starting at the Beginning
Castle Whiterock was written as a campaign-in-a-box. It
is intended to take a party of adventurers from 1st level
to 15th level (and possibly beyond). This boxed set,
however, need not be used in this manner.
The writers included several points of entry into the dun-
geon. By doing so, Castle Whiterock could be used to
launch a higher-level campaign or even included in a
pre-existing one.
Adventuring parties averaging 3rd or 4th level could
enter the dungeon by excavating collapsed mine shafts
to enter level 3 or collapsed tunnels to enter levels 4
and 4A (as is the case with DCC #51.5: Sinister Secretof Whiterock).
There are two aquatic methods to gain entry. Parties
wishing to begin at 5th level could dive into the caldera
lake (level 5), and those at 6th level could use the river
“exit” in area 6-14 as an entrance.
Parties coming in from the Underdeep have three
options. A 7th-level party could enter Castle Whiterock
by following the dried riverbed in area 7-16. The path
beyond the Lightless Gate (area 11A-10) could lead an
11th-level party straight to Narborg or a 14th-level party
down to the Burning Maze, emerging in area 14A-1.
Any party, but most likely one at or near 10th level,
could be captured by a nefarious organization of the
GM’s choice and end up in the Bleak Theater (level 10)
as gladiators.
It is even possible to “appear” by magical means in
Castle Whiterock. An 8th-level party wandering in any
temperate woods could get lost and find themselves in
the Far Garden (level 8). A 13th-level party composed
entirely of outsiders with an alignment subtype (say, for
example, a party of archons) could be accidentally
shunted to the Demonhold (level 13) while passing
through the area. A 14th-level party could enter the mid-
point of the Burning Maze by passing through its rift
from the Plane of Elemental Fire (area 14B-3), or they
could learn the absolute coordinates of Baghamaya’s
reception point (area 14B-6b) and teleport directly to the
end of the Burning Maze.
Games, not Campaigns
Not all gaming groups are interested in a sweeping
campaign; some groups appreciate the spontaneity of a
one-off game. In this context, Castle Whiterock is more
like a salad bar of ready-to-play adventures. You as the
GM can lift entire levels of the dungeon out of the moun-
tain and plug them into your campaign as stand-alone
adventures. The sub-quests detailed above are a good
model to follow, and eight suggestions are provided
below (with tongue-in-cheek names).
“Slavers of Slave Mountain”
People have been disappearing. Maybe they’re being
taken to Slave Mountain!
The GM takes levels 1-3, including 3A, and sets them in
any mountain of his or her choice. For an ending befit-
ting a module, add more adept levels to Drugila (area
3A-1) and move the figurine of the White Roc (area 13-
8) to somewhere on level 3 (it might be a good idea to
reduce its power somewhat).
“Troglodytes Great and Small”
The troglodytes have been really aggressive lately. Why
is that?
The GM could use levels 4, 6, and 6A as a mini-adven-
ture. Benthoc’s followers are being pushed around by
Sossank’s tribe to conduct raids. All the while, Most
Bloated Muthren is manipulating Sossank. In this sce-
nario, remove the river’s exit to the surface in area 6-14
and add a few cleric or adept levels to Most Bloated
Muthren (area 6A-4). Gunrolz (area 6-6) could be work-
ing for Muthren, or maybe for another NPC of the GM’s
choice.
“I Want a New Skum”
Strange mutations have been appearing near the river.
Go check it out.
The GM uses level 7 to tell a tale about an aboleth’s
bizarre experiments in making new skum. The GM
reconfigures the dungeon, making the elevator in area
7-1 connect to a hidden location on the surface and
removing the barrier in area 7-16, making that the path
the river takes outside the dungeon. The party enters by
the elevator, which they found atop a hill near where the
river emerges from underground. The derro and
Vulgaris now work for Acanthus (area 7-12), acquiring
him new specimens.
“Save the Trees”
I don’t think we’re in Kansas anymore...
Levels 8 and 8A are practically a stand-alone adventure
as written. The party could find the gate to the Far
24
Garden (area 8-1) in any location, or they could just
“appear” there by getting lost in any temperate forest.
Unless the party uses the Castle Whiterock gate, it
should be removed.
“Descent into the Darkness of Caves”
This river goes into a really big cave. I bet there are
monsters and treasure in it!
In this scenario, the GM takes levels 9 and 9A-9C to
cobble together a cave system for the party to explore.
Simply remove all references to Narborg and make the
discovery and destruction of the Inverted Tower the
focal point of the adventure.
“Live! From Duergar Stadium!”
The moral imperative of the imprisoned is to escape.
The GM could decide that it’s time for the party to get
captured, and bases a few game sessions out of level
10 until the party manages to escape. In this scenario,
The Impresario works for himself and not the thane, and
level 10A does not exist.
“Death to the Thane!”
Have fun storming the castle!
If the party is feeling like taking on a fortress, the GM
could take the Narborg levels (11, 11A, 11B, and 12)
and insert them anywhere he or she likes. For this pur-
pose, level 11B may or may not be inhabited, and there
is no entrance to the Demonhold (area 11B-7).
“Dragons: Two for the Price of One”
We’ve been hired to slay a dragon! What do you mean
he’s already dead?
In this scenario, the high-level adventurers are sent to
slay Benthosruthsa. The GM could use only levels 14
and 15 to construct the dragon’s lair.
In Closing
No introduction, appendix, or index (or combination of
same), can possibly address all questions that may
arise. GMs finding themselves stumped should feel free
to visit our forums at (www.goodman-
games.com/forums) and ask whatever questions they
may have.
Castle Whiterock is a lot of material to digest, but we
hope you’ll find the rewards well worth it in terms of
quality dungeon-crawling and hours spent pleasantly
chucking dice with friends.
Finally, as has been said before, each ending is a new
beginning, so it is appropriate that this Introduction
close with the first words of the game:
Player Beginning
Leaving the town of Cillamar behind, you carefully pickyour way through the rough foothills. After a full day’sride, you finally crest the lip of an ancient eroded vol-cano. Its basin is filled with murky water, and its westwall has collapsed, linking it to a large freshwater lake.
A scant path meanders its way down to the water’sedge where your goal lies. Situated against the calderawall are the ruins of a once-majestic castle. Its walls arecomposed of soft pure white rock, a stark contrast to thedrab gray of the caldera’s walls.
Castle Whiterock and its labyrinthine dungeons await
your exploration....
25