Download - Wing Lettering
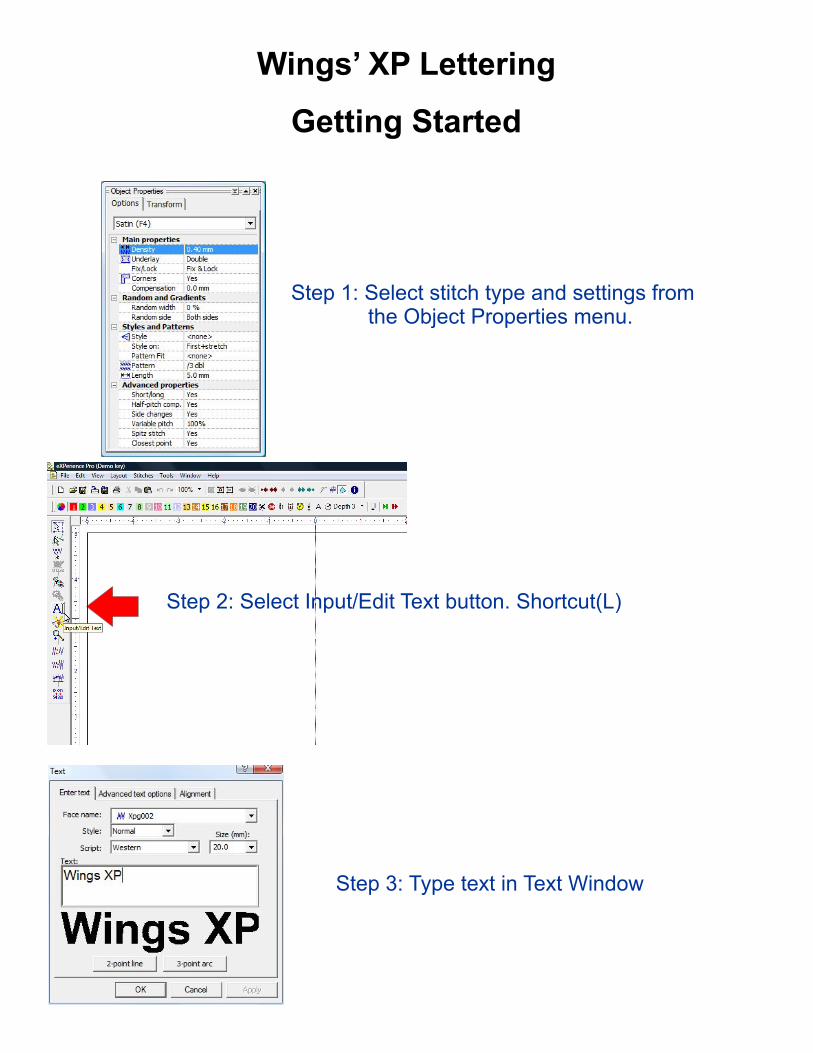
Wings’ XP Lettering
Step 2: Select Input/Edit Text button. Shortcut(L)
Step 3: Type text in Text Window
Step 1: Select stitch type and settings from the Object Properties menu.
Getting Started
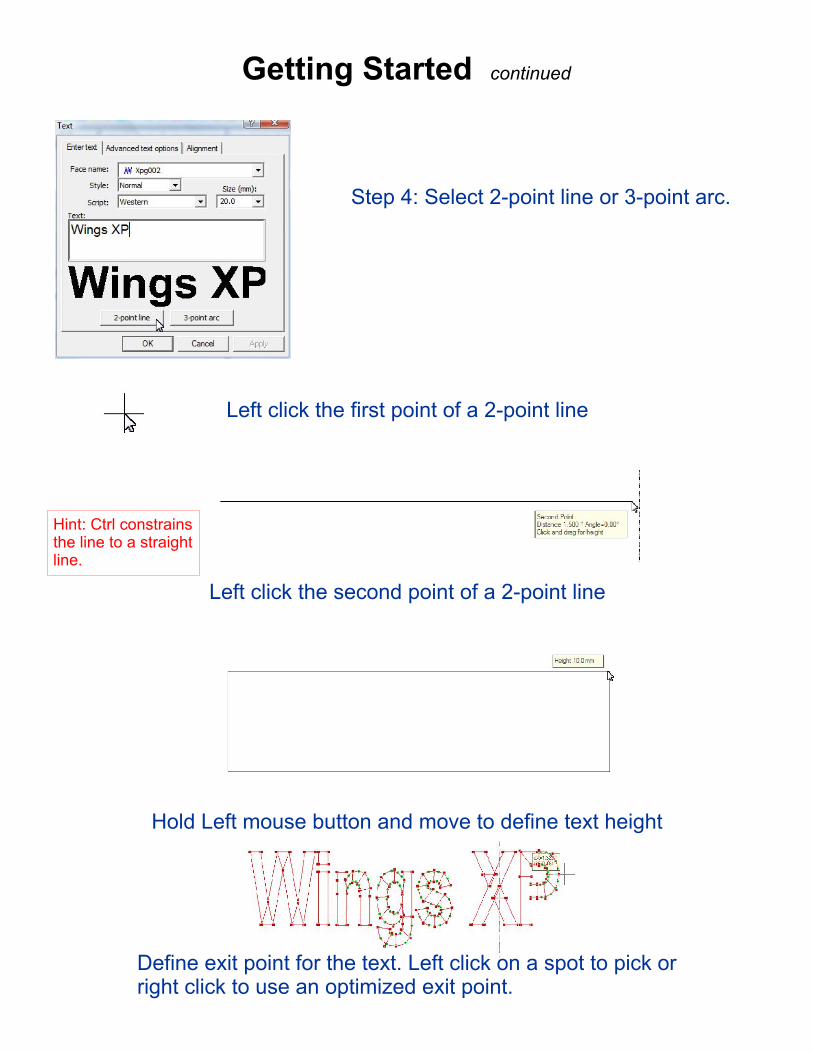
Step 4: Select 2-point line or 3-point arc.
Left click the first point of a 2-point line
Left click the second point of a 2-point line
Hold Left mouse button and move to define text height
Define exit point for the text. Left click on a spot to pick orright click to use an optimized exit point.
Hint: Ctrl constrainsthe line to a straightline.
Getting Started continued
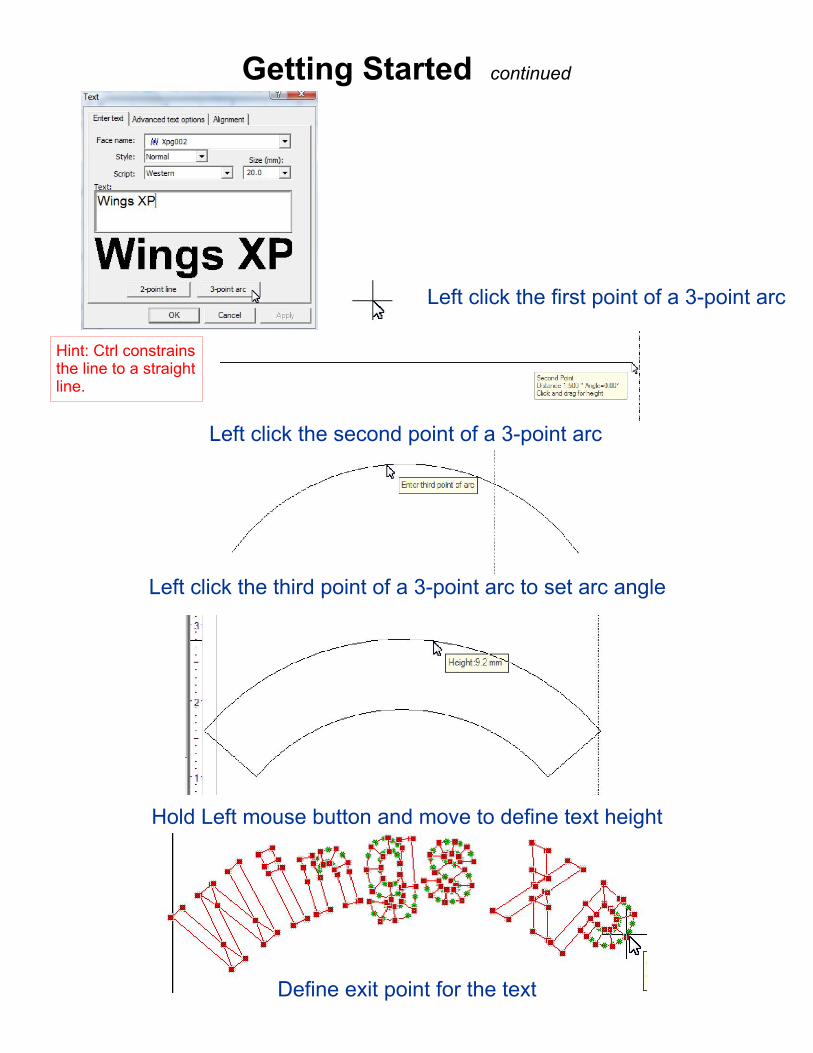
Left click the first point of a 3-point arc
Left click the second point of a 3-point arc
Left click the third point of a 3-point arc to set arc angle
Hold Left mouse button and move to define text height
Define exit point for the text
Hint: Ctrl constrainsthe line to a straightline.
Getting Started continued
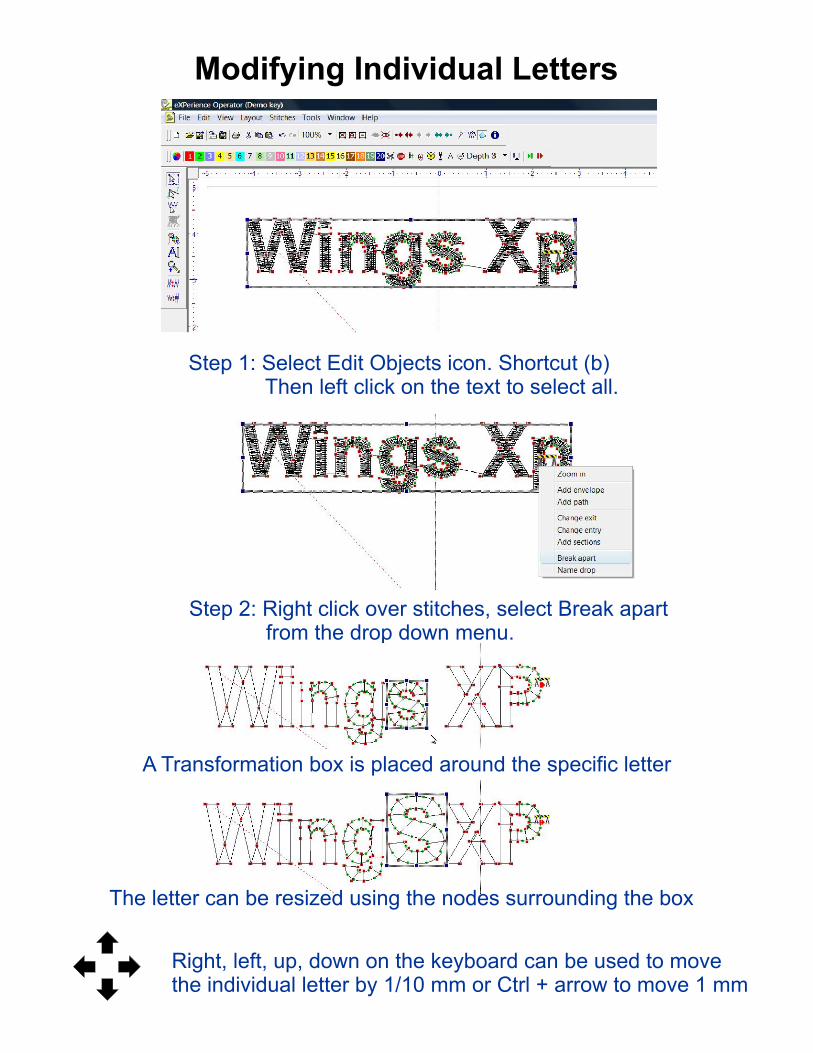
Step 1: Select Edit Objects icon. Shortcut (b) Then left click on the text to select all.
Step 2: Right click over stitches, select Break apart from the drop down menu.
A Transformation box is placed around the specific letter
The letter can be resized using the nodes surrounding the box
Right, left, up, down on the keyboard can be used to movethe individual letter by 1/10 mm or Ctrl + arrow to move 1 mm
Modifying Individual Letters
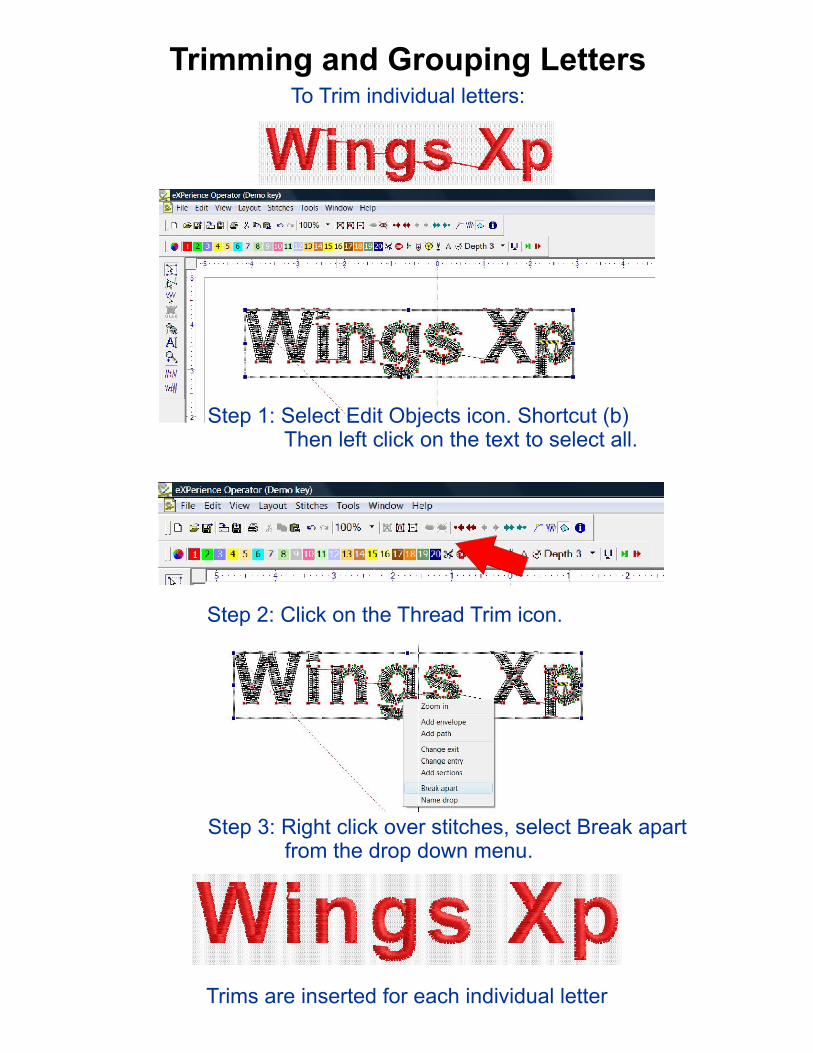
Trimming and Grouping LettersTo Trim individual letters:
Step 1: Select Edit Objects icon. Shortcut (b) Then left click on the text to select all.
Step 1: Select Edit Objects icon. Shortcut (b) Then left click on the text to select all.
Step 2: Click on the Thread Trim icon.
Step 3: Right click over stitches, select Break apart from the drop down menu.
Trims are inserted for each individual letter
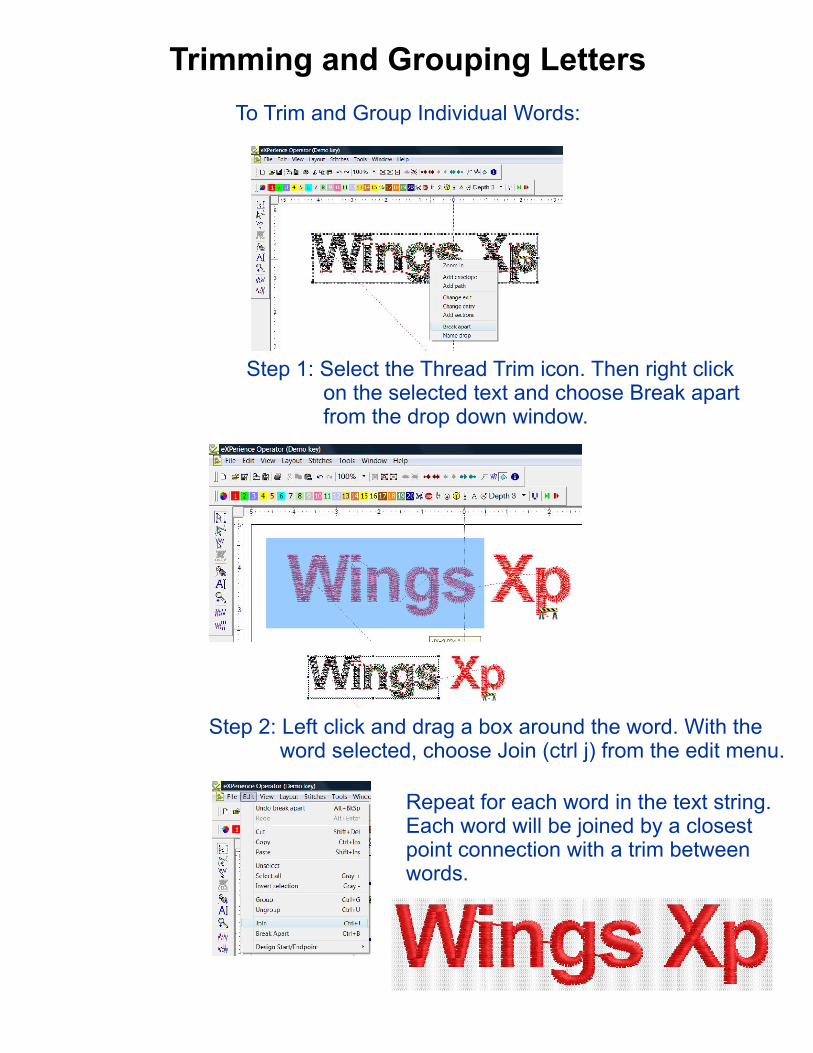
Trimming and Grouping Letters
To Trim and Group Individual Words:
Step 1: Select the Thread Trim icon. Then right click on the selected text and choose Break apart from the drop down window.
Step 2: Left click and drag a box around the word. With the word selected, choose Join (ctrl j) from the edit menu.
Repeat for each word in the text string.Each word will be joined by a closestpoint connection with a trim betweenwords.
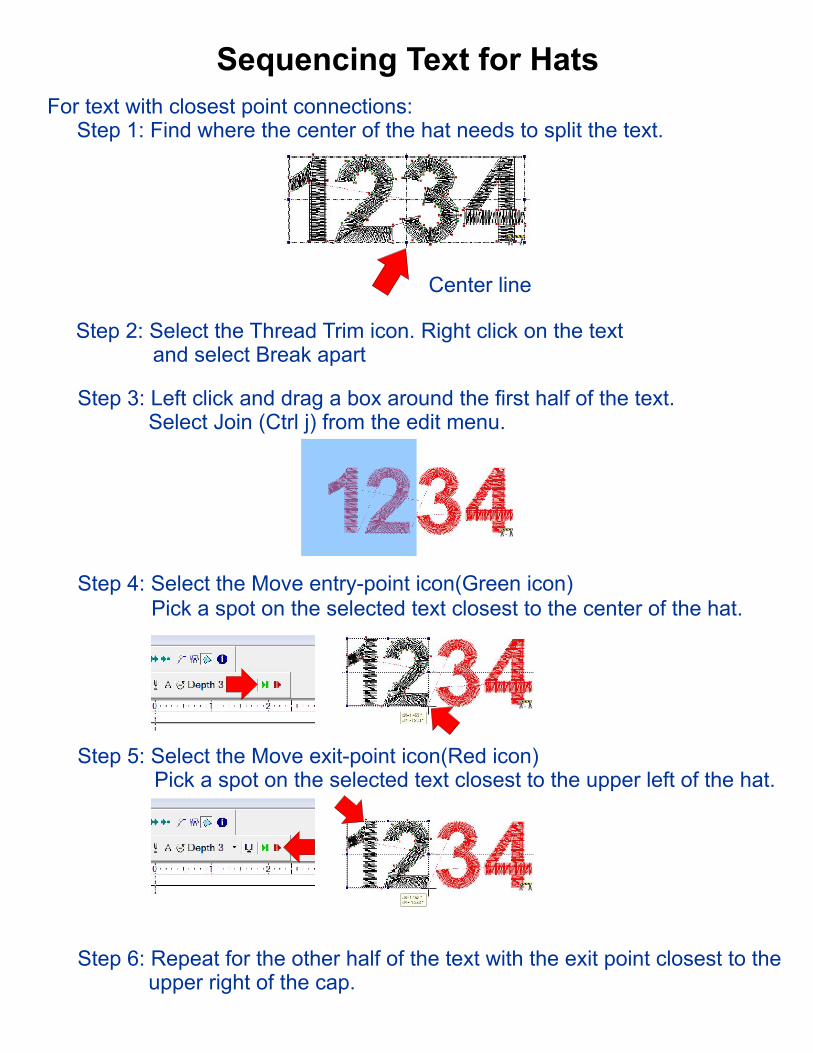
Sequencing Text for Hats
For text with closest point connections: Step 1: Find where the center of the hat needs to split the text.
Center line
Step 2: Select the Thread Trim icon. Right click on the text and select Break apart
Step 3: Left click and drag a box around the first half of the text. Select Join (Ctrl j) from the edit menu.
Step 4: Select the Move entry-point icon(Green icon)Pick a spot on the selected text closest to the center of the hat.
Step 5: Select the Move exit-point icon(Red icon) Pick a spot on the selected text closest to the upper left of the hat.
Step 6: Repeat for the other half of the text with the exit point closest to the upper right of the cap.
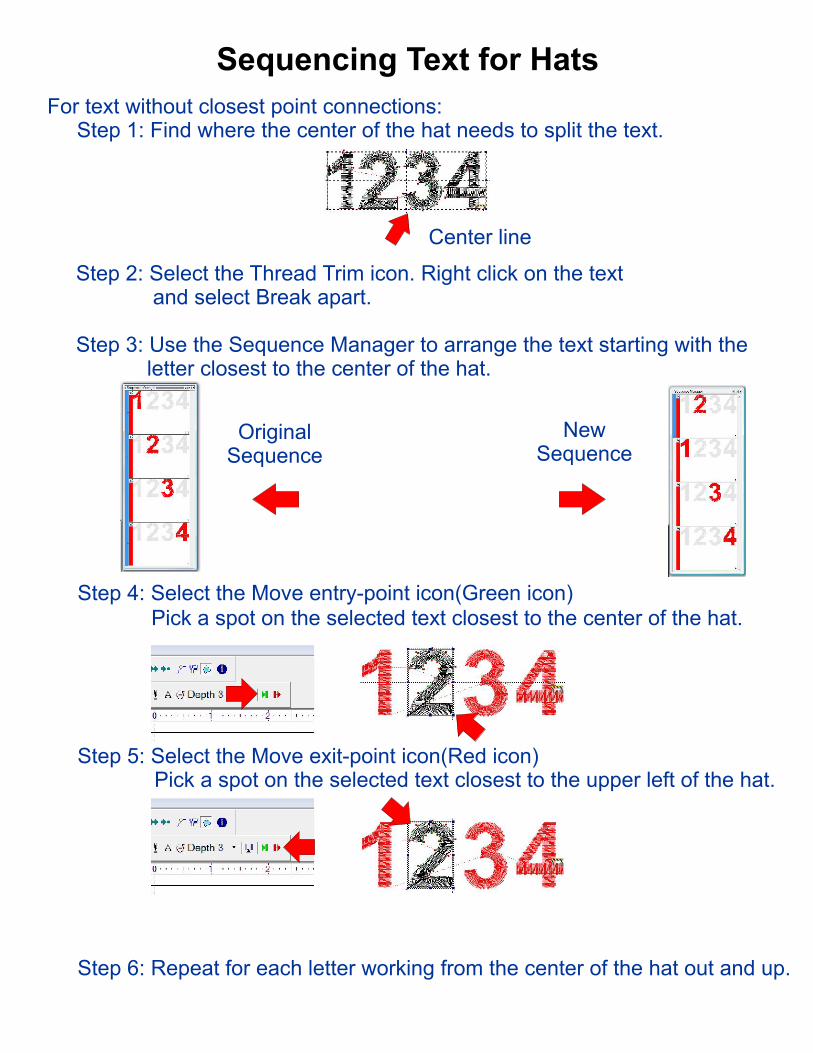
Sequencing Text for Hats
For text without closest point connections: Step 1: Find where the center of the hat needs to split the text.
Center line
Step 2: Select the Thread Trim icon. Right click on the text and select Break apart.
Step 3: Use the Sequence Manager to arrange the text starting with the letter closest to the center of the hat.
OriginalSequence
New Sequence
Step 4: Select the Move entry-point icon(Green icon)Pick a spot on the selected text closest to the center of the hat.
Step 5: Select the Move exit-point icon(Red icon) Pick a spot on the selected text closest to the upper left of the hat.
Step 6: Repeat for each letter working from the center of the hat out and up.
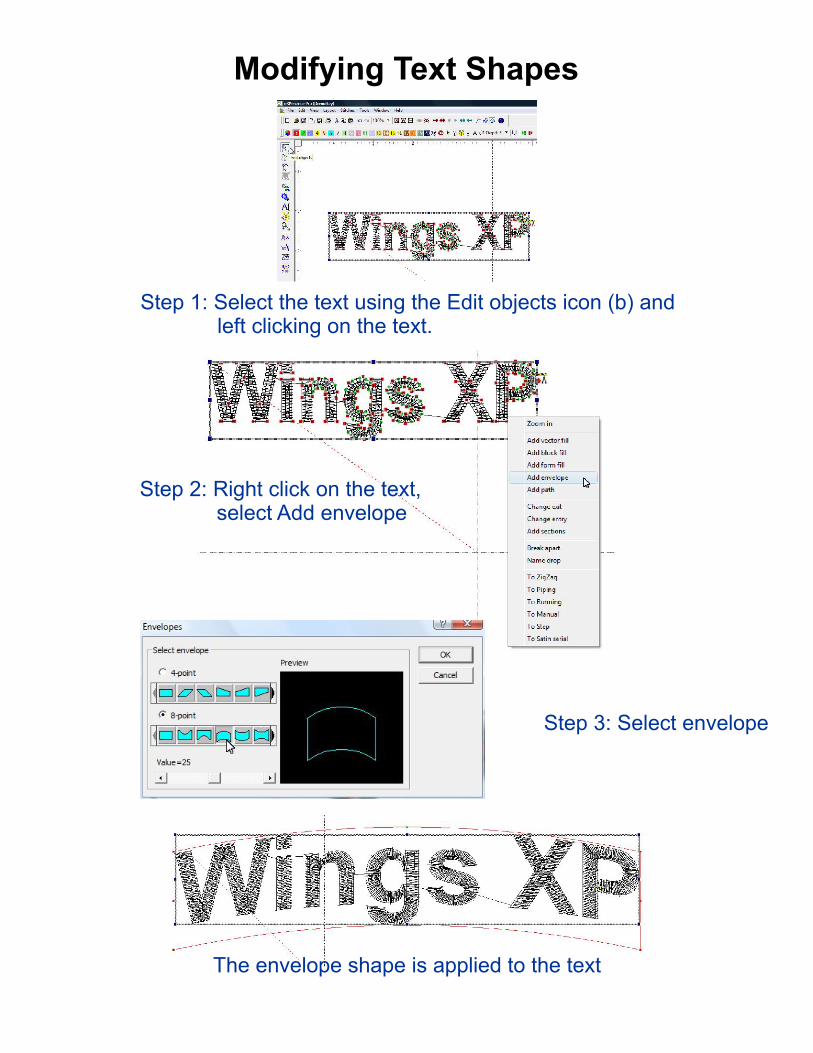
Step 1: Select the text using the Edit objects icon (b) and left clicking on the text.
Step 2: Right click on the text, select Add envelope
Step 3: Select envelope
The envelope shape is applied to the text
Modifying Text Shapes
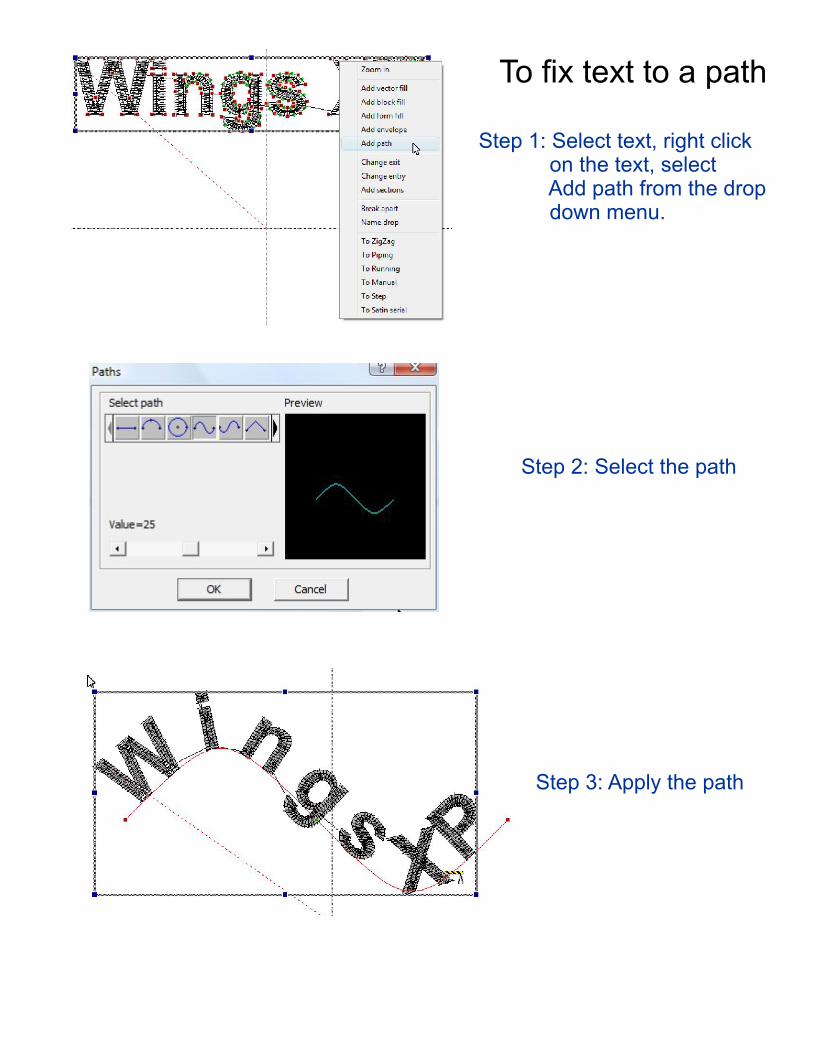
To fix text to a path
Step 1: Select text, right click on the text, select Add path from the drop down menu.
Step 2: Select the path
Step 3: Apply the path
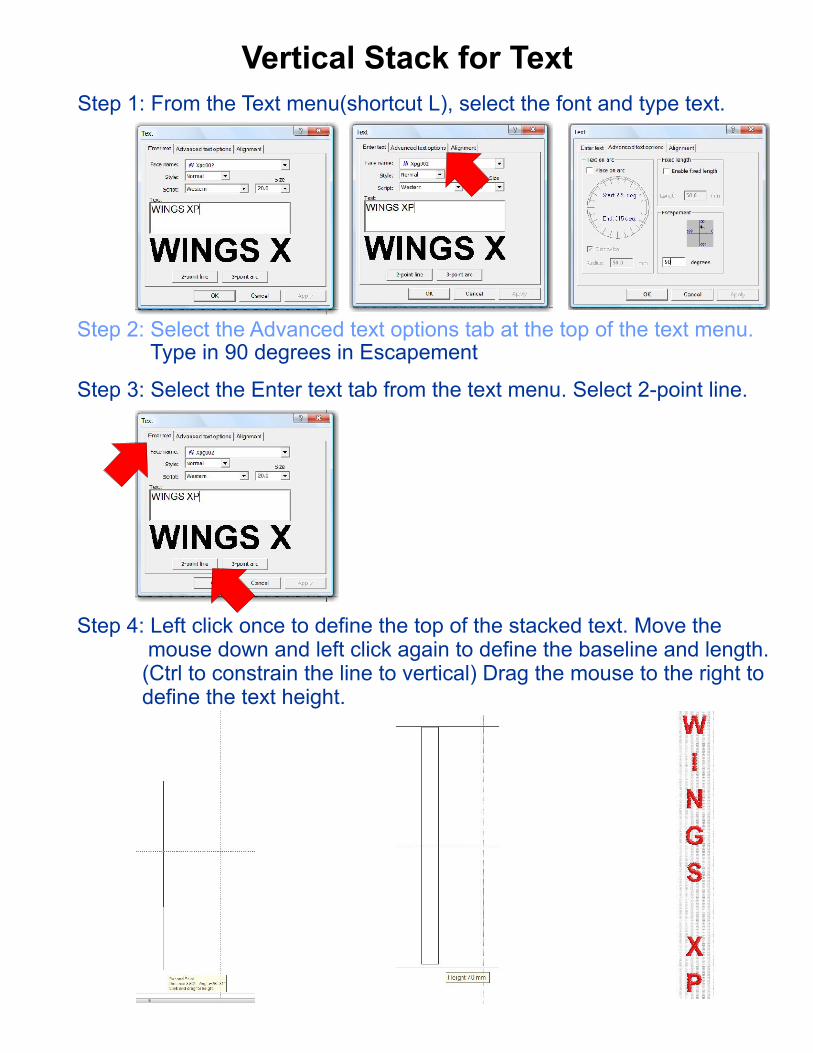
Vertical Stack for Text
Step 1: From the Text menu(shortcut L), select the font and type text.
Step 2: Select the Advanced text options tab at the top of the text menu.Type in 90 degrees in Escapement
Step 3: Select the Enter text tab from the text menu. Select 2-point line.
Step 4: Left click once to define the top of the stacked text. Move the mouse down and left click again to define the baseline and length. (Ctrl to constrain the line to vertical) Drag the mouse to the right to define the text height.
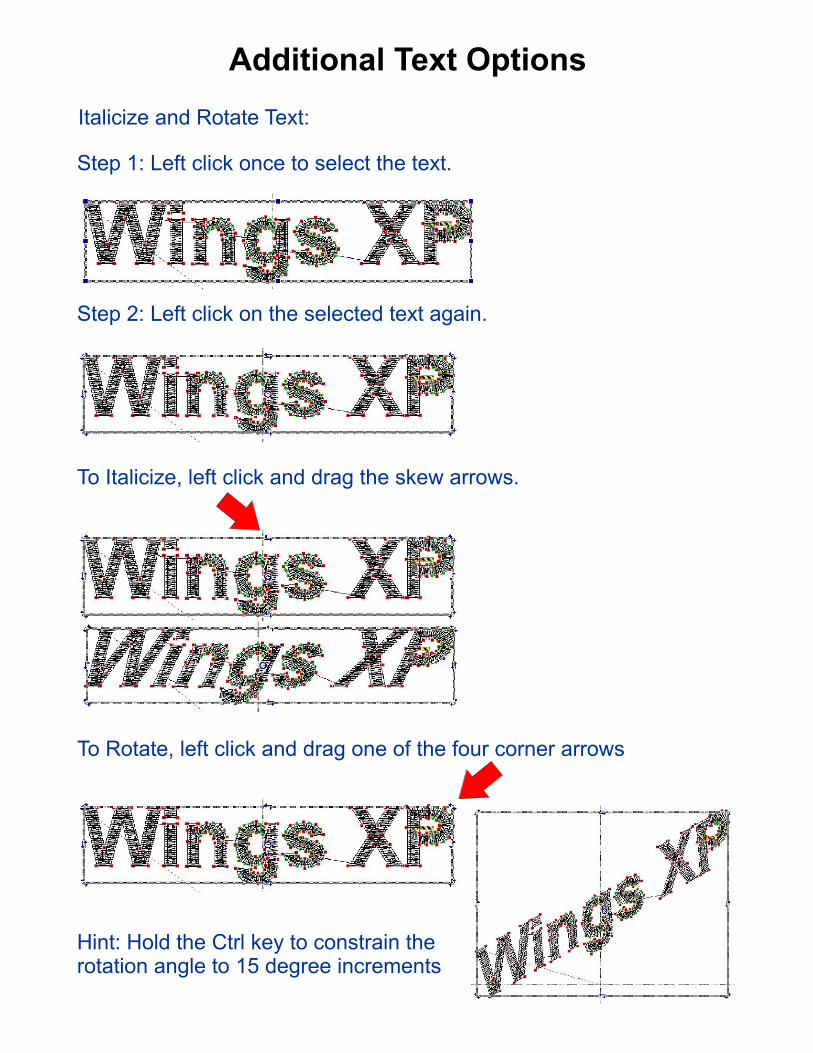
Additional Text Options
Italicize and Rotate Text:
Step 1: Left click once to select the text.
Step 2: Left click on the selected text again.
To Italicize, left click and drag the skew arrows.
To Rotate, left click and drag one of the four corner arrows
Hint: Hold the Ctrl key to constrain therotation angle to 15 degree increments

Creating 2 Color Text
Step 1: Select Step or Satin from the Object Properties menu.
Step 2: Select Font type and size. Type in Text.
Step 3: Deselect Text by left clicking outside the selected text box. Select Satin Serial in the Object Properties menu.
Repeat steps 1 and 2 using the same values.
Step 4: Align the 2 objects using the up, down, right, left arrows on the keyboard. Change to a second color by left clicking on the #2 in the color palette.


