Download - Fruity Party Hats - assets.contentstack.io

Fruity Party Hatsby Gail Armstrong
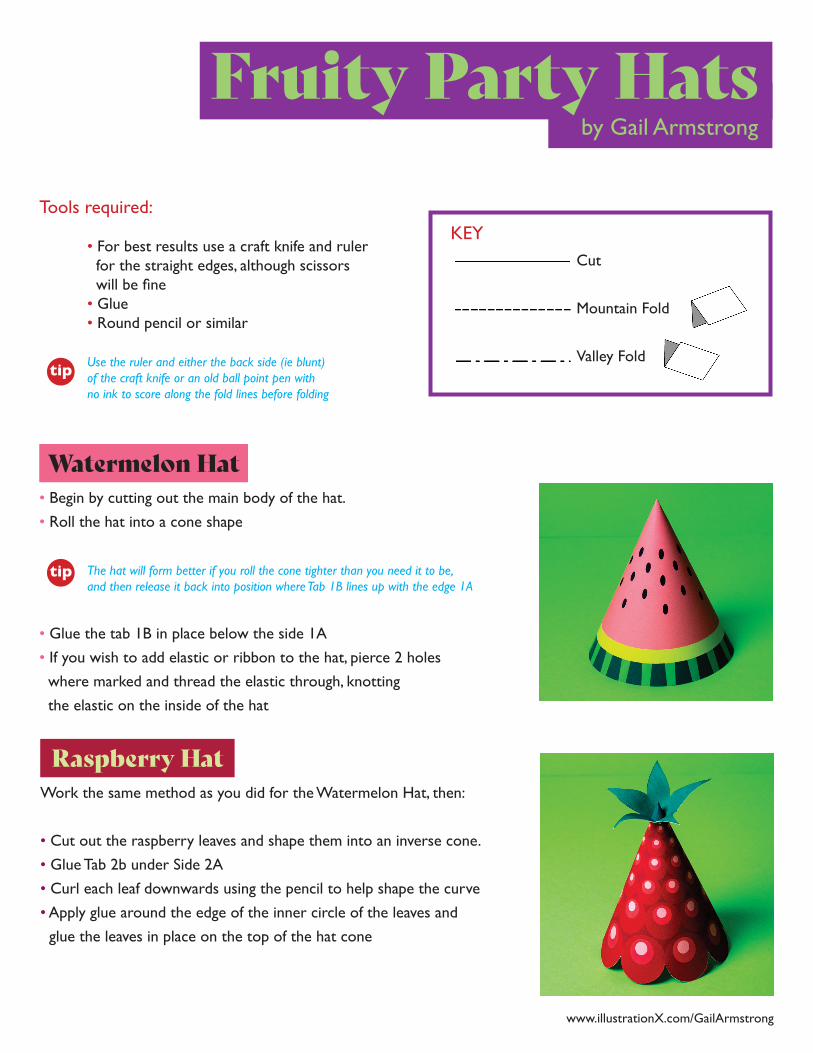
Tools required:
• For best results use a craft knife and ruler for the straight edges, although scissors willbefine • Glue • Round pencil or similarTip Use the ruler and either the back side (ie blunt) of the craft knife or an old ball point pen with no ink to score along the fold lines before folding
tip
KEY
Cut
Mountain Fold
Valley Fold
www.illustrationX.com/GailArmstrong
Fruity Party Hatsby Gail Armstrong
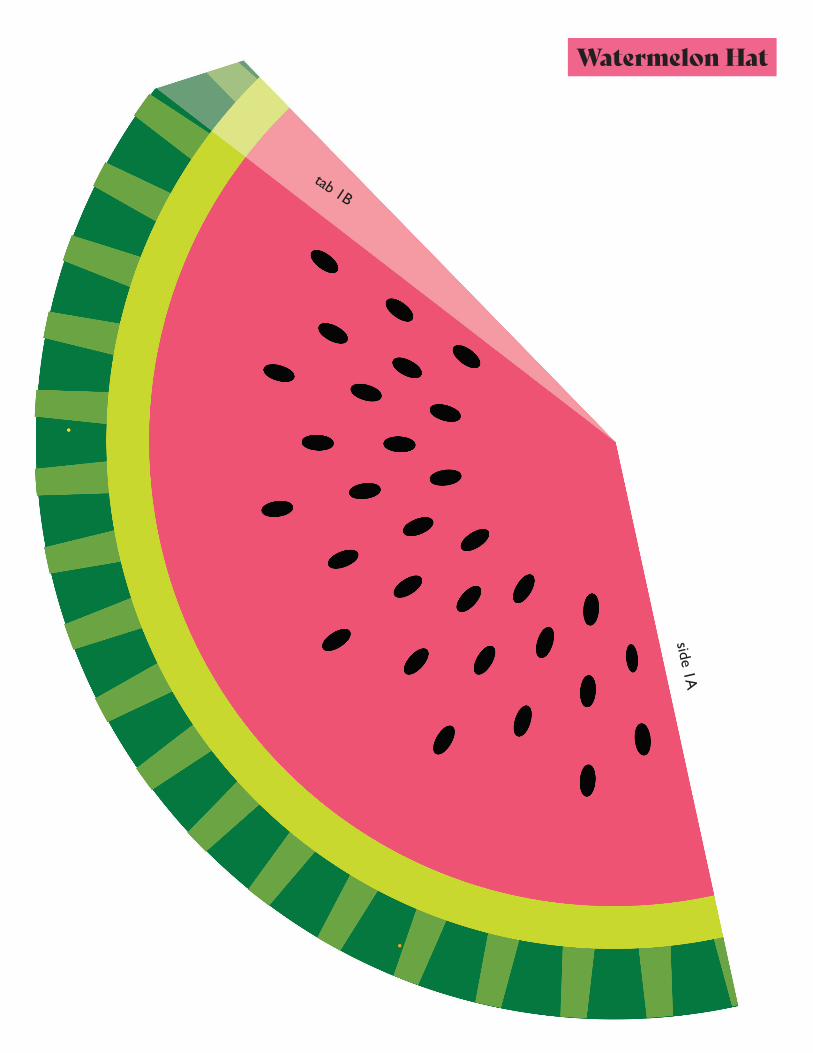
Watermelon Hat• Begin by cutting out the main body of the hat.
• Roll the hat into a cone shape
The hat will form better if you roll the cone tighter than you need it to be, and then release it back into position where Tab 1B lines up with the edge 1A
• Glue the tab 1B in place below the side 1A
• If you wish to add elastic or ribbon to the hat, pierce 2 holes
where marked and thread the elastic through, knotting
the elastic on the inside of the hat
tip
Raspberry HatWork the same method as you did for the Watermelon Hat, then:
• Cut out the raspberry leaves and shape them into an inverse cone.
• Glue Tab 2b under Side 2A
• Curl each leaf downwards using the pencil to help shape the curve
• Apply glue around the edge of the inner circle of the leaves and
glue the leaves in place on the top of the hat cone

www.illustrationX.com/GailArmstrong
Strawberry HatWork the same method as you did for the Raspberry Hat, then, after
sticking the strawberry leaves in place:
• Cut out the stalk and fold the stalk in half along the line marked,
thenopenitflatagain
• Apply glue to the white side of the stalk and stick the pointed end
to the top of the hat cone.
• Once you are happy with the position of the stalk, fold the 2 sides
back together so they stick together above the point of the hat cone
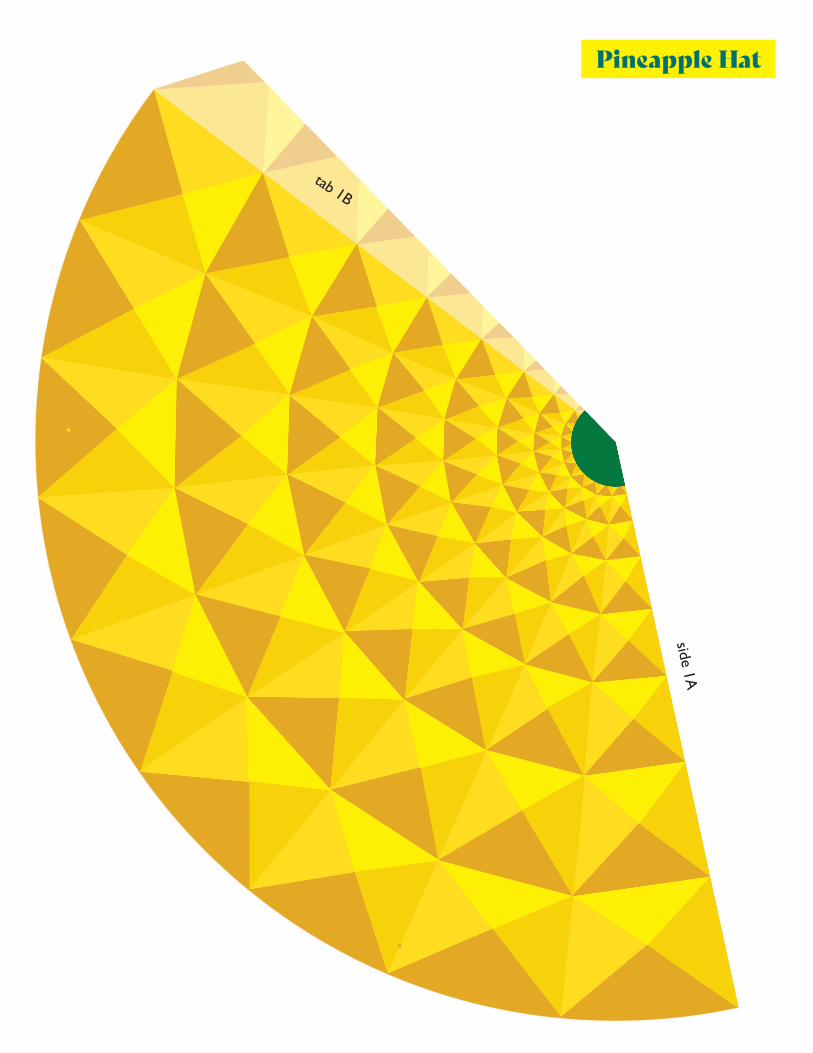
Pineapple HatAs before, cut out the hat cone and glue it together into a cone shape.
• Cut out Pineapple Leaves 1, glue it into an inverse cone and curl the
leaves downwards using the pencil to help create the curves
• Glue around the edge of the inner circle and stick the leaves
to the top of the hat cone
• Repeat for Leaves 2, 3 & 4, but curl the leaves a little less before
gluing them in place in order
• Once the glue is dry you can adjust the curls so they look right
Bunch of Grapes HatAgain cut out the hat shape and glue it together.
Note that this cone ends with a hole at the top instead of a point.
• Cut out Vine Leaf 1 and apply glue to the white side of the leaf stalk
• Put the entire stalk through the hole in the top of the cone and
stick it to the inside of the hat cone
• Repeat for Vine Leaf 2
• Cut out the Tendril strips and roll each around the pencil.
• Release the paper so it forms a spiral shape and glue in place through
the hole in the hat cone.
Balloon Cone
Tab 1a
Side
2b
Watermelon Hat
tab 1B
side 1A

Balloon Cone
Tab 1a
Side
2b
tab 1B
side 1A
Raspberry Hat

Balloon Cone
Tab 1a
Side
2b
tab 1B
side 1A
Strawberry Hat
Balloon Cone
Tab 1a
Side
2b
tab 1B
side 1A
Pineapple Hat

Balloon Cone
Tab 1a
Side
2b
Leaves 1Pineapple Hat
Leaves 2
Leaves 3
Leaves 4
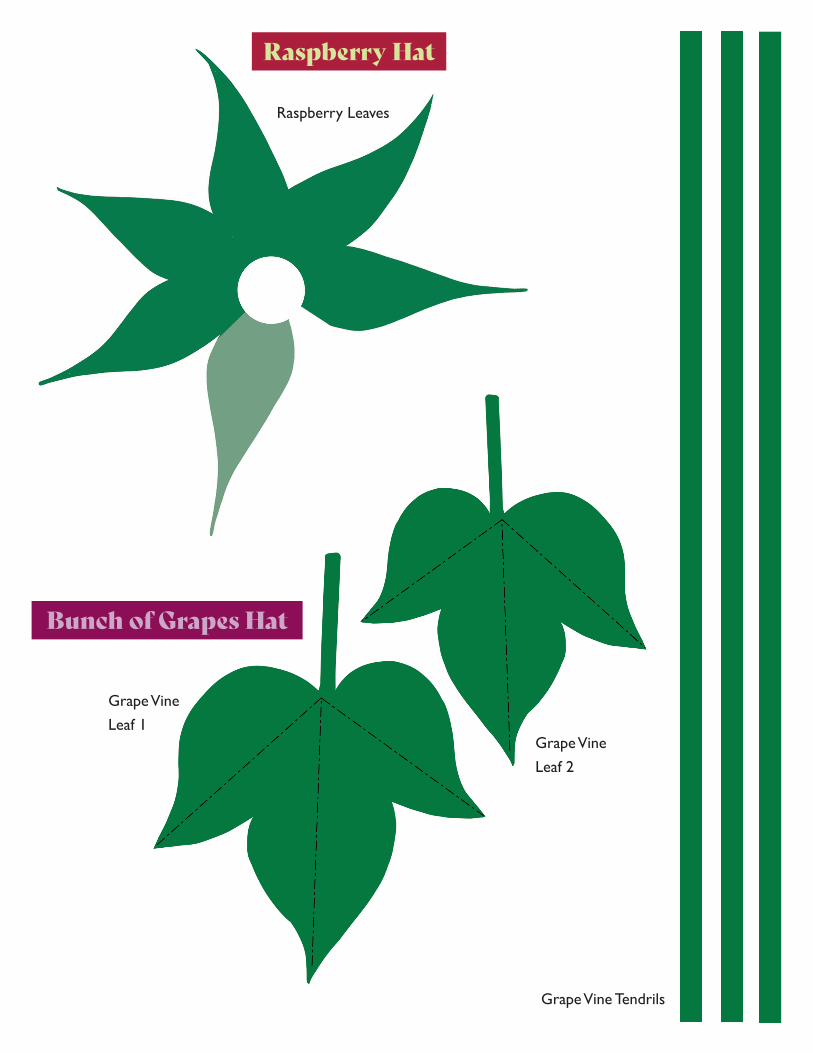
Raspberry Hat
Raspberry Leaves
Bunch of Grapes Hat
Grape Vine Tendrils
Grape Vine
Leaf 1Grape Vine
Leaf 2

Balloon Cone
Tab 1a
Side
2b
tab 1B
side 1A
Bunch of Grapes Hat


