Download - CompAir FX Dryer
This instruction manual must be read prior to installation or operation of this equipment
SERVICE PROCEDURE
01
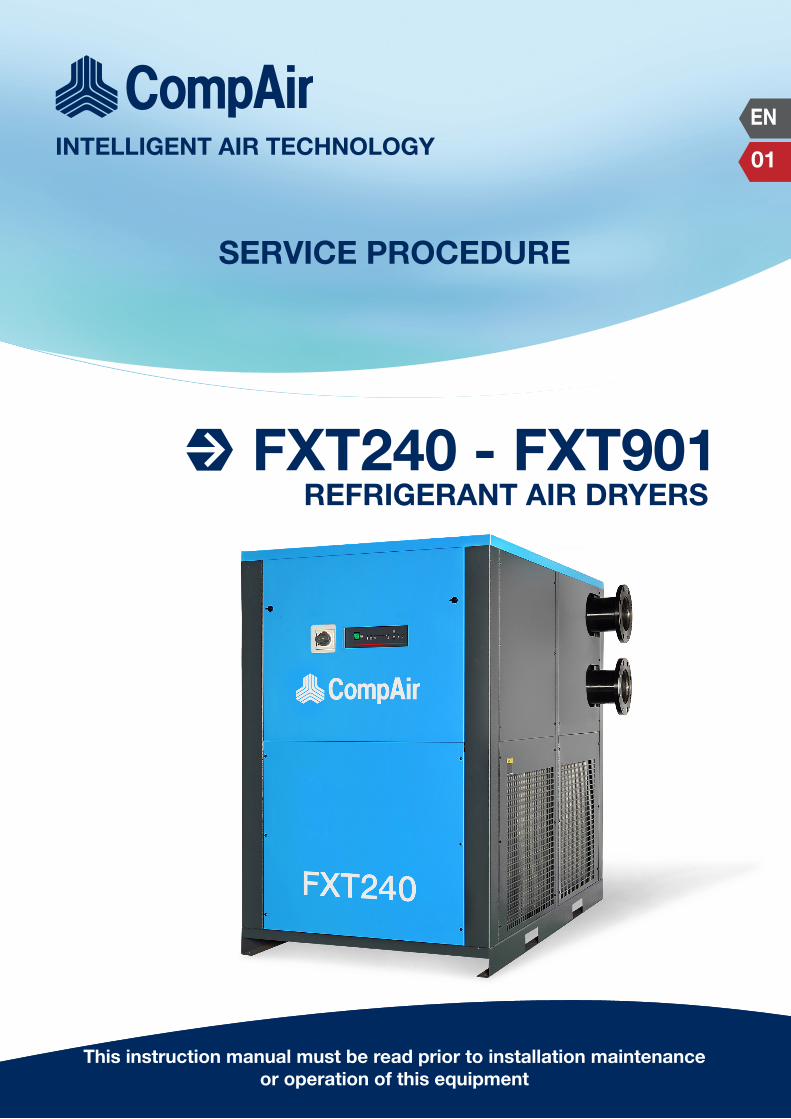
FXT240 - FXT901REFRIGERANT AIR DRYERS
INTELLIGENT AIR TECHNOLOGYEN
This instruction manual must be read prior to installation maintenance or operation of this equipment

SERVICE PROCEDURE
2
1. PRIOR TO SERVICE
These procedures are to be used as guidelines and service tips for qualified, certified refrigeration technicians. These are not used as all-inclusive instructions for performing any service procedure. In any case, the authorized service engineer should service in accordance with the local safety and environmental regulation. In addition to see how to replace the component, the technician should determine the root cause of the failure.
Prior to service, the authorized engineer should check if they disconnect the power supply to the air dryer and switch the service bypass valve in order to bypass the dryer. If no by-pass system installed, stop the compressed air supply. And then open the cabinets for service.
2. COMPRESSOR REPLACEMENT
2-1. The refrigerant can be evacuated from the refrigerant system through the service valve. The service valve provides access to the downstream of evaporator for checking or servicing. The service valve is a Schrader type valve with a sealing cap. To use the valve, unscrew the cap to expose the Schrader valve pin.
Kindly note the evacuation should be done slowly. (In case of large range dryer from FXT240 or the above size, additional Schrader valve can be installed on the accumulator upstream of filter dryer. After the evacuation from the valve on downstream of evaporator, then do evacuation on the accumulator upstream of filter dryer slowly.)
2-2. Service valve Location and type:
Series Location (it can be subject to change without prior notice.) Type
FXS N/a Consult factory
FXR Low pressure line: Downstream of evaporator Schrader type
FXT Low pressure line: Downstream of evaporatorHigh pressure line: On the accumulator upstream of filter dryer
Schrader type
Service valve downstream of filer dryer (Low pressure line, FXT240)

SERVICE PROCEDURE
3
Service valve (Yellow-High pressure line, Green-Low pressure line, FXT901)
2-3. Replace the compressor and the filter dryer. The heat of removing the filter can release contaminants trapped in the filter back into the system. Pressure test and evacuate the system. After replace the compressor by new one, wiring may be done in accordance with the electric schematic which is proved by customer service. By case, you will need to remove the crank heater case heater before compressor replacement upon the compressor series.
STOP (Check test equipment)
2-4. Connect the vacuum pump to the gauge manifold and the manifold to the vacuum gauge only and test the equipment. You must be able to achieve a vacuum of 200 microns or less in this test. If not make, repairs to your test equipment before proceeding.
2-5. It is recommended that when possible the thermistor vacuum gauge be connected to the system at a location other than where the service gauges are connected. The desired system vacuum is 500 microns or less. A field service vacuum of 1000 microns or less is acceptable. Large contaminated systems may require several vacuum pump oil changes and overnight vacuuming.
2-6. Charge the system using a charging scale to the charge amount and type listed on the dryer serial number tag. (It is acceptable to use the uncontaminated refrigerant that was recovered from the dryer. If the acid test showed acid, new refrigerant is required.) After charge the unit with refrigerant to the amount specified on the air dryer serial number tag completely, remove the charging manifold and replace the cap securely on the service valve. Then, reinstall the cabinet and reconnect the power supply to the air dryer.
2-7. Operate the dryer without air flowing through the system. Check for superheat, operating pressures, refrigerant flow, condenser fan cycling, evaporator temperature, Compressor oil level etc. Record these readings on the Dryer Test Datasheet. In the case of an electrical failure, inspect and test the contactor for damage caused from the failed compressor. Replace if needed.
2-8. Operate the dryer with an air load after 30min. operating under no load condition. Check the operating conditions and record them. Note the temperature of the liquid line in and out of the filter dryer. A difference of more than 1 degree indicates that the filter is restricted and needs to be replaced.
2-9. Maintain datasheet and compare the original readings to subsequent readings to note changes in the dryer performance.
2-10. Replacement compressors in a system with a burnout and acid in the system should be inspected 1 week after being placed into service. Check oil levels (in case of FXT240 or above) and filter dryer temperatures.

SERVICE PROCEDURE
4
3. LEAK TEST AND REPAIR
3-1. Using a leak detector, test for possible external refrigerant leaks, paying for particular attention to all brazing points. If an external leak is discovered, repair any external leaks found using brazing. Use a vacuum pump to evacuate the unit of all refrigerant into an approved refrigerant receptacle before replacement or repairing leaks.
3-2. If no leak can be detected, and the pressure loss indicates that a leak is present, perform a standing vacuum test with air pressure on the dryer. Attempt to pull a vacuum. Isolate and monitor the vacuum. If the vacuum dissipates to “0”, atmospheric pressure, the leak is in the piping system and should be able to be located and repaired. If the refrigeration system pressure goes positive and eventually goes to the air system pressure, the system has an air-to- refrigerant leak in the evaporator. Evaporator failures are not considered to be field repairable. You should contact dryer services and do not proceed with the compressor replacement.
4. AIR-COOLED CONDENSER REPLACEMENT
In order to replace the air-cooled condenser, generally follow the procedure of compressor replacement for evacuation by vacuum pump and charging refrigerant gas.
4-1. Prior to replacement, you need to remove the cable tie and disassemble fan motor assembly part from the condenser body. After replace the condenser body, assemble the fan motor assembly part to the body. If you need to replace each component of fan motor assembly, disassemble the safety grill, fan motor, blade each in order from the assembly part. Always retain the screws and bracket for reassembly.
a. Make sure again that you disconnected the power supply to the air dryer and open the cabinet and follow the refrigerant evacuation procedure completely. Refer to the procedure from 2-1 to 2-6.
b. Remove the cable tie securing the cord to the protecting screen and slide the fan motor assembly out of the condenser body.
c. Disassemble each component by loosening and removing the screws. Nothing the orientation of the motor and its leads, peel the old fan motor off of the protecting screen and install the replacement fan motor and then, assemble the components in the reverse order. If necessary, replace the fan blade, fan grill as well. (Check for excessive vibration. If the unit is vibrating excessively, it is likely that one or more of the fan blades are misaligned. In this case, to align the blade, bend the blade back into line by hand or replace the blade.)
d. After assembly of fan motor assembly to the condenser body, using a cable tie, secure the motor leads to the safety grill to keep the motor leads. Then, follow the procedure from 2-8 to 2-13.
4-2. In case of replacement of fan motor assembly (e.g. fan motor, fan blade, fan safety grill only) without condenser body replacement, you can skip the procedure of refrigerant evacuation and charging. After assembly, make sure the wiring was done in accordance with the data on the data label of the fan motor.
5. PRESSURE SWITCH (FAN PRESSURE, HIGH PRESSURE, LOW PRESSURE)
5-1. Pressure switches employ flair type. And you can easily remove the old one by loosening the thread and replace by new one by fastening the thread.
5-2. In case of brazing type, after complete evacuation, cut off the pressure switch by copper cutter from the refrigerant line and then connect Schrader valve by brazing. This valve is used to fasten the flair type pressure switch. You should remove the small pin inside of the Schrader valve’ hall during the brazing and fit it again after the heat from brazing disappear.
5-3. Pin remove and copper line cutting point.

SERVICE PROCEDURE
5
Remove pin inside the hole
Copper pipe cutting and coupling
Brazing and fastening flair type pressure switch
SERVICE PROCEDURE
6
6. DRAIN REPLACEMENT
6-1. Drain type
Series Drain valve type Procedure reference
FXS05~FXS16 Float drain 6-2
FXR25~FXR49 Electric drain with timer 6-3
FXR66~FXT901 Electric drain with direct acting 6-4
6-2. Float drain:
a. complete the procedure No.1.
b. remove the insulation of the separator on the bottom side of heat exchanger.
c. loose the bowl of the separator and remove the float drain inside of the bottom. d. Replace the float drain and fasten the bowl of the separator.
e. Check the leak and recover the insulation.
6-3. EDV assembly with timer:
The dryers are equipped with an electronic drain valve that automatically discharges condensate from the dryer. The electronic drain valve has two indicators and a test button to help verify operation. Pushing the test button causes the drain port to click open. Drain valve operation is controlled by an electronic timer. The drain opening can be set from 0.5 sec to 10 sec. The drain cycle can be set from 0.5 min to 45 min.
a. Complete the procedure No.1.
b. Put your hand to the hole of rear panel and disassemble the power socket of the drain and then, remove the coil from the drain body by loosening the bolt upper side of the drain.
c. Remove the strainer from the heat exchanger then, replace and assemble the drain in reverse order.
d. Check the drain operation.
6-4. Electronic Drain Valve Adjustment, Direct acting type
To minimize air losses, the drain valve control time should be adjusted to open the drain port just long enough to discharge accumulated condensate. Set the drain valve operating time so that only air discharges at the end of the open period. Recommended initial settings are a 1 to 2-second drain opening and 30 seconds drain closed time (cycle). If liquid discharges as the port is closing, set the timer for a shorter cycle or a longer opening. Please refer to 6-3 for replacement.
6-5. Drain maintenance access hole
Up to the range of FXR180, dryer has its own access hole for drain maintenance. However, in case of FXT240 or the above, remove the cabinet for maintenance and you can see the drain at the separator.

SERVICE PROCEDURE
7
7. CONTROL BOARD
7-1. Color indicator
a. Complete the procedure No.1.
b. Remove the cabinets.
c. Remove the cable tie and disassemble the temperature sensor from the discharge line of evaporator.
d. Using the thumb and index finger, press the each side of holder to remove it from the cabinet.
e. Replace by new one and attach the probe on the copper pipe downstream of the evaporator tightly and finalize the insulation.
Drain maintenance access hole on the rear panel (FXR05~FXR180)
Drain valve built in large range (FXT240 or above the range)

SERVICE PROCEDURE
8
7-2. DCB board
a. Complete the procedure No.1.
b. Remove the cabinets.
c. Disassemble 8pin cable from the board and then remove the safety cover by loosening the white bolts by fingers. Then, you can disassemble the board from the panel and replace by new one.
d. Assembly in reverse order.
Color indicator built in FXS05~FXS16
Color indicator built in FXR25~FXR49
DCB built in FXR66~FXR180

SERVICE PROCEDURE
9
8. SERVICE CONTACT
Email: [email protected]
Tel: +81-51-726-5009
Fax: +81-51-728-5359
DCB built in FXT240~FXT901

CompAir (Australasia) Limited13 - 17 Progress Street
Dandenong South Victoria 3175
AustraliaTel. +61 3 9212 5800Fax +61 3 9792 0274 www.compair.com.au
CompAir Far East Pte Ltd5 Toh Guan Road East
Unit # 03-00 Freight Links Express DistriparkSingapore 608831
Tel: + 65 6665 5610Fax: + 65 6562 1577
www.compair.asia
IOMFXT240901122012A


