Download - Bullet Swaging Hb
1
The Corbin Handbook
of
Bullet Swaging,
No. 8
by
David R. Corbin

2
Published by
Corbin Publications
PO Box 2171
White City, OR 97503 USA
(C) Copyright 1998 David R. Corbin
http://www.corbins.com
3
CHAPTERS
1. Introduction to Bullet Swaging
2. Principles of Swaging
3. Bullet Swaging Secrets
4. Tubing JacketsCTJM-1-M,S,HCTJM-2-HTubing
5. Drawn Strip JacketsJMK-1-SJMK-1-HJMK-2-H
6. Base Guard BulletsBGK-1-M, -HBGK-2-H
7. Draw DiesJacket drawing JRD-1Bullet drawing BRD-1RFJM-22SPJM-25
8. Making Lead CoresCM-4CM-3LED-1LED-2LW-10PCS-1PCS-2
9. Swaging with a Reloading PressEC-1BSD-xxx-R
10. Bullet Swaging Presses

4
CSP-3 Silver PressCSP-1 Series IICSP-2 Mega-MiteCSP-1H Hydro-MiteCSP-2H Mega-Mite HydraulicCHP-1 Hydro-PressCHP-2 X-Press
11. Lead, Gas Check, Base Guard and Paper Patched Bul-lets
12. Jacketed Semi-Wadcutters
13. Full Jacket, Flat Base
14. Lead Tip
15. Rebated Boattails
16. Shotgun Slugs
17. Bullet-Makers’ Tools
18. Lubricants and Chemicals
19. Delivery Information
20. Warranty
5
1. Introduction to Bullet Swaging
Good morning! I�m Dave Corbin, and for more than 20 years,I�ve been helping people make the state-of-the art bullets youread about in articles and magazine ads. Nearly every custombullet maker in the world started with equipment developed atthe Corbin die-works. Yet, it seems that only yesterday my brother,Richard, and I were debating whether there was any possibilitythat someone could use our equipment to make a respectableliving, producing custom bullets.
All you have to do is scan the pages of nearly any magazinecatering to handloaders, and you�ll see that the pages are full ofads from our clients; the articles are constantly talking about thebullets our clients make, and the major ammunition firms arebuying the bullets made on Corbin equipment for use in majorname brands of ammunition (the premium offerings, of course).
Corbin Manufacturing publishes a book called the �WorldDirectory of Custom Bullet Makers� listing hundreds of individu-als and firms whose names you will recognize if you like to readgun magazines. When I read the list, I remember people�s enthu-siasm for the new bullets that we were able to design tooling tomake, and figure out a good way to market, thanks to the powerof bullet swaging.
Olympians and world champions in every field of firearmssports, from benchrest to air gun competition, using everythingfrom paper-patched muzzle loaders to custom fin-stabilized shot-gun slugs, have come to the die-works where my brother and Ihave toiled for the last quarter century, some just to improvetheir already-outstanding achievements, and some to help othersbecome better shooters by manufacturing their own best ideas inhow a given bullet should look and be constructed.
Engineers from the Department of the Army, Air Force Ar-mament Labs, Sandia National Laboratories, DuPont, Northrop,and other defense-related organization have visited us over thoseyears. Tools and designs we worked on are in use today all overthe world, wherever a long range, high precision projectile or avery special purpose bullet, that could only be made efficiently bythe high precision techniques of swaging, is needed for the job.
6
Whether it is protecting a President at long range or pickinga pine cone from the top of an experimental tree, whether it issurveying a dense mountain jungle with remotely launched flareprojectiles designed for vertical firing stability, or stitching mir-ror-based bullets in an arctic ice sheet from a low-flying aircraftso a laser beam can measure the depth and estimate the strengthof the ice to hold a transport plane, or whether it is the grimresponsibility of instantly stopping a drug-crazed terrorist beforehe can take the life of another hostage�regardless of the pur-pose, we sat through many meetings pouring over blueprints,computer readouts, and sketches on the backs of dinner napkins,helping design projectiles for visitors from the far corners of theearth.
Yet, this work is only the continuation of development begunby other pioneers of bullet swaging: people like Ted Smith, whofounded the old SAS Dies in the 1950�s; Harvey Donaldson, whoexperimented with some of the first dies to make .224 bulletsfrom fired .22 cases; Walt Astles and Ray Biehler, who developedthe principle of upward expansion and the two-die swage tech-nique (as opposed to the RCBS single-die take-apart system); CharlieHeckman, a pioneer swage maker; and so many others whosenames probably are unknown to modern shooters, but to whomall shooters owe a debt for their contributions to the perfection ofbullets.
You may know that the RCBS company (initials of whichmean Rock Chuck Bullet Swage) got started making bullet swag-ing equipment, but soon dropped it in favor of much more easilyproduced reloading dies. You may even have heard Speer Bulletswas started by Vernon Speer swaging .224 caliber bullets fromfired .22 LR cases.
But bullet swaging played a much larger part in leading tothe products and companies you use today than just that: Hornady,Sierra, Nosler, Barnes, and a host of other mass production op-erations owe their very existence to the concept of bullet swaging.Today, more than three hundred and fifty custom bullet firms�operated by people who probably differ from yourself only in hav-ing taken the step of putting their intense interest in firearms towork at a profitable and enjoyable occupation�make a full-timeliving by producing specialty bullets.
So, what is bullet swaging and how do you do it? What doyou need to get started? How much does it cost? What are theadvantages and drawbacks compared to casting or just buying
7
factory bullets? Can you swage hard lead, make partitioned bul-lets, make your own jackets, make plain lead bullets or paperpatched slugs?
I answer those questions a thousand times a week and I neverget tired of it. But to save you a lot of time on the phone, I�vewritten those answers here. If you read through this book andthink I have left something out, you are absolutely right: I left outabout six more books of information! Those are available if youcare to read further.
Swaging is so simple you can do it correctly after just a coupleof tries. Then you�ll see it�s also extremely versatile and powerful:you can do one more thing, and then one more after that, andsoon, you will have the whole top of your loading bench coveredwith one-of-a-kind bullets, some of which no one in the worldhas ever made before. And that�s why it takes at least six morebooks to make a dent in the vast array of things you might do,could do, if you wished. Only your imagination limits the possi-bilities.
A deeper study of the specifics of bullet swaging techniqueand tooling, including products made by people other than Corbin,can be found in the book �Re-Discover Swaging�, so named be-cause swaging was, in fact, discovered once before and then al-most lost: during the period of 1948-1963 there were many die-makers who produced swaging equipment, but none of them of-fered a comprehensive enough range of products to insure theirown survival, or that of the swaging arts. Corbin Manufacturingwas the first comprehensive effort to preserve and further thetechnology with information, supplies and tools from one source.
Bullet swaging, by the way, is pronounced �SWAY-JING� andrhymes with �paging�. There is a blacksmith technique for pound-ing hot metal around a form that is called �swedging� but it is adifferent sort of thing altogether.
If you want to really dig into the subject and learn thingsmost people�including most gun writers, unfortunately�neverfind out, then order the Book Package. You get another copy ofthis book free, with it. Give this copy to a friend. Who knows:maybe between the two of you, a new bullet making businessmay develop that rivals the fame of some of our other clients? Itcould happen: it has happened over 350 times so far!
8
2. Principles of Bullet SwagingWhen we say �bullet�, the projectile or part of the cartridge
that is propelled through the air is indicated. The news media inthe United States often refers to a �bullet� as the entire cartridgewith powder, primer, bullet and case. Bullet swaging has nothingto do with the rest of the cartridge, but concentrates on the partthat flies to the target. In some countries, notably England, shoot-ers refer to the bullet as the �head� or the �bullet head� and callthe entire cartridge a �bullet�.
There is a good reason not to call the cartridge a bullet, as thegeneral news media seems inclined to do. The bullet is inert metalwithout any explosive or propellant involved, which means that itshould be treated as a precise metal product, not some danger-ous, risk-laden component subject to transportation restrictionsand tariffs.
Finding a �bullet� in the possession of an airline travellershould be no more cause for alarm than finding a coin. Unfortu-nately, through ignorance and imprecise language, the term �bul-let� causes problems where it should not. Some of them are ofpractical concern to those who show their products and mustcarry samples. More than one new bullet maker has run up againstunrealistic insurance, business licensing and zoning problemsbecause of the ignorance about what a �bullet� actually means.
A bullet maker is a precision metal product manufacturer,who could just as well be making precision bearings or electronicfittings. But try to explain that to a bureaucrat who just foundout you intend to make bullets in the home enterprise, or thehysterical airline security guard who scanned a couple of samplesin your pocket, or the customs agent whose eyes widen as hereads your declaration of �bullet-making� equipment being takeninto the country! Such a pity these things happen. The wise bul-let-maker soon learns to discuss precision formed parts ratherthan bullets, around those who know nothing about the field.
Bullet swaging is the process of applying extremely high pres-sures (from 15,000 PSI for soft, unjacketed bullets to as high as200,000 PSI for solid copper bullets) to bullet metals containedin a very tough, extremely well finished die, so that the materialwill flow at room temperature and take on the shape of the dieand the ends of the punches.
A die is a vessel to hold the pressure. A punch is a rod thatfits into the hole in the die and seals off the end. If you refer to apunch as a die and vice versa, you may cause some interesting
9
errors when placing orders. One of the first things to learn is theright names for the basic parts involved in the swaging process.You wouldn�t call a pistol a shotgun, would you? Probably not, orelse you might get some odd-looking holsters through mail order!
It concerns me that some people don�t bother to learn thedifference between a die and a punch, and consequently have astring of fouled-up orders that must be carefully untangled. Butthen, I�m an old curmudgeon and can grouse about anything Ilike, �cause that�s the rule for curmudgeons (Rule 109, look it upin the curmudgeon book).
My foreign friends, whose mastery of the English language isfar superior to anything I could claim in their native tongues,may be forgiven for such errors. It is interesting how seldom some-one from a Spanish, French, Portuguese, Italian, Dutch, Afrikaans,Greek, Arabic, or Hebrew speaking country ever makes these basicerrors: I�m afraid I have to point the accusing finger at my Brit-ish, Australian, Canadian, Kiwi and �merican speaking mates asthe worst benders of terminology.
It wouldn�t be any bother to me at all, if I didn�t have tofigure out what a person really wanted. For casual conversationaround the campfire, no harm is done if someone calls a revolvera pistol or a die a punch. But a person who really wants a die andgets the punch that they actually ordered isn�t usually very happyabout it.
In swaging bullets, you will always be putting a smaller di-ameter object (lead, jacket, or a combination of both) into a slightlylarger die cavity or hole. Each step in swaging increases the diam-eter of the components, until they reach the final diameter in thelast die. Swaging never reduces the diameter. You will only havestuck bullets and hard ejection if you try to push a slightly largerpart into a slightly smaller hole. This is the difference betweenswaging and drawing. You never swage anything �down�. Younever draw anything �up�.
In drawing, you do push a larger part through a smaller hole,to reduce the diameter. This kind of die is a ring, not a cylinderclosed on one end. The jacket or bullet that you are reducing ispushed through the ring, and is decreased in diameter when itcomes through the other side.
We use drawing to make longer, smaller caliber jackets fromshorter, larger diameter ones. Also, within some narrow limits, itis possible to make a smaller caliber bullet from a larger one,although this degrades the quality of the bullet unless very spe-
10
cial conditions are observed. Usually the difference in diametershas to be within 0.005 thousandths of an inch when you reducefinished bullets by drawing. Jackets can be drawn much more thanthis.
Bullet jackets properly designed for swaging are always madesmaller than the finished caliber, then expanded by putting leadinside them and compressing it with a punch. The lead flows tofill the jacket, then pushes the jacket out a few thousandths of aninch to meet the die wall, which stops the expansion. One end ofthe die is sealed with a punch, which stops the end from poppingoff the jacket. If you try to use a jacket larger than the die hole, itcan�t spring back slightly when you release the pressure. In fact,if you pushed a jacket into a die that was too small for it, thejacket will be trying to spring back to original size, and thus press-ing itself firmly against the die walls. This causes difficult ejectionand is hard on the equipment, and can also result in loose cores.
The right way to swage bullets is to use jackets that fit easilyinto the die by hand, and lead cores which are small enough toeasily drop into the jacket. Jackets of course have some wall thick-ness, generally from 0.015 to 0.035 inches (although there is norule that says you can�t make much thicker jacket walls if youwant them). To determine the diameter of lead core which fitsinside, you must subtract two times the wall thickness from thecaliber, and then subtract an additional five to ten thousandths ofan inch to allow for easy insertion, tolerances in the lead wirediameter, and the fact that you may have two or three steps witha small amount of expansion in each, to get to final caliber.
There are two basic designs of swaging dies made by Corbin.All the specific styles of dies are patterned after one or the otherof these basic designs. One design is a cylinder with a straighthole through it. The other is a cylinder with a semi-blind hole,having the shape of the bullet except that at the tip, there is a tinyhole (.052 to .120 inches is a typical range) fitted with a strongpiece of tempered spring wire.
The first design can be used for any sort of operation wheretwo punches can form the desired shape on the end of the en-closed materials. An example would be a �Core Swage� or �CSW-� die, which takes in a piece of cut lead wire or cast lead pellet(the �core� of a bullet) and gives it a precise diameter with smoothflat ends and extrudes off whatever surplus lead there might befor the weight you have set up. Three little bleed holes in the sidesof the die, at 120 degree intervals, allow surplus lead to spurt out
11
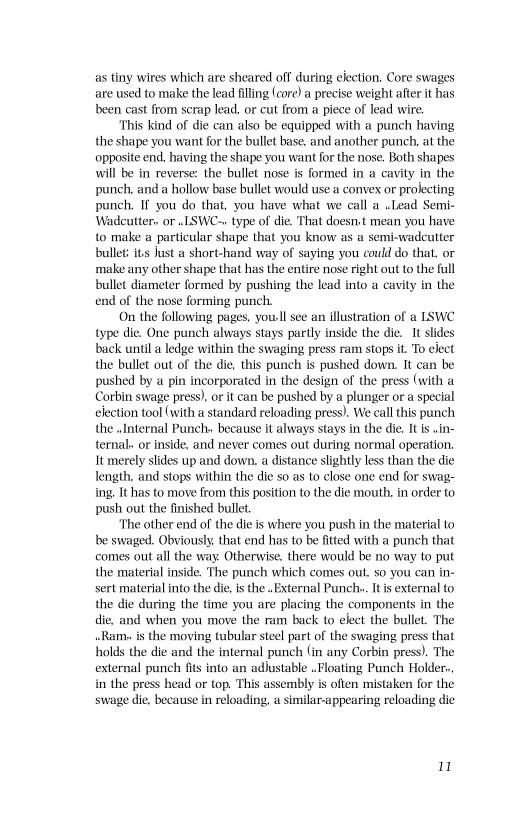
as tiny wires which are sheared off during ejection. Core swagesare used to make the lead filling (core) a precise weight after it hasbeen cast from scrap lead, or cut from a piece of lead wire.
This kind of die can also be equipped with a punch havingthe shape you want for the bullet base, and another punch, at theopposite end, having the shape you want for the nose. Both shapeswill be in reverse: the bullet nose is formed in a cavity in thepunch, and a hollow base bullet would use a convex or projectingpunch. If you do that, you have what we call a �Lead Semi-Wadcutter� or �LSWC-� type of die. That doesn�t mean you haveto make a particular shape that you know as a semi-wadcutterbullet; it�s just a short-hand way of saying you could do that, ormake any other shape that has the entire nose right out to the fullbullet diameter formed by pushing the lead into a cavity in theend of the nose forming punch.
On the following pages, you�ll see an illustration of a LSWCtype die. One punch always stays partly inside the die. It slidesback until a ledge within the swaging press ram stops it. To ejectthe bullet out of the die, this punch is pushed down. It can bepushed by a pin incorporated in the design of the press (with aCorbin swage press), or it can be pushed by a plunger or a specialejection tool (with a standard reloading press). We call this punchthe �Internal Punch� because it always stays in the die. It is �in-ternal� or inside, and never comes out during normal operation.It merely slides up and down, a distance slightly less than the dielength, and stops within the die so as to close one end for swag-ing. It has to move from this position to the die mouth, in order topush out the finished bullet.
The other end of the die is where you push in the material tobe swaged. Obviously, that end has to be fitted with a punch thatcomes out all the way. Otherwise, there would be no way to putthe material inside. The punch which comes out, so you can in-sert material into the die, is the �External Punch�. It is external tothe die during the time you are placing the components in thedie, and when you move the ram back to eject the bullet. The�Ram� is the moving tubular steel part of the swaging press thatholds the die and the internal punch (in any Corbin press). Theexternal punch fits into an adjustable �Floating Punch Holder�,in the press head or top. This assembly is often mistaken for theswage die, because in reloading, a similar-appearing reloading die
12
fits the head of your reloading press. Swaging is �upside-down�from reloading, for reasons that will be clear by the time youfinish this book.
Again, the steel rods that push the material into the die, andseal the die against all that pressure during swaging, are called�punches�. The round cylinder with the hole in it is called the�die�. If you fit punches to a particular die, you have just made a�die set�, because it is a set of matching parts that work together.You can have several dies and punches in a given set, because allthe various dies in that set are designed to work in succession,one after another, to yield a final bullet shape, weight, and con-struction.
The only difference between a �Core Swage� die, which wecall a �CSW� die in the language of swaging, and a �LSWC� die, isthe use of punches which have the final bullet base and noseshape machined on their ends, and of course the diameter of thedie is made to form the final bullet diameter in the LSWC die.Usually the LSWC type of die makes either lead bullets, gas checked,half-jacketed or �Base-Guard� bullets (a superior kind of gas checkthat scrapes fouling out of your barrel with every shot fired). Itisn�t used for bullets that have the jacket covering up the bleedholes in the die wall, which includes most jacketed rifle bulletdesigns.
The core swage die generally has flat punch ends and a diam-eter far less than the final caliber. It is used to prepare the leadcore to fit inside a bullet jacket, in most cases (although you don�thave to use a jacket�you can just swage the lead core to finalshape in the next die if you desire to make a high quality leadbullet, such as a paper-patched or Gase-Guard style). Lead bulletscan be made either in one die (the LSWC) or in two dies (the CSWand CS types, or the CSW and PF types). Jacketed bullets gener-ally require at least two and sometimes three or more dies.
When we make the die, we need to know what it will be usedfor. If you say you want a .308 core swage die, we know youdon�t really want the hole to be .308 inches because a core swagehas to make a core that fits inside a jacket, and the jacket willusually be about .307 inches on the outside before swaging. Thewall thickness of the jacket might be .025 inches at the base, sothe core would have to be no larger than .307 minus twice .025(twice the wall thickness), or .257 inches
13
You would cast scrap lead in a core mould, or cut pieces froma spool of .250 inch diameter lead wire to easily drop into this.257 bore die, swage them up to .257 inch diameter, and thenthey�d fit nicely into the bullet jacket. (There would be two moresteps to expand the core inside the jacket, blowing the jacket outlike the skin of a balloon, and then forming the ogive on thebullet to finish it).
But if you wanted to make a lead .308 diameter bullet for a.30 Mauser, then we�d make almost the same kind of die but we�dmake it with a bore of .308 inches, and fit it with the right kindof nose and base punches. So you see that even if the dies looksimilar and work in a similar way, their purpose really makesthem different dies. That�s why we need two different names forthem. It helps avoid a lot of unnecessary explanation and errors.Perhaps you might order a .308 LSWC die, maybe with an �Auto-loader� nose and a �Cup Base�. We would use the short-hand�AL� for Auto-loader, a sort of rounded semi-wadcutter shape,and �CB� for Cup Base, which is a shallow concave base form. Tous, the term �semi-wadcutter� is a general description for a bulletstyle that can be made using a punch to form the nose, instead ofa point forming die. The wadcutter, Keith, Auto-Loader, and evenround nose SWC styles are all subsets of the semi-wadcutter group,since every one of these styles is made in the same die just bychanging the nose punch.
Two other kinds of dies that are made with a straight holeand two full-diameter punches are the �Lead Tip� die and the�Core Seat� die. These don�t have any bleed holes around theirmiddle. The core seat die is also called a �Core Seater� and abbre-viated �CS�. The lead tip die is also called a �Lead Tip Former�and is abbreviated �LT�. It is not the same thing as a point formeror �PF� die.
The purpose of a core seat die is to expand the jacket, whichis made slightly less than final diameter, and at the same timeachieve a very tight fit between the core and jacket. You can useeither a punch that fits into the jacket, to make open tip stylebullets, or you can use a punch that fits the die bore, and thusmake large lead tips. The use of a CS die to make lead bullets(after first swaging the lead core to exact weight in the CSW die)is a perfectionist�s way to build lead wadcutter or semi-wadcutterbullets: it can be more precise because you separate the pressureneeded to extrude surplus lead from the pressure required to formthe edges of the bullet nose and base.

14
In a LSCW die, the pressure stops building when the leadbegins to extrude through the bleed holes. Thus, some shapes ofbullets with deep nose cavities or hollow bases and sharp edgesmay not receive enough pressure to fully take on the exact punchshape, if that pressure is higher than the pressure which causeslead to spurt out the bleed holes. By first using a CSW die toadjust the weight, and then using a separate CS die to form thenose and base, the pressure issue is resolved for all shapes andstyles.
A punch with a cavity in the end makes the bullet with asemi-wadcutter shoulder (the edge of the punch must be in theneighborhood of .02 inches thick in order to stand the high swag-ing pressures). A core seating punch with a projection on theend, usually conical, makes a hollow point cavity in the lead core.Of course, you can use flat, domed, slightly convex, or highlypointed punch shapes to suit your desires, and make virtually anykind of base you want just by changing the punch. Often this willbe the internal punch, but you can have the die built with thebase punch being external if you wish. The reason we normallymake the nose punch external to the die is because usually peoplechange the nose shape much more often than the base, and it iseasier to change the external punch in seconds without removingthe die from the press ram. Technically it would not matter whichpunch made the nose and which made the base.
The purpose of the lead tip forming die is to finish the veryend of a pointed (spitzer) bullet, and it isn�t normally used forsemi-wadcutter or large lead tip bullets. It looks just like a coreseater, but the bore diameter is slightly larger than the final bulletsize, whereas the core seater diameter is just slightly smaller thanfinal bullet size. The internal punch of a lead tip die is designedwith a cavity to reshape the extruded lead tip of a sharp-pointedrifle bullet so that it looks perfect. It cannot form the entire ogivebecause the edge of the punch, which must withstand tons ofswaging pressure, cannot be paper-thin and survive.
We started this section talking about two general die designs,one with a straight hole through it, and one with a semi-blindhole. This second kind of die came about because, try as you will,there isn�t a reliable way to make a straight-hole die form a smoothogive curve from shank to tip. That punch with the cavity ma-chined in the end must have some thickness at the edge, and thisedge will impress itself on the bullet to make a shoulder.
15
There�s even more to it than that: if you try to push a jacketinto the cavity in the punch, the edge of the jacket will strike theedge of the punch. It won�t reliably jump over that edge, butinstead either the jacket or the punch will be crumpled up. InCorbin dies, the jacket is far weaker than the punch, so it folds up.So, that leaves the problem of how to make a typical rifle-stylebullet, or a smooth rounded or angled bullet nose of any type, nothaving a lead tip from where the jacket stops to the end of thebullet.
The semi-blind hole die is used whenever the nose or base ofthe bullet has to turn inward, away from full bore diameter, with-out a shoulder or step. Conventional rifle bullets, boattail bullets,and modern jacketed handgun bullets with the jacket curving orangling smoothly inward from the shank to the ogive all requirethe use of this die design.
By �semi-blind hole�, I mean that the hole in the die is notstraight through the die, but is shaped like the bullet itself. At thetip is a very small punch to push the bullet out by its nose, andthis punch is retracted a short way up into its little access hole sothere is no possibility of the bullet material pressing against it(which might otherwise bend the small diameter punch underthose tons of pressure).
A straight-hole kind of die uses a punch, with a cavity ma-chined in the end, to form the bullet nose. The edge of the punchwould strike the edge of a jacket and crush the jacket. A punchedge must be .02 inches or more thick to stand up to swagingforces: making the punch edge �paper-thin� so that the jacketmight stand a chance of jumping over it doesn�t work for long,because the thin punch edge soon cracks and falls off under thehigh pressure. You wind up with a ragged .02 inch edge anyway!
There are only a few dies that use this semi-blind hole design.One is the �Point Forming� die, which we abbreviate �PF� die. Itaccepts either a lead core, or the seated lead core and jacket com-bination swaged in the core seat die. A full-diameter external punchshoves the material into the point forming die. The material iscompressed inward in the small end of the die, giving the bulletits smooth curve or angled nose (the ogive).
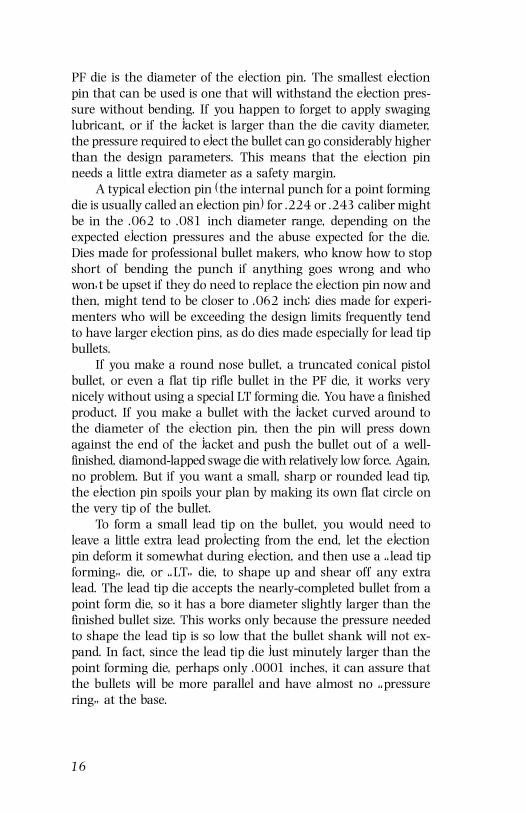
The bullet material follows the die wall, right up to the ejec-tion pin hole and into it, if you push too far. This would put alittle parallel �pipe� on the tip of the bullet, which means youneed to back off the depth adjustment (the punch holder) just alittle. The smallest tip which you can put on the bullet using the
16
PF die is the diameter of the ejection pin. The smallest ejectionpin that can be used is one that will withstand the ejection pres-sure without bending. If you happen to forget to apply swaginglubricant, or if the jacket is larger than the die cavity diameter,the pressure required to eject the bullet can go considerably higherthan the design parameters. This means that the ejection pinneeds a little extra diameter as a safety margin.
A typical ejection pin (the internal punch for a point formingdie is usually called an ejection pin) for .224 or .243 caliber mightbe in the .062 to .081 inch diameter range, depending on theexpected ejection pressures and the abuse expected for the die.Dies made for professional bullet makers, who know how to stopshort of bending the punch if anything goes wrong and whowon�t be upset if they do need to replace the ejection pin now andthen, might tend to be closer to .062 inch; dies made for experi-menters who will be exceeding the design limits frequently tendto have larger ejection pins, as do dies made especially for lead tipbullets.
If you make a round nose bullet, a truncated conical pistolbullet, or even a flat tip rifle bullet in the PF die, it works verynicely without using a special LT forming die. You have a finishedproduct. If you make a bullet with the jacket curved around tothe diameter of the ejection pin, then the pin will press downagainst the end of the jacket and push the bullet out of a well-finished, diamond-lapped swage die with relatively low force. Again,no problem. But if you want a small, sharp or rounded lead tip,the ejection pin spoils your plan by making its own flat circle onthe very tip of the bullet.
To form a small lead tip on the bullet, you would need toleave a little extra lead projecting from the end, let the ejectionpin deform it somewhat during ejection, and then use a �lead tipforming� die, or �LT� die, to shape up and shear off any extralead. The lead tip die accepts the nearly-completed bullet from apoint form die, so it has a bore diameter slightly larger than thefinished bullet size. This works only because the pressure neededto shape the lead tip is so low that the bullet shank will not ex-pand. In fact, since the lead tip die just minutely larger than thepoint forming die, perhaps only .0001 inches, it can assure thatthe bullets will be more parallel and have almost no �pressurering� at the base.
17
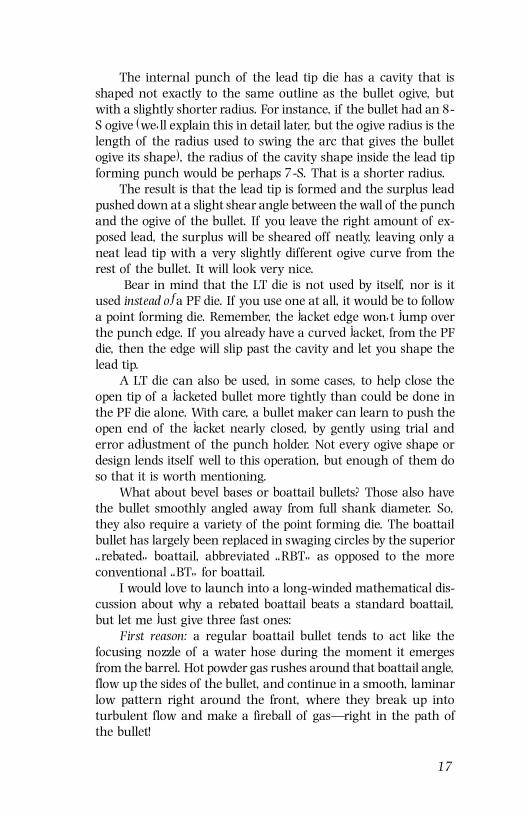
The internal punch of the lead tip die has a cavity that isshaped not exactly to the same outline as the bullet ogive, butwith a slightly shorter radius. For instance, if the bullet had an 8-S ogive (we�ll explain this in detail later, but the ogive radius is thelength of the radius used to swing the arc that gives the bulletogive its shape), the radius of the cavity shape inside the lead tipforming punch would be perhaps 7-S. That is a shorter radius.
The result is that the lead tip is formed and the surplus leadpushed down at a slight shear angle between the wall of the punchand the ogive of the bullet. If you leave the right amount of ex-posed lead, the surplus will be sheared off neatly, leaving only aneat lead tip with a very slightly different ogive curve from therest of the bullet. It will look very nice.
Bear in mind that the LT die is not used by itself, nor is itused instead of a PF die. If you use one at all, it would be to followa point forming die. Remember, the jacket edge won�t jump overthe punch edge. If you already have a curved jacket, from the PFdie, then the edge will slip past the cavity and let you shape thelead tip.
A LT die can also be used, in some cases, to help close theopen tip of a jacketed bullet more tightly than could be done inthe PF die alone. With care, a bullet maker can learn to push theopen end of the jacket nearly closed, by gently using trial anderror adjustment of the punch holder. Not every ogive shape ordesign lends itself well to this operation, but enough of them doso that it is worth mentioning.
What about bevel bases or boattail bullets? Those also havethe bullet smoothly angled away from full shank diameter. So,they also require a variety of the point forming die. The boattailbullet has largely been replaced in swaging circles by the superior�rebated� boattail, abbreviated �RBT� as opposed to the moreconventional �BT� for boattail.
I would love to launch into a long-winded mathematical dis-cussion about why a rebated boattail beats a standard boattail,but let me just give three fast ones:
First reason: a regular boattail bullet tends to act like thefocusing nozzle of a water hose during the moment it emergesfrom the barrel. Hot powder gas rushes around that boattail angle,flow up the sides of the bullet, and continue in a smooth, laminarlow pattern right around the front, where they break up intoturbulent flow and make a fireball of gas�right in the path ofthe bullet!
18
You can get up to 15% increased dispersion at the target justfrom the buffeting the bullet gets by shooting through this ball ofgas. A flat base bullet deflects most of the gas in a circle of fire,expanding rapidly out from the bore with a clear space directly infront of the bullet. The edge of the flat base acts like a �spoiler� tobreak up the laminar flow before it can get started. And so doesthe sharp shoulder on a rebated boattail! How does an extra 15%improvement in accuracy sound as one reason to use the RBTdesign?
Second reason: the boattail bullet tends toward more bore ero-sion than the rebated boattail, because gas pressure on the boattailtends to peel it back away from the bore and let some gas up pastthe bottoms of the rifling grooves, where it cuts the bullet andthe barrel like a hot cutting torch. The rebated boattail has a 90degree shoulder that takes the pressure parallel to the bore, in-stead of at a compression angle away from it. How does increasedbarrel life strike you as a second reason for using RBT bulletsinstead of the regular BT style?
Third reason: the tooling lasts longer, costs less to build, andis more easily built to high standards of precision. Corbin Manu-facturing has perfected a method of using two semi-blind holestyle dies, which we call the �Boattail 1� and the �Boattail 2� dies,as a set, to produce a virtually flawless and highly repeatablerebated boattail. Instead of making the boattail angle so it can behigher on one side or at a little slope like some of the factoryproduction you see today, this system guarantees that the boattailwill start precisely at the same point on one side of the bullet asit does on the other, every time.
Neither my brother nor myself wants to fool with the BTafter all these years of match-winning, record-setting results, sowe don�t make regular BT dies.
All this is documented in greater detail, with mathematicalproofs, in a 1970�s era report by Dr. Fitzgerald of Scotland, whoconducted a study at the Lapua (Finland) factory. Lapua first de-veloped the RBT design, or at least made it popular among targetshooters. The good doctor was kind enough to send me a copy ofhis work �way back when�. The paper is primarily for peoplewith a strong calculus background, and isn�t especially easy read-ing, but the conclusions are clear enough.
Bevel base bullets are made by seating the core in a specialpoint forming die instead of the usual core seating die. The jacketis put into the die, and the lead is pushed into the jacket. The base
19
of the bullet flows down into the short, beveled section of the die(it can�t be a punch cavity, remember, because the edge of thepunch would just cut the bottom of the jacket). You could alsoseat the bullet as usual and then reform the base in this die.
A lead bullet bevel base bullet could be made in two steps:swage the lead core using a rather large, almost finished diametercore swage, and then push the bullet into the special point form-ing die backward, using a nose punch as the external punch.Come to think of it, any lead bullet with a smooth ogive (no semi-wadcutter shoulder) can best be made by using first a CSW die toadjust the weight, and then a PF die to form the ogive. Without ajacket, you don�t need the CS die, the purpose of which is toexpand the core into the jacket and form a tight, parallel shank.
We�ve talked about the basic design of bullet swage dies, inregard to their function. There is another category for classifica-tion of swage dies, and that is by the kind of press used to operatethem. Swaging dies can be designed to operate in a reloadingpress (with severe limitations on pressure and precision), or in anumber of different models of bullet swaging presses, both handand hydraulic-electric powered.
Years ago, we worked out a system of making standard partsfor dies that would cover a wide range of calibers, and thus cutthe cost of swaging through efficient use of what I call �semi-custom production�. My brother Richard and I designed pressesand die sets so that we could build similar punch and die blanksfor certain ranges of calibers and bullet lengths, and then chooseamong perhaps three die body lengths for every caliber from .14to .458 in the hand presses, or from .224 to 20mm in the dies forour big hydraulic presses.
We didn�t have to design and build each die from scratch,because we built a standardized system for determining the mini-mum requirements of strength, die length, stroke length, punchgeometry and strength, steels and heat treatment. We could runhundreds of blanks for each of the various presses, then hand-finish the cavities and hone the rough-finished punch blanks to aperfect fit during the custom phase of each order. It combined theeconomy of mass production with the flexibility and precision ofcustom tooling.
Corbin swaging dies are up to ten times less costly than com-petitive dies without any sacrifice in precision because of thissemi-custom production technique, and the fact that we design
20
and build several different presses to take full advantage of thekind of operations you might want to undertake. No other firmbuilds as many different styles of swaging presses, or matchedsystems of dies, and that is one reason we have been buried inorders for decades, sometimes with backlogs that went back twoyears or more! We built a new plant in 1984 primarily becausethe waiting list for our dies had reached nearly three years, andhardly anyone wanted to cancel their orders. The new die-workshelped, but demand has grown constantly, steadily, and some-times with big spurts (just after the 1986 gun laws and the Bradybills went into effect, we had more orders in a single month thanin the previous quarter).
For years, so many people have been making a living withthis equipment and setting world records of every type with thebullets that there is no longer any reason to doubt that the pro-cess works better than any alternative method (such as casting orlathe turning) and the business aspects of custom swaging areviable. If you know anything about modern bullet design, youhave already heard about the Corbin Hydro-press, since nearlyevery custom bullet maker in the world uses one. There are sixother Corbin swaging presses, including three hand operatedmodels and three other hydraulic/electric models. We�ll cover themindividually along with the dies in later chapters.
Remember these swaging principles:
1. Never swage down; always swage up in diameter. Punches andcomponents should slip into the next die by hand, or else theyshouldn�t be put in at all.
2. Use only enough force to expand the material to the diameterof the die bore and then stop. If the material won�t com-pletely fill out the die with normal pressure, there is some-thing else wrong. Look for excess trapped lubricant or toohard an alloy of lead for the particular shape and method.

21
3. Work carefully and be gentle when moving the ram. Don�twhip the handle up and down as fast as you can, becauseyou will surely slam the punch into the face of the die sooneror later and wreck it. You can get better speed with a nicesteady pace rather than brute force!
4. Pay attention to instructions that recommend the use of softlead, or annealing the jacket, or using the right lubricant.There�s a good reason. All the downstream steps are affectedby missing one upstream.
5. Use the correct thickness and type of materials for the particu-lar dies or punches, and use the right punch in the rightdie. It is amazing how many times the only problem is thatsomeone used the wrong punch, or material.
6. Read about the process before you try it, to save time, needlessinvestment in the wrong tools, and frustration. Corbin pub-lishes eight books and many software programs to assist you.That�s far more than was available to the shooters of the past.It�s a good time to be a bullet-maker!
22
3. Bullet Swaging SecretsBefore I start telling you about the various kinds of swaging
presses and dies that work with them, and why you might wantto select a given type of press and die for a certain kind of bulletmaking, it would be useful for you to know some facts that havetaken decades to figure out, and which most of the people whohave figured them out wish to keep secret from you, since it mightaffect their own income if you knew.
The most common misconception about bullet swaging isthat only a few people really have the money and expertise to doit right�that the equipment to make a good bullet is far too costlyfor you to buy, and the techniques are filled with �secrets� thatonly a few bullet-makers are smart enough to understand.
Horse-feathers!The reason this myth is repeated in print every year is simple.
Think about it: if you were making a reasonably good incomefrom selling your own custom swaged bullets and someone askedyou to tell a magazine audience, through an interview and anarticle, all about your business, would you tell them �Hey, it�seasy: anybody can do it with a little reading and a few hours ofexperimenting with moderately priced equipment!�
Or, would you be more likely to think long and hard about itand then say �Man, it�s tough: the only equipment that workscosts thousands of dollars and takes years to figure out. You guysare way better off just to pay me to do it for you and keep onbuying my bullets!�?
Always remember to consider the source when you read any-thing, and follow the money trail. Forget for a second that I�malso selling products and services: that�s advice from me to youon a personal level. It works in almost everything in life, not justbullet swaging. Before you read something, try to figure out whowrote it, who pays them, and why they might be influenced intheir comments and opinions by the source of their income.
Often the connection is two or three layers deep: the writermight not be �on the payroll� of the person about whom he iswriting, but perhaps the owners of the media he is selling thearticle through have a vested interest in protecting advertisingrevenue from someone who might be harmed if the absolute truthwere printed instead of a slightly shaded version.

23
It�s not a conspiracy: it�s just how life works. Everyone hasan interest in protecting their source of income. The more un-usual the occupation, the less likely it is that the person will sayanything that would encourage you to go into competition. Suc-cessful people learn early how to get good information from shadedstories without necessarily accepting everything at face value.
All this means is that when you read articles by or aboutbullet makers or their products, be aware that the products weremade by human beings, not mythological Titans. Odds are prettygood that, given the right equipment and information, you coulddo the same thing. Or maybe, even better.
Long ago, I sold a successful electronics company and wasable to spend a few years playing with various ideas before get-ting serious about starting another company. I loved writing his-torical articles about the firearms field. Firearms played a muchlarger part of our unique national history than just their dra-matic involvement in winning the West. They are woven into thevery fabric of our industrial, technological and financial historyin a very positive way.
Like space research and computers today, firearms contrib-uted to our technology and general well being in many waysduring the early development of the United States. I wanted to dosomething worthwhile to help shooters, and to be involved on aday to day basis in the field that I enjoyed so much.
I decided to devote my time to the development bullet swag-ing. I did it to preserve an art that I felt was worthwhile and onthe verge of dying, as well as for my own enjoyment, and to makea living by helping others start their own bullet-manufacturingfirms.
I had made enough money in my other business activities sothat I didn�t need to earn very much for several years, and couldafford to spend the time as needed. I divided my time amongwriting, developing new businesses for other people, and buildingwhat was eventually to become the world�s largest bullet swagingtool company.
This latter activity would keep me honest regardless of anyother motivation, since there simply are not enough people whomeet the criteria to be commercial bullet-makers to build a busi-ness based on anything other than repeat business from peoplewho are successful. Being successful at the development of swag-ing equipment meant more than just selling tools to handloaders:

24
it meant developing the commercial market for specialty swagedbullets and helping handloaders become successful bullet mak-ers. The repeat business from their growth was necessary to fuelthe continued growth of my company.
There are not enough potential bullet makers to treat clientslike used car buyers, even if I could somehow justify acting thatway. Either my clients would have to be successful, and continueto purchase equipment and supplies as they grew, or the swagedie business would not work well enough to be viable. Although Ihad earned enough so that I could afford to try this, I certainlycouldn�t justify running it into the ground! Only a fool wastesmoney on ventures that have no chance of success.
After more than two decades of providing income for sixfamilies of Corbin employees, it�s fairly obvious that there mustbe something behind the ideas I am discussing here. It�s not verylikely that thousands of handloaders would come back, year afteryear, for products and ideas that didn�t meet or exceed their ex-pectations.
Many people do, in fact, make a good living using Corbinequipment to produce high quality custom bullets for other shoot-ers. You see their ads every time you pick up a gun magazine.They start small, often just as a hobby, and their interest andbusiness grows and expands to other equipment, which Corbindesigns and manufactures. Our design and engineering work, aswell as marketing help, is critical to the success of most of ourclients (there are some who had everything figured out from thestart, but not many).
Because a substantial part of our income and reason for ourown success has been based on appropriate advice and honestdealing with our clients, your trust is a critical factor in Corbin�svery existence. We continue to have backlogs for our work prima-rily because people know that they can trust in the essential factsthat are spelled out in our books.
You�ll probably read things here that I say are not practicaltoday, and perhaps years from this writing they will be. Maybeyou are reading this years from when I wrote it, and I will contra-dict the literature published at that time. New ideas and productswill develop to make those changes. That�s progress! But by andlarge, the principles are well established by now, even if sometechniques and tools will change.
25
I have promised my clients that I will not compete with them,or reveal their own secrets regarding discoveries they have madeon their own about how to make better bullets for some specialpurpose, and I don�t. It is extremely tempting to manufacturecustom bullets myself. If I had known how very profitable thefield was going to turn out to be, decades ago, I would probablynever had made any equipment for other people. I would havemade dies and presses for my own use and just manufacturedexotic, highly profitable bullets. What better product to sell thanone for which the sole purpose is to use it up in a one quick shotand then get another one!
But back then, I didn�t really think there was much chancethat the gun writers, editors, publishers, and the general hand-loading public who read their work would pay serious attentionto custom bullet makers. I assumed my own success would al-ways be limited to a handful of loyal clients because the firearmsmedia would be interested in preserving the advertising incomefrom mass producers, and the limited size of each of the custombullet markets would mean a custom bullet maker wouldn�t countfor much with the firearms press.
No matter how much better bullet a person working in theirgarage could build on specialized, low-volume swaging equipment,I felt that Winchester, Remington, Speer, Hornady, Sierra, andmaybe a handful of other big advertisers would always be fea-tured in articles and stories, press releases and new product re-ports. They�d get all the coverage, and thus almost all the sales.The �little guy� making special purpose bullets would be on hisown, with just me and perhaps a few enlightened gun writers tohelp spread the word. For a lot of years, I was partly right. In thepast ten or so, I have been mostly wrong!
Today, you can hardly pick up a gun magazine without read-ing something about one of my clients who makes a better cus-tom bullet. Of course, the big advertisers still get the lion�s shareof the praise, but that�s life. And it�s rare for one of them to makeanything that isn�t touted as the answer to every handloader�sprayers, regardless of how mundane the design really might be incomparison to the products of custom bullet makers. Still, thepublic and the press have elevated custom bullet making from adark art to a serious, mainstream part of the firearms industry.
You might not care at all about the commercial possibilitiesfor custom bullet making, but it affects you anyway. The massproducers have been forced to come up with their own premium
26
lines of bullets to avoid losing face, and in some cases have pur-chased bullets from my clients instead of trying to come up withtheir own. The fact that more than 350 people (as of this writ-ing) have turned to bullet swaging as a way to make a living, andthousands more use it as a way to make a little spare cash on apart-time basis, means that your bullet selection has improvedvastly in the past few years.
Guns of a type that you might not have considered using fordefense twenty years ago can now be put into service, since thebullets that are now being made for them have improved theirperformance so much. Game animals that you might havewounded and lost twenty years ago can be cleanly taken withoutthe suffering and without the long hikes to the bottom of can-yons where the game was able to run and finally die a lingeringdeath because of poor bullet performance. Hunting is more hu-mane when the bullets perform flawlessly on the first shot.
Your scores at benchrest, metallic silhouette, IPSIC, and evenblackpowder matches can be higher than they were �back then�because of the tremendous amount of research and testing doneby all the custom bullet makers. Laws have been passed based oncertain kinds of custom swaged bullets that did not come fromany mass producer. If you don�t think you have some interest incommercial swaging already, think again!
Regardless, there are some facts that you should know, be-cause there have been so many myths and smoke-screens thrownup by people who either don�t know any better, or have a vestedinterest in keeping you in the dark about swaging. Bullet swagingputs aside the final barrier between you and the performance ofyour firearm. It steps right in and hands you the power to find outwhat works, and what doesn�t, if you have the mental capacity todo scientific studies (anyone with good horse sense has that abil-ity: it means comparing �apples to apples�, using reasonable con-trol samples and conditions for valid comparisons, and judgingperformance based on a wide enough base of experiments to bemeaningful).
This is damaging to the hype artists. If you can easily findout for yourself that some over-touted design fails to perform aswell as your own, it takes the wind out some very costly promo-tional sails (yes, and sales, too). If you have been reading for yearshow only some master match-winner turned bullet-maker canpossibly make bullets good enough for your rifle, and then youfind out in one weekend that your own bullets can outshoot them,
27
there may be a sputtering noise as a highly publicized ego de-flates. All of a sudden, you start looking a little harder at what the�big boys� and the experts have been repeating, and maybe youquestion some of those statements.
The same thing happened when handloading began to lookthreatening to the commercial ammunition makers decades back.They fought the idea that people could handload their own am-munition. Some of the gunmakers voided the warranties on theirguns if handloads were used (since gunmakers also sold ammu-nition). But handloading was too powerful a tool to fight for toolong. After all, muzzle loaders were �handloaded�. People madetheir own bullets and wads, and the advent of cartridges andsmokeless powder just continued expanding the possibilities.
Bullets which are cast are not a threat to the large bulletmakers because there is so little profit in competing with them.Bullet casting businesses come and go all the time because of theslim margins and intense competition. A cast bullet is a piece offrozen lead. There isn�t too much you can do to make it �exotic�or enhance the value and performance.
Swaged bullets open the floodgates of design. The processcan be used to make almost anything you can imagine in a bullet.Swaging is the process used by mass producers. You are tramp-ing into their territory. They know that given the right tools, youcan make better bullets because the process is only limited byconstraints of time and material quality, both of which you cancontrol with less regard to final cost than they must exercise inthe mass market.
Those with an interest in protecting their commercial terri-tory would like to see as little as possible in print about swaging.What has been in print in the past several years is just the tip ofthe iceberg: a great deal more has been going on with bullet de-sign, with private individuals building successful bullet manufac-turing operations, and with development of ideas that go far be-yond those of mass producers. You have heard a tiny amountcompared to the actual state of the art, unless you�re involved inswaging already.
There are also a number of myths which are based partly ona desire to keep people out of the field and partly on misunder-standing of the facts. I would like to point out something that youshould know about metallurgy, to avoid being �taken� by mis-leading advertising and opinions of people who don�t know whatthey are talking about. There is a great deal of emphasis placed
28
on the buzzword �carbide� at this time. Carbide is a rather ge-neric term that covers a lot of ground, rather like the word �chlo-rophyll� back in the 1960�s, or any other semi-technical wordthat is turned into an advertising catchword.
There is no such thing as a single kind of material called�carbide�, except in the minds of ad writers. When you heat anytool steel to a high enough temperature, some of the carbon inthe material dissolves in the nearby iron, and forms a ferric car-bide material which can be captured in the frozen matrix of thesteel if the temperature is lowered quickly enough.
The ferric carbide trapped in the steel mixture is primarilywhat gives the steel its hardness. The structure also has a matrixof iron and other elements, which form complex compounds thatgive the steel ductility, ability to remain hard at higher tempera-tures, corrosion and shock resistance. All hardened steels have�carbide� in them: that�s what makes them hard.
If you systematically reduced the amount of iron and in-creased the amount of carbon that dissolved in the iron that wasleft, you would wind up with a very hard, but also very brittlematerial. It might be almost �solid carbide� but it wouldn�t bevery strong. By forming compounds of tungsten and other met-als with carbon, the General Electric company (and others) devel-oped commercially acceptable variations of �carbide� in a widevariety of grades. The trade name of �Carboloy� was applied tosome of these.
The important thing to note is that there are variations thatare nearly as soft as hardened tool steel that have fair shock resis-tance, and others that are so brittle that they shatter like glass ifforce is applied incorrectly. Some carbide materials can handlehigh temperatures and some fracture when heated and cooledduring use. Some make good tool bits, and some are only good fora thin coating on the surface of a hardened steel bit. Some arereasonable to machine accurately, and some cost a fortune tomachine compared to making the same shape from a good toolsteel.
If you were to be faced with the decision of a material fromwhich to build dies for a high speed punch press, working at 40strokes per minute or more, and making several million bullets,then one of these grades of carbide material could give you highertemperature operation and thus longer life than a tool steel die.Because the harder materials are more abrasion resistant, youwould be able to run the dies for a longer time before replacingthem.
29
They would still need to be lubricated: the idea that carbidedies need no lubrication is foolish. It is like saying that becauseyour car engine might run 100,000 miles without changing theoil, you don�t need to change the oil. It might run 250,000 milesif you did! And it might run 100,000 miles a lot smoother andcooler with fresh oil.
It is necessary to consider value to make a good decision aboutdie materials. Value is the cost of the die amortized over the num-ber of bullets you expect to make, considering the amount ofwear which will take place before the bullets are no longer ac-ceptable quality.
If you operate your dies in a hand-fed system of any type, itwill be impossible to make more than five or six bullets a minute.At those stroke rates, any heat from friction would dissipate intothe air before the next stroke. There would be minimal heatbuildup, so that normal swaging lubricant (Corbin Swage Lube)would be sufficient to protect the die and the components fromfrictional abrasion.
In a power-fed system, it is possible to stroke the press so fastthat heat cannot radiate away into the air as quickly as it is gen-erated, until the die becomes quite warm. It reaches a stable hightemperature by radiating heat into the air, and into the frame ofthe press. Swaging lubricants may not stand this high tempera-ture, so the metal surface needs to be made of something thatwill remain hard and resist abrasion without lubrication. Certaingrades of carbides will handle the job.
Value is indicated by first estimating the tolerances whichare acceptable for the bullets, and then figuring out how long aset of dies will give that range of tolerances, and how many bul-lets are made with each set, for what price. The lowest cost perbullet indicates the best value, all other things being equal.
In the high speed punch press, a set of dies might easily cost$3000. They might slowly wear to an unacceptable toleranceafter two million bullets were made, at a cost per bullet of threethousand dollars divided by two million bullets. This is a cost of0.15 cents (not fifteen cents, but fifteen hundredths of a cent) perbullet. In this kind of operation, properly made tool steel diesmight only last 50,000 bullets, at a cost of about $300 for thedies. That is 0.60 cents (sixty hundreds of a cent) per bullet.
Obviously, the value is four times greater for using the car-bide dies in this application. One might reasonably expect to maketwo million bullets on a punch press system: at 40 strokes a minute,
30
and a bullet per stroke, that is only about 104.167 days or about3.5 months�assuming the punch press is run eight hours a day,which isn�t unreasonable.
But even the largest and most successful custom bullet makerseldom turns to punch presses. The average custom bullet opera-tion (if one could ever say these outstanding operations are any-thing close to �average�) turns out about 50,000 bullets a year.After all, the market is limited and the price is fairly high (worthit, but not cheap). You probably wouldn�t make even one millionbullets in a lifetime of hand swaging. If you could make twobullets a minute, and worked at it every weekend for four hours,you�d only be making 24,960 bullets a year.
When run at less than ten strokes a minute with proper lu-brication, the high-carbide content die steels used by Corbin holdacceptable tolerances for at least 500,000 bullets, and some havemade over 1,500,000 bullets in commercial operations startedyears ago. Assuming the dies would make 500,000 bullets, thismeans your $300 investment in dies would last for over 20 yearsif you made two bullets a minute, working every weekend forfour hours, every week of those years.
If you are just now turning 20 years old, you�d be 40 beforeyou needed to buy another set at that rate. The prices would bedifferent, but the relative prices would be the same between car-bide and tool steel. If you expected to live to be 100 years old, youwould have a lifetime of bullet making on just three sets of dies,for a total cost of $900. Now, most people don�t make anywherenear 24,960 bullets a year unless they are in business to makebullets. The odds are great you�d never make 500,000 bullets in alifetime. But just suppose you did.
Your cost per bullet for determining die value would be $300divided by 500,000 bullets, or .06 cents (six hundredths of acent) per bullet. In your lifetime, if you made 1.5 million bullets,you�d use up three sets of dies, so your total cost per bullet wouldbe $900 divided by 1.5 million bullets, or .06 cents. This is forusing tool steel dies.
If you purchased $3000 carbide dies, you would not get onebit more accuracy or any better die, other than the fact that long-term abrasion resistance would be less, so you could get by withone set of dies for your lifetime. We assumed you might live 100years, and make 1.5 million bullets. Your cost per bullet with acarbide die set would be .20 cents per bullet ($3000 divided by

31
1.5 million bullets). The steel dies are three and a third timesbetter value for this application! That is 333% more value foryour money with the steel dies.
The reason I�ve gone so long into this is not any animositytoward �carbide�, but because of the widely-held perception thatjust stamping the word �carbide� on a die automatically blessesthe product with supernatural powers and makes it somehowmore accurate. Hogwash. A die is only as accurate as you canmake the hole. It is a lot easier to make a good die from a materialthat can be worked in its annealed state, then hardened and givenits final adjustment in size with diamond lapping in the hardstate. The easier a job is to do, the less it has to cost. So, you getmore value: the same accuracy for far less money.
Electrochemical machining is a last resort, not a step up. It isused when there is no other practical way to machine a part,because it is very costly, slow and difficult to make the hole pre-cisely the right diameter and shape without going to much higherexpense than with traditional machining techniques. ECM has itsuses, one of which is to machine carbide materials that simplycannot be cut any other way. There is nothing inherently moreaccurate about ECM. It costs fortunes in equipment just to makeit the same accuracy as lathe boring, reaming, and diamond lap-ping. Using ECM makes sense when you can�t cut the material ina more traditional way. People who sell ECM machines are thefirst to tell you this.
Unless you are operating a high speed punch press, there isno point and less value in brittle carbide as compared to tough,high-carbide-content die-steel. A person who understands thematerials and their actual benefits can make an informed deci-sion. One who simply swallows the advertising hype is set up tospend extra money without getting the extra value. If I thoughtthat there was better value for my clients in selling them $3000dies, I�d certainly have no reason NOT to do it! But for the past 20years I�ve been proving over and over that it isn�t necessary and itisn�t good value for this application.
Another myth is that aerodynamic shape is synonymous withaccuracy. Years ago, I made some bullets that were just cylinderswithout any ogive at all, and fired them from a benchrest rifle in.224 caliber into a group that measured about 0.2 inches across.Then I fired another group made with 6-caliber ogive spitzer bul-lets made exactly the same way, with the same weight and diam-eter and the same materials. These made almost exactly the same
32
size group. The gun was at its limit and the bullet shape had noeffect on accuracy, except that the cylinders landed a little loweron the target (more drag, so they dropped slightly more).
In our work for various government agencies, Richard and Imade dies that we called the �Ultra Low Drag� or �ULD� design,many years before the popularity of the so-called �VLD� design ofthe late 1990�s. The two designs are quite similar. In fact, nearlyall low drag designs that are practical utilize a long ogive andsome kind of boattail. Ours used a nine-degree rebated boattail,and a 14-caliber radius curve that was offset by 0.014 inchesfrom the tangent (a secant ogive, in other words). There is noth-ing magical about the numbers. There are dozens of variationswhich would work approximately as well, better in some guns,worse in others.
There is a problem with promoting these buzzword designs:people tend to believe that they solve all problems of accuracy,when in reality they are very special designs made for certainkinds of loads, rifling twist rates, and purposes. They are notalways more accurate nor are they even useful in some guns.Here are some of the problems with the very low and ultra lowdrag designs:u To offer less air resistance, the bullet needs to be more
streamlined, which in turn makes it longer for the same weight,or lighter for the same length as a conventional design. To keepthe amount of shank in approximate balance with the extra longnose (which would fill up with all the available lead in a normalor light weight design and leave nothing for the shank), thesebullets are usually made in the heavier weights for the caliber.
This means that the long, heavy bullet has the center of bal-ance shifted toward the rear, so it wants to turn over more easilythan the conventional bullet, and thus requires a higher twistrate to stay nose first. If you have a barrel with the appropriatefaster twist, you may get a flatter shooting bullet with equivalentaccuracy to a normal design.
Since the custom swaged bullets are usually made with morecare than mass produced bullets, you may even get superior ac-curacy plus a flatter trajectory. But if you don�t have a faster twistrate, you may find accuracy actually is worse.
The longer ogive and boattail (or rebated boattail) combineto make the same weight of bullet longer than in a conventionalshape, which means that the bullet may not chamber or feed in
33
some guns, and may actually be too long for the throat in thebarrel. This might require setting the base of the bullet far downinto the cartridge, intruding into the powder space, and possiblyrequiring the case neck to be partly encircling the start of theogive. This means the bullet may not be held securely on a centerline with the cartridge, but instead might be able to tip and startinto the rifling at a slight angle, which does no good for accuracy.
Bullet jackets need to be longer for the same weight, or elseyou need to sacrifice some weight to use conventional jacketlengths in the extremely long ogive designs. As a practical matter,this might mean making your own jackets from copper tubing orwith Corbin�s bullet jacket maker kits using flat strip. There isnothing wrong with this, but it runs up your equipment expenseas compared to using a conventional shape, and eliminates thepossibility of using off-the-shelf jackets for normal and heavyweight bullets.
On the other hand, extremely efficient airframes do give youa flatter shooting bullet, because they drop less in the same amountof flight time. While less trajectory isn�t necessarily the same asmore accuracy, it contributes to your ability to judge distance andhold the sights in the right place. It helps you be a better shooter,rather than actually improving the accuracy of the bullet, butthe effect is the same.
My point is that if you use accuracy and flat shooting assynonyms, you�ll be just far enough off the mark so that you�llfall for some of the advertising hype about bullet shape. You maybe like the fellow who heard that three of the top benchrest shoot-ers won that year using bullets that happened to have a 7-S ogive(a nose shape formed by a curve that has a radius of seven cali-bers) instead of the more common 6-S, so he passed up goodbuys on both 6-S and 8-S ogive die sets to wait for a custom made7-S set. In truth, any of those sets would have been fine, and the8-S would be slightly flatter shooting yet.
I�d like to let you in on another secret: there is no inherentdifference in accuracy between spire points, truncated conicalpoints, round noses, spitzers, and secant ogives, if you make all ofthem from equal quality materials with the same level of care. Around nose or what we would call a 3/4-E (elliptical ogive with alength of 0.75 times the caliber) handgun bullet is inherently noless accurate than the regular 9 or 10 degree truncated conical
34
bullet (truncated means cut off, and the TC is a spire shape withthe end cut off, usually at about 40% of the caliber). Whicheveryou like best and feeds best in your gun is the one to use.
There can be a significant difference in accuracy, however,between bullets of different diameter, but there is no cut anddried rule about it except that undersized bullets (compared tothe rifling groove-to-groove depth of your particular gun, not tosome arbitrary industry standard) generally don�t shoot as wellas same size ones, and oversized bullets tend to shoot a little bet-ter but have minor problems in some guns with case swelling andchambering. The pressure difference is insignificant for a 0.308inch bullet compared to a 0.309 inch bullet until you reach thoseloading intensities where the gun is about to come apart anyway.
For my money, if I were to decide on a given diameter for myswage dies, I would always choose either right on the money fordiameter compared to my gun�s rifling groove-to-groove depth,or slightly larger (between half and one thousandth, dependingon whether it is an Auto-loader or not�some pistols have a prob-lem with slightly larger bullets which bulge the case and causefeeding failures). On the other hand, if I had a bullet that shotwell in a given gun, I couldn�t care less if the bullet was under-sized, lopsided and backward! The goal is to hit where you aim,and if the bullet does that, forget about what it ought to be andjust be happy that it works so well. Some armchair ballisticianstend to wind themselves up so tightly in their theories that theymiss the fun and miss the point of it all: shooting. If it works, itmust be right by definition.
Another secret is that many factory barrels are so far differ-ent from each other that you wouldn�t believe it, and the differ-ences in bore diameter at various points even in the same barrelcan be far more than the wildest tolerances in any bullet. Sincethe whole idea of controlling bullet diameter and tolerance is tomake it fit into the bore, or the rifling grooves, there�s a problemhere!
Why worry about a precise bullet if the bore isn�t precise?We�ve had clients send us sample bullets, pushed through a fac-tory barrel, that came out as much as .41 caliber from a .40caliber pistol! In one instance, the client sent the gun back twiceand got two different oversized barrels, both different by as muchas 0.005 inches from each other. I won�t mention the gun-maker,but it is a respected name and the problem isn�t unique.
This doesn�t mean that it isn�t important to have good con-trol over bullet diameter. It merely means that you should nottake the �published specifications� for granted. Measure your gun
35
if you really want to specify the bullet correctly to fit it. If youdon�t know how to measure it, you can fire a low velocity slugthrough it and capture the slug in water, and send us the slug tomeasure. By low velocity, I mean just enough pressure to get itout of the barrel reliably.
Measuring a barrel is an art. Firing the bullet through it onlygives you an idea of the diameter at the point where the bulletcame out. Suppose your barrel has �waves� in the bore, where itvarys 0.002 inches larger than the average, but the muzzle isactually tight at 0.001 smaller than the standard specifications.The bullet might expand when it passed through the big areas,but it would be drawn down again when it hit the tight spots.Which dimension is really the size of your bore? Who knows�itall depends on your meaning. Average? Mean? Tightest point?Loosest point? Standard deviation?
You want a bullet to fit so it won�t be distorted and so powdergas won�t escape around it and cut the jacket or lead like a torch.It�s worse to have gas jetting around the bullet in the loose placesthan it is to have the bullet slightly elongated by the tight ones(since the amount of distortion is so tiny, yet the damage by gascutting can be so harmful to both bore and accuracy). That�s whyI lean toward large bullets so long as they don�t cause any otherproblems.
What about the pressure ring myth? You�ve probably heardthis one: a good accurate handmade bullet must have a pressurering slightly larger than the rest of the shank, whereas a factorybullet doesn�t have one and that is why factory bullets are lessaccurate. Lots of shooters believe this one.
Actually, the pressure ring on the back end of a swaged bul-let is there for two reasons. The difference in diameter betweenthe core seating die, which is used to make the bullet expand tonearly final diameter in a cylinder form by pressing the lead coreinto the undersized jacket, and the point forming die, which formsthe ogive on the bullet, must be very small, but still the pointforming die should be slightly larger than the core seating die (indiameter of hole).
If the core seating die is the same size or larger, the bullet willtend to stick in the point forming die. People who don�t knowmuch about swaging will assume the point forming die is bad,when it is likely that the core seater is producing a bullet too largeto easily slip into the hole of the point former. The difference isvery small. A typical .224 bullet would be made using a core
36
seating die of about 0.2238 inch diameter, or at least the bulletwould come out of the core seater at that size (the hole might beslightly different because of material springback).
A desirable range of diameters for a .224 bullet would befrom 0.2240 to 0.2245 inches in the parallel shank section. Rightat the base, the bullet might measure from 0.2242 to 0.2248.This �pressure ring� is the lack of springback across the solid diskof metal that makes the bullet base, compared to the springytubular sides of the jacket. Having a large difference betweencore seater and point former die cavities will make the pressurering larger, and if the difference gets too large, then the bullet willstart to come out with a �wasp-waist� shape, like the old Herter�Super-Sonic Wasp-Waist� bullets of long ago.
(A note about those Herter�s bullets: these were most likelyreject bullets made because of a severe mismatch in a set of com-mercial swage dies, but Herter�s was innovative enough to turnsomeone else�s rejects into their �Model Perfect� offering of theseason. Strange advantages were touted for this bullet: it was saidthat the air went in a sort of circle around that hourglass shapeand somehow whipped around behind the bullet, whacked it inthe rear and drove it faster! If this were true, Herter�s discovereda perpetual motion machine with a new twist. Imagine whatwould happen if you accidently gave one of those bullets a thumpwith your finger while it rested on the table: the air would startaccelerating it faster and faster until it was zipping around theroom at supersonic speed, blowing holes in all observed physics!)
The pressure ring is not a design feature: it is a physical factof life that gets in the way of having a nice parallel shank on thebullet and can expand the case neck as the bullet base passesthrough, leaving the bullet slightly loose. In a short-necked roundlike the .300 Savage, the pressure ring is a real problem, since thecase holds part of the ring and part of the shank, and the bulletflops around as a result.
Most of the time, the pressure ring doesn�t hurt anything butif there were a way to get rid of it without hurting accuracy insome other way, it should be done. The best way to minimize it isto match the core seater and point former dies very closely, moreclosely than you can do with a regular micrometer. You can alsomake the bullets slightly oversized and tapered, so the dies reallyeject easily, and then push the bullet through a ring die that ironsthe sides perfectly straight: now you�ve got a factory bullet! That�s
37
the way it�s done. But that also tends toward a loose fit betweenjacket and core: the core pushes in and stays there, while thejacket springs back a tiny bit and loosens its grip on the core.
If you bond the core (using Corbin Core Bond flux and melt-ing the lead core into the jacket for a permanent adhesion), youcan draw down the shank of the bullet without any springbackeffect. But all this is not necessary for target shooting and barelynecessary for anything else so long as the ring is only slightly0.001 inch or less) larger than the rest of the shank. If you haveany problem with the bullet in a short necked case, then this isworth some consideration.
The main thing is, don�t be suckered into thinking that youmust have this mysterious feature in order to have a top-qualitybenchrest bullet. It�s just how they come out, no design requiredor intended, and rather than admit it, many bullet makers in thepast have turned it into a �feature�. This is rather like the soft-ware bug that you call about, and the technical support personclaims is actually a feature: it�s supposed to work that way, didn�tyou know? It�s designed to crash!
Here�s another myth that needs to be shot down: copper foulsyour bore, and brass is too hard on it, so you have to use a mys-terious metal called �gilding metal� that only the factories have.In the first place, gilding metal is 95% copper and 5% zinc, whereasthe brass most people refer to is 70% copper and 30% zinc. Cop-per is 99.95% copper and a trace of silver or other elements,sometimes phosphorus, sometimes arsenic. You can have any ofthem for the going price, any time you like. Corbin stocks variouskinds of bullet materials and can get others if you order the mini-mum run.
The factories normally use either gilding metal or commer-cial bronze for bullet jacket material. Commercial bronze is reallynot bronze at all. It is another kind of brass, made with 10% zincand 90% copper. It is cheaper than gilding metal, slightly tougherand can be made harder. Any of these metals can be used tomake good jackets. None of them necessarily has to foul the boreany more than the others.
Pure copper, properly annealed, makes a fine jacket materialbut it is a little more �sticky� in the punch press dies and harderto draw to deep cups, so it is seldom used. A little zinc makes thematerial easier to draw, but more brittle when it strikes the tar-
38
get. When it comes to a choice between helping the mass pro-ducer produce the product, or making the product work betterfor you, guess which way it goes!
Why do people think copper fouls more than gilding metal,then? I wondered about that for a long time, since we are involvedwith shooting lots of bullets made with copper and have not no-ticed any unusual fouling problems. (We get into all kinds of cali-bers, from .14 to 20mm. We�ve shot .50�s made from everythingyou can imagine, and fouling isn�t any worse with copper.) I thinka big part of it is the finish of the material used to make thebullets, and the treatment it gets during the process.
Copper tubing is a traditional material for making bullets. Ittends to have a slightly soft, powdery surface after it is annealed.Annealing with gas heat, or in an oxygen atmosphere, will oxi-dize the surface and cause a reddish or blackish oxide to form.These tend to be flaky and loose. When the copper is drawn downand shaped into a jacket, it will harden slightly but the surfacemay not be burnished enough to get rid of the porous layer. Ithink this layer is what comes off in the bores.
Nearly all metals will leave something of themselves in thebore, but we are talking about fouling bad enough so that it is aproblem, an exceptional amount of fouling. And with properlydrawn and polished bullets, I have not seen any significant prob-lem. With the highly finished copper strip that we use for makingdrawn bullet jackets, there is no problem worth consideration.
Some of the rumor probably comes from the fact that peoplewho do this sort of experimental work with bullets are morecurious and inspect their guns more carefully than people whojust buy factory bullets, and they notice even a small amount offouling sooner. Some of it comes from the loose, porous finishthat experimenters may get on their torch-annealed copper tub-ing jackets. So, use annealed copper instead of annealing it witha torch, or polish the jackets so that the outer surface is removeddown to the hard underlying metal. Don�t worry about it unlessyou actually experience a problem, which you probably won�t.
There certainly are a lot of myths to debunk! I don�t thinkthis book is big enough to handle all of them, but those are a fewof the important ones that might keep you from trying some-thing that would actually help you. I think one of the most im-portant myths is really a whole grab-bag full of related ones aboutstrange, mysterious things you might have to do in order to getyour bullets to shoot accurately. I�ve heard all these tales about

39
how you have to let the bullets �rest� overnight before you shootthem, or how you have to swage cores and then put them in a jarand give them a day to �normalize� (whatever that means) beforeputting them into the jackets.
Most of this is purely in the mind of the person who believesit, and came about either because someone else said it, or be-cause the person happened to shoot a great group one day afterdoing something of the kind and from that day forth will alwaysgive the ritual credit. I wonder if a hunter who dropped his rifleand had it go off and by sheer luck shot a deer with that straybullet would henceforth go into the woods and toss his loadedrifle on a rock?
I suppose we all know people who got lucky one time withtotally inappropriate equipment or techniques, and without anyfurther testing just assumed that the thing they did incorrectlywas responsible for the good fortune of that day. Likewise, badresults are sometimes blamed on coincidental precursors. A sta-tistic says that 80% of all people killed in car wrecks ate carrotsduring the previous twelve months. So, does this mean that eat-ing carrots causes you to get killed in a car crash? If you don�t eatcarrots, do you thus avoid such a fate? Oh, my, it�s time for arefresher course, Logic 101.
Once Friday I made a pile of bullets and wanted to shoot agood group so much that I spend all afternoon weighing and sort-ing them into two piles. The first pile had almost no weight varia-tion that I could measure: those suckers were right on. The otherpile had the other bullets, which could vary as much as threegrains plus or minus from my desired weight. After supper, I wentback out to the bench and I carefully loaded them up for myheavy barrel .222 Remington on a nice Sako action, weighingevery charge, and seating those bullets with the greatest of care.I was ready for Saturday�s match.
Saturday was a great success, and my group was as small asI could have hoped. I was now positive that absolute bullet weightcontrol was the secret of small groups. Upon my triumphantreturn home, the first thing I noticed was the pile of bullets onmy loading bench. It looked suspiciously small. Weighing a few,then a few more, it finally dawned upon me that I had loaded therejects and shot them, instead of the selected ones. Come to thinkof it, there were a lot of loaded rounds! So I guess a six grainrange of weight variation didn�t make all that much difference ingroup size, after all.
40
One more myth: the correlation between bullet weight varia-tion and bullet �quality�, which generally means potential accu-racy. This one is partly true and partly misunderstanding. If abullet is unbalanced, so that one side is heavier than the other, itwill tend to spiral in flight and will land at different points aroundits axis of flight. That much is well proven and has been knownfor years. If the difference in weight between two bullets is causedby a bullet jacket that is thicker on one side (eccentric jacketwalls) or if it is caused by an air pocket or void within the core ofone bullet which is off-center, then the weight variation is a wayof telling us about eccentric construction.
Note that we don�t know which of the two bullets is builtincorrectly. With air pockets, the lighter bullet is probably the badone, but with eccentric jacket walls, we don�t really know if theheavy bullet has a thicker wall on one side, or if the lighter onehas a thinner wall on one side. If the lighter bullet has a thinnerwall but it is concentric, then provided we had five more like it,we could shoot just as good a group as we could with a concen-tric, thicker-wall jacket. If we had bullets with air pockets thatwere perfectly centered, such as you get with a hollow base orhollow point that is correctly swaged, then there is also no prob-lem with eccentric weight or balance.
Mixing bullets that have eccentric weight variations into agroup that has none will increase the group size. Mixing thinwalled concentric jackets with thicker ones can change the groupsize only because the friction of the jackets as they pass throughthe bore may be different, so the powder burns a little differently,and the velocity may vary. This can cause the bullets to dropmore or less depending on their velocity. The variation due onlyto difference in weight, meaning the gravitational drop, is so slightat 100 yards on a few grains (such as 2% or so of the bullet�sweight) that you can disregard it. You may as well talk about theeffects of an airplane flying over and its gravitational pull shiftingthe bullet impact as the weight variation in a 2% or less situation.
If you make your own bullets, and you have jackets that notonly weigh the same but have walls that are the same on all sides,and you seat the lead cores to the same pressure so there is noloose core and no air pockets, then you will be able to ignoreweight variations of less than 1% of total weight for any kind ofshooting, and below 2% for anything but top level benchrest com-
41
petition. Any weight variation in this range would be simply moreor less core, concentric to the bullet center line, and would haveno serious or noticeable effect on group size.
If you have the same weight variation and it can be shownthat the cause is eccentric walls or anything else that causes theweight to be shifted in an eccentric manner, then you will prob-ably notice an increase in group size. So, weight variation is notan absolute measure of quality, but it is an indicator of a possibleproblem. One of the gunsmith/die-makers on the Corbin teamhas built an accurate .22 Hornet rifle for testing this in a quanti-tative manner. He has loaded bullets to serve as control for theaverage groups, and will be conducting a long series of experi-ments to see just how much weight variation of both eccentricand concentric type is required to affect the group size.
(Eccentric bullets are easy to make by putting a known weightof nylon string down one side of the jacket before swaging in thecore�you can control the weight and position of the variationthis way.) I suspect we will find the groups of bullets made withconcentric weight variation (more or less core weight) are withinthe average size for the control bullets, whereas the eccentricstend to fall outside in proportion to the amount of eccentricity,but we�ll get some hard facts and numbers and then write aboutit later.
My point is that weight is not some absolute number thattells you �good� or �bad� about a bullet. After all, a 2 grain plusor minus variation on a 50 grain .224 is plus or minus 4% of thetotal weight and may have some noticeable effect, whereas thesame variation on a 500 grain .458 bullet is only 0.4% and isbelow the limit of accuracy of most electronic meters and chro-nographs, and is unlikely to have any affect that can be mea-sured.
As a rule of thumb, strive for a maximum of 1% plus orminus weight variation in your best target bullets, and don�t worryif you make hunting or defense bullets with a 2% variation. Toget this figure, divide the difference between the heaviest bulletand the lightest bullet by the average bullet weight, and multiplyby 100. The average bullet weight is the total of all weights di-vided by the number of bullets that you weighed.
One last example is the myth of the infallible micrometer. Ithink that at least once a month we hear from someone with theworld�s most accurate micrometer. That remarkable tool certainlygets around. Since the advent of digital electronic readouts of

42
reasonable price, and the availability of micrometers and caliperswith stated accuracy of either 0.0005 or 0.0001 inches (or some-times 50 millionths, or whatever the ad writers feel like writingthat week) there have been more than a few people who call tonote that they expect to order a bullet that measures some ridicu-lously precise figure and wonder if we�ll guarantee it.
In the first place, Corbin probably makes the most precisebullet swages you can buy because we have put literally decadesinto building the only full-time, full-line bullet swaging equip-ment and die-works in the world, and you can�t run one withoutthe best measuring instruments. Each of our diamond lappingmachines has a gauge mounted on it that cost several thousandsof dollars, and is tested and set with a setting fixture that is peri-odically sent in for NBS calibration. The setting fixture alone costsmore than most people would pay for their second car. The dia-mond probes that fit into the precision bore gauges cost severalhundred dollars, and each one only covers a narrow range suchas .204 to .210 inches, so we have thousands more in all theselittle diamond probe sets.
I am not reciting all this to impress anyone with what wespend on measuring tools, so much as to make this point: if therewere anything better, we�d buy it. That�s our business. We have toknow the limits and uses of precision measuring tools to survive.Those salesmen who call on Corbin certainly are more than anx-ious to sell us the latest and best technology, and they keep usappraised of it. Precision measurement isn�t something we onlyread about in an old copy of Machine Tool magazine at the dentist�soffice.
I also don�t mean to imply that we know it all and no onecould possibly measure anything better: we make errors like any-one else. I�m sure that at NASA or Sandia Labs or Cal-Tech thereare tools of greater precision than we can justify or afford. Butwhat I do mean to point out is that someone with a digital mi-crometer that costs a hundred bucks or so isn�t even close to thestate of the art in measurement precision, and if this high pricedequipment we use is only guaranteed to give plus or minus 50millionths of an inch precision, you can darn well bet that themicrometer isn�t going to actually give you anything like an abso-lute precision of plus or minus a half thousandth inch, which is500 millionths.

43
So, how can the ads in the machine tool catalogs say that thereadout is accurate to 0.00001 inches or whatever they claim?Easy: they are talking about the readout. The digital readout isthe thing that displays the numbers. If it says a given number,you can bet it means exactly that number, to the last digit it candisplay plus or minus one digit (since any digital tool has no finerdivision than 0 or 1 on its last number displayed, you never knowfor sure if the last number is half way between 0 and 1).
But the trick�the secret, if you will�is in that wording. Thereadout accuracy has nothing to do with the instrument accuracy.You can connect a digital readout to anything, and the numberswill click off just fine, but they mean nothing more than themechanical limit permitted by the actual instrument itself. Youcould put a ten decimal place readout on your car odometer, butthe wide tolerance in the little gears and cabling to the engine ortransmission would limit the usefulness to whatever mileage read-ing you normally get without all the decimals.
Digital readout on a moderately priced instrument is a wayto fool gullible buyers into thinking they bought the world�s mostaccurate tool for a few dollars, while the �uninformed� laborato-ries continue to spend thousands to get the same kind of accu-racy. It�s the stuff headlines in supermarket checkout magazinesare built from: �Man Survives Fall From Space Shuttle: DoctorsBaffled�. It�s human nature to want to think that all the expertsare wrong, because it gives the average fellow�s ego a little boost.Sometimes the experts are wrong, of course. But, really, if it werepossible to get dependable accuracy in the tenths of a thousandthinch with cheap tools, why would anyone in business waste moneyon anything else?
I will never convince the person who is so proud of his newdigital mike that he can�t repeatedly and accurately tell what thediameter of a bullet is to five places, and probably not to four. Thelimit of accuracy of a lead-screw micrometer, which nearly all ofthem are unless you buy laser or magnetic track instruments (forthousands of dollars) is the physical accuracy of the mechanicalscrew thread itself, not the digital readout. This cannot honestlybe guaranteed to be better than 0.0005 inches in the very finestof instruments, (such as the Starrett �Last Word� bench mike)and more likely is only accurate to 0.001 inches. Of course theyread to zillionths of an inch (well, at least 0.0001 inches) butbeing able to display a tiny number does not mean the tool reallysees it repeatedly or even sees it at all.
44
For all practical purposes, a micrometer you can hold in yourhand will give you the nearest thousandth plus or minus abouthalf a thousandth. So if you specify a bullet of 0.308 inches plusor minus 0.0005 inches, you have some chance of telling it isbetween 0.3085 and 0.3075 inches. If you buy a gauge blockwith guaranteed traceable dimension of 0.3080 inches plus orminus 0.0001 inches, you can set your mike as a comparator tosee if your bullet is .3081 to .3079 inches.
But you can�t tell if you have a .30805 or a .30795 inchbullet. A screw thread measuring system just won�t repeat anycloser than that. All it can do is give you a readout where thenumbers themselves are guaranteed to be whatever the ad says,not that they represent what the measured part actually is. Thatis how many precision tool brands are sold to the public today.The difference between readout and instrument precision is justcomplex enough so that some people don�t care to understand it.It�s much easier to believe you bought the precision of a $5,000lab tool for $150.
What matters is that the bullets land in the same hole, or asclose to it as possible, and there is no way yet devised to deter-mine if they will do that before shooting them! Bullets that areundersized to the bore by even half a thousandth may show signsof lower accuracy, whereas bullets that are a thousandth over-sized from this ideal usually shoot as well as the �right� size bul-let.
But we don�t really know in advance what is �right� becauseit depends on your particular barrel. We do know that in general,if you want maximum accuracy, you should strive for a tolerancerange of minus zero, plus one thousandths of an inch from thegroove-to-groove depth. You may not find this is �right� for everygun or load, but it is a good starting point.
45
4. Tubing JacketsBesides the swaging dies to make bullets, there are also jacket
making dies. You can buy ready-made jackets (the cups or emptyskins for the bullets are usually made from a copper alloy, from100% copper to 80% copper and the rest zinc). Bullet jackets arefrom .001 to .005 inches smaller than the caliber, so they can beexpanded upward when you insert and seat the lead core. Youcan�t always buy the calibers, lengths, and thicknesses you wantto use. There are good alternatives to buying them. You can makeyour own, or you can buy something that is available and draw itdown to make a smaller diameter, greater or less length (by pinchtrimming), and thinner or thicker wall (by design of the punch todie clearance).
Commercially made bullet jackets normally contain from 5%to 10% zinc, with the balance of the alloy being copper. The 5%zinc alloy is called �gilding metal�, and the 10% zinc alloy is called�commercial bronze�, even though it isn�t a bronze at all (bronzesare tin-copper alloys). The advantage of the zinc is that it makesthe jackets easier to draw into deep tubes, starting with flat strip,without breaking through at the end or wrinkling. But for shoot-ing purposes, pure copper tends to hold together better on impactand has about the same level of fouling if the surface finish isequally good.
Corbin makes two different systems to form your own bulletjackets, one system using tubing, and one using flat strip. Tubingdies cost less and fit more kinds of presses, but strip jackets havethe accuracy edge and can be made with greater control over thewall tapers and thickness.
For big game hunting, the tubing jacket may have the edgesince it is easier to build thicker walled, tougher jackets with tub-ing (after all, the deep drawing operation is done for you in tubingand all you have to do is round over one end and adjust the diam-eter in a draw die). Jacket drawing from strip can be done in ahand press only for jacket lengths of about half an inch (or less),because punching out a disk and turning it into a cup requires alot of power early in the stroke. Hand presses generate almost alltheir power at the end of the stroke. Hydraulic presses are usedfor draws that exceed the half inch jacket length, in order to getfull power at the start of the stroke.
46
Copper Tubing Jacket Maker Sets (CTJM-1-M, -S, and -H)
You can make jackets from copper tubing (or almost anyother metal, but copper, aluminum, brass, and mild steel are themost practical things to use, and of these, copper works best formost shooting needs). To do this, you could use copper watertubing (yes, the same kind used to hook up wash basins), boilertubing, or refrigeration tubing. Corbin has precision drawing gradetubing available also, if you want �good stuff� for testing.
The cost of new tubing generally means that you won�t savemoney over buying jackets if the jacket you want is already avail-able on the market. But most large caliber jackets for rifles, orheavy walled jackets of any sort, are simply not available unlessyou make them, so the cost of the jacket is secondary to whetheror not you want a better bullet! Prices of from seven to twentycents for material, depending of course on the source, quality,size, and length you need, would be a good range in 1996 as thisis being written. Of course, if you can get a reasonably goodquality of tubing surplus, from contractors or plumbers, and thewall thickness variation is not too bad, you might get by verycheaply indeed.
Regardless of the size or type, you would cut it to length,deburr one end, put the piece over a precision punch and roundthe end over in one of our end-rounding dies (looks like a bluntpoint forming die), anneal the tube, draw it to smaller diameter,and then flatten the end with a special punch in your normalcore seat die.
The advantages are (1) tooling is quite reasonable in price,(2) the number of operations is relatively small and not hard tolearn, (3) tubing is fairly low cost and you might get even lowerpriced deals from building contractors just finishing up a big apart-ment complex, (4) the process makes very tough bullets for biggame shooting. And there may not be any practical alternative, ifyou need a high performance hunting bullet.
In a Corbin hydraulic-powered press such as the CHP-1 Hy-dro-press, or CSP-2H Hydraulic Mega-Mite press, using the -Hfamily of high pressure dies, you can completely close the base sono hole appears. In the -M and -S family of hand press dies, whichfit the Corbin Silver Press CSP-3, or the Series II Press, CSP-1, orwhen using an -H die in the Mega-Mite CSP-2 hand press, you
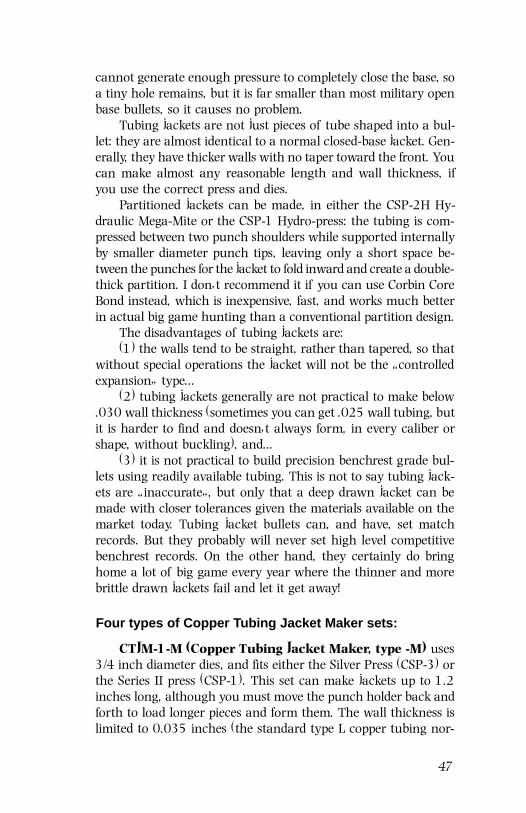
47
cannot generate enough pressure to completely close the base, soa tiny hole remains, but it is far smaller than most military openbase bullets, so it causes no problem.
Tubing jackets are not just pieces of tube shaped into a bul-let: they are almost identical to a normal closed-base jacket. Gen-erally, they have thicker walls with no taper toward the front. Youcan make almost any reasonable length and wall thickness, ifyou use the correct press and dies.
Partitioned jackets can be made, in either the CSP-2H Hy-draulic Mega-Mite or the CSP-1 Hydro-press: the tubing is com-pressed between two punch shoulders while supported internallyby smaller diameter punch tips, leaving only a short space be-tween the punches for the jacket to fold inward and create a double-thick partition. I don�t recommend it if you can use Corbin CoreBond instead, which is inexpensive, fast, and works much betterin actual big game hunting than a conventional partition design.
The disadvantages of tubing jackets are:(1) the walls tend to be straight, rather than tapered, so that
without special operations the jacket will not be the �controlledexpansion� type...
(2) tubing jackets generally are not practical to make below.030 wall thickness (sometimes you can get .025 wall tubing, butit is harder to find and doesn�t always form, in every caliber orshape, without buckling), and...
(3) it is not practical to build precision benchrest grade bul-lets using readily available tubing. This is not to say tubing jack-ets are �inaccurate�, but only that a deep drawn jacket can bemade with closer tolerances given the materials available on themarket today. Tubing jacket bullets can, and have, set matchrecords. But they probably will never set high level competitivebenchrest records. On the other hand, they certainly do bringhome a lot of big game every year where the thinner and morebrittle drawn jackets fail and let it get away!
Four types of Copper Tubing Jacket Maker sets:
CTJM-1-M (Copper Tubing Jacket Maker, type -M) uses3/4 inch diameter dies, and fits either the Silver Press (CSP-3) orthe Series II press (CSP-1). This set can make jackets up to 1.2inches long, although you must move the punch holder back andforth to load longer pieces and form them. The wall thickness islimited to 0.035 inches (the standard type L copper tubing nor-
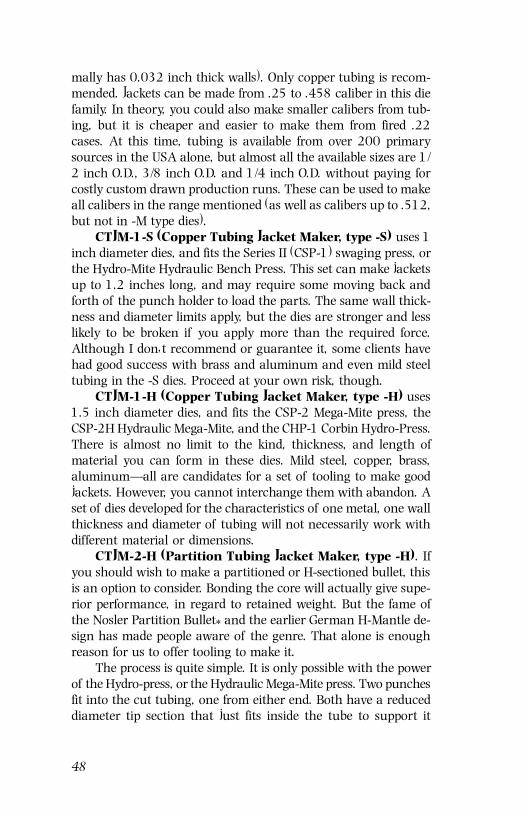
48
mally has 0.032 inch thick walls). Only copper tubing is recom-mended. Jackets can be made from .25 to .458 caliber in this diefamily. In theory, you could also make smaller calibers from tub-ing, but it is cheaper and easier to make them from fired .22cases. At this time, tubing is available from over 200 primarysources in the USA alone, but almost all the available sizes are 1/2 inch O.D., 3/8 inch O.D. and 1/4 inch O.D. without paying forcostly custom drawn production runs. These can be used to makeall calibers in the range mentioned (as well as calibers up to .512,but not in -M type dies).
CTJM-1-S (Copper Tubing Jacket Maker, type -S) uses 1inch diameter dies, and fits the Series II (CSP-1) swaging press, orthe Hydro-Mite Hydraulic Bench Press. This set can make jacketsup to 1.2 inches long, and may require some moving back andforth of the punch holder to load the parts. The same wall thick-ness and diameter limits apply, but the dies are stronger and lesslikely to be broken if you apply more than the required force.Although I don�t recommend or guarantee it, some clients havehad good success with brass and aluminum and even mild steeltubing in the -S dies. Proceed at your own risk, though.
CTJM-1-H (Copper Tubing Jacket Maker, type -H) uses1.5 inch diameter dies, and fits the CSP-2 Mega-Mite press, theCSP-2H Hydraulic Mega-Mite, and the CHP-1 Corbin Hydro-Press.There is almost no limit to the kind, thickness, and length ofmaterial you can form in these dies. Mild steel, copper, brass,aluminum�all are candidates for a set of tooling to make goodjackets. However, you cannot interchange them with abandon. Aset of dies developed for the characteristics of one metal, one wallthickness and diameter of tubing will not necessarily work withdifferent material or dimensions.
CTJM-2-H (Partition Tubing Jacket Maker, type -H). Ifyou should wish to make a partitioned or H-sectioned bullet, thisis an option to consider. Bonding the core will actually give supe-rior performance, in regard to retained weight. But the fame ofthe Nosler Partition Bullet* and the earlier German H-Mantle de-sign has made people aware of the genre. That alone is enoughreason for us to offer tooling to make it.
The process is quite simple. It is only possible with the powerof the Hydro-press, or the Hydraulic Mega-Mite press. Two punchesfit into the cut tubing, one from either end. Both have a reduceddiameter tip section that just fits inside the tube to support it
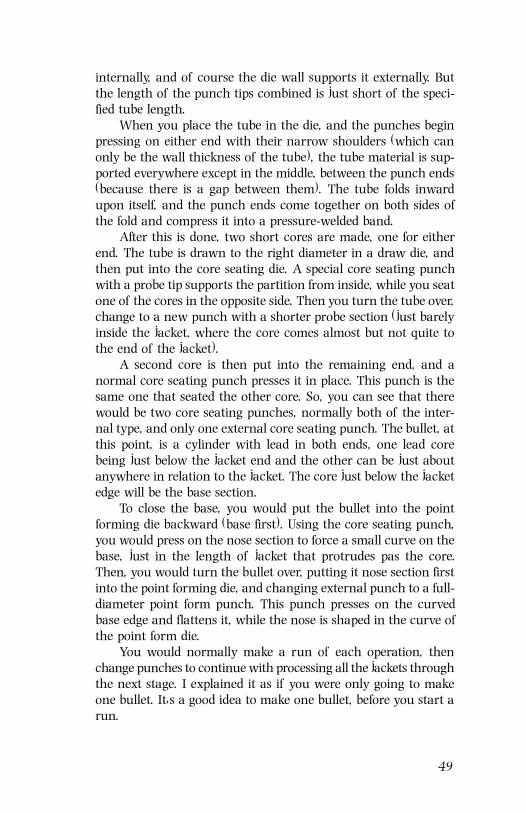
49
internally, and of course the die wall supports it externally. Butthe length of the punch tips combined is just short of the speci-fied tube length.
When you place the tube in the die, and the punches beginpressing on either end with their narrow shoulders (which canonly be the wall thickness of the tube), the tube material is sup-ported everywhere except in the middle, between the punch ends(because there is a gap between them). The tube folds inwardupon itself, and the punch ends come together on both sides ofthe fold and compress it into a pressure-welded band.
After this is done, two short cores are made, one for eitherend. The tube is drawn to the right diameter in a draw die, andthen put into the core seating die. A special core seating punchwith a probe tip supports the partition from inside, while you seatone of the cores in the opposite side. Then you turn the tube over,change to a new punch with a shorter probe section (just barelyinside the jacket, where the core comes almost but not quite tothe end of the jacket).
A second core is then put into the remaining end, and anormal core seating punch presses it in place. This punch is thesame one that seated the other core. So, you can see that therewould be two core seating punches, normally both of the inter-nal type, and only one external core seating punch. The bullet, atthis point, is a cylinder with lead in both ends, one lead corebeing just below the jacket end and the other can be just aboutanywhere in relation to the jacket. The core just below the jacketedge will be the base section.
To close the base, you would put the bullet into the pointforming die backward (base first). Using the core seating punch,you would press on the nose section to force a small curve on thebase, just in the length of jacket that protrudes pas the core.Then, you would turn the bullet over, putting it nose section firstinto the point forming die, and changing external punch to a full-diameter point form punch. This punch presses on the curvedbase edge and flattens it, while the nose is shaped in the curve ofthe point form die.
You would normally make a run of each operation, thenchange punches to continue with processing all the jackets throughthe next stage. I explained it as if you were only going to makeone bullet. It�s a good idea to make one bullet, before you start arun.
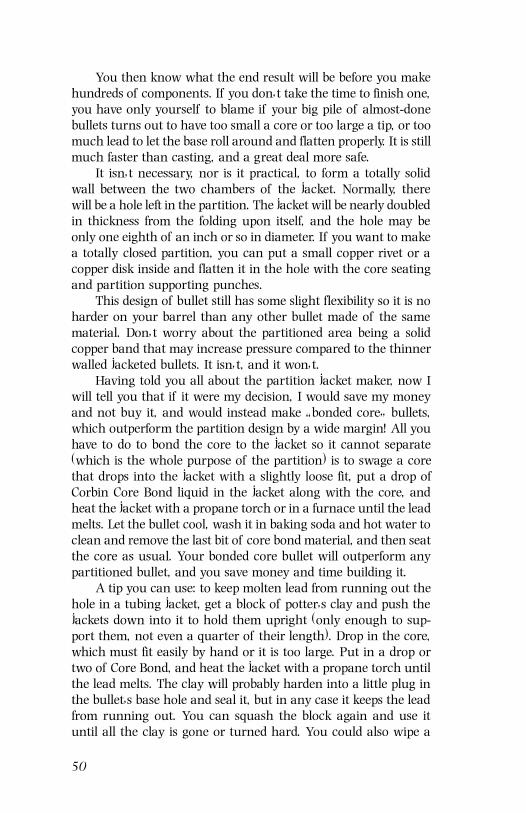
50
You then know what the end result will be before you makehundreds of components. If you don�t take the time to finish one,you have only yourself to blame if your big pile of almost-donebullets turns out to have too small a core or too large a tip, or toomuch lead to let the base roll around and flatten properly. It is stillmuch faster than casting, and a great deal more safe.
It isn�t necessary, nor is it practical, to form a totally solidwall between the two chambers of the jacket. Normally, therewill be a hole left in the partition. The jacket will be nearly doubledin thickness from the folding upon itself, and the hole may beonly one eighth of an inch or so in diameter. If you want to makea totally closed partition, you can put a small copper rivet or acopper disk inside and flatten it in the hole with the core seatingand partition supporting punches.
This design of bullet still has some slight flexibility so it is noharder on your barrel than any other bullet made of the samematerial. Don�t worry about the partitioned area being a solidcopper band that may increase pressure compared to the thinnerwalled jacketed bullets. It isn�t, and it won�t.
Having told you all about the partition jacket maker, now Iwill tell you that if it were my decision, I would save my moneyand not buy it, and would instead make �bonded core� bullets,which outperform the partition design by a wide margin! All youhave to do to bond the core to the jacket so it cannot separate(which is the whole purpose of the partition) is to swage a corethat drops into the jacket with a slightly loose fit, put a drop ofCorbin Core Bond liquid in the jacket along with the core, andheat the jacket with a propane torch or in a furnace until the leadmelts. Let the bullet cool, wash it in baking soda and hot water toclean and remove the last bit of core bond material, and then seatthe core as usual. Your bonded core bullet will outperform anypartitioned bullet, and you save money and time building it.
A tip you can use: to keep molten lead from running out thehole in a tubing jacket, get a block of potter�s clay and push thejackets down into it to hold them upright (only enough to sup-port them, not even a quarter of their length). Drop in the core,which must fit easily by hand or it is too large. Put in a drop ortwo of Core Bond, and heat the jacket with a propane torch untilthe lead melts. The clay will probably harden into a little plug inthe bullet�s base hole and seal it, but in any case it keeps the leadfrom running out. You can squash the block again and use ituntil all the clay is gone or turned hard. You could also wipe a
51
plug of clay into the base holes and then use something else tosupport the jacket. Leaving the tiny dot of clay in the base is nota problem. It weighs next to nothing and looks interesting.
Changing lengths and tubing dimensions
You can change the length of a tubing jacket, if you alsopurchase two additional punches per length. The two punchesare (1) the end rounding punch, which has a turned-down sec-tion that is just shorter than the desired length by half the diam-eter of the tubing, so that enough metal protrudes to be rolledover into a base within the first die, and (2) the end flatteningpunch, which likewise has a probe-like section that fits inside therounded, drawn and annealed tube just far enough to compressthe rounded end and make it flat, within your existing (not partof the set) core seating die. Sometimes you can use the same endflattening punch, depending on the amount of change in length.The whole idea of these punches is that enough unsupportedtubing projects past their end to roll over into an angle or curve(in the end rounding die) and then flatten by pressing firmly inthe core seating die (without a core).
If your jacket projects a little more past the end than thesample sent with the punch, it will probably work anyway, untilit gets long enough so that a lot of jacket is unsupported andcollapses inward on itself when you try to round the open end.But if the jacket is even a little too short, the punch will come upagainst the end of the die and there won�t be any jacket there tobe rounded. Thus, you have wider base openings, incomplete clo-sures, and might even damage the die or punch trying to get thebase to close up.
The right length to cut the piece of tubing is about a quarterinch or so longer than the length of the smaller diameter of thepunch (so it projects that far past the punch tip). Another way tolook at it is to make the tubing about half a caliber longer thanthe punch tip length, since you are going to fold it over half acaliber per side to close up the base. The length of the cut tubingis marked on the punch. Length is critical to within about 0.01inches for a given punch.
Selecting the right tubing
52
The standard sizes of tubing that are available, and which westock for resale, are 1/2 inch O.D. and 3/8 inch O.D. We can alsomake custom diameters. Three other useful diameters are 7/16inch O.D., 5/16 inch O.D., and 1/4 inch O.D. They are more diffi-cult to find than the first two, but we can draw them for you.
In each case, the closest larger diameter of tubing is selectedas the starting point for a caliber you want to make. The 1/2 inchtubing is used to make all calibers from .512 down to just above.375 (for instance, the .400 caliber). Both rifle and handgun cali-bers can be made, although you need two punches for each length.You can�t make jackets shorter than the punch design withoutstriking the punch end against the bottom of the die, which failsto fold the jacket over to make a base. Longer tubing will tend tobuckle.
The wall thickness of standard tubing is 0.032, 0.035, 0.049,and 0.065 inches, depending also on the diameter. Some diam-eters are simply not available in a given thickness of wall withoutcustom mill runs (translates into a big order and lots of money).If you want anything else, it may be available if you can buy amill run. We can not make jacket maker sets without having thetubing you plan to use. Each jacket maker is a complete develop-ment effort, trial and error, to make sure it does the job right. Wecan not do it �by the numbers� because tubing tolerances are notthat close and our die and punch tolerances are extremely tight.We have to have some material on hand to work with.
If you plan to use our standard tubing, then there�s no prob-lem. If you plan to get your own tubing somewhere else, we musthave at least six feet of it on hand before we can start your order.We will cut it into pieces and test the tooling. The length anddiameter, whether the tubing sticks or releases from the punches,the concentricity and evenness all depend on the temper, grain,alloy, tolerances, wall thickness, and diameter of your tubing.
Plumbing is not especially precise in these factors. If you geta large quantity at one time, it will probably be consistent enoughto make good bullets, but if you change suppliers there is noguarantee that the same nominal sizes you get will be anywherenear identical. The jacket maker punches may need some adjust-ment, or different punches need to be made, in case you changevendors or your vendor changes specifications.
53
Corbin�s tubing is higher cost than some of the tubing youwill find in the hardware stores, but not by a great deal. We arevery strict with our specifications and order large lots of highquality tubing just for bullet making. We recommend that, unlessyou have a good source of tubing in mind, you use our standardtubing to get started. We can help you obtain larger quantitieswhen your needs outgrow a few dozen feet at a time, but untilthen, the odds are good that you won�t find much better pricing.
My recommendation is that you establish prices for your cus-tom bullets that allow you to make a profit even with the highercost material, purchased initially in small quantity. Then, by thetime you can afford the larger mill orders, you�ll have alreadyguaranteed a higher margin and your success will be just thatmuch greater.
The range of calibers for each size of tubing
7/8: .787 down to .750 such as 20mm and similar slugs.3/4: .75 down to .626, such as 12-gauge jacketed bullets.5/8: .625 down to .515, such as .600 Nitro, .577 Snyder.1/2: .510 and .458 down to .400 diameter.3/8: .375 down to .318. Best in .375, .358.5/16: .314 down to .264 caliber. Best for .308.1/4: .257 down to .224 (but free .22 cases are available)
You need to know how to cut tubing to length without wast-ing too much effort, or damaging the ends with burrs and crimps.A tubing cutter usually rolls the end so much it won�t fit over apunch. Use either a lathe, or a metal cutting blade in a saw. Someof the more successful methods include a fine tooth metal cuttingblade in a chop saw, table saw, miter box saw, jig saw, or bandsaw. A home-built stop, consisting of nothing more elaborate thana block of wood clamped to the saw table, will give you reason-ably accurate lengths.
The number of teeth per inch should be from 32 to 40 on ahacksaw blade. The rule of thumb is �three teeth in the materialat all times�. Copper is a little �sticky� so you may wish to use ablade with a special tooth set or with a reverse rake on the teeth.We use a turret lathe and an air feed. We can chop up accuratelengths with one end deburred in runs of 500 or more.
54
We also have tubing in 2 foot lengths, easy to mail or shipanywhere in the world. You can save some labor cost by chop-ping these up yourself. Tubing normally comes in either 20 footpieces in big boxes of 200 to 500 pounds each, or in coils (an-nealed tubing). We use hard drawn or 3/4-hard, as it is called,because it is easy to handle in a lathe for cutting.
You must anneal the tube after you have formed the roundedend and before drawing it down to correct diameter. If you fail toheat the jacket red hot and let it cool (annealing it), then you willhave problems with cracking, sticking on punches, uneven ordifficult forming. A regular propane torch is all it takes. Just sit afew jackets on a couple of fire bricks, arranged in an �L� shape sothe flame is reflected back, and heat them by playing the flamedirectly on the jackets, one by one.
A great many of the problems that some bullet makers havewith tubing jackets and bullets comes from skipping the anneal-ing stage. For whatever reason�maybe because it takes extrawork�they assume the step is unnecessary. Wrong! Skip it andyou will have problems with tubing that sticks in the dies or onthe punches, bullets coming out the wrong diameter, or bulletsthat come out the wrong length! Maybe you will get away with-out annealing in some rare case, but by and large, it is a requiredstep that affects the rest of the operation severely if skipped.
We also offer electronic-control, electric heating furnaces withdigital readout. The HTO-2 Heat Treatment Oven runs on 120volts or, optionally, 240 volts, and can safely generate 2000 de-grees F. and hold the temperature within a few degrees. All youneed to anneal the tubing is about 1400 degrees F. for a fewseconds.
If you bond the core using Corbin Core Bond, you will meltthe lead in the jacket in the presence of the bonding agent, andthis will heat treat and stress relieve the copper, but it is not a fullanneal. You must anneal before attempting to draw down thejacket material. The only exception to this is with rimfire jacketcases, because of the head unfolding. In this case only, you mustanneal after drawing, never before drawing. Annealing a rimfirejacket before drawing it can cause the drawing punches to break.Failure to anneal tubing before drawing can cause the same thing.
Softened copper tubing expands better and generally is lesslikely to fragment on impact. It also picks up a scale that comesoff in the bore, unless you tumble or vibrate the bullets in a pol-

55
ishing media to remove it. This scale may be what causes somekinds of custom bullets to �foul� worse than a gilding metal jacket.But the scale can and should be removed.
We make the BPK-1 Bullet Polisher Kit for this purpose. It isa kit consisting of a vibrator motor prewired with thermal cut-out, line cord and switch, a mounting bracket and anti-vibrationhardware, instructions and a package of polishing media. Mount-ing this motor to the bottom of a coffee can or bucket is the usualprocedure, with the container suspended from a shelf bracket ora door spring hooked to some kind of hanger. Vibratory polisherstend to move the media around and carry the bullets in it, insteadof rolling the bullets against each other.
56
5. Drawn Strip JacketsA second form of jacket making uses flat strip instead of
tubing. This is the method used by the factory bullet maker. Stripgenerally costs less per bullet than tubing, and lets you makeexactly the wall thickness, wall taper, and length of jacket youdesire. In a hand press, the jacket must be kept relatively short,generally about half an inch. But in Corbin�s CHP-1 Hydro-Press,you can make 20mm jackets, .50 BMG jackets, or jacketed 12-gauge shotgun slugs if you wish (as well as all the smaller cali-bers, and jacket walls thicknesses up to virtually solid material).
I�m especially pleased with the work that my brother Rich-ard has done in bringing the costly high-speed production systemdown to an affordable, lower-volume operation. Until his researchand experimentation brought about the JMK- series of tools tomake flat strip into quality bullet jackets, you would have beenfaced with rebuilding very old transfer presses that cost at leasttwenty thousand dollars each, building progressive dies with ashuttle feed for another five to ten thousand dollars, and thenbuying all the feeder and handling equipment to make it work,plus hiring a die-maker to keep it operating and fix it when itfailed.
57
Jacket making, in the traditional way, is a commercial ven-ture for people who want to invest at least fifty thousand dollarsup front, spend a year or more getting the bugs out, and thenkeep someone on staff who could go elsewhere and earn a com-fortable living. The traditional equipment is far to complex andtouchy to just buy it and run it, like a blender or a TV set. Youhave to constantly fiddle with it to make good parts and keep itrunning, and sometimes that takes a very skilled fiddler. Besideswhich, if you want new equipment that can be put on line in afew months and has any sort of guarantee of working, the pricetag jumps into the half million dollar range. And the profit onjackets isn�t so great that I would feel comfortable with the kindof return that investment could generate!
But now, with a considerably smaller investment, you canmake every bit as good a jacket, perhaps better. More importantly,you can make these jackets in the specific way that will performbest, not just some way that lets them feed fast through an auto-matic machine. And, you can use ductile, pure copper if youwish, which is normally too sticky for the high speed punchpresses: it tends to break out at the base as you slam it through aprogressive die. This is the main reason why a five or ten percentzinc content is used in factory jackets. Adding zinc makes thematerial stronger so it can resist the force of drawing, and makesit a little harder and slicker so it won�t stick quite as much on thepunch or in the die
By using the relatively low impact of a slower-moving hy-draulic ram, Corbin�s system eliminates the problem of breakingout the bases with ductile copper material. Ours is one of the fewsystems of jacket drawing that works well with 99.995% purecopper strip. You no longer have to use copper tubing to get thelarge mushroomed bullets that don�t crack apart on impact.
The cost of these tools is less than a tenth of what you�d haveto pay for a used punch press system, including the Hydro-press(which can be quickly set up to make lead wire and jacket, coins,medals and fishing tackle if you so desire). Because the alignmentsystem is in the press head itself, rather than being built witheach die set in a �die shoe�, changing calibers or operations isquick and simple in comparison to a punch press. Twenty min-utes would be a long time to set up the Hydro-press for jacketmaking. Five minutes would be slow for changing calibers. Fif-
58
teen hours would possibly give you enough time to get a punchpress retooled for another caliber, including the tedious testingand adjustment period.
As with most things in life, there is a balance to be made.The punch press system costs as much as a home and takes daysto tool up, so you must make hundreds of thousands of the samepart once you have it working. Otherwise, the setup time eats upall the benefit and there is no gain. Your cost per jacket would beastronomical. But most shooters and custom bullet makers don�tneed to make more than twenty thousand to perhaps as many asa hundred thousand jackets a year. That�s a day or two in punchpress production time.
If you need millions of jackets, the cost and time involvedmake good sense. If you need a more moderate quantity, theycan�t be justified. The Hydro-press can easily justify its own costwith the kind of quantities a custom bullet maker requires. Bearin mind that the goal of making custom bullets is, in fact, thecustom feature. If the bullet you want is available from a massproducer and the price is reasonable, buy it. But if you want tofine tune some particular combination of features to make thebest possible bullet for a certain purpose, then you need the kindof control over components that a jacket drawing system cangive you.
Copper Strip
Copper strip can be purchased from Corbin, or from over200 copper mill outlets in the United States and Canada. Many ofthe large copper mills have outlets around the world. Names suchas Olin and Revere share space in our �World Directory of Cus-tom Bullet Makers� with the makers of precision brass, gildingmetal, German Silver, bronze, and aluminum tubing and strip.You can find their addresses and write for a list of outlets close toyou, or direct shipment terms and prices.
Generally, for moderate size lots, our prices will be reason-able. But I would encourage you to shop around. Sometimes ourprices are far better, during high copper market prices, becausewe stockpile when the market is low. Copper isn�t a bad invest-ment when you have reason to take delivery of the actual mate-rial. You just have to know the historical price swings and buywhen it is cheaper. We do that for you, to help stabilize the price.Sometimes, if you find the market for copper is low, you can buy
59
strip at a better price elsewhere. But generally, the minimum millpurchase will be too much for a lower-volume bullet maker tojustify.
In most cases, if a bullet jacket is selling for eight cents, youcan make it from strip for about five cents. But the custom bulletyou can make from this jacket typically gets another two or threecents worth of lead added, and then sells for a dollar and a half !Typically you would make from 50 to 400 bullets an hour, de-pending on the complexity of the bullet. But let�s say you couldonly manage to complete twenty bullets an hour. Your hourlycost is what you could pay to replace your own labor.
Someone who earned about six dollars an hour would cer-tainly be able to punch the buttons and make the bullets onceyou set up the job and adjusted the process for them. This is beingwritten at a time when less than five dollars is minimum wage. Itdoesn�t require a brain surgeon to run a Hydro-press, once youhave set up a given operation. You just have to come back everyso often and set up a new task.
The one hour labor costs you six dollars, and the materialfor twenty bullets times eight cents each, or one dollar and sixtycents. So the hour�s production cost you seven dollars and sixtycents, and the average price a serious shooter will pay for cus-tom bullets is a dollar fifty each. That means thirty dollars foryour hour�s work. Subtract the seven sixty cost, and your profitis actually $22.40. The return on your investment is 294.74percent!
And you wonder why people become custom bullet makers?What do you get at the bank now, five percent a year? During thehigh inflation times, we used to earn twelve percent on a two-year certificate of deposit. Think of the difference, investing inyourself and your own products! You are the most importantinvestment you�ll ever make, and the most secure, since no oneelse will pay as much attention to it as you will.
You can use gilding metal (5 percent zinc) or commercialbronze (10 percent zinc) like the factories do, but you don�t haveto (and they do). These zinc alloys are a little harder, but they arealso harder to obtain in small lots because they are binary alloyswhich can be made in a virtually unlimited number of alloymixes, grain structures, and tempers. Copper is just one element,and it comes as annealed (dead soft), three-quarter hard, half-hard, and full hard drawn. It comes in a standard and a deep-drawing (non-earing) grade.
60
The non-earing grade isn�t completely free from the little lobesor ears that grow on the edge in a deep drawn tube (like a jacket),but the amount of this waste is minimal compared to standardstrip used for flashing, welding transformer windings, and othernon-drawing operations. An uneven edge is caused by tiny differ-ences in grain or hardness which show up as greatly stretcheddifferences in a deep drawn part. The more uniform the grain,the less earing will occur.
The edges need to be finished, so that there is very little burror waviness in the edge of the strip. If the edges are curled, asthey might be when cut with shears or tin snips, the strip thick-ness appears to be much greater so it won�t feed through the slotin the disk cutting die. If the edge is rough or wavy, it will bedifficult to pull the strip through the guide slot. A die set is madefor a certain width and thickness of strip, as well as a certainmaterial. If we have plenty of your material, we can make specialdies for it. Otherwise, we offer the dies made for our own mate-rial, and cannot recommend or guarantee operation with any-thing else. Fortunately, our material is a standard around the world,so you can get it from hundreds of other suppliers.
When we design your dies, we will also calculate the correctthickness and width of copper to use for the jacket. You can alsodo this with a software program called �DC-CUPS�, available fromCorbin. This program can record specific jacket designs, includ-ing details on every step of drawing, and print out a productionprocess giving all the parameters. You can calculate strip widthand thickness for any jacket, and even design the jacket given acertain bullet weight, style, caliber and shape. The program workswith both strip and tubing.
CU-5 (Copper Strip, 5-lb bundle). Corbin offers copperstrip in two packages. First, you can purchase a five-pound bundleof strip, in pieces cut to 18 inch lengths. We provide our standard.030-thick deep drawing grade pure copper, in a 1 inch width. Ifwe have open and partly used coils of other widths and thick-nesses on hand, from making special sets, then you can purchasejust five pounds of these other sizes. The only one we stock, how-ever, is the .030 inch wall, 1 inch width. This is a very practicaland versatile size, which can be used for Base-Guard disks, gaschecks, half jackets, and all calibers of handgun jackets in lengthsup to half an inch, and the smaller rifle jackets up to perhaps.257 caliber.
61
CU-100 (Copper Strip, 100-lb coil). The second packageis the flat, pancake coil. The most economical weight is the 100pound size, which we stock in several widths and thicknesses.There is a slightly higher price per pound for a 50 pound coil, andwe do not stock this size but can provide it on special order. Largersizes than 100 pounds are difficult to handle, although you canbuy them directly from a copper mill in minimum quantities of500 pounds. The 100 pound coils are a flat, pancake coil with alarge �eye� or center hole, which fits on the Corbin Strip Uncoilermachine (CSU-1) for automatic feed into the press.
I should point out that the CSU-1 can be used with either theautomatic feed die set, or the manual feed set. If you purchaselarge coils, you�ll either need the CSU-1 or something like it touncoil the strip without kinking it, or you will need to chop it intoeasily handled pieces. The whole idea of the continuous coil is tolet you run the blanking and cupping stage in the �unattended�mode, which really means you keep an eye on it but it runs byitself until you have made the desired count of jacket cups. Acounter on the Hydro-press lets you know how many pieces youhave made so far, and the press shuts off when material runs out.
Jacket Maker Kits (JMK-1-S, -1-H, -2-H)
Corbin makes all the tooling you need for any kind of jacketimaginable, from a .14 caliber to a 20mm cannon. The processcan be done in a regular jacket-maker die set, or an automaticstrip feed system that blanks and cups the strip at better than600 per hour, no hand feeding required for the first stage. Bothsystems require handfeeding of the cups into the redrawing andpinch trimming (to exact length) stages. The demand worldwidefor these sets has been overwhelming. As a consequence, we of-ten have delivery times that can be over a year, sometimes overtwo years. This is not always the case, of course, but it has beenin the past and may be again at times (whenever panic sets inbecause of some harsh new ammunition or firearms law). Findout whether we have anything available in stock, or whether ourbacklog of orders is extremely long, before you plan a businessaround the strip jacket making equipment, or schedule a trip tosee it or take it back with you.

62
JMK-1-S (Jacket Making Kit for Series II Press). CorbinCSP-1 presses make up to .5 inch long jackets from .030 inchthick strip. That covers most handgun jackets, and some smallercaliber rifle jackets like the shorter .22, 5mm, .17, and .14 cali-bers. It leaves out the larger rifle lengths of bullet jackets, whichtypically run from .75 to 1.3 inches in calibers below the .50Browning. For these, you need the Hydro-press.
A hand press just doesn�t have the starting pressure at thebottom of the stroke to punch and coin a blank of copper, thendraw it into a deep cup longer than half an inch. Sorry: that�sjust physics. If people were made with 20 foot long arms, thenwe could build hand presses with bigger strokes.
The first stage is a blanking die. You pull the strip of copperthrough a slot, and work the press handle up and down to punchout little disks. The second stage is a cupping die, which turns thedisk into a short, thick cup. The third stage redraws the cup tomake it longer and thinner, and the final stage trims the cup,while giving it the final diameter. Detailed instructions are putwith each set. The specific number of draws and any special strip-pers or punches are specified and explained. These sets are cus-tom tools made to produce the jacket you want, and generally arenot stock items. We may have some in the more popular sizes.
JMK-1-H (Jacket Maker Kit, Manual Strip Feed). Hy-draulic power presses, such as our Hydro-press, have full powerfrom the bottom of the press stroke to the top.
The JMK-1-H is designed for use on the CHP-1 or the CSP-2HHydraulic press. The CHP-1 is designed with electronic sensorsthat can accurately determine the stroke length and the pressure,and can interface with the CSU-1 Corbin Strip Uncoiler. You canset up both pressure and position stops, which will prevent theram from bending the various punches and crushing the pres-sure pad springs used to hold flat strip so it will not fold as it isdrawn into a cup shape. The CSP-2H does not have all the con-trols of the CSP-1 nor does it have automatic pressure transduc-ers, but it does have position sensors, which allow it to be usedsafely with this manually-fed die set.
In the JMK-1-H kit, there are usually four stages, but theexact number depends on the length, thickness, caliber, and taperof the jacket wall. We can build almost anything for you, workingbackward from the jacket you want to get the proper strip widthand thickness. The first stage is a blanking die. It cuts a disk from
63
the strip of copper. You simply pull the strip through a slot in thedie, as the ram goes up and down. Disks, like coins, are punchedout.
The second stage is a cupping die, which has a spring-loadedpressure pad around a punch. The disk is put into the die face, ina recess made to hold it. The pressure pad is run up against thedisk, and it holds the disk by its edge while a punch travels up anddraws the disk into the die, pulling it from under the pressurepad. This keeps it from folding or bending.
A third stage redraws the short, thick cup into a longer, thin-ner jacket. This stage could be the final one, for short jackets. Orit might be repeated one or more times for longer and thinnerones. Until we know precisely what dimensions your jacket is tohave, we cannot say how many steps it will take to make it.
The last stage is a combined draw and trim. The jacket isreduced at least twice its wall thickness, while a punch that justfits into the die at one point, and has a tip that fits inside the -drawn jacket, pushes the jacket through the die. When the shoul-der of the punch comes to the die mouth, it shears off the jacketat that length. One length of jacket can be made per punch. Ad-ditional punches can make shorter jackets from the same start-ing point.
Each jacket maker kit is designed around one specific caliber,wall taper, and length of jacket made of a specific material. Itmay be possible to change the final draw and trim punch, tomake shorter jackets, provided the trim is in a portion of jacketthat is under about .030 inches in wall thickness. Thicker wallsections are very difficult to pinch trim. This means that a straight-walled .050 inch thick wall jacket may have to be drawn near themouth to less than .030 inch wall thickness in order to trim itevenly (or else, you would have to arrange for some other trimmethod). In this example, it would be unlikely you could make ashorter jacket simply by changing a die or punch, because theinitial starting blank thickness and width would be designed toresult in a heavy walled jacket of a given caliber and length.
However, if you were to make a .458 rifle jacket that taperedor had two different wall thicknesses, say .050 inches for half itslength and then .030 inches tapering down to .015 inches at themouth, this could be pinch trimmed fairly easily in the taperedsection to almost anything you wanted, just by buying additionalpinch trim punches for each length. So, you can see that jacketdrawing equipment is not easy to design and may be difficult to
64
modify, or quite easy, depending on what kind of jacket dimen-sions it is originally made to produce, and what kind of modifica-tion you intend. Sometimes you can draw down an existing jacketto smaller calibers, longer lengths, and thinner walls just by add-ing a stage or two to the operation.
This may result in two or more practical jackets from thesame die set. But don�t count on it in every case! If you initiallybudget one complete die set for each length, each caliber, andeach wall taper or thickness, you may be pleasantly surprised tosave money by using fewer tools to achieve a few of the differenteffects. But if you count on using one die set for a wide range ofjackets, it might not be possible, and then your budget would beshot, your plans ruined and your dog might hate you, too.
We�ll let you know any time we see a good way to save moneyby using any of our tools for multiple purposes, and ask if youwant to change your order to accomplish that. As I said earlier,your success is what builds our future, too, and I�d rather take thelong view and save you money now so you�ll be a bigger successtomorrow and buy more equipment from us when you need to.
JMK-2-H (Jacket Maker Kit, Automatic Strip Feed). TheHydro-press has special plugs and screw holes made so that youcan install this rather amazing contraption. It has a jacket con-veyer belt with a motor, a lubrication roller system to put lube onthe strip, a roller-cam hitch-feeder, and an interesting kind ofblanking and cupping die all combined into one unit. The jacketmaterial is automatically fed in, lubricated, blanked into a coin,drawn into a thick, short cup, and carried out into your con-tainer, ready for redrawing to a longer, smaller diameter jacket.
The CSU-1 Corbin Strip Uncoiler is used with this system toprovide a steady source of material without undue drag on thefeed. The uncoiler is controlled by the amount of sag in the strip,which loops from the 100 pound coil to the press head over a sixto eight foot distance. A separate sensor stand has upper andlower limit switches that detect when the strip is pulled snug. Theupper limit switch then trips, turns on the uncoiler for a brief,quiet partial turn, feeding out a few more inches of strip. Thislets the strip sag until it trips the lower limit switch, and stops theuncoiler. It�s fun to watch this run, because it is almost silent andseems to anticipate the needs of the press.
65
Without this device, you would have to devise some otherway to keep the hitch feed from lifting or pulling more than apound or two of resistance. Otherwise, you would not have reli-able feeding, and the die or punch assembly might be damagedunless you cleared the partially cut disks before another strokemashed the parts together. The press is also controlled by thestrip feed, with a sensor that detects the metal�s presence andshuts off the press when the strip begins to run out.
The JMK-2-H consists of three separate parts that you canuse to mix and match with other calibers in some cases. Theautomatic press head assembly can be used with any caliber orsize of blanking and cupping die set. It is the hitch feed, striplubricator, die holder, and all the other general machinery thatmakes the system work, except for caliber-specific dies themselves.The blanking and cupping die might also be used for several cali-bers, and can be changed separately from the head assembly. It ismade for a certain width and thickness of material, which will bedrawn down to make a certain caliber, taper, wall thickness, andlength of jacket.
Each jacket has one blank diameter and width that maxi-mizes the use of material. But often, there are other calibers youcould make with it. A short, heavy walled jacket might be pos-sible in a large caliber, such as .45 ACP, using the same strip thatmakes a longer, thinner, but smaller diameter caliber such as the.308 rifle. I can�t publish a table here that shows what is possible,because all the various parameters make it too complex. Whenwe make a jacket maker set, it is designed for one specific jacketonly. Then, after that is working fine, we try to figure out if theremight be some other useful calibers in certain lengths and wallthicknesses that could be gotten with the same blanking and cup-ping die, by using different redrawing and trimming dies. Youcan purchase the DC-CUPS software program (for any MS-DOS orWindows compatible computer with a hard drive) to calculate allthis and much more, including costs of jackets, and recordingand printing the operation steps for making any jacket.
The redrawing and pinch trimming dies are the same in theJMK-1-H and the JMK-2-H. In fact, you can add the automaticfeeding die head assembly and the blanking and cupping die thatfits it, to an existing JMK-1-H set, to create a new JMK-2-H set.That�s the same as saying you can upgrade the manual jacket
66
maker just by adding the head and first stage die assembly (whichis a significant part of the total price for the auto-feed jacket-maker kit).
You can also buy just the redrawing dies or final pinch trimdie, if your particular jacket set would be practical to convert intoanother caliber (we have to figure that out on a case by casebasis). And finally, you can buy just the final pinch trim punch tomake shorter jackets (but not longer ones) than the main designcalled for. Generally speaking, you would want to plan for onecomplete JMK-2-H set for your style of jacket, and then just thedies (both the first stage and the redraw and trim dies) for anyother jackets. If we get lucky, maybe some of the jackets can bemade using the same original strip width and thickness, whichmeans you don�t need another first-stage die. I hope that isn�t toobadly explained. Just think of the pages I�d need to write to ex-plain how the factory 12 station jacket maker press works! Thisone only has from three to six steps, typically four steps, depend-ing on the length and thickness and caliber of jacket.
There is a special liquid lubricant that we provide for theautomatic lube system on the JMK-2-H. This lubricant feeds froma glass reservoir down onto felt roller wheels, which in turn applya film of lube to both sides of the strip. This is necessary to main-tain the die life and reduce sticking. I can�t tell you how long a setof dies will last because we have not been making them for enoughyears.
So far, none of them have worn out. If the punch wears outat the shoulder after five or ten thousand bullet jackets, I wouldnot be surprised. I do consider pinch-trim punches to be more orless a consumable item, considering the tremendous strain ap-plied to their edge. No, I can�t make them out of �carbide� be-cause any of the carbides that are significantly harder are alsomuch more brittle and would pop off like an icicle. We do workwith exotic coatings, which are a trade secret. Let�s just say thatthere are heat-cured dry film and penetrant compounds whichwill do far more than carbide to extend die life.
Corbin publishes a manual called the Guide to Jacket Makingwhich is incorporated into the larger book, World Directory ofCustom Bullet Makers. If you are interested in manufacturing jack-ets from tubing or from copper strip, you would benefit fromreading it. The World Directory also lists wholesale suppliers of

67
copper and lead, custom bullet makers from around the world,and has a wealth of information about the commercial aspects ofcustom bullet making.
68
6. Base-Guard BulletsYou can swage bullets without jackets, using just the lead, or
you can swage jacketed bullets, but there is a kind of hybrid de-sign that reduces the cost and increases production speed whileextending the usable velocity range beyond that of a lead bullet.In fact, this special design, called the �Base-Guard�, lets you shootpure, soft lead bullets at up to 1,400 feet per second withoutfouling the bore, without using any lubricant whatever, and evencleans fouling from your bore as you shoot!
Years ago, the Harvey Prot-X-Bore bullet stirred up some mildinterest because it made similar promises. The bullet was a plainlead pistol slug with a zinc washer swaged to the base. The leadwould extrude through the hole in the washer, and form a rivethead by flowing into a larger diameter, shallow dome-shaped cav-ity in the face of the base punch.
We made many of these die sets for clients, but I was neverconvinced the design worked as well as some people claimed. TheNational Rifle Association tested it at least twice and both articlesconcluded that there was no difference between using the zincwasher and shooting a plain lead bullet. Both fouled their bores.But people kept buying the zinc washers and dies, so someonemust have had good luck.
Shooters don�t generally keep doing something that doesn�twork, yet I was not having much luck with it. So, with the helpof several relatively famous shooting friends, people who set worldrecords and were serious about their bullets, I conducted a longseries of experiments to find out whether the zinc base bulletsreally worked or not.
I found out, after thousands of rounds, that zinc itself haslittle to do with the fouling or not fouling. Aluminum, sheet steel,brass, copper�all of these materials would work, or not work,equally well. It all depended on two factors. When both wereright, the washer bases worked wonderfully, making it possible toeliminate the jacket and build bullets that kept the barrels clean,at very low cost and at high speed. When either one was absent,the idea was a miserable failure with fouling that just about pluggedthe bore!
Here are the two factors. First, the washer or disk has to beprecisely the diameter of the bullet. Even a ten thousandth of aninch undersized is too much. At the pressure developed by even
69
the lower powered handguns, lead will flow back under the diskunless the disk fills the barrel to the very bottom of the riflinggrooves.
When I measured the zinc washers (which are stamped outof sheet zinc in a high speed punch press), I found variations ofup to 0.002 inches! That is twenty times greater than the mini-mum required to work! But once in a while, I found a short runof zinc washers that actually measured a little oversized, or per-haps right on. Those worked, provided the other factor was present.
The second necessary design factor to make the washers scrapeall the fouling from the bore on each shot, and eliminate the needfor lubricant, is that the washer must have both a sufficient thick-ness and strength to resist bending under the drag force on itsedge as it speeds along the bore, and at the same time it musthave a sharp, burnishing-tool kind of edge facing forward to sealand scrape fouling out.
If the edge is rounded, or if the material is thin enough tobend backward under the stress of firing, the lead will flow underit, and be smeared along the bore, filling the rifling with fouling.But when the diameter is perfect and the edge is sharp, and facingforward, a thick enough disk will work wonderfully, making anastounding bullet that is cheap, fast, easy to build, and that workswithout the need for any lubrication, at least up to the speedwhere the material is bent back from drag and inertia and effec-tively quits presenting its scraper tool edge to the fouling.
The metal did not matter. We used barn siding, tin cans, shimstock brass, and copper jacket material as well as zinc. In fact,copper seemed to work better. The main thing was the difficultyin holding such tight diameter tolerances on a low-cost part. Thehigh precision disks were just too costly to make, but they workedfine. They worked better than a half jacket on handgun bulletsand on .45-70 rifle bullets.
So, the problem was how to make them almost perfect zerotolerance diameter and also how to form the sharp edge withouta lot of expense. We had plenty of copper strip, which was mucheasier to work at high accuracy than zinc. The disks were comingout of our simple disk-punching die set with a little cone shapebecause we combined the center hole punch with the cookie-cutter punch. First the little pin punch would poke a hole aboutone sixteenth inch in diameter through the strip, and then therest of the punch would come down against the strip and punchout the correct diameter for the caliber.
70
Except, as I said, the disks came out slightly cone shapedbecause the force of the little pin punch bulged the strip into themuch larger caliber-sized die hole. We almost tossed out this ideafor the disk-making die, but on second thought, we realized thatif the disk were cut slightly oversized and it were made a coneshape, the diameter would effectively be reduced so it would eas-ily drop into the swage die. But when pressure flattened the coni-cal disk again, it would grow back to original size! The die wallwould stop the growth, and any extra material would be forced toextrude forward, into the soft lead bullet, just below the edge. Theother side would be backed up by a hard steel punch, blockingany extrusion in that direction.
By accident, we had the answer! Just make the disks conicaland slightly over caliber before the cone shape is applied. Then,the cone will drop into the die, grow to full diameter plus a bur-nishing tool edge, and there will be absolutely zero tolerance be-tween the diameter of the bullet (the lead part) and the diameterof the base disk! It could be no other way: both parts receivedtheir final diameter from the swaging action, within the samedie, at the same moment.
A second benefit was that the disks would work in a slightlywider range of calibers. A disk made for the 9mm pistol wouldalso work in a .357 Magnum, and a disk made for a .45 ACPwould grow enough to fit a .458 or a .45-70 (which has a grooveto groove diameter about 0.006 inches larger than the pistol).The .41 caliber disks worked fine in our .40 caliber barrels. Andthey all worked amazingly well in nearly every gun, provided thebore was in good shape and the bullet diameter was either exactlygroove to groove or slightly larger.
My friend Jim Crane, who used to market our Bore Cleanerand introduced me to Metallic Silhouette Pistol shooting, and is aworld record shooter in that game, used a .44 Magnum pistolwith full loads in a match, with these Base-Guard bullets. Afterthe match, he said the bore was just as clean as before it started.That was years ago, of course. Now, thousands of shooters areusing the Base-Guard bullet. It has been to regional, national, andinternational competitions of all sorts, including Practical Pistolmatches of every flavor.
One of the special advantages of using no lubricant is thatthere is no puff of lubricant smoke, which means that the Prac-tical Pistol shooters don�t have to try for double-taps while look-

71
ing at an obscured sight picture on the second shot. When youare firing two shots that come so fast they sound like one, lubri-cant smoke can be a problem.
The big advantages of the Base-Guard are that you can makethe bullet in one, or at most, two, strokes of the press, and thecost is almost the same as a cast bullet without the disadvantagesof lubricant, extra handling, hard lead alloys, and rejects. I havepersonally made four hundred bullets in just under an hour, in-cluding cutting the lead wire, swaging the bullets and making theBase-Guards! This was for a match, so they had to be loaded inthe next hour.
Base-Guards are superior to gas checks and half jackets inthree ways. First, they cost less, usually about half the price ofgas checks and a fourth the price of half jackets. Second, theyturn with the rifling on their central axle instead of being pinchedagainst the bullet, so if the bullet slips in the rifling, the Base-Guard keeps tracking and seals the gas. Third, they scrape foulingout of the bore, instead of ironing over it again and again.
Gas checks and half jackets rub more lead on the bore andthen pass over it with the smooth side of the copper. Base-Guardsare like a tool bit, presenting their sharp edge to the fouling andmachining it off like a lathe bit. Try turning a lathe bit sidewaysto the work: that�s how a gas check looks to the fouling plasteredalong your bore!
If you use preformed Base-Guards, which we offer in bags of1000 at a very low cost (barely more than the cost of material tomake them), you can turn out up to 500 bullets an hour. Or, youcan use .030 to .040 inch thick copper strip and punch out theBase-Guards yourself, using a BGK-1-M, or BGK-1-H Base-Guardkit (the -S type doesn�t exist because it would be identical to the -M, since the die fits into the press head and must be the same sizefor either the Silver Press or the Series II press).
BGK-1-M (Base-Guard Kit, type -M)
The Silver Press or the Series II vertical steel press both canuse the -M type die for making Base-Guard disks. This tool is athreaded die with a slot cut more than half way across one end.The section below the slot is closely fitted to a punch. The punchscrews into the press ram. You would use it by stroking the ramup and down only enough to move the punch past the slot andback down to let a piece of copper strip pass through.
72
As you stroke the ram up and down this short distance, youwould advance the copper strip through the slot, always makingsure that you bring the last hole past the edge of the punch beforethe punch comes up and cuts out another Base-Guard disk. Thedisks begin to come out the top. There is no type -S because itwould have to be identical to the -M.
BGK-1-H (Base-Guard Kit, type -H)
This set is similar to the -M type, except that it is made witha longer stroke and somewhat tougher components. Both diesscrew into the press head from the bottom, up. This is just theopposite of most kinds of dies that fit the press head. The threadspoint UP, not down. The slotted end of the die faces the ram.
You can set up a short, automatic stroke operation in theCHP-1 Hydro-press, and slow the ram travel to a comfortablecycle rate with the flow-rate throttle. Just turn the knob to get anup and down cycle which gives you plenty of time to move thestrip to the next position. Keep your hands away from the movingpunch and wear tough leather gloves to avoid being cut on theedge of the strip (it is rare, but could happen).
BGK-2-H (Automatic Base-Guard Machine)
If your custom bullet business involves Base-Guards, you maybe interested in obtaining one of these high speed productionmachines to make the Base-Guard disks. This is a very specializedmachine, which only makes Base-Guards, but can be tooled up tomake almost any caliber.
The BGK-2-H uses a CSU-1 Corbin Strip Uncoiler to handlethe 100 pound coils of 1 inch width, .030 inch thick copperstrip. It lubricates the strip, feeds it automatically, and punchesout from one to four disks at the same time, depending on thecaliber. You can set it to make a certain number and stop. It willautomatically stop when the copper runs out. Sensors detect thepresence of strip in the feed mechanism.
A second, optional CSU-1 can wind up the punched strip sothat you can sell it as a secondary product (in some cases: not allcalibers provide an efficient pattern of holes that leaves enoughweb for coiling strength in the scrap). Copper strip punches fullof holes makes great grounding strap for lightening protection,radio towers, microwave relay stations, and other electrical ground-
73
ing applications. It is light and carries a great deal of current, andcan be fastened easily by any number of means including embed-ding in construction materials.
The BGK-2-H comes with one set of dies in your choice ofcaliber. The CSU-1 is optional, but either it or something just likeit is necessary for reliable automatic feeding. Additional dies canbe obtained in virtually any caliber from .224 to .58 Minie. Themost practical calibers are the .25 ACP to .45 Auto, and the .45-70 Rifle. The BGK-2-H is built using similar components to theCHP-1 Hydro-press, but it uses a smaller and faster cylindermounted on top of the press head, rather than a large drive sys-tem below. It cannot be used for anything other than makingBase-Guards, washers, or disks. But it does that job exceedinglywell and for a very reasonable cost.
Production rates range from about 1,000 to 4,000 parts perhour, depending on the number of punches that will fit acrossthe strip in a diagonal pattern. Special versions using wider stripand more stations can be made, for an additional cost. The pressis available with both 120 volt 60 Hertz single phase (standardUSA household current) power, and in a 240 volt, 50 Hertz singlephase export version.
Base-Guards offer an attractive alternative to both hard castand lubricated bullets, and to gas checks, half-jackets, and evenfull jackets when used at velocities up to 1,400 FPS. The bulletsare quick to make, much faster than casting. They are precise,especially if you double swage by either making the core in aseparate CSW-1 core swage die and then forming the nose andapplying the base in a CS-1 core seating die, or else by first swag-ing the core without a Base-Guard in the LSWC-1 die, then drop-ping in the Base-Guard and applying it in a second stroke.
You can add the Base-Guard option to any of your existingsets of dies, just by ordering the appropriate base punch. Andreally, the Base-Guard punch does no harm if you use it for leador conventional jacketed bullets: the only difference is that yourbullet will have a little round bump projecting from the very cen-ter of the base, which only serves to identify your bullet and hasno other effect.
Here is what you would need to order, if you want to add theBase-Guard capability to any set of dies:

74
For any LSWC-1 set (Lead, Semi-Wadcutter single die), youwould want (1) PUNCH-M (or -S, or -H depending on the die),Internal, BG, and specify the diameter. If you have a .45-70 paperpatch swage die, or any other die where the diameter is not thesame as the caliber (since paper patched 45 caliber bullets areusually swaged at .448 inch diameter), be sure to specify theactual diameter, not the caliber!
For any JSWC-1 set (Jacketed, Semi-Wadcutter two-die set),you would want (1) PUNCH-M (or -R, -S, or -H), Internal, BG,and specify the diameter.
For any FJFB-3 set (Full-jacketed, Flat Base three-die set), youwould want (1) PUNCH-M (or -R, -S, or -H), Internal Core Seat(CS), BG, plus (1) PUNCH-M (or -R, -S, or -H), External PointForm (PF), BG. Whenever you apply the Base-Guard in the coreseater and then shape a smooth ogive in the point former, youmust use a matching base punch for both dies, or the little rivethead will be smashed flat and made less effective at retaining theBase-Guard.

75
7. Draw DiesDrawing dies have a hole all the way through, and they fit
into the press head. You push a jacket or a bullet through them,in one side and out the other, to make the part smaller in diam-eter. Since the die screws into the press head, there is really nodifference in the 7/8-14 threaded die body for type -R or type -Msets (and type -S is not made since it would be identical to type -M). The only difference is the punch, because a reloading press (-R) uses a T-slot ram and Corbin presses use threaded rams (5/8-24 TPI for both the Silver Press -M and the Series II Press -S).
There is no -S category in draw dies. Use the -M for both. The-H dies, however, are different. There is more stroke, more power,and a longer alignment section. Also, we utilize tougher materi-als that stand up under the greater force and speed possible. Youcan adapt a -M or -R draw die to a Hydro-press, but it is not aseconomical as it may seem because of the possibility of breakageand less efficient use of the available stroke for alignment andguidance of the components.
JRD-1-R, -M, -H (Jacket Reducing Dies)
A way to produce special jackets is to draw down an existinglarger caliber of jacket to produce a smaller diameter, longer jacket.This method is often used to make some of the less popular cali-bers, or to make heavy-walled .224 jackets by drawing down a.243 jacket. Jackets can be drawn to the next smaller caliber inone pass (generally speaking�there are always some exceptions).
A .45 caliber jacket can be made into a .44 in one stroke. A.44 can be made into a .41 or .40 caliber. By making severalreductions in sequence, a .30 can be made into a .284, .270,.264, or .257 jacket. Each reduction makes the jacket longer,smaller in diameter, and tends to make the jacket wall somewhatthicker up to the limit of the base material itself, since it pullsbase material into the wall area.
If you want to draw the jacket down at least twice the wallthickness, you can use a special jacket drawing set that pinchtrims the jacket to shorter lengths. You cannot pinch trim thesame diameter. The pinch trimming die set uses a stepped punch.The tip of the punch fits inside the jacket after it passes throughthe draw die, but the larger diameter only fits inside before the
76
jacket is reduced. The larger diameter portion fits through thering die snugly by itself, leaving no room for the jacket walls, andthe jacket is thus pinched off as you push the punch on through.
There is a special die set called the ET-2-M (or -S, or-H) whichexpands and then trims off the expanded portion of the jacket.This gives the effect of pinch trimming at the same diameter,since you start with the same caliber you eventually have at theend. But in reality, a die and punch are first used to swell up thepart you wish to cut off, so it is large enough that another punchwith a shoulder can fit inside it, and then only the shoulder alonecan fit through a matching ring die, shearing off the jacket mate-rial. This set cannot be used with extremely thick jackets, be-cause the force and shear angle become too great. If you need totrim a piece of virtually solid copper, use a saw or lathe.
A ring of jacket material is left on the punch when you pinchtrim a jacket. It can be pushed off during the return stroke byusing a disk and tube ejection system. The disk is a large diameterwasher that fits over the larger diameter portion of the punch.The tube fits around the press ram loosely. When the ram is re-tracted, the disk is drawn back with the punch until it is stoppedagainst the top of the tube. The ram continues back, forcing thecut part of the jacket off the punch. This ejection method is alsoused in the .224 and .243 rimfire case jacket maker dies, to pushthe formed jacket off the punch.
Drawing is the opposite of swaging. People sometimes askabout �swaging down� a bullet to make a smaller one. That iswrong. Making something get smaller is called �drawing�, and itis done by pressing the jacket or bullet through an annular die (a�ring die�, we call it). The part goes in one side and pops out theother, where it springs back slightly larger than the hole size.
We need to have sample material to draw down if you wantthe parts to come out precisely, since different materials and lotswill spring back a little different amount. Swaging always ex-pands a smaller component to become larger. If you try to push alarger bullet into a closed swaging die with a hole even slightlysmaller than the bullet, you�ll make it stick in the die. The mate-rial wants to spring back toward original size, so if it was origi-nally larger than the hole, it will keep trying to grip the die walls.
On the other hand, if you do it right and use a componentsmaller than the hole you are about to shove it into, it will go ineasily, expand under pressure until it hits the die walls, and assoon as you relax the pressure, the component will spring back
77
slightly toward its original smaller diameter, releasing its grip onthe die walls. In a drawing die, you can apply a lot of pressure tothe full diameter of the bullet, or to the inside diameter of thejacket, and push it right on through, even though it is trying togrip the die walls. In a swage die, especially a point forming diewhich relies on a tiny ejection pin, this isn�t possible.
BRD-1-R, -M, -H (Bullet Reducing Dies)
Now, you won�t be one of those who try pushing a .323bullet into a .318 swage die, will you? Instead, you�d get a BRD-1Bullet Reducing Die (a ring die) and DRAW the bullet by shovingit through the hole, which is probably a .3165 or .31754 hole,depending on the amount of springback in the particular bulletused to make and adjust it.
You can draw down existing bullets, but only within verysmall limits: if you try to reduce an existing bullet more thanabout 006 inches, the amount of lead you are moving becomessignificant enough to materially spoil the accuracy and looks ofthe bullet, and the stresses in the jacket material will begin tocause serious �banana-shape� distortion.
This means making a 9mm (.355 inches) bullet from a .38(.357 inches) slug is easy and practical, while making a .41 cali-ber from a .44 caliber (.429 inches) gives miserable results. Apractical limit is making a .318 inch diameter 8mm bullet fromthe modern standard 8mm of .323 inch diameter.
There is a huge difference between drawing a jacket, anddrawing down a bullet. A jacket is just the empty cup. You put itover a punch, and shove it through the die by pressing on theinside of the base, so it is drawn over the sides of the punch. Youcan reduce a jacket by at least two or three times the wall thick-ness, easily.
Don�t confuse the .006 inch reduction limit for bullets withthe vastly larger potential reduction for bullet jackets. Also, likemost things in life, this rule isn�t written in stone. Some few bul-lets with nice soft jackets and room for the lead to go into a hol-low cavity or base can be reduced more than .006 inches But youare asking for trouble if you want to do that as a general rule.What might work sometimes on a particular experiment, mayfail almost all the other times with other materials. What works afew dozen times during limited trials may fail in long term usebecause of unexpected wear or slight changes in the materials
78
due to normal tolerances. Perhaps what works in one specificinstance only worked because the materials were exactly right. Itmight not be so easily repeated.
This gets some people into trouble: just because somethinghappens to work one time, they think it will work in every in-stance. Not just in bullet swaging, but in hunting, this is a com-mon mistake. A fellow takes a big elk with a .243 target bullet,and from that day forth he is convinced that a 6mm is big enoughfor game the size of an elk, and that there isn�t any problem usingbullets constructed for target shooting, with their thin jacketsand non-bonded cores, on noble game. Sure, you might do it once.But the odds are overwhelmingly in favor of wounding the ani-mal and having it get away.
In swaging, if something works that maybe shouldn�t have,then that�s a reason to carefully experiment and find out why. It�sbad judgement to assume it will always work in every instance,especially if others who have spent years in the field are dubious.You may have found something new, but try it on several cali-bers, styles, and materials before you count on it always working.
Drawing down bullets is certainly one area where you canfind all kinds of exceptions that work, but only because the mate-rial, hardness, and style are just right in a particular instance.Corbin will make tools for you to your specifications, against ourown advise and experience, provided you take responsibility ifthey don�t work. If we design and recommend the tools, then ofcourse we guarantee they will work.
Draw dies for the Hydro-press (type -H dies) are more sophis-ticated and can produce results that may not be possible in ahand press. The long stroke and great power of the Hydro-pressgive us room to build special guide sections, finger-strippers andejecting punches that won�t work on a hand press. In drawing,full power is generally required at the start of the stroke, not justat the end (as with most swaging operations).
Since nearly all the hand operated presses have about half aninch of extremely high pressure travel toward the end of the stroke,and progressively lower pressure as you retract the ram, it followsthat drawing operations which may require high pressure over alonger travel than half an inch may not be practical in a handpress.
RFJM-22 -R, -M, -H (Rimfire Jacket Maker, 224 caliber)
79
One of the most popular tools we�ve ever made is the RimfireJacket Maker set, which turns fired .22 cases into excellent jack-ets to make .22 centerfire bullets. You�ve probably read about thisbefore. RCBS, Speer, Hornady and many other firms got their startby doing just this. You can do it today, and with the price ofbullets, it is more popular than ever.
Fired .22 short cases make great 40 grain Hornet jackets.Fired .22 long or long rifle cases make the standard .705 inchlong 52 to 60 grain open tip or small lead tip bullets for all flavorsof centerfire .22 cartridges, from the .222 to the .225. Manyshooters don�t realize that all modern .22 caliber centerfires, in-cluding the 5.56mm, actually use the same diameter barrel (anominal .224 bullet size fits them all).
The .22 high velocity loads such as the �Stinger� use a caseslightly longer than the standard long rifle, which will produce alittle heavier bullet. You can make 65 to 70 grain .224 bulletsusing these for jackets.
The process is simple. You wash the fired cases to removegrit. I like to boil them in a mixture of water and some detergent,plus a little vinegar to help restore the shine. Then, I pour off thewater, and spread the cases out on an old cookie sheet. I fire upthe kitchen oven and heat the jackets quickly to drive off thewater.
Shortly, I have a tray full of clean, dry cases. I take them out,and put the jacket maker die in my press. The die itself is thesame for both reloading presses and for our Silver Press or SeriesII press. We don�t make a -S version, because it would be identicalto the -M type in every way. The -R differs from the -M versiononly in the punch.
In the reloading press, the punch has a T-slot head or button,like a shell-holder. In the -M version, to fit our two hand smallerhand presses, the punch has a kind of die body attached thatscrews directly into the ram. The die screws into the press headin all versions.
There is a tube with a disk attached to one end, and a holethrough the disk that just slips over the punch. This is the ejectordisk and tube, which slips over the ram. If your press does nothave a ram that will fit inside this 1-1/8 inch tube, such as a bar-type or progressive press, it won�t work for making jackets in thisway. You are a bullet maker now, and you should have a real
80
bullet making press! Put the disk and tube assembly over thepunch, with the open end of the tube pointing down toward thepress frame.
Use a little Corbin Swage Lube on your fingertips and give thepunch a quick wipe of lube, then pick up a case and put it overthe punch tip. Adjust the die so it is very high in the press threads.Raise the ram carefully. The rim of the case should just barelystart to go into the die as you reach the end of the ram stroke.
Lower the die until this point of adjustment is reached, andthen lower it just another quarter turn or less. Lower the ram, asnecessary to adjust the die, and then raise the ram. Little by little,you should be finding the point where the rim is ironed out cleanly,leaving no ridge behind.
When you find this point of adjustment, you have two choices.Either you can process all your cases at this setting, at whichpoint they will probably stay on the punch and be ejected by thetube and disk assembly, or you can adjust the die carefully so thatthe jackets (they are turned into jackets now) will come all theway through the top of the die on two or three strokes (pushed upby the two or three cases that follow).
Do not operate the press with the die so low that it takes allyour effort to push the cases through! This is not necessary andwill only strain your bench mountings and your patience. A firmone hand push will do the job, if you settle for processing in twopasses, one to iron out all the rims, and then a second with thedie adjusted lower, to push all the cases through one after an-other. Or, a firmer one hand shove will get them through in asingle pass, but only if you find the exact point where one casewill push the next one without mashing the mouth.
These little jackets represent a lifetime of free components,so it is worth spending a little time to learn the fine points. Onceyou have drawn the jackets, you may have to anneal them. Onefine point is that the annealing temperature can be critical. If youmake a wide open tip or a large lead pointed bullet, you may nothave to anneal at all. But if you try to make a small open tipbullet, or even a small lead tip, you may find that the end of thebullet folds over with a little flap of metal instead of drawing to asmooth curve.
This is a sure sign that the jacket material is not annealedsufficiently. Actually, annealed may be the wrong word becausethat implies a dead soft condition. You can just soften the brass toa lesser degree, more of a stress relief heat treatment. If you do
81
get it dead soft, that is fine. But if you overheat the cases, theywill turn discolored and may become rough on the surface. Youcan always heat them a little more, but you cannot undo thedamage from overheating. Some people use a tuna can floating ina molten lead pot to hold the cases for annealing. I like to use theself-cleaning oven, or a propane torch with one of those fishtailflame spreaders and just heat the cases until they are barely redin a dimly lighted room. It only takes a few seconds to get themthat hot. You can do a small group of twenty or so at one time.
You can try skipping this, but make one bullet all the way tocompletion before you seat all the lead cores in those jackets: youmay find out that you need to heat a little more. If that happens,your seated cores make it harder to do (but not impossible).
If you find that the jackets have circular rings in the shankarea, like badly-made cannelures, this is a sure sign that you haveoverheated the cases to the point where they are rough and deadsoft. Then they will not have enough strength to resist folding likean accordion against the pressure needed to shape the ogive ornose. This kind of folding usually happens in the point formingoperation, as does the flap of metal that folds at the ogive whenthe jacket is too hard.
Sounds tough, eh? Too soft, and the shank gets rings in it.Too hard, and the nose folds over. But there is quite a wide rangebetween those extremes where the bullet forms very nicely, withbarely any suggestion of the little fold lines you would see on allcommercial spitzer bullets (less so on round noses) if they werenot polished out in a tumbler before being boxed. The ogive curveon the spitzer shaped bullets brings the metal close at the tip andthickens it, and it tends to develop lines that look like scratchesbut are actually folds. This is normal, but not commercially at-tractive. So, commercial bullets are polished to remove or bur-nish over this minor cosmetic flaw, and you don�t see it. (If youinspect the bullets very closely, you may in fact see some remain-ing signs.)
A jacket drawing die is also the second die included in a set ofcopper tubing jacket makers. In this case, the die is made to re-duce the standard diameter of the tubing after you have roundedthe end of the tube in the CTJM set�s first die (the �end roundingdie�). There is a limit to the amount of reduction that can bedone in one step, based on the pressure it takes to unfold therounded end of the tube (since the draw die�s punch presses onthis rounded end from the inside, to push the tube through the

82
draw die). There is no specific number for the reduction possible.It depends on many factors, such as the wall thickness of thetubing, the hardness and grain structure of the particular lot oftubing, and the angle and polish of the die surface. Reducing diesare designed partly by experience and partly by testing and ad-justment for your particular set. Arbitrary changes may not work:only the reduction which has been tested is guaranteed to work.
83
8. Making Lead CoresLead is the most commonly used core material for bullets.
What is a core? We call the material that fills up the jacket a core,but even if you don�t use a jacket, the piece of lead that will formthe swaged bullet is also called a core. Swaging requires that youprepare the core so that it will fit inside the swage die. You can�tshove a huge billet of lead into the die, of course, but you canmelt the lead and cast it in a multi-cavity �core mould� to formthe right diameter and length of ready-to-swage cores.
You can purchase lead wire in 10 pound spools, LW-10, fromCorbin in sizes from .125 to .390 inch diameter, or you can ex-trude your own wire with Corbin�s equipment. Lead wire is by farthe most convenient and time saving way to produce bullets. Iteliminates all of the risk from hot lead. All you do is chop the leadwire into the correct lengths using a tool called a �core cutter�.
You do not need to cut the cores which are cast with a coremould, because core moulds are designed so that you can adjustthe length of the core as it is cast. Core moulds let you take ad-vantage of existing supplies of scrap lead, provided it isn�t toohard for the kind of swage dies you have. Any hardness of leadcan be swaged, but you need type -H dies for alloys over aboutBhn 10-12 hardness to avoid die breakage. Generally there is noadvantage to a hard lead for swaging, because swaging gives youso many other ways to eliminate bore leading.
Corbin makes two kinds of core moulds, and two kinds ofcore cutters. For diameters of cores in the range of .185 to .365inches, the CM-4 four-cavity adjustable core mould can be used.In this same range of lead wire diameters, plus diameters for thesub-calibers (.14, .17 and .20 caliber) which use .105 to .125diameter wire, the PCS-1 Precision Core Cutter is recommended.The PCS-1 handles the range from .125 to .365 without anyspecial parts.
Corbin core cutters mount to your bench, so that the leadwire is fed straight down, into the top of the cutter. A stop screwis adjusted to stop the wire at the desired projection below theshear line of the cutter. This is what gives you the desired coreweight (plus a little for final adjustment in the core swage die orLSWC-1 die�usually 2 to 5 grains more than desired weight isenough to assure a good final weight control).
84
Core cutters quickly shear the lead as you feed it down intothe device and move the handle back and forth with the otherhand. Usually it is easiest to cut about eighteen inches of wire, orwhatever amount will stand up straight in the air without sag-ging over to one side. Then insert this length into the cutter andlet gravity feed it down as fast as you can chop off pieces. Agentle support with one hand is usually all it takes to give goodfeeding. You can also mount rolls of lead on a simple pipe stand,so they feed down into the core cutter and lengths can be pulledoff quickly.
If you prefer to cast your lead cores, the CM-4 four-cavitycore mould can be adjusted for any practical weight of core bysetting the displacement of four pistons in their matching, honedsteel cylinders. It is rather like a straight-line automobile engine:the sprue cutter is a long handle similar to the engine head; thefour pistons slide up and down inside of matching cylinders toeject the cores as soon as you rotate the sprue cutter to one side;the cylinders are held firmly in a block with a long mountinghandle, in the manner of a car�s engine block. The pistons restupon a �rest plate� which in turn is supported by two threadedrods, but loosely, so it can move up and down. There are two pairof nuts on each of the rods, which form a stop that adjusts theposition of the rest plate in the down position. This sets the pis-ton displacement, which in turn sets the weight of lead core youwill make in each cylinder.
The CM-4 core mould mounts to your bench with two screwsso the pistons and cylinders hang over the edge. I like to mount iton a short piece of two by four wood, and clamp this woodenblock in a bench vise so the mould is held parallel to the floor. Infact, by mounting the mould with a common door hinge insteadof solidly, on screws, the motion of opening the sprue cutter canalso be used to tip the mould over so the cores fall out into a box.
For cutting lead wire diameters larger than .365 inches, thePCS-2 Magnum Core Cutter is recommended. It is nearly threetimes the size of the PCS-1, and uses specially made individualhardened die inserts for each range of wire sizes up to 0.5 inches.This larger cutter can also handle sizes down to .185 inches butthe minimum length of core is half an inch, because this is thethickness of the steel frame holding the dies.
Thus, for lighter weight cores in the .224 or smaller caliber,and for light cores in 9mm and .38 caliber, the PCS-2 cannot beused. If the core can be at least 0.5 inches long, it works very
85
nicely and is highly recommended because of its great strengthand leverage. But if you need cores that might be shorter than0.5 inches, the PCS-1 is the correct choice provided that the corediameter can be .365 inches or less.
For casting cores larger than .365 inch diameter, the CM-3three-cavity Magnum Core Mould is available. It can be made incustom diameters up to .500 inches. It has three piston and cyl-inder units, instead of four, because of its great size and surfacearea. Heat radiation becomes too large when a fourth piston andcylinder is added, making it difficult to keep the mould hot. Butwith three cavities, this mould forms and ejects over 900 coresan hour, ready to be swaged.
There is no difference in the accuracy of bullets made withcast or wire cores, if you process the cores with either a coreswage die or the LSWC-1 style of die (both have bleed holes toadjust the core weight precisely). In theory, lead wire would beslightly more precise because it has been extruded at high pres-sure and probably does not contain any air bubbles or voids, butthe core swaging operation takes care of that in any case.
If you do not use a core swage or LSWC-1 die to adjust thecore weight, then your core variation should be less than 2% ofthe total bullet weight with careful casting or cutting technique.Bear in mind that percentage of total bullet weight is what mat-ters, not absolute weight difference. Five grains makes no practi-cal difference in a 500 grain bullet, but it is very significant in a50 grain bullet. Swaged cores typically are held to less than 1% oftotal bullet weight, and perfectionists achieve less than 0.5% tol-erances. This could be any amount of grains, of course.
Lead wire is not commonly available in sizes over .390 diam-eter. You can make your own in any size, using the Corbin LED-1extruder kit in either the CHP-1 Hydro-press, or the CSP-2H Hy-draulic Mega-Mite press. None of the hand operated presses canextrude lead wire in calibers larger than 0.125 inches in practicallengths. You need hydraulic power for this.
However, if you do use the LED-1 and extrude your own wire,you can make virtually any diameter up to about 0.5 inches andcut it with the PCS-2 core cutter to the desired length (and weight).The pressure required to extrude lead goes down as the ratio oforiginal slug size (billet diameter) to final wire size goes down.This means that it takes no pressure to push a 0.75 inch billet oflead through a 0.75 inch hole, but it takes a tremendous amountof pressure to push it through a 0.10 inch hole.
86
The smaller the wire diameter, the higher the pressure neededto extrude it. This should make intuitive good sense to you. Largediameters, then, can sometimes be made from slightly hardermaterial in the same die that would not begin to extrude thatmaterial in a smaller diameter. But generally speaking, only puresoft lead is extruded in the LED-1 set.
The LED-1 Lead Extruder Kit comes with four LED-D extruderdie inserts (for your choice of four wire sizes), two BMT-2 billetmould tubes, a BMT-Base billet mould tube mounting base sohold the tubes vertical so you can fill them with lead, the extruderdie body (which screws into the 1.5 inch diameter threaded topof the CHP-1 press), the extruder punch that presses on the leadand forces it through the die, and a hardened retainer bushing tohold the die in the top of the extruder body.
To use the extruder kit, you would first either buy or cast softlead billets of about .75 inch by 4 inch diameter. (The tubes andbase form a simple mould to do this.) Then you would lubricatethe billets liberally with Corbin Swage Lube, and insert them intothe extruder body from the bottom, put the punch in the pressram and align it in the body, and insert the desired size of ex-truder die into the top of the body. Finally, screw in the retainerbushing, and move the ram up.
At no point should any part of your body be over the top ofthe die! It is possible, but rare, for trapped air to shoot a piece oflead out of the top of the extruder with lethal force. I have a holein the ceiling of my shop where this happened once. When thelead begins coming out of the die, let it droop over to one sideunder its own weight, and then, wearing a glove (because thelead comes out hot from friction) guide the wire where you wantit to go.
Lead wire does not �join together� well, so cut off the smallremaining disk left in the die and insert a new billet. You won�t beable to make one continuous long strand of wire by putting inanother billet. The pressure required to extrude the billet dependson the diameter of wire, but generally about 1900 pounds ofpressure on the gage is indicated when the wire begins to move.If it does not move by then, your wire may be too hard to extrudewith the LED-1. Only soft lead is recommended. Try it with thelargest size die you own, and if it still won�t extrude, it is too hard.
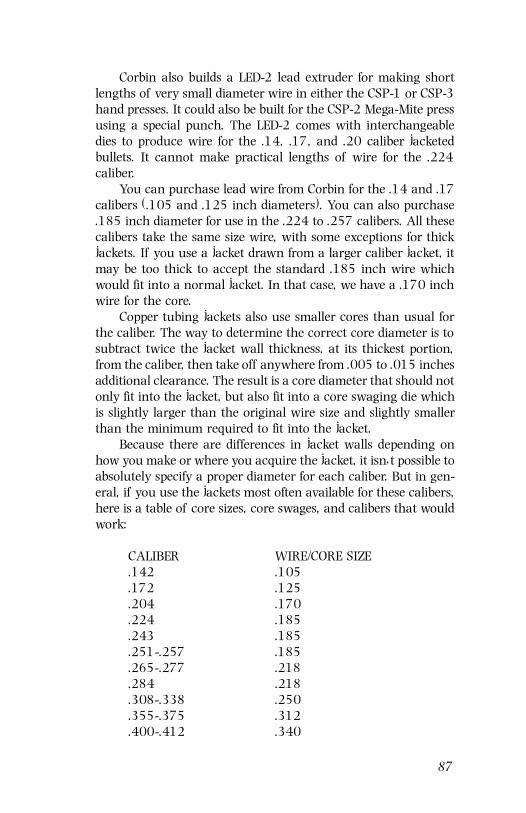
87
Corbin also builds a LED-2 lead extruder for making shortlengths of very small diameter wire in either the CSP-1 or CSP-3hand presses. It could also be built for the CSP-2 Mega-Mite pressusing a special punch. The LED-2 comes with interchangeabledies to produce wire for the .14, .17, and .20 caliber jacketedbullets. It cannot make practical lengths of wire for the .224caliber.
You can purchase lead wire from Corbin for the .14 and .17calibers (.105 and .125 inch diameters). You can also purchase.185 inch diameter for use in the .224 to .257 calibers. All thesecalibers take the same size wire, with some exceptions for thickjackets. If you use a jacket drawn from a larger caliber jacket, itmay be too thick to accept the standard .185 inch wire whichwould fit into a normal jacket. In that case, we have a .170 inchwire for the core.
Copper tubing jackets also use smaller cores than usual forthe caliber. The way to determine the correct core diameter is tosubtract twice the jacket wall thickness, at its thickest portion,from the caliber, then take off anywhere from .005 to .015 inchesadditional clearance. The result is a core diameter that should notonly fit into the jacket, but also fit into a core swaging die whichis slightly larger than the original wire size and slightly smallerthan the minimum required to fit into the jacket.
Because there are differences in jacket walls depending onhow you make or where you acquire the jacket, it isn�t possible toabsolutely specify a proper diameter for each caliber. But in gen-eral, if you use the jackets most often available for these calibers,here is a table of core sizes, core swages, and calibers that wouldwork:
CALIBER WIRE/CORE SIZE.142 .105.172 .125.204 .170.224 .185.243 .185.251-.257 .185.265-.277 .218.284 .218.308-.338 .250.355-.375 .312.400-.412 .340

88
.429-.458 .365
.475-.500 .390
Please bear in mind that actual lead core diameters dependon the jacket wall thickness, so that you might need the nextstandard smaller size of wire if the jacket wall is thicker.
Lead wire larger than .390 is too difficult to coil, so it iseither supplied in straight lengths or you would use a core mould.In fact, when the required core is larger than .390 the cost factorper bullet favors casting your own cores. When the core is below.218 inch diameter the cost factor favors lead wire instead ofcasting. The convenience and time saving of lead wire is a strongconsideration regardless of diameter and cost per bullet.
If you plan to make swaged lead bullets, either with or with-out a Base-Guard, then the best diameter of core is just slightlyless than the caliber, or the diameter of the smallest die used inyour process. For instance, if you want to make a paper-patched.45-70 bullet, and your bullet diameter with the patch applied isto be .458 inches, using 0.0025 inch thick paper, this wouldrequire a bullet of .448 inch diameter before patching.
Why? Paper patching material is generally wrapped aroundthe bullet twice, so the edges just come together on the secondwrap. Looking at a cross section of the bullet, then, you wouldhave the bullet diameter, plus four thicknesses of paper. Generallyyou would want the total diameter to fit into the bottom of yourrifle grooves. A .45-70 bore generally has a groove-to-groove depthof .458 inches and a .450 inch bore hole, for .004 inches ofrifling per side. Subtract four times the paper thickness from thebarrel�s groove-to-groove diameter, and this gives you the correctbullet diameter to make.
In this example, .458 less 4 times .0025 gives us .458 -.010or .448 inches for the bullet. You can use .390 lead wire, sincethis is the largest practical coiled diameter available. But if youwere to have an extruder made, or a core mould, it would be evenbetter to use .440 to .445 inch diameter cores. Any diameter thatfits into the die nicely and is not too long, at the weight youdesire, to be enclosed completely in the die before any pressure isapplied, will work.
The upper limit of core diameter is whatever fits easily intoeither the jacket, or the die (for lead bullets). The lower limit iswhatever just fits completely in the die without sticking out thedie mouth, and allows at least one caliber of length for inserting
89
the external punch before any pressure is created. If you use toolong and thin a core, it will contact the external punch before thepunch can be aligned at least a full caliber depth in the die. Thiscan cause the punch to be tipped or bent when you apply pres-sure to compress the core. Any core diameter between these twoextremes works, but the closer the core is to finished diameter,the less folding and wrinkling takes place and the less work it is tocompress it smoothly and evenly.
When a core is swaged, it is first lubricated with Corbin SwageLube, simply by applying a drop to your fingertips and rolling thecore back and forth once or twice as you pick it up. No detailedritual is required. A thin film of lube transferred to the lead sur-face is sufficient. If you want to lubricate a large quantity, puthalf a teaspoon of Corbin Swage Lube inside a clean tumbler andload it with as many cores as your tumbler will spin withoutoverloading it. Then turn it on and let them tumble for half anhour, or until all the cores are evenly lubricated.
The film of lube greatly reduces swaging pressure, helps in-sure long die life and eliminates lead fouling of the die and punches.You can swage cores without lubrication, just as you can driveyour car without lubrication�for a while! You pay for it eventu-ally. Once you have swaged the cores, the lubrication must comeoff before you put them into jackets. Corbin Swage Lube willwash off by boiling the cores in a pot of hot water with a littlestrong detergent added. In fact, just the hot water works reason-ably well. I like to use boiling water, because the heat quickly drysthe cores once you pour them out onto an old towel to dry. Youdon�t want them to sit around very long with moisture, becausethey will tend to oxidize, and this prevents a good core to jacketfit.
Swaging lubricant is not the same as bullet lubricant. Thetwo lubricants serve entirely different purposes. Swaging lube actsas a high pressure film between the die and the bullet, reducingfriction and lowering the pressure needed to form the part. It isnot designed for use under high temperature, and it is designed tobe easily removed in solvents or water. It is clean, and is normallyquite safe to handle (in rare cases someone may be allergic to thecastor oil or lanolin components). Corbin Swage Lube is madefrom medical grade compounds designed for cosmetics and phar-maceutical firms.

90
It does form a hard lacquer film when heated to annealingtemperatures for copper jackets, however. This film prevents Cor-bin Core Bond from working, so be sure to wash off the lube fromany bullet jacket and core which are intended to be bonded usingthe Corbin Core Bond process.
91
9. Swaging with a ReloadingPress
Some Corbin dies are designated type -R. This stands for �Re-loading Press�, and means that the die set was designed to fit intoa regular single-station, slotted ram reloader with standard 7/8-14 threads. Any of our tools that have the -R suffix are meant foruse in a reloading press. The dies screw into the press head, like areloading press die. The external punch snaps into the slottedram like a shell holder.
Why would you want to use dies modified for use in a reload-ing press, when swaging presses are so much faster and moreversatile? The reason is economic: if you already have a reload-ing press, and don�t wish to make benchrest quality bullets butwill settle for a reasonably good bullet, then you might want touse the -R dies.
Reloading presses have these drawbacks, however:
1. A reloading press die is built only for use with pure softlead cores, not alloy lead. If you use alloy lead, the pressure willbe considerably higher, and could break the die. If the die breaksfrom excess pressure, it is not a warranty problem and you willneed to get another die (and hopefully not use so much force,which generally means going to a softer lead).
2. A reloading press has no built-in floating alignment, andin fact is generally quite sloppy compared to the alignment of anactual swaging press. This is fine for reloading because there is noreal need for high precision alignment: the shell holder and fit ofthe cartridge case both are so sloppy that there is no gain inmaking the press highly aligned between head and ram. But inswaging, better bullets result from precise alignment of the presshead and ram. The forces are considerably higher, so that a littleoff-center torque can make a difference in punch life and bulletquality. The lack of high alignment precision means that certainstyles, such as the rebated boattail, are not available for the re-loading press.
3. A reloading press has no built-in way to eject the bulletfrom the swage die. You need to use one of two methods: eitheruse a small plastic mallet and tap the plunger provided with the
92
swage die, to knock out the bullet (and catch it with your otherhand), or purchase the Corbin PE-1 Power Ejector unit whichslips over the top of the type -R die, and gives you a compoundleverage ejection system. (Actual swaging presses have automaticbuilt-in ejection and are considerably faster to operate.)
4. A reloading press has less than half the leverage of anyCorbin swaging press, since it must use about four inches of ramtravel. Swaging only requires about two inches, for most of thecalibers and styles that can be made by hand. Therefore, by simplephysics we can double the force with the same amount of handletravel. This makes swaging with a real swaging press far easier(less than half the effort required).
5. A reloading press does not generally have any bearings.Corbin swaging presses such as the Series II or the Mega-Mitetravel on roller bearings with the rams guided in long oil-impreg-nated bushings. This extends the life and lowers the friction. Inaddition, most loading presses have sufficiently heavy frames butrather weak, soft screw-stock rams and pins which are often re-duced to half their visible diameter inside the hole, as safety links,to prevent damage to the rest of the press. Corbin swaging pressesuse full-diameter, hardened alloy steel links which turn inside high-pressure bearings. The swaging press can be physically smallerand yet still be considerably stronger, especially those which webuild from alloy steels, with chrome-moly support rods. The Se-ries II press, for instance, uses 130,000 PSI steel, whereas themost popular large reloading presses advertise �35,000 PSI ten-sile strength� for their cast iron frames.
6. Because the whole idea of making swage dies that fit exist-ing reloading presses, instead of the correct design of swagingmachine, is to save money, we assume that if you want a type -Rsystem your main goal is to get into swaging as cheaply as pos-sible and still make reasonably good bullets. Therefore, to keepthe cost down, we make only larger runs of standard calibers andshapes, and do not make custom shapes or diameters for the -Rdies.
The additional tooling cost for custom work negates the sav-ings in getting a die to fit an existing loading press; your custombullet designs are more economical in one of the proper swagingsystems that have a press designed especially for bullet making.One type of -R die comes in any standard caliber from .224 to.500 inch diameter for soft lead, semi-wadcutter style bullets (thatis, bullets which have their noses made entirely from lead, and
93
which have a small step or shoulder between the nose and theshank). These dies are called the �Econo-Swage� dies. They areonly made in the design of a core seater, not point form, lead tip,core swage, or lead semi-wadcutter.
You can get flat base, cup base, dished base, or hollow basestyles, or the Corbin �Base-Guard� base (which I�ll explain later).The internal nose-forming punch is available in Keith, 3/4-E (atypical pistol round nose shape), 1-E (a typical Winchester orSharps rifle nose shape), target wadcutter, button-nose wadcut-ter, hollow point (which is then followed by another punch to getboth the HP cavity shape and the nose curve shape), auto-loader(a sort of bell-shaped round nose that feeds nicely in mostautoloaders), and conical.
We also build -R dies in two, three, or four die sets to makejacketed rifle or handgun style bullets. The two die set normallyconsists of a CS-1-R core seating die, and a matching PF-1-Rpoint former. The three die set adds a CSW-1-R core swage die formore precise lead core weights. The four die set adds a LT-1-Rlead tip forming die for a professionally finished lead tip. Theseare available in the following calibers, in the 6-S ogive shape only:.224, .243, .257. They are also available in 3/4-E ogive shape(handgun or carbine style) in these calibers: .251, .308, .312,.314, .355, .357.
Please note that you can make a .30 caliber rifle bullet inthese dies, but only up to about 150 grains total weight, and onlywith the various wadcutter, semi-wadcutter, or round nosed ogiveshapes. This is ideal for carbines and handguns, but isn�t suitablefor long range match competition. For that you need to step up toone of Corbin�s swaging presses and the dies to fit it. If you usetype -M dies, there is no difference in die cost, but only the pressitself.
Why do we make type -R dies that can go up to .50 caliber usingsoft lead, and a semi-wadcutter shoulder, but stop with .357 diameterwhen it comes to the smooth ogive point forming die?
A reloading press has very little leverage compared to a swag-ing press, so there are limitations as to the amount of work youcan do at various points in its stroke. With a lead bullet which hasformed in the cavity of a punch (thus the little shoulder), almostall the work is done at the end of the stroke, where the reloadingpress has sufficient power.
94
But with a jacketed bullet and a point forming die, almosthalf the die length is the ogive in a typical rifle bullet. That meansyour full diameter seated core and jacket have to be aligned insidethe die, and the external punch aligned at least one caliber of itslength inside the same die, before the edge of the jacket starts toenter the ogive section. This puts the ram position down in thevery low leverage operating region, where you almost have tojump on the handle to make it work. I wouldn�t want anyonefalling off a handle and breaking their neck!
For those with no sense of humor, it�s really because theprocess barely works in some calibers and styles: its another ofthose situations where you can get by with something in somecircumstances, but you couldn�t build a business based on it work-ing every time for every caliber. So, we just make the things weknow will work every time. There are far better alternatives forthe calibers and styles which are marginal in a reloading press.
I know that other people have made these designs that I wouldnot recommend, and some may even be trying it as you read this.I suppose the thing to do is scan through the old gun magazinesand look at all the outfits who used to make swaging dies. You�llprobably see Corbin swaging tools mentioned in those articles,from way back in the �old days�. Try to find those firms today.There are not in business now, you say? Really! And they usedthose same designs that Corbin will not make?
Now, I wonder if there is something to be learned from that?There will always be a few firms springing up with the same re-invented square wheel, who will shine in the spotlight of public-ity and win a few converts, then become scarce as the years pass.It is always sad to see someone fail in business�which is why Iam happy from talking to my clients (with their 98% plus suc-cess rate).
What kind of reloading press can you use? For the fired .22 longrifle cases drawn to make .224 or .243 bullets, you can use al-most anything that will accept the dies and the punches. Thelittle RCBS Junior press was one we used to demonstrate swagingat gun shows, in the old days. It doesn�t take a big press to swagesmaller caliber bullets. You can use Rockchuckers or Pacific Multi-Powers or C-H Champions, of course. They are sturdy, standarddesign presses.
95
The ones you can�t use are those which have special me-chanical shell holder devices instead of a slotted ram, or thosewhich have a handle that swings over the top of the press, likethe Bonanza Co-Ax press (the handle parked itself right over thedie, where you need to tap on the swaging die�s knockout rod topush the bullet out of the die). I prefer not to use turret or pro-gressive presses because of inherent alignment and strength prob-lems. Swaging puts a lot of strain on that pivot! Aluminum andlight duty reloading presses may be usable for smaller caliberswaging, but are not ideal for it.
We make a die that turns fired .22 cases into either .224 or.243 caliber jackets by ironing out the rim and drawing the caseto a different diameter. This is the RFJM-224R or RFJM-243Rrimfire jacket-maker die. The punch for this die fits into the pressram, and there is a steel disk with a snug hole (like a large washer)that fits over the punch. Then, there is a steel tube that you woulddrop over the ram, before you put the punch and disk into theram slot. This tube is about an inch and a half high, and has aninside diameter of just about one inch. It�s purpose is to contactthe edges of the disk, when you lower the ram, and slide the diskup so that if the jacket sticks on the punch, it will be extracted onthe down stroke.
If you have a press with a ram diameter larger than oneinch, this obviously won�t work. Most reloading presses use aram diameter from 13/16 inch to 1 inch A few have larger rams.For those, you will need to buy the separate, optional �Big Max�adapter, which is a heavy duty steel tube with a much largerdiameter and a larger disk. It will fit over these larger rams.
Here are the calibers of -R dies that we make, and the stylesof bullet swages along with their catalog numbers:
Calibers..................... .224 .243 .251 .257 .308 .312 .314 .355 .357
Dies:CSW-1-R Core SwageCS-1-R Core SeaterPF-1-R Point FormerLT-1-R Lead Tip Former
Calibers........................... .375 to .500 (soft lead only)Dies:
96
EC-1-R Econo-Swage
In addition, Corbin makes virtually every sort of bullet andjacket reducing die, plus the dies to turn fired .22 rimfire casesinto .224 or .243 caliber jackets. The EC-1-R Econo-Swage isnormally used for paper-patched bullets, so we supply it with acup base and a 1-E round nose ogive punch for rifle calibers un-less you specify something different.
Another popular use of the EC-1-R and the CS-1-R dies is forcenterfire pistol and blackpowder rifle Base-Guard bullets (the foul-ing-scraper disk that fastens to the base, using a �BG� bottompunch). Generally, a pistol swage set would be supplied with aKeith Truncated Conical (TC) nose style and a BASE-GUARDbasestyle unless you specify something else. The Base-Guard base punchcan be used without a Base-Guard disk. It simply creates a smallrivet head in the exact center of the bullet base, which hurtsnothing (and serves to identify your bullet among others recov-ered later).
A die designed to make lead bullets may also be used withhalf-jackets (which cover about half the bullet shank) or gas checks.Base-Guards are much more effective at keeping the bore clean,however. Once you�ve used Base-Guards, it�s doubtful you�d evergo back to gas checks (they cost more and don�t work nearly aswell).
General instruction for swaging in a reloading press
Remove any shell holder from your reloading press, and cleanout the slotted ram with a swab to remove any accumulated primerresidue and shavings. These can prevent alignment of the swag-ing punch and die.
Snap the reloading press punch into the ram (like a shellholder). Don�t try to use a shell holder in addition!
Screw the die into the top of the press just a few turns. Don�ttry to set up as you would a reloading press die (against the end ofthe ram). Just barely get it started.
Cut the lead wire, or cast scrap lead cores to the right weight.If you are using a core swage die, add about five grains to thedesired final weight. For jacketed bullets, put the jacket in thescale pan, cut a piece of lead wire and adjust the length so that
97
the total weight (jacket and core) are a few grains more than youdesire for the finished bullet. Without a core swage die, the totalof bullet jacket and core is the finished weight.
Open a bottle of Corbin Swage Lube. Squeeze a few drops oflube out, onto a lube pad. Just put a tiny bit of lube on your fingertip, and when you pick up the lead core, give the core a turnbetween your thumb and finger tip. That�s all the lubricant youneed.
Put the core into the mouth of the core swage die, then care-fully raise the ram of the press until you can remove your fingerand let the punch hold the core. Gently raise the ram all the way.If the punch is stopped before you get to the end of the pressstroke, raise the die slightly.
With the ram of the press as high as it can go, lower the die(screw it down, toward the ram) until you can�t turn it by handany further. You�ve just pushed the lead core up against the endof the internal and external punches.
Lower the handle of the press very slightly, and turn the dieabout half a turn closer to the ram, then raise the ram again.When you feel resistance on the handle, lower the ram all theway and inspect the core (or seated core, or finished bullet, de-pending on the die you are using). To eject the bullet, put theknurled-head knockout rod into the top of the die and tap it firmlywith a plastic mallet. Or, if you prefer to use Corbin�s power ejec-tor unit (PE-1), install it on the die and just pull down the handleto eject.
When the lead forms completely (square ends, sharp edges,full diameter of the die with parallel sides), you have found thecorrect adjustment. If, during this process, you feel that the pres-sure is too great (too much force on the handle�you should notfeel more than about what it takes to seat a bullet or expand themouth of a cartridge case), stop and inspect the lead. Perhaps it ismuch harder than you thought. Only pure, soft lead is really suit-able for reloading press swage dies. If lead spurts around the punch,you are using too small a punch diameter for the operation.
Lock down the locking rings on the die, and proceed to swageall the cores you wish. Use care to insure that the punch tip goesinto the die and doesn�t strike the edge. (Make sure it doesn�tpinch your finger, either: that hurts!)
If you have been swaging the cores, you will note that thereis a little �antenna� or bleed-off of lead on the end of each leadcylinder. Snip these off with a pocked knife or nail clippers. If you
98
don�t get this bleed-off, your cores may vary in weight. A coreswage can only remove extra lead�it can�t add more. That meansyour cores must be cut, or cast, heavy enough so that all thevariation is smaller than the amount of extra lead you left toswage off.
Clean the lubricant from the cores, if you intend to put theminto jackets next. For lead bullets, you don�t need to clean themyet. To remove the lubricant, you can slosh the bullets around ina can of organic solvent such as acetone, or Corbin�s CleaningSolvent. Or you can wash them in hot water with a little deter-gent added. Either way, roll them on adsorbent cloth or papertowel to dry them.
To make a Keith semi-wadcutter (a variety of truncated coni-cal bullet), you would select the CS-1-R or the EC-1-R die and anose punch of the desired shape. If you want a hollow base, cupbase, flat base, or a Base-Guard base, select the punch having theface that is machined to transfer that shape to the bullet. Thepunch trapped inside the die body is the internal punch. The punchthat snaps into the ram slot is the external punch. Both can bechanged, to change the base or nose shape.
Place the cleaned cores into jackets. Just set them in thejackets. You want to avoid getting any lubricant inside, since itwill just keep the core from pressing firmly against the jacketwall. Then, put a drop of lube on your fingertip, and pick up thejacket (with core inside). Put the jacket into the die, so that thelead faces the nose forming punch.
Swage as described in steps 6 through 10. One difference: ifyou are using a jacket and an external punch that forms a semi-wadcutter or a lead tip bullet, the length (and thus the weight) ofthe lead core must be such that the lead will be at least as long asthe jacket after the core is fully seated. If you try to use too lighta core for the jacket length, and a punch that requires lead to fillits cavity, the punch will push against the edge of the jacket andwrinkle the jacket. You could damage the punch.
Lead cores expand and become shorter as you seat them: youneed sufficient length of lead so that there will be material to fillthe cavity in the external punch tip. If you are using a hollowpoint punch, use it first to extrude lead forward, and then shapethe lead with the second punch. If the hollow point is uneven, tryflattening the lead core first with a flat punch, then use the hol-low point punch, and finally use the Keith or other semi-wadcut-ter punch.
99
You may be done at this point, if you are making semi-wadcut-ter style bullets (which includes paper-patched rifle bullets or anyother type having the SWC shoulder). If so, congratulations! Wipethe lube off the bullets and you are ready to load them. If not, itmeans you have one or two more steps to perform to make asmooth ogive bullet or to form one with a small lead tip.
To form a smooth ogive, lead tip bullet, you need to make aseated core with exposed lead beyond the jacket. If you want asmooth ogive, open tip bullet, then you need to use a punch thatfits inside the jacket, rather than just inside the die. The core ismade shorter than the jacket. We call this the �open tip� style. A�hollow point� is something else: you make a HP bullet by push-ing a punch with a conical projection into the lead core, so that ahole is pressed in the lead. The core can be down inside the jacketat the time (making an open tip hollow point) or it can extendbeyond the jacket (making a lead tip hollow point). Press the coredown so it fills up the jacket, then stop pressing. Remove the coreseating die, and replace it with the point form die (PF-1-R).
With the point form die in place, and a full-diameter basepunch in the press ram (which just slides into the point form dieby hand with very little tolerance), put a small amount of lubri-cant on your fingertip and roll the seated core and jacket betweenyour thumb and forefinger. Put the seated core and jacket intothe point forming die, so that the lead faces up (toward the die).Gently push the punch in behind the bullet and adjust the dieposition so that you feel only a light resistance when swaging atthe end of the stroke. Eject and examine the bullet.
If there is a pipe or extension on the end of the bullet, itmeans that you have the die just a bit too low. Turn it counter-clockwise very slightly. If the bullet won�t eject or has a large,rough and unfinished looking tip, it means you have not pushed itfar enough into the die. There is a position where you will getmaximum tip closure before the lead flows up the ejection pinhole. You can find it by trial and error. (Hint: save a good bullet touse as a setting gauge next time. Put the bullet in the die, raisethe punch and ram, and screw the die down until it stops.)
To make a smooth flat tip on your bullet, just turn it over,push it backward into the die, and gently bump it on the nosewith the base punch. It doesn�t take much pressure. You canmake any size of flat point this way. If you are making a handgun
100
bullet, you have finished. Wipe off the lube, and load it. If you aremaking a lead tip rifle bullet, you may need to go to one more die:the lead tip forming die.
To finish a lead tip rifle bullet, remove the point forming dieand install the lead tip forming die. You�ll notice that the lead tipis deformed and mushroomed by the force of ejection. The secretof making a good lead tip bullet is to leave plenty of lead: yourcore needs to be longer than the jacket and you need to make sureyou don�t close the jacket down so small that it leaves no roomfor a strong stem of lead joining the tip with the main body of thecore. The wall thickness of the jacket, at the tip of the bullet, canuse up a considerable distance across the total tip distance. Thejacket walls need to be far apart at the tip, so that a strong stemof lead comes up between them and holds the tip in place.
Push the bullet up into the lead tip forming die and let theinternal punch reshape and shear off any extra lead extrudedfrom the tip. If you press very hard, a ring will be impressed inthe ogive section. Find that delicate point where you just shaveoff the extra lead and leave no mark on the jacket. It works verynicely.
Paper Patched Lead Bullets
If you want to make a paper-patched bullet, just install theEC-1-R Econo-swage, cut or cast some lead cores of the rightweight, and swage them using the gentle, increasing pressuremethod until you get the right shape. Typically, if you had 0.0025inch thick paper, you�d want the bullet to fill the grooves at .458inch diameter with two complete wraps. That means you�d take.458 and subtract four times .0025 (two wraps, but doubled be-cause it is on both sides of the bullet) and make the bullet .448-inches in diameter (before patching).
Full-jacket Open Base (military style) Bullets
Just put the bullet jacket in the point forming die, with theopen end facing the die mouth. Push a piece of lead core into thejacket with a punch that fits inside the jacket mouth. The seatedcore should be just below the jacket mouth, perhaps one eighthor less of an inch. Eject the bullet. You�ll have formed the ogiveon the normal base end of the jacket. (Having a flat ended jacketmakes no difference: the pressure will expand and reshape the
101
end just as if the copper were a balloon skin.) But to finish thisbullet, you must do something else: you must roll the open end ofthe jacket over the core.
If you leave the base open, when the bullet is fired the muzzlegas pressure will peel the jacket away from the core and the bulletwill be very inaccurate. It might even cut ragged asterisks in thetarget instead of round holes, from having the jacket expanded somuch that it splits at the base.
To get the muzzle gas to help you keep the jacket folded tightlyon the bullet, just reverse the bullet and put the open end into thepoint forming die. Gently push on the bullet nose with your punch.The curved die wall will move the edges of the open jacket slightlyinward. Eject the bullet again, turn it over once more, and push itback into the die. Now, you have an angle applied to the openbase. The pressure of pushing the bullet back into the die willflatten this angle, folding the jacket over the core. Gas pressure onthe base of the bullet will help hold it shut, not tear it apart.
Changing the Nose and Base Shape
With semi-wadcutter and wadcutter styles, the nose shape iscontrolled by the punch you select. With smooth ogive bullets(those without a step between the shank and the nose), the ogiveis controlled by the particular point forming die that finishes thebullet.
To change nose shapes with a bullet that uses a point form-ing die, you need a different shape of point forming die. That isthe PF-1-R. If the bullet is finished in an EC-1-R or a CS-1-R die,then all you need is a different nose punch. It is important tounderstand this, because it makes a big difference in planningand ordering. Point forming dies cost about six times more than apunch, so if you can use a bullet with a little shoulder and a leadnose instead of having a smooth curve without a shoulder be-tween ogive and shank, you�ll save money on tooling. If you needthe smooth ogive shape, then the matched pair (core seater andpoint former) is the only way to do it.
Spare punches can be purchased in standard shapes of flatbase, dish base, cup base, hollow base, or Base-Guard base. Nosepunches can be purchases in conical, Keith (semi-wadcutter, trun-cated conical), 3/4-E pistol round nose, target wadcutter, buttonnose wadcutter, hollow point (a universal HP punch that works
102
in conjunction with any other punch), open tip, or 1-E rifle roundnose. Other custom shapes can be specified (with dimensionedsketch or sample) for a small extra charge.
Boattail and Partitioned Designs
Those are best done in the swaging presses and larger dies,not in a reloading press. But you can simulate a boattail by push-ing a bullet backward into a point forming die, thus applying aslope or angle to the base. Then form the nose in the same die byreversing the bullet. Because it takes less force to shape the openend of the jacket than to change the base shape (on most jacket,the base is thicker), the same pressure will create a nose withoutmaterially removing the base angle. This doesn�t work for all bul-let styles and calibers, but you can try it.
To make a good partition style bullet, use another jacket smallenough to fit inside, and short enough to fill just a little morethan half the larger jacket�s length. Or, in the .224 and .243calibers, use fired primers as heavy walls between two short piecesof lead core! A .243 jacket makes a good partition in a .30 caliberjacket, and a short .30 jacket fits inside a .358 or .38 jacket. Youcan seat a core in the smaller jacket first, with lead exposed, thenput the lead end down, into the larger jacket, and seat the assem-bly like a core to expand it in the larger jacket. Top that with ashort piece of lead core, and finish as usual.
Fired .22 Case Jackets
Making bullet jackets for .224 and .243 caliber bullets fromthe spent cases of fired .22 ammunition is, even after all theseyears, a very popular activity. Corbin builds the RFJM-224R RimfireJacket-maker to gently unfold and redraw the rimfire case, mak-ing it into a jacket that looks for all the world as if it were in-tended to be that way. Bullets made with a rimfire case for ajacket have much more explosive expansion than those made withconventional jackets. Friction is lower in the bore, so your rifledbarrels last longer. Fouling is less, partly because of the higherzinc content of cartridge brass and partly because the thin jack-ets need to be loaded to lower velocity to avoid coming apart inthe air.
103
The performance of fired .22 cases used for jacketed bulletsis outstanding. The price is right (free). About 1976, WolfePublishing�s �Handloader� magazine published an article whereinRick Jamison (currently with �Shooting Times� magazine) madesome rimfire jacket bullets and shot them from a benchrest rifle.The groups obtained were in the 0.200 inch category, and thesame gun and loads used with Sierra match bullets got slightlylarger groups, and slightly smaller groups with certain of thecustom swaged benchrest bullets using commercial jackets.
The point is, rimfire jacket bullets are at least as accurate asthe ones you buy, produce less fouling, are easier on your gun�sbore, and cost you nothing. Their only drawback is the need toload them to lower velocity because they are very thin and explo-sive. At 3200 feet per second, a rimfire jacketed .224 or .243bullet performs more violently than a conventional bullet drivento over 4,000 feet per second! Your varmint hunting expeditionsare safer with them, because there is almost never a ricochet:once these bullets touch the ground, they disintegrate. (See thechapter on jacket drawing for instructions on the use of the RFJM-22 and RFJM-6M dies.)
Open Tip, Lead Tip, and Hollow Point
For open tipped bullets, you need to use a punch that slipsinside the jacket (and a core length short enough to allow this).For lead tipped bullets, you need to use a punch that fills the diebore, not the jacket I.D. The lead core, after seating, should belonger than the jacket. How much longer depends on how muchlead you desire to be exposed.
A lead tipped bullet expands more quickly than an open tippedbullet, since the jacket is left with a larger opening. The jacketopening controls the expansion far more effectively than theamount of lead exposed. A hollow point, on the other hand, ex-pands faster yet.
To make a hollow point bullet, you would seat the core usinga punch that had a conical projection on the tip. This forces ahole into the lead, perfectly centered. This punch can fit eitherthe die bore (for making lead tip hollow points) or it can fit thejacket I.D. (for making open tip hollow points). You can see whyit is important that you use the terms �open tip� and �hollowpoint� correctly, since they require different equipment.
104
With the jacket finished, you can either cut a piece of leadwire or cast scrap lead into cores with a Corbin Core Mould (CM-4, four cavity .185 inch diameter cores). Both the .243 and the.224 calibers use the same size core. Lead wire of .185 inch di-ameter is available from Corbin in 10 pound spools (LW-10). Itcan be cut to length with the PCS-1 core cutter, which has a stopscrew to set the correct length for the weight of bullet desired.
The cores can be swaged in the CSW-1-R core swage die for amore precise control over the weight, or used as cut or cast. Thevariation in weight from cutting or casting is normally about 2%of the total weight. A 40 grain core might vary as much as 0.8grains from 40.8 to 39.2 grains. This is quite insignificant formost shooting. The core swage will bring this variation down toperhaps one-half percent of total weight. It doesn�t get muchbetter than that, no matter what you do except for sorting bulletsby weighing each one, an exercise in futility that satisfies somepeople more than others. The difference in drop due to a varia-tion of 0.2 grains or less is primarily seen on a calculator, not onthe target.
In order for the core swage to operate correctly, the pressmust be run in such a manner that every stroke goes to the physi-cal limit of the ram travel, to leave precisely the same volume inthe die between the two punch tips on every stroke. Then, usingthis same fixed end of stroke position for each core, a small amountof lead must be extruded from the cores. If any core does notextrude some surplus lead, it will probably be light. Cores cannotgo over the upper limit, but in that case you may find some thatgo under and are too light. You can tell by the resistance on thepress handle whether the core was extruded slightly or not. Ifnot, toss that core aside for making lighter bullets. The cores areejected using the standard knockout rod which comes with eachset of dies, and a plastic mallet (not provided), or the optional PE-1 Power Ejector device, which fits over the top of Corbin reload-ing press dies.
Lubrication (Corbin Swage Lube, CSL-2) should be used con-sistently but sparingly on each core, and then washed off withhot water or any normal organic solvent before the cores are putinto the jackets. Corbin Cleaning Solvent, CCS-16, is available forremoving all traces of lubricant from cores and jackets. You canuse alcohol, acetone, or any of a dozen other solvents as well. Hotsoapy water works well, too, but you need to dry the cores beforegoing on.
105
The jackets are already clean but may have lubricant insidefrom the drawing process. They may need a final hot water washor a sloshing around in solvent to remove the lubricant. Any lu-bricant left inside the jacket only serves to unbalance it and toprevent the core from becoming �one� with the jacket under highpressure. For maximum accuracy, you want the core and jacketto have intimate contact with each other, and nothing else be-tween them to keep the core from slipping as the jacket is spun bythe rifling.
Once the cores are safely placed into the jackets, you canthen put a little lubricant on your finger tips and, as you pick upeach assembled core and jacket, give it a little twirl to spread afilm of lube on the outside surface.
The core is put into the jacket and pressed firmly by usingthe appropriate external core seating punch, in the CS-1-R coreseating die. Use only enough pressure so that the core expandsthe jacket and makes the pair stay within the die. If too muchpressure is used, the die will be broken. Gentle, one-hand pres-sure that feels about like sizing a pistol case is all you need to use.
You can easily bend the punch, crack the die, or spurt leadpast the punch through the small air gap if you don�t observeproper technique. Swaging is just like loading: the pressures arethe same or higher than inside a rifle chamber, and you alwayswant to work up slowly, little by little, to accomplish the goal andthen stop. More pressure is worse than useless: it is destructive.
Eject the core by putting the knurled knockout rod (a quarterinch diameter straight rod about two and a half inches long witha knurled head) into the top of the die and tapping it with aplastic mallet. You could also use the Corbin PE-1 Power Ejector,which is a miniature compound leverage press designed �upsidedown�, to apply gentle pressure and push the seated core andjacket out of the die. The PE-1 fastens to the top of the reloadingpress die, so that a circle of three set screws lines up with agroove in the die body, just below the knurled head portion of thedie body. With the PE-1, you can get almost the same speed fromthe reloading press as you could with the self-ejecting Corbin swag-ing presses. The PE-1 comes with a straight piece of quarter inchdiameter rod that is used instead of the regular knockout rod.
With the cores seated, you would then remove the core seat-ing die and its punch (which fits into the jacket mouth for opentip bullets, or fills the die bore for lead tips) and install the PF-1-Rpoint forming die in its place. Don�t forget to change the bottom
106
punch (external punch) to the correct, larger diameter punchwhich fits more closely into the bore of the PF-1-R die. If youforget, you�ll get off-center fins extruded around the punch andthe bullets won�t be very accurate.
Apply another thin film of swaging lube to the jacket as youpick it up, and push it up into the PF-1-R point forming die. Itshould slide in easily, by hand. It may stay there under the slightgrip of the lube film. Raise the ram, and push the jacket into thedie gently, taking care not to strike the punch against the face ofthe die. If the slot on your reloading press is full of primer resi-due, the punch may not center or float properly, and you mayfind that the die gouges into the side of the punch as the punchtries to tip and can�t straighten itself up, in line with the die bore.In extreme cases the punch may even bend. (Some reloadingpresses are so out of line that cleaning the slot does not help. Ifthis is the case, you are better off to obtain a Corbin SwagingPress, such as the Silver Press, and sell the type -R dies to some-one with a better reloading press.)
The point forming die has a small ejection pin pushed backby a spring. Put the ejection rod into the top of the die and tap itwith a plastic mallet to drive the bullet out. This should be al-most, but not quite, comfortable enough to do by hand withoutthe mallet. Don�t smack it with a blow that would drive nails!Hold the mallet firmly so that it won�t bounce back: the internalspring will push the knockout rod up. If you let the mallet bounce,the knockout rod will be tossed out and clatter across the floor!
If the bullet moves down but does not fully eject, and youcan feel spring pressure when you press on the knockout rod byhand, it means the tip is still too open and the bullet you aremaking is a little too short or light to eject at that particular tipopening. If you want to make a wide open light weight bullet,you can use a small pair of side-cutting pliers (diagonal electronicwire cutters are ideal) to gently grip the projecting part of thebullet and pull it out. But normally you would want to close thetip a little more. Just lower the die slightly and raise the ramagain. Lower the ram and try to eject again.
If the bullet has a little teat on the end, with parallel sides,this means you have pushed the bullet jacket up into the ejectionpin hole. Back off the die a quarter turn or so and try anotherbullet. The adjustment is quite sensitive: you will find that a quar-ter turn of the die can make the bullet look great, open the tipconsiderably, or put this little extrusion on the end. With lead
107
bullets or lead tips, you will find that this extrusion is quite pro-nounced if you push too far (die adjusted to close to the ram atthe top of the stroke). But the LT-1-R lead tip forming die can putthe extra lead to good use.
Soon you�ll have a relatively small opening in the bullet tipand the ejection pin (about 0.081 inch diameter) will be able topush against the end of the jacket, instead of trying to go insideand push on the lead core. Ejection should be easy and complete.If the knockout rod stays down and has no spring after you at-tempt ejecting, it means the pin has stuck into the bullet core.The spring is compressed and held. This is a nuisance but not amajor problem to the experienced bullet maker. You just need tofind a little lower setting of the die before trying to eject (or useslightly more lead in the jacket, more lubricant on the jacket, orfind out if the seated core is oversized and is being reduced by thepoint forming die).
To un-stick a bullet, remove the knockout rod, unscrew thedie from the press, and remove the die insert (the actual hardeneddie itself) from the black, threaded die body. The die insert un-screws. If there isn�t enough of the insert sticking out of the diebody to grasp, you can use a finished bullet: stick the bullet intothe cavity and use it like a spindle to turn the die. Or if there is asmall amount of die insert protruding from the die holder body,you can grip it with pliers (the hardened die insert, not the softerblack die holder) and turn it.
The die will unscrew and bring with it the internal punch(ejection pin, spring and punch head). Grasp the head of the in-ternal punch, and gently twist it while pulling out. Normally itcomes out without too much fuss. Put the die down with thethreaded end against the bench top, and insert the external punchin the die mouth. Use your plastic mallet to tap the punch anddrive the bullet further into the die, closing the hole where theejection pin penetrated the core. Then find a large enough nut ormake a large enough hole in a piece of wood so that the bulletcould easily drop through it, and place the die mouth down ontop of the nut or wood. Put the ejection pin back into the top ofthe die, but without the spring. Use the mallet to tap straightdown (don�t bend the pin). You may drive the bullet out. Or, thepin may penetrate again.
If the bullet remains stuck, just continue this operation fiveor six times and eventually you will fatigue the bullet jacket, makeit lose its grip on the die walls, and it will pop out on one of your
108
ejection attempts. Don�t try to use brute force: you�ll only bendthe ejection pin. Each time the pin penetrates the core and youclose the hole, you move the jacket slightly back and forth andweaken it. You can use this technique even if you pop the bottomoff the jacket and knock a hole right through the bullet. Just pushit back in harder and try to eject again and again. Eventually itworks.
Don�t use a drill bit or tap extractor! Don�t melt the lead outwith heat! Don�t try to pick, drill, or gouge out the stuck bullet!You may get away with it once or twice, but sooner or later youwill wreck a perfectly good die this way, and it is not necessary. Becalm and patient, and you can easily get a stuck bullet out of thepoint forming die no matter how badly it appears to be stuck.Remember that pushing it in a little further is the key to getting itout.
In extreme cases, you may need a short piece of the samediameter of oil-tempered spring wire that we used to make theejection pin. This piece may have to be driven through the bullet,and perhaps another one driven through to get it out. But thesame technique works: push it back in, try to eject, clear thestuck pin, push it back in, over and over until the jacket gives up.Hey, who�s got more patience, you or a dumb piece of brass? Themost attempts I have ever had to make (in over 20 years of doingthis) were ten. I did have to make a couple of short pieces of wireto avoid bending the longer and more fragile ejection punch.
If you ever get a bullet stuck so badly that you don�t thinkyou can get it out, send the die back to us and all it will cost is theshipping back and forth for us to clear it. Don�t let the Devil temptyou to resort to hard tool bits or heat! Those techniques will onlygenerate more revenue for Corbin when you find out you ruinedthe temper of the die or put a deep scratch in the finely-finishedinterior. (Wait a minute: What am I saying? Shouldn�t I keepquiet? Well, no... you paid for helpful advice in this book, not foradvice to help Corbin�s income statement! There are plenty ofother people who won�t follow it, anyway.)
I dwell on the bad things that might happen because thegood things don�t require explanation or assistance. Just don�tjump to the conclusion that swaging is any harder than reloadingor casting just because the manufacturer himself is willing todiscuss the problems instead of pretending they don�t ever hap-pen. You know there are all kinds of things that go wrong withcasting and reloading, too.
109
Generally you won�t have any more difficulty with swagingthan you do with any other activity that requires some knowl-edge, patience and care. It is not an activity for mindless oafs, butneither is handloading: you probably handload now, so I�m sureyou�ll find swaging is a similar process with slightly different toolsand rules.
Your rimfire .224 or .243 bullet may be finished now, withan open tip or with the lead right up to the edge of the jacket, orit may have a big lead tip with a doughnut of lead on the end. TheLT-1-R lead tip forming die is similar to the core seating die, be-cause it has a straight hole through it. The bore is larger than thefinished diameter of the bullet, however, whereas the core seatingdie has a bore slightly smaller than the finished diameter. Theinternal punch has a cavity machined into the end which matchedthe curve desired on the bullet tip.
By gently pushing the bullet up against this punch, the tip ofthe bullet can be reshaped without deforming or expanding therest of the bullet. A nice radius or a sharp point can be formed inthe lead. Any surplus lead will be pushed down against the jacketand pinched between the jacket and the edge of the punch, shear-ing it off. You must be careful to use very gentle pressure, or atleast adjust the die so that you can�t generate any significant pres-sure. Otherwise the edge of the punch will be pushed into thejacket, forming a shoulder.
If you get very small lead tips that don�t completely form,and appear to be partially void on one side, this means you areattempting to form a lead tip without sufficient exposed lead.There is a minimum amount required, below which the processdoesn�t work because there is not enough lead to fill the space inthe punch cavity. Also, if you attempt to close the jacket tootightly at the end, the stem of lead that connects the tip with thebody of the lead core will be nearly sheared through. The jacketmaterial may be thin, but it does have some wall thickness, andthis doubled thickness pushes in from both sides against the stemof lead. Lead tip bullets need to have a fairly wide jacket openingto maintain a secure connection to the tip.
The LT-1-R die uses exactly the same external punch as thePF-1-R die. You can also use the PF-1-R die�s external punch inthe CS-1-R die to form large lead tip bullets, provided the particu-lar set you have accepts this punch by hand. One of the bad thingsto do is force an oversized punch into a die that won�t accept itwith firm hand pressure. The die will usually draw down the
110
punch. The punches are made softer than the dies to save clientsmoney in case they decide to test one against the other (punchescost less than dies to replace).
The use of the -R type dies in any caliber follows the sameprocedure outlined here. The limitations of the press, which lim-its the size and alignment of the dies and punches, and the factthat better results can be obtained using a swaging system de-signed specifically for making bullets, means that many morestyles and designs of bullets are offered in Corbin�s -M, -S, and -Htype dies. These types use the Silver Press, the Series II Press, theMega-Mite or the Hydro-Press (and variations of these basic mod-els), which permit designs such as the Rebated Boattail, solid cop-per, and various kinds of jacket making (from strip, or from tub-ing).
In the Corbin swaging presses, the swaging die always fitsinto the ram so it is extended forward during swaging, and thushas nothing around it to block extrusions. This means we candesign dies that adjust the lead volume during swaging of thebullet, such as the LSWC-1 (Lead Semi-Wadcutter, single die set).The CSW-1-M, -S, and -H dies have bleed holes in the die wall, at120 degree increments, rather than attempting to bleed from oneend of the core (through the punch).
This gives you a more evenly distributed pressure relief port,and greatly strengthens the punch as well. We can�t use this de-sign in the dies made for a reloading press, since the die has to fitinto the press head. The ram stroke on a reloading press has tostop just below the press head, in order to work with reloadingdies and full length sizing. When the end of the stroke is reached,the swaging punch will be positioned so it requires the die to bein the press threads at the point where the bullet is being formed.Bleed holes in the die wall would spurt lead straight into the threadsof your press! Angled holes and a smaller die body were triedearly on and they weakened the die so much that it would breakfar too easily with the slightest misuse.
If you want to make the more exotic variations of bullets,faster production speed (up to 300% more bullets per hour), anduse an easier and more satisfactory method of making bullets,then by all means skip the reloading press phase and go directlyto one of the systems designed from the ground up just for bulletmaking. You won�t regret it.
111
10. Bullet Swaging PressesCorbin builds six standard models of bullet swaging presses
and one experimental model for labs and special projects. Thestandard press each have a range of capabilities, and dies of a sizethat match those capabilities.
The Corbin Presses are: Using die type:CSP-3 Silver Press .................................... -MCSP-1 Series II ......................... -R, -M, -SCSP-2 Mega-Mite .............................. -R*, -HCSP-1H Hydro-Mite ......................... -R, -M, -SCSP-2H Mega-Mite Hydraulic .............................. -R*, -HCHP-1 Hydro-press .............................. -R*, -HCSP-2 X-Press ...................... -R*, -H*, -X
* with optional adapter kit onlyDie Types:-R Reloading press, 7/8-14 threads with T-slot ram (soft lead)-M Corbin Mity-Mite, 3/4”-OD with 5/8-24 threads (soft lead)-S Corbin Series II, 1”-OD with 5/8-24 threads (to Bhn 10)-H Corbin Hydraulic, 1.5”-OD with 1”-12 threads.-X Corbin Custom Experimental Dies, up to 4”-OD 2”-12 tpi
The smallest swaging press is the CSP-3 Silver Press. It isCorbin�s horizontal swaging machine, designed to use the type ofdies having catalog numbers that end with -M. The -M stands forMity Mite: the original Corbin Mity Mite swage press was themodel for today�s Silver Press. If you find old literature that refersto the Corbin Mity Mite, the same operating technique applies tothe Silver Press.
(We call it the Silver Press because it was our first modelusing the rugged stainless-steel powder and black baked-on poly-ester finish, which gives it a silvery-black appearance. Don�t befooled by cheap imitations: Corbin never has built an aluminumor pot metal press.)
The Silver Press is unique in several ways. It has a horizontalram. It has a concentric power system, with the leverage cen-tered along the ram axis to eliminate side torque. It ejects auto-matically on the back stroke (a feature shared by all Corbin presses).It accepts the dies in its ram, not in the press head, and uses afloating punch holder in the press head (as with all Corbin presses).

112
Although the Silver Press is the lowest cost Corbin swagepress, you need not feel at a disadvantage to use it for the calibersand materials for which it was designed. Even industry giantssuch as Nosler Bullets have purchased it, for developing proto-types of bullets on the inexpensive type -M dies, before investingmany thousands in punch press tooling.
These are some of the advantages of using the Silver Pressinstead of a reloading press:
1. Self-ejection on the back stroke. The Silver Press uses dies whichfit into the ram, and which can have their internal punchautomatically operated by a hardened stop pin, so that asyou draw the handle (and ram) back, the stop pin contactsthe end of the punch and stops it, while the die continuesback with the ram. This pushes the bullet out of the diemouth, where is gently drops to the back of the press, cut-ting several seconds from the time required to make a bul-let. Those seconds add quickly!
2. Self-alignment of external punch and die. The Silver Press holdsthe external punch in an adjustable floating punch holder,in the press head. The punch is secured by a hex bushing,threaded with hand pressure into the holder�s mouth so itpushes on the underside of the punch head, and holds it inthe punch holder. A hardened steel ring, placed over thepunch between the hex bushing and the solid head, allowsa certain small amount of �float� to take place, so that thepunch can align perfectly with the die walls. This results inless punch and die wear, and perfectly square bases (nottipped).
3. Twice the leverage, over 200% more strength. Most reloadingpresses use a 4 inch ram travel and are cast from 35,000PSI grey iron or aluminum alloys. The Silver Press uses a 2inch ram travel with the same amount of handle travel,doubling the available ram thrust. It is cast from a ductileiron with 80,000 PSI tensile strength, more than doublethe advertised strength of even the largest reloading presses(yet the Silver Press is more compact and lighter weight,and takes up less bench space).
113
4. Over 300% faster operation. With a reloading press, you mustpick up a mallet and tap a plunger to eject the bullet, andthen catch the ejected bullet before it drops to the floor. Toswage another bullet, you have to push the componentsinto the die and then get your finger out of the way whileslipping the external punch past. With the Silver Press, thedie is horizontal: just put components in the die and theysit there, with gravity as your friend and not your enemy,waiting for the one-two stroke that swages and then ejectsautomatically, with half the effort of a swage press. Youcan make more bullets in the same time.
In addition to the press itself, the type -M dies give you fur-ther reason to use this advanced swaging system. Since Corbinpioneered the semi-custom manufacturing method for swaging,where standard presses and die dimensions within broad familiesallow us to make large �blank parts� runs, and then finish thecavities and punches as your orders are entered, instead of �rein-venting� each particular set of tooling from scratch with everynew design of bullet, it has become practical to manufacture cus-tom calibers, shapes and designs of bullet swages without payinghuge prices.
This is practical with all Corbin presses, because we can con-trol the tolerances and dimensions of the entire swaging systemand are not at the mercy of dozens of different press manufactur-ers, each with their own ideas of tolerances and dimensions forram slots, press heads, ram travel, ram diameters and leveragesystems. We know that three lengths of dies will cover the entirerange from .14 to .458 caliber, for example, and with combinedogive and shank lengths of up to 1.2 inches, in the type -M familyof dies.
Thus, we can manufacture huge �runs� of die blanks in theappropriate lengths, matched to the standard punch blank lengths,and achieve great cost savings over making all these one at atime. When your order for a special benchrest .243 with a 14-caliber secant ogive and an 8 degree boattail comes in, we knowright away that all we have to do is reach into the bin of 2 inchlong die blanks and pull out three of these, knurled and threaded,center-drilled and ready for the die cavities.
We know for certain that we can use internal punch blanksmanufactured while the machines were set up for a week�s totalproduction of nothing but these blanks. They�ll fit perfectly, once
114
we diamond lap, heat treat and hand fit them to their die cavities.In other words, you save hundreds, perhaps thousands of dollarsin some cases, and get the same quality of die, compared to fid-dling with someone else�s press and coming up with a unique setof dies just to fit it, or compared to making low volume, single-unit custom parts from scratch on every order (as most of thebullet swage die firms have done in the past).
One final reason to get a Silver Press instead of trying to buycustom reloading press dies is that the price of the Silver Pressand a complete set of dies to fit it, is usually less than half thecost of any other alternative. Those who make �benchrest� swagedies generally charge from $1200 to $3500 for a set of just thedies. They probably fit your reloading press, since few die-makerstoday build actual bullet swaging presses. But look at how muchmoney you�d save, and how much better and faster your workwould be, if you just purchased the Silver Press and the dies to fitit, instead!
The Silver Press was designed for calibers between .14 and.458, using only soft lead cores and jackets of .030 inch thick (orless) annealed copper, in lengths up to 1.2 inches Regardless ofthe shape or weight, if the design exceeds .458 inch diameter, or1.2 inch length, it is outside the appropriate range. If the mate-rial requires more pressure to form than pure 5.0 Bhn lead oruses a jacket that forms only with more pressure than a softcopper jacket of 0.030 inch or less thickness, you�re workingoutside of the specified range.
The CSP-3 Silver Press uses a high strength cast iron framewith 80,000 PSI tensile strength. Most reloading presses are builtof aluminum or grey iron with only 35,000 PSI tensile strength.Since the Silver Press is horizontal, it cannot be used to reloadammunition even if you were to adapt the 5/8-24 tpi ram to ashell holder. It is designed for optimum speed and ease of use inswaging bullets.
Series II press, CSP-1 model.
This is the most popular press today, because it not only ac-cepts the original type -M dies, but also a 1 inch diameter type -S die (same threaded shank size, 5/8-24 tpi) in the ram. The Se-ries II press is a vertical design, with the floating punch holder inthe press head. It is the same FPH-1-M floating punch holder that
115
is used in the Silver Press. In fact, all of the tools that have a -Mdesignation in their catalog number fit the Series II press as wellas the Silver Press.
The Series II press looks like a Roman numeral II from thefront. It is designed from steel, not cast iron, so it is smaller andlighter than iron presses, which have up to five times less tensilestrength and half the power. A set of four roller bearings in thelinks provides smooth operation. Bearings surround the ram.
Bullets from .14 to .458 caliber, with a length limit of 1.2inches, are well within the range of most small arms calibers,and are also within the capability of the Series II press. The ad-vantage of the Series II press over the Silver Press is the greaterstrength (up to 130,000 PSI versus 80,000 PSI), slightly higherleverage due to the full 180 degree arc of the handle travel, moresophisticated engineering (all moving contact points use bear-ings, including the ram, which is surrounded by two inch-longbearings mounted in a precision honed cylinder), and capabilityto do reloading. The CSP-1 press comes with a FPH-1-M floatingpunch holder and a reloading adapter (to hold standard RCBSshell holders in the ram, extend the ram height, and provide aport for spent primers to drop into the primer catcher tray, alsoprovided).
A stop pin, mounted in the front of the press, pulls out soyou can use a long reloading stroke, and pushes back in so youcan use it to stop the downward movement of swaging punchesand cause automatic bullet ejection on the down stroke. The longstroke is set by removing a retainer pin (which looks a little like ahand grenade pin) from the link, pushing the steel pin out of theram and toggle, and moving the ram to a second set of holes inthe toggle, then pushing the pin back in and replacing the re-tainer pin. This is easily done by hand: just wiggle the toggle andram a bit as you push out or push in the pivot pin to help get itlined up in the ram bearing.
The CSP-1 press would be the right choice if you plan tomake bullets larger than about .308 with any chance of usinglead that isn�t pure, soft Bhn 5 material, because you could thenchoose the type -S dies, which hold more pressure than the regu-lar type -M dies. The hardest material suggested for use with type-S dies is Bhn 10, which is similar to many casting alloys, such asa 1 percent antimony content).
116
As the caliber gets closer to .458, you should consider thetype -S dies more strongly (because they are more strong thantype -M dies). As the caliber gets closer to .14, you can relax alittle more and consider the type -M dies, because there is moremetal around the hole and thus the die is stronger even though ithas the same outside diameter. There is no absolute cutoff point:we make .458 dies in type -M and type -S, and we can even maketype -S dies as small as .14 caliber (but it is a waste of yourmoney in most cases and we�ll try to tell you not to do it).
The guiding factor is the lead hardness, your tolerance forbeing careful, and the odds of breaking the smaller diameter diedoing experiments. If your lead is pure soft lead and you are afairly careful worker, and plan to use techniques that are recom-mended, the type -M dies should be fine. If you might use a littlewheelweight alloy from time to time, might get in a hurry some-times and throw the handle pretty quickly when swaging, or wantto play around with some techniques that no one may have triedyet, then the type -S dies are a much better choice. One brokentype -M die will more than pay for the cost of getting type -S inthe first place.
In neither the type -M nor the type -S dies should you try toswage solid copper, or lead harder than Bhn 10, or jackets thickerthan .035 in annealed copper, or any other operation that wouldtake greater pressures than recommended. If you want a caliberover .458, or a length of bullet over 1.2 inches, or a hardness ofmaterial over Bhn 10 (such as a steady diet of wheel weight al-loys or linotype) then you want type -H dies and the larger pressesthat use them.
The Series II press mounts directly to your loading bench, oryou can purchase the optional CSP-B Bench Stand. This sturdysteel stand puts the press about a foot higher than your benchtop, so you can look directly into the area where the externalpunch enters the die, and so you gain some extra leverage on thehandle. The Bench Stand has a shelf to hold spare parts and diesand a thick steel reinforcing plate that mounts under the top sec-tion. The press is held slightly forward, over the bench edge, tokeep the handle from striking the front of your bench.
Using the Bench Stand gives you room both under the standand on the shelf, so you wind up having more storage room thanbefore, instead of decreasing your bench space. But the main rea-son I like it is that most reloading benches are the right height forreloading, where you want to look down into the case during
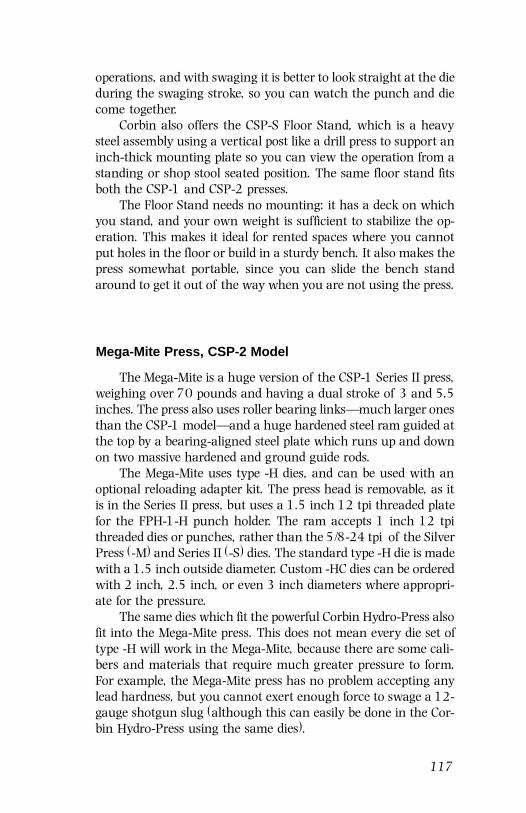
117
operations, and with swaging it is better to look straight at the dieduring the swaging stroke, so you can watch the punch and diecome together.
Corbin also offers the CSP-S Floor Stand, which is a heavysteel assembly using a vertical post like a drill press to support aninch-thick mounting plate so you can view the operation from astanding or shop stool seated position. The same floor stand fitsboth the CSP-1 and CSP-2 presses.
The Floor Stand needs no mounting: it has a deck on whichyou stand, and your own weight is sufficient to stabilize the op-eration. This makes it ideal for rented spaces where you cannotput holes in the floor or build in a sturdy bench. It also makes thepress somewhat portable, since you can slide the bench standaround to get it out of the way when you are not using the press.
Mega-Mite Press, CSP-2 Model
The Mega-Mite is a huge version of the CSP-1 Series II press,weighing over 70 pounds and having a dual stroke of 3 and 5.5inches. The press also uses roller bearing links�much larger onesthan the CSP-1 model�and a huge hardened steel ram guided atthe top by a bearing-aligned steel plate which runs up and downon two massive hardened and ground guide rods.
The Mega-Mite uses type -H dies, and can be used with anoptional reloading adapter kit. The press head is removable, as itis in the Series II press, but uses a 1.5 inch 12 tpi threaded platefor the FPH-1-H punch holder. The ram accepts 1 inch 12 tpithreaded dies or punches, rather than the 5/8-24 tpi of the SilverPress (-M) and Series II (-S) dies. The standard type -H die is madewith a 1.5 inch outside diameter. Custom -HC dies can be orderedwith 2 inch, 2.5 inch, or even 3 inch diameters where appropri-ate for the pressure.
The same dies which fit the powerful Corbin Hydro-Press alsofit into the Mega-Mite press. This does not mean every die set oftype -H will work in the Mega-Mite, because there are some cali-bers and materials that require much greater pressure to form.For example, the Mega-Mite press has no problem accepting anylead hardness, but you cannot exert enough force to swage a 12-gauge shotgun slug (although this can easily be done in the Cor-bin Hydro-Press using the same dies).

118
Also, the stroke length and power cycle affect some designsof bullets: you can swage a soft lead .600 Nitro bullet in theMega-Mite, but you cannot make a typical jacketed .512 for the.50 BMG caliber because the normal bullet is too long to allowsufficient leverage early enough in the engagement of the powerstroke. It hurts nothing to screw a set of .50 BMG dies into theMega-Mite, but you can push all you like without forming a bul-let.
On the other hand, if you made a .500 A.E. pistol bullet, theblunt nose and short length means you can use the end of thestroke, and thus apply force during the maximum power portionof the ram travel. That design of .50 caliber bullet can be swagedin the Mega-Mite press, provided you don�t also try to use hardlead or a very thick jacket (over .035 inches for the walls, incopper).
It is difficult to give a sudden cutoff point where the pressworks and then doesn�t work. This is because many factors influ-ence the amount of force you can apply with any hand-operatedpress, which gains power as the end of the stroke approaches.Any operation requiring much force at the start or middle of thestroke probably requires hydraulic power, whereas most opera-tions requiring maximum force only at the last half inch or lessof ram travel can probably be done on the Mega-Mite, if the di-ameter doesn�t become too large.
With the most blunt nosed, soft lead bullets, a .600 calibershort bullet (under 1.5 inches) can probably be swaged, as cansmaller ones. Some shotgun slugs, such as the .410, 28 gauge,and possibly even some short, blunt 20 gauge soft lead slugs, maybe made on the big hand press. But a 12-gauge slug, any sort ofexotic design of 20 gauge or 16 gauge slug, any bullet with anogive more than a caliber long, or any bullet over about 1.5 inchesin length, probably will require hydraulics.
Lead wire extruders designed for the hydraulic presses willnot work in the Mega-Mite. Practical lead extrusion takes fullpower from the start of the stroke, not just at the end. No matterhow large you make the press, if it uses practical leverage a nor-mal human being can operate, it probably will have about thesame amount of final tonnage and power cycle. This means abouthalf an inch of the final travel will give you 90 percent of thepower. Thus, jobs that require much pressure before the last halfinch of ram travel may not be practical on any size of hand press.
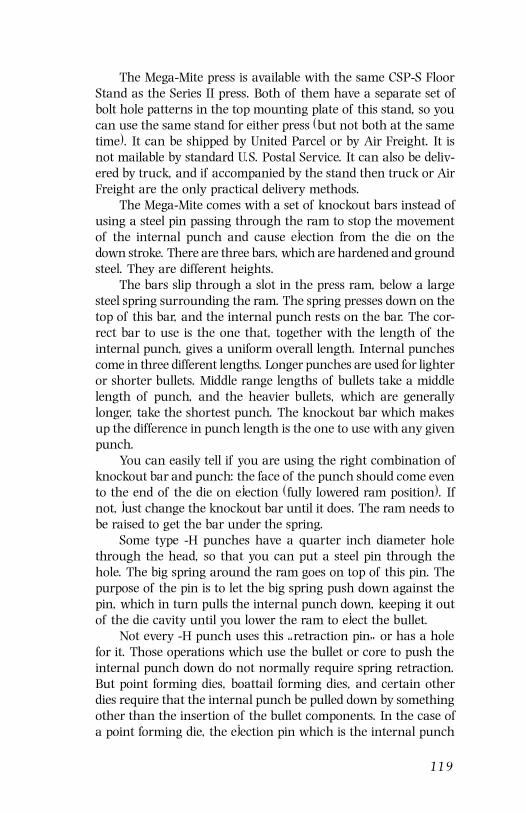
119
The Mega-Mite press is available with the same CSP-S FloorStand as the Series II press. Both of them have a separate set ofbolt hole patterns in the top mounting plate of this stand, so youcan use the same stand for either press (but not both at the sametime). It can be shipped by United Parcel or by Air Freight. It isnot mailable by standard U.S. Postal Service. It can also be deliv-ered by truck, and if accompanied by the stand then truck or AirFreight are the only practical delivery methods.
The Mega-Mite comes with a set of knockout bars instead ofusing a steel pin passing through the ram to stop the movementof the internal punch and cause ejection from the die on thedown stroke. There are three bars, which are hardened and groundsteel. They are different heights.
The bars slip through a slot in the press ram, below a largesteel spring surrounding the ram. The spring presses down on thetop of this bar, and the internal punch rests on the bar. The cor-rect bar to use is the one that, together with the length of theinternal punch, gives a uniform overall length. Internal punchescome in three different lengths. Longer punches are used for lighteror shorter bullets. Middle range lengths of bullets take a middlelength of punch, and the heavier bullets, which are generallylonger, take the shortest punch. The knockout bar which makesup the difference in punch length is the one to use with any givenpunch.
You can easily tell if you are using the right combination ofknockout bar and punch: the face of the punch should come evento the end of the die on ejection (fully lowered ram position). Ifnot, just change the knockout bar until it does. The ram needs tobe raised to get the bar under the spring.
Some type -H punches have a quarter inch diameter holethrough the head, so that you can put a steel pin through thehole. The big spring around the ram goes on top of this pin. Thepurpose of the pin is to let the big spring push down against thepin, which in turn pulls the internal punch down, keeping it outof the die cavity until you lower the ram to eject the bullet.
Not every -H punch uses this �retraction pin� or has a holefor it. Those operations which use the bullet or core to push theinternal punch down do not normally require spring retraction.But point forming dies, boattail forming dies, and certain otherdies require that the internal punch be pulled down by somethingother than the insertion of the bullet components. In the case ofa point forming die, the ejection pin which is the internal punch

120
cannot be inside the open end of the jacket while it is being formedinto a point (or else the pin would be trapped inside the jackettip). The spring pulls down on the retraction pin, which in turnpulls down the internal punch, and thus keeps the wire pin por-tion of the punch out of the main die cavity until you need it forejection on the down stroke.
The CSP-2 Mega-Mite press is a very capable reloading presswhen used with the appropriate adapter bushing and ram ex-tender/shell holder adapter. It can accept .50 BMG reloading diesdirectly in the head (if they are 1.5 X 12 thread). The RLA-1Reloading Adapter kit converts the press for use with regular RCBSshell holders and 7/8-14 tpi reloading dies. It also follows thatyou could use Corbin type -R dies for swaging in this press, or inthe Series II press (not the Silver Press). You cannot use -M ortype -S dies and punches in this press, however: the cost of adapt-ers for all the punches and dies would exceed the cost of gettingthe right dies in the first place!
Choose the Mega-Mite primarily if you need to swage hardlead, reload .50 BMG, make bullets larger than .458 diameter yetnot too large, long, or hard for a hand press, or plan to get ahydraulic press later and want to use the same dies now.
Hydro-Mite Press, Model CSP-1H
The Corbin CSP-1H Hydro-Mite is the smallest hydraulic pow-ered press Corbin builds. It is the same general size and frame asthe Series II press, but is equipped with a 3/4 HP 120 volt ACremote controlled power system. The smooth, quiet operationmakes long jobs of jacket drawing, bullet swaging, or case sizinggo quickly with almost no physical effort.
Although the press itself can generate somewhat more forcethan the hand presses, the main advantages are the lack of effortrequired (so that even disabled persons can perform long runs ofproduction without becoming tired), consistent adjustable pres-sure, and full power from the start to finish of the stroke. It is alinear power stroke rather than the log power stroke of a handpress, meaning that you can do drawing operations, lead extru-sion, and other jobs which use the same power at the start asthey do at the end.
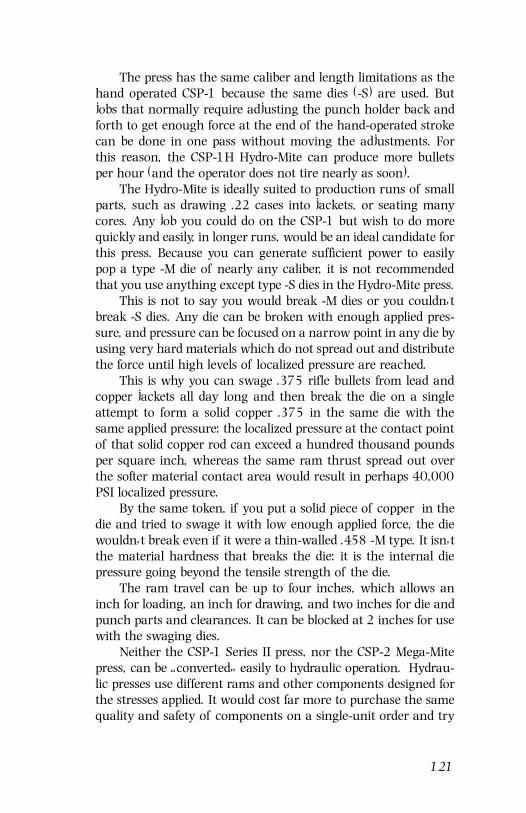
121
The press has the same caliber and length limitations as thehand operated CSP-1 because the same dies (-S) are used. Butjobs that normally require adjusting the punch holder back andforth to get enough force at the end of the hand-operated strokecan be done in one pass without moving the adjustments. Forthis reason, the CSP-1H Hydro-Mite can produce more bulletsper hour (and the operator does not tire nearly as soon).
The Hydro-Mite is ideally suited to production runs of smallparts, such as drawing .22 cases into jackets, or seating manycores. Any job you could do on the CSP-1 but wish to do morequickly and easily, in longer runs, would be an ideal candidate forthis press. Because you can generate sufficient power to easilypop a type -M die of nearly any caliber, it is not recommendedthat you use anything except type -S dies in the Hydro-Mite press.
This is not to say you would break -M dies or you couldn�tbreak -S dies. Any die can be broken with enough applied pres-sure, and pressure can be focused on a narrow point in any die byusing very hard materials which do not spread out and distributethe force until high levels of localized pressure are reached.
This is why you can swage .375 rifle bullets from lead andcopper jackets all day long and then break the die on a singleattempt to form a solid copper .375 in the same die with thesame applied pressure: the localized pressure at the contact pointof that solid copper rod can exceed a hundred thousand poundsper square inch, whereas the same ram thrust spread out overthe softer material contact area would result in perhaps 40,000PSI localized pressure.
By the same token, if you put a solid piece of copper in thedie and tried to swage it with low enough applied force, the diewouldn�t break even if it were a thin-walled .458 -M type. It isn�tthe material hardness that breaks the die: it is the internal diepressure going beyond the tensile strength of the die.
The ram travel can be up to four inches, which allows aninch for loading, an inch for drawing, and two inches for die andpunch parts and clearances. It can be blocked at 2 inches for usewith the swaging dies.
Neither the CSP-1 Series II press, nor the CSP-2 Mega-Mitepress, can be �converted� easily to hydraulic operation. Hydrau-lic presses use different rams and other components designed forthe stresses applied. It would cost far more to purchase the samequality and safety of components on a single-unit order and try

122
to build up a solitary prototype than it would to take advantage ofthe huge volume discounts Corbin already has earned and buyone of the standard presses for which parts are readily available.
Hydraulic Mega-Mite, Model CSP-2H
The Hydraulic Mega-Mite press looks almost identical to thefamous Corbin CHP-1 Hydro-press at first glance. You notice thecolorful top, the color-coded indicator lamps and buttons, heavychrome-moly ground and polished guide rods and space-age ramand guide plate bearings. The difference is in the additional logicand control circuits, transducers and sensors found in the Hydro-press.
The purpose of the CSP-2H is to fill in the gap between theCSP-2 Mega-Mite hand press, which uses the same dies, and themore versatile CHP-1 Hydro-press. If you don�t need to add auto-matic strip feeds, or semiautomatic stroke cycle, or let the pressfinish a bullet while you inspect and package the last one (givingyou almost twice the production per hour), then the CSP-2H is agood choice.
With a 2,000 PSI drive pressure, adjustable down to 500PSI, and position detectors for the ram, you can set not only thecorrect pressure to use, but also the ram position at the top andbottom of the stroke. This becomes important because it meansyou can define the stroke, adjusting for various die and bulletlengths to give you optimum speed and minimum wasted ramtravel.
If you want to extrude lead wire, make 12-gauge or 10 gaugeslugs, stamp out medals or coins from thick strips of silver, cop-per, brass, or bronze, make copper tubing jackets up to .125 inchwall thickness, or form certain kinds of solid copper bullets, thenthe CSP-2H may be the most economical choice. If the caliber islarger than .458 or the material hardness exceeds Bhn 10, or thebullet length is between 1.2 and 2.5 inches, such as the .50 BMGbullet, you can choose between this press and the CHP-1 Hydro-press.
There is no other reason besides cost not to get the CHP-1.The CSP-2H is identical in power, stroke, cabinet and head designand takes the same dies and punches (-H). The CHP-1 adds ad-justable ram speed, automatic pressure reversing, programmablestroke controls, automatic loading position, adjustable top-of-stroke
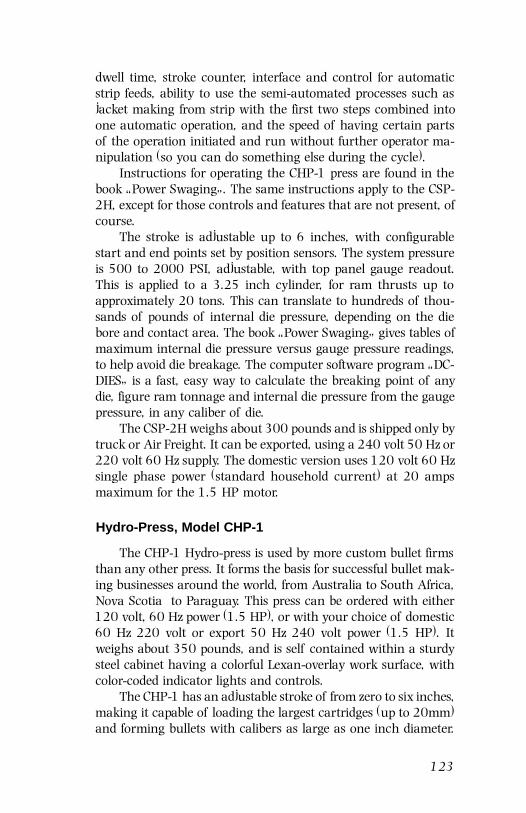
123
dwell time, stroke counter, interface and control for automaticstrip feeds, ability to use the semi-automated processes such asjacket making from strip with the first two steps combined intoone automatic operation, and the speed of having certain partsof the operation initiated and run without further operator ma-nipulation (so you can do something else during the cycle).
Instructions for operating the CHP-1 press are found in thebook �Power Swaging�. The same instructions apply to the CSP-2H, except for those controls and features that are not present, ofcourse.
The stroke is adjustable up to 6 inches, with configurablestart and end points set by position sensors. The system pressureis 500 to 2000 PSI, adjustable, with top panel gauge readout.This is applied to a 3.25 inch cylinder, for ram thrusts up toapproximately 20 tons. This can translate to hundreds of thou-sands of pounds of internal die pressure, depending on the diebore and contact area. The book �Power Swaging� gives tables ofmaximum internal die pressure versus gauge pressure readings,to help avoid die breakage. The computer software program �DC-DIES� is a fast, easy way to calculate the breaking point of anydie, figure ram tonnage and internal die pressure from the gaugepressure, in any caliber of die.
The CSP-2H weighs about 300 pounds and is shipped only bytruck or Air Freight. It can be exported, using a 240 volt 50 Hz or220 volt 60 Hz supply. The domestic version uses 120 volt 60 Hzsingle phase power (standard household current) at 20 ampsmaximum for the 1.5 HP motor.
Hydro-Press, Model CHP-1
The CHP-1 Hydro-press is used by more custom bullet firmsthan any other press. It forms the basis for successful bullet mak-ing businesses around the world, from Australia to South Africa,Nova Scotia to Paraguay. This press can be ordered with either120 volt, 60 Hz power (1.5 HP), or with your choice of domestic60 Hz 220 volt or export 50 Hz 240 volt power (1.5 HP). Itweighs about 350 pounds, and is self contained within a sturdysteel cabinet having a colorful Lexan-overlay work surface, withcolor-coded indicator lights and controls.
The CHP-1 has an adjustable stroke of from zero to six inches,making it capable of loading the largest cartridges (up to 20mm)and forming bullets with calibers as large as one inch diameter.
124
There is no limit to the jacket wall thickness, other than practicalconsiderations of performance. You can swage virtually solid jacketmaterial with merely a tiny hole through the center, or in somecases even solid copper rod.
Naturally, there is no limit to the lead hardness or alloy youcan swage in the Hydro-press. The normal die size is 1.5 inches indiameter, but custom dies can be made as large as three inches.Custom dies of 2-1/2 inch diameter are sometimes built to handleslightly higher than normal pressures without going to the hugeX-Press (CHP-2), which uses a larger cylinder and a 2-HP 220-240 volt AC motor. Such dies are quoted individually dependingon features needed.
The Hydro-press is the world�s most powerful bullet swagingpress in standard production. The ram is threaded for 1 inch by12 threads per inch (tpi), and moves inside precision fitted guidebearings. The press head is aligned and guided by a heavy steelplate, which itself runs up and down on two high-tech friction-less bearings, on hardened and ground steel guide rods.
Instead of just providing raw power, the CHP-1 applies intel-ligent use of force to your bullet making operation. You can setthe appropriate starting point, for proper ejection of the bullet,by moving a non-contact electronic position sensor. Then youcan set a second point where the ram will come up and stop,retracting the internal punch a short distance to allow easy inser-tion of the next part. This is set by a second proximity transducer,mounted on a steel standard beside the press head.
The top of the stroke is set by yet another proximity trans-ducer. You can define the precise amount of ram travel and endpoints of travel, which in turn defines the amount of space youhave to load components, eject them, and form the bullet, jacket,or other component. Reloading with the Hydro-press is a plea-sure because of this precise stroke control feature.
The press also features pressure transducers which monitorthe applied pressure and can be set to stop the travel of the ram ata predetermined pressure, hold that pressure for a given amountof time (adjustable precisely in milliseconds, seconds, minutes, oreven hours), then either wait for your manual command to re-tract, or follow a programmed stroke cycle that can include auto-matic ejection, and return to a loading position.
With a key-locked automatic/manual mode switch, the presscan be set for fully automatic stroke cycling. This allows you tomeet safety standards by controlling who will be allowed to run
125
the press in automatic mode. It also lets us design electronic in-terfaces with the JMK-2 jacket maker kit, so it can work with theCSU-1 Corbin Strip Uncoiler. You can set up a fully-automaticstrip feed that handles 100 pound coils of jacket material, andcan lubricate, feed, punch disks and draw them into cups, chopup the scrap material remaining for easy handling and resale to ametals dealer, and run the cups into a waiting container on asmall conveyer belt!
The JMK-2 connections let the CHP-1 shut down when thelast of the coil is turned into cups, and provide power to theautomatic lubricator/feeder/die-head/conveyer system. All of thismay not be of great interest to the person just starting in thebullet business, but it can be a valuable bonus feature later whenthe business expands. Instead of buying new machinery, you cancontinue to use the versatile CHP-1 with optional add-on sys-tems.
The CHP-1 is best used for making bullets from .224 to .720caliber (12 gauge), although it can make bullets up to 1 inchdiameter with custom dies and punches, and some restrictionson the jacket materials and core hardness. It can extrude a 14-ounce cylinder of lead in seconds, turning it into yards of bulletwire from .390 to as small as .040 inch diameter (below about.125 inch; we use multiple die holes and extrude several streamson the same stroke).
Jacket length is of little concern: the CHP-1 can make bulletsfor the .50 BMG or a .600 Nitro, or draw long jackets for 6.5mmbullets with equal ease. Even jacketed 12-gauge slugs are simpleto build. The CHP-1 is covered thoroughly in the book �PowerSwaging�. This book is highly recommended before attemptingto operate the press.
Safety is a primary concern with any powerful machinery.The safety record of the CHP-1 is remarkable. No injuries havebeen reported since the first machine was shipped over a decadeago. The normal operation calls for one hand to press an �Ener-gize� button, and the other to press on a large �UP� or �DOWN�button. A bright red light comes on when you put the press inautomatic mode, with the key lock switch. Even then, you mustfollow a correct sequence of pressing the �ENERGIZE� button,holding it down, then pressing and releasing the �UP� button,and finally releasing the �ENERGIZE� button, before the auto se-quence will be recognized.
126
Ram speed can be controlled from zero to about 2 inches persecond. This is fast enough to make over 400 lead bullets perhour, and yet slow enough so that occupational health and safetyofficials are not concerned excessively about the need for elabo-rate guards on the machine. The press comes with two brightorange metal guards that clip onto the moving ram guide. Theirmain function is to intercept any lead extrusions which pop outof the CSW-1-H core swage or LSWC-1-H lead semi-wadcutterdies, so that their energy will be expended and they cannot strikeyou.
The CHP-1 is designed so that the cabinet is part of the cool-ing system for the motor and hydraulics, and also holds the hy-draulic fluid in a closed, baffle-stabilized tank that is the lowerportion of the cabinet. Air is moved through the cabinet fromtwo 100 CFM electric fans on the left side, and drawn over the oilreservoir section, from a fixed-width gap that causes the air toexpand slightly and thus adsorb heat from the tank.
The front panel of the cabinet comes off to expose the motor,control and logic panel, drive cylinder, and hydraulic plumbing. Ahydraulic oil filter of the canister, screw-on type, is mounted in-side and will need to be changed only once every five or so yearsof normal use. The closed system with vertical cylinder mount-ing puts very little wear on the cylinder seals and permits little orno contamination of the oil. Thus, maintenance is reduced tovirtually nothing: just keep the guide rods and ram reasonablyclean of grit and use a light oil to prevent rust in damp environ-ments, and don�t keep the machine in an unheated space wherecondensation can form inside. Operate at normal room tempera-tures of from 60 to 85 degrees F. for best results. That�s it!
The CHP-1 press uses type -H dies. The cost of adapting -Mor -S dies to this huge machine would be prohibitive, and it wouldbe far too easy to crack them from excess pressure. Reloadingpress dies, on the other hand, are easily fitted by using the RLA-1Reloading Adapter kit. This kit consists of a 7/8-14 tpi to 1.5�-12 tpi bushing (for the press head), and the combination of aram extender and shell holder adapter (T-slot with primer port,similar to the RCBS ram).
Optional accessories for the CHP-1 include the LED-1 LeadExtruder set, to make lead wire from scrap lead (soft lead only),anvils to screw into the punch holder and ram so you can use the
127
press as a high powered, precision arbor press, and both the JMK-1and JMK-2 jacket maker kits for turning strip into drawn jacket,just like the factory�only better!
The Hydro-press can also be used to punch and form medalsand coins from gold, silver, brass, nickel-silver, and aluminum,and to stamp and shape such items as gun sights, trigger guards,and other steel parts. It has been used to manufacture compo-nents from fishing tackle to power transmission line connectors.
You can, of course, build as powerful a machine by connect-ing an appropriate size cylinder to a hydraulic pump and motor.But it would not be designed with the various dies at hand norwith the years of experience getting the dimensions, control cir-cuitry, and appropriate cycle timing. And if it cost less, the oddsare extremely good that the components used are not the samequality: we buy hundreds of pumps and cylinders from top mak-ers like Vickers (The TJ-Aeroquip division is right around the blockfrom our plant) and generally it is more economical to buy a lotthan just one, a savings we pass along in pricing the machine.
The CHP-1 press is built to do everything from making yourlead wire, to forming the jackets, to swaging the bullets, and evento reloading the cartridges, with the effort it takes to press a but-ton. It is not a high-speed production machine, like a progressiveloader, but is a high precision, high power production machinefor profitable, exotic bullet styles that are not offered in high vol-ume by anyone (because their market is smaller and more exclu-sive).
Our purpose in developing the custom bullet market over thepast two decades has been to carve out a niche with appropriatetools, in the appropriate price range, so that individuals whowanted to have an interesting, profitable business at home coulddo so without the need for high risk investments in high speedproduction and the huge markets that are needed to support them.The custom bullet market is ideally sized for the machines webuild, because we built the machines with the business conceptof custom bullet sales and markets in mind. Then, we built themarkets by showing clients how to promote, advertise, and sellhigh performance, at a fair profit, instead of run-of-the-press massproduction that must compete only by offering a lower price andthus virtually assuring a low profit.
The CHP-1 Press is the main tool used by hundreds of full-time commercial bullet makers today. It is not a mass-produc-tion, high volume, low profit machine. It is a custom production,

128
high profit machine. It stamps out profits for its owners, withevery bullet you carefully assemble, because it can make bulletsmany shooters are willing to pay over a dollar, sometimes overtwo dollars, each to obtain. Almost every advertisement you seetoday for custom bullets is from one of our successful clients.Some are quite famous now. It makes me feel very good about theswaging field.
For more information about the business aspects of customswaging, ask for the booklet �Opportunities in Custom BulletMaking�. It comes with other information regarding return oninvestment, capitalization of labor, market size and so forth. Thenegatives are spelled out clearly, but I will summarize it here:
You need to be a shooter and know about handloading to selland market bullets (a business person is at a disadvantage with-out this skill), and the market size is limited so that the averagecustom bullet business will only produce about twice the averagewage-earner�s income. It probably will not become a big busi-ness. Only a few do over a million dollars per year gross. The goodpoints are that relatively few people are in the field compared tothe potential buyers, the return on investment is extremely high(typically around 500% per year) and the capital risk is minimalprovided you follow a proven, low-overhead plan I outline in thebooklet. Plus you can do it at home with the family and have fun!
X-Press, CHP-2
The Corbin X-Press (we call it our experimental model, be-cause the only people who need it are on the cutting edge ofexperimental bullet designs) is a huge version of the CHP-1. Ithas more power (2-HP 220-240 volt motor). It has much largerram and head assembly, and directly accepts huge composite -Xtype dies. These dies are made by a process of extreme cold andheat, reinforced with a thick band of 4140 steel pressed on whilered hot, on a frozen inner cylinder. They are heat treated in spe-cial gas atmospheres, salt baths, and by other methods to achievethe necessary strength.
Solid copper or brass bullets in calibers as large as the 50BMG are made in these dies. A �Top-Gun� 3 gun aggregate 50caliber bench gun winner, Carl Matts, made the first of the solidson one of the first of these machines and took the winner�s posi-tion with the bullets it produced. Others have built interesting
129
and unusual bullets that required more pressure than the -H dieswould handle, or more ram thrust than the CHP-1 would pro-duce. It is not �better� than the CHP-1 and I would not wantanyone to purchase it thinking it was a step up in general. It is aspecial purpose machine that was built to fill certain needs, andnot as a �deluxe� version of anything.
The reason I want to make this clear is so that you won�t say,�Well, if I�m going to go for the CHP-1, I might as well spend alittle more and get the CHP-2. It isn�t that much more and Imight need the extra power someday.�
The CHP-2 is so much larger that the regular -H dies have tobe fitted with adapters in order to work in it. This isn�t a bigthing, but it makes the press slightly less convenient to use for�normal� work. Also, the size of the head makes it impractical toadapt the JMK-2 automatic jacket drawing head. It would justcost too much, and you�d be far better served by spending thesame amount on a second press (a CHP-1) that is designed tohandle the jacket maker head.
This is not to say you couldn�t make jackets on a CHP-2. Oh,no. You could do that. But you would need to use either custombuilt dies, or adapt the JMK-1 dies with a bushing kit so they fitboth the ram and the press head. The JMK-2 is out of the ques-tion. It fits only the CHP-1 press, period. We spent ten years de-veloping it, and getting the dimensions and interface just right,and I don�t think you�d want to pay for a whole new developmentjust for the CHP-2 when you could get the CHP-1 for less.
So, why would anyone want the CHP-2? It costs about 20%more than the CHP-1, but that isn�t prohibitive: anyone who canafford the one, can probably afford the other. The main reasonyou�d want it is for solid copper bullets, aluminum bullets, stamp-ing and drawing heavy strips into coins or cups (heavier than.125 inches, or tougher to punch than .125 inch thick copper),or for fabricating products that simply are too large or hard toswage for the -H dies or the CHP-1 press.
I said products, not just bullets. Many people use our pressesfor things other than bullet making, although that is their mainpurpose. Lead extrusion, hollow lead tubing, primer cord, trans-mission line connectors, bass lures, fishing tackle and sinkers,calcium carbide capsules for emergency lamps, flare gun cartridges,rocket motor housings, even punching holes in truck leaf springsfor mounting bolts... there is so much a powerful, controllablepress can do. But bullet making is the main thing.
130
If you want to make a 1 inch projectile with soft lead coreand a thin copper jacket, the CHP-1 will probably do fine as longas you use a custom 2.5 inch diameter die. But if you change thespecifications to a harder lead alloy, keep the same inch diameter,or want a brass or steel jacket, then probably the CHP-2 is abetter choice, along with the big dies that fit into it.
The X-Press is only slightly heavier than the Hydro-press, atabout 380 pounds (more steel, bigger cylinder, larger motor). Youneed 220 or 240 volts single phase power for the most standardof the designs, but we can build just about any kind of version:that is why it is �experimental�. Bear in mind, though, that if youdrop the power back to 1.5 HP so you can run it on 120 voltsingle phase power, the speed will drop considerably on the ramtravel.
Total horsepower is a product of the speed of travel times theamount of pressure available. If the press is very slow moving,you can get more power with the same motor. If it moves asquickly as you would probably want for reasonable production,and has more pressure than the alternative press, it must havemore horsepower applied.
You can use up to a 3 HP motor on a 220/240 volt singlephase circuit. If you want more power, you must go to 3 phasecircuitry. We can furnish the X-Press larger motors for a differen-tial in price. To gain an advantage by doing this, we also need tosize the gallons per minute flow rate of the pump, and its maxi-mum rated pressure, to utilize this power. If your operation doesn�trequire more pressure or speed, no more power is needed either.It is just a matter of operating efficiency, whether you need todraw that much or not.
The X-Press is available on a custom basis, and isn�t usuallykept in stock except for the one we have for testing dies (no, sorry,it isn�t for sale: we have to keep one on hand all the time for ourown use, or we could not do repairs and test the dies!). If youthink you want or need one, let�s talk it over and see if the CHP-1 would do the job, first. Then if it becomes obvious that it wouldnot be adequate, we can build an X-press just for you, the wayyou want it.
131
11. Base-Guard, Half-Jacket andPaper Patch Bullets
Bullets which have a shoulder between the nose section andthe shank can be made in a straight cylinder kind of die, by usinga punch that has the nose shape machined into a cavity. The edgeof the punch cannot be knife-edge thin, because it would soonbreak off from the stress of being pressed under tons of forceagainst the die wall and then moved to eject the bullet. In fact,the edge would break off at a ragged point about .020 inchesthick.
This is why we build the punches with a nominal edge thick-ness of about .020 inches: it is the minimum practical thicknessof edge that will withstand being pressed outward by swagingpressure and then moved.
One of the most common misconceptions is that a personshould somehow be able to make a bullet in the straight cylinderand punch cavity type of die (which we would call the LSWC-1style) with no shoulder�in other words, a typical rifle bullet or afull jacket style of handgun bullet. How? Well, they suggest mak-ing the punch edge razor thin. Simple. No edge, no shoulder.
Too bad it doesn�t work that way. We could save untold thou-sands of dollars invested in machines and tools to build diamond-lapped point forming dies, with the shape of the bullet carefullyreamed and lapped into the cavity itself instead of into a movingpunch with an edge.
A straight hole, through the die cylinder, fitted with a close-fitting punch that has the nose shape machined in reverse (acavity), can form lead, gas check, Base-Guard, or half-jacketedbullets with virtually any shape of nose. You can make wadcut-ters, semi-wadcutters, big hollow cavities like the old Webley Man-Stopper, sawtooth bullets, and even pointed rifle type bullets�provided the nose is all lead and the jacket stops where the punchbegins, with a shoulder the width of the punch edge.
We call any bullet of this general type a �semi-wadcutter� or�wadcutter� depending on how much of a nose it has, if any.That doesn�t mean you can�t make a very nice .45 caliber paperpatch rifle bullet with the LSWC-1 die. It just means the nose willbe joined to the shank with a small shoulder, which you willprobably just barely cover with the edge of the paper patch.
132
To get rid of the shoulder, you would swage the bullet in apoint forming die, which is a semi-blind hole shaped like the bul-let, having a small ejection pin at the tip to push the bullet out.But this kind of die is not sealed on both ends: the small ejectionpin needs to be out of cavity to avoid putting pressure on it dur-ing swaging, because it is, after all, very long and thin. Since thedie is not sealed, you cannot develop the same high, uniformpressure that is produced in a cylinder type of die.
So, to be able to extrude surplus lead, adjust the weight, andform a more nearly perfect diameter and roundness of shank,you would first swage the lead slug in a CSW-1 core swage die.This would give you the high precision weight control and diam-eter you want in quality swaged bullets, and at the same timewould put a nice flat on both ends, instead of a rough cast or cutwire end. Then, the smooth flat end will shape itself more cleanlyinto a smooth round end in the next die.
No shoulder means two dies: a core swage, and a point form.A shoulder means you can use one die: the lead semi-wadcutter.Yes, even for paper-patched, round nosed rifle bullets: it is exactlythe same kind of die, even if you make the nose cavity longer anddon�t normally think of the bullet style as being a semi-wadcut-ter. We can�t call this die a �Lead, gas-check, Base-Guard, andpaper-patch bullet swage that can make wadcutters, semi-wadcutters, and rifle type noses too�. That won�t fit in the 8 char-acter space our computer order system provides! So we�ll just callthem all �LSWC-1� dies, OK?
In the -R (reloading press) dies, we have the EC-1-R Econo-Swage, which is almost the same thing without any bleed holes.It is similar to what we would otherwise call a �Core Seater� dieor �CS-1� style, being a cylinder fitted with punches to form thenose and base of the bullet on one stroke. Putting bleed holes inthe side of the die makes it a �LSWC-1�, if it does in fact havenose and base punches so it can finish up the bullet in one stroke.(If it made the core for a bullet, and was fitted with flat punches,it would be a �Core Swage� or �CSW-1� style of die.)
133
The EC-1-R Econo-Swage can�t have bleed holes in the sideof the die, because it fits into a reloading press. The reloadingpress is designed for reloading, so the ram comes almost to thetop. That is where all the power is developed in the stroke, so thatis where the die must be set to form the bullet. If the die is in thetop of the press, not hanging down below it, there is no place forlead extrusions to be spurted out of the die sides. The bullet isbeing formed inside the part of the die that is surrounded bythreads of the press head. In the EC-1-R die, you adjust the weightby casting or cutting the lead as accurately as you can beforeswaging.
In any of the Corbin presses, you would put the LSWC-1 dieinto the ram, along with its internal punch. With the type -M andtype -S dies, in the Silver Press or Series II press, there is a roundstop pin projecting from the press. It has a knurled head. Nor-mally you just leave this pin in place with all the dies except forthe point forming die, which uses this pin to trap the ejection pinpunch so it is retracted from the die cavity when the bullet forms.All the other dies have punches large enough so that they will bepushed back by the component when you raise the ram.
The stop pin pushes on the tail end of the internal punchwhen you pull the handle back down (retract the ram). This stopsthe punch from moving back down with the die and ram. Theycontinue down, the stop pin holds the internal punch and keeps itfrom moving, and so the bullet is pushed out of the die on thedown stroke. This provides automatic ejection.
In the Mega-Mite and Hydro-Press, a steel bar goes completelythrough a slot in the ram and serves the same purpose as the stoppin (which goes in a slot in the ram, but the slot is only in oneside of the ram). The bar for the press is made in three differentheights, so that the total length of the punch you use and theheight of the bar, combined, are always the same distance. Witha longer punch, you use a shorter knockout bar, and vice versa.
Punches are made longer or shorter to accommodate longeror shorter bullets. A .50 caliber bullet is quite a bit longer than a.224 bullet or a .38 pistol bullet. A .308 rifle bullet is somewherein the middle. There would be no point and a lot of wasted metalin making a .22 or .38 die the same length as a .50 BMG die, sothat is why we have three standard lengths of dies, which havematching length punches, which have corresponding length
134
knockout bars. The range of bullet lengths in the smaller pressesis not so extreme, so we can get by with one stop pin positioneven with slightly different punch and die lengths.
The external punch always goes into ram in a reloading press,just like a shell holder. But in Corbin presses for swaging, theexternal punch fits into a threaded body called the �Floating PunchHolder� or �FPH-1�. The same kind of 7/8-14 tpi FPH-1 is usedin both the Silver Press, and the Series II press. It is designated the�FPH-1-M�. A larger 1.5�-12 tpi FPH-1 is used in the Mega-Miteand Hydro-Press. It is called the FPH-1-H.
A special high accuracy punch holder made of hardened steelwith a hole all the way through it, so you can drop the punch infrom the top, then screw in an adjusting stop bolt, is made for theHydro-Press. It is designed to contact the die face and stall thepress, providing almost zero tolerance weight control. This spe-cial punch holder is not provided with the press, but is availableas an option. It is called the �FPH-2-H� Positive Stop Punch Holder.
In the reloading press you would move the die up and downto adjust for weight and changes in style. In any Corbin press youwould move the FPH-1 up and down. The external punch is heldin the FPH-1 by a retainer bushing. In the type -M and -S dies, theexternal punch is identical and interchangeable, whereas the in-ternal punch is longer with the type -S die.
Type -M and -S dies can have the retainer bushing (also calleda �hex bushing� since it is hexagonal at the exposed end) fitted tothe punch permanently, if the punch tip is larger than about.375 inches. Smaller punches use the retainer bushing that comeswith the punch holder, which comes with the press. There is alsoa steel ring or collar, which slips over the punch before you screwin the retainer. This collar allows the punch to move slightly un-der pressure for perfect die alignment (hence the name �Floating�in the punch holder designation).
The type -H sets use punches so massive that their own weightassures alignment as they hang down vertically from the punchholder. No collar is used in the FPH-1-H. The retainer can behexagon or round. Generally if it is made round it will haveknurling or a pin wrench hole to snug it down. Hand tighteningis usually sufficient except for long production runs.
Moving the punch (or punch holder) in, closer to the die, isjust like using more powder in your handloads. You want to ap-proach any changes with care, use small changes and test the
135
results, watch for risky pressure signs, and back off if it appearsyou are raising pressure too far. It�s not likely you�ll hurt any-thing but the die or punch with careless operation, but damagingeither one of those will hurt your budget.
With the die and internal punch in place in the ram, makesure the stop pin (the little knurled head with the short pin, fittedto a hole in the top of the press) is in place. This pin stops theinternal punch from going back with the ram on the ejectionstroke, which is what pushes the bullet out of the die. If you don�thave the stop pin in place, you can�t eject anything from the die.
Cast or cut a piece of lead to approximately the right weight,plus a few grains (unless you are using the EC-1-R, in which caseyou want the right weight now). Put a small amount of CorbinSwage Lube on your fingertips, and give the lead a turn betweenyour fingers to spread some lube film on it. Then put the lead inthe die, and gently move the ram forward so the punch enters it,pressing on the lead core.
I like to adjust the punch holder so that there is no contactwith the ram all the way forward, then screw the holder downuntil I can�t move it by hand, lower the ram slightly and give thepunch holder about a quarter turn further down. Raise the ramand swage. Inspect the bullet. If it isn�t formed out completely,keep lowering the ram in 1/4 turn increments until it forms, butdon�t apply more than a comfortable amount of pressure on thehandle. If the pressure goes way up, you have the punch holdertoo close to the ram and have lost the point of high leverage thatmakes the operation child�s play. A five year old could do it if youadjust the position just right. A gorilla couldn�t do it if you gohalf an inch too low.
In every operation, with each kind of swage die, you willwant to follow this basic procedure. Moving the external punchcloser to the ram always reduces the space between the internaland external punches at the end of the press stroke, and thusgenerates more pressure on the core. Approach this just as youdo when increasing the powder charges in a handload: work froma known safe level in small increments toward higher pressures,checking the results as you go. As soon as you see any signs ofexcess pressure, back off !
The signs you may see would be an increased effort withoutan increase in the diameter of the bullet shank, or excess leadextruding around the punch. When the diameter of the bullet orcore reaches that of the die cavity, you have done all that is nec-
136
essary or wise, and should stop applying any more pressure. Fur-ther force only stresses and eventually breaks the die or bends thepunch.
It is a good idea to test the actual diameter of any die bymaking a pure, soft lead slug in that die and then measuring thediameter of the slug as a standard to compare with jacketed bul-lets formed in that die, and with the size of following dies to beused. In the case of the LSWC-1 or EC-1 die, this isn�t necessarybecause you generally make lead bullets as the final product. Butin a core swage or point forming die, boattail dies or lead tipforming dies, the difference between the component diameterformed in the previous die and the bore size of the next die iscritical. You should always have a slightly larger hole into whichto push the component on the next operation. If the componentis already at or larger than the size of a lead slug formed in thedie, you�ll probably get hard ejection and stuck bullets.
In the LSWC-1 or EC-1 die, however, the bullet is finishedwhen it comes out of the die, and there are no more operations toperform on it. If you want to make a hollow point cavity in thenose, you can use a separate HP type external punch to poke ahole in the nose, which of course displaces lead and changes thenose shape. You can either use the HP punch first, on the flat endof the lead slug, forming a broad flat-end wadcutter with a largecavity, and then change punches and wrap the nose around bycareful adjustment and inspection until you have the shape ex-actly right with the desired cavity size, or you can use the regularnose punch first and then push a HP punch only part way into it(since pushing it all the way would totally change the nose shapeinto a flat-end hollow point wadcutter).
For gas checks and half jackets, the lead slug that you use forthe core must fit inside the jacket or gas check before it is swagedto final size. The jacket should always be slightly smaller than thefinal bullet diameter, so it will fit easily and expand upward, cre-ating a snug fit on the lead when you release the pressure. If thejackets are, for instance, 0.3575 inch diameter and your die hasa bore of 0.3570 inch diameter, all you get is difficulty formingand loose cores or gas checks that pull off from base drag on theirway to the target.
On the other hand, if you use half-jackets or gas checks thatmeasure at least 0.0005 inches smaller than the desired bulletdiameter (and bore of the die), they will be expanded nicely andthen spring back slightly when you release the swaging pressure,
137
gripping the lead tightly, coming out of the die easily, and pre-venting the lead from turning inside the jacket. If you ever getstuck with a quantity of oversized jackets, Corbin makes JRD-1jacket reducing dies that can be used to pull them down to slightlyless than the final bullet diameter. You can use jackets that are asmuch as .005 inches smaller than the bullet without any prob-lem. Some jackets can be even smaller, depending on their strength,temper and wall thickness.
Base-Guards are conical disks with a hole in the middle, likea very wide washer. The hole is usually about 1/8 inch in diam-eter. The Base-Guard is normally made of copper, about .030inches thick. Because they are conical, they will expand whencompressed and become the exact size of your swage die. Anysurplus metal will be extruded forward to form a burnishing tooledge, because one side is backed by the steel punch and the otherside only faces soft lead. This scraper edge will engage the riflingand push fouling out ahead of it, making it unnecessary to useany bullet lubricant, up to reasonable velocities of 1,200 to 1,400feet per second.
The best way to make a Base-Guard bullet is to first swagethe lead slug into the bullet shape using either a flat base punchor the special BG punch, which has a shallow depression in theexact center. Then eject the bullet, drop a Base-Guard disk intothe die with the cone tip facing out, toward the bullet, and swagethe bullet again.
This double-swaging process does two things for you. First, itassures that the base is already square and flat before the Base-Guard disk is attached, and thus prevents the Base-Guard fromhaving to bend and shape itself to a rough or uneven lead coreprior to attachment. Second, it helps to adjust the weight and getthe nose formed perfectly before worrying about the correct pres-sure needed to extrude the lead stem through the hole in theBase-Guard and form a good rivet head in the punch depression.
If you use cast cores, they are probably already flat on theend and you can swage all in one step with just about as goodresults as double-swaging. If you cut lead wire, there is always ashear angle to the cut, which tends to tip the Base-Guard disk andcan result in a few bullets being made with the disk at an angle orpushed up along one side of the bullet. However, try it both waysand decide for yourself the best combination.
138
For paper-patched rifle or handgun bullets, nothing special isrequired except that you may wish to use a cup-base (CB) inter-nal punch, instead of the usual flat base punch. There are actu-ally three standard base cavity shapes that Corbin produces (aswell as any custom shape or dimension you wish, for a customfee). These are: (1) Dish Base (DB), (2) Cup Base (CB), and (3)Hollow Base (HB).
The Dish Base is a shallow curve that extends from one sideof the bullet to the other, with no flat �margin� on either side. Itis used to slightly force the edges of the bullet against the riflingso that moderate loads of slower burning powder will quicklyexpand the bullet into the bore and prevent early gas leakage. It isused when the pressure is fairly high (hot loads) and cup or hol-low bases might become flared excessively from the muzzle gaspressure.
The Cup Base is a deeper curve with margins on the sides,designed to hold moderate muzzle pressures in blackpowder riflesand in modern target handguns firing typical target loads. Thecurve is less than one caliber in depth (typically 1/16 inch). It isvery useful in paper-patched bullets as a place to tuck the extrapaper gathered at the bullet base, and can help fit a standarddiameter bullet to various bores during firing.
The Hollow Base (HB) is the deepest curve, with marginsthat are designed to hold muzzle pressure so the base won�t ex-pand excessively when the bullet pops out of the barrel. The de-sign is to shift weight forward and lighten the bullet for its length.Air gun pellets, shotgun slugs, and muzzle loader bullets that aremade to slide down the bore and then expand into the rifling onfiring generally work best with this design.
In the Hydro-Press or Mega-Mite Hydraulic press, you canswage fairly hard lead in a LSWC-1-H die. Be careful to use theorange press-fit guards around the die, however. The pressurethat it takes to extrude the lead is very high, thousands of pounds,and can build up before the lead extrusions finally move throughthe bleed holes. When they do let go, they can fly out at fairlyhigh velocity. They are generally light and not very aerodynamic,so they lose velocity quickly and are easily stopped. Stopping themwith your body could be painful when using hard lead, becauseof the higher pressure, and the guards work much better.
139
Never put your face down close to the die when you are swag-ing! If you should happen to exceed the breaking point of the dieby applying too much pressure, generally there is a loud pop andthe die either falls in two (or three) fairly even pieces, or it crackswithout any apparent change, and is held together at the threads.Sometimes, though, there is enough lubricant or air under pres-sure in the die to blow a piece of lead or broken die at high veloc-ity in any direction. If it hits you in the eye, it could blind you.This kind of thing has never happened in the past 22 years of myexperience, but it is possible, so wear eye protection and keepyour face back from the die while swaging.
You should be able to put the external punch into the die byhand, so long as the punch is clean and lightly oiled. It may takea little gentle turning and pushing with some cavity-shapedpunches, since the cavity area will expand slightly after usageand fit itself snugly in the die. But if you cannot push the punchinto the die by hand even with a moderate amount of force, don�tput it in the press and push it in! Send back the die and punchand we�ll adjust the diameter by lapping and honing. Don�t takesandpaper or a file to it, or turn it down in a lathe.
The internal punch can become too snugly fitted to easilyremove by hand, because the three lead extrusion holes may stillhave a bit of lead in them from the last job. These little plugs oflead are bearing firmly against the side of the punch, and canmake it hard to move by hand. The fact that it is already in thepunch means you can safely assume it is the right diameter. Ifyou try to put a different internal punch in the die and it won�t goby hand, that is a different matter. Clean it very well, oil it, andgently turn it back and forth while applying a modest amount ofpressure by hand. If it still won�t go in, probably it is the wrongdiameter: don�t force it with the press.
As a practical matter, it doesn�t really make any difference ifthe external punch is the nose, or the base. But since people nor-mally change the nose more frequently than the base, and theexternal punch is faster to change, we generally supply the noseas the external punch, and the base as the internal punch. Sincewe�ve done it this way for decades, our inventory and job plan-ning is set up to continue it. You can have it the other way around,but from that point on you must specify any future additionalnose or base punches for that set as being external or internal.Left without specific instructions to the contrary, you�ll get exter-nal nose punches and internal base punches.
140
In the EC-1-R Econo-Swage we reverse this only because re-loading presses are so poorly aligned that it is important to pro-tect the edges of the punch that has the deep cavity (nose punch).Making it internal gives it the protection of the die walls. Theexternal punch may get damaged if you smash it into the dieface, but it is more sturdy and will take more abuse than the nosepunch.
A note about jackets that cover the bleed holes in the die: ifyou want to use a 3/4-length or full jacket, you are welcome totry it in the -H dies. Chances are it will work unless the jacket istoo thick or hard. Lead will simply blow a hole right through thejacket wall and you�ll have three tiny, shiny dots of lead showingthrough that lock the core into the jacket. If you try it with the-M or -S dies, you are taking a risk of die breakage or at best hardejection as the jacket bulges into the bleed holes but does not letthe lead pop through. In large calibers such as .40 to .45, the diewalls are thin enough that you will probably break the die if youkeep this up very long, and die breakage from overpressure is nota warranty problem. (If you do break a die, send back the punchesand we can make just the die body, thus saving you a fair amountof the total die cost.)
Most half-jackets are from 0.25 to 0.35 inches high. Most3/4-jackets are from 0.437 to 0.560 inches high, and most of thepistol caliber full jackets are about 0.70 inches high. A point ofconfusion seems to be between half-jacket and half inch jacket. Ahalf-jacket is just the common name given to the shortest lengthof jacket for a caliber, which normally goes about halfway up theshank of a normal weight for that caliber. A half inch jacketlength could well cover the entire shank, and thus would be calleda three-quarter jacket (because the shank is normally about 3/4of the total bullet length). Hey, if firearms terminology was easy,everyone would be using it!
You can use Base-Guards to replace both gas checks and half-jackets. They work better and are cheaper, easy to apply and don�trequire that your lead core is much smaller than the final bulletsince you don�t have to put the core inside the jacket. Base-Guardsreplace 3/4-jackets and full jackets as long as the velocity remainssomewhere below 1,400 feet per second and the gun has a fairlygood bore, and the bullet fits the bore closely. If you need to useeither 3/4-jackets or full jackets, then the LSWC-1 type of die is

141
not the best one for your bullet. Instead use a two-die set consist-ing of the CSW-1 and CS-1, or a three-die set that adds the PF-1to these.
142
12. Jacketed Semi-WadcuttersIf you need to make a jacketed bullet, and the jacket must
cover most of the bullet�s shank, then the LSWC-1 style of diewon�t work because it has bleed holes to adjust the bullet weightright in the side of the die. The long jacket would block them.Instead, graduate to the next level of equipment, where you swagea lead core in one die, at a diameter that will fit into the jacket foryour caliber, and then seat the core into the jacket in another diethat makes the bullet full diameter.
These two dies are called the �Core Swage� and the �CoreSeat� dies. The Core Swage (CSW-1) must be large enough toaccept the lead core wire or cast core by hand, and not so largethat it produces a finished core too big to fit all the way to thebottom of the jacket you wish to use. Different jackets may havedifferent wall thicknesses and internal tapers, so changing thejacket might require a different size of core swage die.
On the other hand, core swage dies don�t have to be anyspecific size so long as you can get the core into the jacket easilyand the core isn�t so thin that the weight of bullet you makerequires the core to be so long it sticks out of the core seating die.This means you can save some money by getting one core swagedie for a smaller caliber and using the same die for larger calibersthat are close enough in weight to permit such use.
A .40 caliber jacket, for instance, normally uses a .340 inchdiameter lead core. While we would usually provide a core swageof about .370 to .380 diameter for a .44 or a .45 caliber bullet,you could use the .340 core swage on all but the heavier bulletweights. A .38 Special and .357 Magnum both use .357 inchbullets, and a 9mm, .380 ACP, .38 Super, and several other 9mmcalibers use .355 inch bullets. All of these can use a .312 diam-eter cast or cut wire core, which swages to .315 in the core swagedie. This diameter fits most of the .38/9mm jackets available.
The same core swage die would work for .358 rifle and even.375 rifle (assuming the same jacket wall thickness), except thatwe normally make the head of the internal punch longer for pis-tol length cores and may have built the swage die itself somewhatshorter than you need for heavy rifle bullets. If the swage die islong enough, we can just provide a different internal punch, so
143
that the punch head is shorter and lets the punch slide back fur-ther into the ram. This gives you more usable space to make theheavier rifle cores.
When we build a core swage and core seater as a matched setto produce jacketed semi-wadcutter style bullets, we call this com-bination a �JSWC-2-� set (with -R, -M, -S, or -H added to indicatewhich kind of press and die diameter). The JSWC-2 set is 2/3 ofthe next level: add a point forming die (PF-1) and you will havebuilt a FJFB-3- die set that makes full jacket, open tip bullets.
We�ll discuss that one in another chapter, but just be awarethat once you get past the LSWC-1 type of die, all the dies build tomake the next set in capability. The various combinations are justputting together the same few basic types of dies in different ways,to make certain kinds of bullets, the way Taco Bell puts the samefew basic ingredients together in different ways to offer you allsorts of menu options. The LSWC-1 die doesn�t build toward anyother sets because it is a combination itself of the core swage andcore seat into one single die.
The LSWC-1 is, in fact, just a core swage die fitted with thenose and base punches you want, and made in the final bulletdiameter. A CSW-1 is the same thing made in a diameter thatproduces a core, rather than a finished diameter bullet, and isfitted with flat ended punches. The CS-1 is likewise a straightcylinder die, made in final bullet diameter or just very slightlyunder (perhaps .0005 to .001 inches smaller), but it has no bleedholes for lead weight adjustment.
Because the CS-1 die doesn�t have bleed holes, you can buildup considerable pressure inside it, enough to form all sorts ofelaborate hollow cavities, deep hollow base skirts, and fancy noseshapes. Ridges, teeth, hexagon shaped hollow points, and muchmore, can be formed because there is no pressure escape routethrough bleed holes.
The LSWC-1 sometimes does not let you make certain shapesvery completely, because thin or long sections of lead may takemore pressure to form than the pressure needed to spurt leadthrough the bleed holes. Once you begin extruding lead, the pres-sure inside the die can�t go much higher. All you do by trying is tomake lead come out faster, leaving partly finished noses or partlyfilled-out skirts on deep cavities. For this reason, we sometimessuggest a two-die JSWC-2 set even though you might be makingan all-lead bullet which in theory could be formed in the LSWC-1.
144
To make a bullet in any die set that uses the CSW-1 core swage,follow these steps:
Cut or cast a piece of lead to approximately the right weight,plus a few grains. Put an empty jacket in the scale pan, and setthe scale weights for the final bullet weight you want plus aboutthree to five grains extra. Snip off a length of lead about equal tothe jacket length or longer if you plan to make a semi-wadcutter.You can do this by trial and error the first time (measure a bulletlength of the weight you want, as a starting point). Once you getthe weight right, you can save one core as a gauge and use it toset the tools next time.
Lubricate the cores lightly with Corbin Swage Lube. You canroll them on a lube pad, handle them with a little lube on yourfingers, or roll them in a tumbler with some lube added. What-ever suits you is fine. The lube is to keep the dies in good shapeand reduce the amount of force and wear. It is removed beforeyou put the cores into jackets or shoot the bullets. Swaging lubeis not the same as bullet lube: it isn�t for reducing fouling in thebore, but only for reducing pressure and friction in the dies.
Put the CSW-1 die and its internal punch in the press ram,and put the external punch in the press head (in the FPH-1 float-ing punch holder). A retainer bushing and ring go around thepunch and screw into the front of the long, threaded punch holder.The -H punch does not use a ring, but only a retainer bushing.
Put the lubricated core into the die, and run the ram forwardso that the external punch slips into the die mouth. Make surethat the core is completely inside the die before any pressure isneeded, and that the core is small enough to drop easily into thedie. Also make sure the external punch is the correct one: it mustfit easily into the die by hand, but be a close enough fit so that ifit were not for the bleed holes you could pull a vacuum inside thedie with the punch. Swage one core, weigh it, and adjust thepunch holder position so that you get the desired core weight.The core weight plus the jacket weight should be exactly whatyou want for the final bullet weight. You should be bleeding offfrom three to five grains minimum. A little more does not hurtanything.
For the maximum benchrest precision in core weight, doubleswage the cores. Swage them all once, and then put them backinto the die without changing the setting and swage them allagain. If you are using a hand press, try holding the pressure at
145
the top of the stroke for just a second or two. If you are using aHydro-press, set the dwell time for a second or so, and make surethat the pressure is high enough to extrude immediately, with noapparent delay. For the ultimate in precision, use the FPH-2-HPositive Stop Punch Holder in the Hydro-press or CSP-2H press.
Make as many cores as you need, then remove the CSW-1core swage die and install the CS-1 core seating die and punches.You probably want to use an external punch that fits into the dieclosely, with a cavity in the end of the punch shaped like thebullet nose you desire to form. The normal handgun set comeswith either a 3/4-E round nose or a Keith SWC nose punch. Youcan of course specify other shapes, standard or custom.
Seating the lead core into the jacket is a bit of an art: youneed to learn how much pressure expands the jacket to the sizeof the die, and how much more would be hard on the tooling.Normally, once the jacket expands to the diameter of the die, youare done. Higher force only stresses the die, and does not give youa better bullet.
I like to seat the core gently and see if the core and jacketstay in the die, or if they come back out on the punch. If theystay in the die, odds are good I have expanded the jacket enoughto make it press against the die walls, and that is about all youneed to do. If you get lead bleeding past the punch with lightpressure, it just means that your core seating punch is too small.You cannot develop enough pressure to expand the jacket to cor-rect diameter with an undersized core seating or nose formingpunch.
You can make a lighter bullet in a longer jacket by usingeither a plastic �bullet ball� to take up some of the space in thebottom of the jacket, or filling the bottom part of the jacket withcompressed cornstarch. Cornstarch can easily be compressed intothe bottom of a small cardboard pill box, using the lid of a tele-scoping box to hold the powder and the bottom as a piston tocompress it.
This firm layer of cornstarch will take up about a quarter ofthe original height. You can then use the jackets like cookie cut-ters, pushing them down into the firm layer to insert a specificamount of material into the jacket. One, two or three �cookies�can be pushed into the jacket, as needed to take up room withoutadding much weight. Then the lead can be seated on top. Yourbullet will have the length of a heavier projectile.
146
You can also make a heavier bullet in the same jacket, just bymaking a longer nose, less of a hollow base (switch to cup or dishbase to make the bullet heavier in the same length), or by lettingsome of the lead core extend past the jacket at full diameter. Thisis not necessarily the best design, because lead touching the borewill cause fouling at some velocity, eventually. You can even tele-scope two jackets end to end over a single core, squeeze them inthe core seating die with a wadcutter nose punch, and make afully jacketed bullet that is longer than any available single jacket
With any Semi-Wadcutter design of bullet (which also coverswadcutters), it is very important that there be at least a tinyamount of lead extending past the end of the jacket. The reasonis that there is no way for the jacket edge to jump over the punchedge. If you expect the punch to last, it has to be made with aminimum of .020 inches of thickness at the edge. Otherwise, theforce of moving the punch after applying tons of swaging pres-sure to the bullet would simply expand the thin edge against theinside of the die, and rip it off. You would have about .020 inchesof edge thickness, but it would be rough and broken. Better tomachine it neatly where it would normally break anyway.
This edge means you cannot make the jacket curve awayfrom full bore diameter in the LSWC-1 or CS-1 die (both of whichuse the punch cavity to form the entire bullet nose). Hence, bothkinds of straight wall dies, using a punch cavity to form the nose,are restricted by physics to making lead nosed bullets with a shoul-der. Below the shoulder, it doesn�t matter if you have a jacket ornot because either lead or a jacket will expand nicely against thedie walls.
If you try to make a bullet that has too light a core for thejacket length, the nose punch will compress the lead until thepunch edge contacts the jacket edge, then proceed to crush thejacket. Making the lead core heavier solves this problem. If youwant to make the same weight of bullet, you can use a hollowbase, cup base, hollow point or a light filler in the jacket. Any ofthese methods will displace some lead, cut down the weight (orkeep it the same, depending on how you look at it) and move thecore forward so it has room to fill the entire cavity in the noseforming punch.
If your bullets have an angle or uneven spot on the nose, itprobably means that the core isn�t long enough to fill the entirenose cavity in the punch, or the lead is too hard to flow at thepressure you can safely apply with that die, or there is trapped
147
lubricant between the punch cavity and the end of the bullet.Normally you won�t have this problem with the JSWC-2 die set,because swaging the core in the first die makes the end squareand smooth, so it flows evenly into the nose punch in the nextoperation.
But, if you should have these symptoms, use pure lead just tosee if your supposedly soft lead is really not so soft after all. Hardlead is much more difficult to flow than pure lead. Alloys thatseem soft to you might actually be fairly hard compared to purelead. A rule of thumb is that each 2 point increase in Brinellhardness number (Bhn) will just about double the pressure re-quired to fill out the bullet completely. Soft lead is Bhn 5 andLinotype is about Bhn 22. Most wheelweight metal ranges aboutBhn 10-15. Going from Bhn 5 to Bhn 7 may double the pressureneeded to make the edges form completely. This is fine if yourdies will handle the pressure.
The type -M dies can only handle pressure designed for Bhn 5to Bhn 6 hardness of lead, especially in the .40 to .45 calibersizes. Type -S dies may handle up to Bhn 10 alloys, and type -Hgenerally handles any lead you can put into them.
Using the JSWC-2 2-die set to make semi-wadcutter stylebullets also gives you the option of adding one more die and ex-panding the set to a full 3-die package, which eliminates the needto have a shoulder between the jacket and nose, and permits theproduction of soft point, open tip, or full metal jacket styles wherethe jacket curves away from full bore diameter. This cannot bedone with jacketed bullets in the LSWC-1 type die, because thedie is made to combine core seating and core swaging. A longenough jacket to form a full jacket style bullet would cover thebleed holes in the die and prevent the core swaging operationfrom working.
All you have to do is add the point forming die, but it isn�tthat easy for the die-makers, who must match the point formingdie to within a few ten thousandths of an inch to your core seater�and YOU have the core seater, if the point former is an add-onsale! There are three ways to do this.
First, you can send back the core seater along with its punches(please! - otherwise we have to make the punches just to test thedie), and we can test both the core seater and point former to-gether and make sure the diameter difference is correct. Second,you can just send back some lead slugs and some seated jacketsand cores from the core seater, in the weight you intend to be
148
making when you get the point form die. This is not quite as goodfor us as having the die here, but at least we have a good chanceof getting the diameter right if you send enough cores (a dozen orso) and they don�t become damaged in shipping.
Third, you can throw caution to the wind and just order thedie off the shelf, so to speak. We can do it that way, but the oddsare fair that the particular die we ship may not be the best criticalmatch to your particular core seater, in which case you will ei-ther get tapered bullets or difficult ejection with some sticking inthe point form die. Nothing is wrong with either die, usually. It isjust a mismatch in diameters. Either one would work fine, if ithad the proper mate.
If you send samples or the core seat die, then the fit andfunction of the point former are guaranteed by us for the jacketsand core that you send us to use (or we will tell you if there is anyreason it won�t work correctly, so you can decide what to do fromthe reasonable options). But if you order the die without allowingus to test and adjust it to fit your core seater, there really is noway we can guess what will happen, and so while we are morethan happy to make adjustments, you�ll have to bear the costs ofshipping back and forth. Fair enough?
You can use more than one nose punch on the same bullet,to achieve special effects such as various diameters and depths ofhollow points. Thousands of shapes that are not exactly the sameas either of the punches can be created by remembering onething: after you have once applied the force needed to expand thejacket fully, you don�t have to apply that level again. This meansyou can push the next punch into the die as lightly or as short offull contact as you wish, and only partially make the bullet nosereform to the new shape.
The most versatile way to make a hollow point, for instance,is to use two punches. First, form a giant hollow cavity by seatingthe core only with the HP punch, which has a conical projectionon its tip. You have just made something like the famous oldWebley �Man-Stopper�, excellent short range defense bullet forrevolvers, which might not feed in some autoloaders.
Now, pick out a second punch, be it round nose, or Keith, orany other shape of cavity (wadcutters are not as effective). Pushthis punch only partly into the die, lower the ram, and examinethe bullet. Adjust the punch holder so that the punch consis-tently forms the desired shape at the very end of the ram travel,
149
so you don�t have to guess how far to raise the ram (just go all theway up, with the punch holder set high enough to prevent fullpressure and complete reforming).
Play with the punch holder position, using the end of thestroke each time, and see how many interesting different bulletsyou can make with only two punches! Change back to the hollowpoint punch and see how reversing the order of use makes acompletely different shape bullet, even if both punches are usedto the same relative depth of insertion. In fact, if you have a cupbase or hollow base punch (internal), try using a flat or wadcutterpunch to push the base into the die, forming the nose against theinternal punch, then reversing the bullet direction for a secondpass with the punch holder set higher.
This kind of thing is the most fun for a lot of bullet makers:you get instant results, some good and some bad, but all of theminteresting. You don�t have to spend any more money on tools tomake these bullets, but just use your imagination and the adjust-ment of the punch holder and order of different punches in theoperation.
One of my favorites is the large HP punch, followed by aSabre punch (as in the Sabre-tooth Tiger). This punch has a num-ber of saw-teeth cut into the steel of a concave curved surface.It�s a real challenge to make one, since they must be hand pol-ished on every surface and angle. But the results are dramatic.You get a sort of buzz-saw bullet that zips through targets. It is acrowd-pleaser, assuming the crowd made up of attacking wolvesor feral pigs. Put a few of those on your table at a gun show andsee how fast they are picked up by handloaders!
Six teeth is the optimum number for this kind of punch,because eight makes the teeth too thin and they won�t stand upvery long to the high end pressure. You can nick the edge of thejacket (on purpose) with these teeth, to help it start expanding,but don�t try to actually cut down into the jacket material veryfar. This will soon overstress the sharp edges and break them. Aslong as most of the Sabre-teeth are formed from the lead extend-ing beyond the jacket, this concept works very well.
We�ve also had good luck making the curve almost a halfball, cutting six teeth into it, and pushing it down against a jacketthat has lead seated even with or below the mouth! The jacketbuckles inward slightly, and the thin sharp teeth slide under the
150
jacket, crimping it like a blank cartridge case mouth. This lets itfold further inward, so that the jacket take on the half-ball shapeof the punch end.
This is the only instance I have seen where it actually is pos-sible to make a full-jacket bullet in a straight-walled die. Thecrimped-in grooves strengthen the jacket to impact along the edge,so that feeding difficulties disappear, yet cause stress lines thathelp the bullet peel back from a direct nose impact. All together,the design is a great defense bullet (especially when the core isnot solid lead, but swaged number nine lead shot). The only thingwrong with it is the strange appearance.
Core seating dies (and core swage dies, too) have a maximumand minimum weight limit, related to the length of the core andjacket. The heaviest possible weight is reached when the core andjacket are so long they do not let you put the external punch atleast a full caliber length into the die. You need at least one cali-ber length along the external punch to be supported and guidedby the die cavity before any pressure is encountered. Otherwise,the punch may be driven off to one side so that it is damaged bystriking the die mouth, or pressure in a nose forming cavity orrebated boattail cavity may build up to the bursting point of thethin punch walls, since they are supposed to be supported by thesolid steel die walls when pressure is applied.
The lightest core and jacket that you can make, and hencethe lightest bullet, is determined by the minimum volume left inthe die, between the internal and external punch faces, when theram is all the way forward toward the die. The length of the headon the internal punch determines the minimum and maximumweight for a given die. By using two or sometimes three differentpunches, with the same overall length but with a different punchhead length, you can swage the widest possible range of weights.Here is how that occurs:
In a reloading press die, the threaded die holder body is ma-chined to accept a die in one end, and a quarter inch diameterknockout rod in the other end. The internal punch has a head,half inch diameter, which keeps the punch from falling out of thedie.
In any of Corbin�s swaging presses, the threaded die holder isreplaced by the ram itself. All the dies screw directly into the ram,so they do not need an adapter. The ram is machined so there isroom for a 3/8 inch diameter head on the internal punch to slideback and forth for the length of the die. The part of the punch
151
which fits into the die must be the same length as the die or youcould not eject the bullet fully. The overall length of type -M ortype -S internal punches must be the same, or the stop pin wouldnot push the punch forward to the right point for ejection.
But the head of the punch can be different lengths, since thehead is not right at the end of the punch. It is a larger portion ofthe punch at least 3/16 inch further along than the end. We callthe 5/16 inch end of the punch its �tail�, on type -M and type -Sdies. The type -H dies do not use a stop pin, so there is no �tail� onthem to contact it. Instead they rest on a hardened steel bar thatslides through a slot in the ram.
The back edge of the punch head contacts a shoulder in theram, regardless of the kind of press. This shoulder and the headlength together determine exactly how far back the internal punchwill slide before it is stopped. The shoulder inside the ram takes allthe force applied when you swage the bullet, so there is a mini-mum thickness or length to the head. However, by varying thehead length, the amount of protrusion into the die is also varied.
To swage a heavy core, you would want an internal punchwith a short head length, so the punch would slide back as far aspossible inside the die, offering as much volume to fill as possible.But if you used this punch to swage a light core, the externalpunch might travel past the bleed hole location, blocking the bleedholes. Then you might crack the die by trying to extrude leadthrough those holes, because no matter how hard you push, nolead can come out.
If you want to make a light core, very gently try to swage itand watch to see if the external punch goes into the die so farthat its face would cover the bleed holes. You can easily deter-mine this by holding the punch beside the die, in the same posi-tion as it would be when swaging. Align the face of the punchjust below the bleed holes, so they would be open if the punchwere inside. Use a marker pen or grease pencil to put a line onthe shank of the punch, where it would just line up with the diemouth.
Now, when you try to swage the first light core, notice whetheror not the mark you made disappears into the die mouth. If itdoes, you cannot swage that short of a core with the internalpunch currently installed. You need an internal punch with alonger head, so the punch is held further into the die, closer to thedie mouth. Then, the light core would be contacted before theexternal punch could cover the bleed holes.
152
You will also find this true of other dies besides the coreswage. A shorter head is used with heavy cores, and a longerhead is used with lighter cores. Normally the range is great enoughso that the division is roughly between �pistol� lengths and �rifle�lengths. Weight alone does not tell the story: you need to knowthe caliber and the weight to determine whether it is a light orheavy core.
Generally, two punches will allow you to make any practicalweight. Sometimes it takes three to cover special purpose lightcores such as triple or double core or partition-style bullets usingsplit cores. When you order, let us know the heaviest and lightestbullet or core you want to make, and we can determine howmany core swage or core seat internal punches it will require.
With the -H dies, you can use the bottom electronic positionsensor (one of three adjustable sensors mounted along the presshead on a standard) to set the point of ejection. A single steelejection bar slides through a slot in the ram and rides up anddown with the ram. On the lower part of the down stroke, thisbar comes to rest on the mounting plate for the press head, andstops moving down. The ram continues on down. The die andinternal punch go with the ram, but the internal punch headcomes up against the top of this ejection bar and thus must stopmoving. The die and ram continue down, which pushes the bul-let out of the die mouth.
Longer bullets and cores use a shorter head on the internalpunch. Shorter bullets and cores use a longer head. The adjust-able ejection position, as well as adjustable stroke length of theCorbin Hydro-Press and Corbin Mega-Mite Hydraulic model, al-low you to use one height of ejection bar. The manual-poweredCorbin Mega-Mite (not the hydraulic model) only ejects at a fixedposition at the bottom of its stroke. Thus, three different ejectionbars are provided with the press. The overall length of the ejec-tion bar height plus the punch length (from tip to head, full mea-surement of the punch) must be the same for whatever combina-tion you use.
That is, a short punch uses the tallest ejection bar. A me-dium length punch uses the middle height bar. The longest punchesuse the shortest height of ejection bar. If you set them alongsideeach other, they would all measure the same total, combinedlength when properly paired. If you should use the wrong heightejection bar with a punch, in the CSP-2 Mega-Mite (manual) press,

153
you would not get good ejection of the bullets, or the punch wouldproject beyond the end of the die on the down stroke instead ofjust coming even with the face of the die.
154
13. Full-Jacket, Flat Base BulletsIn the previous chapter, we described a 2-die set called the
JSWC-2 using a CSW-1 Core Swage and a CS-1 Core Seater. Thisset could make jacketed or lead bullets, but the bullets could nothave the jacket curved inward away from the shank because astep was required between the nose and the shank. The edge ofthe jacket would strike the edge of the nose punch, and be crushed,if you tried to make too light a bullet or force the jacket into thenose punch. By adding one more die, we can eliminate the step.
If you take the JSWC-2 set, and add a PF-1 �Point Former�,you have just built what we call the �FJFB-3� set. We call it thatbecause of the general style, full-jacketed, flat base design that itmakes. Using various techniques, this set builds both rifle andpistol bullets. It can make open base military-type full jacket, orclosed base open tip full jacket. In the closed base full jacket style,it can produce both open tip and soft point bullets, with somelimitations on the sharpness of the soft point (which are over-come by adding a fourth die).
Everything that applied to the JSWC-2 set still applies here,except that we can build the ogive or nose on the jacket, if wewish. That means we can use external core seating punches thatdo not have to have a cavity in them to form the nose. The PF-1point forming die has a cavity shaped just like the bullet we wantto make, instead of forming the nose in a punch cavity. Thiseliminates the edge of the punch, and thus eliminates the needfor a shoulder on the bullet.
In bullet swaging, we refer to �open tip� and �hollow point�as two completely separate features. The open tip (OT) is made bypushing a lead core into a jacket, so that the core is shorter thanthe jacket by enough to allow the point to form and leave the coreshort of the bullet tip. The core just stops and the jacket contin-ues, leaving an air space inside the tip. You can fill this with aplastic �Bullet Ball� or leave it open. That�s the open tip. All ittakes is a normal open tip core seating punch, supplied as a stan-dard item with rifle caliber 3-die sets.
The hollow point (HP) is made by pushing a conical-shapedprojection machined on the core seating punch down into thelead core. You can do this regardless of the length of core com-
155
pared to the jacket. If the HP punch fits down inside the jacket,then you can make an open tip bullet that is also a hollow point.We call that OT, HP in our work orders.
If the HP punch is made large enough to fit the die bore,instead of going into the jacket, then it requires a lead core longerthan the jacket after seating. The lead projects beyond the jacket,so it will form a soft point with a hollow point cavity. The hollowpoint punch normally is of the soft point variety, and is suppliedwith pistol caliber sets. If we don�t know whether you intend theset to be rifle or pistol, we normally provide an open tip coreseating punch. If we are sure it is for a pistol and you don�t specifyanything to the contrary, we would probably provide any HP punchordered as a soft point type that fits the die bore.
It is not uncommon for people to use the term �hollow point�in referring to what we call �open tip� bullets. That is fine unlessyou are ordering equipment. Be sure you understand the differ-ence and order what you really want to make. You can make anopen tip hollow point, an open tip, a soft point, or a soft pointhollow point. It would not be possible to make an open tip softpoint: those two terms contradict each other. Either the lead islonger than the jacket (soft point) or it is shorter (open tip). Itcannot be both.
Technically speaking, you can seat the lead so it comes toexactly the same length as the jacket after the ogive is formed.But this is just a little bit too fine an argument to create a newname, because in order to accomplish this, the core will be seatedbelow the jacket in the open tip style prior to forming the ogive.The lead always moves forward to some extent, and this is just amatter of setting the open tip style so that the lead moves rightthe jacket edge when you process it through the PF-1 die. Callthat a �flush tip� if you like. Nosler calls that design a �ProtectedPoint� since the lead is more or less protected by the jacket.
Now that we are putting the lead and the external punchdown into the jacket during core seating, a new considerationarises: fitting the punch to the internal diameter of the jacket atthe point where the lead will be seated. Most jackets are taperedinside, getting thicker toward the base. Copper tubing jackets areusually not tapered. You can probably use the same core seatingpunch with almost any weight of core, when you build your owncopper tubing jackets. But drawn jackets require that the punchdiameter fit closely to the jacket I.D. at the point where the leadwill eventually come to rest.
156
With a tapered jacket, this means you will need different di-ameter core seating punches if you plan to make both light andheavy bullets in the same jacket. Some latitude is possible. Thelimits are reached when a punch lets too much lead spurt outaround it to expand the jacket, or sticks tightly in the jacket.Usually there is enough range so that two or three core seatingpunches will make every practical range of weights with anyjacket.
If you change jackets, going from a thin one to a thicker one,you will also need to change core seating punches (to a smallerdiameter, in this case). If we build a set of dies and test it with150 grain open tip bullets, and you decide to make 125 grainopen tip bullets, the odds are good you will want a smaller diam-eter core seating punch for that. Likewise, if we build the set for100 grain bullets and you try making 140 grain bullets, you mayfind the punch is too small at that point in the jacket.
Again, the Bullet Balls can come to the rescue by moving thelead forward, so that a large diameter punch still fits at the samepoint in the jacket even with a shorter lead core. Corn starch doesthe same job. Any light material that is stable under swagingpressure can be used to take up volume without adding muchweight. Bullet Balls are good because they are very accurate inweight and size, so you can depend on them to give you consis-tent bullets.
However, in practice you have enough weight range so thatup to as much as 20 percent of the bullet weight can be shifted(plus or minus 10 percent) around the core seating punch�s per-fect point of contact. If the punch is just a little small, or just alittle large, it either lets an insignificant leakage of lead around itor it makes a very tiny amount of jacket displacement, and willprobably release from the jacket if there is some lubricant on thepunch and you expand the jacket so it firmly contacts the diewalls.
This figure of 20 percent (plus or minus 10) of the bulletweight is quite rough, depending on the amount of taper in thejacket wall. A very tapered wall with sharp angle will allow lessadjustment of weight without changing punch sizes. A shallowtaper will allow a great deal more. You can only tell by trying it.If the lead leaks around the punch and the jacket won�t expand tothe same size as a lead slug does, in the same die, then probablyyou need either a longer core, a shorter jacket, some filler in the
157
bottom of the jacket, or a larger diameter core seating punch.Any of these things will seat the core at a point inside the jacketwhere the punch fits right.
If the punch sticks into the jacket, or the jacket comes outshorter and not expanded enough in diameter, it probably meansthat the punch is too large. If it is too large, it will contact thejacket wall firmly before you can create enough force to fullycompress the lead core. This can stop the punch too early, so thatthere isn�t enough pressure developed in the core to expand thejacket properly. This causes tapered, undersized bullets in the pointforming operation, which is the same thing that happens if thepunch is too small.
A punch that is too small, or too large, will prevent you fromdeveloping enough pressure to expand the lead core during coreseating, and this in turn makes the jacket and core undersized forthe point forming die. When you form the ogive on the bullet inthe next die (point former), the base expands to contact the diewall, but the undersized shank probably will not expand evenly.
Instead, it may expand near the contact point on the ogive,and be curved inward like a Coke bottle in the shank area. Theamount of curve is very small, usually just the difference be-tween the original seated core and jacket diameter and the finalbullet diameter at its largest point. But it can cause the bullet tobe a loose fit in the case neck after you load it. This may not be aproblem in a single shot, but in a repeating rifle or magazine fedhandgun it may cause trouble in feeding. In a revolver it maycause the bullet to slip forward during recoil and lock up thecylinder.
The answer is to experiment with the particular jacket andcore length combination you are using, and if you are having anyof these problems with expansion, make sure that you are usinga punch that fits correctly. To correct the problem, use a differentcore length, a different jacket, put some filler behind the core(such as a bullet ball or corn starch), or get a new punch that fitsyour combination correctly. There is no wrong or right punch byitself: each punch is only right or wrong for the particular lengthof core and jacket wall thickness.
Point forming dies can also be used with just a core swage tomake lead bullets which do not have the semi-wadcutter shoul-der. Paper-patched bullets or lead pistol bullets can be made ei-ther in the LSWC-1 type of die (in all but reloading presses) or ina combination of CSW-1 and PF-1 dies. In theory you could put
158
holes in the side of a point forming die and make the core and theogive all in one operation, but in actual practice the lead tends toflow up the ejection pin hole about as fast as it extrudes throughthe weight-adjustment holes.
The ejection pin in a point forming die pushes the bullet outby its tip. This means that a bullet with a blunt or flat tip prob-ably will look good, with perhaps a small circle where the ejec-tion pin pushes on the lead tip. But a sharp spitzer tip bullet isn�tpractical with the PF-1 die as a final step, because the ejectionpin crushes the tiny point. In the next chapter we discuss the LT-1 lead tip die and how it is used to solve this problem.
Full metal jacket (military style) bullets can also be made byturning the jacket backward, so the base faces the cavity of thePF-1 die, and actually seating the lead core into the jacket in thePF-1 instead of in the CS-1 core seater. The pressure changes theflat jacket end into a pointed shape, conforming to the die out-line. But the base is still wide open (the lead core should comejust about 1/8 inch below the jacket mouth).
To make a proper base, eject the bullet, turn it over and pushit back into the point forming die. But use a special �base-turn-ing� punch that has a shallow concave face. This punch doesn�tdo anything a flat punch wouldn�t do at this point, but it will inthe next step and it saves you from changing punches yet again.You want to just barely push the open end of the jacket into theogive portion of the PF-1 die, so it acquires just the start of acurve. Then, eject the bullet and turn it over one more time.Press more firmly this time, using the �base-turning� punch. Be-cause the jacket edge has already been curved inward, it will con-tact the face of this concave punch closer to the center than thevery edge, and will be curled inward and flattened.
Press firmly enough so that the base is flat and the jackettakes on a radius that matches the curve of the punch face. Pro-cess all the bullets this way and then change to the normal flat-faced external point former punch that is supplied with all PF-1dies. Put the bullet into the PF-1 die one last time, and pressfirmly with the flat punch (against the almost-flat base). Thisfinishes off the base, rolling the edge firmly over against the leadcore.
If you made the core length just right for the jacket length,the base will be flat and even with a silver circle of lead broughtcleanly to the surface, aligned perfectly with the jacket surface atthe base. No extra lead will spurt out and be flattened unevenly

159
across the base. No folding or wrinkling of the jacket near thebase will occur from lack of sufficient filling of core. Chances areit will take you a couple of trys to get this ideal combination, andthe weight may not be precisely what you intended (a grain or soeither way usually makes the base come out perfectly).
To use a standard length jacket, and still make whatever weightof FMJ bullet you desire, you can use Corbin�s plastic Bullet Ballsin the tip, or you can fill part of the jacket with compressed cornstarch to adjust the weight and maintain proper core length. Ifyou just made the open base in one step and shot it, the gaspressure at the muzzle would flare the jacket open, and you wouldbe shooting a bullet that had an asterisk shaped base, easily deter-mined by looking at the ragged holes in a paper target. You mightbe able to skip the final, flat-faced punch operation if you like theappearance of the �base-turned� bullet, but you should never skipthat important step.
Point forming dies have an ejection pin that is designed forthe minimum tip closure possible, consistent with long punch lifeand proper ejection. If the ejection pin is made smaller than theoptimum design diameter, it becomes very weak in relation to therequired ejection force for the caliber, ogive shape and material.You will experience bent ejection pins too often in that case.
There is no problem with making the ejection pin too largeexcept that you cannot close the bullet tip any smaller than theejection pin diameter. If you want to make flat or blunt roundnose lead tip bullets, a big pin is actually desirable since it has lesstendency to penetrate and mark up the soft lead nose. Using a diedesigned for the sharpest possible spitzer tip and minimum jacketclosure on open tip bullets to make lead tip bullets can be a prob-lem, since the ejection pressure might exceed the strength of thejacket or lead tip. In that case, the pin will penetrate into thebullet instead of pushing it out of the die.
The more we know about the bullets you intend to make, thebetter we can design the set to do it. In some cases, you may needmore than one point forming die if the requirements of two dif-ferent designs conflict greatly. Point forming dies are not designedby making the die a certain caliber, but by making sure that thematerials inserted will expand and then spring back slightly to aspecified final dimension. The same die that makes perfect .3080bullets when used with the specified materials (such as .032 wall
160
annealed copper tubing) may produce a .309 or .307 bullet whenyou use a tapered-wall commercial gilding metal jacket, or hardcopper, or brass.
Changing materials, core seating dies, and sometimes eventhe weight beyond a certain range can affect the bullet diametergreatly. A point forming die is part of a closely-integrated pack-age or system, designed to work together. It isn�t something youcan make in isolation and expect to work correctly with any kindof material. This is why so few die-makers offer bullet swagingequipment of high precision.
The client and die-maker need to work closely together onthe design, and make sure that everyone understands the weights,materials, and processes that will be used. Then, it is possible todeliver tooling that forms truly outstanding bullets. Otherwise,you may be headed for a frustrating experience because the bul-lets will stick, come out tapered or in the wrong diameter. Yet thedies may be excellent, when used with the right material, weightrange, and style of bullet.

161
14. Lead Tip BulletsThe LT-1 lead tip forming die is available in type -R, -M, -S, or
-H sizes. It is similar to a CS-1 core seating die, in that the die hasa straight hole all the way through, and punches that are full boresize of the die. However, the diameter is just slightly larger thanthe finished bullet, whereas the core seater is slightly smaller. Theinternal punch has a cavity machined in the end, shaped similarto the ogive curve of the bullet you wish to form, but with aslightly wider angle.
To make a large round or flat tipped lead nose bullet, youprobably don�t even need this die. You can just seat the lead coreso that it projects beyond the jacket you are using. Then, formthe nose in the point forming die, and you�ll be done. If the pointforming die is designed especially for lead tip bullets, we will havemade it with a larger than usual ejection punch. This spreads outthe force of ejection over a wider area, and reduces the amountof a mark which the punch makes in the bullet nose. Normally itis quite acceptable even if you can see a little circle where theejection pin pushed against the lead nose.
However, if you wish to make a sharper lead tip, the strengthof the tip might not be enough to avoid being mushroomed as thebullet is ejected from the point forming die. This is where the leadtip forming die comes into play. Go ahead and eject the bullet andaccept the deformed blob of lead that comes out of the pointformer die. You want that lead to be enough so it will fill up thecavity in the lead tip forming punch, in the next operation.
Any extra lead will be sheared off against the jacket, becausethe lead tip forming die has a slightly different curve than theactual bullet it is designed to form. We catalog LT-1 dies by thebullet ogive, such as 6-S or 8-S, but the actual curve in the punchmight be 5.5-S or 7.5-S instead. This lets the punch meet thejacket at a slight angle and act as a shear to pinch off any extralead left over from the deformed tip, after the tip has been prop-erly formed.
Lead tip bullets require that you leave the jacket open suffi-ciently so that the tip is connected to the main core by a substan-tial stem. If you try to close the jacket down to a tiny tip, in orderto make a very small lead tip, you will push the two jacket wallsso close together that nothing is left to hold the tip to the core. It

162
can actually fall off the bullet when you try to load it into thecartridge case, or even when the gun cycles and pushes the car-tridge out of the magazine.
To illustrate this, just subtract twice the jacket thickness fromyour bullet diameter at the end of the jacket, after forming to asmall tip. The difference is all that holds the tip to the core. As anexample, imagine that you want a tiny lead tip on a .308 bullet,but you want this bullet to be made with a .032 inch thick cop-per tubing jacket for big game hunting. This is quite reasonable,if you reconsider what �tiny� means in such a lead tip design.
The two jacket walls together measure .064 inches in width,so this means no matter how hard you push, you will never suc-ceed in getting the tip smaller than .064 when completely closed.A lead rod that is .050 inches thick can be twisted apart fairlyeasily by hand pressure, so you would probably want at least 0.100inches of lead joining the exposed tip to the lead core.
Add the two jacket walls to the minimum practical stem oflead, and you have a tip diameter of 0.164 inches where thejacket ends. The lead itself can be shaped to a needlepoint beyondthe jacket, as long as the diameter across the position of the jacketend is 0.164 or wider. The moral of this story is simply to makesure that you leave a nice, wide opening with plenty of lead pro-truding from it, in the point forming die, so there is both plentyof lead to shape in the tip forming die and also a nice thick stemto hold it onto the core. In other words, don�t forget about thejacket wall thickness and how it takes away from the core diam-eter at all points, including the tip.
The LT-1 die helps do one other operation: it not only shapesexposed lead tips into factory-finished appearance, but it also sizesthe base portion of the bullet so minimize the �pressure ring� atthe base. This is a very subtle amount of sizing, not the same asremoving body taper from a mass production operation by shov-ing bullets through a ring die (which tends to loosen the cores). Itis useful in hunting rifles and autoloading handguns because ithelps keep the case neck snug and parallel to the bullet.
Lead tip forming dies can be added to any set that uses a PF-1 point former. Added to the FJFB-3 set, the combination is calledthe �LTFB-4� which simply stands for �Lead Tip, Flat Base� fourdie set. It can still make open tip or full metal jacket bullets, ofcourse, just as it did before you added the fourth die. Only now itcan also make better quality lead tip bullets.
163
We have not yet discussed the RBTO-4 set, but that will becovered soon. It stands for �Rebated-Boattail, Open Tip� four dieset. It uses a core swage, and a point form die, but instead of theusual core seater it has two other dies. One is a boattail preformer,and the other is a rebated boattail finisher. A four die set, then, isnot always a lead tip set. If you added a LT-1 die to the RBTO-4,you would create a five die set capable of both open tip and leadtip rebated boattail bullets. It would be called the �RBTL-5� fivedie set.
Please keep in mind that any die set having the �L� as part ofits catalog number just means you have got an extra die to makenice lead tips. It does NOT mean you can ONLY make lead tips.Any such set can also make open tips and full jacket bullets aswell as lead tip bullets. The LT-1 die just adds one more thing youcan accomplish.
There is another kind of five die set. We left the normal flatbase core seating die out of the RBTO-4 and also out of the RBTL-5 sets. All they make is the rebated boattail base. Suppose youwanted to add the normal core seater (CS-1) so you could alsomake flat base bullets? Fine, that would be the �FRBO-5� or the�FRBL-6� package of dies. You can probably guess that �FRBL-5�stands for �Flat base, Rebated Boattail, Lead tip� five die set. The�FRBL-6� means you can do everything in regard to �Flat base,Rebated Boattail, Lead tip� with those six dies.
Adding the �F� for flat base does not mean some strangecombined flat and boattail base: it means you can do both kind ofbullets. The same is true of the �L�, which only means you havean extra die that can produce nice lead tips. You can still makeopen tips, full metal jackets, and anything else that you madewith sets having less dies in them. Also, a six die set does notrequire that you use all six dies on one bullet. It means you mightuse two, three, four, or possibly even five dies.
You could use two dies (CSW-1 and CS-1) to make a Keithnose pistol style bullet, with the appropriate nose punch. Youcould use three dies (CSW-1, CS-1, and PF-1) to make an opentip, flush tip, or full metal jacket bullet with a flat, cup, dish, orhollow base, jacketed or lead. If you made a lead bullet, you couldprobably skip the CS-1 and just use the CSW-1 and PF-1.
You could also use the CSW-1, BT-1 and BT-2 dies (moreabout these later: they form the RBT-2 pair), and the PF-1 tomake open tip, rebated boattail bullets. Finally, in the most com-plex operation, you would use the CSW-1, BT-1, BT-2, PF-1 and
164
finally the LT-1 to form a rebated boattail lead tip bullet. Eachstep is very similar to the others in how you install the die andpunches, how you adjust and work your way up by applying pres-sure in small increases and inspecting your work to see how it isgoing, and finally how you lock down the setting of the punchholder and process as many pieces as you need for the next stage.
In all these dies, a punch that fits by hand into the die isprobably the right punch to use, and one that will not fit by handis never the right one for that die. External punches either fit thedie bore, or they fit into a jacket, depending on whether their jobis to seat a core inside the jacket or push on the jacket or corefrom the outside. In every operation except for core seating, theexternal punch fits the die bore, and so does the internal punch.
Internal punches for point forming dies and for rebated boattailforming dies are not necessarily as tight a fit as those for coreswages and core seaters. They provide for air escape and do notpress against a lead core (except to eject it). Threads on swagedies are usually undercut slightly so they have a loose fit in theram, and all the force of swaging is taken up by a shoulder on thedie (not on the threads). Reloading press dies are an exception, asthey must accept swaging pressure on their threads. This is onereason for the style and caliber limitations in reloading press dies,as opposed to dies made for proper swaging presses.
165
15. Rebated Boattails A flat-base bullet can be made in the same die that makes
cup bases, hollow bases, dish bases and Base-Guard bullets. Thesekinds of bases are essentially made the same way, taking theirshape from the end shape of an internal punch. In the EC-1-REcono-Swage die, the external punch forms the base because thealignment of most reloading presses isn�t so good that we wouldtrust the fragile edges of the nose forming punch to the rathervariable positioning that takes place in the slotted ram.
You can just buy an inexpensive HB punch to turn a flat basebullet into a hollow base. This would be done in the core seatingdie, and then you would want an external punch to match thatshape if you followed this with a point forming die operation. Thesame punch would work in a lead tip die, if you used one, so therewould be no need to buy two external HB punches. This alsoholds true for any of the other basic base shapes mentioned.
But the Rebated Boattail is special. It requires a pair of diesand a matching base punch for use in the PF-1 die (and LT-1 die,if used). Some handloaders are not familiar with the differencebetween the RBT and the ordinary BT or Boattail style. Most ofthe mass production, factory bullets are of the ordinary BT style,having from eight to twelve degrees of angle at the base, andturning to a flat base in less than one caliber length. This leavesfifty to eighty percent of the base still flat.
There are two purposes for a boattail. The most important isto reduce the amount of drag that occurs when air rushes backto fill the void left by the moving bullet. Turbulence occurs whenthe sharp right angle of a flat base bullet passes a given point inthe air, and the molecules of air rush in a chaotic way to equalizethe pressure back to normal atmospheric levels. In a simplifiedway of looking at base drag, you could say that moving the bulletthrough the air creates a vacuum behind the bullet that �pullsback� on the bullet. The net effect is close enough to think ofdrag this way.
An angle on the bullet shank near the base, shaped ratherlike a boat prow, helps the air to smoothly flow back together. Ineffect, this reduces the amount of vacuum or turbulence andthus cuts down on the �pull� at the base of the bullet. As a result,you get less loss of speed over the same range, and more energyon target, plus a flatter trajectory.
166
A second purpose for the boattail base is to help get the bulletinto the case neck without catching the case edge and bending it.A slight bevel or curve would do as well, but these would not haveas much effect on reducing drag.
A conventional boattail base is most useful when a bullet isfired over very long ranges, or when a bullet is fired at speedsbelow that of sound. As soon as a bullet breaks the first soundbarrier (about 1130 FPS at sea level under standard conditions),it compresses air molecules so rapidly that they don�t have timeto get out of the way, and they form a dense V-shaped pattern ofhighly compressed air that travels along with the bullet.
This big V-shaped cone of packed air molecules is constantlyleaking off at the edges and picking up new molecules, transfer-ring energy from the bullet to the air at a high rate. The shockwave, which is the extended V-shaped cone, acts like a big exten-sion of the bullet itself. In effect, you are dragging along the out-line of a much larger bullet. The velocity at which this happensvaries depending on the density of the air, because it is essentiallycaused by the mass and thus the inertia of the molecules thatmake up air.
Even something as small as a nitrogen atom has some mass,which means it has inertia. Air is mostly nitrogen, with someoxygen and other gasses. The average inertia of this thin soup webreathe every day varies with temperature and atmospheric pres-sure. Sound travels as vibrations through the air, at a speed thatdepends on how close together and thus how much effective iner-tia the air has. When a bullet moves faster than sound, the aircannot pick up speed fast enough to maintain a normal density.The atoms and molecules that are struck by the bullet are accel-erated so fast that they jam into other molecules and those haveenough inertia so they are not gently moved aside, but jam intoyet others.
At some distance from the bullet, the speed of the moleculesand atoms has slowed down enough to let them move adjacentones more gently. The result is a normal whiz of sound. But ifyour ear happens to be in the path of the highly compressedshock wave, you hear a very loud and sharp CRACK! The distanceyou can hear this very loud noise gives you an idea of just howbig a cone of compressed air is being moved along with the bul-let.
167
That takes a lot of energy! When the bullet goes supersonic,it feeds energy to the air so fast that the base drag is a smallportion of the total loss. The base drag is just a big a loss as ever,but now the bullet has something much bigger to worry about.Since you can�t do much about the shock wave except to makethe bullet just as streamlined as possible (which shapes the shockwave to be more streamlined as well), you can work on the basedrag.
At high velocity, the base drag component might cause up to25% of the total loss of velocity, but when the bullet slows downto below the speed of sound, the base drag may cause up to 60%of total velocity loss. This means that pistol bullets, which travelmuch closer to subsonic speeds, and rifle bullets for black powderand muzzle loaders, would benefit far more in total drag reduc-tion from a boattail design than would a high velocity rifle bullet.
On the other hand, a high speed rifle bullet generally is usedat longer ranges. This means that even though the boattail ben-efit is much smaller than for slower bullets, it has a long time toact, or at least a longer range over which crosswinds can work onit. A 40% improvement in ballistic coefficient at 100 yards, wouldonly be a few inches of vertical distance on the target. A 15%improvement in ballistic coefficient in a 1000 yard bullet mightmean hitting the target or missing it.
The boattail adds some length to the bullet, and makes a cupor hollow base ineffective for sealing the bore. Very light shortbullets might not be able to use a boattail base without losingtheir small bearing surface. Boattails also contribute to inaccu-racy in two ways. First, they tend to direct muzzle blast gassesinto sharp focus like the central post of a water nozzle directswater into a stream. The results is that instead of the expandingring of gas that you get from a flat base, a ball of turbulent gas isblown around the bullet and breaks up just as the bullet firesthrough it, adding from 10 to 15% more dispersion than a com-parable flat base bullet would experience.
Second, the boattail angle tends to focus hot gas in the boretoward the junction of the rifling and the bullet, as gas pressure,acting at right angles to all surfaces containing it, is vectored at90 degrees to the BT angle and attempts to peel the boattail andbarrel junction apart. If successful, the gas compresses the boattailportion of the bullet slightly, pulls the bullet jacket slightly awayfrom the bore, and lets more gas rush past the bullet along therifling bottom, cutting the bullet and eroding rifling.
168
This gas-cutting factor can be plainly observed by making a45 caliber pistol bullet with a boattail angle and firing variousloads, then recovering the bullets and examining the edges of therifling grooves under a medium power lab microscope. The edgestypically have solidified drops of previously molten copper depos-ited along them, showing where hot gas has rushed past the jacketalong each rifling groove. A flat base bullet, or a rebated boattailbullet, of identical weight and shape, fired with the same velocityin the same gun with the same loads, shows little or none of thisgas-cutting.
If the angle of the boattail is interrupted by a small but fairlysharp right angle, just as the boattail joins the rest of the bulletshank, both the gas cutting and the muzzle blast focusing effectare greatly reduced, even eliminated. The shoulder acts as a�spoiler� to the laminar flow of muzzle gas, which tends to followthe bullet outline because of the smooth boattail shape, just asthe air follows it in the other direction.
The shoulder also changes the gas pressure vector angle in-side the bore, from the complement of the boattail angle to oneacting parallel with the bore. This vector has no �leverage� to peelthe jacket back from the bore. It can only push gas past the jacketif the jacket is undersized or fouling cuts a groove in the jacket, orthe bullet is driven so fast that it �skids� over the rifling and opensa wider than usual engraved path for gas to leak out.
A minor advantage to the RBT design over the BT is that theexit from the muzzle effectively takes place much faster. How so?Because a boattail exiting the muzzle is like a tapered cork beingpulled out of a bottle of sparkling wine: it releases gas slowly asthe gap widens little by little, and any slight difference on one sideof the gap changes the pressure acting on the bullet and shifts thebullet path slightly.
The RBT is more like a flat base bullet, in that the momentthat the rebate edge passes the muzzle, the restriction drops awayinstantly to a smaller �cork� and gives the gas a much largerorifice for escape. This gives less time and lower pressure for aslight angle or dent in the muzzle area to direct gas unevenlyaround the bullet, and helps to insure consistent straight exitsfrom the barrel.
To build a good rebated boattail bullet, two dies are used.Instead of seating the lead core in the jacket using a straightcylinder die (CS-1), we use a die that has a boattail angle toward
169
the bottom. The normal flat jacket can be used, because it will beshaped by internal lead pressure just like it is in the point formingdie.
We cannot use a rebated boattail shape in this die, becausethe shoulder in the die would catch and jam against the bottomof the jacket. The jacket would be ripped or crumpled. First, wehave to form a conventional boattail. Then, in a second die, weget the base of the bullet past the shoulder and expand the jacketinto the shoulder at 90 degrees, again using lead pressure with asecond core seating operation.
To maintain the shoulder during point forming, we make anexternal punch that has a cavity matching the boattail angle anddepth. The cavity depth is important: too short, and the boattailwill be compressed and buckled, too long and the shoulder will betorn or forced forward. If the angle is not perfect, the bullet willhave two boattail shoulders instead of one, adding unnecessarydrag. This RBT external PF punch is included with the two RBTdies.
The RBT die package is called �RBT-2� and can be ordered asan add-on to any conventional flat base set. Any set of dies thatincludes the letters �RB� in the catalog number includes thesedies and the external PF RBT punch.
If the jacket is thin enough so it will expand into the firstboattail die (called the �BT-1�), then you simply use the regularcore seating punch and seat the lead core in this die instead ofusing the CS-1 flat base core seating die. But if the jacket is cop-per tubing, it normally will be too thick to flow nicely from inter-nal lead pressure and will not form a good boattail angle beforethe end opens up.
In that case, we provide a punch shaped like the boattail core.It is used inside the jacket, without a lead core, to shape the boattailangle. Then, the core is seated as usual in the BT-2 die with theregular core seating punch. If you are using copper tubing jack-ets and commercial drawn jackets in the same dies, you will prob-ably need the boattail forming punch only for the tubing jackets.Seating the lead core in the drawn jackets will work much betterto form them because they have a solid base that can stand morepressure and because they are thinner and can expand more readily.
Rebated boattail die sets are made in the type -M, -S, and -Hdies, but not in type -R because of the fragile point forming punchedges and relatively poor alignment of the slotted reloading press
170
ram and head. In other words, this is too precise for using a re-loading press. If you want to make RBT bullets, you are gettingserious about swaging and need a real swaging machine.
The die sets that make rebated boattails include the RBTO-4(Rebated Boattail Open tip four die set), the RBTL-5 (RebatedBoattail Lead tip five die set), the FRBO-5 (Flat and Rebated BoattailOpen tip five die set), and the FRBL-6 (Flat and Rebated boattailLead tip six die set). These would need the final die type designa-tion of -M, -S, or -H for a complete catalog number.
Because the boattail base angle is formed by putting a steelpunch all the way to the bottom of the jacket, and pressing it intothe BT-1 die, it is not practical to make a partition style tubingbullet using a rebated boattail. The partition is formed by press-ing both ends of the jacket against a shoulder on each of twopunches inserted inside them, inside a straight-walled core seat-ing die. Once the partition has formed, it is impossible to put theboattail punch to the bottom of the jacket.
A better answer than partitioning the jacket is to use CorbinCore Bond and make a bonded core. Since bonded cores are formedby melting the core in the jacket, and then seating the core afterthe jacket has been cooled and cleaned, it may be necessary insome cases to seat a short core first, at the base of the jacket, inthe BT-2 die, just to form the RBT base. Then the rest of the corecan be inserted by hand, bonded, and finally swaged again in thesame die. This would only be necessary if the jacket material andthickness made it difficult to expand the base once the full corehad been inserted and bonded.
A short pistol bullet such as the .45 ACP can sometimes bemade as a rebated boattail by seating the core in a truncatedconical (TC) shape point form die, just as you would to make aFJM bullet, but then using a Keith nose punch to push the bulletbackward into the same die, open end first. The solid end of thejacket, having already been formed into a fairly good boattail shape,fits down into the Keith punch well enough so that it can expandsideways and take on the shoulder. The open end takes on theshape of the point forming die.
This simplified, low cost way to make a RBT bullet does NOTwork if the ratio of bullet length to diameter is much over 1.7 to1. That is, a .452 inch bullet that is less than .7684 inches longprobably will form a reasonable boattail without too much taperin the shank portion. But an inch-long .458 probably will not.This is a short cut method, which doesn�t always work, but is

171
worth a try anyway. If it works for your particular bullet, you�vegot a cheap and easy way to produce RBT bullets. Otherwise, noharm done and you just need the right equipment.
172
16. Shotgun SlugsShotgun slugs are just bigger calibers to the bullet swager.
Everything I�ve said about other bullets applies to them. You canmake jacketed slugs using 3/4 inch O.D. copper tubing or pipecaps for jackets, or you can draw jackets from strip copper. Youcan make lead slugs of conventional or exotic designs. But re-gardless of what you make, it will require either the CSP-2H Hy-draulic Mega-Mite, CSP-1 Hydro-Press, or CSP-2 X-Press. Thereis no way, no how, you�re going to make a shotgun slug for any-thing bigger than a 28 gauge on a hand press.
The 20 gauge, 16 gauge, 12 gauge, 10 gauge, 8 bore, 6 boreand even the huge 4 bore can all be made rather easily using anyof the hydraulic presses that accept type -H dies. We can evenbuild special dies that make fins on the slugs, to spin them fromthe muzzle blast gas flow and keep them spinning all the way tothe target. These use punches with built-in ejectors, not a stan-dard set of tooling by any means, but entirely practical.
Lead cores for such big bullets can be made using specialsingle cavity core moulds or three-cavity adjustable moulds. Leadwire isn�t usually practical because it is too large to coil and hardto cut. Lead shot or thin coiled lead wire wound around a spooland then swaged into what appears to be a solid slug make inter-esting fragmentation bullets.
In most cases, you would want to swage the core in a CSW-1-H core swage die, then put it into a CS-1-H core seater and formthe special features such as a post in a hollow base (keeps the wadfrom being blown inside the cavity) or a Sabre-tooth hollow point.Finally, you might put this into a PF-1-H point form die to shapethe ogive.
A simple style of slug such as a hollow base round nose orwadcutter, with or without hollow point, can be made in a singlestep in the LSWC-1-H die. Slugs that carry a payload in a hollowcavity are formed by making a deep cup in the CS-1-H die andthen filling it with material to be delivered to the target, and fi-nally rolling the walls around in an ogive shape in a PF-1-H die.We have made airfoil-stabilized (finned) slugs this way with goodsuccess. The usual cost of special shotgun slug dies having finsand other fancy features is from 1.5 to 2 times the normal price
173
of a three-die set. Compared to the selling price of these slugs, itcan be a very profitable investment: such slugs often bring $2 to$3.50 each and cost under 25 cents to make (1996 prices).
There is a great deal of similarity in design between certainshotgun slugs and air gun pellets. In regular -M or -S dies, the airgun pellets can duplicate the slugs. But the airfoil-stabilized de-sign is just too delicate to work in a scaled-down version. Theparts become far too fragile compared to the required swagingpressure (works fine on paper, however). Dual diameter pelletsoffer excellent performance in a design similar to a Foster typeshotgun slug, but with a short Keith SWC nose.
The .410 Shotgun slug is a different matter. You can swagethese on any hand press, even a reloading press using the EC-1-Rdie. But the best designs can be made in a real swaging press withdies that adjust the weight while forming the nose and base (LSWC-1). After all, the .410 slug is just a variation on .41 caliber bul-lets.
A dumb-bell or �diablo� style shotgun slug can be swaged byusing a split sleeve around a lead core, the assembly of whichgoes into a CS-1-H die. The larger head and base are swaged tothe diameter of the die, and the split sleeve maintains a smallerwaiste in the middle. After forming and ejecting the slug andsleeve, a thin-edged tool is used to pry apart the two halves of thesleeve, revealing the slug with the hour-glass shape. This does notwork for small calibers because the sleeve becomes too fragile forthe pressures, but it works well enough for shotgun slugs.
174
17. Bullet-Makers� ToolsSome bullet swaging operations require special dies for un-
usual jobs. One of these is the Dual Diameter Sizer die, or DDS-1.This die is made for all of the Corbin presses, in type -M, -S, and-H. The purpose is to form a bullet that has two diameters. Thenose or ogive section of the bullet rides on top of the rifling toalign and guide the bullet with very little friction, while the rearportion of the bullet is left full diameter to engage the rifling.
This is a much better design than a tapered bullet, whichonly aligns properly at two points. A dual-diameter bullet alignsfull length, first in the bore and second at the bottom of the ri-fling grooves.
The DDS-1 die is a final step. It is used with other dies, not byitself. You first make the bullet at its major diameter. Then youpush it into the DDS-1 die to whatever length you wish to havereduced. You can reduce nearly the entire bullet, or just a little ofit.
An internal punch, with a matching cavity to the bullet noseshape, ejects the bullet. You can change the internal punch fordifferent nose shapes of bullets in the same caliber. The base punchcan be the same one you would use in the final point forming die.
A typical use would be in making an air gun pellet. First, aLSWC-1 die forms the basic hollow base SWC style bullet. Thenthe bullet is pushed into the DDS-1 so that most of the bullet isdrawn down to slide on top of the rifling, leaving only a smalldriving band. Another example would be a heel-type bullet. Inthis case, the bullet is pushed backward into the DDS-1, and theinternal punch matches the base shape while the external punchmatches the nose.
Another kind of special die is the ET-2 Expand and Trim set,for turning one length of jacket into a shorter length of the samecaliber. Pinch-trimming requires that there be a reduction in di-ameter that is at least equal to twice the wall thickness of thejacket. The ET-2 set first expands the jacket to twice its wall thick-ness, and then pinches off the expanded portion. The net result isyou get a shorter jacket in the same caliber.
The ET-2 set consists of an expander die, which is similar toa core seating die with a punch that flares the mouth and a diehaving an adjustable stop so you can set the distance for expan-
175
sion, and a pinch-trim jacket reducer die designed to snip off theappropriate length of jacket.
While you can adjust the first die for various lengths, thesecond die has a fixed length punch and the only way to changethe final jacket length is to get another punch. (Making the punchadjustable only works on paper, where even the thinnest threadshave no stress on them. In real life, the thin parts and small threadsneeded would be stripped off just as fast as the jacket itself.)
Cannelures are serrated grooves rolled into a jacketed or leadbullet, either to help identify the bullet, to strengthen the jacket,to use for crimping the case mouth, or just to tighten the bullet�sgrip on the case. There are two kinds of Corbin cannelure tools.
The Corbin Hand Cannelure Tool, HCT-1, handles calibersfrom .224 to .458. It can put adjustable depth and adjustableposition cannelures on copper or gilding metal jackets as well ashard or soft lead bullets. The HTC-1 Hand Cannelure Tool uses aroller V-way to support the bullet, and a padded handle that piv-ots a U-shaped channel down over the bullet, and presses a hard-ened roller wheel against the bullet shank. Turning a crank shaftrolls the cannelure into the bullet in one or two turns.
A special version of the hand cannelure tool is used to makea waffle-pattern or knurled surface on lead bullets, which holdsfar more lubricant than a ring. This tool is called the HCT-2 LeadKnurling Tool. The main difference between it and the HCT-1 isthat the HCT-2 has three diamond pattern knurling wheels in-stead of a pair of smooth V-way rollers and a single cannelurewheel.
The PCM-1 Power Cannelure Machine can process up to 100bullets a minute, as fast as you can feed them into one side of arotating wheel. This production-quality machine features a 1/4HP 120 volt 60 Hz motor running an oil-filled transmission,coupled through a heavy thrust spider drive to a shaft mounted ina strong thrust bearing. The unit weighs about 70 pounds, or31.8 kilograms, and is about a foot high with a six by eight inchfootprint. Cooled by forced air, it is designed or continuous opera-tion.
The PCM-1 uses six standard diameters of wheels to coverthe range from .224 to .475 caliber. Custom wheels and backplates extend the range up to 4 bore (.998 inches). A special

176
knurling back works in conjunction with knurling wheels in thesame range of calibers as the cannelure wheels, to put diamond-pattern knurls on lead bullets.
Multiple grooves can be rolled by ordering the cannelure wheelbuilt to order. There is no special charge for making any kind ornumber of grooves on the wheel. If you don�t specify, the wheelwill come with a standard .050-tall straight knurled groove. (Ac-tually, the wheels have a raised ridge that creates a groove in thebullet.)
Melting lead cores for bonding to the jacket, and heat treat-ing either jackets or lead itself can be done in the HTO-2 HeatTreatment Oven, which features a digital control with thermo-couple sensing and feedback. The oven normally runs on 120volts AC, but can also be ordered in a 240 volt model. Capable ofup to 1850 degree F. temperatures, the HTO-2 offers gunsmithsand tool makers a convenient, fast-heating furnace that can meltgold, aluminum and lead alloys or heat treat tool steels. Thefurnace has a cavity size of about five by five by six inches deep. Ithas a low thermal density ceramic liner that allows rapid heatingand fast cycling time.
A handy way to generate up to 1000 degree temperatures atlow cost without flames is the Flameless Heat Gun, FHG-1. Likean overpowered hair dryer, the FHG-1 uses a fan and electricheating elements to blow a stream of superheated air for anneal-ing, bonding, and heat treatment. It is slower than a propanetorch, but also heats more evenly without risk of going over tem-perature and burning the parts.
Corbin also builds custom dies. The published prices are forstandard calibers and nose shapes which are our own designs.We are glad to make custom diameters and shapes of punches,which have an additional custom work charge because they aremade individually to your specifications by a die-maker, ratherthan programmed into our normal production runs and made bythe hundreds all at one time.
Over time, we may make adjustments in the length of a pis-tol nose or depth of a cavity-forming punch, according to whatseems to work the best for the largest number of clients. Thesestandard punches are described by drawings on our order form orprice list as well as in our books.
177
If you need exact dimensions, such as a hollow point punchthat is precisely 0.35 inches long and has a root diameter ofexactly .030 inches, then this is a custom part. To guaranteespecific dimensions for punch shapes or ogive curves other thanthose we stock, or to specify the diameter rather than to acceptindustry standard diameters for a caliber, would mean you areordering a custom die instead of a stock die.
Specify that you want a punch tip .25 inches long, not �alittle longer than the last one�. With a staff of die-makers, ma-chinists, shipping and order desk personnel, it isn�t possible toremember every order in such minute detail as the exact lengthof a certain punch. But you have the punch, so measure it andyou�ll be able to order exactly what you want by dimension. Thiswould of course be a custom made punch, and the standard pric-ing would not apply.
If you want to make a custom shape of bullet, send us adrawing with dimensions indicated. Use our fax number or themail, or send us a sample of a bullet you want to duplicate. Youcan even make a model out of wood, aluminum or plastic if youwish, or send us a photocopy of a picture from a gun book orarticle. However, it is time consuming and sometimes impracti-cal for us to go find a certain picture of a bullet in a certain bookyou happened to read, especially when we are picking up thephone about as fast as it can ring all day long.
Making a bullet �just like the Hensley and Gibbs number suchand such� can be a confusing order, too, because many bulletmoulds change over time. As an example, the H&G 68 shape haschanged at least three times that I know about over the last twodecades, and our sample or picture might be from a differenttime period than yours. Again, instead of referring to somethingthat we may or may not have here to look at, send a drawing,sketch, picture, sample, or write down the dimensions. If we can�tfigure it out, we will make our own drawing of what we thinkyou mean and put question marks on it for the dimensions aboutwhich we are in doubt.
Very often we receive custom orders that have mutually ex-clusive dimensions indicated. Just the other day I got an order fora bullet that was .577 diameter with a hollow base indicated. Theclient wanted the width of the hollow base cavity to be ..357inches across, which is small for that caliber but not remarkable.
178
In the accompanying letter, he also said that the skirts orwidth of the base walls surrounding the hollow cavity should be0.020 inches thick to allow for easy expansion in the bore. Again,this is quite reasonable for a black powder bullet with a longbarrel and consequently low muzzle pressure (a modern load mightflare out the thin base walls upon exit from the barrel).
But adding the two skirt dimensions together gives 0.040inches, and added to the width of the hollow cavity gives only0.397 inches. Oops! The caliber is not 0.397 but 0.577. Wheredid the client expect us to hide the extra 0.120 inches? I called tofind out. After a few minutes of vigorously defending the skirtwidth and desire for a small diameter hollow cavity, the clientsuddenly stopped talking. The phone appeared to go dead.
�Hello?� I said. �Are you there?��Yeah, I�m here...�, the answer came back. �I meant to say
0.537, not 0.357. I have a lot of .38 pistols that are .357 diam-eter and I guess the number just sticks in my mind.�
A commonly requested custom item is a 1-E or even 2-Enose shape for a handgun. This almost never works out: the ellip-tical nose curve is not practical for rifles at two calibers length,and certainly a one caliber long elliptical nose curve is beyond thepractical limit for most revolvers and autoloaders.
On paper, long elliptical noses look good. But in three-dimen-sional reality, so much weight is shifted to the nose that the bulletbecomes massively heavy and long. Elliptical curves are not mea-sured in the same way as spitzer (tangential ogive) curves.
The typical spitzer bullet has a nose curve that is a segmentof a circle. You can draw it with a compass or trace it with a pairof dividers swung in an arc. The distance the dividers or compasspoints are spread when you swing the arc is the measure of thecurve, in calibers.
The drawing point of the compass begins exactly at the shankof the bullet, with the pivot on a line exactly 90 degrees perpen-dicular to the shank and the center line of the bullet. The com-pass is spread apart to the number of calibers you wish the curveto measure. For instance, a 6-S .308 describes a spitzer (Germanfor �pointed�) shape drawn with the compass points six times.308 or 1.848 inches apart.
The tip of the bullet is called the �meplat� and is the neces-sary width made up by the wall thickness of the jacket plus anyopening in the tip of the bullet.
179
The smallest caliber of radius for a spitzer bullet is 0.5 inches.If you set the compass points exactly half a caliber apart, theywill swing a half circle that touches the other side of the shank.Anything less would not connect. A 1/2-S ogive is a true roundnose. Only experienced big game hunters in Africa usually wantthis shape. Most other shooters want something more stream-lined.
The 1-S ogive has an actual point, and is different in appear-ance from the 1/2-S. A 4-S ogive is longer yet, and the standardrifle ogive for most calibers up to .375 is the 6-S. This gives thewidest range of weights without losing too much energy to drag.As you increase the S-number above 6, you gain less and lesswith each increase. There is little difference between a 10-S and a12-S unless you bring the very tip to a sharp point. Then you cansee it is a little longer. The longest practical spitzer is the 12-S.Anything longer is just pencil-line width different.
The more blunt the bullet nose, the wider a range of weightyou can make in the die and still have a bullet that will fly. This isbecause the lightest bullet you can make still needs some shankto align in the bore. A blunt nose will be shorter than a sharpnose, and take less lead to fill the volume.
With a longer nose on the bullet, there is a higher minimumweight of lead need to fill it up, so the minimum practical weightgoes up. The shank needs to be roughly in balance with the noselength so the bullet will f ly straight.This means that a long nose implies at least a moderately longshank, adding even more weight. Yet, the overall length of thebullet may be limited by practical considerations of the gun.
This means that if you make the nose very long and thin,probably half the bullet is effectively reduced in diameter andholds less lead than the same length of bullet with a blunter nose.So, the maximum weight you can make is higher with a roundnose than a long spitzer. Both the maximum and minimum weightspossible are extended as the nose becomes less pointed.
To make the most efficient possible bullet that is still practi-cal to shoot, Corbin developed the Ultra Low Drag bullet manyyears ago. Today this name is thrown about with abandon, ap-plied to anything that is supposed to sell better, but with us itrefers to a 14-caliber ogive that is not tangent, but secant in itsjunction to the shank, and is offset by 0.014 inches from thetangent. A tangent ogive describes a specific instance of the nose
180
curve joining the shank. A secant ogive can be any shape thatuses an arc for the nose curve but joins the shank anywhere buttangent!
It takes two numbers to describe the secant: you need toknow the radius of the curve and also the distance it is offsetfrom being tangent to the shank. The actual length of the nose isdetermined by both of these numbers. The secant curve is anattempt to use the longest possible nose and join it to the shankearlier than required by a tangent junction, and the trick is tomake the angled junction slight enough so that no extra shockwave is generated as the bullet breaks the sound barrier.
The elliptical ogive is measured in a different way. The ellipti-cal curve is a constantly changing radius, not a fixed radius likethe spitzer ogive. Therefore, it is meaningless to specify the radiusof its curve. What does have meaning is the axis length of theellipse. In reality, the bullet nose is half an ellipse, because anellipse is an oval shape.
An ellipse is measured by two lines. One is the minor axis,which in our case is the caliber of the bullet. The other is themajor axis, which in an ellipse reaches across the longest part ofthe oval. Since we only use half the ellipse for the bullet nose, weuse a half or semi-axis length to measure the size. A 1-E ogive hasa nose that is one caliber long, from the shank to the tip. If thebullet has a flat tip or hollow point, the measurement includesthe imaginary line that would complete the curve where the flator HP cuts it off.
A 1/2-E and a 1/2-S ogive are exactly the same because ahalf-caliber length and a half-caliber radius each result in thesame hemispherical shape. Most pistol bullets with a round nosehave a 3/4-E ogive. A .452 caliber pistol bullet with a 3/4-E ogivewould have a nose that is 0.339 inches long. A 1-E ogive is typi-cally used on the 1886 and later rifle bullets. Most old Winches-ter and Sharps illustrations show the 1-E shape. A .452 pistolbullet with a 1-E ogive would have a nose measuring .452 incheslong. When you consider that the entire pistol bullet is probablyabout 0.7 inches long, that leaves less than a quarter inch ofbearing surface, barely adequate.
The 1.5-E ogive is sometimes used on Kynoch rifle bullets fordouble barrel rifles. A .458 caliber bullet with a 1.5-E ogive wouldhave a nose that is 0.687 inches long. If the bullet is only about 1

181
inch long (typical for the average weight of bullet), then this leaves0.313 inches of shank. A 1-E ogive would be .458 inches longand leave 0.542 inches of shank.
You can see that a tiny change in the elliptical number makesa huge difference in the length of the major semi-axis (or bulletnose length). The only standard, practical sizes are 1/2-E, 3/4-E,and 1-E. While we can make longer elliptical ogives, they arecustom job for special purpose bullets.

182
18. Lubricants and ChemicalsCorbin offers a number of chemical products, including
Corbin Swage Lube. This high pressure, clean lubricant washesoff easily with hot water and soap, yet withstands tons of pres-sure to protect the die surface from fouling and galling.
Each operation, from drawing a jacket to seating a core, re-quires a thin film of CSL to reduce friction and improve the sur-face finish. No other lubricant is guaranteed to work the CorbinSwage Dies; some may, but we know from two decades of experi-ence that CSL does the job correctly.
Application is simple: touch your finger tip to the lube andspread a thin film on your thumb and fingertip. Then when youhandle the jackets or cores, just roll them slightly back and forthas you pick them up. That�s all it takes. Wipe your fingertip overthe punch as you swage each bullet.
Once you have swaged cores, clean them in hot water anddetergent and dry them, then put them into clean jackets withclean hands before you begin seating cores. This keeps lubricantout of the jacket insides, where it does not help accuracy., andkeeps it on the outside, where it extends die and punch life, lowersfriction and pressure, and prevents fouling of the dies. It is NOT abullet lubricant and should not be left on the bullets when youload them. It can be left on bullets that are to be stored for a longtime, unloaded, because it prevents corrosion.
Although the ingredients in CSL are medical grade cosmeticcomponents, a few people may have a reaction to them such as arash or itching. If this occurs, wash immediately and use rubbergloves. This would be extremely rare but possible. Most peoplewill find that handling CSL actually softens hard skin and is ben-eficial in preventing hangnails. Corbin Swage Lube comes in 2-ounce and 16-ounce containers, Cat.No. CSL-2 and CSL-16.
Corbin Bore Cleaner has been used by top shooters atWimbledon and Camp Perry for many years, long before recentlyintroduced and heavily marketed cleaners became popular. Wehave only made small lots for top shooters and our own clients,which includes police, professional gunsmiths and the military. Itworks by mechanical scrubbing: leaving it in the bore will notcause rusting or corrosion.
183
Millions of tiny (20 micron) flat plates align with the boreunder pressure, and shear off any projections such as rust, pow-der, lead, plastic, or even the rough edges of machine marks leftin the bore. It is an oil-based product, which contains no ammo-nia or corrosive salts.
One pass on a cleaning cloth wrapped around the next smallersize of bore brush does the job: move forward two inches and pullback one inch, until you reach the muzzle. Then follow up with acloth patch dipped in either Corbin Dip Lube or Corbin Five-StarGun Oil, to remove the bore cleaner and the particles it has loos-ened. Corbin Bore Cleaner is available in 4-ounce, 16-ounce(pint), and 128-ounce (gallon) containers as catalog numbers CBC-4, CBC-16, and CBC-128.
Corbin Dip Lube is also known as �liquid jacket� because itforms a tough, clear film of hard wax on the surface of leadbullets, which helps reduce leading and friction and also preventscorrosion. It can be applied by dipping or spraying. The carrier isnaphtha, which is a flammable petroleum product. If you shouldever happen to leave the cap off the bottle and the lubricant be-comes too thick, you can thin it with more naphtha (available inmost paint and hardware stores, or from lubricating oil compa-nies who sell solvents and fuels).
Dip Lube can be applied to wood or metal to repel water andprotect the surface. It drys to a slightly foggy finish that can bebuffed lightly to a high gloss. I also pour a little of it in the seambetween the sold and upper leather of my hunting boots to waterproof them, use it on wood screws in fences and gates where iteases entry and helps prevent splitting of the wood as well asretarding rust, and as a carrier for mixing with molybdenumdisulfide powder. This latter mix is messy but gives excellent anti-leading protection to a gun barrel: coat the bullet with it and firethe bullet after it drys.
Corbin Dip Lube is available in 4-ounce bottles, pints andgallons, as catalog numbers CDL-4, CDL-16, and CDL-128. Itshould not be used around open flame or sparking electrical de-vices, and should be used with adequate ventilation. Breathingnaphtha fumes is not as toxic as most of the complex hydrocar-bon carriers used for bullet dip lubricants, but it isn�t good foryou. Some people may have a reaction to contact with naphtha,such as a rash or burning sensation. I recommend wearing rub-ber gloves and eye protection, just in case.
184
Corbin Bore Lap is a 40 micron synthetic sapphire com-pound for smoothing barrels and actions. It is much smoothercutting than valve grinding compound, which is typically madeof silicon carbide crystals. Bore Lap lasts longer and is less aggres-sive in removing metal. In extreme cases of fouling it can be usedto clean the barrel of all lead, copper, plastic, and powder residue,but do not use it as a regular procedure or else the bore will belapped to a larger size over time.
Some manufacturers of bore cleaners use a natural alumi-num oxide particle of 40 micron size as their main ingredient,but the flat crystals of synthetic sapphire that we use in Bore Lapdo not cut in all directions, and are safer to use in a bore. Theytend to line up parallel with the bore under the pressure of thelap, cutting more off the surface than digging into it like a roughnatural crystal does. Corbin Bore Lap is available in 4-ounce,pint, and gallon sizes. The catalog numbers are CBL-4, CBL-16,and CBL-128.
Five Star Gun Oil is available in pint containers. It is thesame high grade ISO-15 oil we use for lathe spindle oil and forlubrication of our presses. A non-gumming, purified oil thathandles low temperature well, Five Star Gun Oil saves you moneyover the price of those little 1-3/4 ounce containers, where mostof the cost is the container. The catalog number is FSO-16.
Corbin Core Bond makes bullets that expand and retaintheir weight far better than any partitioned design. To use it, youwould swage a lead core that is a loose fit in the intended jacket.This is important. If the core fits tightly, it may be blown outwhen you heat the lead, often with a loud pop. Also, no bondingwill take place where the lead is jammed tightly against the jacket.
Clean the jackets and the lead cores in a good solvent or byboiling them in hot water, detergent, and a little vinegar and salt(no jokes about bullet soup are permitted during this process).Rinse the jackets and cores in clean, boiling water to remove thedetergent, vinegar, salt and any debris, and spread them out todry on a rough towel. It is best if you do not use the best guesttowel.
The material should dry from its own heat in short order.Then, place a core inside each jacket, and place them in a fire-proof holder made either from a magnesium oxide fire brick withholes drilled in it, or pack the jackets into a box built from four
185
fireplace bricks pushed up against each other and placed on topof three or four other bricks to protect whatever is under them. Ablock of potter�s clay can be used to hold copper tubing jackets:the clay will plug that little hole in the base and keep lead fromrunning out.
Once you have all your jackets secured in a vertical positionwith a core in each one, place two good-sized drops of Core Bondin each jacket. Let the liquid run down around the cores. Theremust be a slight gap between the jacket and core to allow this, orbonding won�t take place. Do not let the Core Bond touch yourskin. It is powerful agent and must not be gotten into your eyes,taken internally, or left where children could play with it.
Use a propane torch to apply heat as evenly as you can to thejackets, moving the flame slowly back and forth so that the leadis heated to the melting point of the lead as quickly as possible.The idea is to melt the lead before all the flux boils away, so thereis hot Core Bond vapor between the molten lead and the copperjacket wall. This lowers the surface tension of the lead so muchthat it can actually penetrate between the copper atoms and forman alloy junction.
The diffusion junction, similar to the concept of doping sili-con crystals to make transistors, is stronger than the lead core,forcing the bullet to open in the core rather than separating fromthe jacket. When the jackets have cooled, you should have a holeor depression in the middle of each core and should see the edgesof the lead core rise up along the jacket wall to a small extent. Ifyou see a domed core with the edges pointing down, it meansthat there is a poor or no bond.
You can easily test the bond by cutting one of the jackets inhalf lengthwise with a fine-tooth saw, then attempting to crushthe jacket in a vise until the core pops out. If you are successful inpopping out the core, you do not have a bonded core. If you canmash the jacket into a square and still the core will not separate,you have a bonded core. If you did it right, there will be no possi-bility of removing that core unless you melt it out.
When you have finished, and the cores have cooled, placethem all in a pot of boiling water and add a tablespoon of bakingsoda to the water. Let them boil for a few minutes to neutralizeany remaining flux and wash off the dross. Then add a couple oftablespoons of salt and a half cup of strong vinegar and boil for afew more minutes to remove discoloration. This is optional andhas no effect on the bond or bullet quality.
186
Finally, dump the water and boil one last time in plain waterto remove the salt and vinegar. If you skipped the salt and vin-egar, you can skip the final boiling rinse as well. Spread out thejackets to dry on your big fluffy old towel. They ought to dryquickly from their own heat.
Now, seat the lead cores in the usual way. I like to use ahollow point core seating punch because of the shrinkage hole inthe middle of the core. The punch evens up the hole and makes itlook like we meant to do it all along.
A word of caution, again. Core Bond can cause serious in-jury if it gets in your eyes or mouth. Please be careful. Weargloves and eye protection. When you are heating the cores, makesure that none of them is pressed snugly down into the jacket.Trapped air and liquid will turn to vapor, building pressure underthe core that can blow it out with surprising speed. Corbin CoreBond comes in 2-ounce, pint, and gallon sizes, under catalognumbers CCB-2, CCB-16, and CCB-128.
Corbin Cleaning Solvent is used to remove oil, grease andlubricant from bullet components. It also strips dried oil from theinterior working of guns, removes leftover bore cleaning com-pound from the barrel, and prepares metal surfaces for a freshfilm of new oil. If you don�t want to boil bullet jackets in hotwater and detergent to clean them, you can use a little CleaningSolvent in a can and slosh them around in it, then drain themwith a mesh scoop or strainer. Corbin Cleaning Solvent comesin pints and gallons, as CCS-16 and CCS-128.
Corbin Silver Lube is a high temperature lubricant thatcan withstand the heat of molten lead, and is used to lubricatethe hinges and pistons of core moulds. A thin film of this silvercolored lubricant will protect against seizing, rusting, and galling.Available in 4-ounce containers, Silver Lube is Cat.No. SL-4.
Walnut Shell Media is not exactly a chemical, but more ofa bullet-making aid. It is a ground walnut shell polishing mediafor use in vibratory bullet polishers such as the Corbin BPK-1Bullet Polisher Kit. It is packaged in one pound bags, Cat.No. WS-1. One bag comes with the kit.

187
Corbin Hydraulic Fluid is used in all Corbin hydraulicpresses. You do not normally need to add more to a new press,and the original fluid lasts for years of normal use, but if youshould happen to need more, CHF-128 comes in gallon cans.

188
19. Books and Software�Re-Discover Swaging� is a textbook containing the his-
tory of swaging, detailed use of swaging tools and techniques,custom bullets, and even die-making. It is an expanded version ofthis handbook written to cover the principles rather than a spe-cific brand of tooling. The current edition has over 240 pageswith photographic and line art illustrations. If you only have oneother swaging book, this is the one to get.
�Technical Bulletins, Volume 1� is a collection of news-letters or bulletins that was sent to subscribers of the old �CorbinTechnical Bulletin� years ago. The chapters address questions aboutspecific technical issues in bullet making, such as a comparisonof casting and swaging for time and cost of making bullets.
�Technical Bulletins, Volume 2� is a collected set of pa-pers that were published in magazines over a ten year period,relating to bullet swaging. Specific experiments and technical ar-ticles and monographs, some published only in foreign maga-zines, are all translated to English and reproduced with permis-sion of the publishers. These are articles written by Dave Corbinabout experimental work done by Dave and Richard Corbin.
�Technical Bulletins, Volume 3� covers the calibers from.14 to .50 BMG with a chapter on each range of calibers, explain-ing the things that you can do in that particular range to makebetter bullets for different purposes. There is a detailed study ofan experimental long range big bore, notes about the wildcat .22Flea (a reloadable .22 Magnum built in both a Browning FN 1922Model autoloading pistol and a Remington Rolling Block rifle)and other interesting features.
�Power Swaging� covers the use and operation of the CHP-1Hydro-Press, as well as other information about the use of powerpresses for bullet making, jacket forming and lead wire extrusion.Information on the design of power presses for bullet making isalso given along with charts of die strength versus maximumsafe pressures and other technical data.
�The Bullet Swage Manual�, by Ted Smith, is the firstmanuscript to be published in book form about bullet swaging.Dating from the start of modern bullet swaging, this book coversthe old S.A.S. Dies and early Corbin swaging tools from the view-point of the old master die-maker, Ted Smith, inventor of the firstpowder trickler and the original Mity Mite swaging press.
189
�The World Directory of Custom Bullet Makers� is acollection of several booklets under one cover. It includes sourcesfor copper tubing and strip, lead wire and ingots, and informationon the world�s custom bullet makers, marketing and testing ofbullets, how to design and specify bullets, and how to build jack-ets by four different methods. Included in the book is �The CorbinGuide to Jacket Making� and the names and addresses of hun-dreds of custom bullet makers.
Corbin also produces software for personal computers thatoperate on the MS-DOS or Windows system. Included are pro-grams to design bullets, calculate the parameters for extrudinglead wire, determine the breaking point of dies and the ram thrustand hydraulic pressures of presses.
DC-1015 is a Bullet Engineer�s Design Kit of software. Itconsists of the following four sets of programs:
DC-1001 is the basic tangential ogive design program, thatgives you the stable twist rate, BC, sectional density and physicalparameters for any bullet in the .12 to .999 caliber range.
DC-1002 is the Corbin Handbook on disk in ASCII format,for easy computer browsing. Included is a limited license to copyand use the information in your own work.
DC-1003 is the paper patch and multiple materials bulletdesign software, which calculates diameters and weights for bul-lets to fit various bores with different patch thickness, or param-eters for bullets made from up to four different core materials inthe same bullet.
DC-1004 plots the real time air resistance (drag) and showsa number of parameters such as BC and Ingalls coefficient on achart of distance travelled versus velocity. It fires any bullet youwish to design straight up, plots the drag until the bullet reacheszero forward velocity, then drops the bullet so you can see howmuch force is generated when it strikes the ground. Used to cal-culate lethality of falling bullets fired over friendly troops, it hascan be used in many ways to understand performance.
The CEDAR Billing System (CEDAR) is a mail order ori-ented invoicing and inventory control package for bullet makers.It tracks clients, notes, orders, receivables, account aging, andprints mailing labels, statements, invoices, packing slips, and awealth of other information. You can use it to write letters to
190
clients without typing their name, address, or your return ad-dress and date: just write the note and let the program format theletter, and save it as a form letter you can use for another client.
When you sell a box of bullets, the program can automati-cally figure out how much lead, how many jackets, lube, labels,boxes, and other materials are used up, and subtract them frominventory, keeping you posted of the material requirements foryour business. You just enter an order and ship it, and the pro-gram does all the other paperwork and accounting. Catalog num-ber is DC-CEDAR.
Corbin Simplified Maillist (CSM) keeps track of writersand editors of gun magazines, potential clients from mailings lists,and other names and addresses, offering easy entry, merging oflists and purging of close duplications, sorting by any criteria,and printing in many label formats. The program keeps track ofhow many times you have sent a mailer to a given writer orclient, last date of contact, and free-form notes about anyone onyour mailing lists. Up to a billion names can be stored, sorted andcoded for group printing. Catalog number is DC-MAIL.
DC-DIES is not an obituary, but the catalog number for thedie pressure calculator, a program which figures out safe die pres-sure and bursting point for any diameter or caliber of swage die,the ram thrust, the internal die pressure, and the cylinder or sys-tem pressure using various sizes of cylinders.
DC-LEAD is a set of lead wire extrusion programs that cal-culates lengths of any diameter wire from any diameter of billet,extruder pressure required, and other parameters. Even hollowlead tubing extrusion is covered.
DC-LABELS is a set of programs to print mailing and inven-tory labels quickly and easily.
DC-NAMER is a program that helps you come up with goodnames for products or new firms. It is used by ad agencies forbrainstorming sessions, and is very inexpensive.
DC-SHOP tracks the output of your production shop by prod-uct and time, helping you remember what you made and when,for whom, and for how much.
PC-DS is the Powder Coating Data System for powdercoating job shops, a full client, part and production tracking andbilling system with automatic cost estimation. And there are more:ask for the software brochure.
191
20. Delivery InformationCorbin Manufacturing is a small, family business. The tools
and dies are hand built in our plant in White City, Oregon. Corbinequipment is used by nearly every custom bullet making firm inthe world, as well as defense agencies, research and developmentlabs, Olympic champions and international world championshiplevel competitors.
Backlogs can run as long as two years, at times. Although wetry to keep inventory on hand, some items are sold faster thanthey can be replaced. To be fair with everyone, we work on theoldest order first. Clients are served in the sequence that theirorders are entered.
A great deal of work and planning is required in order to getan order �in the works� because the special metals and suppliesmust be ordered months in advance. The various kinds of ma-chines and skills of different people must be scheduled aroundthe number and type of dies pending. Each day, another piece ofthe puzzle is built, until it all comes together for you as a finishedset of tools. At any given time, hundreds of people have beenwaiting anywhere from a day to a couple of years for their order.
The Corbin die-works is one of the few places in the worldwhere you can get benchrest quality equipment for a fraction ofthe price that was common before we developed our system ofmaking swage equipment. Consequently, we are buried in ordersand have been for over two decades. The few others who buildgood swaging equipment make a limited range of dies for benchrestshooting: Corbin builds more dies per month than the rest of theindustry combined makes in a year!
We make custom, specialized tooling and develop not onlythe bullets that you see advertised daily as the latest new ideasbut also figure out the tools to make them. Looking at a pile oforders, we cannot tell if it represents ten weeks or ten months ofwork. Each order, as it unfolds, presents its own challenges to besolved. Some are standard, but some have never been attemptedbefore.
A few simply cannot be done, as we discover at our expense(unless we have already stated that we think the idea is unwork-able, and were asked to proceed anyway at the client�s expense).The difference between our operation and most commercial ma-
192
chine shops is that we know the technology well enough so thatwe can figure whether a design is practical or not. We work outthe solutions so you don�t have to.
Because of the Corbin develops tooling, instead of just build-ing it to client specifications, a great deal of the financial risk inbuilding custom bullets has been eliminated. If you have a goodidea for a bullet, you don�t need to spend thousands of dollarsdeveloping the way to build it.
The price of becoming a custom bullet maker is low enoughso nearly anyone can afford it. Part of the price is patience. If aperson can�t afford the patience to wait until we have the time tobuild the dies, then they only have part of the necessary cur-rency.
I have heard that some firms will take a �rush fee� to pushyour order ahead of clients who have been waiting longer. Thatdoes not happen at Corbin�s die-works. Orders from Lockheed-Marietta, Naval Weapons Research Center, Sandia National Labsand famous shooting champions as well as gun writers on shortdeadlines take their turn exactly as they were received. If yourorder is first, then it goes out first, unless we can do it with aneven earlier order and ship both without putting anyone else be-hind.
Threats to cancel or promises of big orders to come are allbeside the point. For the past several decades we have taken tre-mendous satisfaction in helping people enjoy a new aspect of theshooting hobby, a new source of income, and in some cases, anew life-style, based on the tools and concepts developed here.
That is the real payoff. If the money was my biggest concern,I�d shut down the die-works and spend all my time writing booksand software, making excellent profits with a lot less risk. Buthelping people to become bullet makers for their own enjoymentand security is a source of satisfaction that has no price tag. Ifthat makes me seem �independent�, so be it.
The bottom line is that by keeping our prices as low as pos-sible, taking custom work that is more a labor of love than asensible business decision, and offering everything for swagingfrom one source including supplies no one else finds profitable tokeep in inventory, we are simply not able to predict when a spe-cific order will be shipped unless we have it on the shelf when youcall.

193
I do not know how to guess the length of time it takes tosolve unknown problems, until we solve them. If I were to makean estimate that was just two hours short, then multiply thaterror by the five hundred or so orders that might be in variousstages of processing at any moment, by the time I got to yournew order I might be off by 1,000 hours! That is 100 of our 10-hour work days, or about half a year on the calendar.
What good does it do to say your order will absolutely beready in six months, plus or minus half a year? But that may bethe truth. It might be ready tomorrow or in a month or in 90days, if we happen to have a similar set done at that time andmade a spare. That is the only instance where you will be �putahead� of someone who ordered earlier, because it doesn�t putanyone else behind.
We cannot guarantee delivery at any specified time or by anyspecific date. All orders are taken in good faith that they will beshipped in the sequence in which they are finished, and finishedin the order in which they were placed, and will be accepted andpaid for when ready. Backlogs of up to two years can occur. Atany given time, our average backlog can be stated, but it is not apromise of delivery within that time frame. Backlogs can changerapidly and are only rough estimates at best.
Under no circumstances will Corbin Manufacturing & Sup-ply, Inc. be responsible for any economic loss which may occurbecause you made contracts or promises based on receipt of equip-ment prior to any given date. Wait until you actually have theequipment before entering into any such agreements.
No one wants you to have the equipment more than we do,believe me. In the first place, unless you ordered custom equip-ment where we ask for a 50% deposit with the order, we probablywill not be paid until we are ready to ship. It is to our advantageto ship as fast as possible. Nothing is gained by delay. Every orderis shipped as quickly as possible, whether or not we get calls everymonth, week, or day inquiring about them.
The conversation I often have with clients who don�t wish tobelieve these facts goes something like this:
�When will my dies be ready?��I don�t know. We have an average backlog of six months
right now. Probably sometime within the next six months.��Well, will they be ready in a month?

194
�I don�t know. We have about 550 orders in the works rightnow and yours is one of them. It could be much sooner, or itcould be that some of these will take much longer than estimatedand our six month estimate may be too short.�
�Will they be reading in two months, or six months?��I don�t know. All I can say is that they will be ready when
their turn comes up, and my best guess is about six months worthof work is pending, and the oldest order is about a year old at thismoment. You placed your order today, so in theory it could evenbe a year. But more likely it will be in the next six months.�
�You mean it will take six months to get anything?��No, we have lots of things on the shelf that could go out
today. But one of the dies on your order is not on the shelf, so wehave to build it. If you want the other items, we can ship themtoday. And it may not take six months for your die. I just can�ttell. It depends on how fast we can develop new tools for thecustom orders ahead of yours, and how fast we can make all theother standard tools that we don�t have on the shelf but for whichthere are prior orders pending.�
�Well, I need to be making bullet before hunting season.��I can�t promise delivery before any given date: I can say that
it is likely but not certain that we will be able to deliver every-thing within the next six months. Make no plans based upondelivery by a specified date or within a specific time.�
This conversation could drag on and on, with the client try-ing to pin me down to a guaranteed delivery date that I havealready stated I have no way of knowing. Instead of spendingmoney on the phone to have this conversation, clients so inclinedcan just read it here at their convenience, and we can use thetime to work on dies (every call just slows us down that much).
The good news is that we have a good supply of almost all theitems, such as presses, jackets, lubricants, and other tools, andgenerally have a huge inventory of dies. With virtually no limit tothe number of calibers multiplied by the styles and specific de-signs, it would be impractical to have every possible die all thetime. Did you know there are over 537 calibers we could make,with dozens of styles per caliber, and hundreds of variations oneach style? Just in .45-70 caliber, we�ve been asked to make overa dozen diameters from jacketed to paper-patched rifle, and thebases and nose shapes would fill this book!
195
21. WarrantyCorbin equipment is warranted against defects in material
and workmanship. If you receive a defective product, do not tryto remedy it yourself. Call, write, or fax for a Return MaterialAuthorization number. Include a legible return address inside thepackage, along with a brief description of the problem or defectand the RMA number. Corbin will replace or repair such defectswithout charge other than shipping and insurance. (Normal wearis not a defect.)
The number to call is 541-826-5211, Monday to Thursdayfrom 9:00 AM to 5:00 PM. The fax number is 541-826-8669.The mailing address is CORBIN, PO Box 2659, White City, Or-egon 97503 USA. For UPS delivery, ship to CORBIN, 600 Indus-trial Circle, White City, OR 9503.
Items which you ordered by mistake may be returned within30 days in unused condition. A 15% checking, cleanup, and re-packaging fee (also called a restocking fee) may be deducted fromthe refund to cover the cost of handling the extra work.
Be certain that when you order, you specify the diameterrather than just the caliber. A .45 caliber bullet could be .452 forthe .45 ACP, .454 for the .45 Long Colt, or .458 for a .45-70 rifle.Or, it could be .448 for a paper-patched .45-70 rifle bullet. Whenyou order a die or punch, specify the family type (-R, -M, -S, or -H). When you order a punch, state which kind of die it fits (suchas CSW-1, CS-1, LSWC-1, or PF-1) and whether you want theinternal or external punch.
Tools or dies broken from excessive pressure, bent or crackedfrom improper use are not covered by warranty. Any die can bebroken by the application of excessive pressure, regardless of thehardness or softness of the material put into it.
In no event will Corbin Manufacturing or its associates, offic-ers or representatives be responsible for any damages includingbut not limited to lost profits or other incidental or consequentialdamages arising from the use of or inability to use any Corbinproduct. It is expressly stated and made a condition of sale thatdelivery cannot be guaranteed for any specific date or before anyspecific period of time.
The End


