Download - Bird Banding WNC 2010
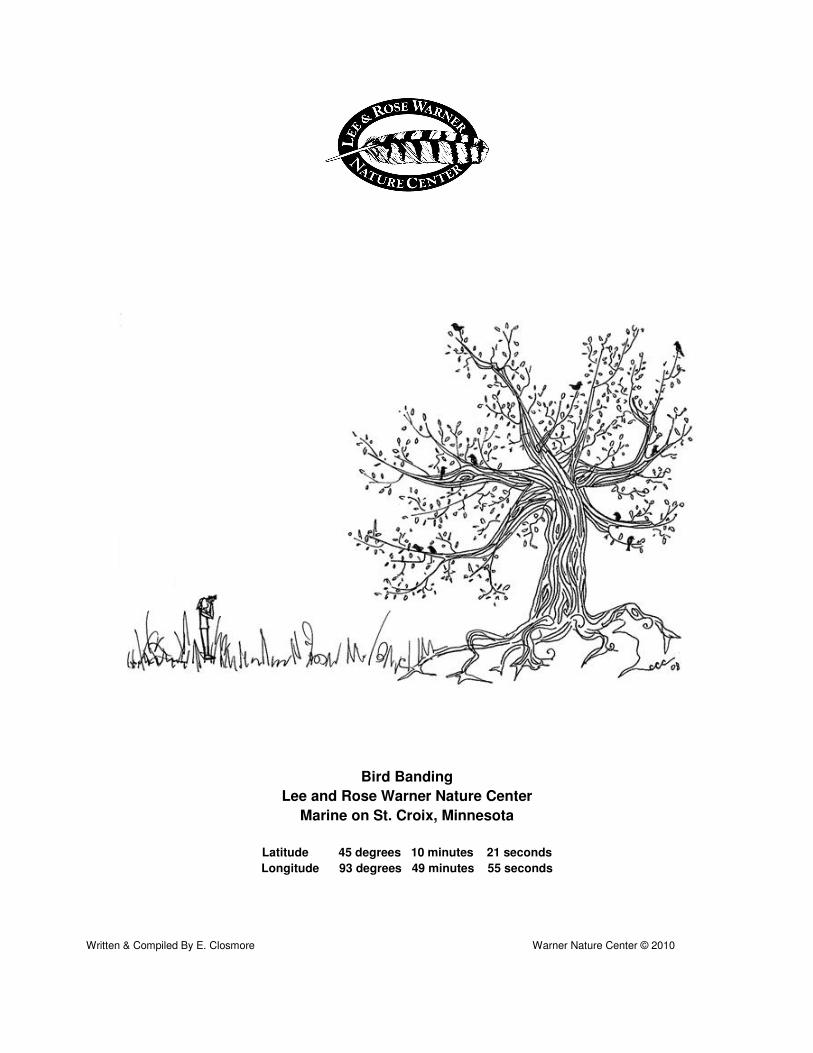
Bird Banding
Lee and Rose Warner Nature Center
Marine on St. Croix, Minnesota
Latitude 45 degrees 10 minutes 21 seconds
Longitude 93 degrees 49 minutes 55 seconds
Written & Compiled By E. Closmore Warner Nature Center © 2010
Bird Banding at Lee and Rose Warner Nature Center
In the mid 1960s the Science Museum of Minnesota was keenly interested in establishing an
environmental education center to encourage understanding and appreciation of the natural world
with an initial goal to stimulate concern for conservation. The Museum and the Junior League of
Saint Paul forged a relationship to start educational programs on land purchased by the Amherst
H. Wilder Foundation in Marine on St. Croix. Bernard “Bernie” Fashingbauer from the State
Department of Fisheries and Wildlife was hired as the first director. With a staff of three, Bernie and
a small army of trained JLSP volunteers introduced up to 18,000 visitors a year to the wonders of
nature whether on foot or on snowshoes. JLSP provided programming and promotion, as well as
trail guiding volunteers. The Lee and Rose Warner Foundation purchased the Nature Center in
1970 to perpetuate the Warner’s strong commitment to natural history and education. It was
renamed in their honor and continues to be a pioneer in the field of environmental education with
dedicated staff and many committed volunteers.
From the start bird banding was one of the most popular programs offered and it remains a
significant part of the Nature Center’s tradition of science-based learning. It’s a unique educational
opportunity to watch seasoned volunteers band songbirds and obtain data for research;
contributing information on bird migration, survival and behavior and ultimately conservation. This
direct experience of witnessing banders holding and examining live birds – science in the making--
has a significant impact on students of all ages. It’s a thrill to see the students’ wide eyes during
the presentation when they hear about the amazing woodpecker tongue or when they release a
recently banded goldfinch. The hope is that by sharing the wonder of birds the students will have a
greater sense of appreciation and responsibility for their future.
The change in seasons brings great anticipation of bird migration and banding to Warner Nature
Center. It has 600 acres of desirable habitat for a variety of birds including neotropical migrants,
winter visitors and year round residents. Forty mist net sites are scattered throughout the Center--
in mature hardwood forests and open prairie, around lakes and a sphagnum bog (complete with a
floating boardwalk). Bird banding takes place in the Arend Forum, a natural bowl limestone
amphitheater which is used as the outdoor classroom.
“Teach children the love of the land, the
love of nature. When they grow up they will
know almost instinctively how to preserve
and protect it.” Sigurd F. Olson
As required under the Migratory Bird Treaty Act of 1918 The Nature Center has a federal permit
issued by the Bird Banding Laboratory in Laurel, MD. North American banding is a cooperative
effort between the U.S .Fish and Wildlife Service and the Canadian Wildlife Service with the
support of the Mexican Fauna Silvestre. Banding permits may be issued for research,
management and conservation or for education. WNC’s station permit is to “educate the public in
order to reinforce stewardship.” Paul Smithson, WNC Avian Coordinator, is responsible for
obtaining the permit and sub-permits for trained, qualified banders. Volunteers with a permit or who
are in-training to obtain a sub-permit are allowed to band. (Appendix C-Permit)
Warner has banded over 38,373 birds representing 86 different species since 1969. (Records are
not available for 1996-97) These figures represent Neotropical migrants including thrushes, vireos,
flycatchers and up to 20 species of warblers. Myrtle, Nashville, Western Palm, Tennessee,
Orange-crowned, Common Yellowthroat, and even the occasional Blue-winged and Mourning are
among the warblers banded. Sparrows, woodpeckers and some winter only visitors such as juncos
and Pine Siskins are also banded.
In 2009 over 1,080 birds representing 74 species were banded at Warner. The birds most
frequently banded during the recent three year period of 2007 – 09 are the Black-capped
Chickadee, American Goldfinch, Song Sparrow, Myrtle Warbler, White-throated Sparrow, and the
Slate-colored Junco. This compares to the Gray Catbird, the most commonly banded bird in the
1980s, which isn’t even in the top five 20 years later. An exciting WNC capture was the Worm-
eating Warbler which holds the state record for the earliest spring sighting on April 14, 2005. One
record belongs to a catbird banded and rebanded for 8 years. A Black-capped Chickadee holds
the Warner longevity record of at least 9 years. (Appendix Q-WNC Bird Checklist)
It is both a privilege and a joy to participate in the bird banding program as a volunteer. Holding
and banding a live bird as part of an international banding network and sharing this experience with
students is extremely rewarding! Volunteers generally work one day a week for eight weeks during
spring and fall migration and on special occasions. The volunteer positions available are Bird
Bander and Net Runner/Bird Banding Assistant. (Appendix S-Assistant Job Description) The
licensed Bird Bander is responsible for leading the banding operations by ensuring the safety of
the birds in all aspects of the program including net set up, extraction, banding, data collection and
release. The Bird Bander also presents the banding demonstration. The Net Runner assists setting
up the nets, extracting birds and recording data. Although there is no substitute for onsite training
with an experienced bander, studying the manuals and following established protocol is instructive
and imperative for a successful program.
Every volunteer should know and follow the
North American Banding Council (NABC)
Bander’s Code of Ethics.
The Bander's Code of Ethics
1. Banders are primarily responsible for the safety and welfare of the birds they study so that stress and risks of injury or death are minimized. Some basic rules:
- handle each bird carefully, gently, quietly, with respect, and in minimum time - capture and process only as many birds as you can safely handle - do not band in inclement weather - frequently assess the condition of traps and nets and repair them quickly - properly train and supervise students - check nets as frequently as conditions dictate - check traps as often as recommended for each trap type - properly close all traps and nets at the end of banding - do not leave traps or nets set and untended - use the correct band size and banding pliers for each bird - treat any bird injuries humanely
2. Continually assess your own work to ensure that it is beyond reproach.
- reassess methods if an injury or mortality occurs - ask for and accept constructive criticism from other banders
3. Offer honest and constructive assessment of the work of others to help maintain the highest
standards possible. - educate prospective banders and trainers - report any mishandling of birds to the bander - if no improvement occurs, file a report with the Banding Office
4. Ensure that your data are accurate and complete.
5. Obtain prior permission to band on private property and on public lands where authorization
is required.
Table of Contents
A. Opening Mist Nets
B. Net Runs
C. Safe Ways to Hold a Bird
D. Extractions
E. Banding
F. Processing
G. Recaptures
H. Injuries and Mortalities
I. Releasing Birds
J. Closing Mist Nets and Mist Net Maintenance
K. Record Keeping
L. Bird Banding Presentation
M. How to Report a Band
N. Appendices
O. Acknowledgments
Manuals
The following resources are essential:
Pyle, Peter. Identification Guide to North American Birds Part I CA: Slate Creek Press
1997
North American Banding Council Banders’ Study Guide (April 2001)
http://www.nabanding.net/pubs.html
WNC Bird Banding Protocol
A) Opening the Mist Nets
The banding volunteers arrive at 8:30 am to prepare for the first class presentation after 10 am.
The lead bander decides how many nets to open -- up to a maximum of 10 per licensed bander
-- depending upon the weather, anticipated numbers of birds, and volunteers. Two demonstration
nets are usually set up -- one in front and one in back of the Trailside Museum (#T1 and #T3.
Appendix B-Map) If the Phoebe is nesting in front of the Museum, don’t set T#1. All nets are
stored in the metal cabinet in the basement storage room with the other banding supplies. Take the
nets, some bird bags, and a radio to set up. Remember to turn the radio on!
At each net site start with the pole on the fixed rebar. Open the plastic net bag and insert the pole
through the net loops on one bag handle from the bottom to the top but not through the bag
handle. The white loop should be on top. Place the pole on the rebar or securely sink the pole in
the ground. You may have to use the pounder to make a hole if the ground is too hard. Grip pads
can assist in pushing in the pole. Use a small clamp to hold the net about 4 feet off the ground
while you walk with the net to the far pole, keeping tension on it so that it does not touch the
ground and gather leaves or other debris. Insert the second pole through the loops -again from
bottom to top and push the pole into the ground. Spread the net shelves at both ends making sure
the pockets are adequate. You may have to use a stick to push the top trammel up the pole. At
some sites, ropes are available to keep the poles upright and give extra tension.
The net should be at least 18 inches off the ground so that a caught bird doesn’t rest on the
ground or in water. Tie the plastic bag at the bottom of the second pole and start with that end
when taking the net down.
B) Net Runs
Each net runner should carry the following: crochet hook, darning
needle, small scissors, small eye dropper bottle of water, grip pad and
a clamp. All items are available in two small black fanny packs in the
banding cabinet. Bring a radio in case you need to call for assistance.
Check the nets every 30-40 minutes or more frequently depending
upon the weather or bird numbers. The longer the bird is in the net the
more entangled it becomes.
Walk the length of the each net and pick up the bottom shelf to make
sure that no birds are missed.
Watch nets constantly and remove birds immediately if the
temperature is below 40 or if rain is intermittent.
No banding in steady rain, sleet, or snow.
Watch for lightning and thunderstorms. Taking the net poles down can be hazardous!
Consider the heat when setting the nets and removing birds. If the birds show signs of stress it
may be too hot or directly in the sun. Close those nets where this is an issue.
C) Safe Ways to Hold a Bird
Warner Nature Center uses two safe ways to secure birds – the Bander’s Grip and the
Photographer’s Grip.
The Bander’s Grip is the safest way to hold a bird. As described
and illustrated in the Study Guide: “Hold the bird with its neck near
the base of the gap between your forefinger and middle finger. With
these two fingers closed gently around the bird’s neck, the wings
can be contained against the palm of your hand. The remaining
fingers and thumb are closed loosely around the bird’s body…”
The Photographer’s Grip is used primarily to photograph the plumage, but
also to extract birds from the mist nets, or to transfer a bird to another person.
It should be used sparingly as it may strain the bird. The Study Guide
describes the grip; “ …scissor grip the bird’s legs, as near to the body as you
can, between the fore and middle fingers …and then pinch the bird’s tarsi
between your thumb and fore finger…Never hold a bird only by the lower part
of its legs; they will break!
Place your free hand over the bird’s back to keep its wings from flapping [if
you need to pause for some reason.]”
D) Extractions
“Only the patient, the soft handed, the considerate person” should
attempt extraction writes Elliott McClure in his treatise, Bird
Banding. Bird extraction should be approached as a puzzle. Even
though each tangled bird is unique, there are two basic extraction
methods--the feet-first method and the body-grasp method. At
times a combination of these methods is necessary. Refer to the
Bander’s Study Guide for a full description of each.
Summary of Feet-First Method:
The first task is always to determine which side of the net the bird entered and start there.
Look for the bare stomach and if possible free the feet one at a time. If the feet are very tangled,
support the body of the bird and firmly hold the joint where the toes meet the tarsus to take the
pressure off the tarsus and gently tug the strands off the toes. (If the feet are very tangled it may be
best to use the body-grasp method). Once you have the bird in the photographer’s grip, holding
both legs securely as close to the body as possible, you may proceed to a wing, the back,
head and finally the other wing. The birds’ legs can be broken if extreme care is not taken. Work
with the net. Sometimes gently pulling the net away from the pocket will show you how the bird is
tangled and at the same time loosen it.
Summary of Body-Grasp Method:
The first task is always to determine which side of the net the bird entered and start there.
If the bird’s back and head are not tangled in the net put the bird in the Bander’s grip and pull the
bird away from the net. If the net is tangled around the head and wing slip your fingers over the
body and under the wings. Gently pulling the bird away from the net to see how it is tangled you
can pluck the strands off the primaries and then lift them over the carpal joint. Then remove the net
from the head and other wing. Secure both wings against the body in the Bander’s Grip and just by
straightening out the legs a bit the bird may release the net from its feet.
The extraction information from McGill Bird Observatory, Montreal, Quebec is very thorough
and compliments the strategies presented above. Excerpts from their website follow.
In terms of safety, extraction of birds is the most critical step in banding, as it is at this stage that
injuries have the greatest potential to occur. Only those who have consistently demonstrated a
very high level of competence at extraction are permitted to extract on their own. Know your
limitations - extraction is NOT for everyone. You need to have considerable dexterity, patience,
gentleness, and problem-solving ability to be a safe and effective extractor.
Two important points to keep in mind:
1) There is no place for pride when extracting. If you aren't making progress, or can't figure
out how to get a bird out in the first place, call for help as soon as you have doubts - you will
learn through experience in time, but the safety of each bird is paramount. Even
experienced extractors sometimes are puzzled by a bird, and the challenge can often be
solved more quickly by having another person look at it from a different perspective
2) Approach each bird with confidence. Like other animals, birds can sense fear. If you are
overly tentative, they will tend to struggle back, thinking that they can escape. On the
contrary, if you establish control and work confidently, you will tend to be met with much
less resistance, and the process will be much quicker. Similarly, it is vital that you remain
patient, since any agitation on your part will be recognized and reacted to by the bird.
Every bird presents a unique challenge. However, following the basic steps below will
usually result in a safe and efficient extraction:
Prioritize extractions
1) Begin with birds that are vulnerable to getting their tongue stuck in the net (especially
thrushes, catbirds, thrashers, and blackbirds). See tongued birds under the tips section
below for advice on extracting those that do have their tongues stuck.
2) Next, target any large birds that are likely to escape because they aren't actually caught in
the mesh.
3) Scan the nets for any birds lying close to each other, and extract at least one of each pair to
ensure that they cannot peck each other while in the net (especially important for larger
species, or aggressive birds of any size, such as chickadees).
4) Of the remaining birds, start with those that are likely to get more tangled as time goes on
(e.g. chickadees, wrens, catbirds, sparrows), rather than those which usually lie calmly (e.g.
kinglets, warblers, finches).
5) All other things being equal begin at the bottom and work your way up through the
panels. This ensures that you won't accidentally bump into lower birds while working on
higher ones, and if you have to lower the top panels to reach upper birds, won't risk having
birds lower down grab on to extra layers of net.
Identify from which side of the net the bird entered. You MUST take birds out from the same
side of the net they entered. Assess situation visually before touching the bird
Determine how the bird is caught in the net, and what can be freed most easily. In some cases it is helpful to use the net as a tool - GENTLY spreading it out around the bird may allow the bird to partly (or even entirely) shake itself loose. Be prepared for the bird to be loose, and if so, cover it quickly and firmly, but gently with your hand (from which you can then easily slide around to secure it with a bander's grip).
Secure the bird
As soon as possible, secure the bird to minimize its ability to struggle against the net. Usually it is
best to hold the bird in a bander's grip as much as possible, but at times it will be necessary [to use
the photographer’s grip. Firmly hold the leg joint close to the body at all times to minimize any risk
of leg injuries.]
Working with the net
Always try to work WITH the net, rather than against it. In practical terms, this means:
1) Remember that the net traps birds first by trapping them in pockets, and only secondarily by having birds actually get caught in the mesh. This means that if you gently open the pocket the bird is in (from the side it entered); the separation of the two sides of the net is often enough to partly (or even entirely) free the bird.
2) Once you are holding a bird, pull SLIGHTLY away from the net. It's easy to waste time in an extraction by "pushing" a bird back into the net. Conversely, if you pull it too far away from the net, the tension on the net will be too great to allow you to get any of it off, and poses a threat of injury to the bird.
3) Always keep the bird in a natural position, i.e. never stretch or bend the wings into unnatural positions, and avoid putting unnecessary stress on the neck.
Begin with the least tangled part of the bird, and proceed sequentially (e.g. wing-head-wing)
Always remember that the bird flew forward into the net, with wings open, and then fell down into
the net pocket. You need to reverse the process. Often the feet will be grabbing the net, but
usually it is more efficient to free the wings and head first. Don't get distracted by the feet!
For more details on extraction from the McGill Bird Observatory, go to this website:
http://www.migrationresearch.org/mbo/extraction.html.
Some helpful hints for delicate situations at WNC:
1) Ask for assistance if you are having difficulty.
2) Use the crochet hook and darning needle to get strands over the head, off the alula, or
around the tongue. Some birds have arrow-shaped tongues which may get tangled.
Woodpeckers have barbs on the end of their tongues and if caught in the net should be
lifted off one strand at a time.
3) If the bird is exhausted or stressed offer a drop of water. Signs of stress include panting,
closed eyes, limpness, and raised body or crown feathers. Release at the net. Inform the
bander.
4) Occasionally a bird will fly in one shelf and then get further stuck in another, usually the one
below. Start with the second. If a bird spins in the net determine the direction and unwind it
first.
5) As a last resort use the small Swiss army knife scissors to cut a few threads. Minimize the
number of threads cut and make sure no threads remain on the bird. The bird’s safety is
your priority.
6) WNC does not band hummingbirds. Often you can free a hummingbird by merely spreading
the net apart. Never hold a hummingbird by its feet. Carefully extract them and release at
the net.
In all cases once the bird is freed put it in the Bander’s grip as soon as possible and release it
inside the bag. Pull the draw string and make sure you slide the colored cord lock or the bird
might escape. Use a larger bag for bigger birds like Blue Jays or Hairy Woodpeckers.
Carry the bird bags on your wrist. Never put a bagged bird
on the ground or hang it on a branch as it may be forgotten.
Bring the birds back to the amphitheatre and hang them on the
banding table hooks.
Inform the Bird Bander if any birds need priority processing, such
as birds with brood patches.
E) Banding
The Bander may prioritize the birds for banding depending upon the number and variety of species
for the presentation, the weather and the condition of the birds. Small Formica chips are available
to write on and place with the bird bags if the Bander wants to keep track of certain birds.
Use the bander’s grip to remove the bird from the bag to minimize stress. Turn the empty bag
inside out and set aside for cleaning. Bags are generally used only once before washing.
Identification is the most important task before banding. Staff and fellow volunteers can
provide expert knowledge. Many guides are also available at the banding table.
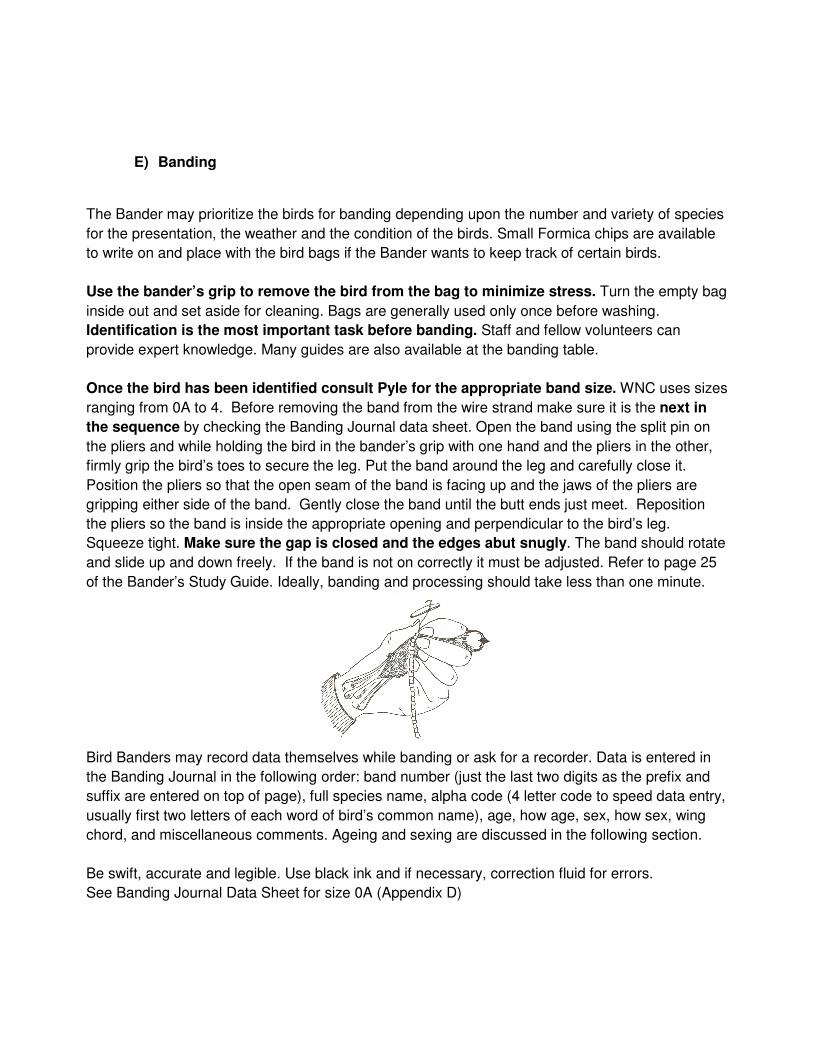
Once the bird has been identified consult Pyle for the appropriate band size. WNC uses sizes
ranging from 0A to 4. Before removing the band from the wire strand make sure it is the next in
the sequence by checking the Banding Journal data sheet. Open the band using the split pin on
the pliers and while holding the bird in the bander’s grip with one hand and the pliers in the other,
firmly grip the bird’s toes to secure the leg. Put the band around the leg and carefully close it.
Position the pliers so that the open seam of the band is facing up and the jaws of the pliers are
gripping either side of the band. Gently close the band until the butt ends just meet. Reposition
the pliers so the band is inside the appropriate opening and perpendicular to the bird’s leg.
Squeeze tight. Make sure the gap is closed and the edges abut snugly. The band should rotate
and slide up and down freely. If the band is not on correctly it must be adjusted. Refer to page 25
of the Bander’s Study Guide. Ideally, banding and processing should take less than one minute.
Bird Banders may record data themselves while banding or ask for a recorder. Data is entered in
the Banding Journal in the following order: band number (just the last two digits as the prefix and
suffix are entered on top of page), full species name, alpha code (4 letter code to speed data entry,
usually first two letters of each word of bird’s common name), age, how age, sex, how sex, wing
chord, and miscellaneous comments. Ageing and sexing are discussed in the following section.
Be swift, accurate and legible. Use black ink and if necessary, correction fluid for errors.
See Banding Journal Data Sheet for size 0A (Appendix D)
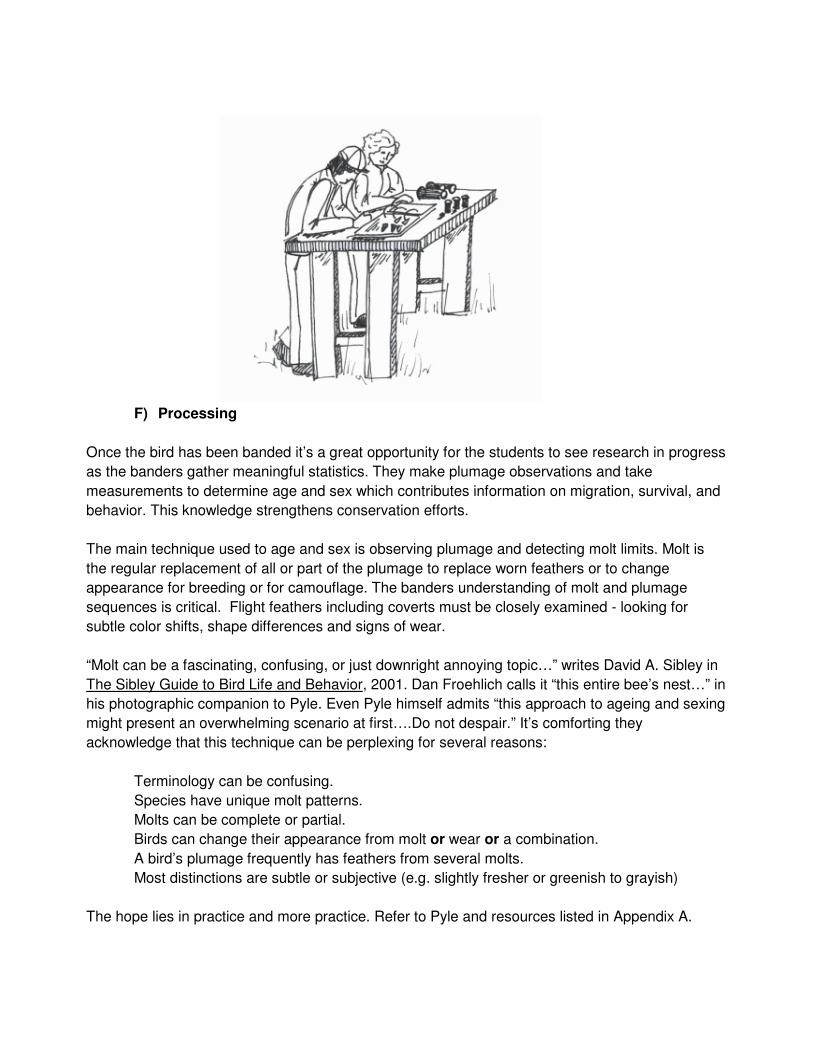
F) Processing
Once the bird has been banded it’s a great opportunity for the students to see research in progress
as the banders gather meaningful statistics. They make plumage observations and take
measurements to determine age and sex which contributes information on migration, survival, and
behavior. This knowledge strengthens conservation efforts.
The main technique used to age and sex is observing plumage and detecting molt limits. Molt is
the regular replacement of all or part of the plumage to replace worn feathers or to change
appearance for breeding or for camouflage. The banders understanding of molt and plumage
sequences is critical. Flight feathers including coverts must be closely examined - looking for
subtle color shifts, shape differences and signs of wear.
“Molt can be a fascinating, confusing, or just downright annoying topic…” writes David A. Sibley in
The Sibley Guide to Bird Life and Behavior, 2001. Dan Froehlich calls it “this entire bee’s nest…” in
his photographic companion to Pyle. Even Pyle himself admits “this approach to ageing and sexing
might present an overwhelming scenario at first….Do not despair.” It’s comforting they
acknowledge that this technique can be perplexing for several reasons:
Terminology can be confusing.
Species have unique molt patterns.
Molts can be complete or partial.
Birds can change their appearance from molt or wear or a combination.
A bird’s plumage frequently has feathers from several molts.
Most distinctions are subtle or subjective (e.g. slightly fresher or greenish to grayish)
The hope lies in practice and more practice. Refer to Pyle and resources listed in Appendix A.
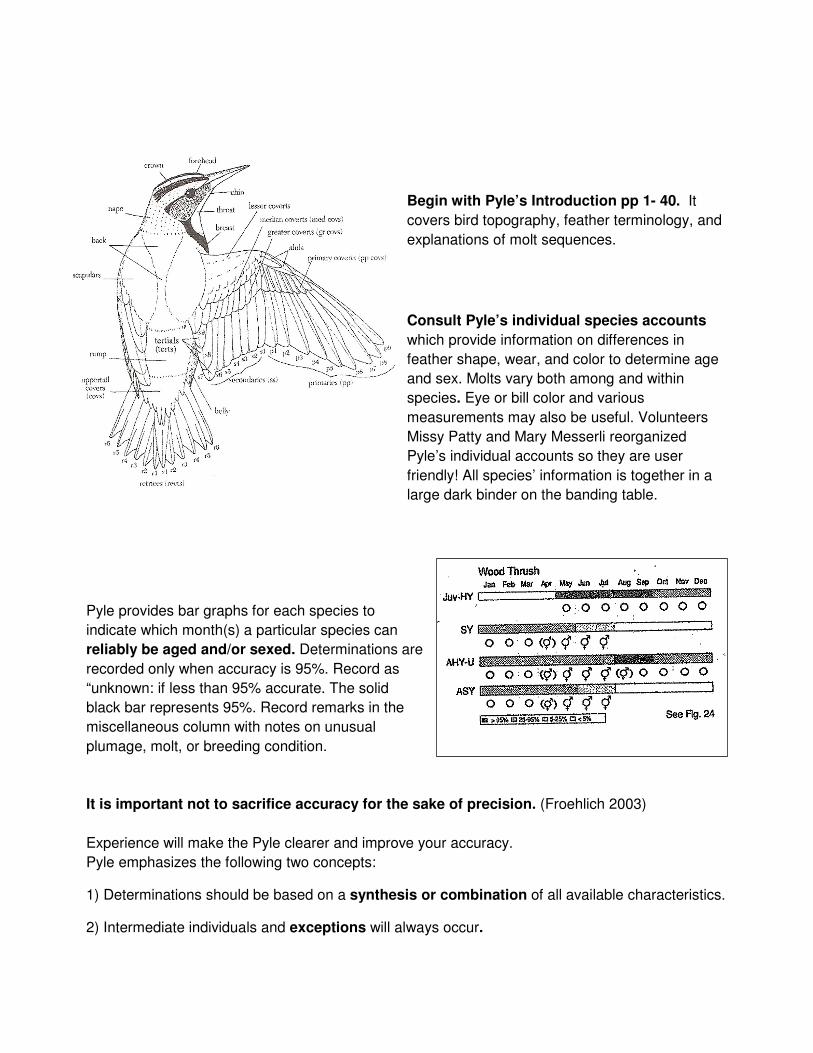
Begin with Pyle’s Introduction pp 1- 40. It
covers bird topography, feather terminology, and
explanations of molt sequences.
Consult Pyle’s individual species accounts
which provide information on differences in
feather shape, wear, and color to determine age
and sex. Molts vary both among and within
species. Eye or bill color and various
measurements may also be useful. Volunteers
Missy Patty and Mary Messerli reorganized
Pyle’s individual accounts so they are user
friendly! All species’ information is together in a
large dark binder on the banding table.
Pyle provides bar graphs for each species to
indicate which month(s) a particular species can
reliably be aged and/or sexed. Determinations are
recorded only when accuracy is 95%. Record as
“unknown: if less than 95% accurate. The solid
black bar represents 95%. Record remarks in the
miscellaneous column with notes on unusual
plumage, molt, or breeding condition.
It is important not to sacrifice accuracy for the sake of precision. (Froehlich 2003)
Experience will make the Pyle clearer and improve your accuracy.
Pyle emphasizes the following two concepts:
1) Determinations should be based on a synthesis or combination of all available characteristics.
2) Intermediate individuals and exceptions will always occur.
Ageing
“A bird is aged according to the number of calendar years it has survived. Birds in their first year
are designated as hatching year (HY) until 31 December. Beginning on 1 January of the next
calendar year, the bird is in its second calendar year (SY) even though it may be only 6 to 7
months old.” (NABC Bander’s Study Guide 2001)
HY: Hatching Year: Birds in their first year are designated as hatching year birds until Dec. 31st.
SY: Second Year beginning January 1.
TY: Third Year
ASY and ATY: After Second Year and After Third Year respectively.
AHY: After Hatching Year “… a catchall code to designate birds that are at least SY, but for
which the age could not be more precisely determined.”
Sexing
It is not always possible to determine sex. Sex may be determined by plumage alone but physical
signs such as cloacal protuberance, brood patch or wing length may also be used depending upon
species. In some species it is possible to determine sex only when age is known.
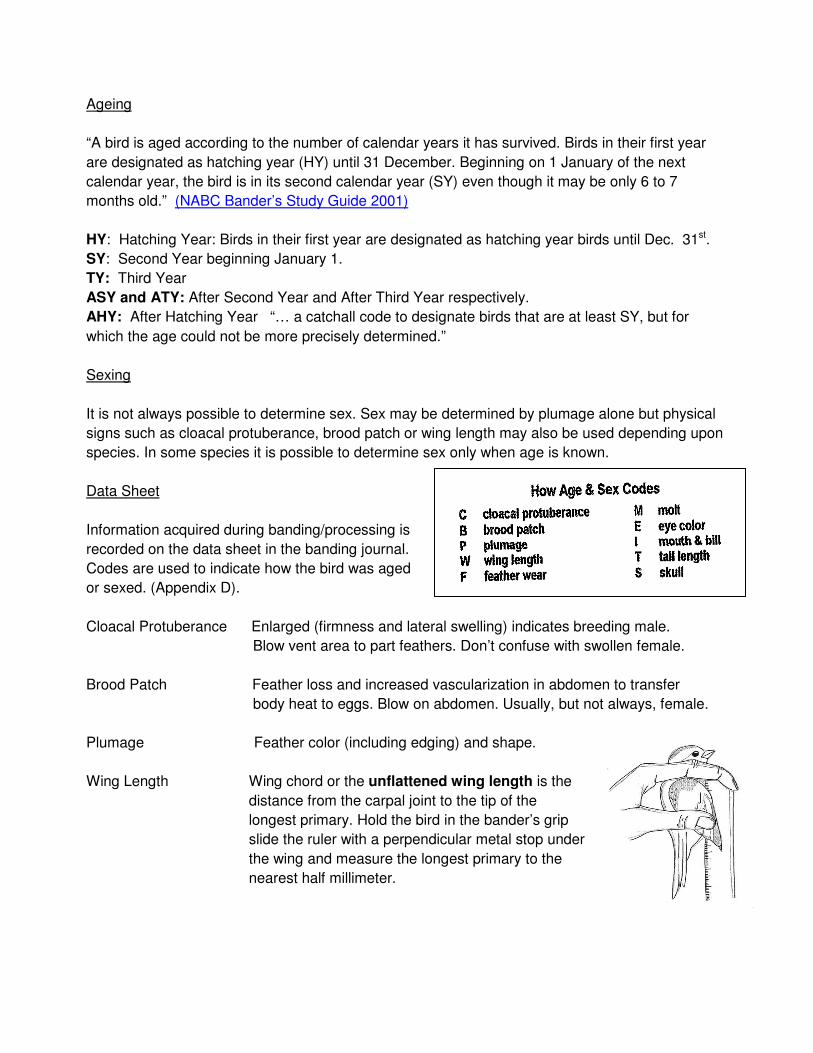
Data Sheet
Information acquired during banding/processing is
recorded on the data sheet in the banding journal.
Codes are used to indicate how the bird was aged
or sexed. (Appendix D).
Cloacal Protuberance Enlarged (firmness and lateral swelling) indicates breeding male.
Blow vent area to part feathers. Don’t confuse with swollen female.
Brood Patch Feather loss and increased vascularization in abdomen to transfer
body heat to eggs. Blow on abdomen. Usually, but not always, female.
Plumage Feather color (including edging) and shape.
Wing Length Wing chord or the unflattened wing length is the
distance from the carpal joint to the tip of the
longest primary. Hold the bird in the bander’s grip
slide the ruler with a perpendicular metal stop under
the wing and measure the longest primary to the
nearest half millimeter.
Feather Wear Wear of primaries, coverts, and rectrices. Season, habits, and molt
sequence have to be considered. (Read Pyle pp 20-23.)
Molt Presence of two or three generations of feathers or presence of
pinfeathers or missing symmetrical flight feathers.
Eye Color Color of iris. Requires good light and experience for comparison.
Mouth/Bill Color, shape, and/or presence of fleshy gape
Tail Length Length of longest rectrix. Pyle will indicate when this measurement is
relevant.
Skull Pneumatization of skull to separate HY from AHY birds. Warner
Nature Center doesn’t use this.
Miscellaneous and Other Measurements
Various other measurements can be helpful.
Length of the culmen (bill) or crown patch
may also be measured.
Wing morphology (or “wing formula”) refers
to the shape of the wing. It can be very useful discriminating between similar small species in the
flycatcher family for example. Consult Pyle page 8 for details on relative primary lengths and
explanations of notch and emargination (shapes) of primaries, as they pertain to wing morphology.
G) Recaptures
“Recaps” are recorded on a designated page in the back of the Banding Journal. Unlike first time
captures they are not separated by band size. Record on next available line. (Appendix F)
Enter the full band number and double check it!
Treat each recap as if it were a new bird when gathering data.
Look up the band number in the back of the Banding Journal. The past ten years of bands used by
the Nature Center are listed in numerical order indicating approximately when the bird was first
banded if banded at WNC. It can be a fun and dramatic point for the banding presentation.
H) Injuries and Mortality
Remember the bird’s safety is your #1 priority. A small first aid kit is in the banding bag. The
Bander may treat a broken leg with super glue or a feather shaft. It may be necessary to cut off the
broken leg and treat with an antiseptic. Minor wounds may be treated with an antiseptic or
antibiotic. Refer to the Bander’s Study Guide pages 43-46 for detailed information on injuries and
mortality.
If a released bird is not banded due to injury or stress enter it in “Released Unbanded” column
of the Daily Log.
If a bird dies or is found dead in the mist net enter it in the Phenology Section of the Daily Log.
No entries are required in the Banding Journal. Dead birds are either used as study skins or fed to
the raptors.
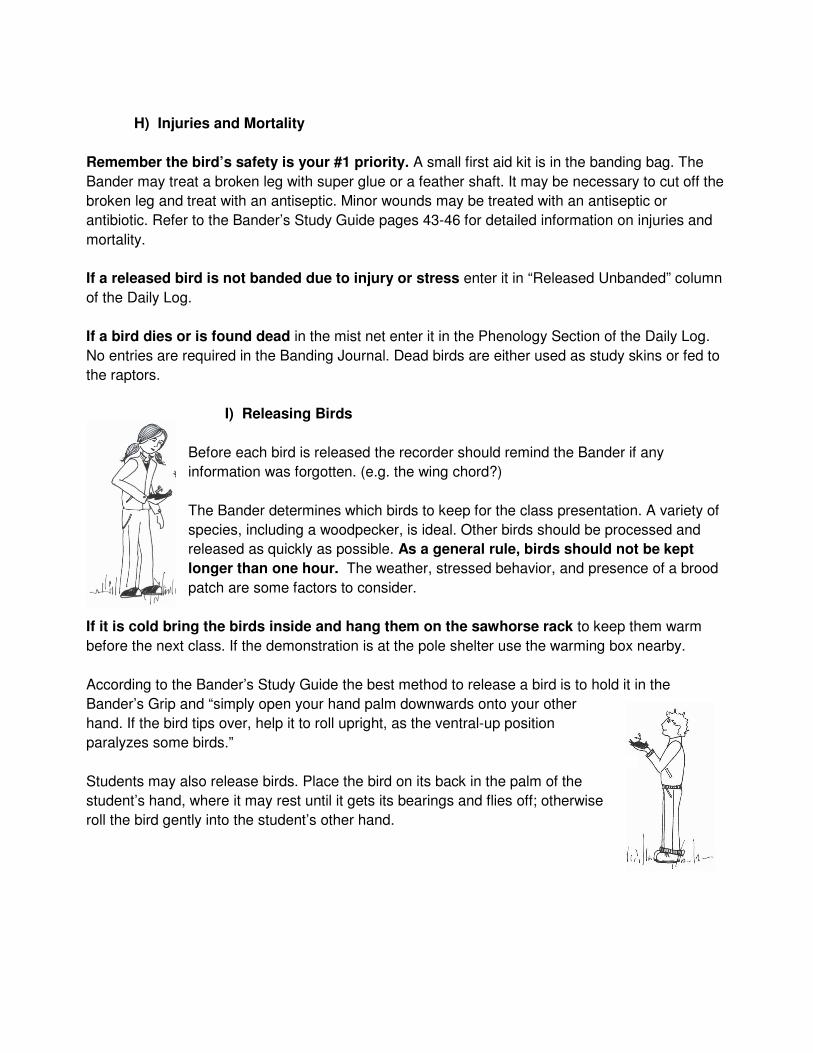
I) Releasing Birds
Before each bird is released the recorder should remind the Bander if any
information was forgotten. (e.g. the wing chord?)
The Bander determines which birds to keep for the class presentation. A variety of
species, including a woodpecker, is ideal. Other birds should be processed and
released as quickly as possible. As a general rule, birds should not be kept
longer than one hour. The weather, stressed behavior, and presence of a brood
patch are some factors to consider.
If it is cold bring the birds inside and hang them on the sawhorse rack to keep them warm
before the next class. If the demonstration is at the pole shelter use the warming box nearby.
According to the Bander’s Study Guide the best method to release a bird is to hold it in the
Bander’s Grip and “simply open your hand palm downwards onto your other
hand. If the bird tips over, help it to roll upright, as the ventral-up position
paralyzes some birds.”
Students may also release birds. Place the bird on its back in the palm of the
student’s hand, where it may rest until it gets its bearings and flies off; otherwise
roll the bird gently into the student’s other hand.
J) Closing Mist Nets and Mist Net Maintenance
Before closing a net remove all leaves, twigs, and insects. Push all the shelves together and
place a clamp on the distant pole to keep the net off the ground and away from branches or leaves.
Slide the plastic bag handles through all the shelf string loops, starting at the bottom and ending
with the white loop on top. Pull the bag and loops off the pole and proceed to stuff the bag,
keeping tension as you walk. Again starting at the bottom insert the bag handles through the
loops, slide them off the pole and tie once to secure the handles. Store all net bags on a
carabineer and return them to the metal storage cabinet.
COUNT the number of nets collected. Make sure all nets are down!
Note the condition of the net when you take it down. Holes or tears can make it difficult to remove a
bird safely. If a shelf line is broken do not use the net until it has been repaired. Label nets that
need to be repaired and hang them on the cabinet door. Nets are expensive so if the nets are
salvageable volunteer Carol Carver graciously repairs them. Using tiny square knots she picks up
threads from each side of the hole. She may cannibalize a net which is beyond repair to use its
thread on another. Unusable nets are burned.
K) Record Keeping
Banding Journal
The Banding Journal contains all data sheets for each band size, recaptures, and a summary of
band numbers used in the last ten years.
Inventory all bands remaining on each strand after the nets are closed and all the birds are
processed. It is ideal if two people do this to check each other. Beginning with the smallest band
size and continuing through each size, read the last band number used and check against the next
band on the strand. All bands must be accounted for either in the Journal or on the strand.
Draw a heavy black line under the last band number used on each page to indicate where to
start the next banding session. (Appendix D)
Bandit
WNC’s Avian Coordinator Paul Smithson enters all information from the Banding Journal into
Bandit, a computerized banding schedule. (Appendix O)This data is then submitted to the Bird
Banding Laboratory (BBL), USGS Patuxent Wildlife Research Center in Laurel, MD. It is available
to anyone who requests it. http://www.pwrc.usgs.gov/bbl/index.cfm
Daily Log
The Daily Log summarizes the day’s banding totals and records weather, banders and phenology.
Enter the time the first net was opened and the time the first net was closed. If all the nets weren’t
opened for the same length of time indicate the number of hours separately. Fill in the total hours
the nets were open.
Provide a general weather report. A thermometer is attached to the table. Estimate cloud cover
and wind speed.
Refer to the Banding Journal and enter by species the number of birds banded, recaptured, or
released unbanded. Total the birds and species banded. (Appendix H and Appendix I)
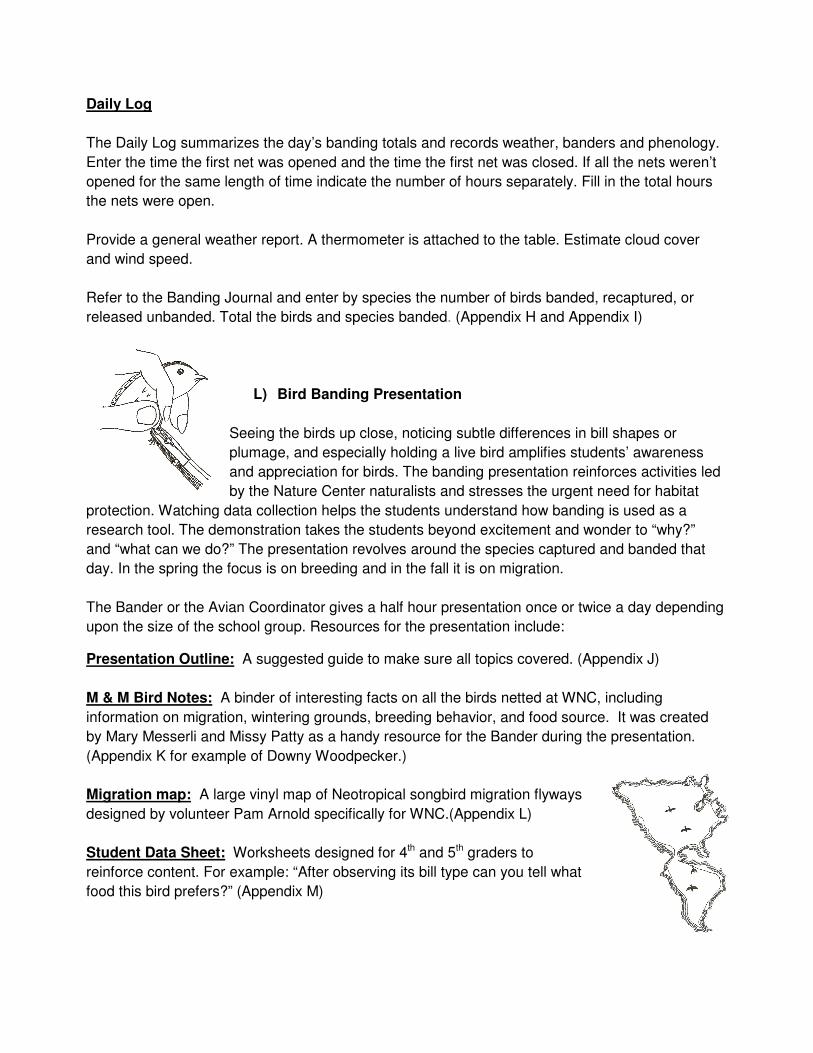
L) Bird Banding Presentation
Seeing the birds up close, noticing subtle differences in bill shapes or
plumage, and especially holding a live bird amplifies students’ awareness
and appreciation for birds. The banding presentation reinforces activities led
by the Nature Center naturalists and stresses the urgent need for habitat
protection. Watching data collection helps the students understand how banding is used as a
research tool. The demonstration takes the students beyond excitement and wonder to “why?”
and “what can we do?” The presentation revolves around the species captured and banded that
day. In the spring the focus is on breeding and in the fall it is on migration.
The Bander or the Avian Coordinator gives a half hour presentation once or twice a day depending
upon the size of the school group. Resources for the presentation include:
Presentation Outline: A suggested guide to make sure all topics covered. (Appendix J)
M & M Bird Notes: A binder of interesting facts on all the birds netted at WNC, including
information on migration, wintering grounds, breeding behavior, and food source. It was created
by Mary Messerli and Missy Patty as a handy resource for the Bander during the presentation.
(Appendix K for example of Downy Woodpecker.)
Migration map: A large vinyl map of Neotropical songbird migration flyways
designed by volunteer Pam Arnold specifically for WNC.(Appendix L)
Student Data Sheet: Worksheets designed for 4th and 5th graders to
reinforce content. For example: “After observing its bill type can you tell what
food this bird prefers?” (Appendix M)

If there are not enough birds (three is usually the minimum) for a presentation the feeder net (T #2)
may be set up.
Only 5 birds may be released by the students per class. After each release the student is
given a release certificate. (Appendix N)
All students who release a bird are asked to sanitize their hands using the disinfectant provided
and reminded to wash with soap and water after the program.
M) How to Report a Band
If you find a band visit www.reportband.gov.
If you cannot submit your report via this website call toll-free 1-800-327-BAND. Report the band
number, how, when and where the bird or band was found.
The U.S.G.S. and the Canadian Wildlife Service will send a Certificate of Appreciation to the
individual who found and reported the band. (See Appendix P) The Bander is also notified of
recoveries and recaptures.
N) Appendices
Appendix A: Bibliography and Resources
Appendix B: WNC Mist Net Sites Map
Appendix C: WNC Federal Bird Banding Permit
Appendix D: Banding Journal Data Sheet for Size 0A
Appendix E: Banding Journal Data Sheets (Blank 2 pp. # 01-99)
Appendix F: Banding Journal Data Sheet for Recaptures
Appendix G: Banding Journal Data Sheets for Recaptures (Blank 2 pp.)
Appendix H: Daily Log 2010 (Blank)
Appendix I: Daily Log dated 9-24-09
Appendix J: Bird Banding Presentation Outline
Appendix K: Downy Woodpecker page from M & M Bird Notes
Appendix L: Neotropical Songbirds Migration Map
Appendix M: Banding Station Student Data Sheet for 4th and 5th Graders
Appendix N: WNC Bird Banding Station Release Certificate
Appendix O: Bandit Screen
Appendix P: USGS Certificate of Appreciation
Appendix Q: WNC Bird Checklist
Appendix R: Volunteer Job Description for Bird Bander is under construction
Appendix S: Volunteer Job Description for Net Runner/ Bird Banding Assistant
O) Acknowledgements
Margery Bolz Allen Grant for Volunteers through the Science Museum of Minnesota
Pam Arnold
Carol Carver
Caroline, Susan, Malcolm, and Elizabeth B. Closmore
Elizabeth Cowie and Norman Cowie
Bernie Fashingbauer
Sara Hettick
McGill Bird Observatory
Mary Messerli
Steve Mizuno
Sam T. Olson
Missy Patty
Jean Royer
Paul Smithson
Lee and Rose Warner Nature Center


