
aws-lambda
#aws-
lambda
Table of Contents
About 1
Chapter 1: Getting started with aws-lambda 2
Remarks 2
Triggers can include: 2
Lambda is best designed for real-time serverless data processing such as: 2
Examples 2
Installation or Setup 2
Java AWS-Lambda S3 Triggered 8
Chapter 2: alexa-skills-kit 11
Examples 11
Create Alexa Skills Kit Using Blueprint 11
Chapter 3: AWS Lambda triggered by S3 13
Examples 13
Echo Input Args in Java 13
Chapter 4: AWS Lambda using Python 14
Examples 14
Why AWS Lambda ? 14
Hello World - Lambda Function 14
Chapter 5: AWS Lambda with S3 26
Introduction 26
Examples 26
Cheatsheet 26
AWS-SDK for javascript 26
Sample function 26
Running S3 26
Use with Elasticache Redis 26
Chapter 6: aws-lambda triggered by S3 28
Syntax 28
Parameters 28
Remarks 28
File names 28
Records key 28
More Examples & Testing 28
Examples 28
S3 PUT Operation 29
Chapter 7: How to develop aws-lambda(C#) on a local machine 30
Introduction 30
Remarks 30
Install Required Components 30
Examples 30
Step 1. Create a new solution in Visual Studio 30
Step 2. Add and change code in your project 32
Step 3 - Install your Lambda Function into AWS 34
Step 4. Invoke your AWS Lambda function from within Visual Studio 35
Chapter 8: Serverless Framework 37
Introduction 37
Remarks 37
Examples 37
Serverless 37
Create Simple CRUD Operation 37
Credits 45
About
You can share this PDF with anyone you feel could benefit from it, downloaded the latest version from: aws-lambda
It is an unofficial and free aws-lambda ebook created for educational purposes. All the content is extracted from Stack Overflow Documentation, which is written by many hardworking individuals at Stack Overflow. It is neither affiliated with Stack Overflow nor official aws-lambda.
The content is released under Creative Commons BY-SA, and the list of contributors to each chapter are provided in the credits section at the end of this book. Images may be copyright of their respective owners unless otherwise specified. All trademarks and registered trademarks are the property of their respective company owners.
Use the content presented in this book at your own risk; it is not guaranteed to be correct nor accurate, please send your feedback and corrections to [email protected]
https://riptutorial.com/ 1
Chapter 1: Getting started with aws-lambda
Remarks
AWS Lambda is a serverless setup for executing functions in the cloud. It leverages existing Amazon Web Services technologies to infinitely scale and run only when necessary in it's own isolated environment. Using Lambda, you can upload your code, configure it to run based on a variety of triggers, and then automatically decommission the process when complete. It operates on a pay-per-use model and is extremely cost effective and easy to scale.
AWS Lambda supports code written in Node.js (JavaScript), Python, Java (Java 8 compatible) and C# (.NET Core). Your code can include existing libraries, even native ones.
Triggers can include:
HTTP Endpoints
Mobile Apps•Other AWS Services (Including REST implementation with Amazon API Gateway)•
Lambda is best designed for real-time serverless data processing such as:
File processing of uploadsTranscoding○
Indexing○
Validation○
Resizing & Filtering○
•
Streaming data analysis•Telemetry•Run as a method-based mobile and web backend•Extending and linking other AWS products•
Examples
Installation or Setup
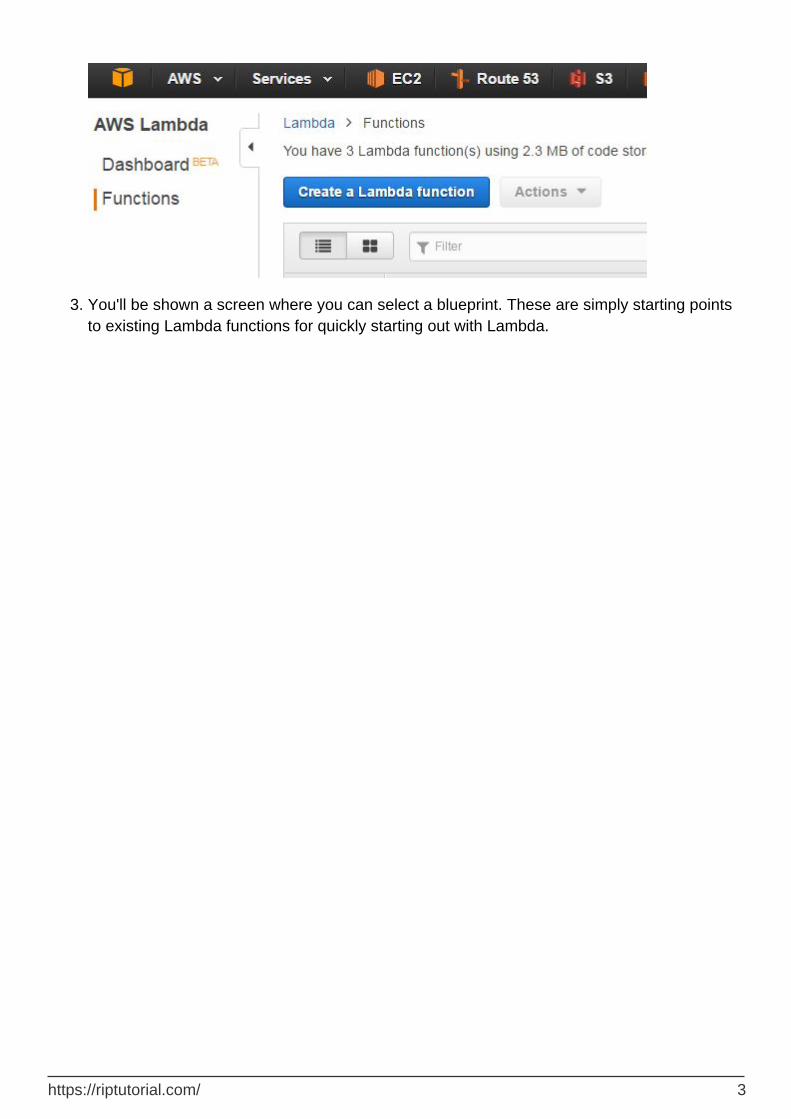
Log into your AWS Console and click on Lambda under the Services tab.1.
Under Functions you'll be able to Create a Lambda function using the same-labeled button.
2.
https://riptutorial.com/ 2
You'll be shown a screen where you can select a blueprint. These are simply starting points to existing Lambda functions for quickly starting out with Lambda.
3.
https://riptutorial.com/ 3
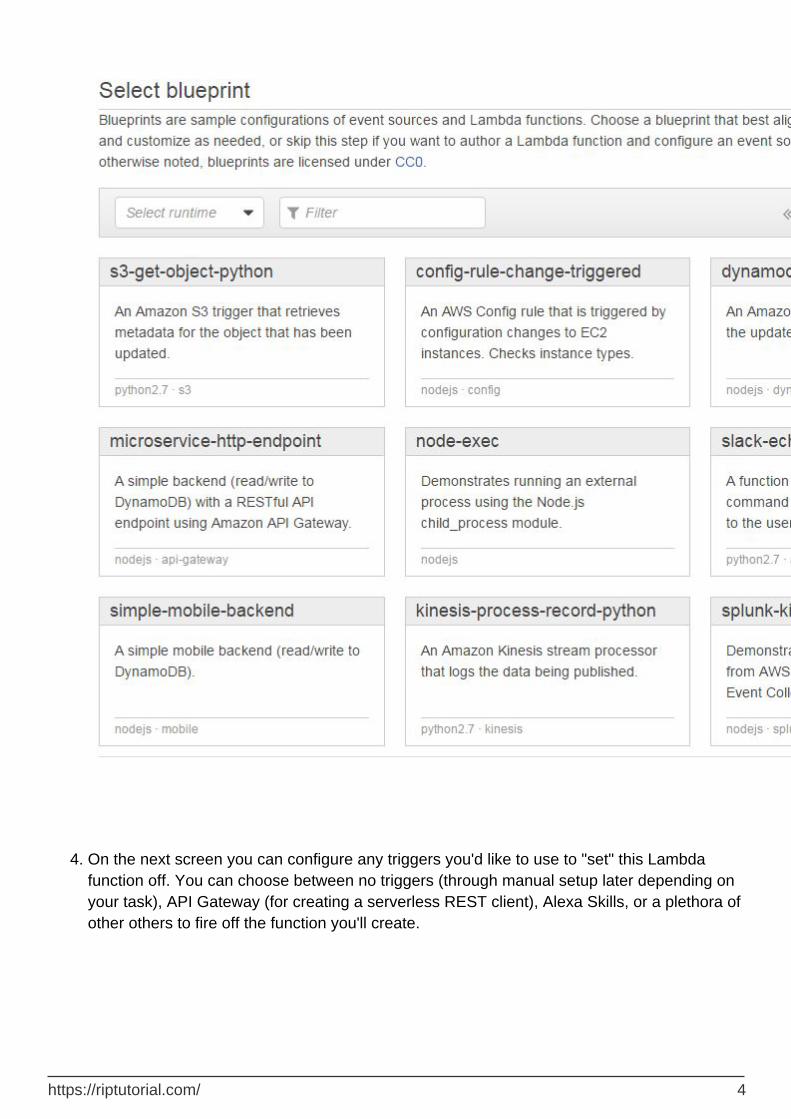
On the next screen you can configure any triggers you'd like to use to "set" this Lambda function off. You can choose between no triggers (through manual setup later depending on your task), API Gateway (for creating a serverless REST client), Alexa Skills, or a plethora of other others to fire off the function you'll create.
4.
https://riptutorial.com/ 4
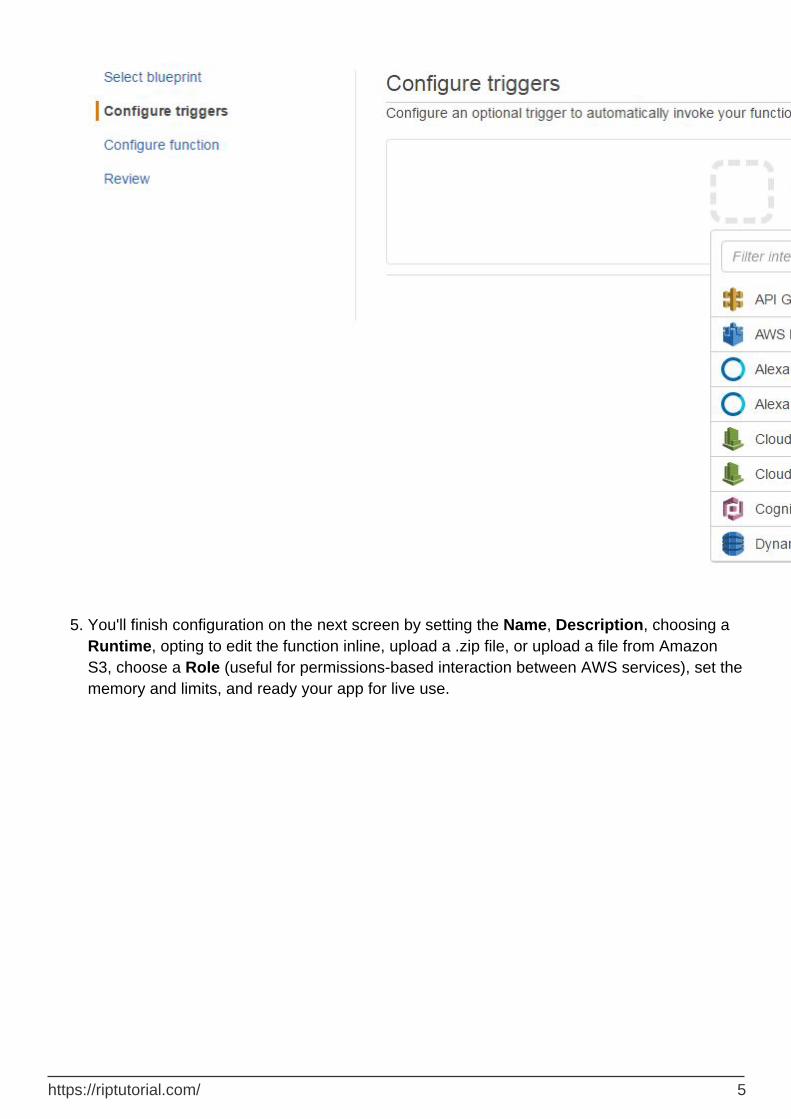
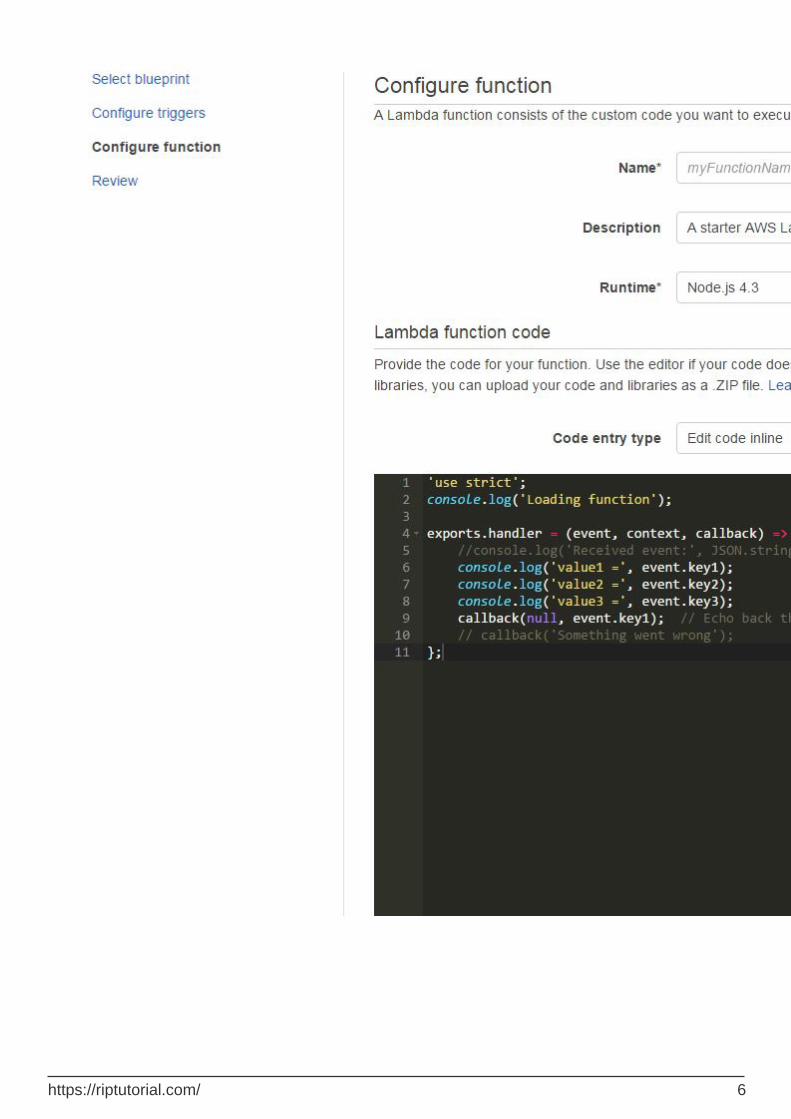
You'll finish configuration on the next screen by setting the Name, Description, choosing a Runtime, opting to edit the function inline, upload a .zip file, or upload a file from Amazon S3, choose a Role (useful for permissions-based interaction between AWS services), set the memory and limits, and ready your app for live use.
5.
https://riptutorial.com/ 5
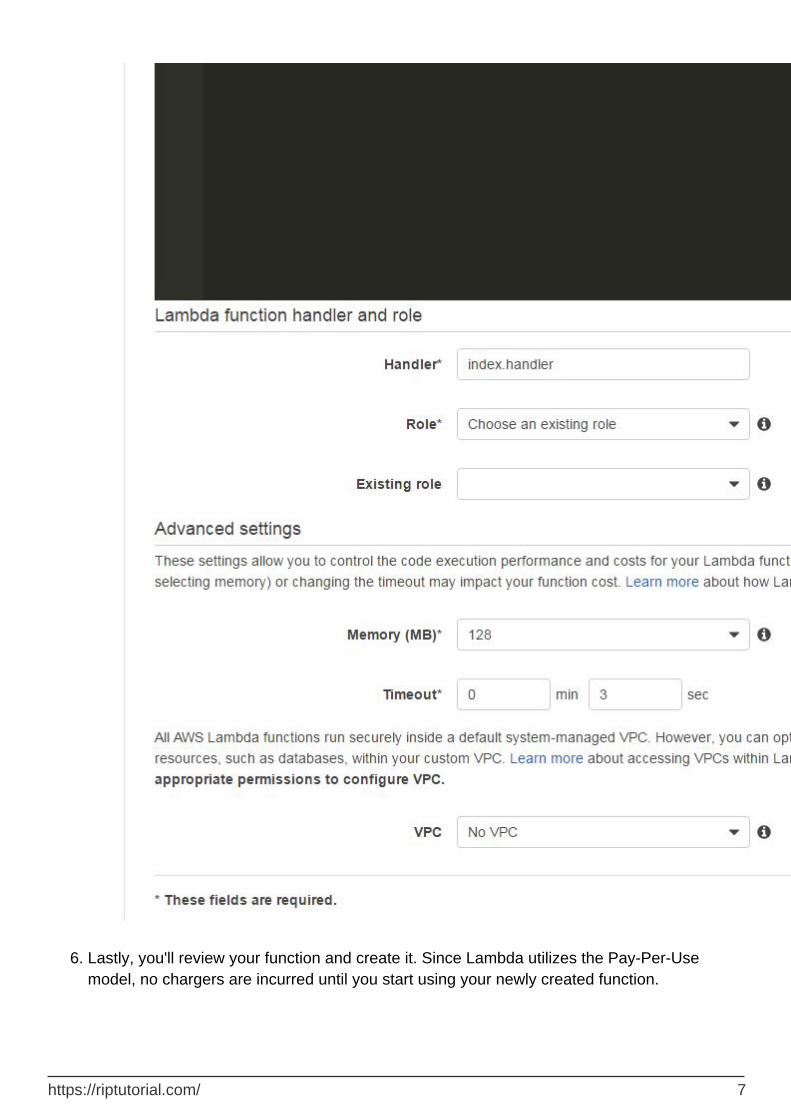
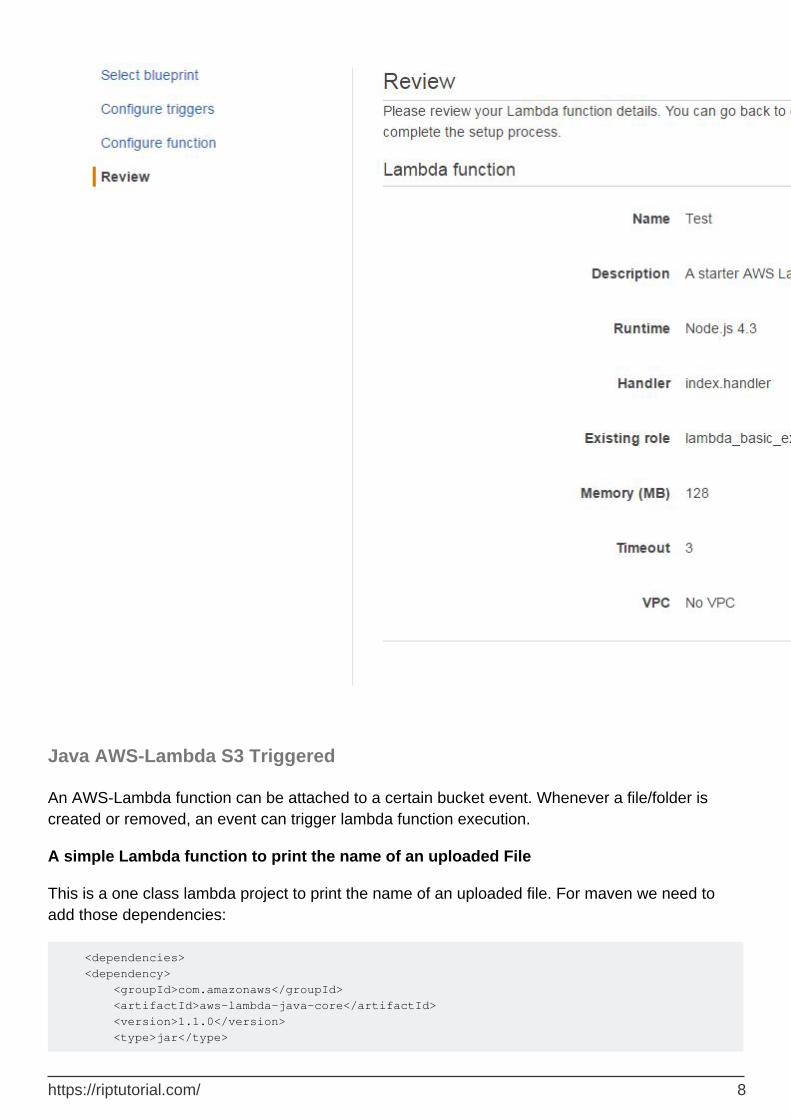
Lastly, you'll review your function and create it. Since Lambda utilizes the Pay-Per-Use model, no chargers are incurred until you start using your newly created function.
6.
https://riptutorial.com/ 7
Java AWS-Lambda S3 Triggered
An AWS-Lambda function can be attached to a certain bucket event. Whenever a file/folder is created or removed, an event can trigger lambda function execution.
A simple Lambda function to print the name of an uploaded File
This is a one class lambda project to print the name of an uploaded file. For maven we need to add those dependencies:
<dependencies> <dependency> <groupId>com.amazonaws</groupId> <artifactId>aws-lambda-java-core</artifactId> <version>1.1.0</version> <type>jar</type>
https://riptutorial.com/ 8
</dependency> <dependency> <groupId>com.amazonaws</groupId> <artifactId>aws-lambda-java-events</artifactId> <version>1.3.0</version> <type>jar</type> </dependency> </dependencies>
Now let's go to our HelloWorld Class:
package com; import com.amazonaws.services.lambda.runtime.Context; import com.amazonaws.services.lambda.runtime.RequestHandler; import com.amazonaws.services.lambda.runtime.events.S3Event; import com.amazonaws.services.s3.event.S3EventNotification; public class HelloWorld implements RequestHandler< S3Event, String> { @Override public String handleRequest(S3Event event, Context ctx) { S3EventNotification.S3EventNotificationRecord record=event.getRecords().get(0); System.out.println("Bucket Name is "+record.getS3().getBucket().getName()); System.out.println("File Path is "+record.getS3().getObject().getKey()); return null; } }
Next step is to build the project using mvn.
After building the project, we need to upload it to AWS-Lambda. Go to Lambda, choose "create a lambda function". Skip the part where you choose the blueprint, because Java is usually not there.
Also, skip "Configure triggers" because we will configure it from a different location. The next page, enter a name for your first lambda function, then a small description and choose Java as runtime.
For the "Code entry type", choose "Upload from a .ZIP file" and then select your .zip file in the next location to upload it.
The tricky part on this page is the Handler field. In the handler field, you have to specify the location of the class the implements the RequestHandler. This class is the entry point for the lambda and your Lambda function won't work if this is not specified correctly. For our case handler is "com.HelloWorld"
Attaching a S3 trigger to Lambda:
Here we will attach a trigger to the S3 file upload
Go to S3, choose the bucket, then "Properties".•In the "Properties" section, go to "Events".•Add event details. In the "Events" field, choose how you want to trigger your Lambda. We will choose "ObjectCreated(All)" Note that the lambda function and the bucket need to be on the same amazon Region
•
https://riptutorial.com/ 9

For "Sends to", check Lambda Function, and choose your lambda function from the list.•
Monitoring Lambda Output
Now, we will upload a file to the bucket that has the lambda trigger. To see the lambda outputs and logs, go to "CloudWatch", then choose "Logs", then choose your Lambda function. You might see many entries under "Log Streams", choose the latest one and open it. You should be able to see the output of the lambda execution there.
Read Getting started with aws-lambda online: https://riptutorial.com/aws-lambda/topic/2357/getting-started-with-aws-lambda
https://riptutorial.com/ 10
Chapter 2: alexa-skills-kit
Examples
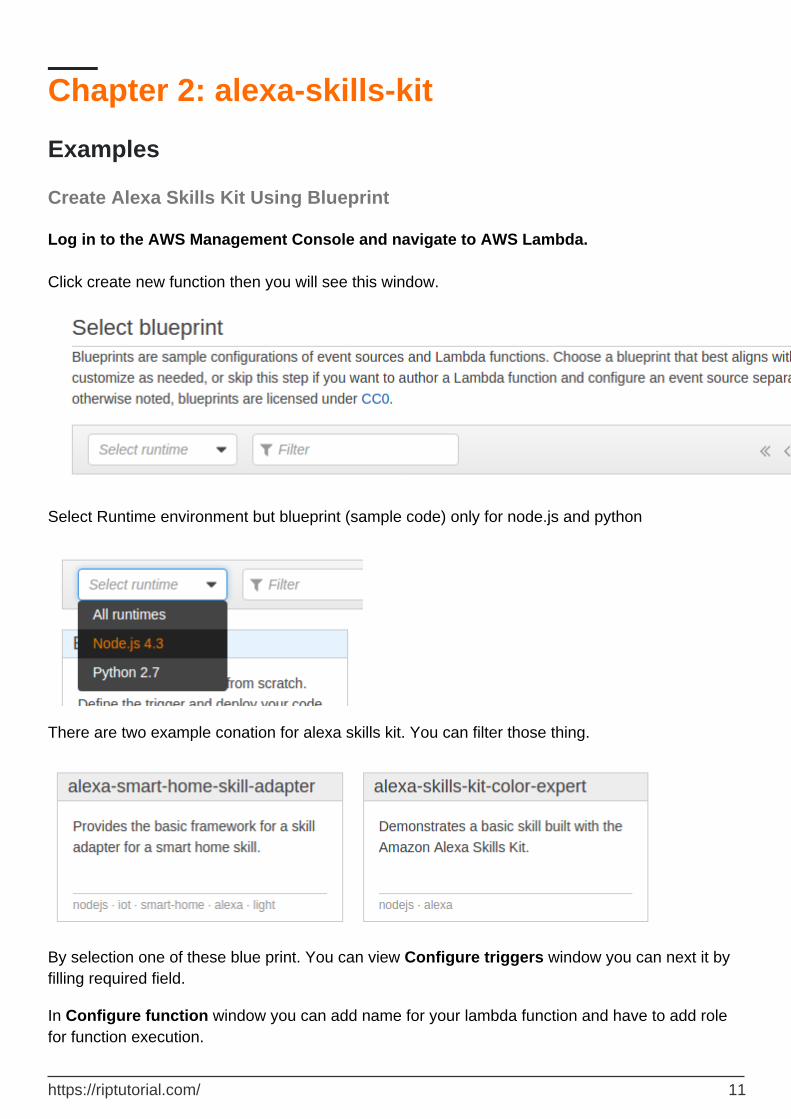
Create Alexa Skills Kit Using Blueprint
Log in to the AWS Management Console and navigate to AWS Lambda. Click create new function then you will see this window.
Select Runtime environment but blueprint (sample code) only for node.js and python
There are two example conation for alexa skills kit. You can filter those thing.
By selection one of these blue print. You can view Configure triggers window you can next it by filling required field.
In Configure function window you can add name for your lambda function and have to add role for function execution.
https://riptutorial.com/ 11
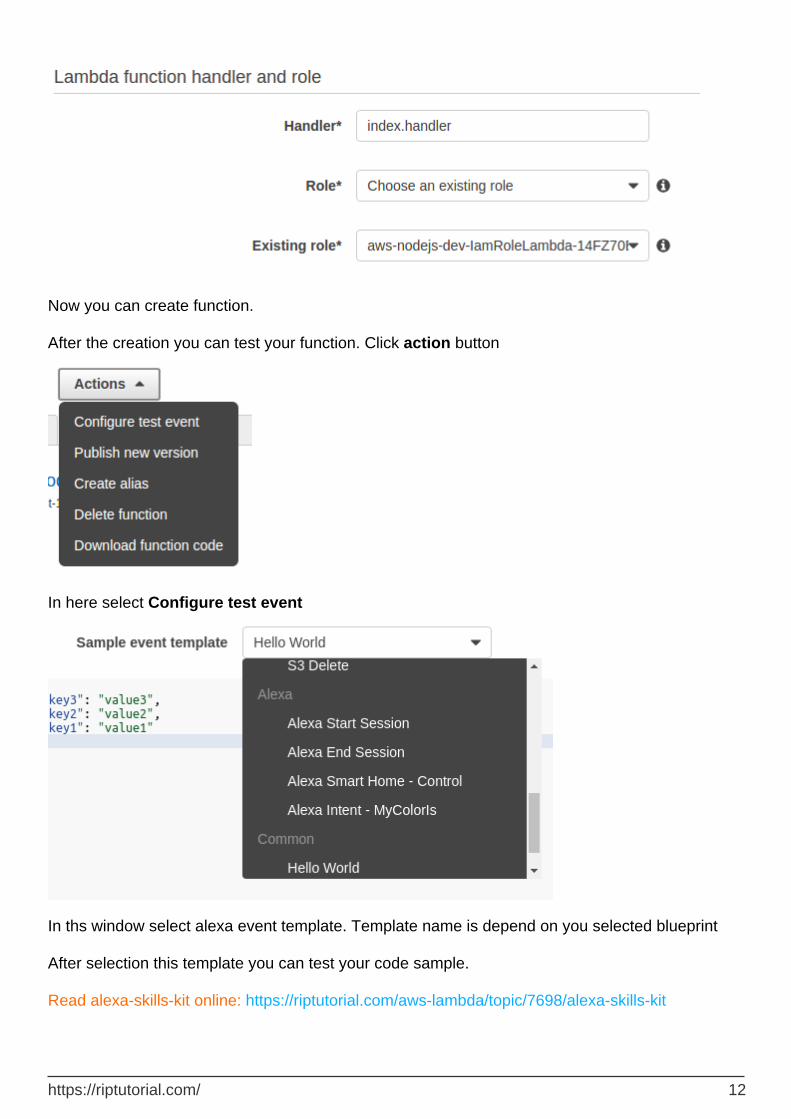
Now you can create function.
After the creation you can test your function. Click action button
In here select Configure test event
In ths window select alexa event template. Template name is depend on you selected blueprint
After selection this template you can test your code sample.
Read alexa-skills-kit online: https://riptutorial.com/aws-lambda/topic/7698/alexa-skills-kit
https://riptutorial.com/ 12
Chapter 3: AWS Lambda triggered by S3
Examples
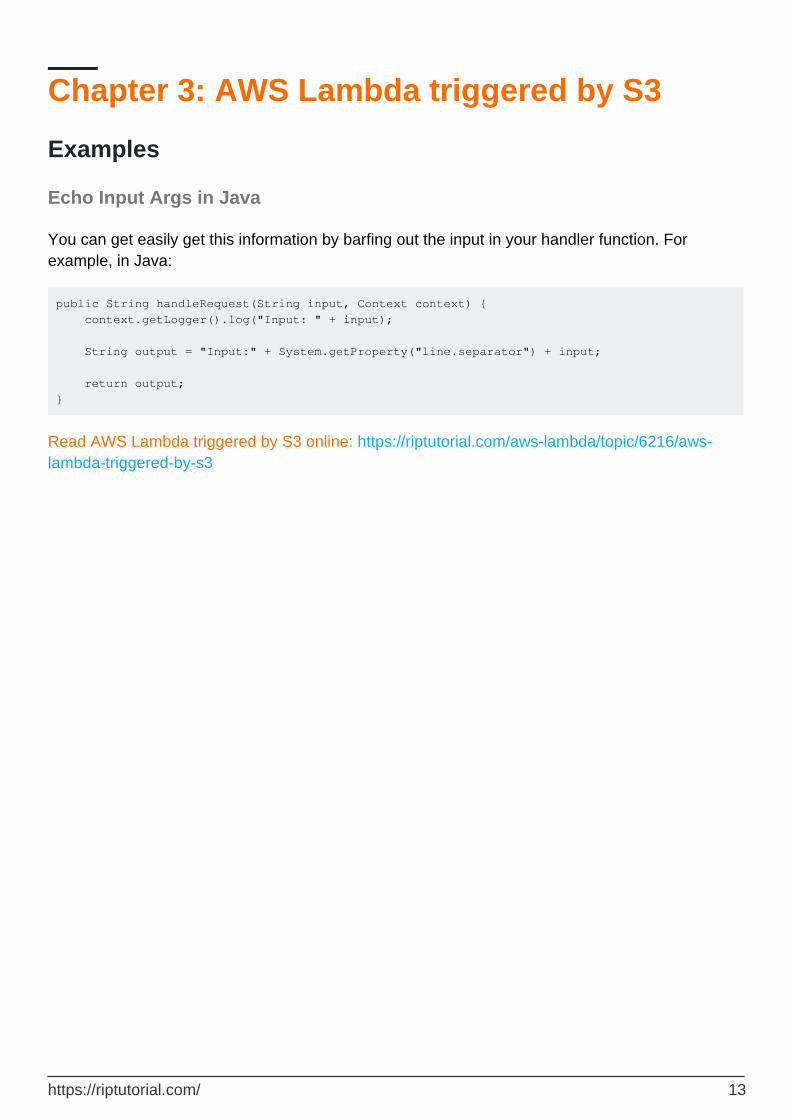
Echo Input Args in Java
You can get easily get this information by barfing out the input in your handler function. For example, in Java:
public String handleRequest(String input, Context context) { context.getLogger().log("Input: " + input); String output = "Input:" + System.getProperty("line.separator") + input; return output; }
Read AWS Lambda triggered by S3 online: https://riptutorial.com/aws-lambda/topic/6216/aws-lambda-triggered-by-s3
https://riptutorial.com/ 13
Chapter 4: AWS Lambda using Python
Examples
Why AWS Lambda ?
AWS Lambda supports
Transparent scalability and availability•Developer friendly operations and no need to manage servers•Native integration to AWS services•No need to pay for idle time•RESTful integration•Monitoring the RESTful interface using AWS API gateway•
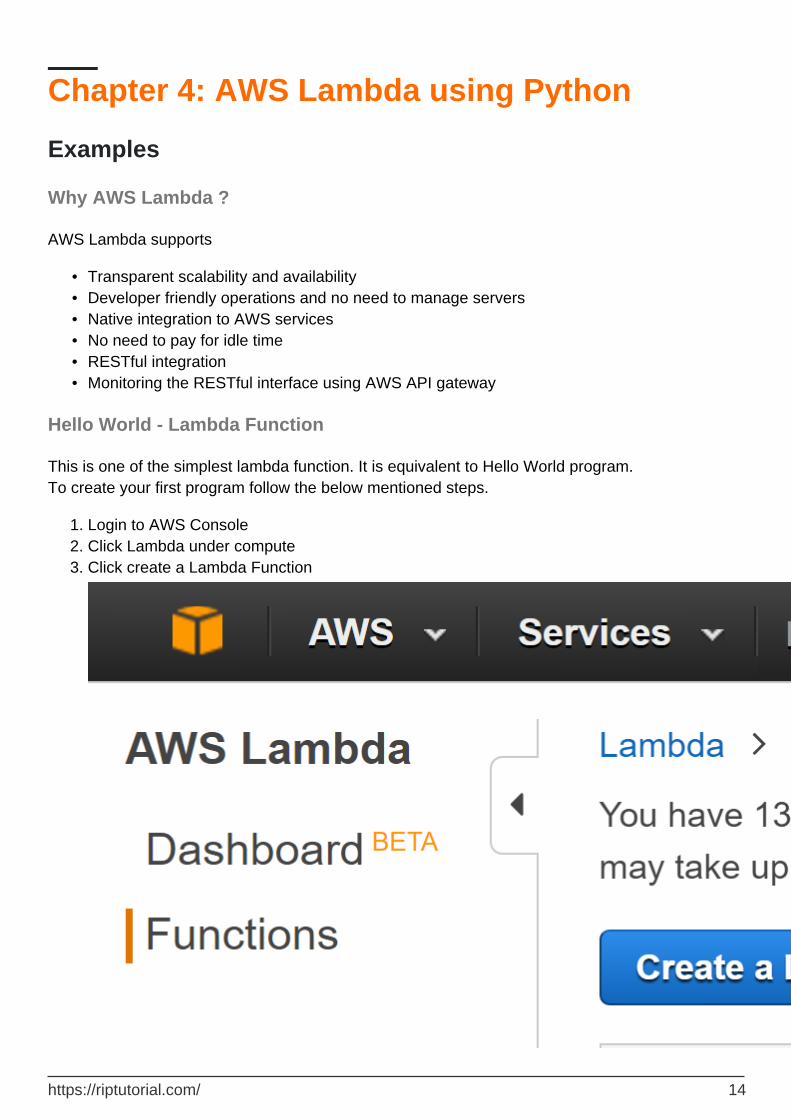
Hello World - Lambda Function
This is one of the simplest lambda function. It is equivalent to Hello World program. To create your first program follow the below mentioned steps.
Login to AWS Console1. Click Lambda under compute2. Click create a Lambda Function 3.
https://riptutorial.com/ 14

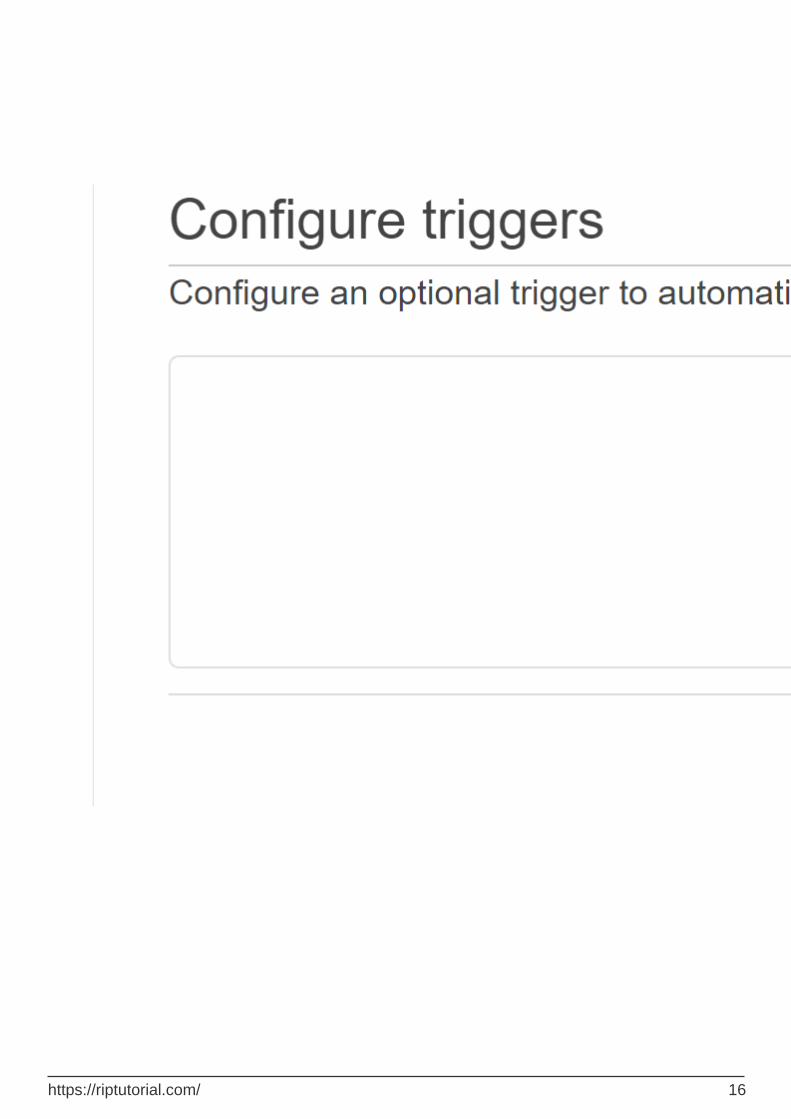
Skip select blueprint section4. In configure trigger click on the dotted rectangle 5.
https://riptutorial.com/ 15
Select API Gateway6. Fill the required details as in the image. 7.
https://riptutorial.com/ 17
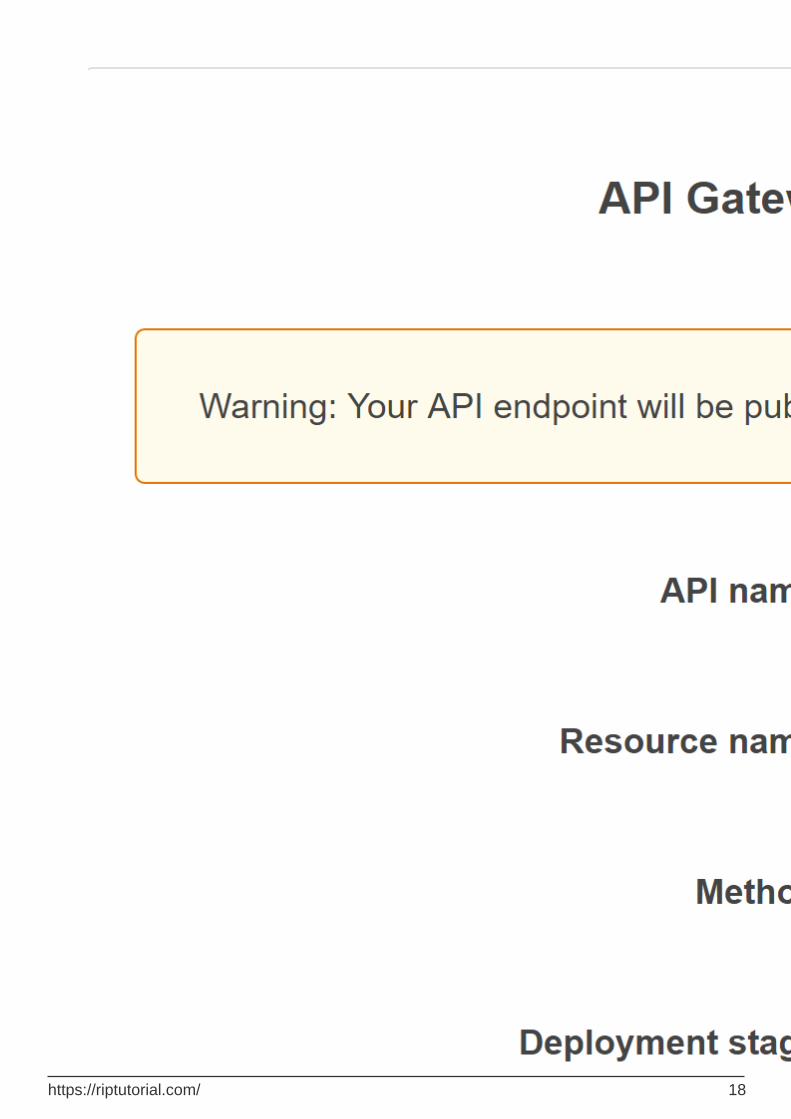
API Name is the name of your API you are going to build. Resource Pattern is the URL path which you can invoke your Lambda function. Select the required http method. In our example we choose GET. In AWS staging can be done in different ways like prod,dev ... It will help you to differentiate the functions from prod and dev. For demo purpose lets choose security as Open(Its not recommended in production).Click nextAPI Name is the name of your API you are going to build. Resource Pattern is the URL path which you can invoke your Lambda function. Select the required http method. In our example we choose GET. In AWS staging can be done in different ways like prod,dev ... It will help you to differentiate the functions from prod and dev. For demo purpose lets choose security as Open(Its not recommended in production).Click nextConfigure the function as below 8.
https://riptutorial.com/ 19
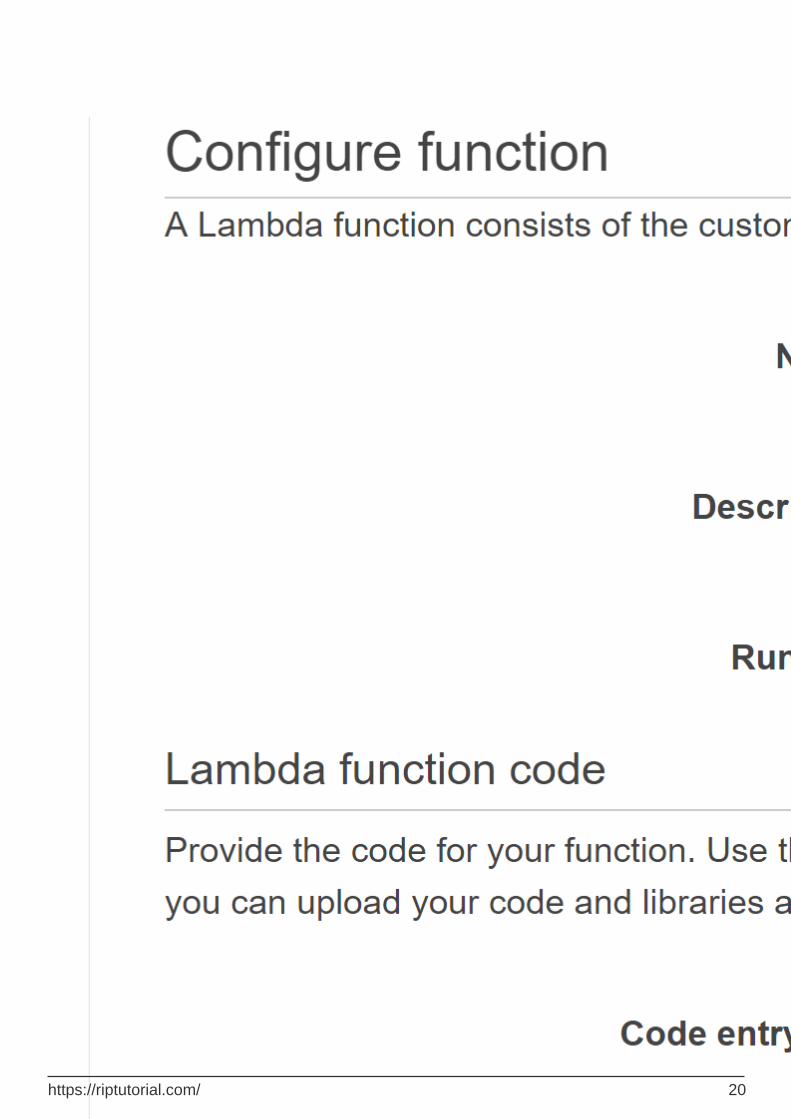

Provide the function name , description of your function and runtime environment. We are choosing python as runtime environment.Modify the code.
Here we are printing the aws lambda event in cloudtrail which is free. It is also returning a string.
9.
Provide Lambda function handler and role 10.
https://riptutorial.com/ 21
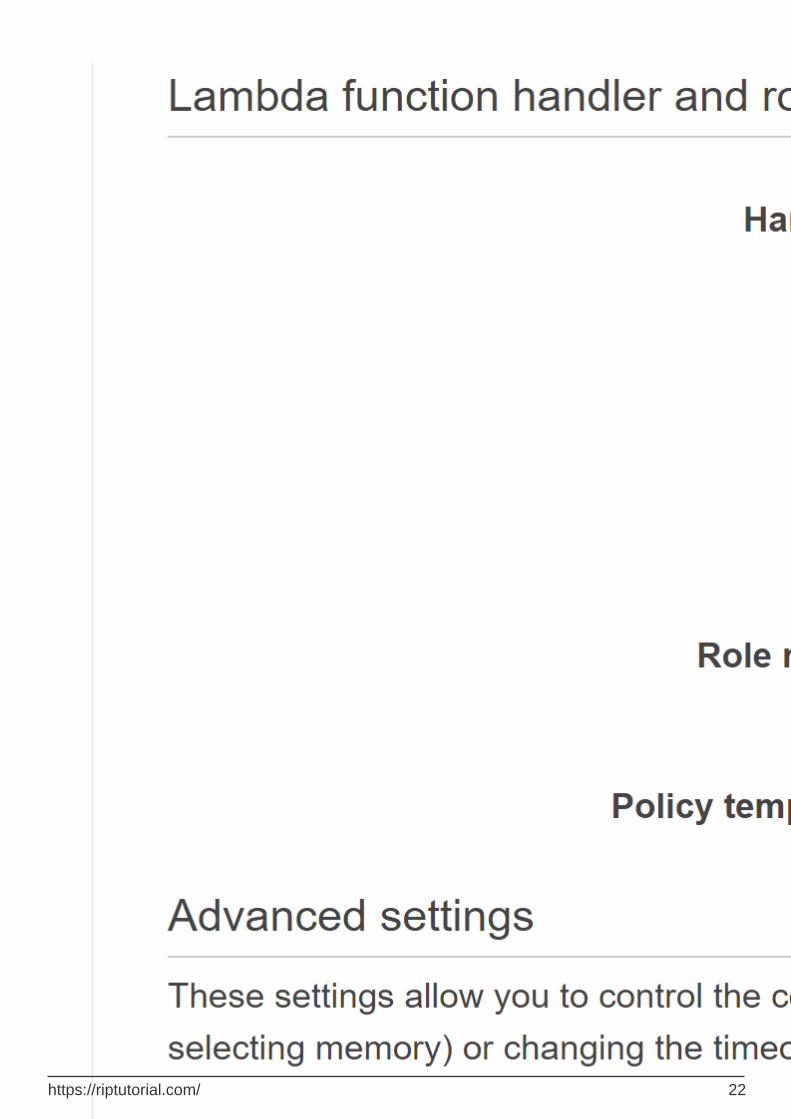
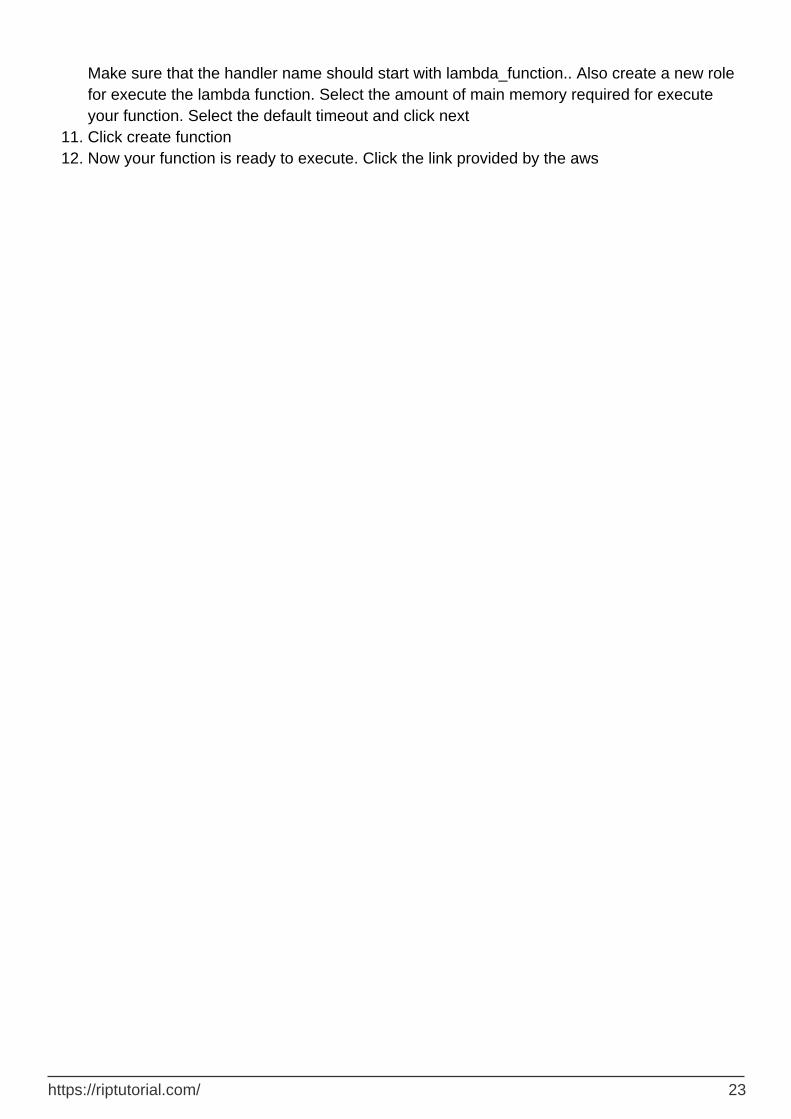
Make sure that the handler name should start with lambda_function.. Also create a new role for execute the lambda function. Select the amount of main memory required for execute your function. Select the default timeout and click nextClick create function11. Now your function is ready to execute. Click the link provided by the aws 12.
https://riptutorial.com/ 23
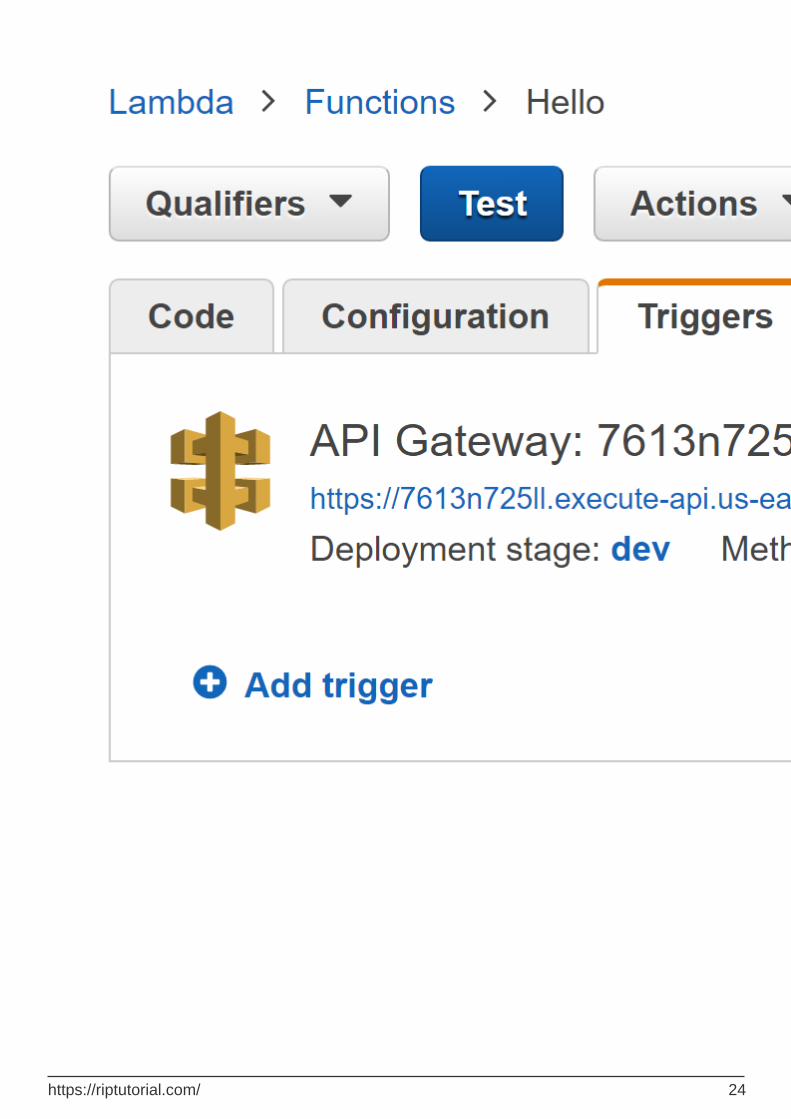
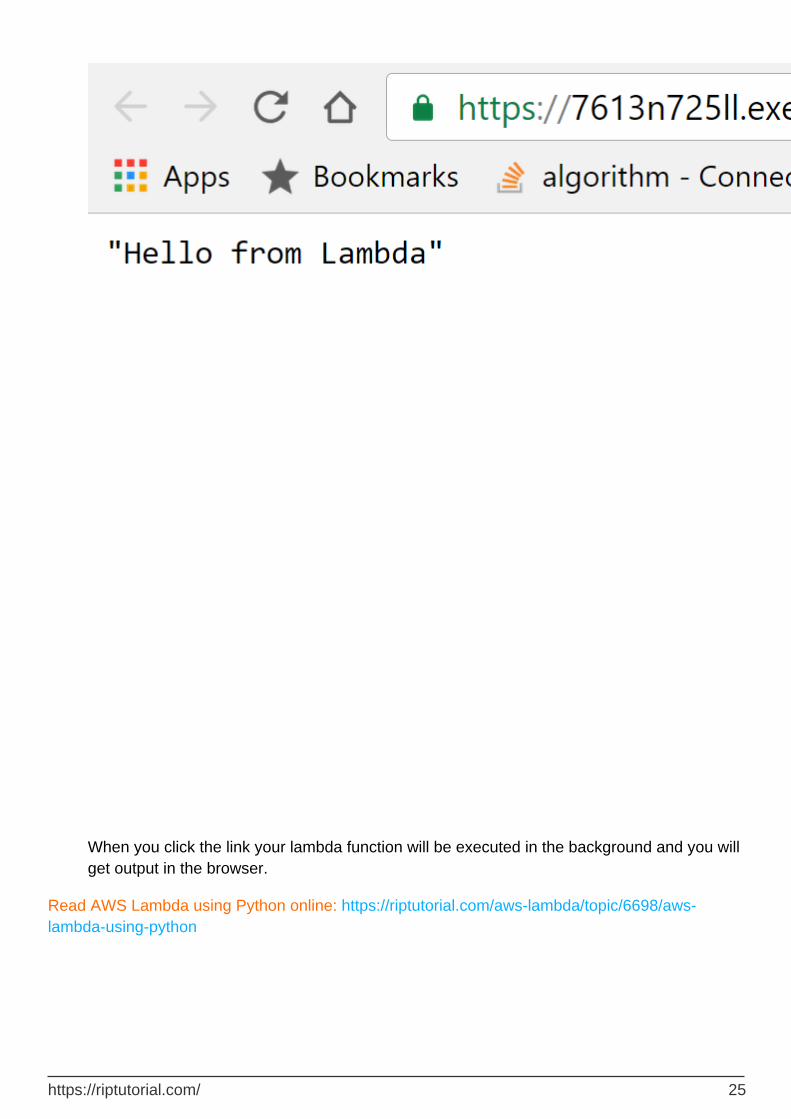
When you click the link your lambda function will be executed in the background and you will get output in the browser.
Read AWS Lambda using Python online: https://riptutorial.com/aws-lambda/topic/6698/aws-lambda-using-python
https://riptutorial.com/ 25
Chapter 5: AWS Lambda with S3
Introduction
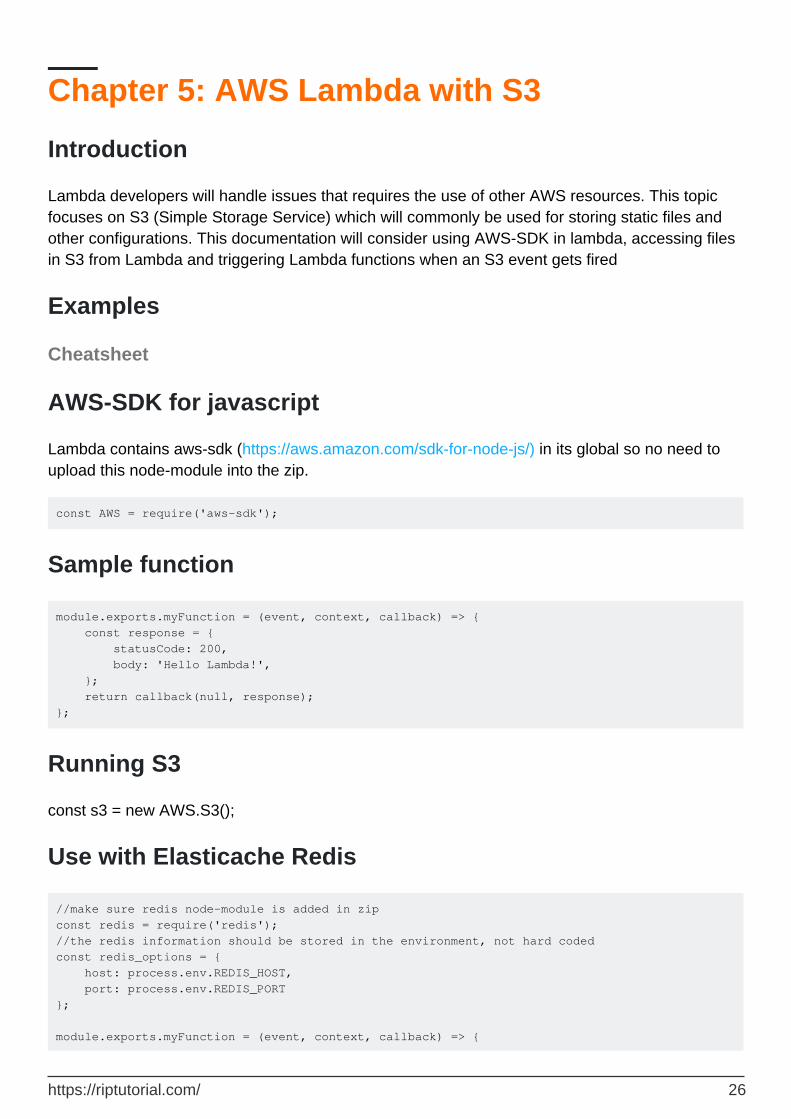
Lambda developers will handle issues that requires the use of other AWS resources. This topic focuses on S3 (Simple Storage Service) which will commonly be used for storing static files and other configurations. This documentation will consider using AWS-SDK in lambda, accessing files in S3 from Lambda and triggering Lambda functions when an S3 event gets fired
Examples
Cheatsheet
AWS-SDK for javascript
Lambda contains aws-sdk (https://aws.amazon.com/sdk-for-node-js/) in its global so no need to upload this node-module into the zip.
const AWS = require('aws-sdk');
Sample function
module.exports.myFunction = (event, context, callback) => { const response = { statusCode: 200, body: 'Hello Lambda!', }; return callback(null, response); };
Running S3
const s3 = new AWS.S3();
Use with Elasticache Redis
//make sure redis node-module is added in zip const redis = require('redis'); //the redis information should be stored in the environment, not hard coded const redis_options = { host: process.env.REDIS_HOST, port: process.env.REDIS_PORT }; module.exports.myFunction = (event, context, callback) => {
https://riptutorial.com/ 26

try { let client = redis.createClient(redis_options); context.callbackWaitsForEmptyEventLoop = false; client.on('connect', () => { console.log('Connected:', client.connected); }); client.on('end', () => { console.log('Connection closed.'); }); client.on('ready', function () { console.log('Connection ready.'); client.keys('*', (err, keys) => { //always quit the redis client when no longer needed //else the connection will be used up client.quit(); const response = { statusCode: 200, body: keys, }; return callback(null, response); }); } catch (err) { if (client) { client.quit();} console.log('Error!: ' + err.message); callback(err); } };
Read AWS Lambda with S3 online: https://riptutorial.com/aws-lambda/topic/9286/aws-lambda-with-s3
https://riptutorial.com/ 27
Chapter 6: aws-lambda triggered by S3
Syntax
Deserialized JSON based object•"Records" key has one or more actual events•Each sub event object contains all information you need to determine what changed•
Parameters
Parameter Details
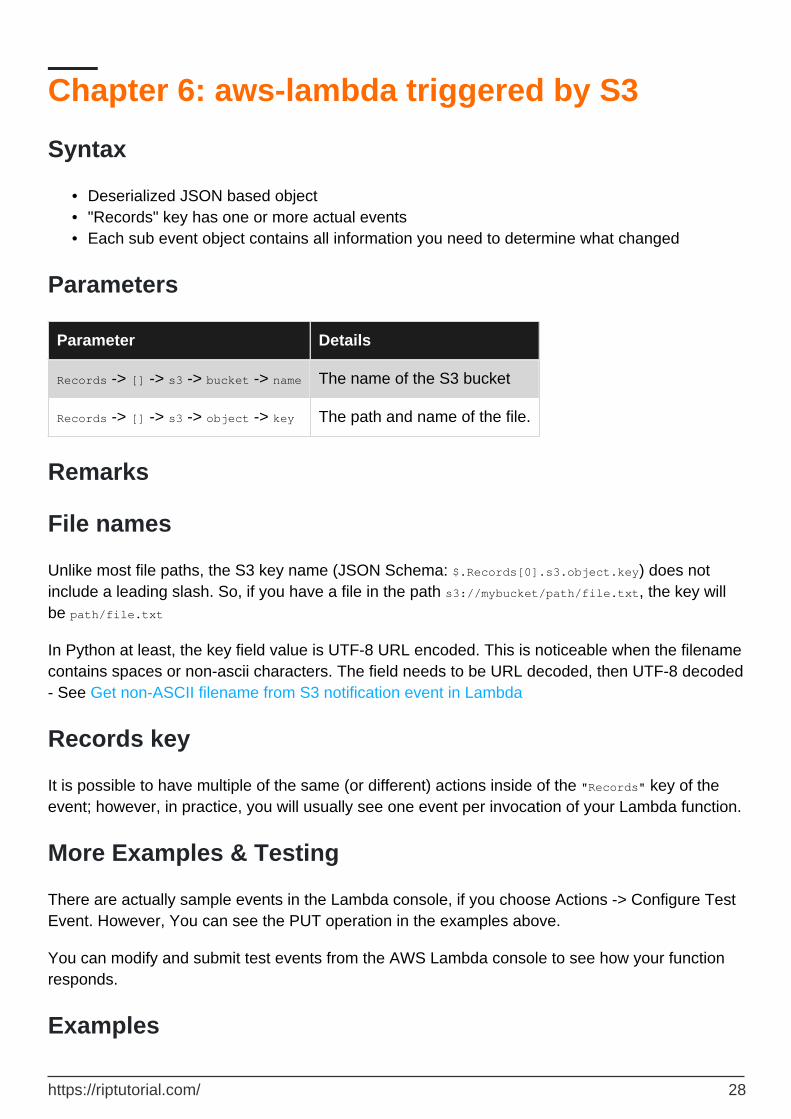
Records -> [] -> s3 -> bucket -> name The name of the S3 bucket
Records -> [] -> s3 -> object -> key The path and name of the file.
Remarks
File names
Unlike most file paths, the S3 key name (JSON Schema: $.Records[0].s3.object.key) does not include a leading slash. So, if you have a file in the path s3://mybucket/path/file.txt, the key will be path/file.txt
In Python at least, the key field value is UTF-8 URL encoded. This is noticeable when the filename contains spaces or non-ascii characters. The field needs to be URL decoded, then UTF-8 decoded - See Get non-ASCII filename from S3 notification event in Lambda
Records key
It is possible to have multiple of the same (or different) actions inside of the "Records" key of the event; however, in practice, you will usually see one event per invocation of your Lambda function.
More Examples & Testing
There are actually sample events in the Lambda console, if you choose Actions -> Configure Test Event. However, You can see the PUT operation in the examples above.
You can modify and submit test events from the AWS Lambda console to see how your function responds.
Examples
https://riptutorial.com/ 28
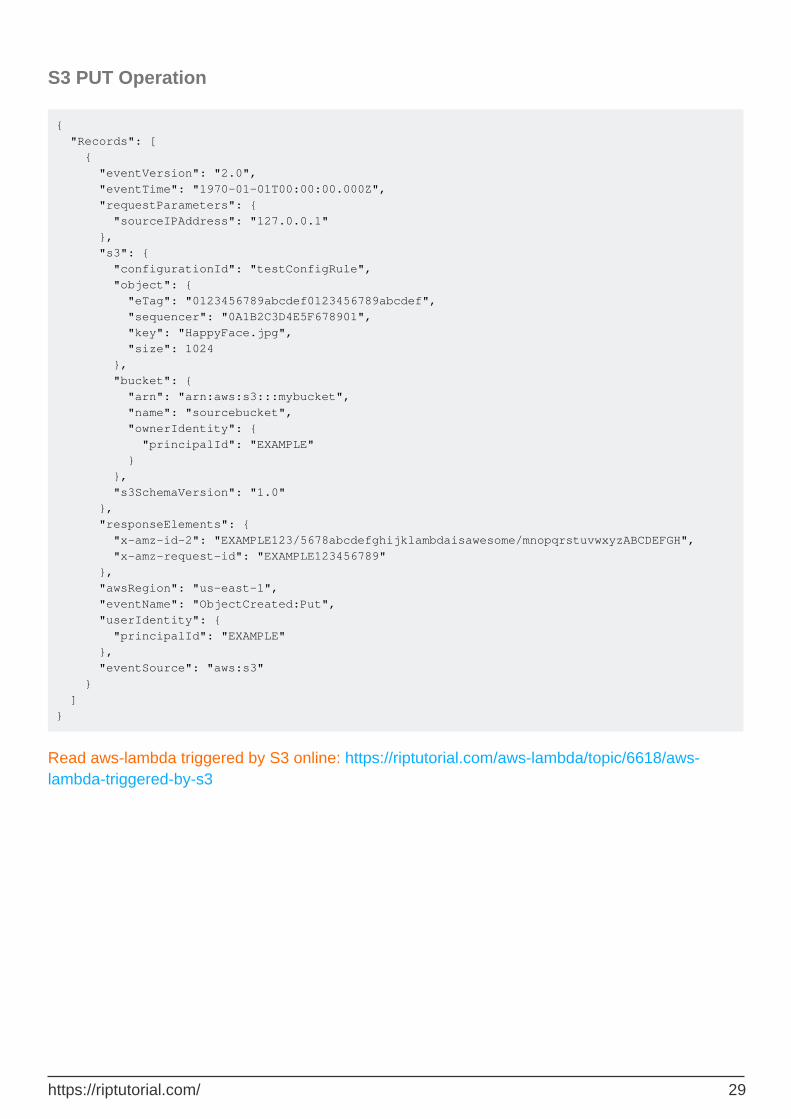
S3 PUT Operation
{ "Records": [ { "eventVersion": "2.0", "eventTime": "1970-01-01T00:00:00.000Z", "requestParameters": { "sourceIPAddress": "127.0.0.1" }, "s3": { "configurationId": "testConfigRule", "object": { "eTag": "0123456789abcdef0123456789abcdef", "sequencer": "0A1B2C3D4E5F678901", "key": "HappyFace.jpg", "size": 1024 }, "bucket": { "arn": "arn:aws:s3:::mybucket", "name": "sourcebucket", "ownerIdentity": { "principalId": "EXAMPLE" } }, "s3SchemaVersion": "1.0" }, "responseElements": { "x-amz-id-2": "EXAMPLE123/5678abcdefghijklambdaisawesome/mnopqrstuvwxyzABCDEFGH", "x-amz-request-id": "EXAMPLE123456789" }, "awsRegion": "us-east-1", "eventName": "ObjectCreated:Put", "userIdentity": { "principalId": "EXAMPLE" }, "eventSource": "aws:s3" } ] }
Read aws-lambda triggered by S3 online: https://riptutorial.com/aws-lambda/topic/6618/aws-lambda-triggered-by-s3
https://riptutorial.com/ 29
Chapter 7: How to develop aws-lambda(C#) on a local machine
Introduction
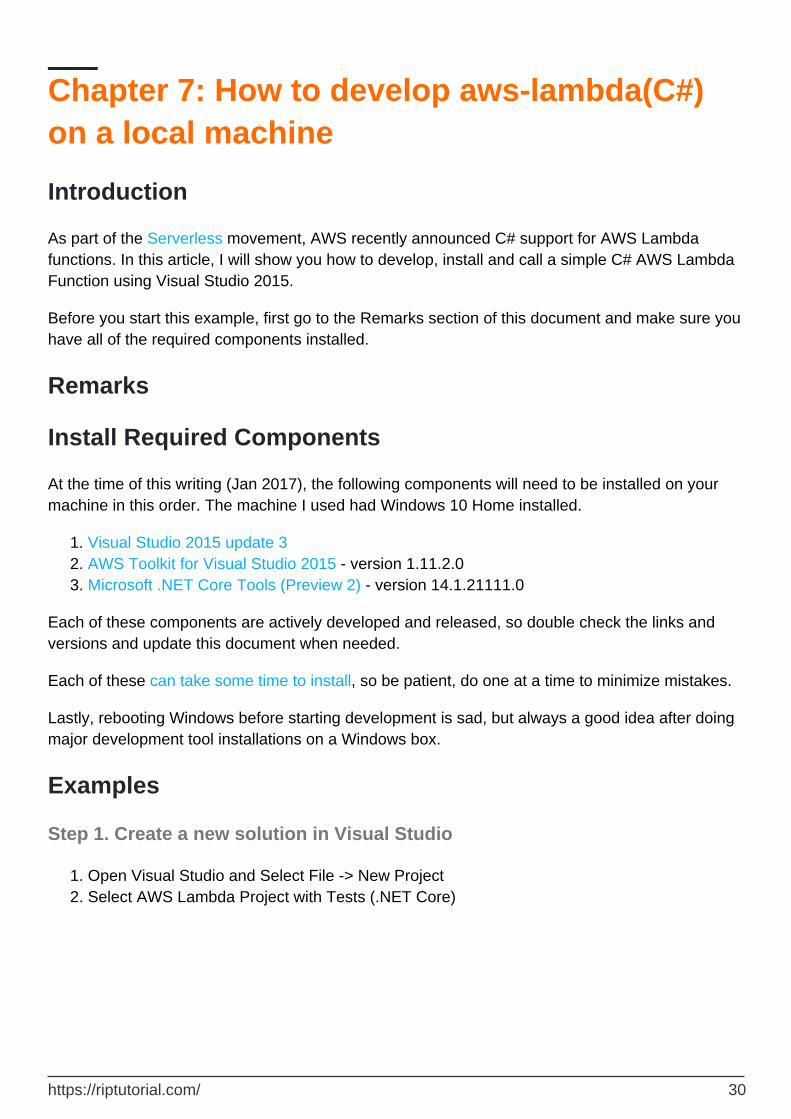
As part of the Serverless movement, AWS recently announced C# support for AWS Lambda functions. In this article, I will show you how to develop, install and call a simple C# AWS Lambda Function using Visual Studio 2015.
Before you start this example, first go to the Remarks section of this document and make sure you have all of the required components installed.
Remarks
Install Required Components
At the time of this writing (Jan 2017), the following components will need to be installed on your machine in this order. The machine I used had Windows 10 Home installed.
Visual Studio 2015 update 31. AWS Toolkit for Visual Studio 2015 - version 1.11.2.02. Microsoft .NET Core Tools (Preview 2) - version 14.1.21111.03.
Each of these components are actively developed and released, so double check the links and versions and update this document when needed.
Each of these can take some time to install, so be patient, do one at a time to minimize mistakes.
Lastly, rebooting Windows before starting development is sad, but always a good idea after doing major development tool installations on a Windows box.
Examples
Step 1. Create a new solution in Visual Studio
Open Visual Studio and Select File -> New Project1. Select AWS Lambda Project with Tests (.NET Core) 2.
https://riptutorial.com/ 30
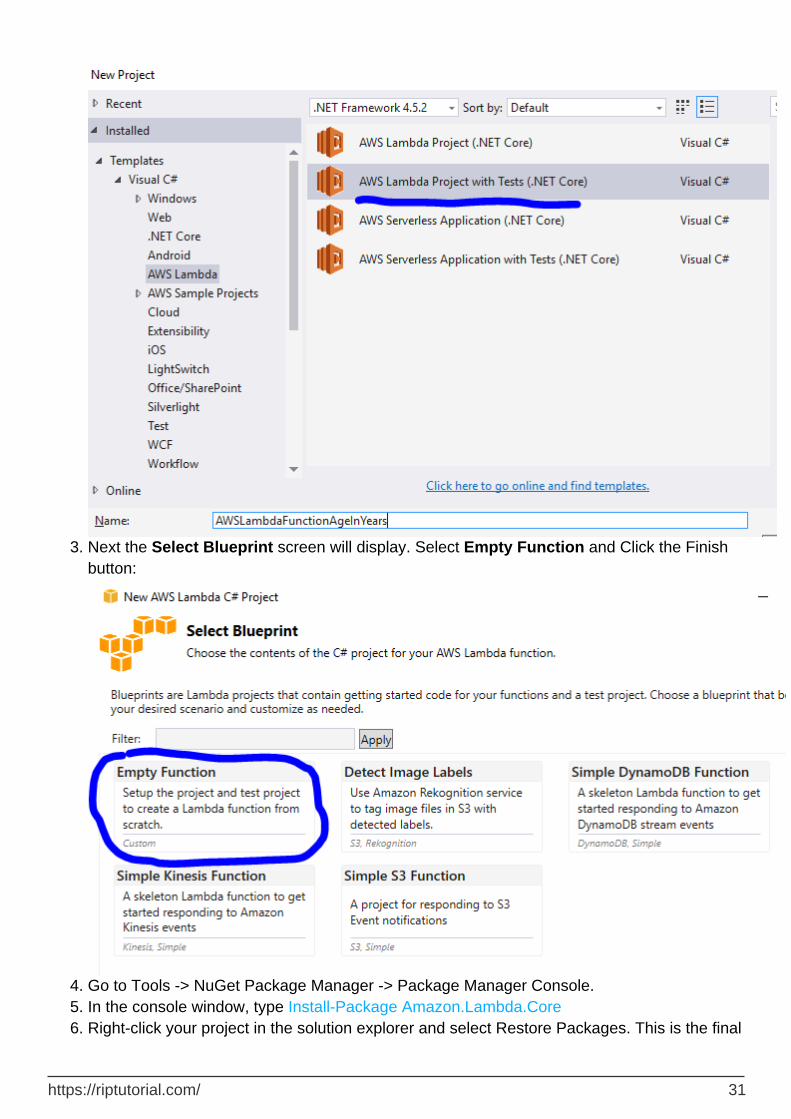
Next the Select Blueprint screen will display. Select Empty Function and Click the Finish button:
3.
Go to Tools -> NuGet Package Manager -> Package Manager Console.4. In the console window, type Install-Package Amazon.Lambda.Core5. Right-click your project in the solution explorer and select Restore Packages. This is the final 6.
https://riptutorial.com/ 31
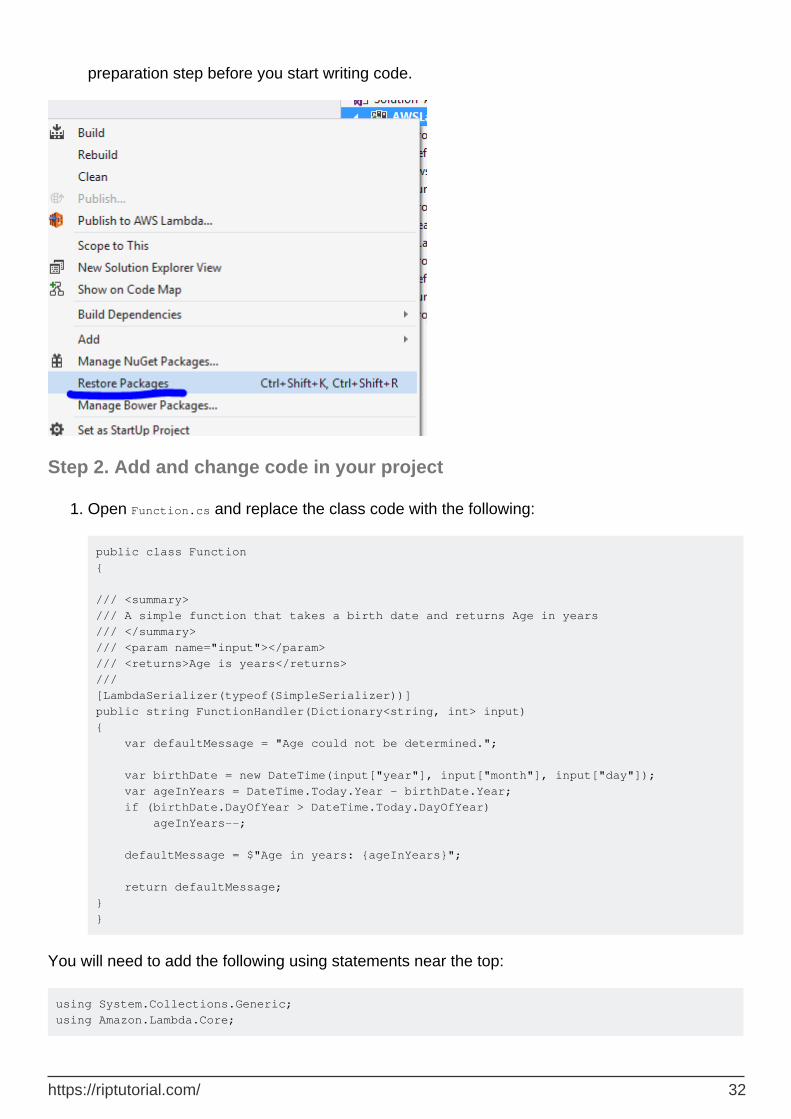
preparation step before you start writing code.
Step 2. Add and change code in your project
Open Function.cs and replace the class code with the following:
public class Function { /// <summary> /// A simple function that takes a birth date and returns Age in years /// </summary> /// <param name="input"></param> /// <returns>Age is years</returns> /// [LambdaSerializer(typeof(SimpleSerializer))] public string FunctionHandler(Dictionary<string, int> input) { var defaultMessage = "Age could not be determined."; var birthDate = new DateTime(input["year"], input["month"], input["day"]); var ageInYears = DateTime.Today.Year - birthDate.Year; if (birthDate.DayOfYear > DateTime.Today.DayOfYear) ageInYears--; defaultMessage = $"Age in years: {ageInYears}"; return defaultMessage; } }
1.
You will need to add the following using statements near the top:
using System.Collections.Generic; using Amazon.Lambda.Core;
https://riptutorial.com/ 32
Add a file to the project named SimpleSerializer.cs2. Place the following code in that file:3.
using System; using System.IO; using Amazon.Lambda.Core; using Newtonsoft.Json; namespace AWSLambdaFunctionAgeInYears { public class SimpleSerializer : ILambdaSerializer { public T Deserialize<T>(Stream requestStream) { string text; using (var reader = new StreamReader(requestStream)) text = reader.ReadToEnd(); try { return JsonConvert.DeserializeObject<T>(text); } catch (Exception ex) { if (typeof(T) == typeof(System.String)) return (T)Convert.ChangeType(text, typeof(T)); throw ex; } } public void Serialize<T>(T response, Stream responseStream) { StreamWriter streamWriter = new StreamWriter(responseStream); try { string text = JsonConvert.SerializeObject(response); streamWriter.Write(text); streamWriter.Flush(); } catch (Exception ex) { if (typeof(T) == typeof(System.String)) { streamWriter.Write(response); streamWriter.Flush(); return; } throw ex; } } } }
In the Test Project, change line 23 of the FunctionTest.cs to the following:4.
https://riptutorial.com/ 33
var upperCase = function.FunctionHandler(null);
Build your solution - you should have no build errors.5.
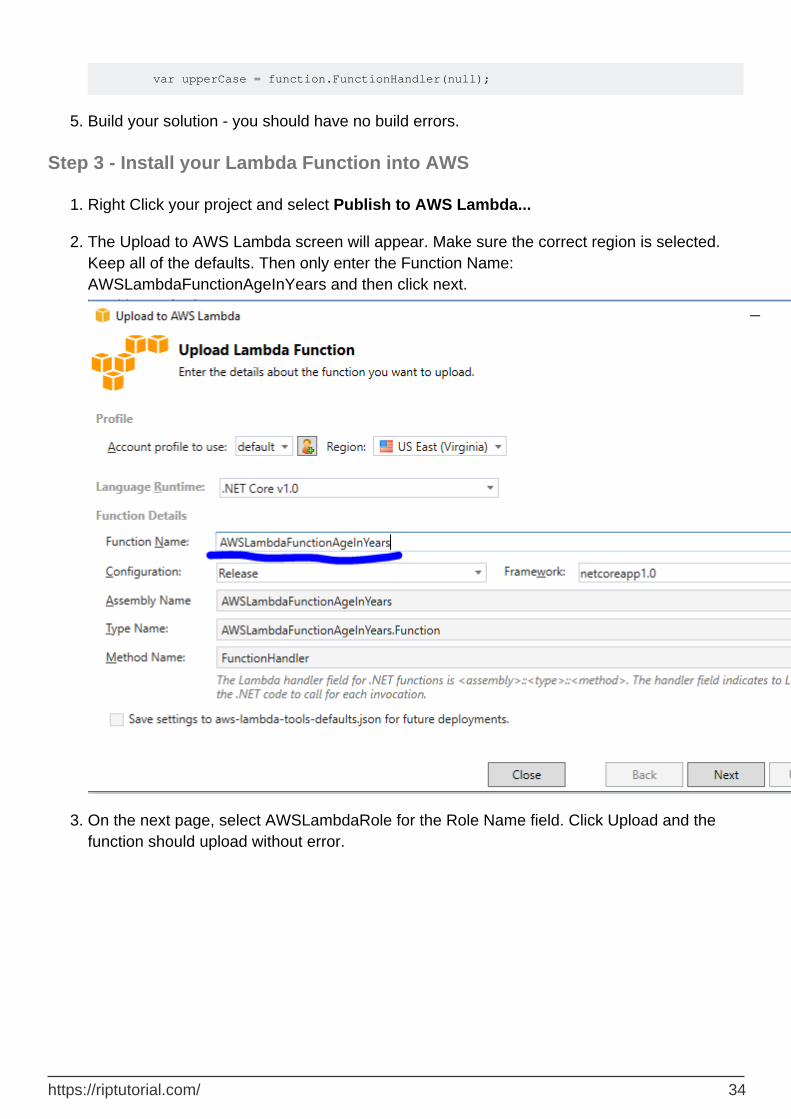
Step 3 - Install your Lambda Function into AWS
Right Click your project and select Publish to AWS Lambda...1.
The Upload to AWS Lambda screen will appear. Make sure the correct region is selected. Keep all of the defaults. Then only enter the Function Name: AWSLambdaFunctionAgeInYears and then click next.
2.
On the next page, select AWSLambdaRole for the Role Name field. Click Upload and the function should upload without error.
3.
https://riptutorial.com/ 34
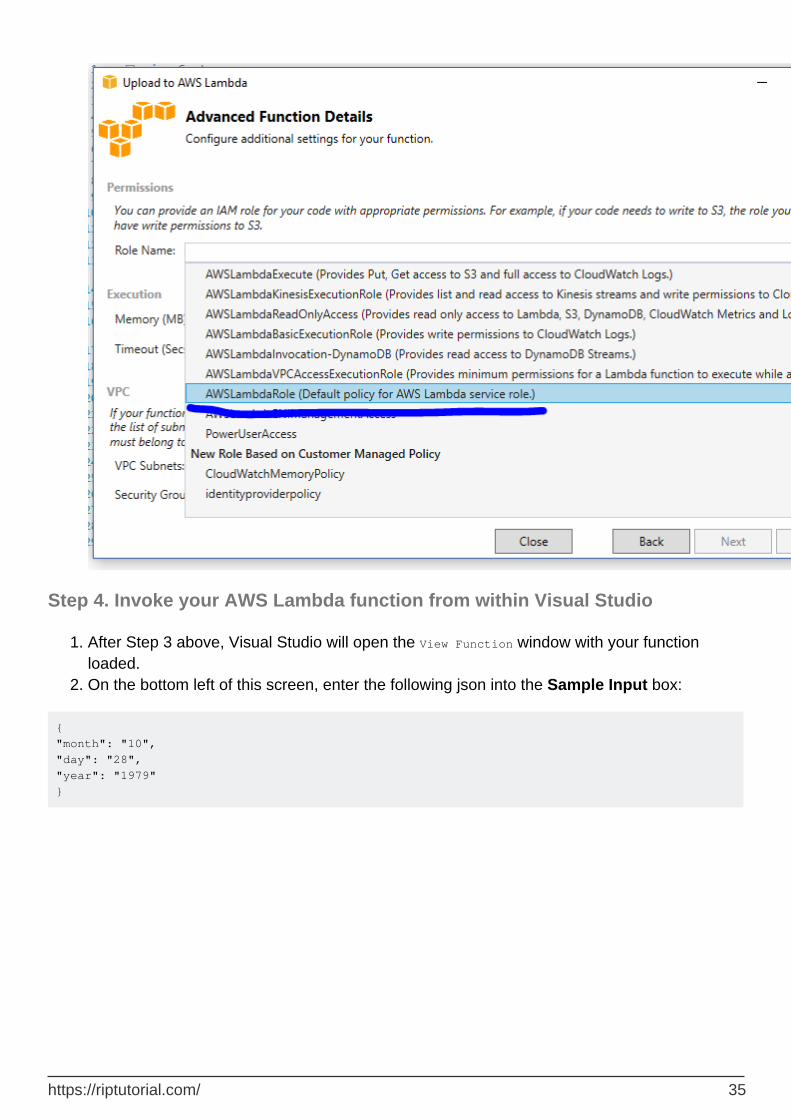
Step 4. Invoke your AWS Lambda function from within Visual Studio
After Step 3 above, Visual Studio will open the View Function window with your function loaded.
1.
On the bottom left of this screen, enter the following json into the Sample Input box:2.
{ "month": "10", "day": "28", "year": "1979" }
https://riptutorial.com/ 35
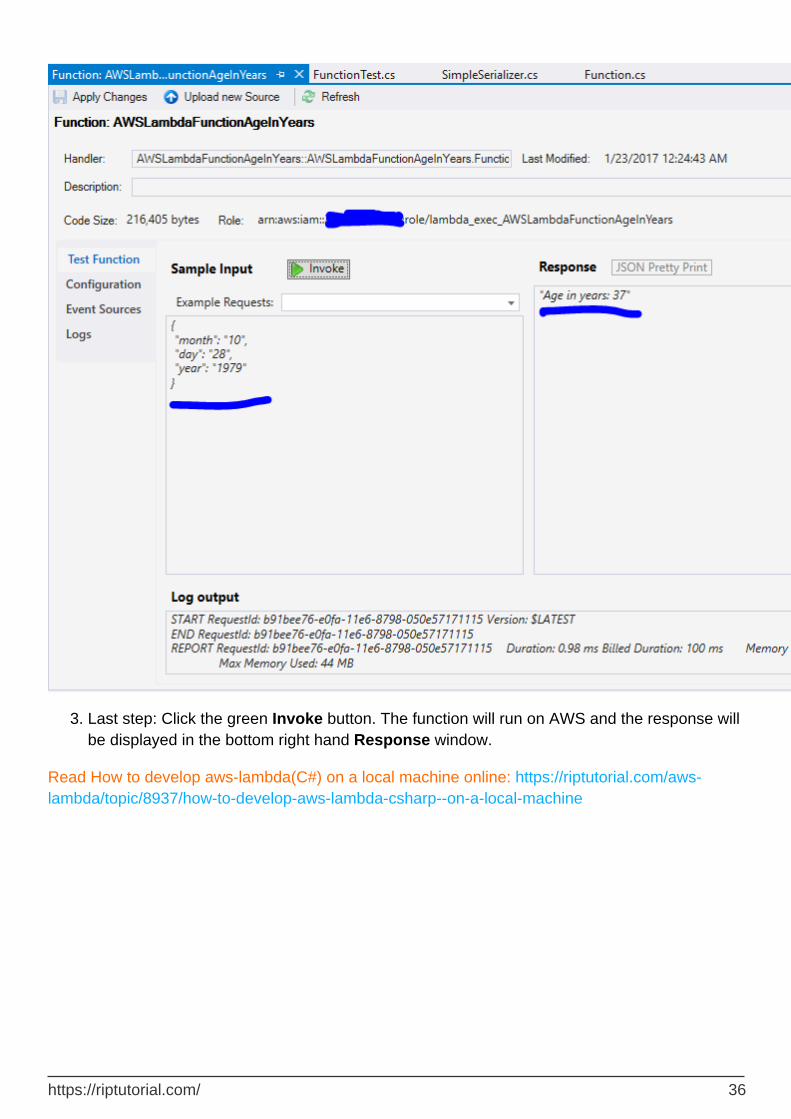
Last step: Click the green Invoke button. The function will run on AWS and the response will be displayed in the bottom right hand Response window.
3.
Read How to develop aws-lambda(C#) on a local machine online: https://riptutorial.com/aws-lambda/topic/8937/how-to-develop-aws-lambda-csharp--on-a-local-machine
https://riptutorial.com/ 36
Chapter 8: Serverless Framework
Introduction
The open-source, application framework to easily build serverless architectures on AWS Lambda & more. This section includes, how to setup serverless framework for application development with relevant examples.
Remarks
"Serverless" is a framework: https://serverless.com/
Examples
Serverless
Install serverless globally
npm install serverless -g
Create an AWS Lamdba function in Node.js
serverless create --template aws-nodejs
Example of a handler.js
'use strict'; // Your first function handler module.exports.hello = (event, context, cb) => cb(null, { message: 'Go Serverless v1.0! Your function executed successfully!', event } ); // You can add more handlers here, and reference them in serverless.yml
Deploy to live AWS account
serverless deploy
Create Simple CRUD Operation
Create simple CRUD Operation Using Serverless Framework
Install Serverless framework globally
https://riptutorial.com/ 37

npm install serverless -g
Create simple Lambda Service
serverless create --template aws-nodejs --path myService
Go to the myService Directory it should contain
serverless.yml1. handler.js2. event.json3.
All Serverless service configuration is managed by serverless.yml Change its contents to define CRUD service.
Example serverless.yml file
service: serverless-crud provider: name: aws runtime: nodejs4.3 region: us-east-1 stage: dev iamRoleStatements: - Effect: Allow Action: - dynamodb:DescribeTable - dynamodb:Query - dynamodb:Scan - dynamodb:GetItem - dynamodb:PutItem - dynamodb:UpdateItem - dynamodb:DeleteItem Resource: "arn:aws:dynamodb:us-east-1:*:*" functions: create: handler: handler.create events: - http: path: todos method: post cors: true readAll: handler: handler.readAll events: - http: path: todos method: get cors: true readOne: handler: handler.readOne events:
https://riptutorial.com/ 38
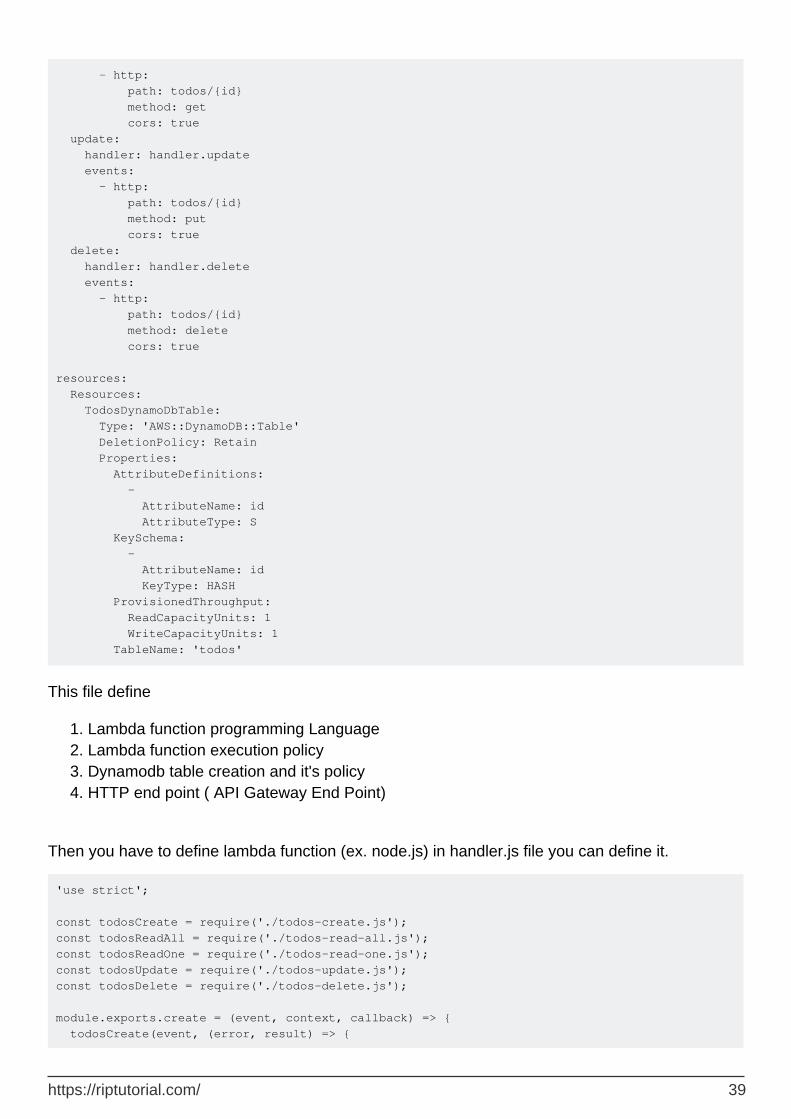
- http: path: todos/{id} method: get cors: true update: handler: handler.update events: - http: path: todos/{id} method: put cors: true delete: handler: handler.delete events: - http: path: todos/{id} method: delete cors: true resources: Resources: TodosDynamoDbTable: Type: 'AWS::DynamoDB::Table' DeletionPolicy: Retain Properties: AttributeDefinitions: - AttributeName: id AttributeType: S KeySchema: - AttributeName: id KeyType: HASH ProvisionedThroughput: ReadCapacityUnits: 1 WriteCapacityUnits: 1 TableName: 'todos'
This file define
Lambda function programming Language1. Lambda function execution policy2. Dynamodb table creation and it's policy3. HTTP end point ( API Gateway End Point)4.
Then you have to define lambda function (ex. node.js) in handler.js file you can define it.
'use strict'; const todosCreate = require('./todos-create.js'); const todosReadAll = require('./todos-read-all.js'); const todosReadOne = require('./todos-read-one.js'); const todosUpdate = require('./todos-update.js'); const todosDelete = require('./todos-delete.js'); module.exports.create = (event, context, callback) => { todosCreate(event, (error, result) => {
https://riptutorial.com/ 39
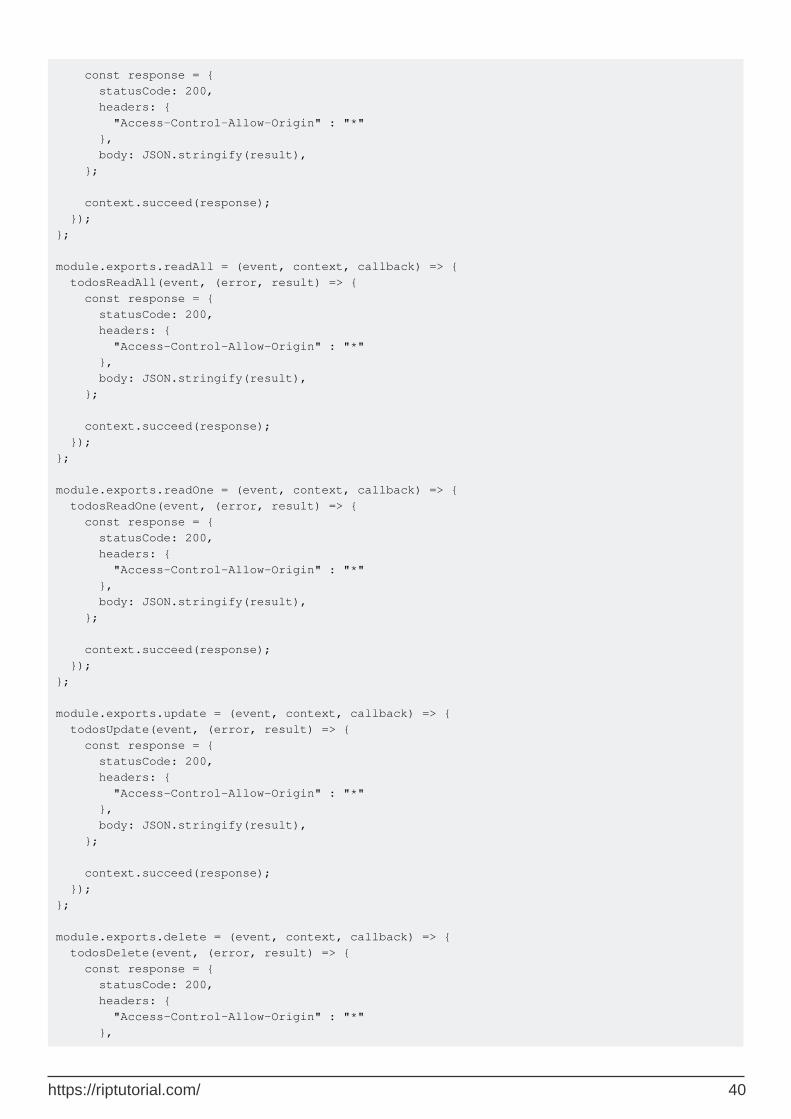
const response = { statusCode: 200, headers: { "Access-Control-Allow-Origin" : "*" }, body: JSON.stringify(result), }; context.succeed(response); }); }; module.exports.readAll = (event, context, callback) => { todosReadAll(event, (error, result) => { const response = { statusCode: 200, headers: { "Access-Control-Allow-Origin" : "*" }, body: JSON.stringify(result), }; context.succeed(response); }); }; module.exports.readOne = (event, context, callback) => { todosReadOne(event, (error, result) => { const response = { statusCode: 200, headers: { "Access-Control-Allow-Origin" : "*" }, body: JSON.stringify(result), }; context.succeed(response); }); }; module.exports.update = (event, context, callback) => { todosUpdate(event, (error, result) => { const response = { statusCode: 200, headers: { "Access-Control-Allow-Origin" : "*" }, body: JSON.stringify(result), }; context.succeed(response); }); }; module.exports.delete = (event, context, callback) => { todosDelete(event, (error, result) => { const response = { statusCode: 200, headers: { "Access-Control-Allow-Origin" : "*" },
https://riptutorial.com/ 40
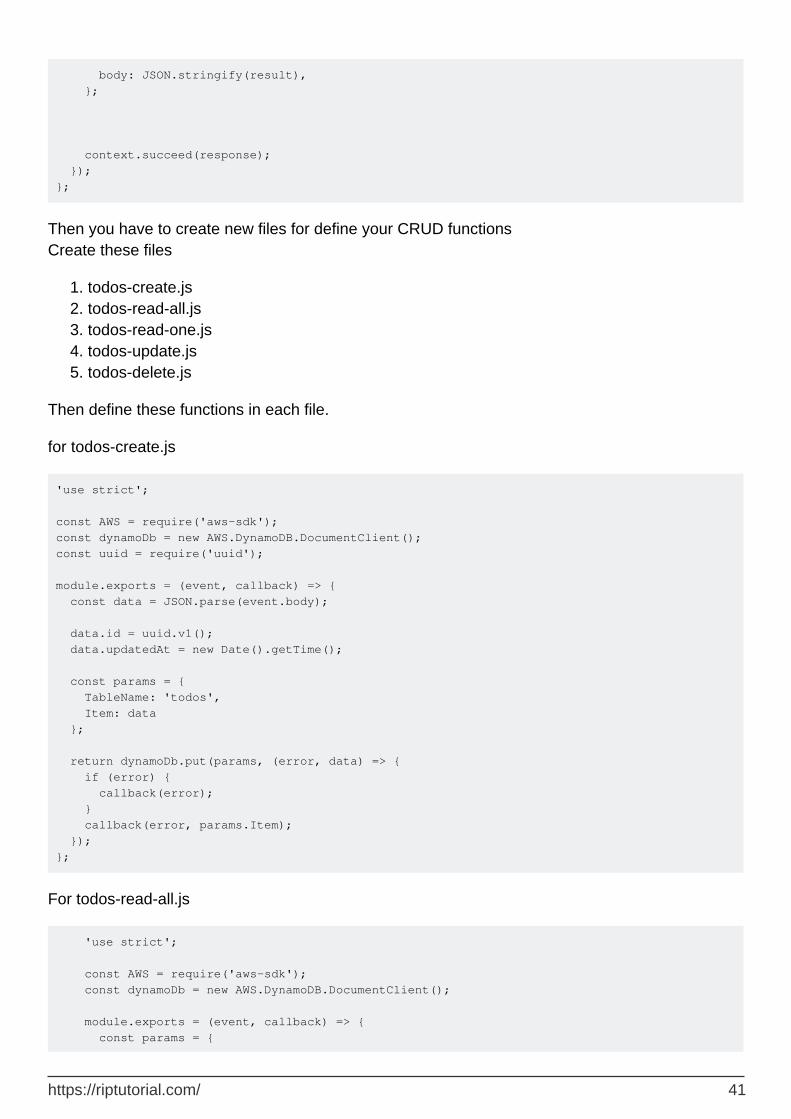
body: JSON.stringify(result), }; context.succeed(response); }); };
Then you have to create new files for define your CRUD functions Create these files
todos-create.js1. todos-read-all.js2. todos-read-one.js3. todos-update.js4. todos-delete.js5.
Then define these functions in each file.
for todos-create.js
'use strict'; const AWS = require('aws-sdk'); const dynamoDb = new AWS.DynamoDB.DocumentClient(); const uuid = require('uuid'); module.exports = (event, callback) => { const data = JSON.parse(event.body); data.id = uuid.v1(); data.updatedAt = new Date().getTime(); const params = { TableName: 'todos', Item: data }; return dynamoDb.put(params, (error, data) => { if (error) { callback(error); } callback(error, params.Item); }); };
For todos-read-all.js
'use strict'; const AWS = require('aws-sdk'); const dynamoDb = new AWS.DynamoDB.DocumentClient(); module.exports = (event, callback) => { const params = {
https://riptutorial.com/ 41
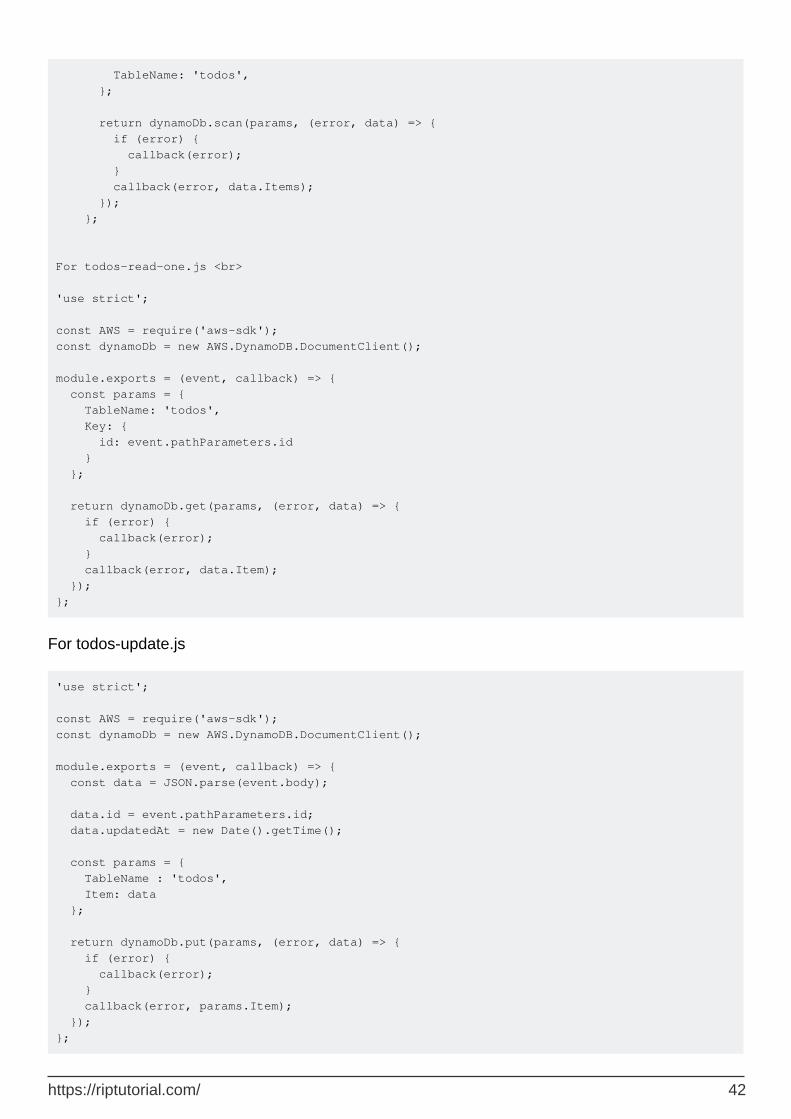
TableName: 'todos', }; return dynamoDb.scan(params, (error, data) => { if (error) { callback(error); } callback(error, data.Items); }); }; For todos-read-one.js <br> 'use strict'; const AWS = require('aws-sdk'); const dynamoDb = new AWS.DynamoDB.DocumentClient(); module.exports = (event, callback) => { const params = { TableName: 'todos', Key: { id: event.pathParameters.id } }; return dynamoDb.get(params, (error, data) => { if (error) { callback(error); } callback(error, data.Item); }); };
For todos-update.js
'use strict'; const AWS = require('aws-sdk'); const dynamoDb = new AWS.DynamoDB.DocumentClient(); module.exports = (event, callback) => { const data = JSON.parse(event.body); data.id = event.pathParameters.id; data.updatedAt = new Date().getTime(); const params = { TableName : 'todos', Item: data }; return dynamoDb.put(params, (error, data) => { if (error) { callback(error); } callback(error, params.Item); }); };
https://riptutorial.com/ 42
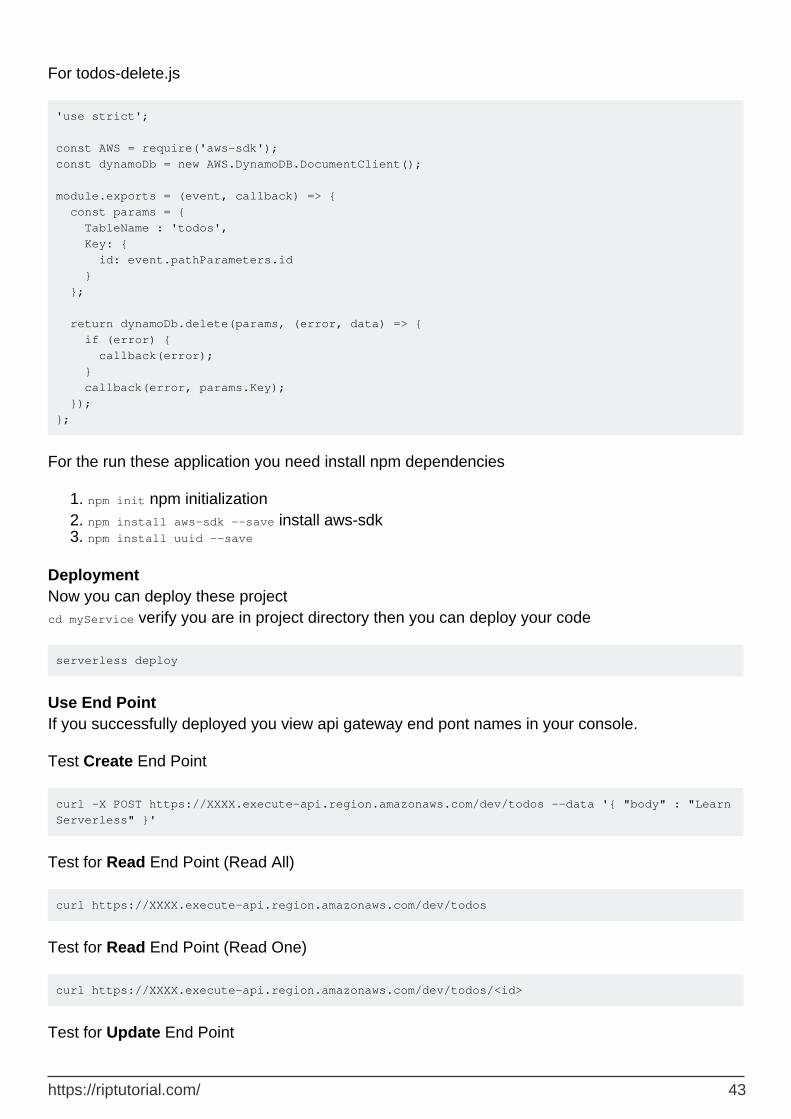
For todos-delete.js
'use strict'; const AWS = require('aws-sdk'); const dynamoDb = new AWS.DynamoDB.DocumentClient(); module.exports = (event, callback) => { const params = { TableName : 'todos', Key: { id: event.pathParameters.id } }; return dynamoDb.delete(params, (error, data) => { if (error) { callback(error); } callback(error, params.Key); }); };
For the run these application you need install npm dependencies
npm init npm initialization1. npm install aws-sdk --save install aws-sdk2. npm install uuid --save3.
Deployment Now you can deploy these project cd myService verify you are in project directory then you can deploy your code
serverless deploy
Use End Point If you successfully deployed you view api gateway end pont names in your console.
Test Create End Point
curl -X POST https://XXXX.execute-api.region.amazonaws.com/dev/todos --data '{ "body" : "Learn Serverless" }'
Test for Read End Point (Read All)
curl https://XXXX.execute-api.region.amazonaws.com/dev/todos
Test for Read End Point (Read One)
curl https://XXXX.execute-api.region.amazonaws.com/dev/todos/<id>
Test for Update End Point
https://riptutorial.com/ 43
curl -X PUT https://XXXX.execute-api.region.amazonaws.com/dev/todos/<id> --data '{ "body" : "Understand Serverless" }'
Test for Delete End Point
`curl -X DELETE https://XXXX.execute-api.region.amazonaws.com/dev/todos/<id`>
Read Serverless Framework online: https://riptutorial.com/aws-lambda/topic/6719/serverless-framework
https://riptutorial.com/ 44
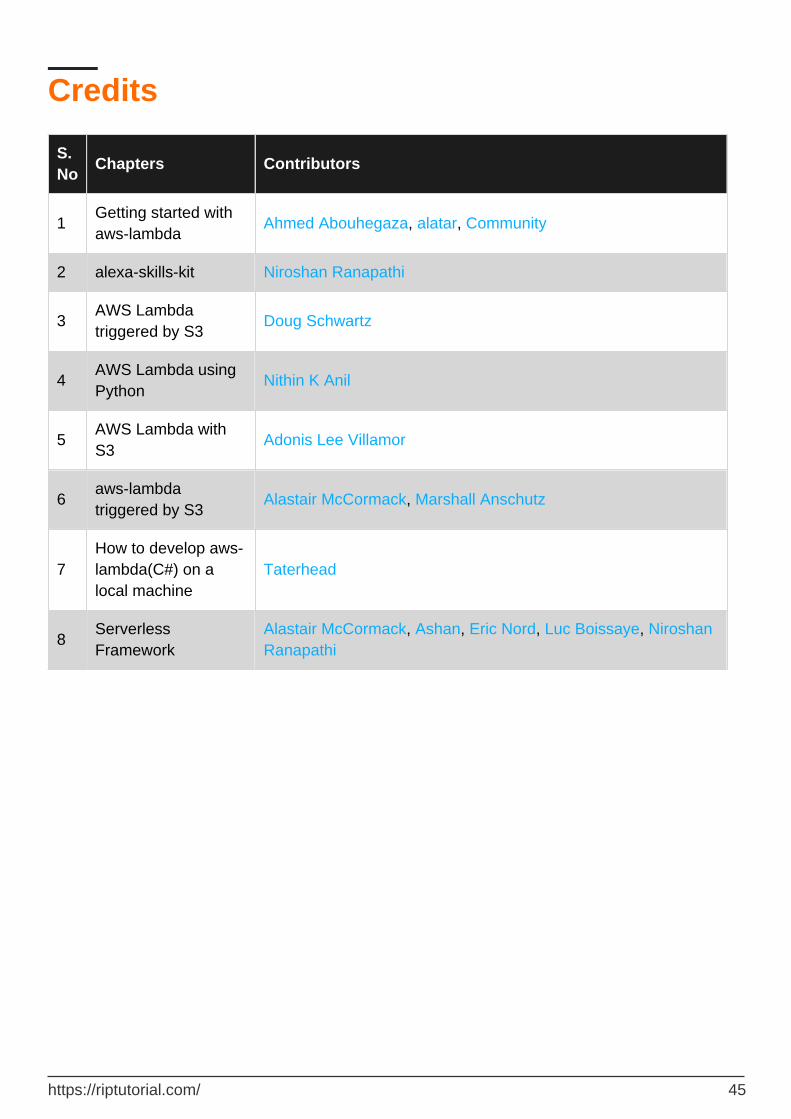
Credits
S. No
Chapters Contributors
1Getting started with aws-lambda
Ahmed Abouhegaza, alatar, Community
2 alexa-skills-kit Niroshan Ranapathi
3AWS Lambda triggered by S3
Doug Schwartz
4AWS Lambda using Python
Nithin K Anil
5AWS Lambda with S3
Adonis Lee Villamor
6aws-lambda triggered by S3
Alastair McCormack, Marshall Anschutz
7How to develop aws-lambda(C#) on a local machine
Taterhead
8Serverless Framework
Alastair McCormack, Ashan, Eric Nord, Luc Boissaye, Niroshan Ranapathi
https://riptutorial.com/ 45


