DENTAL TECHNOLOGY SECTION EDITORS
DANIEL H. GEHL KENNETH D. RUDD
Aluminum-based temporary removable partial dentures
Donald R. Nelson, D.D.S.,* Ann Sue von Gonten, D.D.S.,** and Clarence M. Williams*** University of North Carolina, School of Dentistry, Chapel Hill, N. C.
A ge, health, time limitations, and financial con- straints often dictate the use of a temporary partial denture rather than a definitive prosthesis for the partially edentulous patient. Acrylic resin is normally the material of choice for fabricating temporary remov- able partial dentures.’ In situations in which patients are unsuccessful in accommodating to acrylic resin denture bases, the cast aluminum base becomes a viable treat- ment alternative.
Aluminum offers a number of advantages over acrylic resin as a denture base material. Aluminum provides greater rigidity with decreased bulk, its excellent ther- mal conductivity stimulates the oral tissues and enhances taste perception, it fits the oral tissues accurately, and it is more retentive than acrylic resin.2-5
This article describes the fabrication of aluminum- based temporary removable partial dentures.
LABORATORY PROCEDURES Blockout and duplication
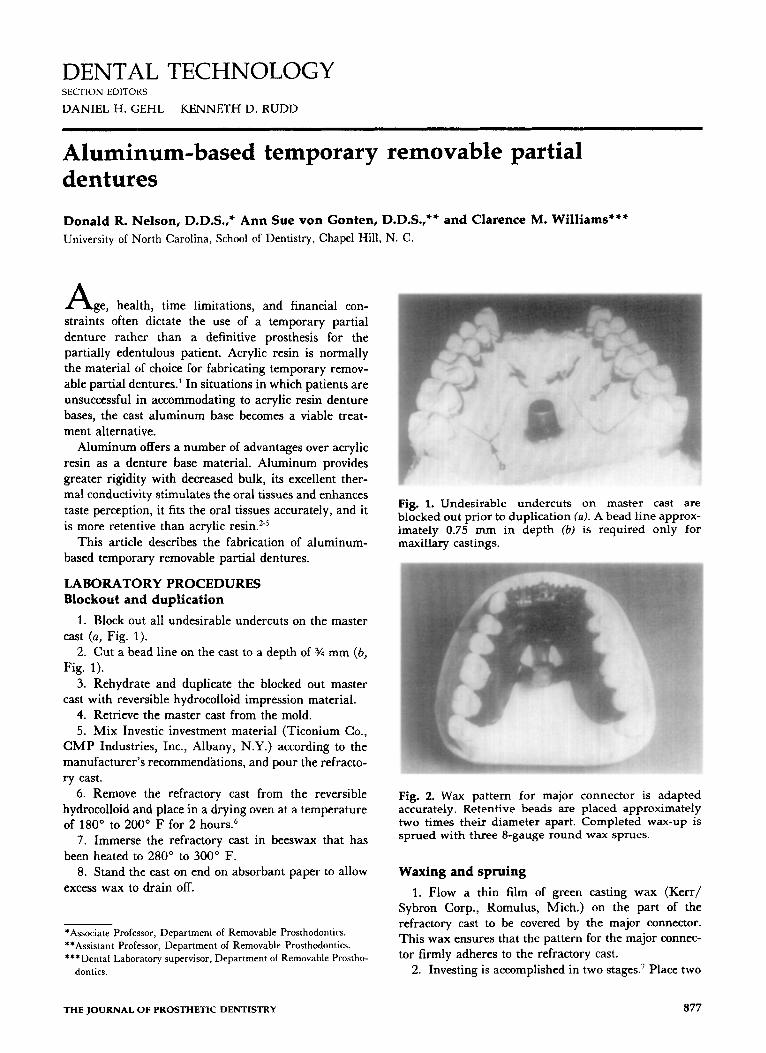
1. Block out all undesirable undercuts on the master cast (a, Fig. 1).
2. Cut a bead line on the cast to a depth of % mm (6, Fig. 1).
3. Rehydrate and duplicate the blocked out master cast with reversible hydrocolloid impression material.
4. Retrieve the master cast from the mold. 5. Mix Investic investment material (Ticonium Co.,
CMP Industries, Inc., Albany, N.Y.) according to the manufacturer’s recommendhtions, and pour the refracto- ry cast.
6. Remove the refractory cast from the reversible hydrocolloid and place in a drying oven at a temperature of 180” to 200’ F for 2 hours.6
7. Immerse the refractory cast in beeswax that has been heated to 280” to 300” F.
8. Stand the cast on end on absorbant paper to allow excess wax to drain off.
*Associate Professor, Department of Removable Prosthodontics. **Assistant Professor, Department of Removable Prosthodontics. ***Dental Laboratory supervisor, Department of Removable Prostho-
dontics.
THE JOURNAL OF PROSTHETIC DENTISTRY
Fig. 1. Undesirable undercuts on master cast are blocked out prior to duplication (a). A bead line approx- imately 0.75 mm in depth (b) is required only for maxillary castings.
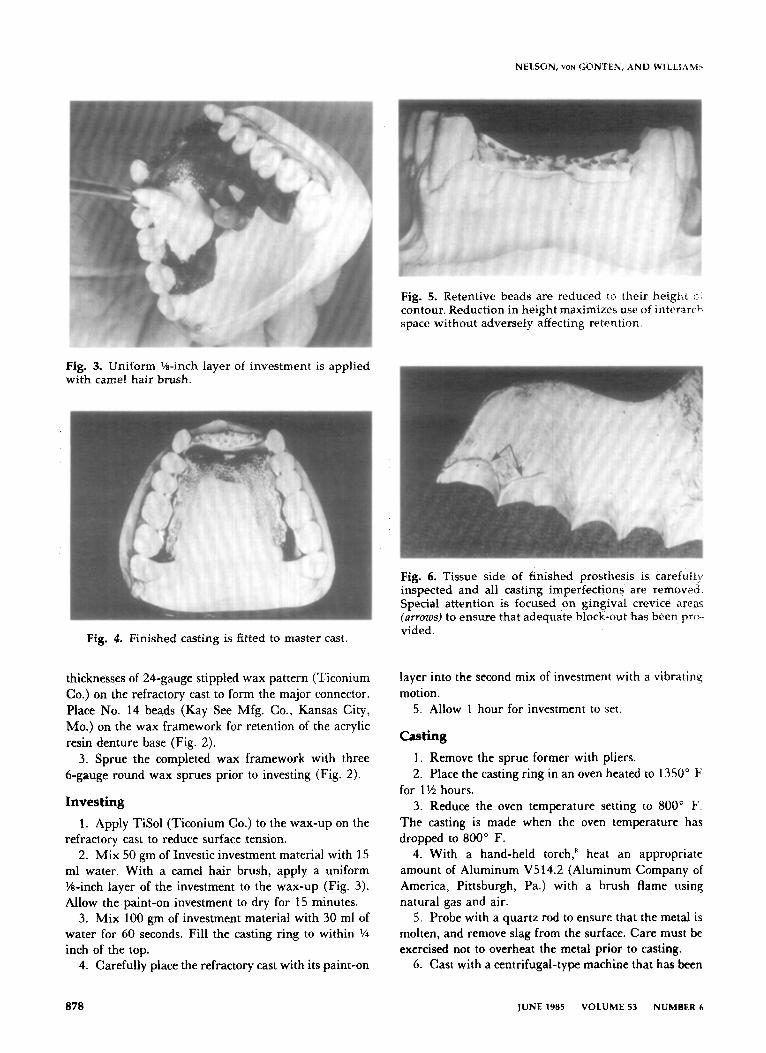
Fig. 2. Wax pattern for major connector is adapted accurately. Retentive beads are placed approximately two times their diameter apart. Completed wax-up is sprued with three s-gauge round wax sprues.
Waxing and spruing
1. Flow a thin film of green casting wax (Kerr/ Sybron Corp., Romulus, Mich.) on the part of the refractory cast to be covered by the major connector. This wax ensures that the pattern for the major connec- tor firmly adheres to the refractory cast.
2. Investing is accomplished in two stages.’ Place two
877
NELSON, VON GONTtX, AN13 WILLIAMT
Fig. 3. Uniform H-inch layer of investment is applied with camel hair brush.
Fig. 4. Finished casting is fitted to master cast.
thicknesses of 24-gauge stippled wax pattern (Ticonium Co.) on the refractory cast to form the major connector. Place No. 14 beads (Kay See Mfg. Co., Kansas City, MO.) on the wax framework for retention of the acrylic resin denture base (Fig. 2).
3. Sprue the completed wax framework with three 6-gauge round wax sprues prior to investing (Fig. 2).
Investing
1. Apply TiSol (Ticonium Co.) to the wax-up on the refractory cast to reduce surface tension.
2. Mix 50 gm of Investic investment material with 15 ml water. With a camel hair brush, apply a uniform %-inch layer of the investment to the wax-up (Fig. 3). Allow the paint-on investment to dry for 15 minutes.
3. Mix 100 gm of investment material with 30 ml of water for 60 seconds. Fill the casting ring to within l/4 inch of the top.
4. Carefully place the refractory cast with its paint-on
Fig. 5. Retentive beads are reduced to their height :?i contour. Reduction in height maximizes use of interarch space without adversely affecting retention,
Fig. 6. Tissue side of finished prosthesis is carefully inspected and all casting imperfections are removed. Special attention is focused on gingival crevice areas (arrows) to ensure that adequate block-out has been pm- vided.
layer into the second mix of investment with a vibrating motion.
5. Allow 1 hour for investment to set.
Casting
1. Remove the sprue former with pliers. 2. Place the casting ring in an oven heated to 1350” 1;
for 1% hours. 3. Reduce the oven temperature setting to 800” E‘.
The casting is made when the oven temperature has dropped to 800” F.
4. With a hand-held torch,H heat an appropriate amount of Aluminum V514.2 (Aluminum Company of America, Pittsburgh, Pa.) with a brush flame using natural gas and air.
5. Probe with a quartz rod to ensure that the metal is molten, and remove slag from the surface. Care must be exercised not to overheat the metal prior to casting.
6. Cast with a centrifugal-type machine that has been
878 JUNE 19135 VOLUME 53 NUMBER 6
ALUMINUM-BASED TEMPORARY RPD
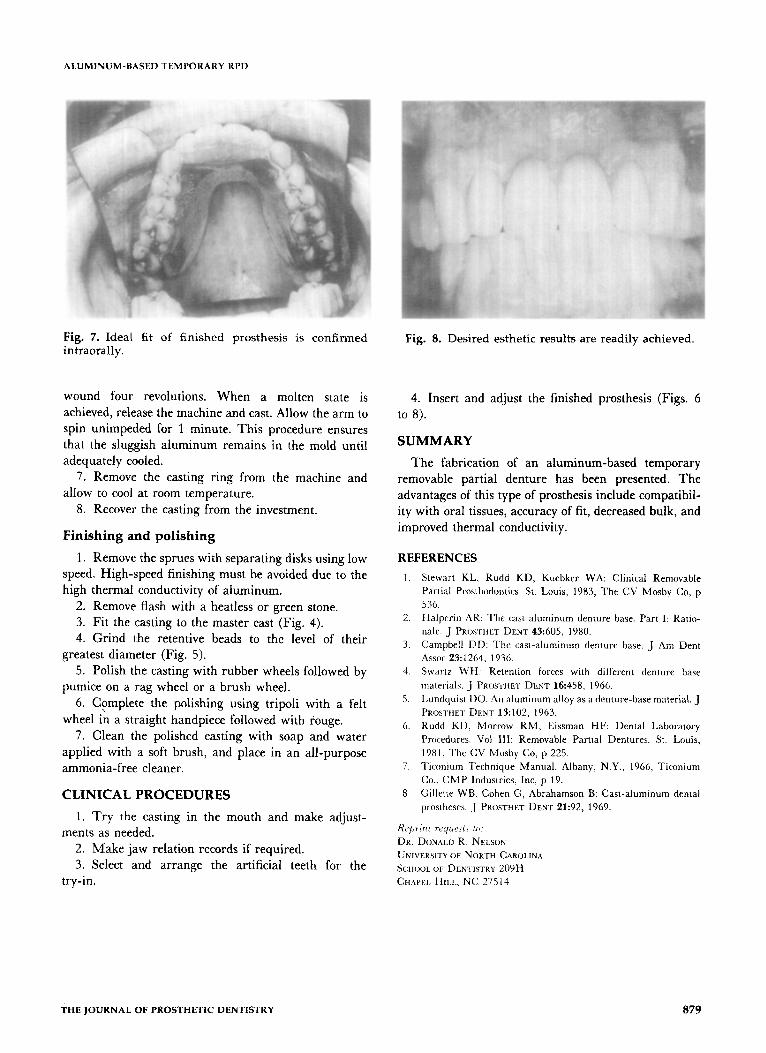
Fig. 7. Ideal fit of finished prosthesis is confirmed intraorally.
Fig. 8. Desired esthetic results are readily achieved.
wound four revolutions. When a molten state is achieved, release the machine and cast. Allow the arm to spin unimpeded for 1 minute. This procedure ensures that the sluggish aluminum remains in the mold until adequately cooled.
7. Remove the casting ring from the machine and allow to cool at room temperature.
8. Recover the casting from the investment.
Finishing and polishing
1. Remove the sprues with separating disks using low speed. High-speed finishing must be avoided due to the high thermal conductivity of aluminum.
2. Remove flash with a heatless or green stone. 3. Fit the casting to the master cast (Fig. 4). 4. Grind the retentive beads to the level of their
greatest diameter (Fig. 5). 5. Polish the casting with rubber wheels followed by
pumice on a rag wheel or a brush wheel. 6. Cemplete the polishing using tripoli with a felt
wheel in a straight handpiece followed with rouge. 7. Clean the polished casting with soap and water
applied with a soft brush, and place in an all-purpose ammonia-free cleaner.
CLINICAL PROCEDURES
1. Try the casting in the mouth and make adjust- ments as needed.
2. Make jaw relation records if required. 3. Select and arrange the artificial teeth for the
try-in.
4. Insert and adjust the finished prosthesis (Figs. 6 to 8).
SUMMARY
The fabrication of an aluminum-based temporary removable partial denture has been presented. The advantages of this type of prosthesis include compatibil- ity with oral tissues, accuracy of fit, decreased bulk, and improved thermal conductivity.
REFERENCES
1. Stewart KL. Rudd KD, Kuebker WA: Clinical Removable Partial Prosthodontics. St. Louis, 1983, The CV Mosby Co, p 536.
2. Halperin AR: The cast aluminum denture base. Part I: Ratio- nale. J PROWHET DENT 43:605, 1980.
3. Campbell DD: The cast-aluminum denture base. J Am Dent Assoc 23:1264, 1936.
4. Swartz WH: Retention forces with different denture base materials. J PROBTIIET DENT l&458, 1966.
5. Lundquist DO: An aluminum alloy as a denture-base material. J PKOSTHET DENT 13:102, 1963.
6. Rudd KD, Morrow RM, Eissman HF: Dental Laboratory Procedures. Vol III: Removable Partial Dentures. St. Louis, 1981, The CV Mosby Co, p 225.
7. Ticonium Technique Manual. Albany, N.Y., 1966, Ticonium Co.. CMP Industries, lnc, p 19.
8. Gillette WB, Cohen G, Abrahamson B: Cast-aluminum dental prostheses. J PR~STHET DENT 21:92, 1969.
Kepml reyue.\1\ lo:
DR. Dcxwtt.r~ R. NELSON
UNIVERSITY OF NOK.TH CAROLINA
SC:HOOL OF DENTISTKY 209H
CHAPEL Hm.. NC 275 I4
THE JOURNAL OF PROSTHETIC DENTISTRY 879


