do-it-yourself home energy audit
TRANSCRIPT

do it yourself home energy audit
{ }g r e e n h o m eh e a l t h y h o m e s f o r a h e a l t h y e n v i r o n m e n t g
interior | exterior
A step-by-step guide for identifying and improving your home’s energy efficiency
green home | energy audit
greenEnergy is a resource
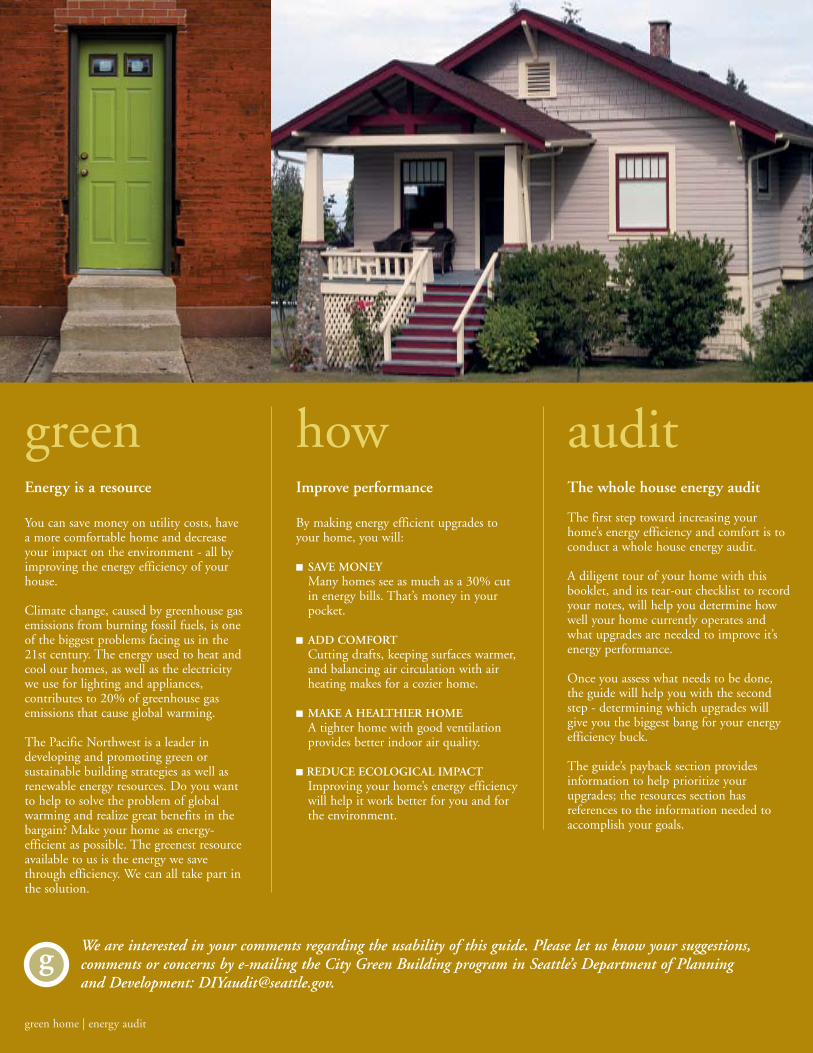
You can save money on utility costs, have a more comfortable home and decrease your impact on the environment - all by improving the energy efficiency of your house.
Climate change, caused by greenhouse gas emissions from burning fossil fuels, is one of the biggest problems facing us in the 21st century. The energy used to heat and cool our homes, as well as the electricity we use for lighting and appliances, contributes to 20% of greenhouse gas emissions that cause global warming.
The Pacific Northwest is a leader in developing and promoting green or sustainable building strategies as well as renewable energy resources. Do you want to help to solve the problem of global warming and realize great benefits in the bargain? Make your home as energy-efficient as possible. The greenest resource available to us is the energy we save through efficiency. We can all take part in the solution.
howImprove performance
By making energy efficient upgrades to your home, you will:
■ SAvE MonEy Many homes see as much as a 30% cut in energy bills. That’s money in your pocket.
■ Add CoMfortCutting drafts, keeping surfaces warmer, and balancing air circulation with air heating makes for a cozier home.
■ MAkE A hEAlthIEr hoME A tighter home with good ventilation provides better indoor air quality.
■ rEduCE ECologICAl IMpACtImproving your home’s energy efficiency will help it work better for you and for the environment.
auditthe whole house energy audit
The first step toward increasing your home’s energy efficiency and comfort is to conduct a whole house energy audit.
A diligent tour of your home with this booklet, and its tear-out checklist to record your notes, will help you determine how well your home currently operates and what upgrades are needed to improve it’s energy performance.
Once you assess what needs to be done, the guide will help you with the second step - determining which upgrades will give you the biggest bang for your energy efficiency buck.
The guide’s payback section provides information to help prioritize your upgrades; the resources section has references to the information needed to accomplish your goals.
contentsIntroductionWhy conduct an energy audit.
how to use this guideWhat you will need before you start your audit.
tear-out ChecklistUse this tear-out form to take notes as you conduct your audit.
the Building EnclosureUnderstand the components of a building enclosure, how to investigate your own home, and what to do to improve its effectiveness.
■ Air Leaks■ Insulation■ Moisture Control
Space and Water heatingUnderstand your home’s mechanical systems, how well they are operating, and what improvements should be made.
■ Space Heating
■ Water Heating
paybacksIdentify the most cost effective means to make your home energy- efficient.
terms to knowDefinitions of common terms used throughout the guide.
new Stuff New energy technologies and products.
resourcesGet more information about creating your own high-efficiency home.
01
03
04
06
14
17
18
1
3
14
green home | energy audit
19
20
g We are interested in your comments regarding the usability of this guide. Please let us know your suggestions, comments or concerns by e-mailing the City Green Building program in Seattle’s Department of Planning and Development: [email protected].
6
19

green home | energy audit
greenEnergy is a resource
You can save money on utility costs, have a more comfortable home and decrease your impact on the environment - all by improving the energy efficiency of your house.
Climate change, caused by greenhouse gas emissions from burning fossil fuels, is one of the biggest problems facing us in the 21st century. The energy used to heat and cool our homes, as well as the electricity we use for lighting and appliances, contributes to 20% of greenhouse gas emissions that cause global warming.
The Pacific Northwest is a leader in developing and promoting green or sustainable building strategies as well as renewable energy resources. Do you want to help to solve the problem of global warming and realize great benefits in the bargain? Make your home as energy-efficient as possible. The greenest resource available to us is the energy we save through efficiency. We can all take part in the solution.
howImprove performance
By making energy efficient upgrades to your home, you will:
■ SAvE MonEy Many homes see as much as a 30% cut in energy bills. That’s money in your pocket.
■ Add CoMfortCutting drafts, keeping surfaces warmer, and balancing air circulation with air heating makes for a cozier home.
■ MAkE A hEAlthIEr hoME A tighter home with good ventilation provides better indoor air quality.
■ rEduCE ECologICAl IMpACtImproving your home’s energy efficiency will help it work better for you and for the environment.
auditthe whole house energy audit
The first step toward increasing your home’s energy efficiency and comfort is to conduct a whole house energy audit.
A diligent tour of your home with this booklet, and its tear-out checklist to record your notes, will help you determine how well your home currently operates and what upgrades are needed to improve it’s energy performance.
Once you assess what needs to be done, the guide will help you with the second step - determining which upgrades will give you the biggest bang for your energy efficiency buck.
The guide’s payback section provides information to help prioritize your upgrades; the resources section has references to the information needed to accomplish your goals.
contentsIntroductionWhy conduct an energy audit.
how to use this guideWhat you will need before you start your audit.
tear-out ChecklistUse this tear-out form to take notes as you conduct your audit.
the Building EnclosureUnderstand the components of a building enclosure, how to investigate your own home, and what to do to improve its effectiveness.
■ Air Leaks■ Insulation■ Moisture Control
Space and Water heatingUnderstand your home’s mechanical systems, how well they are operating, and what improvements should be made.
■ Space Heating
■ Water Heating
paybacksIdentify the most cost effective means to make your home energy- efficient.
terms to knowDefinitions of common terms used throughout the guide.
new Stuff New energy technologies and products.
resourcesGet more information about creating your own high-efficiency home.
01
03
04
06
14
17
18
1
3
14
green home | energy audit
19
20
g We are interested in your comments regarding the usability of this guide. Please let us know your suggestions, comments or concerns by e-mailing the City Green Building program in Seattle’s Department of Planning and Development: [email protected].
6
19

���
introductionAt its most basic, your home is a big box that protects you from the weather and maintains a comfortable temperature throughout the year. Two components - the building enclosure and the heating system - are at the heart of what makes your home operate efficiently while providing maximum comfort.
This booklet will show you how to conduct a basic inspection of your home’s enclosure and heating system in order to make informed decisions about energy efficiency upgrades. It is not meant to be a substitute for a professional audit or for professionally installed efficiency upgrades. But there are many tasks that even a novice homeowner can easily accomplish, and we focus on those activities.
After you complete your audit, develop a master plan for improvements. Start with low cost and no cost measures you can do yourself; then ask yourself if you are capable of performing more extensive work that may involve time in attics and crawl spaces. Consider hiring a professional to complete the more complicated work. A good master plan can be implemented over time to help you reach your goals.
If you have questions or need assistance regarding this audit, please call Seattle City Light’s Conservation Help Line Monday - Friday, 8:30 am - 4:30 pm at (206) 684-3800.
green home | energy audit 2
your home’s Energy profile
Before starting your audit,
get free resource profiles from
your local utility.
For customers of Seattle City
Light or Seattle Public Utilities,
log on to www.seattle.gov/
conserve/homeprofile to get a
one-year history of your home's
electricity and water use. You
can also answer the online survey
to receive a customized profile
of your home's resource use and
suggestions for improvements.
For King County residents
outside of Seattle, and for Seattle
gas customers, Puget Sound
Energy allows you to login in to
My PSE Account and use your
billing history to see how energy
is used in your home and find
ways to save energy and money.
my.pse.com/SUSO/Signup.aspx
g
1 green home | energy audit
professional Inspections and Audits
A professional energy audit comes with a fee, but gives you the benefit of a building performance expert’s experience and judgment. Be sure to hire an independent auditor, one who doesn’t represent a specific product or system. Professional tools, including test equipment for air leakage and infrared camera scans, allow you to ‘see’ energy losses in new ways. Here are some examples of home performance services available:
■ Blower door test - by depressurizing the home with a large fan and then measuring airflow into the home, the overall air leakage of the entire home can be measured. The test can also be used to determine the location of leaks.
■ Duct pressure test - will identify the area and location of leaks in the duct system. A related ‘balance’ test of the heating ducts determines if the right amount of air is flowing to each room for comfort and efficiency. Other tests confirm combustion safety and ventilation fan flows.
■ Heat pumps and A/C commissioning - a set of tests that confirm the systems have the correct air flow and refrigerant charge. Equipment may have been sized using only rules of thumb, which can mean poor performance and durability.
■ Infrared camera scans - can reveal where walls, ceilings or floors are inadequately insulated or sealed.
Photos right top and bottom: Conservation Services Group
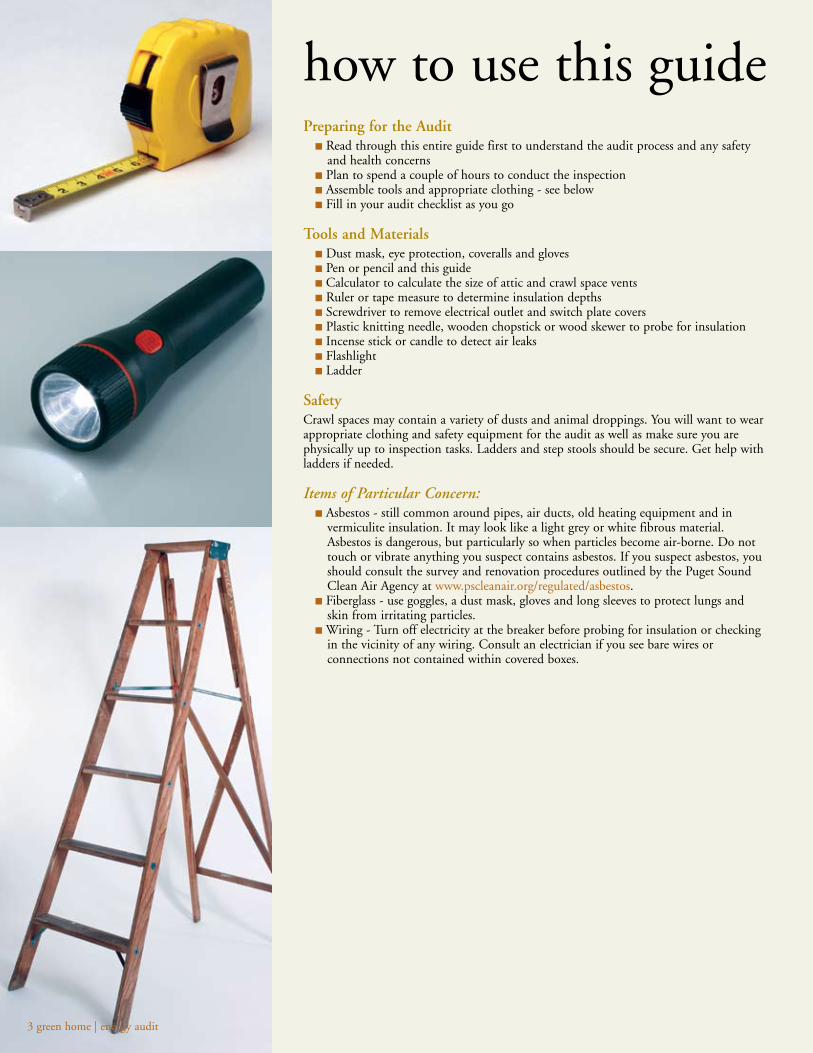
preparing for the Audit■ Read through this entire guide first to understand the audit process and any safety
and health concerns ■ Plan to spend a couple of hours to conduct the inspection ■ Assemble tools and appropriate clothing - see below■ Fill in your audit checklist as you go
tools and Materials■ Dust mask, eye protection, coveralls and gloves■ Pen or pencil and this guide■ Calculator to calculate the size of attic and crawl space vents■ Ruler or tape measure to determine insulation depths■ Screwdriver to remove electrical outlet and switch plate covers■ Plastic knitting needle, wooden chopstick or wood skewer to probe for insulation■ Incense stick or candle to detect air leaks■ Flashlight■ Ladder
SafetyCrawl spaces may contain a variety of dusts and animal droppings. You will want to wear appropriate clothing and safety equipment for the audit as well as make sure you are physically up to inspection tasks. Ladders and step stools should be secure. Get help with ladders if needed.
Items of Particular Concern:■ Asbestos - still common around pipes, air ducts, old heating equipment and in
vermiculite insulation. It may look like a light grey or white fibrous material. Asbestos is dangerous, but particularly so when particles become air-borne. Do not touch or vibrate anything you suspect contains asbestos. If you suspect asbestos, you should consult the survey and renovation procedures outlined by the Puget Sound Clean Air Agency at www.pscleanair.org/regulated/asbestos.
■ Fiberglass - use goggles, a dust mask, gloves and long sleeves to protect lungs and skin from irritating particles.
■ Wiring - Turn off electricity at the breaker before probing for insulation or checking in the vicinity of any wiring. Consult an electrician if you see bare wires or connections not contained within covered boxes.
how to use this guide
3 green home | energy audit green home | energy audit 4
Tear
alo
ng d
otte
d lin
e
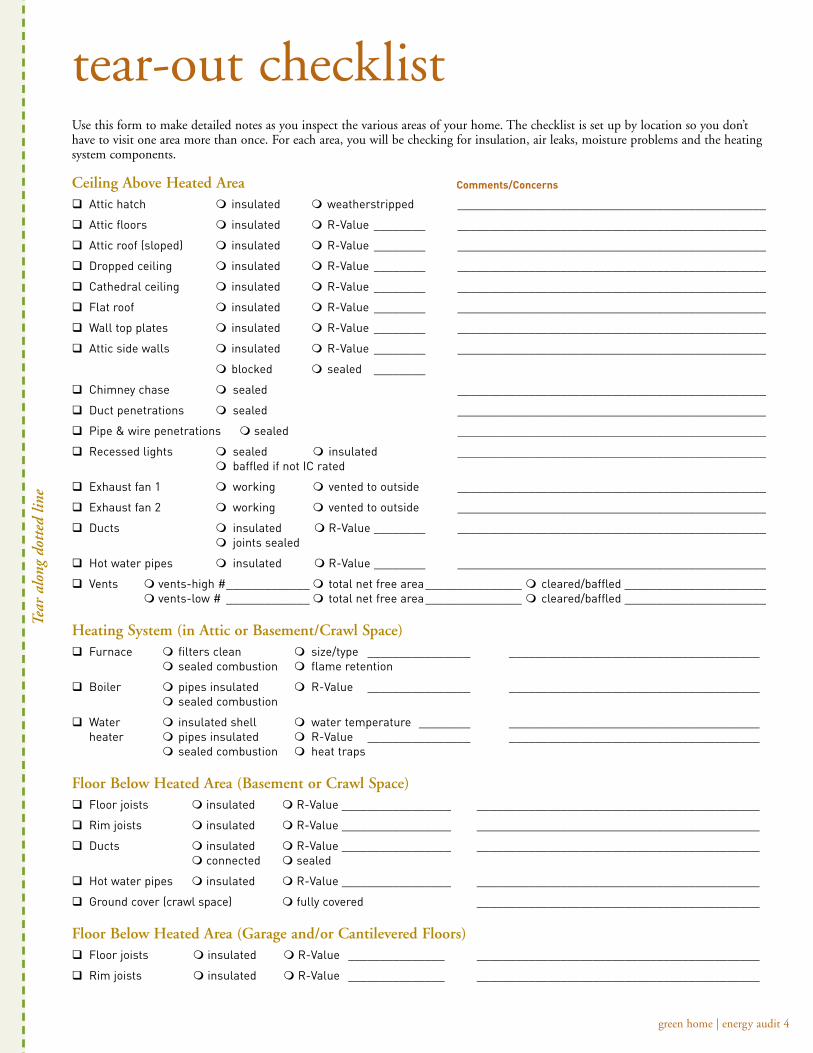
tear-out checklist Use this form to make detailed notes as you inspect the various areas of your home. The checklist is set up by location so you don’t have to visit one area more than once. For each area, you will be checking for insulation, air leaks, moisture problems and the heating system components.
Ceiling Above heated AreaqAttic hatch minsulated mweatherstripped ________________________________________________
qAttic floors minsulated mR-Value ________ ________________________________________________
qAttic roof (sloped) minsulated mR-Value ________ ________________________________________________
qDropped ceiling minsulated mR-Value ________ ________________________________________________
qCathedral ceiling minsulated mR-Value ________ ________________________________________________
qFlat roof minsulated mR-Value ________ ________________________________________________
qWall top plates m insulated mR-Value ________ ________________________________________________
qAttic side walls minsulated mR-Value ________ ________________________________________________
mblocked msealed ________
qChimney chase msealed ________________________________________________
qDuct penetrations msealed ________________________________________________
qPipe & wire penetrations msealed ________________________________________________
qRecessed lights msealed minsulated ________________________________________________ mbaffled if not IC rated
qExhaust fan 1 mworking m vented to outside ________________________________________________
qExhaust fan 2 mworking m vented to outside ________________________________________________
qDucts m insulated mR-Value ________ ________________________________________________ mjoints sealed
qHot water pipes minsulated mR-Value ________ ________________________________________________
qVents mvents-high # _____________mtotal net free area _______________ mcleared/baffled ______________________ mvents-low # _____________mtotal net free area _______________ mcleared/baffled ______________________
heating System (in Attic or Basement/Crawl Space)qFurnace mfilters clean msize/type ________________ _______________________________________ msealed combustion mflame retention
qBoiler mpipes insulated mR-Value ________________ _______________________________________ msealed combustion
qWater minsulated shell mwater temperature ________ _______________________________________ heater mpipes insulated mR-Value ________________ _______________________________________ msealed combustion mheat traps
floor Below heated Area (Basement or Crawl Space)qFloor joists minsulated mR-Value _________________ ____________________________________________
qRim joists minsulated mR-Value _________________ ____________________________________________
qDucts minsulated mR-Value _________________ ____________________________________________ mconnected msealed
qHot water pipes minsulated mR-Value _________________ ____________________________________________
qGround cover (crawl space) m fully covered ____________________________________________
floor Below heated Area (garage and/or Cantilevered floors)qFloor joists minsulated mR-Value _______________ ____________________________________________
qRim joists minsulated mR-Value _______________ ____________________________________________
Comments/Concerns
preparing for the Audit■ Read through this entire guide first to understand the audit process and any safety
and health concerns ■ Plan to spend a couple of hours to conduct the inspection ■ Assemble tools and appropriate clothing - see below■ Fill in your audit checklist as you go
tools and Materials■ Dust mask, eye protection, coveralls and gloves■ Pen or pencil and this guide■ Calculator to calculate the size of attic and crawl space vents■ Ruler or tape measure to determine insulation depths■ Screwdriver to remove electrical outlet and switch plate covers■ Plastic knitting needle, wooden chopstick or wood skewer to probe for insulation■ Incense stick or candle to detect air leaks■ Flashlight■ Ladder
SafetyCrawl spaces may contain a variety of dusts and animal droppings. You will want to wear appropriate clothing and safety equipment for the audit as well as make sure you are physically up to inspection tasks. Ladders and step stools should be secure. Get help with ladders if needed.
Items of Particular Concern:■ Asbestos - still common around pipes, air ducts, old heating equipment and in
vermiculite insulation. It may look like a light grey or white fibrous material. Asbestos is dangerous, but particularly so when particles become air-borne. Do not touch or vibrate anything you suspect contains asbestos. If you suspect asbestos, you should consult the survey and renovation procedures outlined by the Puget Sound Clean Air Agency at www.pscleanair.org/regulated/asbestos.
■ Fiberglass - use goggles, a dust mask, gloves and long sleeves to protect lungs and skin from irritating particles.
■ Wiring - Turn off electricity at the breaker before probing for insulation or checking in the vicinity of any wiring. Consult an electrician if you see bare wires or connections not contained within covered boxes.
how to use this guide
3 green home | energy audit green home | energy audit 4
Tear
alo
ng d
otte
d lin
e
tear-out checklist Use this form to make detailed notes as you inspect the various areas of your home. The checklist is set up by location so you don’t have to visit one area more than once. For each area, you will be checking for insulation, air leaks, moisture problems and the heating system components.
Ceiling Above heated AreaqAttic hatch minsulated mweatherstripped ________________________________________________
qAttic floors minsulated mR-Value ________ ________________________________________________
qAttic roof (sloped) minsulated mR-Value ________ ________________________________________________
qDropped ceiling minsulated mR-Value ________ ________________________________________________
qCathedral ceiling minsulated mR-Value ________ ________________________________________________
qFlat roof minsulated mR-Value ________ ________________________________________________
qWall top plates m insulated mR-Value ________ ________________________________________________
qAttic side walls minsulated mR-Value ________ ________________________________________________
mblocked msealed ________
qChimney chase msealed ________________________________________________
qDuct penetrations msealed ________________________________________________
qPipe & wire penetrations msealed ________________________________________________
qRecessed lights msealed minsulated ________________________________________________ mbaffled if not IC rated
qExhaust fan 1 mworking m vented to outside ________________________________________________
qExhaust fan 2 mworking m vented to outside ________________________________________________
qDucts m insulated mR-Value ________ ________________________________________________ mjoints sealed
qHot water pipes minsulated mR-Value ________ ________________________________________________
qVents mvents-high # _____________mtotal net free area _______________ mcleared/baffled ______________________ mvents-low # _____________mtotal net free area _______________ mcleared/baffled ______________________
heating System (in Attic or Basement/Crawl Space)qFurnace mfilters clean msize/type ________________ _______________________________________ msealed combustion mflame retention
qBoiler mpipes insulated mR-Value ________________ _______________________________________ msealed combustion
qWater minsulated shell mwater temperature ________ _______________________________________ heater mpipes insulated mR-Value ________________ _______________________________________ msealed combustion mheat traps
floor Below heated Area (Basement or Crawl Space)qFloor joists minsulated mR-Value _________________ ____________________________________________
qRim joists minsulated mR-Value _________________ ____________________________________________
qDucts minsulated mR-Value _________________ ____________________________________________ mconnected msealed
qHot water pipes minsulated mR-Value _________________ ____________________________________________
qGround cover (crawl space) m fully covered ____________________________________________
floor Below heated Area (garage and/or Cantilevered floors)qFloor joists minsulated mR-Value _______________ ____________________________________________
qRim joists minsulated mR-Value _______________ ____________________________________________
Comments/Concerns
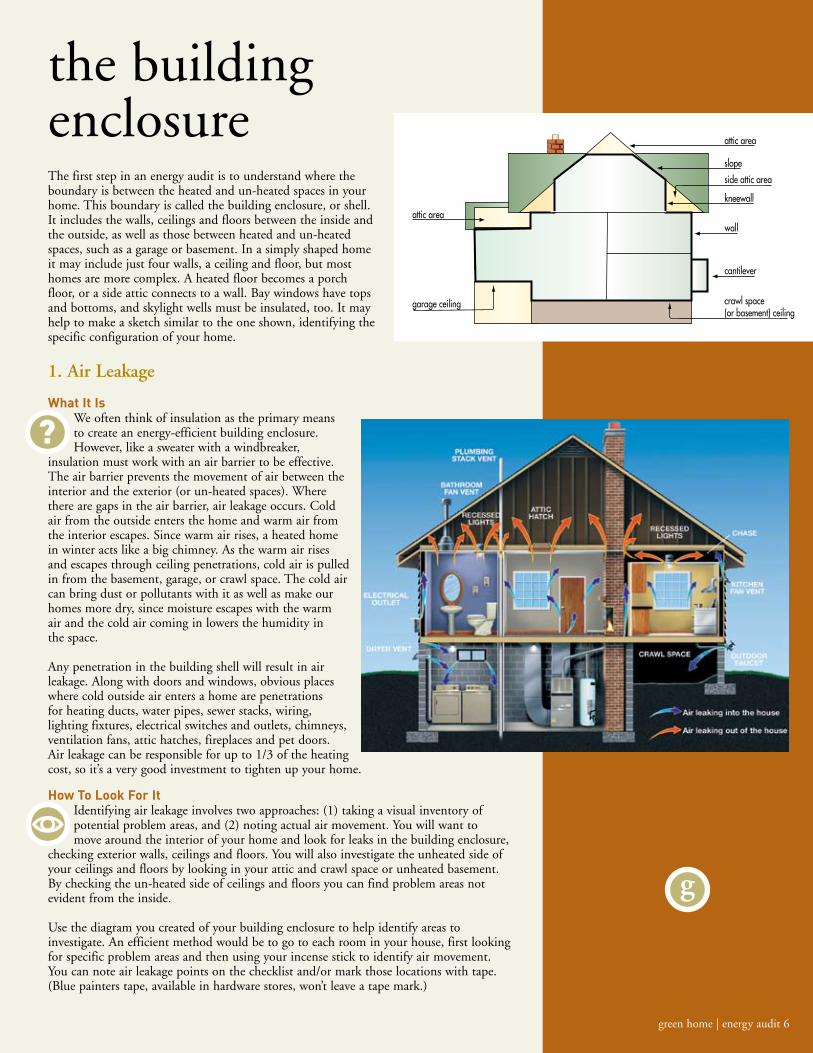
the building enclosureThe first step in an energy audit is to understand where the boundary is between the heated and un-heated spaces in your home. This boundary is called the building enclosure, or shell. It includes the walls, ceilings and floors between the inside and the outside, as well as those between heated and un-heated spaces, such as a garage or basement. In a simply shaped home it may include just four walls, a ceiling and floor, but most homes are more complex. A heated floor becomes a porch floor, or a side attic connects to a wall. Bay windows have tops and bottoms, and skylight wells must be insulated, too. It may help to make a sketch similar to the one shown, identifying the specific configuration of your home.
1. Air leakage
What It IsWe often think of insulation as the primary means to create an energy-efficient building enclosure. However, like a sweater with a windbreaker,
insulation must work with an air barrier to be effective. The air barrier prevents the movement of air between the interior and the exterior (or un-heated spaces). Where there are gaps in the air barrier, air leakage occurs. Cold air from the outside enters the home and warm air from the interior escapes. Since warm air rises, a heated home in winter acts like a big chimney. As the warm air rises and escapes through ceiling penetrations, cold air is pulled in from the basement, garage, or crawl space. The cold air can bring dust or pollutants with it as well as make our homes more dry, since moisture escapes with the warm air and the cold air coming in lowers the humidity in the space.
Any penetration in the building shell will result in air leakage. Along with doors and windows, obvious places where cold outside air enters a home are penetrations for heating ducts, water pipes, sewer stacks, wiring, lighting fixtures, electrical switches and outlets, chimneys, ventilation fans, attic hatches, fireplaces and pet doors. Air leakage can be responsible for up to 1/3 of the heating cost, so it’s a very good investment to tighten up your home.
How To Look For ItIdentifying air leakage involves two approaches: (1) taking a visual inventory of potential problem areas, and (2) noting actual air movement. You will want to move around the interior of your home and look for leaks in the building enclosure,
checking exterior walls, ceilings and floors. You will also investigate the unheated side of your ceilings and floors by looking in your attic and crawl space or unheated basement. By checking the un-heated side of ceilings and floors you can find problem areas not evident from the inside.
Use the diagram you created of your building enclosure to help identify areas to investigate. An efficient method would be to go to each room in your house, first looking for specific problem areas and then using your incense stick to identify air movement. You can note air leakage points on the checklist and/or mark those locations with tape. (Blue painters tape, available in hardware stores, won’t leave a tape mark.)
green home | energy audit 6
g
Walls (Inspected from Inside) qBetween interior/ minsulated mR-Value __________ _______________________________________________ exterior
qBetween heated/ minsulated mR-Value __________ _______________________________________________ un-heated
qPipe & wire penetrations - baths msealed _______________________________________________
qPipe & wire penetrations - kitchen msealed _______________________________________________
qSwitches & outlets mgaskets _______________________________________________
qBaseboards/wall fans mdusted m12” from furniture/ _______________________________________________ combustibles
qThermostat(s) mworking mautomatic setback _______________________________________________
doors/Windows qFront door(s) mweatherstripped m sealed ___________________________________________ mthreshold weatherstripped
qBack door(s) m weatherstripped msealed ___________________________________________ mthreshold weatherstripped
qDoor(s) to unheated m weatherstripped msealed ___________________________________________ area(s) mthreshold weatherstripped
qDog/cat door mweatherstripped m sealed ___________________________________________
qWindows - LR/DR mweatherstripped m sealed ___________________________________________
qWindows - kitchen mweatherstripped m sealed ___________________________________________
qWindows - bath mweatherstripped m sealed ___________________________________________
qWindows - den/office mweatherstripped m sealed ___________________________________________
qWindows - BR 1 mweatherstripped m sealed ___________________________________________
qWindows - BR 2 mweatherstripped m sealed ___________________________________________
qWindows - BR 3 mweatherstripped m sealed ___________________________________________
fireplaceqDamper mtightly sealed when closed ___________________________________________
qFirebox m heat exchanger or fireplace insert m insulated panel ___________________________________________
qChimney through ceiling msealed ___________________________________________
Exterior of houseqGutters and eaves m sealed m cleared of debris ___________________________________________
qDownspouts m connected m sealed ___________________________________________
qWindow/door flashings m sealed ___________________________________________
qTrees or bushes m trimmed back ___________________________________________
qCrawl space vents m#: ________mtotal net free area _______ mcleared/baffled _________ _____________________
qWindows - LR/DR m sealed minsulated glass ___________________________________________
qWindows - kitchen m sealed minsulated glass ___________________________________________
qWindows - bath m sealed minsulated glass ___________________________________________
qWindows - den/office m sealed minsulated glass ___________________________________________
qWindows - BR 1 m sealed minsulated glass ___________________________________________
qWindows - BR 2 m sealed minsulated glass ___________________________________________
qWindows - BR 3 m sealed minsulated glass ___________________________________________
qFront door trim m sealed minsulated glass ___________________________________________
qBack door trim m sealed minsulated glass ___________________________________________
qPipe & wire penetrations - baths m sealed ___________________________________________
qPipe & wire penetrations - kitchens m sealed ___________________________________________
qFoundation to walls m sealed ___________________________________________
qChimney to wall m sealed ___________________________________________
qSmall cantilevered areas (bay/garden window/bump-out) minsulated mR-Value _______ ________________________
Comments/Concerns
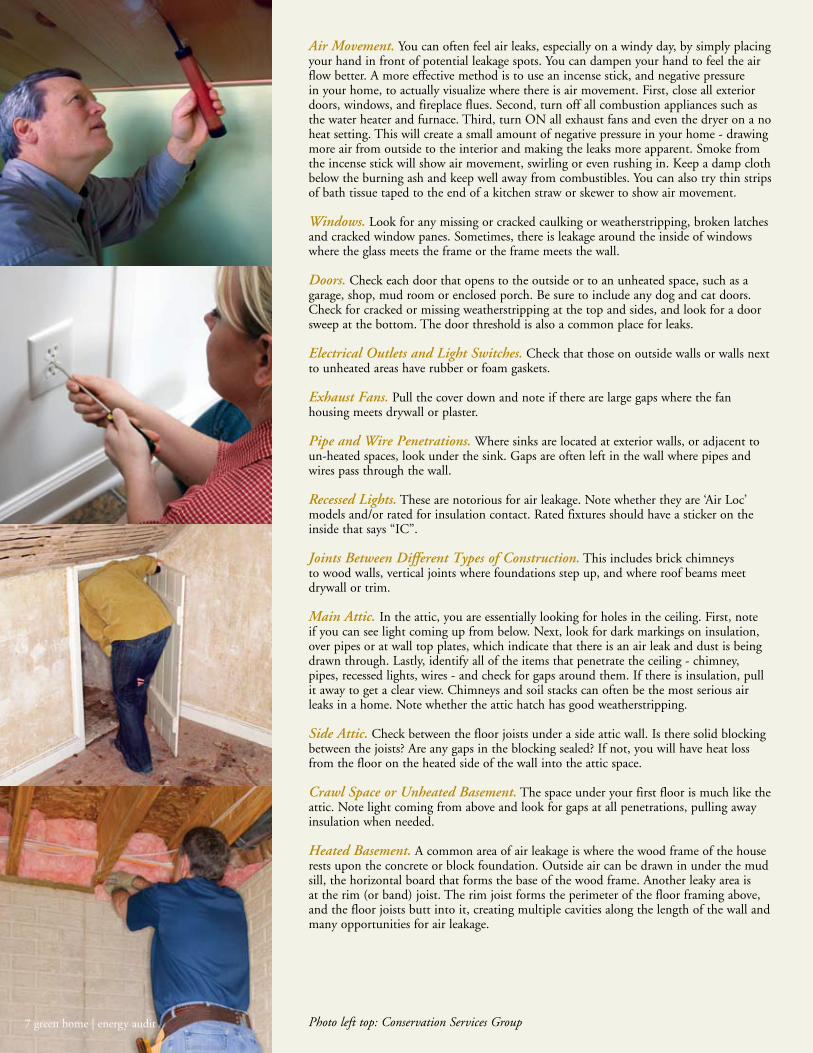
Air Movement. You can often feel air leaks, especially on a windy day, by simply placing your hand in front of potential leakage spots. You can dampen your hand to feel the air flow better. A more effective method is to use an incense stick, and negative pressure in your home, to actually visualize where there is air movement. First, close all exterior doors, windows, and fireplace flues. Second, turn off all combustion appliances such as the water heater and furnace. Third, turn ON all exhaust fans and even the dryer on a no heat setting. This will create a small amount of negative pressure in your home - drawing more air from outside to the interior and making the leaks more apparent. Smoke from the incense stick will show air movement, swirling or even rushing in. Keep a damp cloth below the burning ash and keep well away from combustibles. You can also try thin strips of bath tissue taped to the end of a kitchen straw or skewer to show air movement.
Windows. Look for any missing or cracked caulking or weatherstripping, broken latches and cracked window panes. Sometimes, there is leakage around the inside of windows where the glass meets the frame or the frame meets the wall.
Doors. Check each door that opens to the outside or to an unheated space, such as a garage, shop, mud room or enclosed porch. Be sure to include any dog and cat doors. Check for cracked or missing weatherstripping at the top and sides, and look for a door sweep at the bottom. The door threshold is also a common place for leaks.
Electrical Outlets and Light Switches. Check that those on outside walls or walls next to unheated areas have rubber or foam gaskets.
Exhaust Fans. Pull the cover down and note if there are large gaps where the fan housing meets drywall or plaster.
Pipe and Wire Penetrations. Where sinks are located at exterior walls, or adjacent to un-heated spaces, look under the sink. Gaps are often left in the wall where pipes and wires pass through the wall.
Recessed Lights. These are notorious for air leakage. Note whether they are ‘Air Loc’ models and/or rated for insulation contact. Rated fixtures should have a sticker on the inside that says “IC”.
Joints Between Different Types of Construction. This includes brick chimneys to wood walls, vertical joints where foundations step up, and where roof beams meet drywall or trim.
Main Attic. In the attic, you are essentially looking for holes in the ceiling. First, note if you can see light coming up from below. Next, look for dark markings on insulation, over pipes or at wall top plates, which indicate that there is an air leak and dust is being drawn through. Lastly, identify all of the items that penetrate the ceiling - chimney, pipes, recessed lights, wires - and check for gaps around them. If there is insulation, pull it away to get a clear view. Chimneys and soil stacks can often be the most serious air leaks in a home. Note whether the attic hatch has good weatherstripping.
Side Attic. Check between the floor joists under a side attic wall. Is there solid blocking between the joists? Are any gaps in the blocking sealed? If not, you will have heat loss from the floor on the heated side of the wall into the attic space.
Crawl Space or Unheated Basement. The space under your first floor is much like the attic. Note light coming from above and look for gaps at all penetrations, pulling away insulation when needed.
Heated Basement. A common area of air leakage is where the wood frame of the house rests upon the concrete or block foundation. Outside air can be drawn in under the mud sill, the horizontal board that forms the base of the wood frame. Another leaky area is at the rim (or band) joist. The rim joist forms the perimeter of the floor framing above, and the floor joists butt into it, creating multiple cavities along the length of the wall and many opportunities for air leakage.
green home | energy audit 8Photo left top: Conservation Services Group
fireplace
What It IsA fire burning in an open fireplace is the least efficient way to heat your home because 90% of the fire’s heat goes up the chimney with the smoke. A roaring fire takes combustion air from the house and can pull all the heated air out in less than 30 minutes. Even when not in use, the fireplace can be a big cause of heat loss if the damper does not seal well.
The damper is the metal plate in the chimney above the fire box used to regulate the draft. Dampers should be kept closed when the fireplace is not in use (and any previous fire is completely out). Leaving your fireplace damper open when there is no fire is like leaving your front door wide open and will dramatically increase heat loss.
How To Look For ItUse a bright flashlight to check your fireplace damper. The damper should have a tight seal when closed. If you cannot tell if it’s tight, close the damper on a day or evening when there is a breeze. Hold a lighted incense stick under the damper. If the flame or smoke sways or moves, the seal needs tightening. A professional mason can do these repairs.
What To Do About ItInstall tight-fitting glass doors to increase the overall efficiency of an existing fireplace. Or consider installing one or more fireplace devices such as a flue top damper, air vents, heat exchangers and/or fireplace insert. In some cases an ash cleanout passage can be modified to bring outside air to the fire. Some people make a decorative panel with foam insulation on the back to fit snugly in the opening when not in use. If your fireplace is no longer used, you may wish to engage a chimney repair service to permanently seal off the chimney.
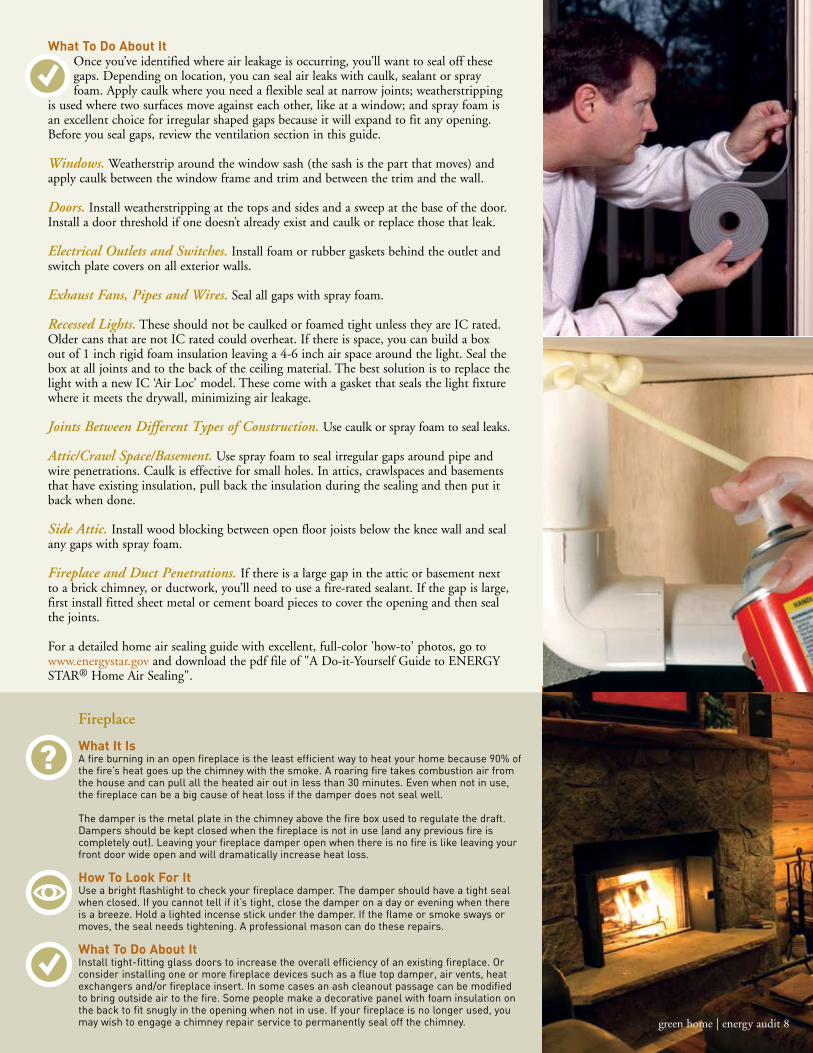
What To Do About ItOnce you’ve identified where air leakage is occurring, you’ll want to seal off these gaps. Depending on location, you can seal air leaks with caulk, sealant or spray foam. Apply caulk where you need a flexible seal at narrow joints; weatherstripping
is used where two surfaces move against each other, like at a window; and spray foam is an excellent choice for irregular shaped gaps because it will expand to fit any opening. Before you seal gaps, review the ventilation section in this guide.
Windows. Weatherstrip around the window sash (the sash is the part that moves) and apply caulk between the window frame and trim and between the trim and the wall.
Doors. Install weatherstripping at the tops and sides and a sweep at the base of the door. Install a door threshold if one doesn’t already exist and caulk or replace those that leak.
Electrical Outlets and Switches. Install foam or rubber gaskets behind the outlet and switch plate covers on all exterior walls.
Exhaust Fans, Pipes and Wires. Seal all gaps with spray foam.
Recessed Lights. These should not be caulked or foamed tight unless they are IC rated. Older cans that are not IC rated could overheat. If there is space, you can build a box out of 1 inch rigid foam insulation leaving a 4-6 inch air space around the light. Seal the box at all joints and to the back of the ceiling material. The best solution is to replace the light with a new IC ‘Air Loc’ model. These come with a gasket that seals the light fixture where it meets the drywall, minimizing air leakage.
Joints Between Different Types of Construction. Use caulk or spray foam to seal leaks.
Attic/Crawl Space/Basement. Use spray foam to seal irregular gaps around pipe and wire penetrations. Caulk is effective for small holes. In attics, crawlspaces and basements that have existing insulation, pull back the insulation during the sealing and then put it back when done.
Side Attic. Install wood blocking between open floor joists below the knee wall and seal any gaps with spray foam.
Fireplace and Duct Penetrations. If there is a large gap in the attic or basement next to a brick chimney, or ductwork, you’ll need to use a fire-rated sealant. If the gap is large, first install fitted sheet metal or cement board pieces to cover the opening and then seal the joints.
For a detailed home air sealing guide with excellent, full-color 'how-to' photos, go to www.energystar.gov and download the pdf file of "A Do-it-Yourself Guide to ENERGY STAR® Home Air Sealing".
7 green home | energy audit
Air Movement. You can often feel air leaks, especially on a windy day, by simply placing your hand in front of potential leakage spots. You can dampen your hand to feel the air flow better. A more effective method is to use an incense stick, and negative pressure in your home, to actually visualize where there is air movement. First, close all exterior doors, windows, and fireplace flues. Second, turn off all combustion appliances such as the water heater and furnace. Third, turn ON all exhaust fans and even the dryer on a no heat setting. This will create a small amount of negative pressure in your home - drawing more air from outside to the interior and making the leaks more apparent. Smoke from the incense stick will show air movement, swirling or even rushing in. Keep a damp cloth below the burning ash and keep well away from combustibles. You can also try thin strips of bath tissue taped to the end of a kitchen straw or skewer to show air movement.
Windows. Look for any missing or cracked caulking or weatherstripping, broken latches and cracked window panes. Sometimes, there is leakage around the inside of windows where the glass meets the frame or the frame meets the wall.
Doors. Check each door that opens to the outside or to an unheated space, such as a garage, shop, mud room or enclosed porch. Be sure to include any dog and cat doors. Check for cracked or missing weatherstripping at the top and sides, and look for a door sweep at the bottom. The door threshold is also a common place for leaks.
Electrical Outlets and Light Switches. Check that those on outside walls or walls next to unheated areas have rubber or foam gaskets.
Exhaust Fans. Pull the cover down and note if there are large gaps where the fan housing meets drywall or plaster.
Pipe and Wire Penetrations. Where sinks are located at exterior walls, or adjacent to un-heated spaces, look under the sink. Gaps are often left in the wall where pipes and wires pass through the wall.
Recessed Lights. These are notorious for air leakage. Note whether they are ‘Air Loc’ models and/or rated for insulation contact. Rated fixtures should have a sticker on the inside that says “IC”.
Joints Between Different Types of Construction. This includes brick chimneys to wood walls, vertical joints where foundations step up, and where roof beams meet drywall or trim.
Main Attic. In the attic, you are essentially looking for holes in the ceiling. First, note if you can see light coming up from below. Next, look for dark markings on insulation, over pipes or at wall top plates, which indicate that there is an air leak and dust is being drawn through. Lastly, identify all of the items that penetrate the ceiling - chimney, pipes, recessed lights, wires - and check for gaps around them. If there is insulation, pull it away to get a clear view. Chimneys and soil stacks can often be the most serious air leaks in a home. Note whether the attic hatch has good weatherstripping.
Side Attic. Check between the floor joists under a side attic wall. Is there solid blocking between the joists? Are any gaps in the blocking sealed? If not, you will have heat loss from the floor on the heated side of the wall into the attic space.
Crawl Space or Unheated Basement. The space under your first floor is much like the attic. Note light coming from above and look for gaps at all penetrations, pulling away insulation when needed.
Heated Basement. A common area of air leakage is where the wood frame of the house rests upon the concrete or block foundation. Outside air can be drawn in under the mud sill, the horizontal board that forms the base of the wood frame. Another leaky area is at the rim (or band) joist. The rim joist forms the perimeter of the floor framing above, and the floor joists butt into it, creating multiple cavities along the length of the wall and many opportunities for air leakage.
green home | energy audit 8Photo left top: Conservation Services Group
fireplace
What It IsA fire burning in an open fireplace is the least efficient way to heat your home because 90% of the fire’s heat goes up the chimney with the smoke. A roaring fire takes combustion air from the house and can pull all the heated air out in less than 30 minutes. Even when not in use, the fireplace can be a big cause of heat loss if the damper does not seal well.
The damper is the metal plate in the chimney above the fire box used to regulate the draft. Dampers should be kept closed when the fireplace is not in use (and any previous fire is completely out). Leaving your fireplace damper open when there is no fire is like leaving your front door wide open and will dramatically increase heat loss.
How To Look For ItUse a bright flashlight to check your fireplace damper. The damper should have a tight seal when closed. If you cannot tell if it’s tight, close the damper on a day or evening when there is a breeze. Hold a lighted incense stick under the damper. If the flame or smoke sways or moves, the seal needs tightening. A professional mason can do these repairs.
What To Do About ItInstall tight-fitting glass doors to increase the overall efficiency of an existing fireplace. Or consider installing one or more fireplace devices such as a flue top damper, air vents, heat exchangers and/or fireplace insert. In some cases an ash cleanout passage can be modified to bring outside air to the fire. Some people make a decorative panel with foam insulation on the back to fit snugly in the opening when not in use. If your fireplace is no longer used, you may wish to engage a chimney repair service to permanently seal off the chimney.
What To Do About ItOnce you’ve identified where air leakage is occurring, you’ll want to seal off these gaps. Depending on location, you can seal air leaks with caulk, sealant or spray foam. Apply caulk where you need a flexible seal at narrow joints; weatherstripping
is used where two surfaces move against each other, like at a window; and spray foam is an excellent choice for irregular shaped gaps because it will expand to fit any opening. Before you seal gaps, review the ventilation section in this guide.
Windows. Weatherstrip around the window sash (the sash is the part that moves) and apply caulk between the window frame and trim and between the trim and the wall.
Doors. Install weatherstripping at the tops and sides and a sweep at the base of the door. Install a door threshold if one doesn’t already exist and caulk or replace those that leak.
Electrical Outlets and Switches. Install foam or rubber gaskets behind the outlet and switch plate covers on all exterior walls.
Exhaust Fans, Pipes and Wires. Seal all gaps with spray foam.
Recessed Lights. These should not be caulked or foamed tight unless they are IC rated. Older cans that are not IC rated could overheat. If there is space, you can build a box out of 1 inch rigid foam insulation leaving a 4-6 inch air space around the light. Seal the box at all joints and to the back of the ceiling material. The best solution is to replace the light with a new IC ‘Air Loc’ model. These come with a gasket that seals the light fixture where it meets the drywall, minimizing air leakage.
Joints Between Different Types of Construction. Use caulk or spray foam to seal leaks.
Attic/Crawl Space/Basement. Use spray foam to seal irregular gaps around pipe and wire penetrations. Caulk is effective for small holes. In attics, crawlspaces and basements that have existing insulation, pull back the insulation during the sealing and then put it back when done.
Side Attic. Install wood blocking between open floor joists below the knee wall and seal any gaps with spray foam.
Fireplace and Duct Penetrations. If there is a large gap in the attic or basement next to a brick chimney, or ductwork, you’ll need to use a fire-rated sealant. If the gap is large, first install fitted sheet metal or cement board pieces to cover the opening and then seal the joints.
For a detailed home air sealing guide with excellent, full-color 'how-to' photos, go to www.energystar.gov and download the pdf file of "A Do-it-Yourself Guide to ENERGY STAR® Home Air Sealing".
7 green home | energy audit
9 green home | energy audit green home | energy audit 10
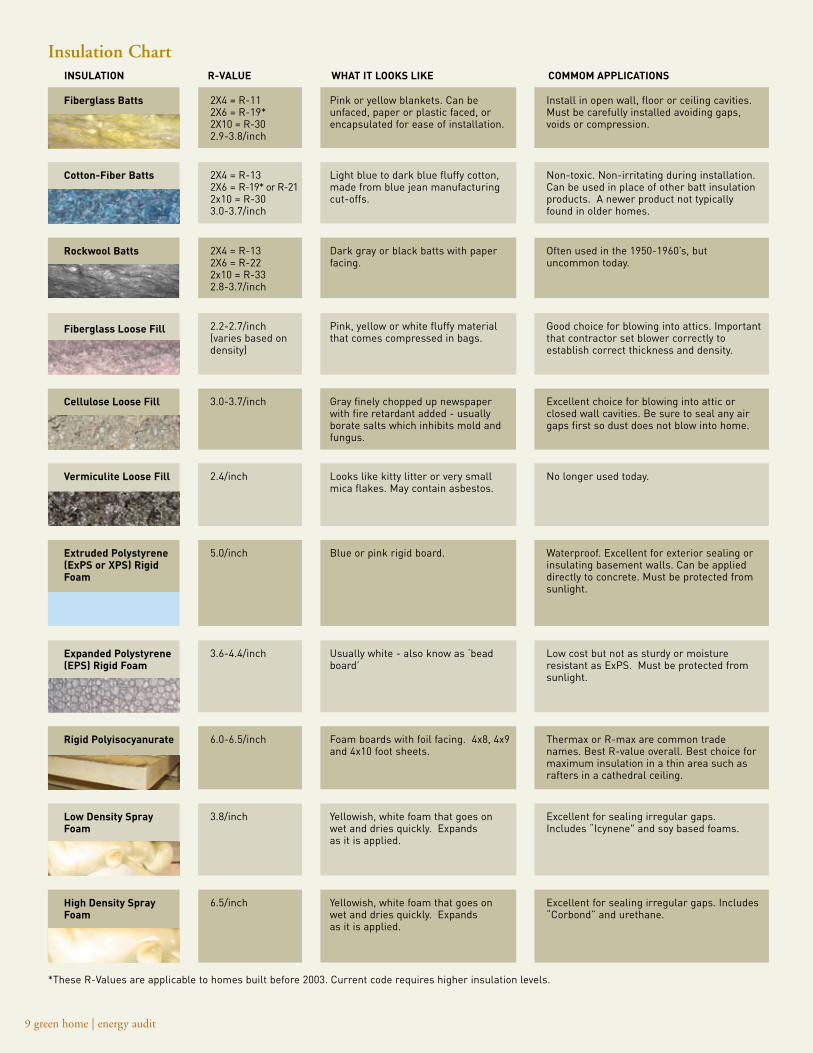
Fiberglass Batts 2X4 = R-112X6 = R-19*2X10 = R-302.9-3.8/inch
INSULATION R-VALUE WHAT IT LOOKS LIKE COMMOM APPLICATIONS
Pink or yellow blankets. Can beunfaced, paper or plastic faced, orencapsulated for ease of installation.
Install in open wall, floor or ceiling cavities. Must be carefully installed avoiding gaps, voids or compression.
Fiberglass Loose Fill 2.2-2.7/inch(varies based on density)
Pink, yellow or white fluffy material that comes compressed in bags.
Good choice for blowing into attics. Important that contractor set blower correctly to establish correct thickness and density.
Cellulose Loose Fill 3.0-3.7/inch Gray finely chopped up newspaper with fire retardant added - usually borate salts which inhibits mold and fungus.
Excellent choice for blowing into attic orclosed wall cavities. Be sure to seal any air gaps first so dust does not blow into home.
Rockwool Batts 2X4 = R-132X6 = R-222x10 = R-332.8-3.7/inch
Dark gray or black batts with paper facing.
Often used in the 1950-1960’s, but uncommon today.
Vermiculite Loose Fill 2.4/inch Looks like kitty litter or very small mica flakes. May contain asbestos.
No longer used today.
Low Density Spray Foam
3.8/inch Yellowish, white foam that goes onwet and dries quickly. Expandsas it is applied.
Excellent for sealing irregular gaps. Includes “Icynene" and soy based foams.
High Density Spray Foam
6.5/inch
Yellowish, white foam that goes onwet and dries quickly. Expandsas it is applied.
Excellent for sealing irregular gaps. Includes “Corbond” and urethane.
Extruded Polystyrene (ExPS or XPS) Rigid Foam
5.0/inch Blue or pink rigid board. Waterproof. Excellent for exterior sealing or insulating basement walls. Can be applied directly to concrete. Must be protected from sunlight.
Rigid Polyisocyanurate 6.0-6.5/inch Foam boards with foil facing. 4x8, 4x9 and 4x10 foot sheets.
Thermax or R-max are common trade names. Best R-value overall. Best choice for maximum insulation in a thin area such as rafters in a cathedral ceiling.
Cotton-Fiber Batts 2X4 = R-132X6 = R-19* or R-212x10 = R-303.0-3.7/inch
Light blue to dark blue fluffy cotton,made from blue jean manufacturing cut-offs.
Non-toxic. Non-irritating during installation. Can be used in place of other batt insulation products. A newer product not typically found in older homes.
What It IsInsulation slows the transfer of heat from the warm side to the cold side of a wall, ceiling or floor. Its purpose is to keep heat in during the winter and out during the summer. Placing insulation between living spaces and unheated areas produces a
protective shell around your home. Insulation products are rated by their resistance to heat flow, called R-Value. The higher the number, the more effective the insulation and the lower your energy bills. Most homes in the United States built before the 1970’s are poorly insulated, if at all. Modern energy codes require minimum levels of insulation.
How To Look For ItTo see if and how well your home is insulated you will be going to each area of your home’s envelope - walls, floors, ceilings - and looking at both the type of insulation installed and its thickness. Some areas may be easy to see, such as insulation in an
attic space. In other areas such as walls, you will need to probe behind the surface.
If you are unable to determine the insulation type and/or depth, such as in a flat roof or cantilevered ceiling, professional insulation contractors and energy raters will be able to investigate further with laser thermometers or an Infrared scanner. If your attic has no opening, you should make one yourself or have a contractor do it for you.
WALLSLiving AreasYou can often check for wall insulation by looking inside wall cavities behind outlet or switch covers. Make sure you choose walls next to the outside or next to an unheated area and not walls between heated rooms. You can expect insulation to be different in remodeled areas so be sure to include these as well. Before you begin, turn off electricity at the circuit breaker or fuse box. At each of the exterior walls you will be investigating, use your screwdriver to remove the cover plates from an electrical outlet or light switch.
1. Shine a flashlight into the opening between the electrical box and the edge of the wallboard or plaster to see if you can detect insulation.
2. If you are not sure if the wall is insulated, use a non-metal knitting needle, wood chopstick or wood skewer to gently and carefully probe the opening between the plaster and the long edge of the electrical box. This is an optional step as you can cause damage to electrical wiring if you probe improperly. There may be a small gap between the electrical box and the insulation, so be sure to check slightly away from the box. If any insulation is present, then the wall cavity is probably full.
3. Determine the type of insulation, whether it’s batt or loose fill, and its thickness. Use the insulation chart on page 9 to determine the R-Value.
4. Replace the cover plates and turn power back on.
Note: You may be able to determine whether your walls are insulated by checking from the outside. If you have wood siding, look along the siding for evidence of drilled and plugged holes. These holes suggest that insulation was blown in after the house was built, with either loose fill fiberglass or cellulose. If you know the depth of the wall, then you can use the insulation chart to estimate its R-Value. Attic If you have a heated room on your top floor, check to see if you have an unheated attic space to either side. The wall between the heated space and the cold attic to the sides (called the knee wall) should be insulated. If there is an access door to the side attic, you can check for insulation (and determine the depth) from the attic side. If the side attics are inaccessible, check from the inside using the method for walls, identified above, or cut out an access door.
BasementIf your basement is heated, the exterior walls should be insulated. There are two primary types of basement walls:
1. Concrete walls that extend the full height of the basement, with the joists for the first floor sitting directly on top of the concrete wall.
2. Concrete walls that extend only partway up, with a wood framed wall above (called a pony wall).
2006 Washington State Energy
Code insulation requirements
for residential construction:
■ Ceiling - R-38
■ Vaulted Ceiling - R-30
■ Walls - R-21
■ Basement Walls (below grade)
■ Interior - R-21
■ Exterior - R-10
■ Floor over unheated space - R-30
■ Perimeter slab on grade - R-10
(extend 2 feet down, or 2 feet
down and under slab combined)
Expanded Polystyrene (EPS) Rigid Foam
3.6-4.4/inch Usually white - also know as ‘bead board’
Low cost but not as sturdy or moisture resistant as ExPS. Must be protected from sunlight.
*These R-Values are applicable to homes built before 2003. Current code requires higher insulation levels.
Insulation Chart 2. Insulation

9 green home | energy audit green home | energy audit 10
Fiberglass Batts 2X4 = R-112X6 = R-19*2X10 = R-302.9-3.8/inch
INSULATION R-VALUE WHAT IT LOOKS LIKE COMMOM APPLICATIONS
Pink or yellow blankets. Can beunfaced, paper or plastic faced, orencapsulated for ease of installation.
Install in open wall, floor or ceiling cavities. Must be carefully installed avoiding gaps, voids or compression.
Fiberglass Loose Fill 2.2-2.7/inch(varies based on density)
Pink, yellow or white fluffy material that comes compressed in bags.
Good choice for blowing into attics. Important that contractor set blower correctly to establish correct thickness and density.
Cellulose Loose Fill 3.0-3.7/inch Gray finely chopped up newspaper with fire retardant added - usually borate salts which inhibits mold and fungus.
Excellent choice for blowing into attic orclosed wall cavities. Be sure to seal any air gaps first so dust does not blow into home.
Rockwool Batts 2X4 = R-132X6 = R-222x10 = R-332.8-3.7/inch
Dark gray or black batts with paper facing.
Often used in the 1950-1960’s, but uncommon today.
Vermiculite Loose Fill 2.4/inch Looks like kitty litter or very small mica flakes. May contain asbestos.
No longer used today.
Low Density Spray Foam
3.8/inch Yellowish, white foam that goes onwet and dries quickly. Expandsas it is applied.
Excellent for sealing irregular gaps. Includes “Icynene" and soy based foams.
High Density Spray Foam
6.5/inch
Yellowish, white foam that goes onwet and dries quickly. Expandsas it is applied.
Excellent for sealing irregular gaps. Includes “Corbond” and urethane.
Extruded Polystyrene (ExPS or XPS) Rigid Foam
5.0/inch Blue or pink rigid board. Waterproof. Excellent for exterior sealing or insulating basement walls. Can be applied directly to concrete. Must be protected from sunlight.
Rigid Polyisocyanurate 6.0-6.5/inch Foam boards with foil facing. 4x8, 4x9 and 4x10 foot sheets.
Thermax or R-max are common trade names. Best R-value overall. Best choice for maximum insulation in a thin area such as rafters in a cathedral ceiling.
Cotton-Fiber Batts 2X4 = R-132X6 = R-19* or R-212x10 = R-303.0-3.7/inch
Light blue to dark blue fluffy cotton,made from blue jean manufacturing cut-offs.
Non-toxic. Non-irritating during installation. Can be used in place of other batt insulation products. A newer product not typically found in older homes.
What It IsInsulation slows the transfer of heat from the warm side to the cold side of a wall, ceiling or floor. Its purpose is to keep heat in during the winter and out during the summer. Placing insulation between living spaces and unheated areas produces a
protective shell around your home. Insulation products are rated by their resistance to heat flow, called R-Value. The higher the number, the more effective the insulation and the lower your energy bills. Most homes in the United States built before the 1970’s are poorly insulated, if at all. Modern energy codes require minimum levels of insulation.
How To Look For ItTo see if and how well your home is insulated you will be going to each area of your home’s envelope - walls, floors, ceilings - and looking at both the type of insulation installed and its thickness. Some areas may be easy to see, such as insulation in an
attic space. In other areas such as walls, you will need to probe behind the surface.
If you are unable to determine the insulation type and/or depth, such as in a flat roof or cantilevered ceiling, professional insulation contractors and energy raters will be able to investigate further with laser thermometers or an Infrared scanner. If your attic has no opening, you should make one yourself or have a contractor do it for you.
WALLSLiving AreasYou can often check for wall insulation by looking inside wall cavities behind outlet or switch covers. Make sure you choose walls next to the outside or next to an unheated area and not walls between heated rooms. You can expect insulation to be different in remodeled areas so be sure to include these as well. Before you begin, turn off electricity at the circuit breaker or fuse box. At each of the exterior walls you will be investigating, use your screwdriver to remove the cover plates from an electrical outlet or light switch.
1. Shine a flashlight into the opening between the electrical box and the edge of the wallboard or plaster to see if you can detect insulation.
2. If you are not sure if the wall is insulated, use a non-metal knitting needle, wood chopstick or wood skewer to gently and carefully probe the opening between the plaster and the long edge of the electrical box. This is an optional step as you can cause damage to electrical wiring if you probe improperly. There may be a small gap between the electrical box and the insulation, so be sure to check slightly away from the box. If any insulation is present, then the wall cavity is probably full.
3. Determine the type of insulation, whether it’s batt or loose fill, and its thickness. Use the insulation chart on page 9 to determine the R-Value.
4. Replace the cover plates and turn power back on.
Note: You may be able to determine whether your walls are insulated by checking from the outside. If you have wood siding, look along the siding for evidence of drilled and plugged holes. These holes suggest that insulation was blown in after the house was built, with either loose fill fiberglass or cellulose. If you know the depth of the wall, then you can use the insulation chart to estimate its R-Value. Attic If you have a heated room on your top floor, check to see if you have an unheated attic space to either side. The wall between the heated space and the cold attic to the sides (called the knee wall) should be insulated. If there is an access door to the side attic, you can check for insulation (and determine the depth) from the attic side. If the side attics are inaccessible, check from the inside using the method for walls, identified above, or cut out an access door.
BasementIf your basement is heated, the exterior walls should be insulated. There are two primary types of basement walls:
1. Concrete walls that extend the full height of the basement, with the joists for the first floor sitting directly on top of the concrete wall.
2. Concrete walls that extend only partway up, with a wood framed wall above (called a pony wall).
2006 Washington State Energy
Code insulation requirements
for residential construction:
■ Ceiling - R-38
■ Vaulted Ceiling - R-30
■ Walls - R-21
■ Basement Walls (below grade)
■ Interior - R-21
■ Exterior - R-10
■ Floor over unheated space - R-30
■ Perimeter slab on grade - R-10
(extend 2 feet down, or 2 feet
down and under slab combined)
Expanded Polystyrene (EPS) Rigid Foam
3.6-4.4/inch Usually white - also know as ‘bead board’
Low cost but not as sturdy or moisture resistant as ExPS. Must be protected from sunlight.
*These R-Values are applicable to homes built before 2003. Current code requires higher insulation levels.
Insulation Chart 2. Insulation
green home | energy audit 12
Cathedral Ceiling or Flat RoofSloped or vaulted ceilings and flat roofs are difficult to check for insulation. You may find that removing a light fixture allows you to probe for insulation in the same manner as probing at electrical outlets worked at walls. It may be possible to remove a recessed can fixture to see inside the cavity. If you are unsure how to remove the fixture, you may want to seek the help of an electrician. If you determine that there is insulation in the ceiling, but can’t assess the depth from the interior, you can measure the depth of the rafters at the exterior eaves to determine it’s likely thickness. Note that the full depth of the rafters may not be filled with insulation and a properly insulated roof will have a 1 inch air space between the top of the insulation and the top of the rafters. Sometimes you have to make an estimate based on the date of construction and the codes at the time. Vaulted ceilings were required to have R-19 after 1980 and R-30 after 1990.
FLOORSUnheated Basement If your basement is unheated, the ceiling becomes part of the shell that encloses your heated space. If the ceiling is exposed, checking the insulation type and depth is straightforward. If there is a finished ceiling, look for any small exposed area or crack where you can insert your non-metal probe to check for the presence of insulation and measure its depth. As with a cathedral ceiling, you may be able to remove a light fixture to access the ceiling/floor cavity.
Heated Basement If the basement is heated by the same system that heats the rest of the house, the basement ceiling does not need insulation. However, basement ceiling insulation is recommended if there is a separate heating system just for the basement. By insulating between the two different heating zones, the basement can be kept at a different temperature than the remainder of the house or the heat to be turned off entirely when the space isn’t being used.
Crawl SpaceA crawl space is similar to an unheated basement with the ceiling acting as the building enclosure. To check the insulation, you’ll need to access the crawl space. Many homeowners have never entered their homes’ crawl spaces. It often involves crawling into a low dark place that may be a hiding place for bugs or rodents or their droppings. The ground may be wet and ducts and pipes may obstruct your view. But not knowing what is in your crawl space could be costing you hundreds of dollars a year.
Start by locating the access opening. It may be in the floor of your home in a closet, on the outside foundation wall or both. Be sure you have found all the access doors or ways to see unheated crawl spaces.
1. Measure the insulation depth between floor joists above you. Floor insulation material is usually fiberglass batts. Some homes have aluminum foil attached to the floor joists. This material alone does not provide adequate insulation. Make sure you probe for insulation under any covering. If the batt insulation has a paper or foil facing you, the batts have been installed backwards and should be reversed. (Moisture created inside the home can condense in the batts, and damage them.)
2. Check to make sure there are no gaps in insulation coverage. Even small gaps can increase heat loss significantly.
3. While in your crawl space, you may also want to check items identified in the Moisture Control and Space Heating sections.
Cantilevered FloorsCantilevered floors are a part of the home that jut out past the foundation wall. They are most common for bay windows, window seats or small bump-outs in living/dining rooms, kitchens or even a garage. Floor insulation for these areas is often overlooked. Check cantilevered areas for insulation and air leaks. At a cantilevered floor over a porch, garage or basement you may find a light fixture you can remove to probe for insulation.
What To Do About ItYou can increase the levels of insulation in any or all parts of your home by hiring a professional insulation contractor or by doing the work yourself. If you choose to do it yourself, see the resources section for information and how-to-guides and be certain
that you are well informed on proper installation techniques.
NOTE: Seal leaks before you insulate - sealing is more cost-effective than installing insulation.
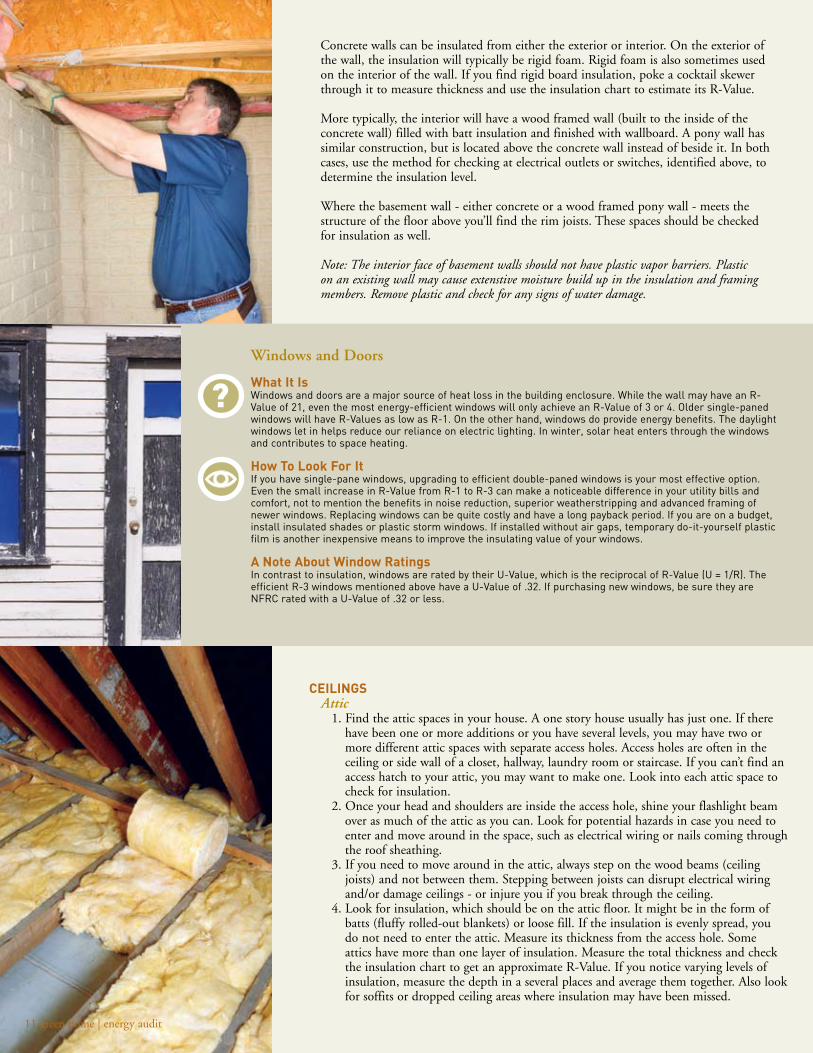
Concrete walls can be insulated from either the exterior or interior. On the exterior of the wall, the insulation will typically be rigid foam. Rigid foam is also sometimes used on the interior of the wall. If you find rigid board insulation, poke a cocktail skewer through it to measure thickness and use the insulation chart to estimate its R-Value.
More typically, the interior will have a wood framed wall (built to the inside of the concrete wall) filled with batt insulation and finished with wallboard. A pony wall has similar construction, but is located above the concrete wall instead of beside it. In both cases, use the method for checking at electrical outlets or switches, identified above, to determine the insulation level.
Where the basement wall - either concrete or a wood framed pony wall - meets the structure of the floor above you’ll find the rim joists. These spaces should be checked for insulation as well.
Note: The interior face of basement walls should not have plastic vapor barriers. Plastic on an existing wall may cause extenstive moisture build up in the insulation and framing members. Remove plastic and check for any signs of water damage.
Windows and doors
What It Is Windows and doors are a major source of heat loss in the building enclosure. While the wall may have an R-Value of 21, even the most energy-efficient windows will only achieve an R-Value of 3 or 4. Older single-paned windows will have R-Values as low as R-1. On the other hand, windows do provide energy benefits. The daylight windows let in helps reduce our reliance on electric lighting. In winter, solar heat enters through the windows and contributes to space heating.
How To Look For ItIf you have single-pane windows, upgrading to efficient double-paned windows is your most effective option. Even the small increase in R-Value from R-1 to R-3 can make a noticeable difference in your utility bills and comfort, not to mention the benefits in noise reduction, superior weatherstripping and advanced framing of newer windows. Replacing windows can be quite costly and have a long payback period. If you are on a budget, install insulated shades or plastic storm windows. If installed without air gaps, temporary do-it-yourself plastic film is another inexpensive means to improve the insulating value of your windows.
A Note About Window RatingsIn contrast to insulation, windows are rated by their U-Value, which is the reciprocal of R-Value (U = 1/R). The efficient R-3 windows mentioned above have a U-Value of .32. If purchasing new windows, be sure they are NFRC rated with a U-Value of .32 or less.
CEILINGSAttic
1. Find the attic spaces in your house. A one story house usually has just one. If there have been one or more additions or you have several levels, you may have two or more different attic spaces with separate access holes. Access holes are often in the ceiling or side wall of a closet, hallway, laundry room or staircase. If you can’t find an access hatch to your attic, you may want to make one. Look into each attic space to check for insulation.
2. Once your head and shoulders are inside the access hole, shine your flashlight beam over as much of the attic as you can. Look for potential hazards in case you need to enter and move around in the space, such as electrical wiring or nails coming through the roof sheathing.
3. If you need to move around in the attic, always step on the wood beams (ceiling joists) and not between them. Stepping between joists can disrupt electrical wiring and/or damage ceilings - or injure you if you break through the ceiling.
4. Look for insulation, which should be on the attic floor. It might be in the form of batts (fluffy rolled-out blankets) or loose fill. If the insulation is evenly spread, you do not need to enter the attic. Measure its thickness from the access hole. Some attics have more than one layer of insulation. Measure the total thickness and check the insulation chart to get an approximate R-Value. If you notice varying levels of insulation, measure the depth in a several places and average them together. Also look for soffits or dropped ceiling areas where insulation may have been missed.
11 green home | energy audit Photo right bottom: Owens Corning
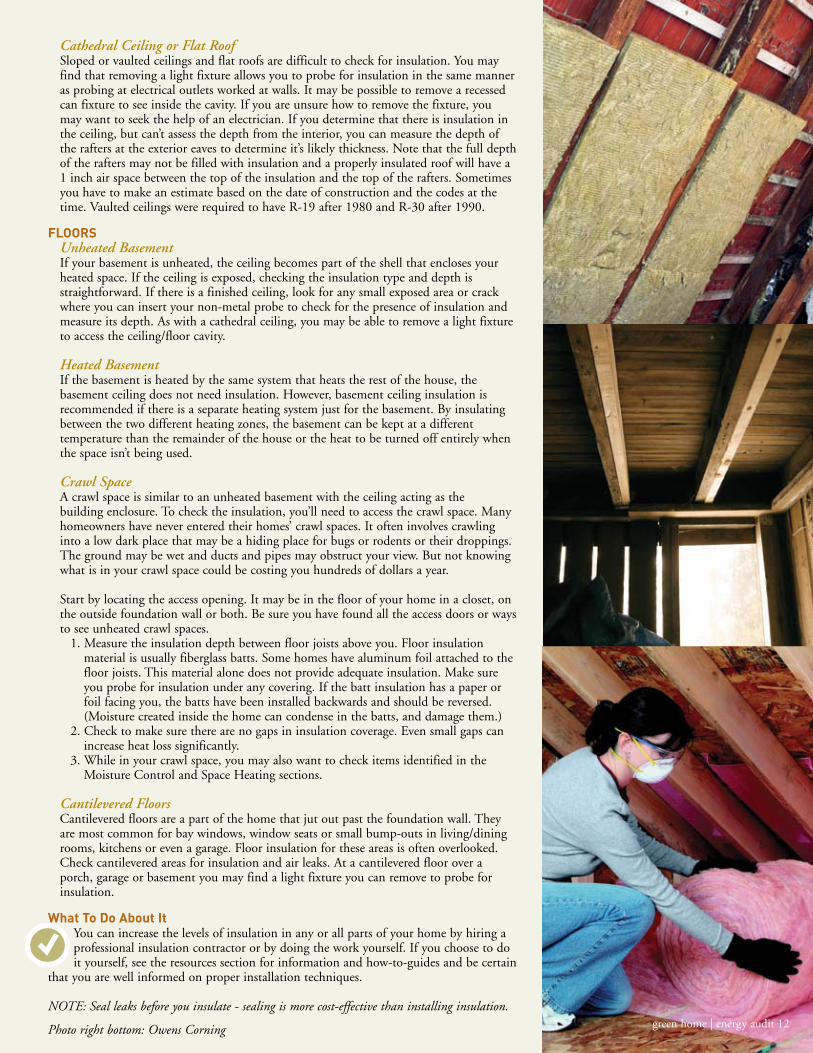
green home | energy audit 12
Cathedral Ceiling or Flat RoofSloped or vaulted ceilings and flat roofs are difficult to check for insulation. You may find that removing a light fixture allows you to probe for insulation in the same manner as probing at electrical outlets worked at walls. It may be possible to remove a recessed can fixture to see inside the cavity. If you are unsure how to remove the fixture, you may want to seek the help of an electrician. If you determine that there is insulation in the ceiling, but can’t assess the depth from the interior, you can measure the depth of the rafters at the exterior eaves to determine it’s likely thickness. Note that the full depth of the rafters may not be filled with insulation and a properly insulated roof will have a 1 inch air space between the top of the insulation and the top of the rafters. Sometimes you have to make an estimate based on the date of construction and the codes at the time. Vaulted ceilings were required to have R-19 after 1980 and R-30 after 1990.
FLOORSUnheated Basement If your basement is unheated, the ceiling becomes part of the shell that encloses your heated space. If the ceiling is exposed, checking the insulation type and depth is straightforward. If there is a finished ceiling, look for any small exposed area or crack where you can insert your non-metal probe to check for the presence of insulation and measure its depth. As with a cathedral ceiling, you may be able to remove a light fixture to access the ceiling/floor cavity.
Heated Basement If the basement is heated by the same system that heats the rest of the house, the basement ceiling does not need insulation. However, basement ceiling insulation is recommended if there is a separate heating system just for the basement. By insulating between the two different heating zones, the basement can be kept at a different temperature than the remainder of the house or the heat to be turned off entirely when the space isn’t being used.
Crawl SpaceA crawl space is similar to an unheated basement with the ceiling acting as the building enclosure. To check the insulation, you’ll need to access the crawl space. Many homeowners have never entered their homes’ crawl spaces. It often involves crawling into a low dark place that may be a hiding place for bugs or rodents or their droppings. The ground may be wet and ducts and pipes may obstruct your view. But not knowing what is in your crawl space could be costing you hundreds of dollars a year.
Start by locating the access opening. It may be in the floor of your home in a closet, on the outside foundation wall or both. Be sure you have found all the access doors or ways to see unheated crawl spaces.
1. Measure the insulation depth between floor joists above you. Floor insulation material is usually fiberglass batts. Some homes have aluminum foil attached to the floor joists. This material alone does not provide adequate insulation. Make sure you probe for insulation under any covering. If the batt insulation has a paper or foil facing you, the batts have been installed backwards and should be reversed. (Moisture created inside the home can condense in the batts, and damage them.)
2. Check to make sure there are no gaps in insulation coverage. Even small gaps can increase heat loss significantly.
3. While in your crawl space, you may also want to check items identified in the Moisture Control and Space Heating sections.
Cantilevered FloorsCantilevered floors are a part of the home that jut out past the foundation wall. They are most common for bay windows, window seats or small bump-outs in living/dining rooms, kitchens or even a garage. Floor insulation for these areas is often overlooked. Check cantilevered areas for insulation and air leaks. At a cantilevered floor over a porch, garage or basement you may find a light fixture you can remove to probe for insulation.
What To Do About ItYou can increase the levels of insulation in any or all parts of your home by hiring a professional insulation contractor or by doing the work yourself. If you choose to do it yourself, see the resources section for information and how-to-guides and be certain
that you are well informed on proper installation techniques.
NOTE: Seal leaks before you insulate - sealing is more cost-effective than installing insulation.
Concrete walls can be insulated from either the exterior or interior. On the exterior of the wall, the insulation will typically be rigid foam. Rigid foam is also sometimes used on the interior of the wall. If you find rigid board insulation, poke a cocktail skewer through it to measure thickness and use the insulation chart to estimate its R-Value.
More typically, the interior will have a wood framed wall (built to the inside of the concrete wall) filled with batt insulation and finished with wallboard. A pony wall has similar construction, but is located above the concrete wall instead of beside it. In both cases, use the method for checking at electrical outlets or switches, identified above, to determine the insulation level.
Where the basement wall - either concrete or a wood framed pony wall - meets the structure of the floor above you’ll find the rim joists. These spaces should be checked for insulation as well.
Note: The interior face of basement walls should not have plastic vapor barriers. Plastic on an existing wall may cause extenstive moisture build up in the insulation and framing members. Remove plastic and check for any signs of water damage.
Windows and doors
What It Is Windows and doors are a major source of heat loss in the building enclosure. While the wall may have an R-Value of 21, even the most energy-efficient windows will only achieve an R-Value of 3 or 4. Older single-paned windows will have R-Values as low as R-1. On the other hand, windows do provide energy benefits. The daylight windows let in helps reduce our reliance on electric lighting. In winter, solar heat enters through the windows and contributes to space heating.
How To Look For ItIf you have single-pane windows, upgrading to efficient double-paned windows is your most effective option. Even the small increase in R-Value from R-1 to R-3 can make a noticeable difference in your utility bills and comfort, not to mention the benefits in noise reduction, superior weatherstripping and advanced framing of newer windows. Replacing windows can be quite costly and have a long payback period. If you are on a budget, install insulated shades or plastic storm windows. If installed without air gaps, temporary do-it-yourself plastic film is another inexpensive means to improve the insulating value of your windows.
A Note About Window RatingsIn contrast to insulation, windows are rated by their U-Value, which is the reciprocal of R-Value (U = 1/R). The efficient R-3 windows mentioned above have a U-Value of .32. If purchasing new windows, be sure they are NFRC rated with a U-Value of .32 or less.
CEILINGSAttic
1. Find the attic spaces in your house. A one story house usually has just one. If there have been one or more additions or you have several levels, you may have two or more different attic spaces with separate access holes. Access holes are often in the ceiling or side wall of a closet, hallway, laundry room or staircase. If you can’t find an access hatch to your attic, you may want to make one. Look into each attic space to check for insulation.
2. Once your head and shoulders are inside the access hole, shine your flashlight beam over as much of the attic as you can. Look for potential hazards in case you need to enter and move around in the space, such as electrical wiring or nails coming through the roof sheathing.
3. If you need to move around in the attic, always step on the wood beams (ceiling joists) and not between them. Stepping between joists can disrupt electrical wiring and/or damage ceilings - or injure you if you break through the ceiling.
4. Look for insulation, which should be on the attic floor. It might be in the form of batts (fluffy rolled-out blankets) or loose fill. If the insulation is evenly spread, you do not need to enter the attic. Measure its thickness from the access hole. Some attics have more than one layer of insulation. Measure the total thickness and check the insulation chart to get an approximate R-Value. If you notice varying levels of insulation, measure the depth in a several places and average them together. Also look for soffits or dropped ceiling areas where insulation may have been missed.
11 green home | energy audit Photo right bottom: Owens Corning

13 green home | energy audit green home | energy audit 14
3. Moisture Control
What It Is Excessive moisture is a precursor to mold and mildew. Excessive moisture shows up on windows that “sweat” and as mold on walls. Moisture can enter from the exterior, from roof leaks, cracked foundations, uncovered dirt flooring in the crawlspace, blocked
gutters, exhaust fans that are vented into the attic, vegetation too close to the house or poor attic or crawl space ventilation. Moisture is also generated inside the home from cooking, bathing and breathing - normal daily household activities. This moist air can then enter walls and ceiling cavities through unsealed cracks.
If your house does not have eaves, it is especially prone to having wet walls. In the 40's, homes were often built without eaves. Gutters were installed where the wall and roof intersected, allowing rain to easily pass behind the gutter and drip directly into the wall cavity, causing mold and mildew and making the home harder to heat.
Proper attic or crawl space ventilation is critical for keeping air circulating in your attic and crawl space areas. It may seem counter-intuitive to encourage cold air to enter attic or crawl spaces, but good venting removes water vapor before it has the opportunity to condense and ruin insulation and the wood structure of your home.
How To Look For It Inspect the outside of your home, along with your attic and crawl space, for possible moisture problems. 1. Check roof, gutters and foundation for cracks and leaks.
2. Note trees and bushes that touch walls or roof or hang over the gutters. They will need to be trimmed back.
3. Look in your attic to ensure that any fans are ducted to vent to the exterior, NOT into the attic itself.
4. Look around the entire perimeter of your crawl space foundation for vents. Count the number and measure their openings in square inches. You need one square foot of net free area for every 300 square feet of crawl space. Net free area refers to the size without the interference of screens or louvers. Subtract about half the total opening size to get an approximate net free area.
5. Check to see if there is a plastic ground cover in your crawl space. It should cover every inch of dirt. Even small gaps can contribute to moisture problems inside your home.
6. While in the crawlspace, check to see that all vents are clear of debris, blocking or insulation. Vents should never be covered, even in winter.
7. Look on your roof, under your eaves or on the gable ends for attic vents. Attic ventilation should be at least one square foot of net free area for every 300 square feet of attic area when half the vents are placed low and half the vents are placed high. Double that amount if you do not have a combination of high and low vents. Examples of low vents are soffit and eave vents covered with louvers or screens. High venting includes roof jacks, and gable vents and ridge vents.
Inspect the inside of your home for possible moisture problems or leaks.1. Check all exterior walls from the inside for any sign of mold or mildew. Don't forget
closets where there may be poor air circulation.2. Check plumbing fixtures, clothes washers and water heaters for evidence of leaks:
swollen materials, rust, cracked or missing caulk or blistered paint.3. Check your exhaust fans to see if they work. With your fans on, hold a light plastic bag
over each one to see if it pulls the bag upwards.
What To Do About It1. Seal all leaks in the building envelope. Before adding wall insulation to an older home, first repair all gutter, roof, and wall flashings.2. Bring crawl space and attic ventilation up to code. Repair broken vent screens and clear away anything blocking airflow. Never add insulation without providing adequate ventilation at the same time.
3. Where they don't already exist, install ventilation fans - vented to the exterior - at baths and ranges.
4. If existing fans are vented into the attic space, install ductwork to vent them through the roof to the outside.
5. Use your kitchen and bath exhaust fans whenever you are cooking or bathing.
Combustion Safety
Gas and oil combustion
appliances require air to burn
fuel. Appliances with a sealed
combustion system have a separate
air intake vent (a sealed duct
or pipe) which supplies air
from outdoors. However, some
combustion appliances use air
from inside the house to support
combustion. In a well air sealed
house, kitchen hoods, bath
exhaust fans and clothes dryers
can create negative pressures
within the house that can cause
dangerous back drafting in which
combustion gases are pulled back
into the living space. Before
performing any air sealing,
ensure that you have either sealed
combustion appliances, or that
there is an alternate means (e.g.
wall vents) for the appliance to
draw outside air. In all cases
combustion appliances must
exhaust their combustion gases
to the outdoors via an exhaust
vent. Call a furnace or water
heater professional if you suspect
that any combustion appliance
is not properly exhausting to the
outdoors, or if you see any damage
to the vent pipes.
space and water heating1. Space heating
What It IsAn estimated 40% of home energy use is for space heating. If your heating system is not working efficiently, as much as 30% to 50% of this energy is wasted. The following information will help you assess your heating system’s efficiency.
Heating System Types:A Central System is one in which air or water is heated in one area and then distributed by a fan or pump to each part of the home. The temperature for the spaces served by the system is usually controlled by one thermostat centrally located. These systems include furnaces and heat pumps that push heated air through ducts (central forced air), and boilers that pump heated water through room radiators or pipes in baseboards, or within floors or ceilings. Common fuels are gas, oil or electricity.
A Zone System is one in which the heating units are contained in each room or space, and the temperature is controlled by its own thermostat. The most common types of zone systems are electric baseboard heaters, wall fans and radiant floor pipes (such as in a bathroom). Zone units are most commonly electric resistance, but may also use circulating water heated by gas or oil.
How To Look For ItCentral Forced Air (ducts in attic, basement and crawl spaces)1. Determine when your furnace was last inspected and cleaned. Look for a record
of inspections on the side of the equipment.2. Check to see if air filters are clean.3. If your ductwork runs through un-heated spaces (such as an un-heated basement
or crawlspace), check for insulation and determine its depth and R-Value. NOTE: If you suspect that ducts or pipes are insulated with asbestos, do not touch it! Call a professional for an assessment. It must be removed by certified asbestos contractors who know how to contain it so no particles escape into your home.
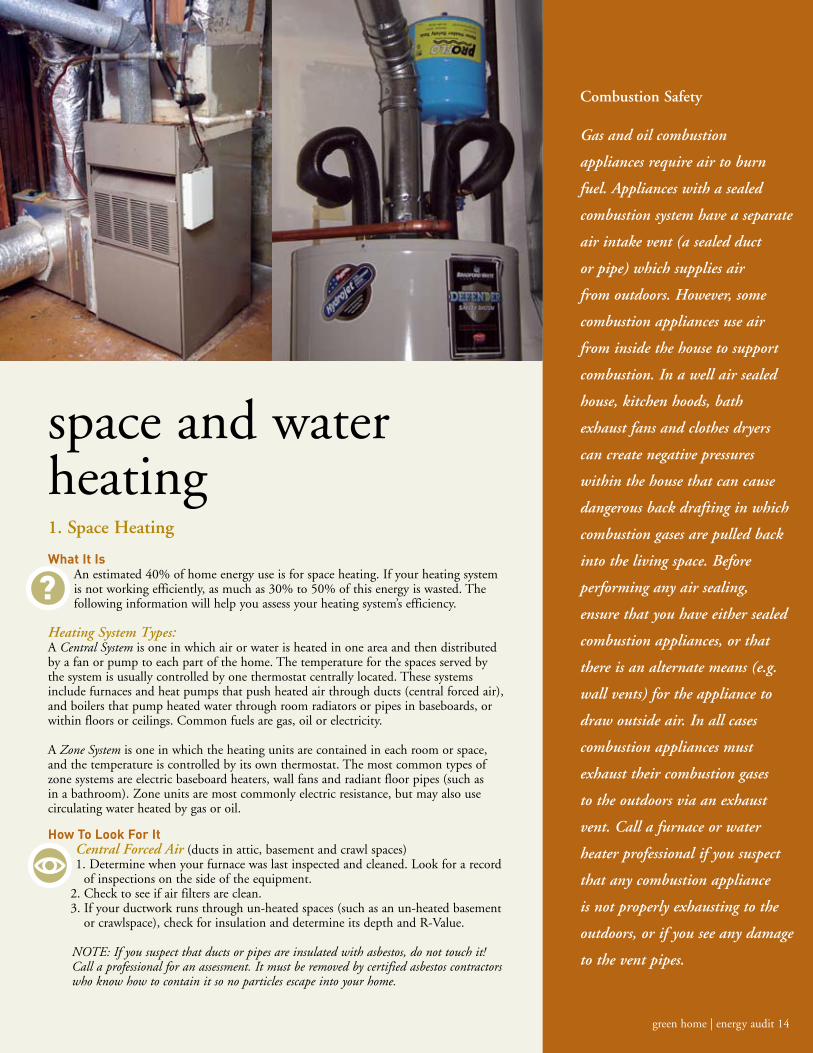
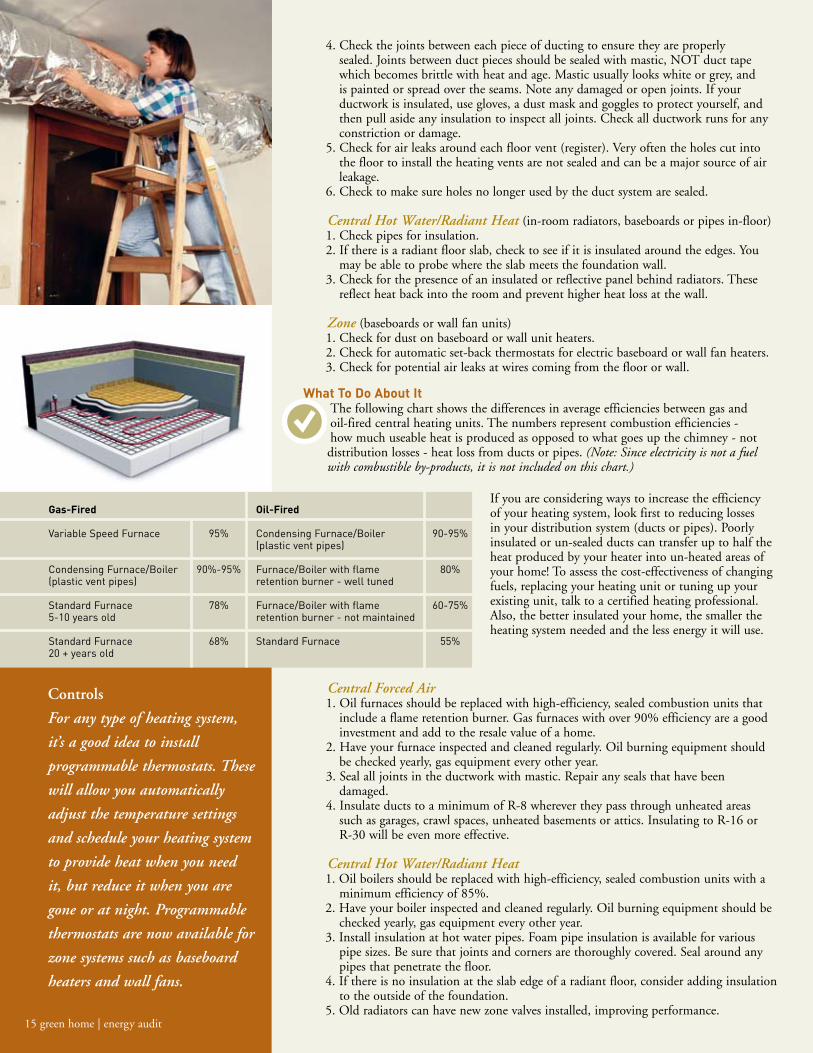
If you are considering ways to increase the efficiency of your heating system, look first to reducing losses in your distribution system (ducts or pipes). Poorly insulated or un-sealed ducts can transfer up to half the heat produced by your heater into un-heated areas of your home! To assess the cost-effectiveness of changing fuels, replacing your heating unit or tuning up your existing unit, talk to a certified heating professional. Also, the better insulated your home, the smaller the heating system needed and the less energy it will use.
Central Forced Air 1. Oil furnaces should be replaced with high-efficiency, sealed combustion units that
include a flame retention burner. Gas furnaces with over 90% efficiency are a good investment and add to the resale value of a home.
2. Have your furnace inspected and cleaned regularly. Oil burning equipment should be checked yearly, gas equipment every other year.
3. Seal all joints in the ductwork with mastic. Repair any seals that have been damaged.
4. Insulate ducts to a minimum of R-8 wherever they pass through unheated areas such as garages, crawl spaces, unheated basements or attics. Insulating to R-16 or R-30 will be even more effective.
Central Hot Water/Radiant Heat1. Oil boilers should be replaced with high-efficiency, sealed combustion units with a
minimum efficiency of 85%. 2. Have your boiler inspected and cleaned regularly. Oil burning equipment should be
checked yearly, gas equipment every other year. 3. Install insulation at hot water pipes. Foam pipe insulation is available for various
pipe sizes. Be sure that joints and corners are thoroughly covered. Seal around any pipes that penetrate the floor.
4. If there is no insulation at the slab edge of a radiant floor, consider adding insulation to the outside of the foundation.
5. Old radiators can have new zone valves installed, improving performance.
Controls
For any type of heating system,
it’s a good idea to install
programmable thermostats. These
will allow you automatically
adjust the temperature settings
and schedule your heating system
to provide heat when you need
it, but reduce it when you are
gone or at night. Programmable
thermostats are now available for
zone systems such as baseboard
heaters and wall fans.
15 green home | energy audit
4. Check the joints between each piece of ducting to ensure they are properly sealed. Joints between duct pieces should be sealed with mastic, NOT duct tape which becomes brittle with heat and age. Mastic usually looks white or grey, and is painted or spread over the seams. Note any damaged or open joints. If your ductwork is insulated, use gloves, a dust mask and goggles to protect yourself, and then pull aside any insulation to inspect all joints. Check all ductwork runs for any constriction or damage.
5. Check for air leaks around each floor vent (register). Very often the holes cut into the floor to install the heating vents are not sealed and can be a major source of air leakage.
6. Check to make sure holes no longer used by the duct system are sealed.
Central Hot Water/Radiant Heat (in-room radiators, baseboards or pipes in-floor)1. Check pipes for insulation.2. If there is a radiant floor slab, check to see if it is insulated around the edges. You
may be able to probe where the slab meets the foundation wall. 3. Check for the presence of an insulated or reflective panel behind radiators. These
reflect heat back into the room and prevent higher heat loss at the wall.
Zone (baseboards or wall fan units)1. Check for dust on baseboard or wall unit heaters.2. Check for automatic set-back thermostats for electric baseboard or wall fan heaters.3. Check for potential air leaks at wires coming from the floor or wall.
What To Do About ItThe following chart shows the differences in average efficiencies between gas and oil-fired central heating units. The numbers represent combustion efficiencies - how much useable heat is produced as opposed to what goes up the chimney - not distribution losses - heat loss from ducts or pipes. (Note: Since electricity is not a fuel with combustible by-products, it is not included on this chart.)
Zone 1. Keep furniture at least 12” away from baseboards and wall unit heaters and keep
them free of dust for more effective heat flow.2. Seal any holes or gaps around wires coming from the floor or wall.
green home | energy audit 16
2. Water heating
What It Is Heating water for bathing and washing accounts for as much as 15% to 30% of your household energy use.
How To Look For It1. Check your water temperature. It should be between 120°F and 130°F (this also prevents scalding). Water heater thermostat settings are often inaccurate. Run hot tap water over a candy or meat thermometer to verify temperature. Most hot water tanks have two thermostats and both should be set at the same temperature.
2. Most water heaters manufactured in the last 10 years have adequate insulation under the shell however, older units may not. Put your hand on the shell. If it feels warm, it should have an insulating blanket around it.
3. Look at the hot and cold water pipes. All exposed hot water pipes and the first five feet of the cold water pipe should be insulated. Foam pipe insulation is available for various pipe sizes.
4. Check to see if showerheads and kitchen and bath faucet aerators are low-flow models. The GPM (gallons per minute) rating may be on the side of the aerator. New products must be 2.5 GPM or less.
What To Do About It1. Install new faucet aerators and low-flow showerheads to save on both energy and water. The following new, lower flow-rate products are readily available and deliver excellent results - most folks don’t notice a difference. Check with your local electric or water utility to see if they provide them at no or low cost.■ Showerheads — 1.5 - 2.2 GPM■ Kitchen faucet aerators — 1.5 - 2.2 GPM■ Bathroom faucet aerators — 0.8 - 1.5 GPM
2. Install heat traps and an insulation blanket if you have a water heater that is more than 15 years old.
3. Replacement tanks should have an EF (Energy Factor) rating of over .62 for gas and .93 for electric. Gas-heated tankless water heaters can save about 20%. Check with your gas or electric utility for efficiency rebates.
Consider installing solar hot water - some homeowners are getting up to 70% of their water heat from the sun - even in Seattle!
Space Cooling
When it’s hot outside, heat will enter a home through windows, walls, the roof and air leaks. The chimney effect can reverse and pull hot air in at the top as the heavier cool air “falls out” of leaks at the lower part of a home. In the Puget Sound Area, if your home is well insulated and adequately sealed, and there is good ventilation, you generally do not need air conditioning. If you do have a room that is hot, try to control the problem by reducing the heat gain rather than buying a room air conditioner. Air conditioners use a lot of power!
1. Use deciduous trees and shrubs to shade sunny walls, windows, and walkways. Vegetation not only creates shade, but its constant evaporation helps cool the surrounding air, so try to bring in ventilation air from below or near trees.
2. Add overhangs to south windows. If designed correctly, they will allow the sun’s rays to enter in the winter but block them in the summer.
3. Shades can also be used on south and west windows to keep heat out, but only if installed on the exterior of the window. Mesh shade cloth can block heat, but still allow a view. Another option is roll down bamboo shades hung from the eaves.
4. If your roof is black, it will absorb the heat of the sun and re-radiate it into your home. If possible, install a radiant barrier, a shiny foil surface, to the bottom side of rafters on a south roof. Be sure there is good air flow through the air space in front of the foil. Proper attic ventilation, discussed in the Moisture Control section, can also greatly increase summer comfort by allowing the warm air in the attic to exhaust to the exterior before it enters the interior spaces below.
If you must use an air conditioner replace any model older than 2000 with an ENERGY STAR® unit.
Gas-Fired Oil-Fired
Variable Speed Furnace 95% Condensing Furnace/Boiler 90-95% (plastic vent pipes)
Condensing Furnace/Boiler 90%-95% Furnace/Boiler with flame 80% (plastic vent pipes) retention burner - well tuned
Standard Furnace 78% Furnace/Boiler with flame 60-75% 5-10 years old retention burner - not maintained
Standard Furnace 68% Standard Furnace 55% 20 + years old
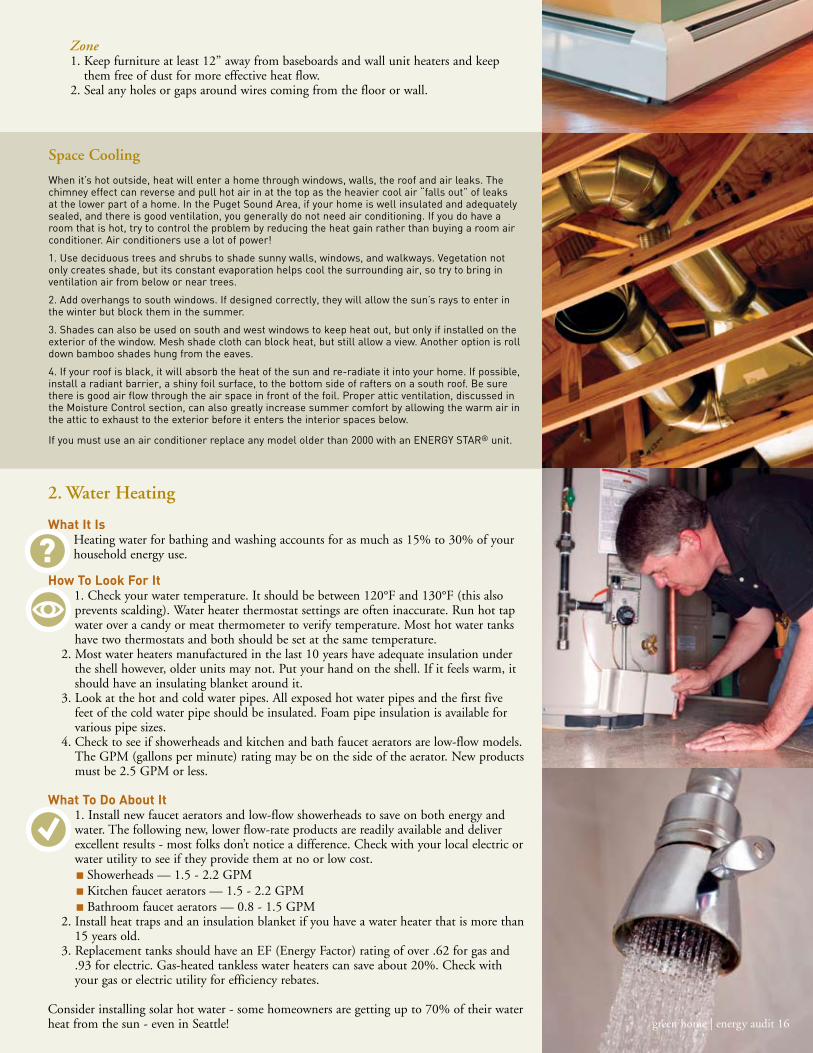

green home | energy audit 1817 green home | energy audit
Case Study
A 1956 brick-faced home
in Seattle was purchased
by a new buyer in 2007. It
had only about 3” of attic
insulation and no wall
insulation. Floors over a
partial crawl space were
insulated with R-19, but the
concrete walls of the heated
basement had none nor did
some short walls separating the
crawl space from the heated
basement. The furnace was
relatively new, a standard
model about 80% efficient.
Air sealing in the attic and
floor along with sealing/
insulating the air ducts in the
crawlspace were judged a high
priority. Analysis showed this
home could see a 46% savings
for an investment under
$6,000--a return of nearly
20%. Rising energy prices in
the future would only improve
these numbers.
paybacksPayback is an estimate of how long it will take to save enough energy to pay for the cost of a conservation measure. A payback calculation will help you decide which upgrades to prioritize. Sealing up air leaks and duct-sealing are low cost measures and usually come in first place for payback. Air infiltration can be up to a third of a home’s heating load. Insulation, especially in walls or basements that have none, is an excellent investment.
When looking at how much an investment may save, consider the source of information. Someone selling a product may overestimate the savings of that product or miss lower cost measures. Information from your local utility or engaging the services of a professional can help you with unbiased information.
We recommend doing those improvements first that cost the least and save the most energy. The following list of energy conservation measures are arranged in the order of their payback.
A. Energy Measures that Save a lot and have little or no Cost■ Keep your home at or below 68°F.■ Lower heating thermostat 10°F at night and when home is unoccupied.■ Close fireplace damper when fireplace is not in use.■ Replace furnace air filters regularly. ■ Lower water heater thermostats to 120°F.■ Insulate hot water pipes and install heat trap fittings at flex connections. Insulate the
first five feet of cold line.■ Install low flow efficient showerheads and faucet aerators.■ Install gaskets behind electric outlets and switch plates on exterior walls.■ Seal air leaks to attic and crawl space with spray foam. ■ Caulk and weatherstrip windows, doors, cracks and holes.■ Dust baseboard and wall heaters.
B. Energy Measures with an Estimated one to two-year payback■ Install programmable thermostats. ■ Have a blower door test conducted to assist with air sealing.■ Install do-it-yourself plastic storm windows.■ Repair fireplace damper seal.■ Install compact fluorescent lights in all fixtures.■ Install dimmer switches, photocells, timers and motion detectors.■ Install do-it-yourself insulated panel or cover to seal fireplace when not in use.■ Tune up heating and cooling equipment.■ Insulate and air seal rim joist area in basement.
C. Energy Measures with an Estimated two to five-year payback■ Insulate walls in a heated basement, and the rim joist of an un-heated basement or
crawl space.■ Install attic insulation to achieve a minimum R-38. ■ Install underfloor insulation to achieve a minimum R-30. ■ Install fireplace modifications such as glass doors, flue top damper and outside
combustion air.■ Install do-it-yourself insulated window shades or shutters.■ Install wall insulation in un-insulated exterior walls.■ Install do-it-yourself solar warm air panel or hot water preheat.
d. Energy Measures with an Estimated payback of More than five years■ Install commercial storm windows.■ Replace existing single-pane windows with new double, or even triple-pane, windows.■ Replace older furnace or boiler with a 90%+ condensing unit.■ Install a fireplace insert into an existing fireplace.■ Install an energy efficient hot water tank or tankless hot water heater.■ Replace conventional oil furnace burner with a new flame retention burner.■ Install active solar hot water system.
Case Study
A 1925 home had a new high
efficiency boiler but needed
significant air sealing in the
floor, attic and on the windows
to a glassed-in porch. It had
no wall insulation and floor
insulation was very limited.
In addition, there was asbestos
material in the unheated
basement left when the old boiler
was removed. This made air
sealing the floor very important
for air quality. Replacement
was recommended for the front
door and several of the largest
old windows. Energy modeling
predicted a 33% savings for
the investment of about $7000
in this package - about a 13%
return on investment. The south
exposure was excellent and hot
water use fairly high, so the
audit recommended adding solar
hot water as well. This brought
the total savings to about 40%
with a $13,000 investment - a
return of about 7%.
terms to knowR-Value is the resistance to heat loss. It indicates how well insulation resists heat movement. A bigger number means better insulation. Common R-Values are R-21 for fiberglass batts in 2x6 walls, R-38 for 12-16” of attic insulation, and R-30 for 10” thick floor insulation batts.
U-Value is how a material transmits heat - simply the inverse of R-Value (U = 1/R). In this case, a lower number is better. U-Values are found on windows and some doors. ENERGY STAR® windows are now U-0.35 or less. Super efficient triple-pane windows can be as low as U-.17. Old double pane-windows are about U-.60 and single-pane may be over U-1.2
NFRC ratings are required on new manufactured windows and doors. Look for a certification sticker showing the U-Value at the upper left. The sticker will also show the solar heat gain coefficient (SHGC) which identifies the percentage of solar heat that will enter through the window, and visible light transmission (VT), a measure of how much daylight comes through. Windows with a low SHGC are effective at keeping the home cool, especially when used on the south and west orientation.
AFUE (Annual Fuel Use Efficiency) measures how much of the energy in the natural gas or oil is coming into the home as useful heat. A 94% efficient furnace loses only 6% of the energy in the gas or oil up the chimney vent. Old systems may run at 65% AFUE with almost 35% wasted heat. You will notice how much cooler the vent pipe of a modern furnace is. Boilers and some fireplaces also have AFUE ratings.
SEER (Seasonal Energy Efficiency Ratio) is the standard for air conditioning efficiency. It is the ratio of the cooling capacity to the power input. The higher the number the more cooling is achieved for each watt of electricity. This has improved substantially in recent years. The federal standard is now SEER 14 which used to be only the super efficient models. SEER 19 or higher units are now available.
HSPF (Heating Season Performance Factor) is the most important measure for heat pumps. Heat pumps also have a SEER for their air conditioning function, but we don’t need much AC here, so we focus on HSPF. The federal standard is now 7.8 HSPF and ENERGY STAR® models are above 8.5 HSPF.
EF (Energy Factor) is the measure for the overall efficiency of water heaters. It includes the pilot light and standby loss from a tank. Standard gas hot water tanks have been about EF .58 - or about 58% efficient. High efficiency gas tanks above .62 EF and electric tanks above .93 EF qualify for utility rebates. Tankless water heaters range from .79 - .86 EF, while some condensing boilers and water tanks reach above .90 EF.
GPM (Gallons Per Minute) is the water flow rate for faucet aerators and showerheads. The code requires that all plumbing fixtures must be 2.5 GPM or less, but showerheads are available that work well at 1.6 GPM and aerators that work well at 0.8 GPM.
Heat Traps – valves or loops of pipe – allow water to flow into the water heater tank but prevent unwanted hot-water flow out of the tank. The valves have balls inside that either float or sink into a seat, which stops convection. These specially designed valves come in pairs. The valves are designed differently for use in either the hot or cold water line.
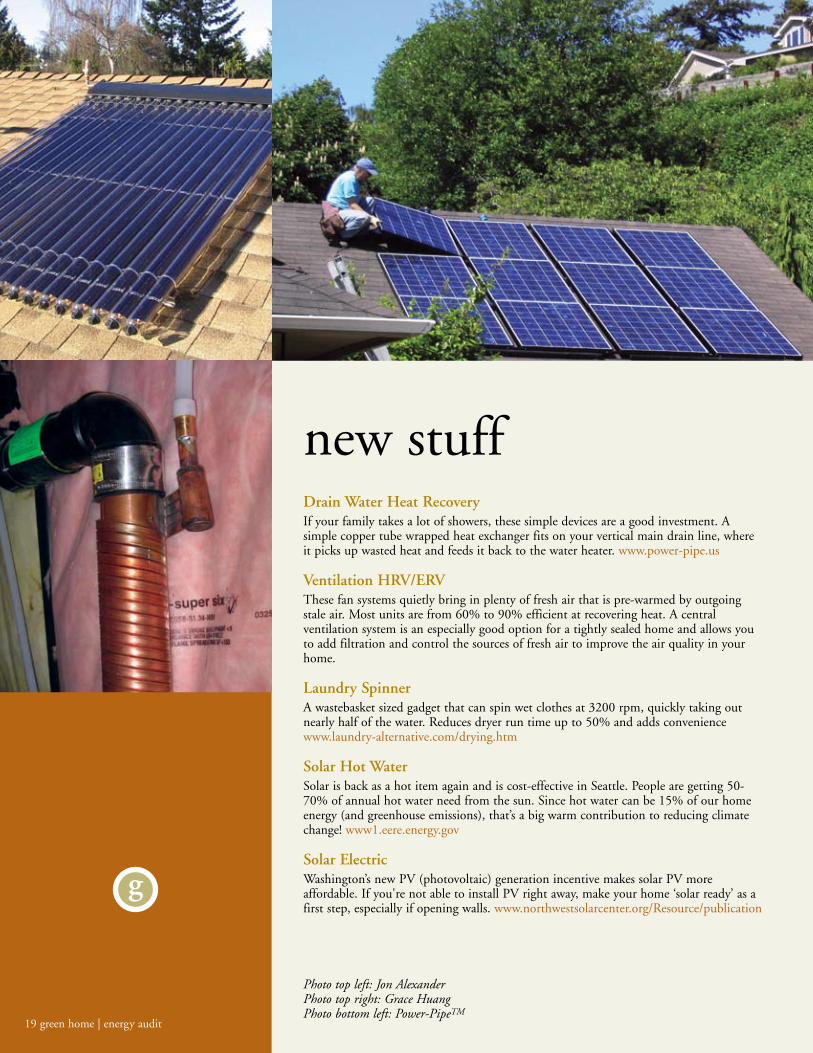
19 green home | energy audit
g
new stuffdrain Water heat recoveryIf your family takes a lot of showers, these simple devices are a good investment. A simple copper tube wrapped heat exchanger fits on your vertical main drain line, where it picks up wasted heat and feeds it back to the water heater. www.power-pipe.us
ventilation hrv/ErvThese fan systems quietly bring in plenty of fresh air that is pre-warmed by outgoing stale air. Most units are from 60% to 90% efficient at recovering heat. A central ventilation system is an especially good option for a tightly sealed home and allows you to add filtration and control the sources of fresh air to improve the air quality in your home.
laundry SpinnerA wastebasket sized gadget that can spin wet clothes at 3200 rpm, quickly taking out nearly half of the water. Reduces dryer run time up to 50% and adds convenience www.laundry-alternative.com/drying.htm
Solar hot Water Solar is back as a hot item again and is cost-effective in Seattle. People are getting 50-70% of annual hot water need from the sun. Since hot water can be 15% of our home energy (and greenhouse emissions), that’s a big warm contribution to reducing climate change! www1.eere.energy.gov
Solar Electric Washington’s new PV (photovoltaic) generation incentive makes solar PV more affordable. If you're not able to install PV right away, make your home ‘solar ready’ as a first step, especially if opening walls. www.northwestsolarcenter.org/Resource/publication
resourcesgovernment AgenciesSeattle City Light: www.seattle.gov/light/conserve/residentPuget Sound Energy: www.pse.comKing County: www.greentools.usEPA ENERGY STAR®, www.energystar.gov – go to “Home Improvement” section.Northwest ENERGY STAR®: www.northwestenergystar.comU.S. Department of Energy (DOE): www.eere.energy.gov/consumerState of Washington (energy codes): www.sbcc.wa.gov City of Seattle (energy codes): www.seattle.gov/DPD/CodesResidential Energy Services Network (HERS): www.natresnet.org
Air Sealing & InsulationSealing and Insulating, ENERGY STAR®: www.energystar.gov – type in “air sealing” in search box.Weatherstripping and Caulking, U.S. DOE – www.eere.energy.gov/consumer – type “weatherstripping” or “caulking” in search box.Home Remedies for Energy Nosebleeds, Fine Homebuilding: www.taunton.comMaking Sense of Caulks and Sealants, Fine Homebuilding: www.taunton.comAll About Insulating Your Home, PSE: www.pse.comInsulation, U.S. DOE - www1.eere.energy.gov/consumer/tips
AsbestosPuget Sound Clean Air Agency: www.pscleanair.org – type in “asbestos” in search box.
Windows and doorsEfficient Windows Collaborative: www.efficientwindows.org
heating & CoolingAn Introduction to Residential Duct Systems, Lawrence Berkeley National Laboratory: http://ducts.lbl.govBest Practices Guide for Residential HVAC Retrofits, Lawrence Berkeley National Laboratory: http://ducts.lbl.govHeat and Cool Efficiently, ENERGY STAR®: www.energystar.govRadiant Barrier Attic Fact Sheet, U.S. DOE: www.ornl.gov
ventilationHome Ventilating Institute: www.hvi.org
hot WaterU.S. DOE: www1.eere.energy.gov/consumer – type in “hot water” in search box.
AppliancesENERGY STAR®: www.energystar.gov – type in “appliances” in search box.
lightingSeattle City Light’s Twist & Save program: www.seattle.gov/twistandsaveNorthwest ENERGY STAR®: www.northwestenergystar.com/lighting
plug loadsSurvey of Plug Loads: www.efficientproducts.org/plugload
Photo top left: Jon AlexanderPhoto top right: Grace HuangPhoto bottom left: Power-PipeTM
This guide was developed by Seattle City Light and the Seattle Department of Planning & Development's City Green Building Program.Printed jointly by the City of Seattle and King County Green Tools.
g
green home | energy audit 20

seattleCAN.orgwww.greentools.us
city green buildingCity of SeattleDepartment of Planning & Developmentwww.seattle.gov/dpd/greenbuilding
www.seattle.gov/light/conserve(206) 684-3800
g
Printed on paper containing 100% post- consumer fiber. Please reuse this guide by sharing it with a friend, or recycle it.
Thank you! March 2008
We are interested in your comments regarding the usability of this guide. Please let us know your suggestions, comments or concerns by e-mailing the City Green Building program in Seattle’s Department of Planning and Development: [email protected].
This information can be made available on request to accommodate people with disabilities.