diótörő printables
TRANSCRIPT
7/30/2019 diótörő printables
http://slidepdf.com/reader/full/diotoero-printables 1/3
spoonful.com© Disney
Page 1 of 3
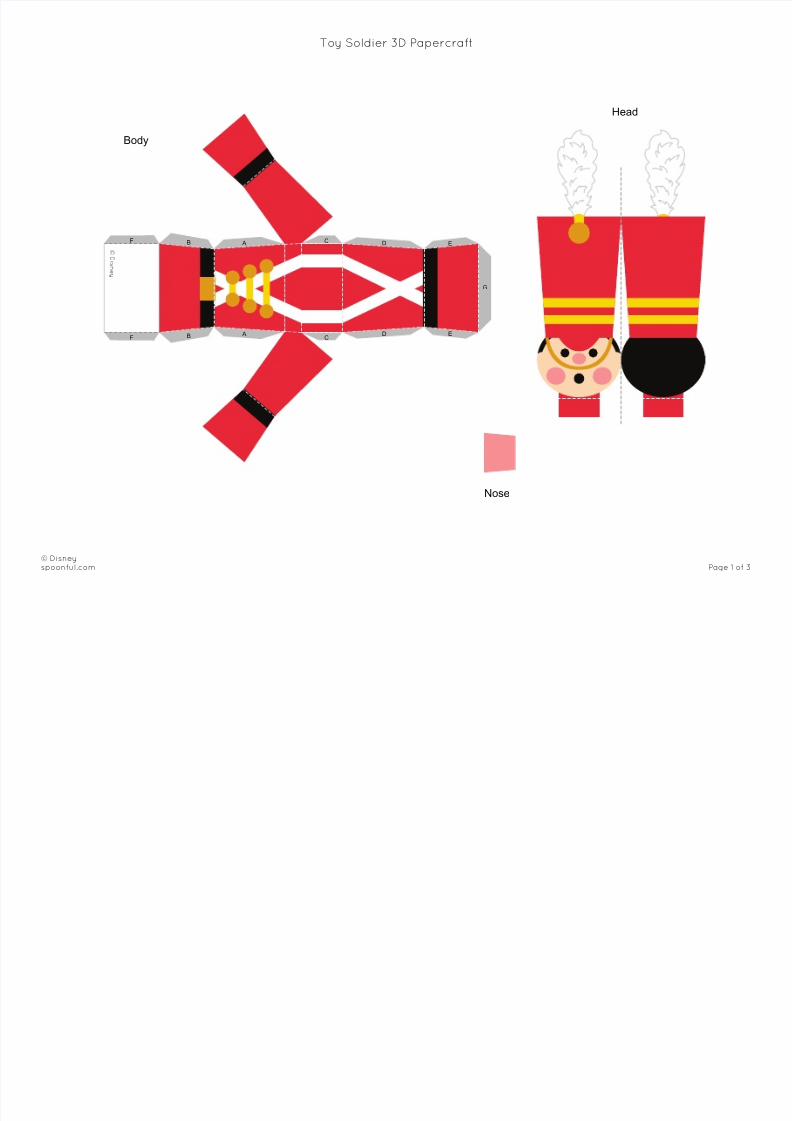
Toy Soldier 3D Papercraft
© Di sne
y
Body
F
F
B
B
A
A
C
C
D
D
E
E
G
Head
Nose

7/30/2019 diótörő printables
http://slidepdf.com/reader/full/diotoero-printables 2/3
Page 2 of 3© Disneyspoonful.com
H H
C C C C
H
A
B
D
D
B
A A A
F F F F
E E
E E
F F F F
A A A A
A A A A
A A A A
H
A
B B
A A
C
C
C
B B
A A
C
C
C
A
C C C C
B B B B B B B B
Upper Arms
Hands
Lower Arms
Legs
Shoes
Toy Soldier 3D Papercraft
7/30/2019 diótörő printables
http://slidepdf.com/reader/full/diotoero-printables 3/3
1. Print the template on regular paper or cardstock and cut out the pieces.
2. For the body, fold the paper at the dashed line running through his waist toward you. Continue this same fold on all sides of thebody. Make all other folds away from you. Using glue or double-sided tape, secure all tabs to the back of their corresponding
panels in alphabetical order. Complete the shape of the body with the G tab.
3. Fold the head in half along the center dashed line and secure so the design is two-sided. Butterfly the red tabs outward and usethem to attach the head to the body.
4. Roll the nose into a tube shape and secure the end with glue so it doesn’t unravel. Then attach the nose to the face.
5. For each leg, fold all tabs away from you. Carefully curl each leg into a tube and secure the A tab to the inside of the tube. You can
use a pen to help get a smooth curl. The B and C tabs will be used to attach the legs to the body and shoes.
6. Secure all tabs on the shoes to the back of their corresponding panels in alphabetical order. Attach each shoe to its correspondingleg using the B tabs on the leg.
7. Attach the legs to the body using the C tabs on each leg.
8. For each upper arm, fold the A tabs away from you. Carefully curl each upper arm into a tube and secure the B tab to the inside of
the tube. You can use a pen to help get a smooth curl. Close each red circle like a lid and secure it to the A tabs.
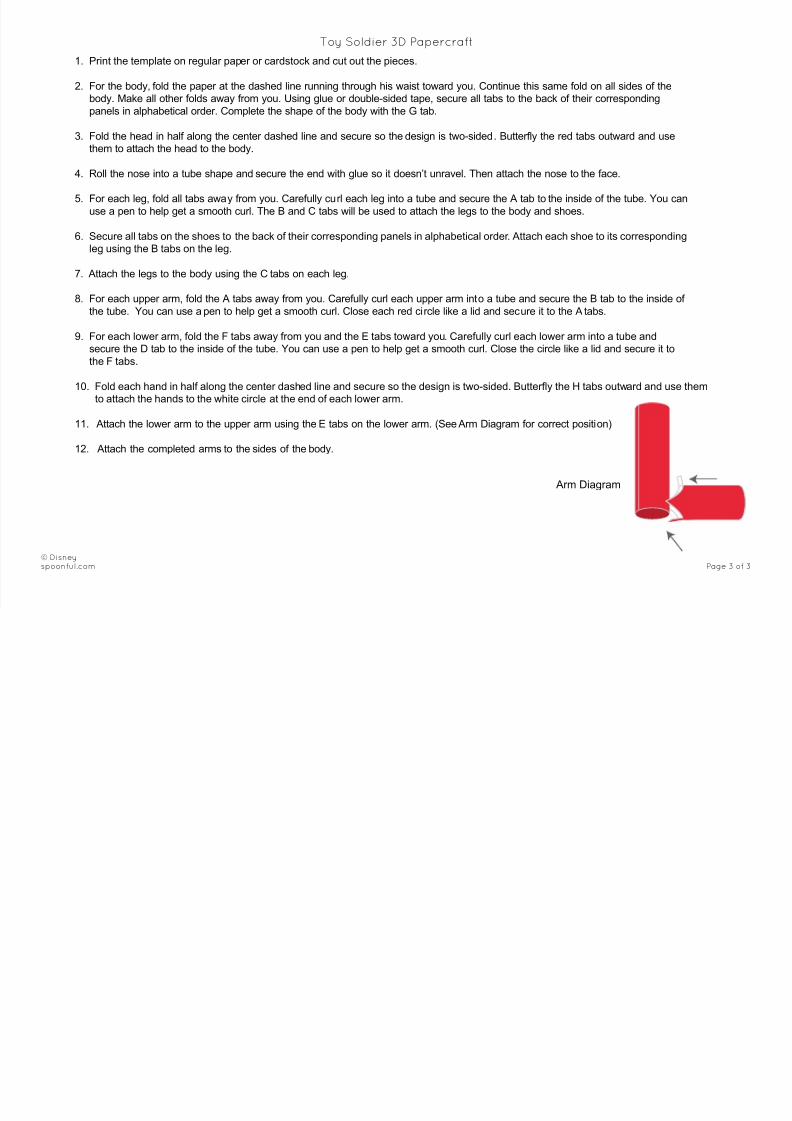
9. For each lower arm, fold the F tabs away from you and the E tabs toward you. Carefully curl each lower arm into a tube andsecure the D tab to the inside of the tube. You can use a pen to help get a smooth curl. Close the circle like a lid and secure it to
the F tabs.
10. Fold each hand in half along the center dashed line and secure so the design is two-sided. Butterfly the H tabs outward and use themto attach the hands to the white circle at the end of each lower arm.
11. Attach the lower arm to the upper arm using the E tabs on the lower arm. (See Arm Diagram for correct position)
12. Attach the completed arms to the sides of the body.
Page 3 of 3© Disneyspoonful.com
Arm Diagram
Toy Soldier 3D Papercraft