cross-fading video & audio
DESCRIPTION
The fundamentals in cross-fading, dissolves and transitions of both video and audio files in Adobe Premiere Pro.TRANSCRIPT
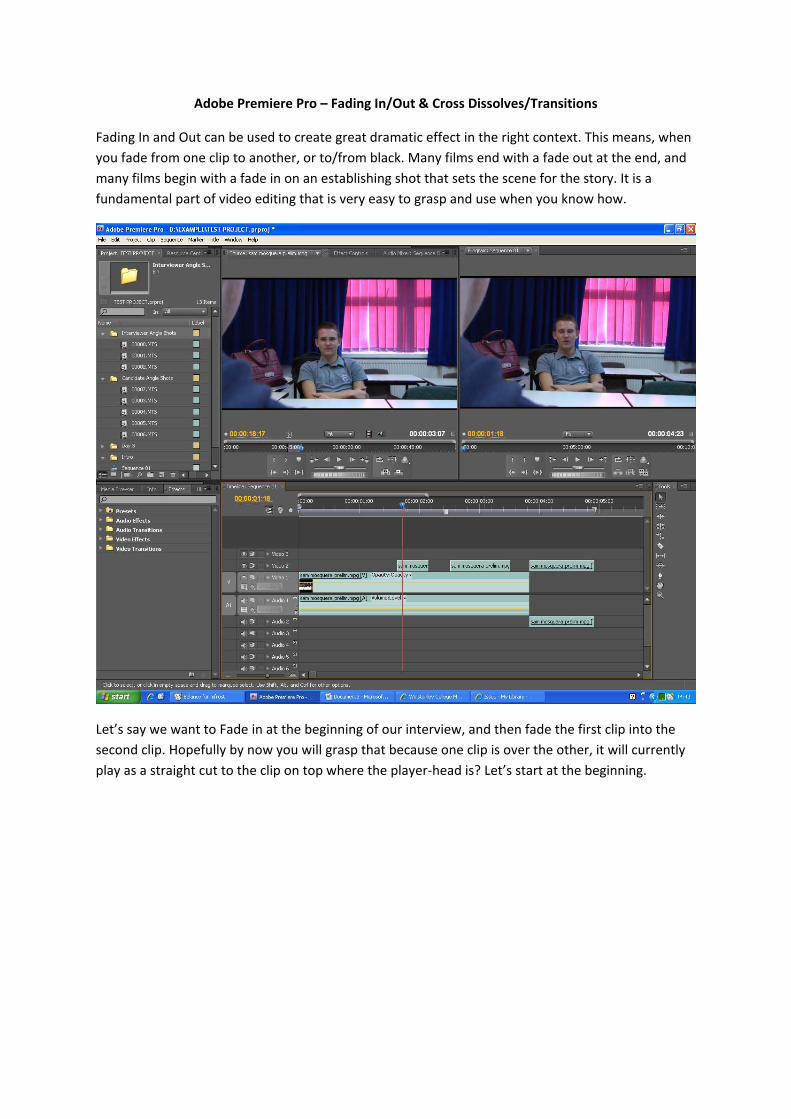
Adobe Premiere Pro – Fading In/Out & Cross Dissolves/Transitions
Fading In and Out can be used to create great dramatic effect in the right context. This means, when you fade from one clip to another, or to/from black. Many films end with a fade out at the end, and many films begin with a fade in on an establishing shot that sets the scene for the story. It is a fundamental part of video editing that is very easy to grasp and use when you know how.
Let’s say we want to Fade in at the beginning of our interview, and then fade the first clip into the second clip. Hopefully by now you will grasp that because one clip is over the other, it will currently play as a straight cut to the clip on top where the player-head is? Let’s start at the beginning.
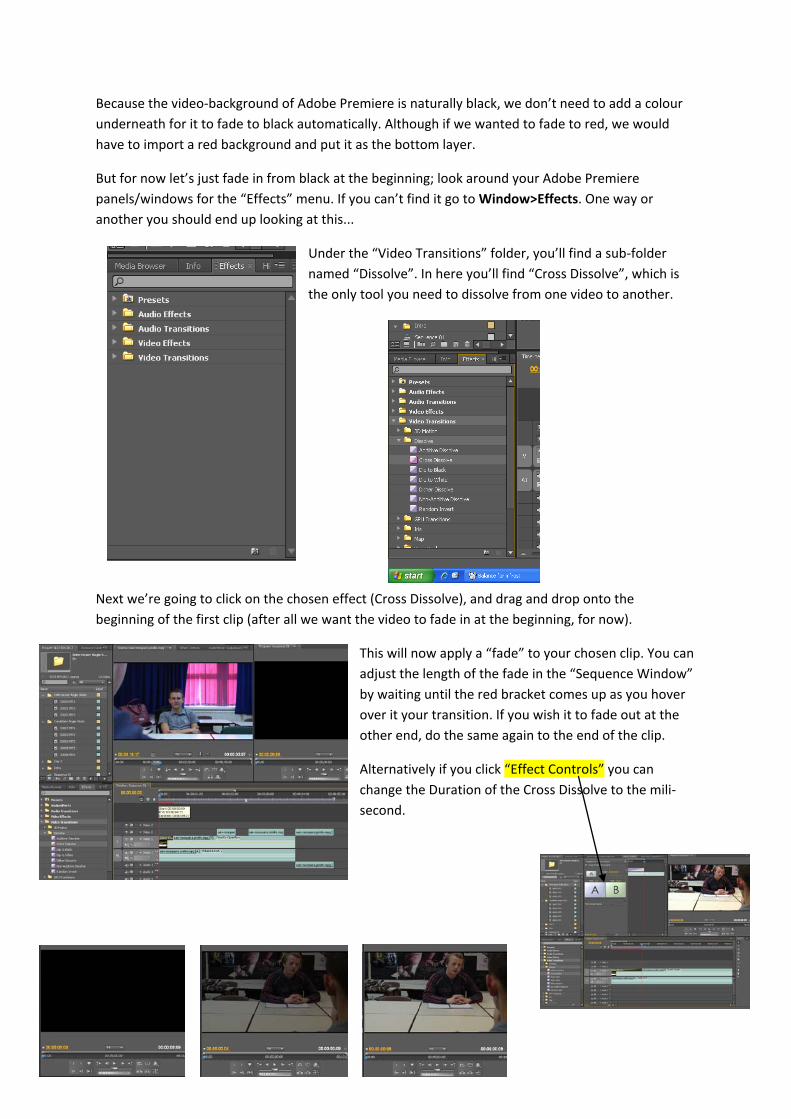
Because the video-background of Adobe Premiere is naturally black, we don’t need to add a colour underneath for it to fade to black automatically. Although if we wanted to fade to red, we would have to import a red background and put it as the bottom layer.
But for now let’s just fade in from black at the beginning; look around your Adobe Premiere panels/windows for the “Effects” menu. If you can’t find it go to Window>Effects. One way or another you should end up looking at this...
Under the “Video Transitions” folder, you’ll find a sub-folder named “Dissolve”. In here you’ll find “Cross Dissolve”, which is the only tool you need to dissolve from one video to another.
Next we’re going to click on the chosen effect (Cross Dissolve), and drag and drop onto the beginning of the first clip (after all we want the video to fade in at the beginning, for now).
This will now apply a “fade” to your chosen clip. You can adjust the length of the fade in the “Sequence Window” by waiting until the red bracket comes up as you hover over it your transition. If you wish it to fade out at the other end, do the same again to the end of the clip.
Alternatively if you click “Effect Controls” you can change the Duration of the Cross Dissolve to the mili-second.
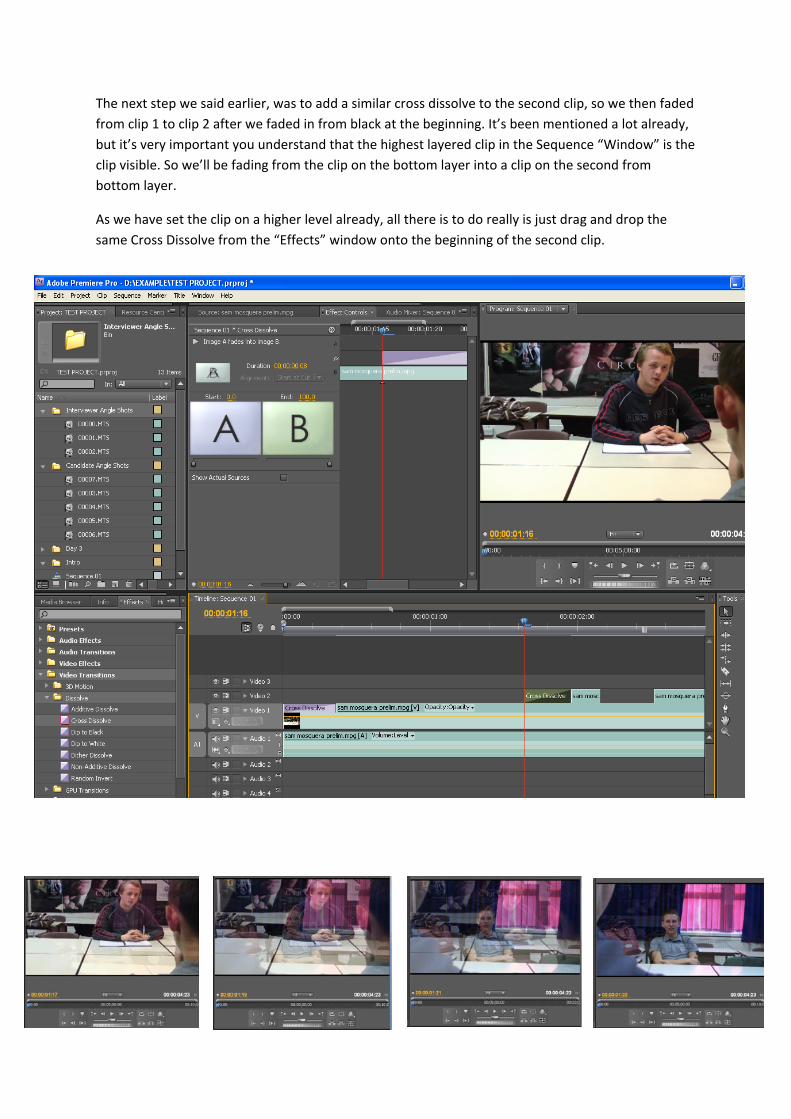
The next step we said earlier, was to add a similar cross dissolve to the second clip, so we then faded from clip 1 to clip 2 after we faded in from black at the beginning. It’s been mentioned a lot already, but it’s very important you understand that the highest layered clip in the Sequence “Window” is the clip visible. So we’ll be fading from the clip on the bottom layer into a clip on the second from bottom layer.
As we have set the clip on a higher level already, all there is to do really is just drag and drop the same Cross Dissolve from the “Effects” window onto the beginning of the second clip.
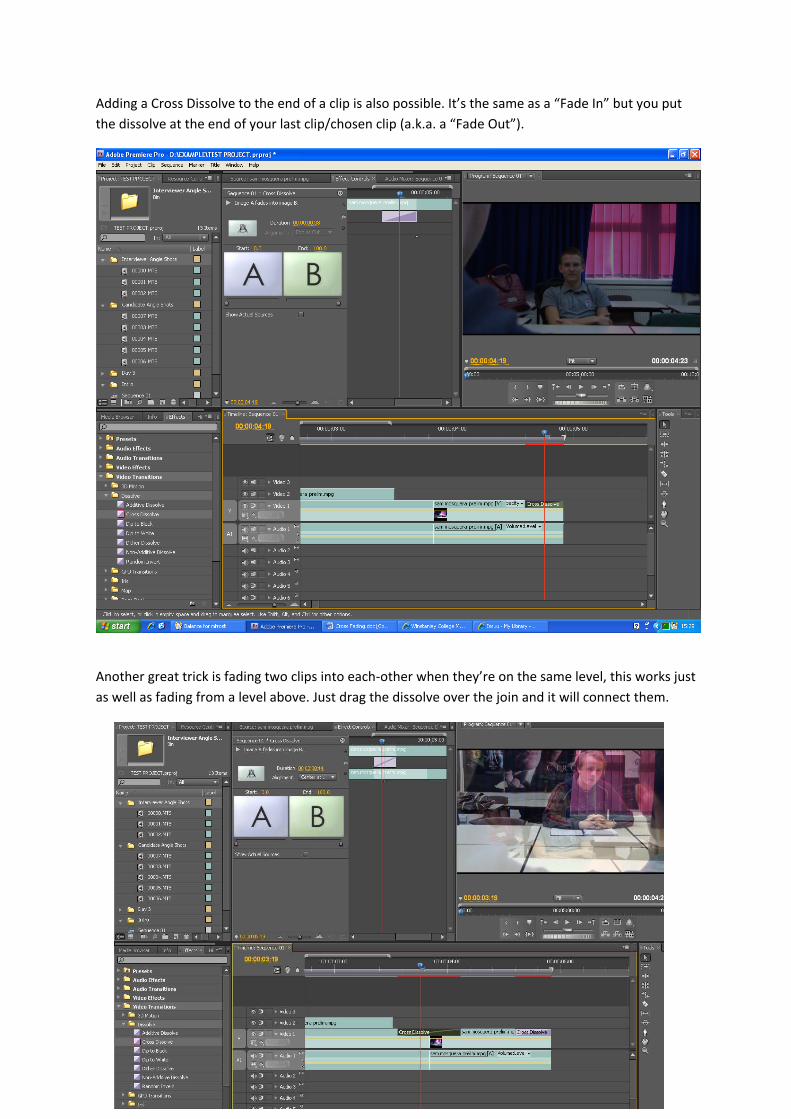
Adding a Cross Dissolve to the end of a clip is also possible. It’s the same as a “Fade In” but you put the dissolve at the end of your last clip/chosen clip (a.k.a. a “Fade Out”).
Another great trick is fading two clips into each-other when they’re on the same level, this works just as well as fading from a level above. Just drag the dissolve over the join and it will connect them.
Just because you do these effects to the video doesn’t mean you’ve done them to the Audio. You will more than likely still get a background noise change or something at the cutting point, or what is now “the middle of the fade”. All Audio work is SEPERATE to Video work.
So what we basically need to learn, is to fade the audio in with the video from black, or you can fade a music backing track in, half way through the project if you like it’s the same process.
It’s the same principal as fading video clips, but we’re going to look at ones on the same line/joined to each other. So instead of the Video Transitions folder, we go to
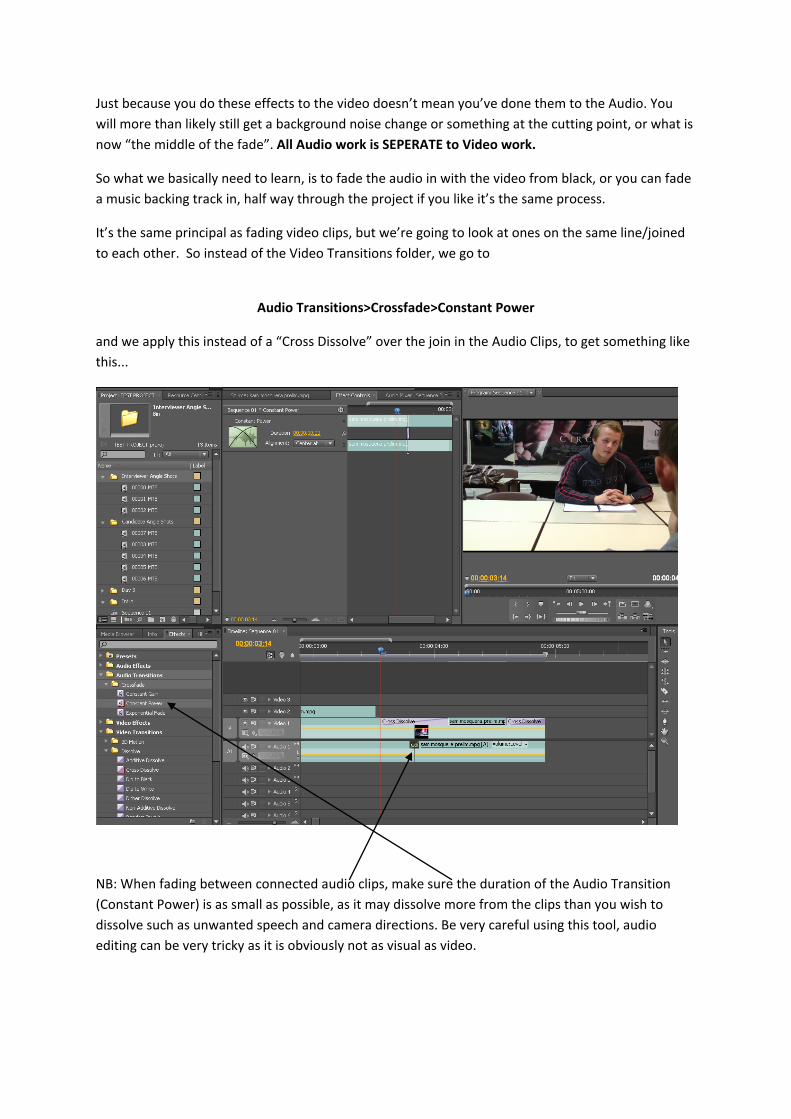
Audio Transitions>Crossfade>Constant Power
and we apply this instead of a “Cross Dissolve” over the join in the Audio Clips, to get something like this...
NB: When fading between connected audio clips, make sure the duration of the Audio Transition (Constant Power) is as small as possible, as it may dissolve more from the clips than you wish to dissolve such as unwanted speech and camera directions. Be very careful using this tool, audio editing can be very tricky as it is obviously not as visual as video.