colored pencil-sketch-tutorial
TRANSCRIPT

COLORED PENCIL SKETCH PHOTOSHOP TUTORIAL
By: Mrs. Hurd

STEP 1• Find and open an
image in Photoshop8x10 200 ppi
• The first step is to desaturate image by hitting ctr + shift + uor >Image > Adjustments >Desaturate.

STEP 2
You should have a black and white picture now.
• Duplicate it. right clicking on it and >Duplicate Layer
• Now invert the new layer Hit ctrl + i or Image > Adjustments > Invert.

STEP 3• Set the blending mode of
the inverted layer to Color Dodge in the layer blending mode dropdown.
This should make the entire picture almost completely white.

STEP 4
• Go to Filter > Blur > Gaussian Blur
• Select a radius from a few pixels up to about 30 pixels that looks good for you. I used a radius of 25.4 pixels.
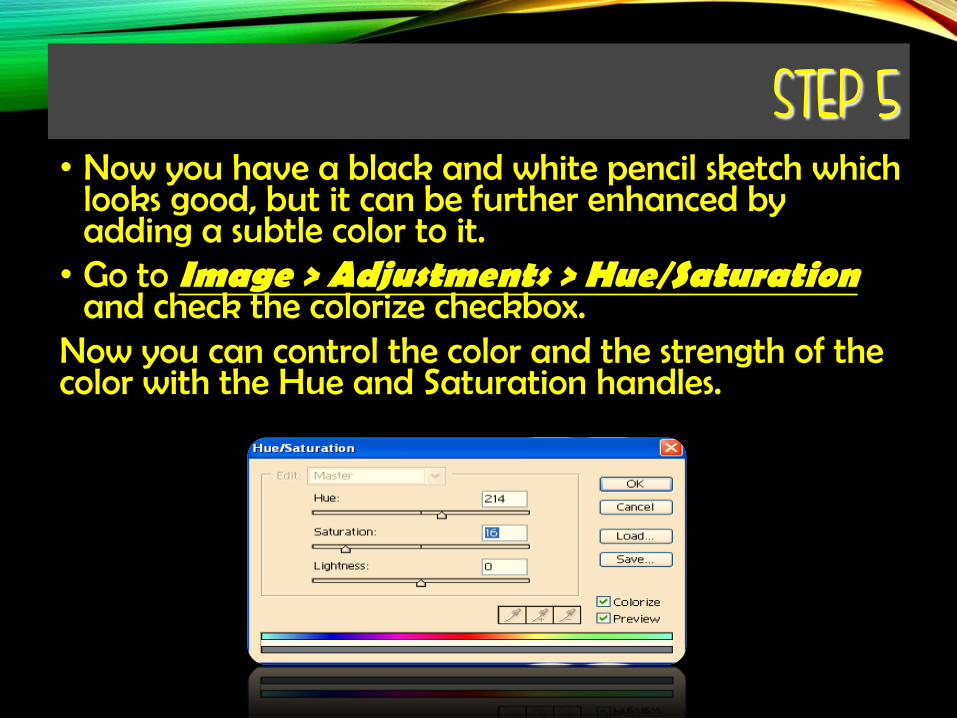
STEP 5• Now you have a black and white pencil sketch which
looks good, but it can be further enhanced by adding a subtle color to it.
• Go to Image > Adjustments > Hue/Saturationand check the colorize checkbox.
Now you can control the color and the strength of the color with the Hue and Saturation handles.
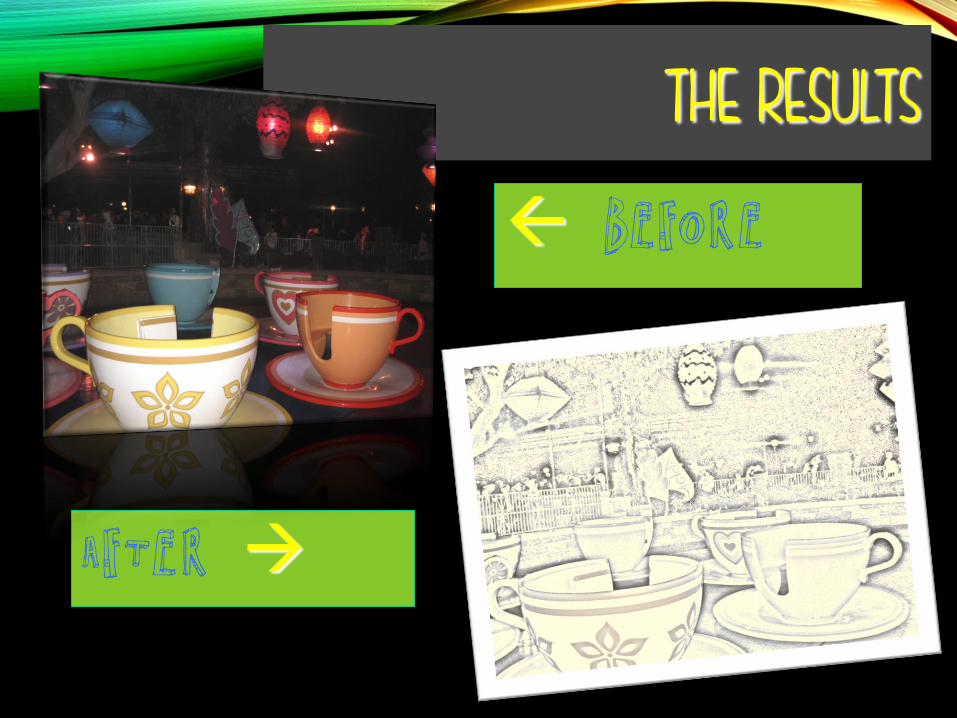
THE RESULTS
AFTER
BEFORE
THE END• Make sure you put a signature in the bottom right
corner before you save it as a jpeg.• Email the final project as a jpeg to
[email protected]• *BONUS-go above and beyond the assignment and
add your own style flair to image. Make note of any additional steps and how you achieved them in the email…such as an extra layer and blending mode, or filter option you may have used.