clean + easy roller wax system pre - waxing spa … · 1 clean + easy roller wax system pre -...
TRANSCRIPT

1
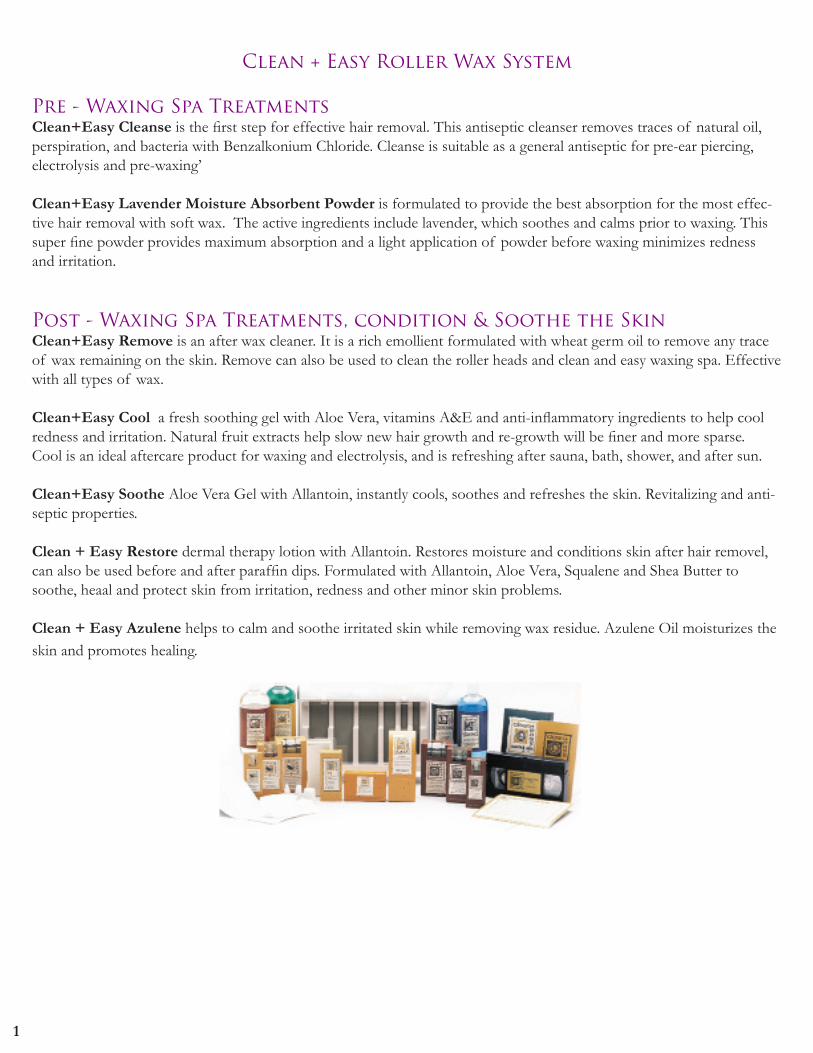
Clean + Easy Roller Wax System
Pre - Waxing Spa TreatmentsClean+Easy Cleanse is the first step for effective hair removal. This antiseptic cleanser removes traces of natural oil, perspiration, and bacteria with Benzalkonium Chloride. Cleanse is suitable as a general antiseptic for pre-ear piercing, electrolysis and pre-waxing’
Clean+Easy Lavender Moisture Absorbent Powder is formulated to provide the best absorption for the most effec-tive hair removal with soft wax. The active ingredients include lavender, which soothes and calms prior to waxing. This super fine powder provides maximum absorption and a light application of powder before waxing minimizes redness and irritation.
Post - Waxing Spa Treatments, condition & Soothe the SkinClean+Easy Remove is an after wax cleaner. It is a rich emollient formulated with wheat germ oil to remove any trace of wax remaining on the skin. Remove can also be used to clean the roller heads and clean and easy waxing spa. Effective with all types of wax.
Clean+Easy Cool a fresh soothing gel with Aloe Vera, vitamins A&E and anti-inflammatory ingredients to help cool redness and irritation. Natural fruit extracts help slow new hair growth and re-growth will be finer and more sparse.Cool is an ideal aftercare product for waxing and electrolysis, and is refreshing after sauna, bath, shower, and after sun.
Clean+Easy Soothe Aloe Vera Gel with Allantoin, instantly cools, soothes and refreshes the skin. Revitalizing and anti-septic properties.
Clean + Easy Restore dermal therapy lotion with Allantoin. Restores moisture and conditions skin after hair removel, can also be used before and after paraffin dips. Formulated with Allantoin, Aloe Vera, Squalene and Shea Butter to soothe, heaal and protect skin from irritation, redness and other minor skin problems.
Clean + Easy Azulene helps to calm and soothe irritated skin while removing wax residue. Azulene Oil moisturizes the skin and promotes healing.
2
The Spa System Roll-On Procedure1. Have a consult with you customer and set up your station and disinfect your tools.2. Disinfect the waxing area with Clean + Easy Cleanse and trim the hairs if needed. The hair has to be ¼”3. Apply a thin layer of Clean + Easy Lavender Powder to dry the skin and check the direction of the hair growth.4. Apply wax in the direction of the hair growth in a 45 degree angle. 5. Remove the wax with a Clean + Easy Paper Strip quickly in the opposite direction of the hair growth. Hold the skin taut to prevent the skin for bruising. Apply pressure. Do not rewax the same area again!6. Use Clean + Easy Remove to remove the residue on the skin.7. Apply a thin layer of Clean + Easy Cooling Gel to calm the skin. Do not massage the area.8. Apply a thin layer of Clean + Easy Restore to moisturize the skin. Do not massage.9. Clean your machine, tools and roller heads with Clean + Easy Clean-Up Spray
Steps for Sanitizing Roller HeadsClean+Easy advises that the applicator roller heads be disinfected after every salon patronusage. Disinfect the roller heads by immersion in an EPA registered, hospital grade, germicidal, bactericidal, virucidal, and fungicidal disinfectant according to disinfectant manufacturer instructions. However, these instructions are super-ceded by the guidelines set forth by the State Board of Cosmetology where the service is being rendered. Clean+Easy directs the salon and the operator to follow their State Board of Cosmetology rules and regulations for salon sanitization and disinfection.
DO’S & DON’TS FOR CLEAN & EASY WAXING SPA
1. Turn heater on every morning, if it is ready to go at all times you will do more waxing.2. Make sure that all roller heads are facing the back of the metal heater plate. This keeps roller heads from clog ging.3. Do not squeeze applicator.4. Do not use pressure when rolling wax on area. This will cause roller head to move unevenly on the skin and apply too much wax.5. Keep applicator full at all times. You can wax faster with full applicators. In addition, wax will not cool while it runs down the applicator to the roller head. 6. Always hold applicator ar 45 degree angle and wait for bubbles to start rising. If you hold it straight up. the wax will drip out. If you do not wait for bubbles to start rising, the wax will not come out.
3
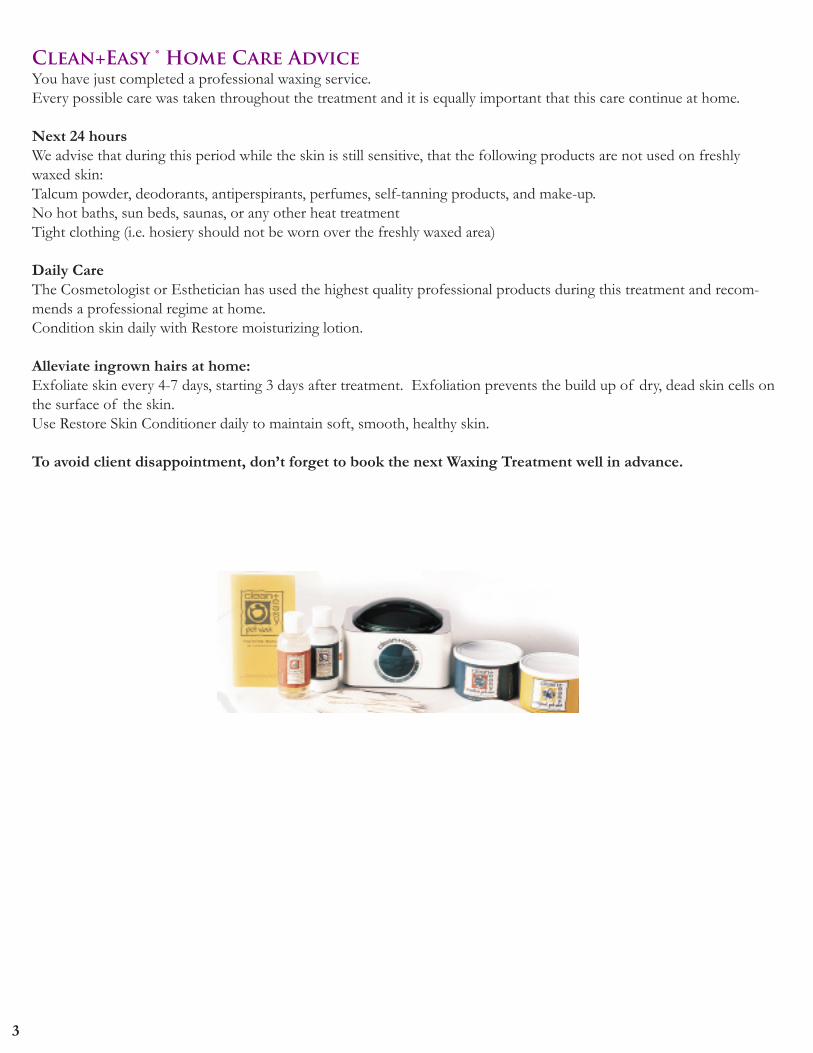
Clean+Easy ® Home Care AdviceYou have just completed a professional waxing service. Every possible care was taken throughout the treatment and it is equally important that this care continue at home.
Next 24 hoursWe advise that during this period while the skin is still sensitive, that the following products are not used on freshly waxed skin:Talcum powder, deodorants, antiperspirants, perfumes, self-tanning products, and make-up.No hot baths, sun beds, saunas, or any other heat treatmentTight clothing (i.e. hosiery should not be worn over the freshly waxed area)
Daily CareThe Cosmetologist or Esthetician has used the highest quality professional products during this treatment and recom-mends a professional regime at home.Condition skin daily with Restore moisturizing lotion.
Alleviate ingrown hairs at home:Exfoliate skin every 4-7 days, starting 3 days after treatment. Exfoliation prevents the build up of dry, dead skin cells on the surface of the skin.Use Restore Skin Conditioner daily to maintain soft, smooth, healthy skin.
To avoid client disappointment, don’t forget to book the next Waxing Treatment well in advance.
4
Name: Telephone:
Address: Date of Birth:
Skin Diagnosis:
Please check all conditions that apply to you:
Varicose Veins _______ Edema
Poor Circulation _______ Moles
Diabetes _______Recent Scar Tissue (Less than 3 months) _______
Epilepsy _______ Undiagnosed lumps & bumps
Skin Diseases _______ Hypersensitive Skin
Warts _______ Sunburn
Orthotricyline _______ Phlebitis
Pregnancy _______ Psoriasis
Prescribed Medication (detail) _______
Do you use any of the following products:
Retin A _______ Glycolic Acid
Accutane _______ A.H.A. Skincare
Dates of Previous Waxing Treatments: ______________ ______________I understand that I am responsible for notifying the Esthetician, Cosmetologist, or Salon should any of the information change prior to any treatments.
Client Signature: __________________________________
Date: __________________________

5 6
Clean+Easy Original Pot Wax System ( Soft Wax )
The Clean+Easy Pot Waxer was designed with the needs of the professional in mind. Compact, economical, and easy to use and maintain, the Clean+Easy Pot Waxer and the complete line of Spa Treatment Products and accessories give you all the tools you need to wax easily and efficiently.
Compact, sleek, professionally designed pot warmer.
Fits anywhere, saves space, and can’t tip over.
Hinged, unbreakable Lexan cover keeps wax clean and hygienic.
Thermostatically controlled unit keeps wax at the perfect temperature all day. It’s ready whenever you are.
Clean+Easy Accessories
Clean+Easy Applicator Sticks are made of natural wood. They are available in three sizes: large for legs, medium for body, and petite for face.
Clean+Easy Muslin Wax Strips are made of a fine grade muslin.
Clean+Easy Pot Wax Drip Collars are specifically designed to fit the rim of the warmer while preventing any dripping on the outside of the warmer. The collar should be changed as often as necessary to maintain a clean appearance.
Clean+Easy Purifying Antiseptic Spray is a hand sanitizer that kills bacteria on contact.
Clean+Easy Pot Wax BlendsClean+Easy Original Wax - Our original soft wax formula blended from bees wax, honey and pine rosins. This high temperature wax is particularly effective for removing stubborn hair. Perfect for all areas and for non-sensitive skin.
Clean+Easy Sensitive Wax - Formula features Chamomile and Azulene to soothe and calm the skin. Perfect for those clients who experience redness and irritation with waxing, this wax is designed for all facial and ody hair removal proce-dures.
Pre - Waxing Spa TreatmentsClean+Easy Cleanse is the first step for effective hair removal. This antiseptic cleanser removes traces of natural oil, perspiration, and bacteria with Benzalkonium Chloride.
Clean+Easy Lavender Moisture Absorbent Powder is formulated to provide the best absorption for the most effec-tive hair removal with soft wax.
Post - Waxing Spa Treatments, condition & Soothe the SkinClean+Easy Remove is an after wax cleaner. It is a rich emollient formulated with wheat germ oil to remove any trace of wax remaining on the skin. Remove can also be used to clean the roller heads and clean and easy waxing spa. Effective with all types of wax.

6
Clean+Easy Cool a fresh soothing gel with Aloe Vera, vitamins A&E and anti-inflammatory ingredients to help cool redness and irritation. Natural fruit extracts help slow new hair growth and re-growth will be finer and more sparse.Cool is an ideal aftercare product for waxing and electrolysis, and is refreshing after sauna, bath, shower, and after sun.
Clean+Easy Soothe Aloe Vera Gel with Allantoin, instantly cools, soothes and refreshes the skin. Revitalizing and anti-septic properties.
Clean + Easy Restore dermal therapy lotion with Allantoin. Restores moisture and conditions skin after hair removel, can also be used before and after paraffin dips. Formulated with Allantoin, Aloe Vera, Squalene and Shea Butter to soothe, heaal and protect skin from irritation, redness and other minor skin problems.
Clean + Easy Azulene helps to calm and soothe irritated skin while removing wax residue. Azulene Oil moisturizes the skin and promotes healing.
The Original Pot Wax Procedure1. Have a consult with you customer and set up your station and disinfect your tools.2. Disinfect the waxing area with Clean + Easy Cleanse and trim the hairs if needed. The hair has to be ¼”3. Apply a thin layer of Clean + Easy Lavender Powder to dry the skin and check the direction of the hair growth.4. Apply wax in the direction of the hair growth in a 45 degree angle. 5. Remove the wax with a Clean + Easy Paper Strip quickly in the opposite direction of the hair growth. Hold the skin taut to prevent the skin for bruising. Apply pressure. Do not rewax the same area again!6. Use Clean + Easy Remove to remove the residue on the skin.7. Apply a thin layer of Clean + Easy Cooling Gel to calm the skin. Do not massage the area.8. Apply a thin layer of Clean + Easy Restore to moisturize the skin. Do not massage.9. Clean your machine, tools and roller heads with Clean + Easy Clean-Up Spray

7 8
Clean+Easy Brazilian Pot Wax System (Hard Wax )
Advantages of Hard Stripless WaxBrazilian Pot Wax is gentler to your client’s skin than Soft Wax when you are waxing sensitive areas. It adheres only to hair, not to skin. This makes Brazilian Pot Wax gentle for sensitive areas while providing for the re-moval of even the coarsest hair. An additional benefit is the lack of the sticky residue that can occur with Soft Wax.While hard wax can be used for any waxing service, Soft Strip Wax is generally preferred for large areas, such as legs and arms, due to the amount of wax necessary for larger areas. Soft wax is generally more economical for large area waxing.
Products Necessary for Brazilian Hard Wax ServicesThe Clean+Easy System is a scientifically balanced family of products designed to allow you to use the complete line to achieve optimal results.
Clean+Easy Brazilian Pot Wax – Full Body Hard Wax is formulated specifically for thorough bikini waxing. It adheres only to hair, not to skin. This makes Brazilian Pot Wax gentle for sensitive areas while providing for the removal of even the coarsest hair. This no strip formulation is fast, efficient, and it is gentle enough to use anywhere on the body.provides clean, close removal of unwanted hair from the bikini area, the face or anywhere you want hair removed.Clean+Easy Pre-Epilation Oil is designed for use with Clean+Easy Wax for easier hair removal while protecting and conditioning the skin.
Pre - Waxing Spa TreatmentsClean+Easy Cleanse is the first step for effective hair removal. This antiseptic cleanser removes traces of natural oil, perspiration, and bacteria with Benzalkonium Chloride. Cleanse is suitable as a general antiseptic for pre-ear piercing, electrolysis and pre-waxing’
Prep - Oil pre - epilation oil for hard wax procedures, an essential companion product for the Clean + Easy Brazilian Hard Wax.
Post - Waxing Spa Treatments, condition & Soothe the SkinClean+Easy Cool a fresh soothing gel with Aloe Vera, vitamins A&E and anti-inflammatory ingredients to help cool redness and irritation. Natural fruit extracts help slow new hair growth and re-growth will be finer and more sparse.Cool is an ideal aftercare product for waxing and electrolysis, and is refreshing after sauna, bath, shower, and after sun.
Clean+Easy Soothe Aloe Vera Gel with Allantoin, instantly cools, soothes and refreshes the skin. Revitalizing and anti-septic properties.
Clean + Easy Restore dermal therapy lotion with Allantoin. Restores moisture and conditions skin after hair removel, can also be used before and after paraffin dips. Formulated with Allantoin, Aloe Vera, Squalene and Shea Butter to soothe, heaal and protect skin from irritation, redness and other minor skin problems.
Clean + Easy Azulene helps to calm and soothe irritated skin while removing wax residue. Azulene Oil moisturizes the skin and promotes healing.

8
Items Necessary for Brazilian Hard Wax ServicesBefore you begin Brazilian Waxing, make sure you have the following items:A private room with a padded table. Unlike a traditional bikini waxing service, your client may remove all clothing from the waist down. Your client will be exposed during the service, so privacy is crucial.Clean+Easy Brazilian Pot Wax – Full Body Hard Wax heated in a professional warmer so you are able to maintain a consistent temperature.Clean+Easy Cleanse Antiseptic Cleansing Lotion with anti-bacterial properties.Clean+Easy Pre-Epilation Oil to prepare the area prior to waxing and soothe the skin.Soft, disposal towels for application of cleansing lotion and oil.Clean+Easy ApplicatorsScissorsTweezersGloves
Brazilian Hard Wax – General GuidelinesThere are several key points to remember when using Brazilian Pot Wax, especially if you are primarily a Soft Wax user:Maintaining the proper wax temperature is important for a successful result. The wax should form a soft ball on the end of the applicator. Until you become familiar with the proper consistency for Brazilian Pot Wax, a good guide is to heat the wax for 15 to 30 minutes on the HIGH setting until the center is not completely melted. At this point, the wax along the exterior of the can should be the appropriate temperature and consistency for waxing. Set and maintain the warmer temperature setting to LOW. The application is much thicker than with a Soft Wax. The Hard Wax should be even all the way around the edges, ex-tending beyond the hair growth area.Apply the initial layer of wax in the direction of hair growth. Spread the wax rapidly without placing a large quantity of wax on a single area. This allows for the heat to be distributed evenly, creating more comfort for your client.Beginners should apply only one strip at a time. After you have mastered the technique, apply as many strips of wax as you are comfortable with at one time, allowing the wax to set. Check the surface of the wax strip for tackiness. If the strip is not ready, put it back down and wait a few second until fully set.The wax surface dulls as it sets. When removing the wax strip, stretch the skin taut and hold firmly. Flick the edge of the strip and remove in the opposite direction of hair growth.If the wax breaks or is brittle, then the application was too thin or was allowed to set too long. The application of the Clean+Easy Epilation Oil should be very light. It is very important not to apply too much oil or it will interfere with the ability of the wax to adhere to the hair. As you proceed with the Brazilian Design, a guideline may be helpful. A Clean+Easy Epilation Strip or a disposable bikini provides a perfect guide. You may find it helpful to section the hair to be removed with a disposable brush applicator.
9
Clean+Easy advises that the follow precautions apply to waxing clients:To eliminate after wax redness, recommend that clients take an antacid 1-½ hours before the wax service. Do not wax over moles.Do not wax clients that have the following condition: Sunburn, diabetes, phlebitis, recent scar tissue, or other skin condi-tions.Due to the side effects of increased sensitivity and irritation, it is not recommended that you wax clients that are using Retin A, Accutane, Tetracycline or Glycolic Acid.Be aware that during pregnancy clients can experience increased water retention.During the 24-hour period following a waxing service, the client should avoid hot baths, tanning beds, saunas or other heat treatments.
Brazilian Bikini Waxing with our Clean+Easy Professional Brazilian Hard Wax Video PLEASE MAKE THIS ANNOUNCEMENT BEFORE SHOWING THE VIDEO: This is a very graphic video that shows nudity below the waste. This video has three sections. The first section presents general information on hard wax and preparation for the Brazilian service. The second section shows the Brazilian and Sphinx services in VERY GRAPHIC detail. The third section concludes with Clean+Easy product knowledge. You will notice that the technician is not wearing gloves. Clean+Easy recommends that gloves be worn during the service. However, this was not possible during the filming of the video due to the intense heat of the lights necessary for filming.
Demonstration on model, if available.Begin the Brazilian procedure by washing your hands with antibacterial soap, and when finished, rinse and dry hands. Disinfect your hands immediately before starting the service with Clean+Easy Purifying Antiseptic Spray. You may elect to wear gloves during this service. Front Area Procedure- Have the client lie face up on the table. Disposable waxing bikinis may make modest clients more comfortable, while also acting as a guideline for the Brazilian service. It may be necessary to trim the hair to within ½ inch before you begin waxing. This is especially true for clients that have never waxed the bikini area or have not been waxed for a long period of time.You will encounter many different body configurations during this type of service. Like a traditional Bikini Wax, you may begin by bending the client’s leg with the knee pointed out and towards the side. The size and shape of your client may require that you approach an area in a different manner than what you will see during this demonstration. It is perfectly all right to ask your client to assist you. Simply tell the client what you would like them to do, and place their hand where it is needed. Cleanse the front area to be waxed with a Clean+Easy Cleanse Antiseptic Cleansing Lotion, applied with a soft, disposable towel.Apply a light layer of Clean+Easy Pre-Epilation Oil to waxing area. It is very important not to apply too much oil or it will interfere with the ability of the wax to adhere to the hair. Apply the initial layer of wax in the direction of hair growth. Spread the wax rapidly without placing a large quantity of wax on a single area. This allows for the heat to be distributed evenly, creating more comfort for your client. .Apply as many wax strips as you are comfortable with at one time, allowing the wax to set.Test for tackiness. When the wax has set, stretch skin taut. Flick the end of the wax strip that will allow you to remove the strip in the opposite direction of the hair growth. Quickly pull off the strip in the opposite direction of the hair growth. Immediately apply pressure to the epilated area.It may be necessary to overlap wax areas due to varied hair growth patterns. Remember that Clean+Easy Brazilian Pot Wax is designed with your clients’ comfort in mind so it adheres to hair, not skin.Continue to follow the design line, paying attention to growth patterns.Use tweezers to remove stray hairs as necessary to complete the front of the Brazilian Wax. When you have finished, apply Clean+Easy Cool to soothe the skinBack Area Procedure - We will demonstrate two alternatives for completing both the Brazilian and the Sphinx tech-
10
niques. You should select the method that is most comfortable for your client. You will cleanse with Clean+Easy Cleanse and apply Clean+Easy Pre-Epilation Oil in preparation for waxing.With the first technique, reposition your client with their leg brought up toward their chest and have them hold that posi-tion. If this is too difficult, hang the leg over the edge of the table. Apply as many wax strips as necessary. Finish with an application of Clean+Easy Cool to soothe the skin For the alternate technique, ask your client to kneel on the table with their upper body resting on their elbows and a relaxed their back. Cleanse with Clean+Easy Cleanse and apply Clean+Easy Pre-Epilation Oil to prepare the area to be waxed, remembering to include the buttocks, if necessary. Move around the table so you are working from the best vantage point though out the service. When you have completed waxing, apply Clean+Easy Cool to soothe the skin
Clean+Easy ® Home Care AdviceYou have just completed a professional waxing service.Every possible care was taken throughout the treatment and it is equally important that this care continue at home.
NEXT 24 HOURSWe advise that during this period while the skin is still sensitive, that the following products are not used on freshly waxed skin:Talcum powder, deodorants, antiperspirants, perfumes, self-tanning products, and make-up.No hot baths, sun beds, saunas, or any other heat treatmentTight clothing (i.e. hosiery should not be worn over the freshly waxed area)
DAILY CAREYour Cosmetologist or Esthetician has used the highest quality professional products during your treatment and recom-mends that you continue the same professional regime at home. Condition - Condition skin daily with RESTORE moisturizing lotion. This professional after care product is used because if contains Allantoin. This ingredient has the ability to sooth, heal, and stimulate growth of healthy skin. Soft, smooth, healthy skin – what more could you ask for?
Alleviate ingrown hairs at home:Exfoliate skin every 4-7 days, starting 3 days after treatment. Exfoliation prevents the build up of dry, dead skin cells on the surface of the skin.Use Restore Skin Conditioner daily to maintain soft, smooth, healthy skin.To avoid client disappointment, don’t forget to book the next Waxing Treatment well in advance.

11 12
About Paraffin Therapy
The practice of heat therapy is centuries old. Through the ages, the Romans, the Japanese and many other cultures have realized the benefits of heat therapy on body and mind. Doctors and physical therapists have used hot paraffin treat-ments for decades for those suffering from arthritis, bursitis and just even tire, swollen feet. The paraffin therapy reduces swelling in muscles and decreases inflammation of joints and connective tissues. Doctors have found that the therapeu-tic effects of paraffin treatments can last weeks longer than other heat treatments.
clean+ easy® now brings this soothing, luxurious treatment into the salon as a conditioning cosmetic service for your clients. The Digital Paraffin Spa provides a soothing bath of warm paraffin that creates a heat-maintaining barrier for the skin. The paraffin coating holds the heat for 10-15 minutes, expanding the pores of the skin and allowing moisture to penetrate more readily.
For facials, manicures, pedicures and body treatments. Paraffin therapy provides every client with that extra special touch.
Paraffin Therapy Supply Checklist
Before you begin the therapy treatment, be sure you have all your supplies ready and available. Here’s what you’ll need:clean+easy® Digital Paraffin SpaClean+Easy Paraffin WaxClean+Easy® “Purify” Antiseptic SprayClean+Easy® Paraffin Brush Clean+Easy® Paraffin ProtectorsClean+Easy® Hands and Feet Insulating Mittens & BootiesClean+Easy® “Hydrify” Massage Therapy CreamTowels
Paraffin Therapy TreatmentsThe Clean+Easy Digital Paraffin Spa has several beneficial uses for any salon. A paraffin manicure will leave the hands feeling soft and gives every client a soothing, relaxing salon experience.
Paraffin therapy is also excellent for pedicure clients. The therapeutic heat treatment relaxes sore, tired feet, stimulates circulation and allows for a much more effective massage experience.
For facial clients, a paraffin treatment will leave your client’s skin soft and rehydrated. while aiding in the infusion of any treatments into the skin.As an added service for those who want an all over paraffin treatment, a full body Paraffin wrap is recommended to deeply relax the muscles and soften the skin creating a mini-sauna on your body. Its therapeutic properties help release muscle tension, decrease joint stiffness, increase circulation and improve nutrition of the tissues.
Paraffin ProfitsPlace a Clean+Easy Digital Paraffin Spa in your salon and watch your profits grow. Paraffin wax treatments are a great way to maximize skin care services and attract new clients.
As an added benefit this easy treatment demands only a few minutes of your time, yet your clients will leave the salon feeling more pampered and relaxed than ever before! Client referrals will soar!!

12
Paraffin Do’s & Don’ts
DO keep the paraffin level about 2 inches from the top of the tub.DO test the paraffin temperature by applying a small dab of paraffin wax on the backside of your wrist to make sure it is comfortable.DO protect your client’s clothing and remove all jewelry. We suggest a customer gown or apron. DO make sure client’s hands or feet are cleaned with “Purify” antiseptic spray and dry before beginning paraffin therapy.DO always guide your client’s hands or foot into the paraffin spa. This maintains contact and prevents any mistakes on their part.DO dip foot into the paraffin spa up to the ankles and keep the foot in the same position as going in and coming out so you don’t break the paraffin seal.DO dip hands all the way into the paraffin up to the wrist and keep hands in the same position going in and coming out so you don’t break the paraffin seal.DO clean your paraffin unit periodically.
DON’T use the bath if your client has impaired circulation or any skin irritation, rashes, cuts, burns or warts. This in-cludes severe diabetes.DON’T allow clients to “fingertip” test the paraffin for temperature. Fingertips have extremely sensitive nerve endings and can make the paraffin feel much hotter than it actually is. Always explain this to your client. This is also true when dipping the foot.DON’T heat paraffin on a stove or in a microwave. DON’T put used paraffin back into the spa. Keep the paraffin in the unit fresh and sanitary for your next client.DON’T heat other waxes, lotions, water, or liquids of any kind in your Digital Paraffin Spa. It is intended exclusively for use with paraffin wax.
Manicure Paraffin TreatmentWe recommend you apply a “Hydrify” massage therapy cream after the manicure when hands and nails are at their clean-est. Your clients will leave the salon with wonderful fresh feeling.
InstructionsComplete manicure. DO NOT APPLY POLISH!Spray hands with “Purify” antiseptic spray. Apply a light coat of “Hydrify” massage therapy cream.Hold client’s arm just above the wrist with the hand in a relaxed position, fingers slightly apart and palms down. Now gently immerse the client’s hand into the paraffin wax up to the wrist. Remove and hold over spa unit for a few seconds until paraffin wax no longer appears shiny.The hand should be immersed into the spa five times to form a thick paraffin glove.DO NOT LEAVE HAND IN THE PARAFFIN UNIT TO SOAK
Slip hand into plastic protector bag. Press the back edge of the bag into the paraffin at wrist to secure it. Then slide on the terry mitt. This will retain heat for a longer treatment. Repeat steps 4-7 with the other hand. After 8-10 minutes, remove the terry mitts. For the cleanest and easiest paraffin removal, leave the plastic protector bags on.Gently massage the hand through the plastic bag to loosen paraffin. Then, slide the paraffin “glove” off your hands. Dispose of the bags with paraffin after removal. Repeat with the other hand. Massage hands until oils or lotion are com-pletely absorbed.Clean nails with polish remover to eliminate any paraffin wax or lotion residue prior to applying polish. Nails will be warm, proceed with polish application.
Pedicure Paraffin TreatmentParaffin Therapy is the perfect finish for any pedicure service, leaving your clients feeling exceptionally pampered and relaxed.
InstructionsComplete the pedicure. DO NOT POWDER OR POLISH!Spray the feet with “Purify” antiseptic spray. Apply a light coat of “Hydrify” massage therapy cream to ankles and feet. The spa should be placed with the deepest end towards the client. This allows the foot to be immersed in a natural posi-tion, with the heel lowered and the toes slightly upward.Holding the client’s foot above the ankle, immerse it into the paraffin spa unit up to ankle. Then remove.Wait a few seconds until the paraffin wax no longer appears shiny and repeat. The foot should be immersed into the paraffin spa five times.Slide foot into plastic protector bag. Then into a terry bootie. This will retain heat for a longer treatmentRepeat steps 4-7 with the other foot. Leave the booties on for 10-12 minutes.Remove terry booties. Leave the plastic protector bag on, as in the manicure treatment.For removal, follow guidelines for manicures.Repeat steps 9-10 on other foot.Massage residual lotions or oil into feet and legs.Clean toenails with polish remover prior to applying polish.
For sanitary purpose, it is best to use a separate unit for pedicures.
Body Paraffin TreatmentBody paraffin wrap is an effective therapeutic body treatment. It increases blood circulation, muscles and joints are left relaxed and the skin is intensely softened and moisturized. The client leaves with an invigorating and stimulating feeling all over.
InstructionsLine the table with an electric blanket, then a disposable sheet.Apply “Purify” antiseptic spray to your hands, mist the client’s hands and feet, and wipe dry.Apply “Hydrify” massage therapy cream to the client’s neck, shoulders, elbows, knees and feet.Dip the paraffin brush into the Digital Paraffin Spa, picking enough paraffin on the brush to cover large areas. Use a folded paper towel under the paraffin brush as you are going from the spa unit to the client to avoid dripping paraffin onto the client.Start at the ankles; brush on the paraffin quickly in long strokes, working upward to cover the body with an even coat of paraffin.Apply at least five layers of paraffin. A thicker layer of paraffin will better moisturize the skin and easier paraffin remov-al.When finished coating the legs, cover them with a plastic wrap and towel to retain the heat while you continue.When paraffin application is completed on the legs and back, fold the disposable sheet around the body, and then fold the electric blanket over the sheet.After 15-20 minutes, unwrap the body and remove the paraffin in large pieces. Wipe off any paraffin residue on the body with a towel.Discard all used paraffin.Have the client roll over to the other side and repeat steps 3 through 11.Finally, massage “Hydrify” massage therapy cream to the shoulders, elbows, knees, and heels.

13
Facial Paraffin TherapyParaffin therapy is applied after a basic facial is completed. The heat and oils present in the paraffin will open pores, al-lowing treatment creams, oils, or lotions to penetrate deeper into the skin.
InstructionsDO NOT USE ALCOHOL-BASED PRODUCTSPerform complete facial, analyzing skin to determine the best creams, oils, or lotions to apply prior to paraffin masque.Use a headband and wrap the client’s head with a towel to protect the hair.Apply Aromatic Oil or your choice of cream, lotion, or essential oils to face and throat.Place cotton ball or pad over the eyes. Check paraffin temperature on the back of your wrist. For strip use, dip a 2” wide gauze strip (about 6” in length) into the paraffin and place it on the face. The warm paraffin will hold the gauze in place.For masque use, place the gauze mask over the face. Use a facial masque brush to apply a thin layer of paraffin over the face. Wait a few seconds until the paraffin no longer appears shiny, and then apply a second, third and fourth layer of paraffin. Keeping the layers of paraffin wax as even as possible.Allow the client to relax for 10-15 minutes.Remove the masque by simply lifting the edges of the gauze at the neck, and gently peel the mask off.Dispose of the paraffin wax properly.Gently massage the face. Remove any excess lotion or cream with a tissue.
Cleaning Your Digital Paraffin SpaYour Digital Paraffin Spa should be cleaned after every 25 paraffin therapy treatments or when the paraffin is no longer clear and sediments have accumulated on the bottom of the spa. Old paraffin should never be reused.
InstructionsTurn the unit “OFF”, then remove the lid and unplug. Allow paraffin to solidify. After paraffin has completely hardened, plug in your spa unit. Turn unit “ON” to put in “Manual” mode and adjust the temperature to “MELT” until the edges of the paraffin are softened and loose around the sides of the paraffin spa unit (about 15 minutes).
DO NOT PRY HARDEND WAX OUT OF PARAFFIN SPA OR USE METAL TOOLS TO SCRAPE BATH
Push down on one end of the paraffin cake and it will tip up. Lift the paraffin out of the bath and dispose of it.Turn the unit “OFF” and unplug it.Wipe the inside of the spa unit with a disposable towel to remove residual paraffin wax.Clean the inside and outside of the paraffin spa with an all-purpose cleaner. Thoroughly wiping the spa dry.
DO NOT IMMERSE PARAFFIN SPA IN WATER
Important SafeguardsWhen using electrical appliances, especially when children are present, basic safety precautions should always be followed, including the following:

READ ALL INSTRUCTIONS BEFORE USING.KEEP AWAY FROM WATER.DANGER- As with most electrical appliances, electrical parts are electrically live even when the switch is off:Always unplug the paraffin spa unit immediately after using.Do not use while bathing.Do not place or store appliance where it can fall or be pulled into a tub or sink filled with water.Do not place in or drop into water or other liquid.If an appliance falls into water, unplug it immediately. Do not reach into the water.
WARNING-to reduce the risk of burns, electrocution, fire or injury to persons:Do not leave appliance unattended while it is operating or is still plugged in.Close supervision is necessary when this appliance is used near children or invalids.KEEP AWAY FROM CHILDREN!Use this appliance only for its intended use as described in the Digital Paraffin Spa Manual. The use of attachments not recommended by the manufacturer may cause hazards.Never operate this appliance if it has a damaged cord or plug. if it is not working properly, if it has been dropped or damaged in any manner, or dropped into water. Return appliance to Clean+Easy® Customer Service, 2220 Gaspar Ave. Los Angeles, CA 90040.Keep the cord away from hot or heated surfaces.Never use while sleeping or while drowsy.Do not drape the cord over a counter or a tabletop such that it can be pulled on by children or tripped over unintention-ally.Do not immerse into water or other liquids.Do not make contact with hot metal surfaces.Use this appliance on a level surface.Unplug from the outlet when not in use. Allow to cool before handling, cleaning, or storing the appliance.Test wax on a small area of skin for warmth and possible skin reactions before using. If you are susceptible to allergic reactions or if you have circulatory problems, it is recommended that you consult a physician before using this appliance.
Clean+Easy Roll-On Waxing Quiz
01. For best results, how long should hair be prior to waxing?02. How does technician check wax temperature?03. In what direction does technician apply wax?04. How does technician prevent bruising the skin?05. How much time should one allow for eyebrow waxing?06. Is it ever safe to re-wax an area?07. What advice does one give to clients who tan?08. Should technician apply wax in a thick or thin layer?09. What is the term for hair removal below the skin?10. What does heated wax allow the pores to do?11. After waxing, will hair grow back darker and thicker?12. After waxing, will hair grow back thinner and finer?13. Should wax warmer be left on all day?14. How should technician remove stray hairs?15. Can anyone do waxing?16. Can the client bathe after treatment?17. Are there any age restrictions to waxing services?18. What is the minimum time between waxing ser vices?19. What waxing treatments should men be advised of?20. What is the first step in waxing service?21. What should you do to maintain a professional atmosphere?22. Who should fill out a client waxing card?23. What is the problem if the technician experiences dripping wax?24. How long will waxing treatment last?25. Should technician apply pressure to skin after treat ment?26. Can you wax a man’s beard?27. When waxing, is it best to work in large or in small sections?28. Can long hair be waxed?29. What is the most sensitive area on the face?30. Is it important to clean roller heads after every use?31. How can you test when the wax in the applicator ready to roll?32. In which direction should wax be removed?33. Who should NOT receive wax treatments?34. Applicators should be kept in the warmer facing which direction?35. True or False: Waxing technicians do not make much money?36. How long does it take for wax to heat?
37. During a treatment, what should you talk to the cli ent about?38. Should you mention waxing during a haircut?39. Where on the face should you never wax someone?40. On what setting should the warmer be kept?41. What is the main cause of hair growth in women?42. What are the six basic steps of waxing?43. Why remove wax in the opposite direction of hair growth?44. Why is it important to use a complete wax system?45. What should technician do if wax is applied in the wrong area?

Clean+Easy Roll-On Waxing Quiz Answers
01. ¼ “02. Apply a small amount to wrist.03. In the direction of the hair growth.04. Hold the skin taut when removing strip.05. 5-10 minutes.06. No, never.07. Do not tan the same day as waxing treatment.08. Thin.09. Eplilation.10. Open.11. No.12. Yes.13. Yes.14. With tweezers.15. If you are professional and have been trained (class or manual).16. Advise client to wait a few hours before bathing.17. No.18. 10 days.19. The brow and the nape of the neck.20. Cleansing.21. Keep the waxing area clean.22. Every client receiving a waxing service.23. Tech is either squeezing the applicator or not hold ing it at a 45º angle.24. Between 3 and 8 weeks.25. Yes, it reduces the flow of blood to the area.26. No, the hair is too coarse.27. Small sections.28. First trim hair to ¼” before waxing.29. The upper lip.30. Yes, or they will get clogged.31. Hold applicator at a 45º angle until 2 bubbles rise.32. Wax should be removed in the opposite direction of hair growth.33. Diabetics, people with varicose veins, those using Retin-A, glycolique acids and accutane.34. Facing the back of the warmer.35. False.36. About 30 minutes.37. The benefits of waxing and when to return for next treatment.38. Yes, during a haircut is an excellent time to discuss waxing benefits.39. Inside the ears or inside the nostrils.40. Warmer should be kept in the medium position.41. Hormones.
42. Six Step: Determine direction of hair growth. Apply wax in the direction of hair growth. Apply strip firmly over wax. Hold the skin taut. Remove strip quickly in the opposite direction of hair growth. Apply pressure.
43. To avoid breakage.44. Comfort, satisfaction and professionalism.45. Use Remove to remove wax, stay calm.