cisco icnd1 lab guide v1.0
TRANSCRIPT

© 2010 Marc Bouchard
CiscoCCENTLabGuide
Covers all topics for the ICND1 exam
Version 1.0
Writtenby
MarcBouchard
www.subnet192.com

www.subnet192.com 2
Cis
coC
CE
NT
Lab
Gu
ide
Contents Introduction ............................................................................................................................................ 3
Recommended training material ............................................................................................................. 3
Recommended lab equipment................................................................................................................. 3
How this guide works… ............................................................................................................................ 4
Lab 1 – Configuring S1 – Basic switch configurations ................................................................................ 5
Enabling connectivity ....................................................................................................................... 5
Enhancing security ........................................................................................................................... 9
Configure Ports and Port Security .................................................................................................. 13
Configure VLANs ............................................................................................................................ 17
Flash and nvram management ....................................................................................................... 20
Miscellaneous commands of interest ............................................................................................. 23
Lab 2 – Configuring R1 – Basic router configurations ............................................................................. 25
Enabling connectivity ..................................................................................................................... 25
Enhancing security ......................................................................................................................... 29
Flash and nvram management ....................................................................................................... 33
Lab 3 – Interconnecting components ..................................................................................................... 35
Configuring S2 and S3 .................................................................................................................... 35
Session Management ..................................................................................................................... 37
Network identification ................................................................................................................... 40
Lab 4 – Full topology.............................................................................................................................. 45
Configuring R2 and R3.................................................................................................................... 45
Serial Connectivity ......................................................................................................................... 47
PPP with Authentication ................................................................................................................ 50
Routing: Static Routes .................................................................................................................... 52
Routing: RIP ................................................................................................................................... 60
References & Resources ........................................................................................................................ 65
Software................................................................................................................................................ 65
Special thanks… ..................................................................................................................................... 65

www.subnet192.com 3
Cis
coC
CE
NT
La
bG
uid
e
Introduction Studying for the CCENT/CCNA exams is challenging. There are a lot of resources out there, lots of
material but there was nothing I could find to meet my objective: provide me with a challenge, and then
show a step by step explanation to validate the tasks.
This guide is in no way endorsed by Cisco Systems. I created this document out of personal need and to
help myself memorize and learn the various commands and configurations. I thought I should share this
with others to assist in actually learning hands-on skills with Cisco equipment. Also, note that I didn’t
reinvent the wheel here. Most of this is inspired from personal experience in my own lab, from
information gathered on the internet, from some of the simulators, etc.
This guide is provided FREE of charge. If you paid for this guide, you got ripped off. I do
however accept donations of any amount via Paypal at [email protected] if you find this
guide of use and want to thank me for my efforts. Visit my site at www.subnet192.com for
more information and the latest guides!
Recommended training material The following are what I personally used to pass the certification. I find that going through a CBT before
hitting the books helps a lot to make the book easier to understand.
CBT Nuggets ICND1 training by Jeremy Cioara.
Cisco Press ICND1 by Wendell Odom.
Recommended lab equipment Finding the right gear to build a lab is quite a daunting task. There is a multitude of models and versions,
as well as modules to customize each device. While you can get by with simulators, (I have tried them
all), nothing compares to working with the real deal.
My recommendations, for a reasonably priced lab that would get you through the CCENT and CCNA
curriculum would be the following. Note that not all of them are used for the CCENT, but will be useful
at the CCNA level.
3 Cisco 2950 series switches
3 Cisco 2620XM 128/45 series routers
3 WIC-2T serial interfaces
3 DCE/DTE Smart Serial cables (for the WIC-2T to WIC-2T connections)
1 NM-4A/S serial interface
3 Serial to Smart Serial cables (for the NM-4A/S to WIC-2T connections)

www.subnet192.com 4
Cis
coC
CE
NT
Lab
Gu
ide
How this guide works… First off, this is not intended to explain any of the concepts. There are fantastic books out there for that
job. This guide attempts to make you think about what you need to do, which commands are required
to complete each step and so on.
Lab 1 and 2 will focus on standalone device configurations. However, you don’t go far if nothing is
interconnected. The objective is to make you build your lab, practicing commands as you go.
The goal topology is the following, based on my recommendations for hardware above. You can also
perform most of the steps using Cisco’s Packet Tracer software if you are part of the Cisco Learning
Academy, but be aware that some commands are not implemented like SSH support, etc.
Device ID Interface IP Address Default Gateway
PC Ethernet adapter 192.168.1.100/24 192.168.1.1 S1 Vlan 1 192.168.1.5/24 192.168.1.1 S2 Vlan 1 192.168.1.6/24 192.168.1.1 S3 Vlan 1 192.168.1.7/24 192.168.1.1 R1 FastEthernet 0/0 192.168.1.1/24 R1 Serial 0/0 172.16.0.1/30 R2 FastEthernet 0/0 10.50.0.1/24 R2 Serial 0/0 172.16.1.1/30 R2 Serial 0/1 172.16.0.2/30 R3 FastEthernet 0/0 69.70.16.147/29 R3 Serial 0/0 172.16.1.2/30
For R3’s FastEthernet 0/0 interface, if you have an internet connection available, substitute the IP
address for your own static address. This will provide you with real connectivity to the internet in your
lab.

www.subnet192.com 5
Cis
coC
CE
NT
La
bG
uid
e
Lab 1 – Configuring S1 – Basic switch configurations Material required: 1 switch, 1 PC, console (rollover) cable, Ethernet cable
Enabling connectivity
Objectives
This lab will guide you in configuring a switch from a factory default state.
Preparation
Connect the console (rollover) cable from the PC to the Console port of the switch.
Connect the Ethernet cable from the PC to the FastEthernet 0/1 port of the switch.
Configure the PC’s Ethernet port to 100mbps/Full Duplex.
Tasks
Open a terminal emulator session to the switch
Erase the current configuration (reset to factory default) then reboot the switch.
Set the host name to “S1”.
Set the console password to “cisco”.
Set the privileged mode password to “ciscoexec”.
Set the IP address and default gateway using the topology reference table, and enable the
interface.
Enable Telnet connectivity on all ports, using password “remote”.
Configure all ports to 100mbps/full duplex.
Verify the running configuration.
View the interface list summary.
Test the Telnet connection from the PC to the switch.
View currently connected users.
Save the configuration.
Attempt to perform all the tasks listed above before going through the walkthrough.

www.subnet192.com 6
Cis
coC
CE
NT
Lab
Gu
ide
Walkthrough
Connect via the console cable using a terminal emulator (Putty, Tera-term, Hyper-Terminal …)
Enter privileged mode
Switch>enable
Enter configuration mode
Switch#configure terminal Enter configuration commands, one per line. End with CNTL/Z.
Erase the startup configuration file (reset to factory defaults)
Switch#write erase Erasing the nvram filesystem will remove all configuration files! Continue? [confirm] Switch#reload Proceed with reload? [confirm]
OR
Switch#erase startup-config Erasing the nvram filesystem will remove all configuration files! Continue? [confirm] Switch#reload Proceed with reload? [confirm]
Set the host name
Switch(config)#hostname S1
Set the console password
S1(config)#line console 0 S1(config-line)#password cisco S1(config-line)#exit
Set the privileged mode password
S1(config)#enable password ciscoexec
Configure the IP address and default gateway, and enable the interface
S1(config)#interface vlan 1 S1(config-if)#ip address 192.168.1.5 255.255.255.0 S1(config-if)#no shutdown S1(config-if)#exit S1(config)#ip default-gateway 192.168.1.1

www.subnet192.com 7
Cis
coC
CE
NT
La
bG
uid
e
Enable Telnet connectivity
S1(config)#line vty 0 15 S1(config-line)#password remote S1(config-line)#login S1(config-line)#transport input telnet S1(config-line)#exit
Configure all ports to 100mbps/full duplex.
S1(config)#interface range fastEthernet 0/1 - 24 S1(config-if-range)#speed 100 S1(config-if-range)#duplex full S1(config-if-range)#exit S1(config)#exit
Verify the running configuration
The following output has been edited for space considerations.
S1#show running-config Building configuration... Current configuration: 2673 bytes ! version 12.1 no service password-encryption ! hostname S1 ! enable password ciscoexec ! interface FastEthernet0/1 speed 100 duplex full ! … ! interface Vlan1 ip address 192.168.1.5 255.255.255.0 ! ip default-gateway 192.168.1.1 ! line con 0 password 0 cisco line vty 0 4 password 0 remote login transport input telnet line vty 5 15 password 0 remote login transport input telnet ! End

www.subnet192.com 8
Cis
coC
CE
NT
Lab
Gu
ide
View the interface list summary
S1#show ip interface brief Interface IP-Address OK? Method Status Protocol Vlan1 192.168.1.5 YES manual up up FastEthernet0/1 unassigned YES unset up up FastEthernet0/2 unassigned YES unset down down FastEthernet0/3 unassigned YES unset down down FastEthernet0/4 unassigned YES unset down down …
Test the Telnet connection
From your PC connected to switch via an Ethernet cable, open your terminal emulator software
and connect to the switch using the Telnet protocol.
View currently connected users
S1#show users Line User Host(s) Idle Location 0 con 0 idle 00:00:30 * 1 vty 0 idle 00:00:00 192.168.1.100 Interface User Mode Idle Peer Address
Save the configuration
S1#copy running-config startup-config Destination filename [startup-config]? Building configuration... [OK]

www.subnet192.com 9
Cis
coC
CE
NT
La
bG
uid
e
Enhancing security
Objectives
Your switch has been configured in the previous lab, but could use a bit more security. Complete the
following tasks to enhance the security of your switch. Note that several tasks here do NOT work in
Packet Tracer or on a non-crypto IOS.
Tasks
Set the secured privileged mode password to “ciscosecret”
Set notification banners
o Message of the Day: “AUTHORIZED PERSONEL ONLY”
o Login: “ACCESS RESTRICTED”
Encrypt all clear text passwords
Enable SSH connectivity with local authentication. Leave Telnet enabled for the purpose of the
lab.
o Create an account named “admin” with a password of “cisco”
o Use domain name “subnet192.com”
o Configure the terminal port ranges independently (0-4 and 5-15)
Verify the cryptographic key
Save the configuration
Verify your configuration
Attempt to perform all the tasks listed above before going through the walkthrough.

www.subnet192.com 10
Cis
coC
CE
NT
Lab
Gu
ide
Walkthrough
Connect via the console cable using a terminal emulator (Putty, Tera-term, Hyper-Terminal …)
Enter privileged mode
S1>enable
Enter configuration mode
S1#configure terminal Enter configuration commands, one per line. End with CNTL/Z.
Set the secured privileged mode password
S1(config)#enable secret ciscosecret
Set notification banners (Login and Message of the Day)
S1(config)#banner login ! ACCESS RESTRICTED ! S1(config)#banner motd ! AUTHORIZED PERSONEL ONLY !
Encrypt all clear text passwords
S1(config)#service password-encryption
Enable SSH connectivity with local authentication
S1(config)#ip domain-name subnet192.com S1(config)#username admin password cisco S1(config)#crypto key generate rsa The name for the keys will be: S1.subnet192.com Choose the size of the key modulus in the range of 360 to 2048 for your General Purpose Keys Choosing a key modulus greater than 512 may take a few minutes. How many bits in the modulus [512]: Generating RSA keys ... [OK] S1(config)#line vty 0 4 S1(config-line)#login local S1(config-line)#transport input ssh telnet S1(config-line)#line vty 5 15 S1(config-line)#login local S1(config-line)#transport input ssh telnet S1(config-line)#exit S1(config)#exit
www.subnet192.com 11
Cis
coC
CE
NT
La
bG
uid
e
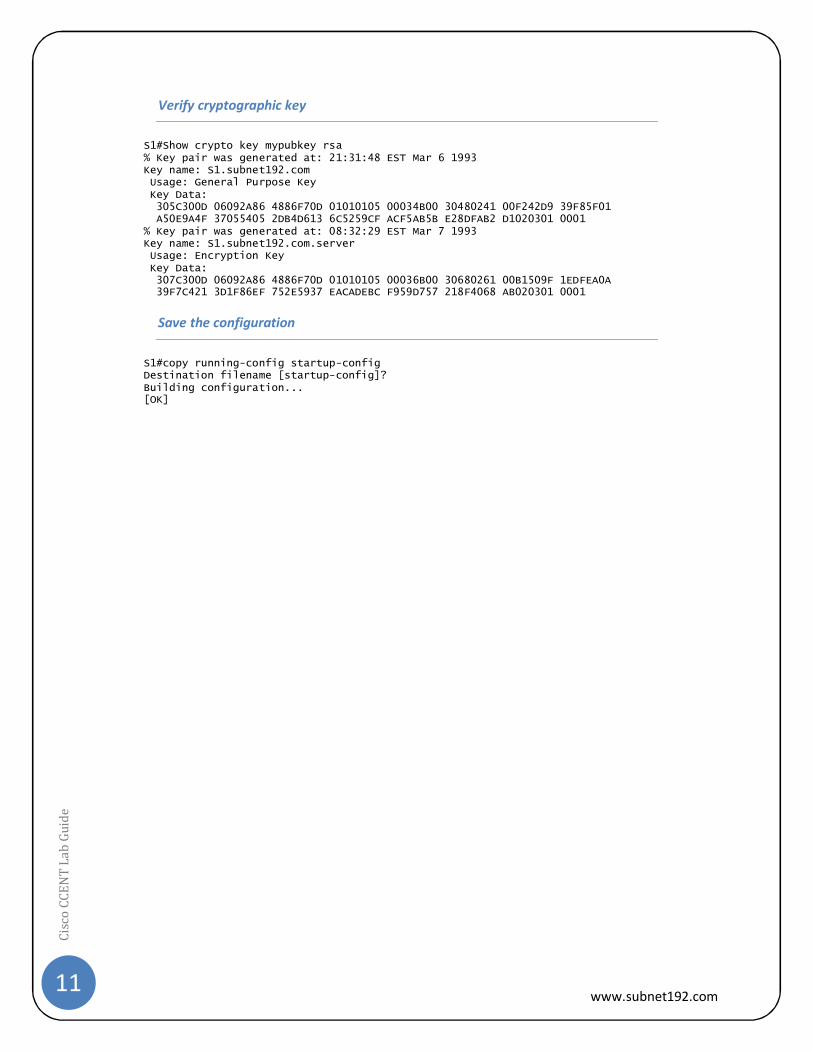
Verify cryptographic key
S1#Show crypto key mypubkey rsa % Key pair was generated at: 21:31:48 EST Mar 6 1993 Key name: S1.subnet192.com Usage: General Purpose Key Key Data: 305C300D 06092A86 4886F70D 01010105 00034B00 30480241 00F242D9 39F85F01 A50E9A4F 37055405 2DB4D613 6C5259CF ACF5AB5B E28DFAB2 D1020301 0001 % Key pair was generated at: 08:32:29 EST Mar 7 1993 Key name: S1.subnet192.com.server Usage: Encryption Key Key Data: 307C300D 06092A86 4886F70D 01010105 00036B00 30680261 00B1509F 1EDFEA0A 39F7C421 3D1F86EF 752E5937 EACADEBC F959D757 218F4068 AB020301 0001
Save the configuration
S1#copy running-config startup-config Destination filename [startup-config]? Building configuration... [OK]

www.subnet192.com 12
Cis
coC
CE
NT
Lab
Gu
ide
Verify the configuration
The following output has been edited for space considerations.
S1#show running-config Building configuration... Current configuration : 2126 bytes ! version 12.1 service password-encryption ! hostname S1 ! enable secret 5 $1$h81C$6qczYbE/ul7.g.VH/jV7p. enable password 7 094F471A1A0A120A0E0F ! username admin password 7 070C285F4D06 ip subnet-zero ! ip domain-name subnet192.com ip ssh time-out 120 ip ssh authentication-retries 3 ! interface FastEthernet0/1 speed 100 duplex full ! interface FastEthernet0/24 speed 100 duplex full ! interface Vlan1 ip address 192.168.1.5 255.255.255.0 no ip route-cache ! ip default-gateway 192.168.1.1 ip http server banner login ^C ACCESS RESTRICTED ^C banner motd ^C AUTHORIZED PERSONEL ONLY ^C ! line con 0 password 7 02050D480809 line vty 0 4 password 7 105C0C140A0317 login local transport input ssh line vty 5 15 password 7 105C0C140A0317 login local transport input ssh ! end

www.subnet192.com 13
Cis
coC
CE
NT
La
bG
uid
e
Configure Ports and Port Security
Objectives
Your switch has been setup with all the basic settings, the remote access connections are now secured,
but what about the access ports? Anybody can connect anything to any port at this point. You can make
the switch even more secure by preventing unauthorized devices from connecting.
Tasks
Disable unused ports (13 to 24)
View the MAC address table
View the current port security settings on port 12
Enable Port Security on port 12
o Make the port shutdown in case of violation
o Allow a single MAC address only
o Let the switch learn the MAC address of the device currently plugged in.
o Plug in any device on port 12 and try to ping something, to send a packet out so the
switch learns the MAC address
View the current port security settings on port 12
Plug in a different device in that port to trigger port violation rules
View the current port security settings on port 12 post violation
Restore connectivity on violated port
Verify your configuration
o List all ports with Port Security enabled
o List all MAC addresses linked to Port Security enabled ports
Attempt to perform all the tasks listed above before going through the walkthrough.

www.subnet192.com 14
Cis
coC
CE
NT
Lab
Gu
ide
Walkthrough
Connect via the console cable using a terminal emulator (Putty, Tera-term, Hyper-Terminal …)
Enter privileged mode
S1>enable
Enter configuration mode
S1#configure terminal Enter configuration commands, one per line. End with CNTL/Z.
Disable unused ports (13 to 24)
S1(config)#interface range fastEthernet 0/13 - 24 S1(config-if)#shutdown S1(config-if)#exit S1(config)#exit
View the MAC address table
S1#show mac-address-table Mac Address Table ------------------------------------------- Vlan Mac Address Type Ports ---- ----------- -------- ----- All 000a.4117.5300 STATIC CPU All 0100.0ccc.cccc STATIC CPU All 0100.0ccc.cccd STATIC CPU All 0100.0cdd.dddd STATIC CPU 1 0004.2007.6d2b DYNAMIC Fa0/1
View the current port security settings on port 12
S1#show port-security interface fastEthernet 0/12 Port Security : Disabled Port Status : Secure-down Violation Mode : Shutdown Aging Time : 0 mins Aging Type : Absolute SecureStatic Address Aging : Disabled Maximum MAC Addresses : 1 Total MAC Addresses : 0 Configured MAC Addresses : 0 Sticky MAC Addresses : 0 Last Source Address : 0000.0000.0000 Security Violation Count : 0
Enter configuration mode
S1#configure terminal Enter configuration commands, one per line. End with CNTL/Z.

www.subnet192.com 15
Cis
coC
CE
NT
La
bG
uid
e
Enable port security on port 12
S1(config)#interface fastEthernet 0/12 S1(config-if)#switchport mode access S1(config-if)#switchport port-security S1(config-if)#switchport port-security maximum 1 S1(config-if)#switchport port-security mac-address sticky S1(config-if)#switchport port-security violation shutdown S1(config-if)#exit S1(config)#exit
View the new port security settings on port 12
S1#show port-security interface fastEthernet 0/12 Port Security : Enabled Port Status : Secure-up Violation Mode : Shutdown Aging Time : 0 mins Aging Type : Absolute SecureStatic Address Aging : Disabled Maximum MAC Addresses : 1 Total MAC Addresses : 1 Configured MAC Addresses : 0 Sticky MAC Addresses : 1 Last Source Address : 0005.5e17.4a40 Security Violation Count : 0
View the new port security settings on port 12 post violation
S1#show port-security interface fastEthernet 0/12 Port Security : Enabled Port Status : Secure-shutdown Violation Mode : Shutdown Aging Time : 0 mins Aging Type : Absolute SecureStatic Address Aging : Disabled Maximum MAC Addresses : 1 Total MAC Addresses : 1 Configured MAC Addresses : 0 Sticky MAC Addresses : 1 Last Source Address : 000d.bd11.c580 Security Violation Count : 1
Enter configuration mode
S1#configure terminal Enter configuration commands, one per line. End with CNTL/Z.
Restore connectivity on violated port
S1(config)#interface fastEthernet 0/12 S1(config-if)#shutdown S1(config-if)#no shutdown S1(config-if)#exit S1(config)#exit

www.subnet192.com 16
Cis
coC
CE
NT
Lab
Gu
ide
Verify your configuration
S1#show port-security Secure Port MaxSecureAddr CurrentAddr SecurityViolation Security Action (Count) (Count) (Count) --------------------------------------------------------------------------- Fa0/12 1 1 1 Shutdown --------------------------------------------------------------------------- Total Addresses in System (excluding one mac per port) : 0 Max Addresses limit in System (excluding one mac per port) : 1024 S1#show port-security address Secure Mac Address Table ------------------------------------------------------------------- Vlan Mac Address Type Ports Remaining Age (mins) ---- ----------- ---- ----- ------------- 1 0005.5e17.4a40 SecureSticky Fa0/12 - ------------------------------------------------------------------- Total Addresses in System (excluding one mac per port) : 0 Max Addresses limit in System (excluding one mac per port) : 1024

www.subnet192.com 17
Cis
coC
CE
NT
La
bG
uid
e
Configure VLANs
Objectives
By default, all ports are members of VLAN 1. Create new VLANs and assign them ports.
Tasks
Create VLANs
o Create VLAN 10, with a description of “Sales”
o Create VLAN 20, with a description of “Marketing”
o Create VLAN 30, with a description of “Research”
Assign ports to VLANs
o Assign ports 5-6 to VLAN 10
o Assign ports 7-8 to VLAN 20
o Assign ports 9 to VLAN 30
Review VLAN configuration
Attempt to perform all the tasks listed above before going through the walkthrough.

www.subnet192.com 18
Cis
coC
CE
NT
Lab
Gu
ide
Walkthrough
Connect via the console cable using a terminal emulator (Putty, Tera-term, Hyper-Terminal …) or via
Telnet.
Enter privileged mode
S1>enable
Enter configuration mode
S1#configure terminal Enter configuration commands, one per line. End with CNTL/Z.
Create VLANs
S1(config)#VLAN 10 S1(config-vlan)#name Sales S1(config-vlan)#VLAN 20 S1(config-vlan)#name Marketing S1(config-vlan)#VLAN 30 S1(config-vlan)#name Research S1(config-vlan)#exit
Assign ports to VLANs
S1(config)#interface range fastEthernet 0/5 - 6 S1(config-if-range)#switchport access vlan 10 S1(config)#interface range fastEthernet 0/7 - 8 S1(config-if-range)#switchport access vlan 20 S1(config)#interface fastEthernet 0/9 S1(config-if)#switchport access vlan 30 S1(config-if)#exit S1(config)#exit

www.subnet192.com 19
Cis
coC
CE
NT
La
bG
uid
e
Review VLAN configuration
S1#show vlan brief VLAN Name Status Ports ---- ------------------------ --------- --------------------------- 1 default active Fa0/1, Fa0/2, Fa0/3, Fa0/4,
Fa0/10, Fa0/11. Fa0/12, Fa0/13, Fa0/14, Fa0/15. Fa0/16, Fa0/17, Fa0/18, Fa0/19. Fa0/20, Fa0/21, Fa0/22, Fa0/23. Fa0/24
10 Sales active Fa0/5, Fa0/6 20 Marketing active Fa0/7, Fa0/8 30 Research active Fa0/9 1002 fddi-default act/unsup 1003 token-ring-default act/unsup 1004 fddinet-default act/unsup 1005 trnet-default act/unsup

www.subnet192.com 20
Cis
coC
CE
NT
Lab
Gu
ide
Flash and nvram management
Objectives
Managing and safeguarding the IOS image and configurations.
Preparation
Install TFTPD32 on your PC.
Create a folder on your PC with a new IOS image to upload to the switch.
Tasks
Backup the configuration to TFTP.
View the contents of flash memory.
Backup the current IOS image to TFTP.
From the IOS, send a new IOS image to a switch using TFTP.
From ROMMON, send a new IOS image to a switch using TFTP.
Attempt to perform all the tasks listed above before going through the walkthrough.

www.subnet192.com 21
Cis
coC
CE
NT
La
bG
uid
e
Walkthrough
Enter privileged mode
S1>enable
Backup the configuration to TFTP
S1#copy startup-config tftp Address or name of remote host []? 192.168.1.100 Destination filename [s1-confg]?
View the contents of the flash memory
S1#dir flash: Directory of flash:/ 2 -rwx 112 Mar 01 1993 01:37:46 +00:00 info 3 -rwx 330 Mar 01 1993 01:42:25 +00:00 env_vars 4 -rwx 2126 Mar 01 1993 00:09:19 +00:00 config.text 5 -rwx 1100 Mar 01 1993 00:09:19 +00:00 private-config.text 7 -rwx 3721946 Mar 01 1993 01:40:37 +00:00 c2950-i6k2l2q4-mz.121-22.EA13.bin 8 drwx 4416 Mar 01 1993 01:41:38 +00:00 html 332 -rwx 112 Mar 01 1993 01:42:17 +00:00 info.ver 333 -rwx 976 Mar 07 1993 02:47:58 +00:00 vlan.dat 7741440 bytes total (2142208 bytes free)
Backup the current IOS to TFTP
S1#copy flash tftp Source filename []? c2950-i6k2l2q4-mz.121-22.EA13.bin Address or name of remote host []? 192.168.1.100 Destination filename [c2950-i6k2l2q4-mz.121-22.EA13.bin]? !!!!!!!!!!!!!!!!!!!!!!!!!!!!!!!!!!!!!!!!!!!!!!!!!!!!!!!!!!!!!!!!!!!!!!!!!!!!!!!!!!!!!!!!!!!!!!!!!!!!!!!!!!!!!!!!!!!!!!!!!!!!!!!! 3721946 bytes copied in 27.988 secs (132984 bytes/sec)
From the IOS, send a new IOS image to a switch using TFTP
S1#copy tftp flash Address or name of remote host []? 192.168.1.100 Source filename []? c2950-i6k2l2q4-mz.121-22.EA13.bin Destination filename [c2950-i6k2l2q4-mz.121-22.EA13.bin]? ##################################################################################################################################################[ok] S1#configure terminal Enter configuration commands, one per line. End with CNTL/Z. S1(config)#boot system flash c2950-i6k2l2q4-mz.121-22.EA13.bin S1(config)#exit

www.subnet192.com 22
Cis
coC
CE
NT
Lab
Gu
ide
From ROMMON, send a new IOS image to a switch using TFTP
To get into ROMMON, press CTRL-BREAK during the boot sequence (power up) of the switch.
ROMMON>IP_ADDRESS=192.168.1.5 ROMMON>IP_SUBNET_MASK=255.255.255.0 ROMMON>DEFAULT_GATEWAY=192.168.1.1 ROMMON>TFTP_SERVER=192.168.1.100 ROMMON>TFTP_FILE= c2950-i6k2l2q4-mz.121-22.EA13.bin ROMMON>tftpdnld

www.subnet192.com 23
Cis
coC
CE
NT
La
bG
uid
e
Miscellaneous commands of interest
Objectives
There are some commands that you can use to improve the device management experience. Here are
some more configuration tasks you can perform.
Tasks
Configure the console logging to not overlap the command prompt
Disable the session timeout
Create an alias called “save” to save your running configuration to nvram:
Prevent DNS lookups
Create an entry in the host name table called “TFTPServer” and test connectivity
Configure the command history buffer to remember 15 commands.
Attempt to perform all the tasks listed above before going through the walkthrough.

www.subnet192.com 24
Cis
coC
CE
NT
Lab
Gu
ide
Walkthrough
Connect via the console cable using a terminal emulator (Putty, Tera-term, Hyper-Terminal …) or via
Telnet.
Enter configuration mode
S1#configure terminal Enter configuration commands, one per line. End with CNTL/Z.
Configure the console logging to not overlap the command prompt
S1(config)#line console 0 S1(config-line)#logging synchronous S1(config-line)#exit
Disable the session timeout
S1(config)#line console 0 S1(config-line)#exec-timeout 0 S1(config-line)#exit
Create an alias called “save” to save your running configuration to nvram:
S1(config)#alias exec save copy running-config startup-config
Prevent DNS lookup
S1(config)#no ip domain-lookup
Create an entry in the host name table called “TFTPServer” and test connectivity
S1(config)#ip host TFTPServer 192.168.1.100 S1(config)#exit S1#ping TFTPServer Type escape sequence to abort. Sending 5, 100-byte ICMP Echos to 192.168.1.100, timeout is 2 seconds: !!!!! Success rate is 100 percent (5/5), round-trip min/avg/max = 1/1/4 ms
Configure the command history buffer to remember 15 commands
S1#terminal history size 15

www.subnet192.com 25
Cis
coC
CE
NT
La
bG
uid
e
Lab 2 – Configuring R1 – Basic router configurations Material required: 1 router, 1 PC, console (rollover) cable, crossover Ethernet cable
Enabling connectivity
Objectives
This lab will guide you in configuring a router from a factory default state. The steps in this lab are very
similar to the basic switch configuration, with minor (but important) differences.
Preparation
Connect the console (rollover) cable from the PC to the Console port of the router.
Connect the crossover Ethernet cable from the PC to the FastEthernet 0/0 port of the router.
Tasks
Restore the router to factory defaults
Set the host name
Set the console password
Set the privileged mode password
Configure the FastEthernet 0/0 interface.
o Set the IP address and subnet mask
o Configure to 100mbps/Full Duplex
o Enable the interface
Enable Telnet connectivity
Verify the running configuration
View the interface list summary
Test the Telnet connection
View currently connected users and which lines are used.
Save the configuration
Attempt to perform all the tasks listed above before going through the walkthrough.

www.subnet192.com 26
Cis
coC
CE
NT
Lab
Gu
ide
Walkthrough
Connect via the console cable using a terminal emulator (Putty, Tera-term, Hyper-Terminal …)
Enter privileged mode
Router>enable
Enter configuration mode
Router#configure terminal Enter configuration commands, one per line. End with CNTL/Z.
Set the host name
Router(config)#hostname R1
Set the console password
R1(config)#line console 0 R1(config-line)#password cisco R1(config-line)#exit
Set the privileged mode password
R1(config)#enable password ciscoexec
Configure the FastEthernet 0/0 interface
R1(config)#interface fastethernet 0/0 R1(config-if)#ip address 192.168.1.1 255.255.255.0 R1(config-if)#no shutdown R1(config-if)#speed 100 R1(config-if)#duplex full R1(config-if)#exit
Enable Telnet connectivity
R1(config)#line vty 0 4 R1(config-line)#password remote R1(config-line)#login R1(config-line)#transport input telnet R1(config-line)#exit R1(config)#exit

www.subnet192.com 27
Cis
coC
CE
NT
La
bG
uid
e
Verify the running configuration
The following output has been edited for space considerations.
R1#show running-config Building configuration... Current configuration : 834 bytes ! version 12.4 service timestamps debug datetime msec service timestamps log datetime msec no service password-encryption ! hostname R1 ! boot-start-marker boot-end-marker ! enable password ciscoexec ! interface FastEthernet0/0 ip address 192.168.1.1 255.255.255.0 speed 100 full-duplex ! interface Serial0/0 no ip address shutdown ! interface Serial0/1 no ip address shutdown ! ip forward-protocol nd ! ip http server no ip http secure-server ! line con 0 password cisco line aux 0 line vty 0 4 password remote login transport input telnet ! end
View the interface list summary
R1#show ip interface brief Interface IP-Address OK? Method Status Protocol FastEthernet0/0 192.168.1.1 YES manual up up Serial0/0 unassigned YES unset administratively down down Serial0/1 unassigned YES unset administratively down down
Test the Telnet connection
From your PC connected to switch via an Ethernet cable, open your terminal emulator software
and connect to the switch using the Telnet protocol.

www.subnet192.com 28
Cis
coC
CE
NT
Lab
Gu
ide
View currently connected users and which lines are used.
R1#show users Line User Host(s) Idle Location 0 con 0 idle 00:03:35 * 66 vty 0 idle 00:00:00 192.168.1.100 Interface User Mode Idle Peer Address R1#show line Tty Typ Tx/Rx A Modem Roty AccO AccI Uses Noise Overruns Int * 0 CTY - - - - - 0 1 0/0 - 65 AUX 9600/9600 - - - - - 0 0 0/0 - * 66 VTY - - - - - 1 0 0/0 - 67 VTY - - - - - 0 0 0/0 - 68 VTY - - - - - 0 0 0/0 - 69 VTY - - - - - 0 0 0/0 - 70 VTY - - - - - 0 0 0/0 - Line(s) not in async mode -or- with no hardware support: 1-64
Save the configuration
R1#copy running-config startup-config Destination filename [startup-config]? Building configuration... [OK]

www.subnet192.com 29
Cis
coC
CE
NT
La
bG
uid
e
Enhancing security
Objectives
Your router has been configured in the previous lab, but could use a bit more security. Complete the
following tasks to enhance the security of your router.
Tasks
Set the secured privileged mode password to “ciscosecret”
Set notification banners
o Message of the Day: “AUTHORIZED PERSONEL ONLY”
o Login: “ACCESS RESTRICTED”
Encrypt all clear text passwords
Enable SSH connectivity with local authentication. Disable Telnet.
o Create an account named “admin” with a password of “cisco”
o Use domain name “subnet192.com”
Verify the cryptographic key
Save the configuration
Verify your configuration
Attempt to perform all the tasks listed above before going through the walkthrough.

www.subnet192.com 30
Cis
coC
CE
NT
Lab
Gu
ide
Walkthrough
Connect via the console cable using a terminal emulator (Putty, Tera-term, Hyper-Terminal …)
Enter privileged mode
R1>enable
Enter configuration mode
R1#configure terminal Enter configuration commands, one per line. End with CNTL/Z.
Set the secured privileged mode password
R1(config)#enable secret ciscosecret
Set notification banners (Login and Message of the Day)
R1(config)#banner login ! ACCESS RESTRICTED ! R1(config)#banner motd ! AUTHORIZED PERSONEL ONLY !
Encrypt all clear text passwords
R1(config)#service password-encryption
Enable SSH connectivity with local authentication. Disable Telnet.
R1(config)#ip domain-name subnet192.com R1(config)#username admin password cisco R1(config)#crypto key generate rsa The name for the keys will be: R1.subnet192.com Choose the size of the key modulus in the range of 360 to 2048 for your General Purpose Keys Choosing a key modulus greater than 512 may take a few minutes. How many bits in the modulus [512]: Generating RSA keys ... [OK] R1(config)#line vty 0 4 R1(config-line)#login local R1(config-line)#transport input ssh R1(config-line)#exit R1(config)#exit

www.subnet192.com 31
Cis
coC
CE
NT
La
bG
uid
e
Verify cryptographic key
R1#Show crypto key mypubkey rsa % Key pair was generated at: 21:31:48 EST Mar 6 1993 Key name: R1.subnet192.com Usage: General Purpose Key Key Data: 305C300D 06092A86 4886F70D 01010105 00034B00 30480241 00F242D9 39F85F01 A50E9A4F 37055405 2DB4D613 6C5259CF ACF5AB5B E28DFAB2 D1020301 0001 % Key pair was generated at: 08:32:29 EST Mar 7 1993 Key name: R1.subnet192.com.server Usage: Encryption Key Key Data: 307C300D 06092A86 4886F70D 01010105 00036B00 30680261 00B1509F 1EDFEA0A 39F7C421 3D1F86EF 752E5937 EACADEBC F959D757 218F4068 AB020301 0001
Save the configuration
R1#copy running-config startup-config Destination filename [startup-config]? Building configuration... [OK]

www.subnet192.com 32
Cis
coC
CE
NT
Lab
Gu
ide
Verify the configuration
The following output has been edited for space considerations.
R1#show running-config Building configuration... Current configuration : 1010 bytes ! version 12.4 service timestamps debug datetime msec service timestamps log datetime msec service password-encryption ! hostname R1 ! boot-start-marker boot-end-marker ! enable password 7 045802150C2E49560C1A ! ip domain name subnet192.com ip auth-proxy max-nodata-conns 3 ip admission max-nodata-conns 3 ! username admin password 7 0822455D0A16 ! interface FastEthernet0/0 ip address 192.168.1.1 255.255.255.0 speed 100 full-duplex ! interface Serial0/0 no ip address shutdown ! interface Serial0/1 no ip address shutdown ! ip forward-protocol nd ! ip http server no ip http secure-server ! banner login ^C ACCESS RESTRICTED ^C banner motd ^C AUTHORIZED PERSONEL ONLY ^C ! line con 0 password 7 121A0C041104 line aux 0 line vty 0 4 password 7 1317121F041801 login local transport input ssh ! End

www.subnet192.com 33
Cis
coC
CE
NT
La
bG
uid
e
Flash and nvram management
Objectives
Managing and safeguarding the IOS image and configurations.
Preparation
Install TFTPD32 on your PC (if not done in Lab 1)
Create a folder on your PC with a new IOS image to upload to the router.
Tasks
Backup the configuration to TFTP.
View the contents of flash memory.
Backup the current IOS image to TFTP.
From the IOS, send a new IOS image to a switch using TFTP.
From ROMMON, send a new IOS image to a switch using TFTP.
Attempt to perform all the tasks listed above before going through the walkthrough.

www.subnet192.com 34
Cis
coC
CE
NT
Lab
Gu
ide
Walkthrough
Enter privileged mode
R1>enable
Backup the configuration to TFTP
R1#copy startup-config tftp Address or name of remote host []? 192.168.1.100 Destination filename [r1-confg]?
View the contents of the flash memory
R1#dir flash: Directory of flash:/ 1 -rw- 28542192 <no date> c2600-advipservicesk9-mz.124-23.bin 49807356 bytes total (21265100 bytes free)
Backup the current IOS to TFTP
R1#copy flash tftp
Source filename []? c2600-advipservicesk9-mz.124-23.bin Address or name of remote host []? 192.168.1.100 Destination filename [c2600-advipservicesk9-mz.124-23.bin]? !!!!!!!!!!!!!!!!!!!!!!!!!!!!!!!!!!!!!!!!!!!!!!!!!!!!!!!!!!!!!!!!!!!!!!!!!!!!!!!!!!!!!!!!!!!!!!!!!!!!!!!!!!!!!!!!!!!!!!!!!!!!!!!! 3721946 bytes copied in 27.988 secs (132984 bytes/sec)
From the IOS, send a new IOS image to a switch using TFTP
R1#copy tftp flash Address or name of remote host []? 192.168.1.100 Source filename []?c2600-advipservicesk9-mz.124-23.bin Destination filename [c2600-advipservicesk9-mz.124-23.bin]? ##################################################################################################################################################[ok] R1#configure terminal Enter configuration commands, one per line. End with CNTL/Z. R1(config)#boot system flash c2600-advipservicesk9-mz.124-23.bin R1(config)#exit
From ROMMON, send a new IOS image to a switch using TFTP
To get into ROMMON, press CTRL-BREAK during the boot sequence (power up) of the switch.
ROMMON>IP_ADDRESS=192.168.1.1 ROMMON>IP_SUBNET_MASK=255.255.255.0 ROMMON>DEFAULT_GATEWAY=192.168.1.1 ROMMON>TFTP_SERVER=192.168.1.100 ROMMON>TFTP_FILE= c2600-advipservicesk9-mz.124-23.bin ROMMON>tftpdnld

www.subnet192.com 35
Cis
coC
CE
NT
La
bG
uid
e
Lab 3 – Interconnecting components
Objectives
Let’s build on what we have learned so far and start adding more devices to our lab. Let’s add 2 more
switches and connect the R1 router to our topology.
Configuring S2 and S3
Objectives
Configure the additional switches to create a functional multi-component environment.
Preparation
Connect R1’s FastEthernet 0/0 interface to FastEthernet port 0/1 of S1.
Connect S2’s FastEthernet port 0/1 to FastEthernet port 0/2 of S1
Connect S3’s FastEthernet port 0/1 to FastEthernet port 0/3 of S1
Connect the PC to FastEthernet port 0/4 of S1.
Tasks
Using what you have practiced so far, configure the new S2 and S3 switches like you did in Lab 1
– Enabling connectivity. Alternatively, you can use the script in the walkthrough section to
automate the configuration.
Disable SSH on S1 and remove the local user ‘Admin’ account. This will make connectivity easier
for future labs.
Attempt to perform all the tasks listed above before going through the walkthrough.

www.subnet192.com 36
Cis
coC
CE
NT
Lab
Gu
ide
Walkthrough
Connect via the console cable using a terminal emulator (Putty, Tera-term, Hyper-Terminal …).
S2 and S3 configuration script
Start by resetting the switches to the factory default, and reload. Once restarted, when back at
the Switch> prompt, copy and paste the following script to configure it. Items in bold vary from
device to device.
enable configure terminal hostname S2 service password-encryption alias exec save copy run start ip default-gateway 192.168.1.1 enable secret 5 $1$h81C$6qczYbE/ul7.g.VH/jV7p. enable password 7 094F471A1A0A120A0E0F ip domain-name subnet192.com interface range fa0/1 – 24 speed 100 duplex full exit interface vlan 1 ip address 192.168.1.6 255.255.255.0 exit banner login ^C ACCESS RESTRICTED ^C banner motd ^C AUTHORIZED PERSONEL ONLY ^C line con 0 password 7 02050D480809 line vty 0 4 password 7 105C0C140A0317 login transport input telnet line vty 5 15 password 7 105C0C140A0317 transport input telnet end save
Disable SSH on S1, remove the admin account.
S1#configure terminal S1(config)#line vty 0 15 S1(config-line)#transport input telnet S1(config-line)#login S1(config-line)#exit S1(config)#no username admin password cisco

www.subnet192.com 37
Cis
coC
CE
NT
La
bG
uid
e
Session Management
Objectives
Experiment with remote sessions between devices.
Tasks
Session management
o From S1, open a telnet connection to S2 (192.168.1.6)
o Return to the S1 prompt without closing the connection to S2.
o From S1, open a telnet connection to S3 (192.168.1.7)
o Return to the S1 prompt without closing the connection to S3.
o Display the list of opened sessions (notice which one has a *)
o Resume the S2 session (192.168.1.6)
o Display the users connected to S2.
o Close the session to S2 permanently.
o Verify that the session is closed.
o From the S1 prompt, close the session to S3.
Attempt to perform all the tasks listed above before going through the walkthrough.

www.subnet192.com 38
Cis
coC
CE
NT
Lab
Gu
ide
Walkthrough
Connect via the console cable using a terminal emulator (Putty, Tera-term, Hyper-Terminal …).
From S1, open a telnet connection to S2 (192.168.1.6)
S1>telnet 192.168.1.6 Trying 192.168.1.6 ... Open AUTHORIZED PERSONEL ONLY ACCESS RESTRICTED User Access Verification Password:
Return to the S1 prompt without closing the connection to S2.
CTRL-SHIFT-6 then X
From S1, open a telnet connection to S3 (192.168.1.7)
S1>telnet 192.168.1.7 Trying 192.168.1.7 ... Open AUTHORIZED PERSONEL ONLY ACCESS RESTRICTED User Access Verification Password:
Return to the S1 prompt without closing the connection to S3.
CTRL-SHIFT-6 then X
Display the list of opened sessions (notice which one has a *)
S1>show sessions Conn Host Address Byte Idle Conn Name 1 192.168.1.6 192.168.1.6 0 0 192.168.1.6 * 2 192.168.1.7 192.168.1.7 0 0 192.168.1.7
Resume the S2 session (192.168.1.6)
S1>resume 1 or simply S1>1
Display the users connected to S2.
S2>show users Line User Host(s) Idle Location * 1 vty 0 idle 00:00:00 192.168.1.5 Interface User Mode Idle Peer Address

www.subnet192.com 39
Cis
coC
CE
NT
La
bG
uid
e
Close the session to S2 permanently.
S2>exit [Connection to 192.168.1.6 closed by foreign host]
Verify that the session is closed.
S1>show sessions Conn Host Address Byte Idle Conn Name * 2 192.168.1.7 192.168.1.7 0 3 192.168.1.7
From the S1 prompt, close the session to S3 (192.168.1.7)
S1>disconnect 2

www.subnet192.com 40
Cis
coC
CE
NT
Lab
Gu
ide
Network identification
Objectives
Discover connected devices and document the topology of an unknown environment.
Tasks
Assume you don’t know the topology of the network and you need to document it. You connect to
switch S1 thru the console port and from there; you must use various commands to help you create the
diagram with port and IP information:
Device ID S1.subnet192.com S2.subnet192.com S3.subnet192.com R1.subnet192.com
IP address/mask
Platform
Capabilities
IOS version
Incoming port to S1 n/a
Outgoing port from device n/a
Start by getting the information about the device you’re connected to. Remember, this is an
unknown network to you, so find out as much as you can from this device! Do this without
looking at the running or startup configuration.
Display a summary list of all the devices known to S1.
Display detailed information about each of these devices, from the S1 prompt.
Use telnet to go to the other devices to complete the missing information.
o Display a summary list of all the mac-addresses known to S1.
o Display a summary list of all the devices known to S2.
o Display a summary list of all the devices known to S3.
o Display a summary list of all the devices known to R1.
Using all these steps should allow you to document your network
and even draw out your diagram from scratch, identifying which
devices are visible and which interface to use to get to them.
Once you have completed the table, configure R1 to not advertise its presence to others.
Display a summary list of all the devices known to S1. R1 should no longer be listed (it might
take a few minutes to disappear)
Attempt to perform all the tasks listed above before going through the walkthrough.

www.subnet192.com 41
Cis
coC
CE
NT
La
bG
uid
e
Walkthrough
Connect via the console cable using a terminal emulator (Putty, Tera-term, Hyper-Terminal …).
Show information about the local device
S1>show version Cisco Internetwork Operating System Software IOS (tm) C2950 Software (C2950-I6K2L2Q4-M), Version 12.1(22)EA13 IOS Version Technical Support: http://www.cisco.com/techsupport Copyright (c) 1986-2009 by cisco Systems, Inc. Compiled Fri 27-Feb-09 22:20 by amvarma Image text-base: 0x80010000, data-base: 0x80680000 ROM: Bootstrap program is C2950 boot loader S1 uptime is 1 hour, 51 minutes System returned to ROM by power-on System image file is "flash:c2950-i6k2l2q4-mz.121-22.EA13.bin" cisco WS-C2950-24 (RC32300) processor (revision E0) with 19912K bytes of memory. Processor board ID FHK0626X0H9 Last reset from system-reset Running Standard Image 24 FastEthernet/IEEE 802.3 interface(s) 32K bytes of flash-simulated non-volatile configuration memory. Base ethernet MAC Address: 00:0A:41:17:53:00 Motherboard assembly number: 73-5781-10 Power supply part number: 34-0965-01 Motherboard serial number: FOC0625077S Power supply serial number: DAB0625576E Model revision number: E0 Motherboard revision number: B0
Model number: WS-C2950-24 Platform System serial number: FHK0626X0H9 Configuration register is 0xF S1>show ip interface Vlan1 is up, line protocol is up Internet address is 192.168.1.5/24 IP address/mask Broadcast address is 255.255.255.255 Address determined by non-volatile memory MTU is 1500 bytes Helper address is not set Directed broadcast forwarding is disabled Outgoing access list is not set Inbound access list is not set Proxy ARP is enabled Local Proxy ARP is disabled Security level is default Split horizon is enabled ICMP redirects are always sent ICMP unreachables are always sent ICMP mask replies are never sent IP fast switching is disabled IP fast switching on the same interface is disabled IP Null turbo vector IP multicast fast switching is disabled IP multicast distributed fast switching is disabled
…

www.subnet192.com 42
Cis
coC
CE
NT
Lab
Gu
ide
Display a summary list of all the devices known to S1
S1>show cdp neighbors Capability Codes: R - Router, T - Trans Bridge, B - Source Route Bridge S - Switch, H - Host, I - IGMP, r - Repeater, P - Phone Device ID Local Intrfce Holdtme Capability Platform Port ID S3.subnet192.com Fas 0/3 176 S I WS-C2950G-Fas 0/1 S2.subnet192.com Fas 0/2 175 S I WS-C2950G-Fas 0/1 R1.subnet192.com Fas 0/1 144 R 2620 Fas 0/0
Display detailed information about each of these devices, from the S1 prompt
S1>show cdp neighbors detail ------------------------- Device ID: S3.subnet192.com Device ID Entry address(es): IP address: 192.168.1.7 Platform: cisco WS-C2950G-24-EI, Capabilities: Switch IGMP Platform & capabilities
Interface: FastEthernet0/3, Port ID (outgoing port): FastEthernet0/1 I/O Ports Holdtime : 157 sec Version : Cisco Internetwork Operating System Software
IOS (tm) C2950 Software (C2950-I6K2L2Q4-M), Version 12.1(22) EA13 IOS Version Technical Support: http://www.cisco.com/techsupport Copyright (c) 1986-2009 by cisco Systems, Inc. Compiled Fri 27-Feb-09 22:20 by amvarma advertisement version: 2 Protocol Hello: OUI=0x00000C, Protocol ID=0x0112; payload len=27, value=00000000FFFFFFFF010221FF00000000000000131A2C2700FF0000 Native VLAN: 1 Duplex: full Management address(es): IP address: 192.168.1.7 ------------------------- Device ID: S2.subnet192.com Entry address(es): IP address: 192.168.1.6 Platform: cisco WS-C2950G-12-EI, Capabilities: Switch IGMP Interface: FastEthernet0/2, Port ID (outgoing port): FastEthernet0/1 Holdtime : 91 sec Version : Cisco Internetwork Operating System Software IOS (tm) C2950 Software (C2950-I6K2L2Q4-M), Version 12.1(22)EA13, RELEASE SOFTWARE (fc2) Technical Support: http://www.cisco.com/techsupport Copyright (c) 1986-2009 by cisco Systems, Inc. Compiled Fri 27-Feb-09 22:20 by amvarma advertisement version: 2 Protocol Hello: OUI=0x00000C, Protocol ID=0x0112; payload len=27, value=00000000FFFFFFFF010221FF00000000000000152B1C9A40FF0000 Native VLAN: 1 Duplex: full Management address(es): IP address: 192.168.1.6

www.subnet192.com 43
Cis
coC
CE
NT
La
bG
uid
e
------------------------- Device ID: R1.subnet192.com Entry address(es): IP address: 192.168.1.1 Platform: cisco 2620, Capabilities: Router Interface: FastEthernet0/1, Port ID (outgoing port): FastEthernet0/0 Holdtime : 39 sec Version : Cisco Internetwork Operating System Software IOS (tm) C2600 Software (C2600-D-M), Version 12.2(5a), RELEASE SOFTWARE (fc1) Copyright (c) 1986-2001 by cisco Systems, Inc. Compiled Thu 04-Oct-01 19:45 by pwade advertisement version: 2 Duplex: full Management address(es):
Display a summary list of all the mac-addresses known to S1
S1>show mac address-table Mac Address Table ------------------------------------------- Vlan Mac Address Type Ports ---- ----------- -------- ----- All 000a.4117.5300 STATIC CPU All 0100.0ccc.cccc STATIC CPU All 0100.0ccc.cccd STATIC CPU All 0100.0cdd.dddd STATIC CPU 1 0005.5e17.4a40 DYNAMIC Fa0/1 1 0013.1a2c.2701 DYNAMIC Fa0/3 1 0015.2b1c.9a41 DYNAMIC Fa0/2 Total Mac Addresses for this criterion: 7
Display a summary list of all the devices known to S2
S1#telnet 192.168.1.6 Trying 192.168.1.6 ... Open AUTHORIZED PERSONEL ONLY ACCESS RESTRICTED User Access Verification Password: S2>show cdp neighbors Capability Codes: R - Router, T - Trans Bridge, B - Source Route Bridge S - Switch, H - Host, I - IGMP, r - Repeater, P - Phone Device ID Local Intrfce Holdtme Capability Platform Port ID S1.subnet192.com Fas 0/1 144 S I WS-C2950-2Fas 0/2 S2>exit

www.subnet192.com 44
Cis
coC
CE
NT
Lab
Gu
ide
Display a summary list of all the devices known to S3
S1#telnet 192.168.1.7 Trying 192.168.1.7 ... Open AUTHORIZED PERSONEL ONLY ACCESS RESTRICTED User Access Verification Password: S3>show cdp neighbors Capability Codes: R - Router, T - Trans Bridge, B - Source Route Bridge S - Switch, H - Host, I - IGMP, r - Repeater, P - Phone Device ID Local Intrfce Holdtme Capability Platform Port ID S1.subnet192.com Fas 0/1 144 S I WS-C2950-2Fas 0/3 S3>exit
Display a summary list of all the devices known to R1
S1#telnet 192.168.1.1 Trying 192.168.1.1 ... Open AUTHORIZED PERSONEL ONLY ACCESS RESTRICTED User Access Verification Password: R1>show cdp neighbors Capability Codes: R - Router, T - Trans Bridge, B - Source Route Bridge S - Switch, H - Host, I - IGMP, r - Repeater Device ID Local Intrfce Holdtme Capability Platform Port ID S1.subnet192.com Fas 0/0 167 S I WS-C2950-2Fas 0/1 R1>exit

www.subnet192.com 45
Cis
coC
CE
NT
La
bG
uid
e
Lab 4 – Full topology
Objectives
In this lab we complete the topology and start having fun with routing protocols.
Preparation
Configure R2 and R3 using the steps from Lab 2.
Connect R1 Serial 0/0 interface (DCE) to Serial 0/1 of R2 (DTE).
Connect R2 Serial 0/0 interface (DCE) to Serial 0/1 of R3 (DTE).
Connect your internet link to R3’s FastEthernet interface.
Connect any device in the Ethernet port of R2 and R3 to bring the link up.
Configuring R2 and R3
Objectives
Configure the serial interfaces to simulate WAN connectivity between the routers.
Tasks
Using what you have practiced so far, configure the new R2 and R3 routers like you did in Lab 2
– Enabling connectivity. Alternatively, you can use the script in the walkthrough section to
automate the configuration.
Disable SSH on R1 and remove the local user ‘Admin’ account. This will make connectivity easier
for future labs.
Attempt to perform all the tasks listed above before going through the walkthrough.

www.subnet192.com 46
Cis
coC
CE
NT
Lab
Gu
ide
Walkthrough
Connect via the console cable using a terminal emulator (Putty, Tera-term, Hyper-Terminal …).
R2 and R3 configuration script
Start by resetting the routers to the factory default, and reload. Once restarted, when back at
the Router> prompt, copy and paste the following script to configure it. Items in bold vary from
device to device.
enable configure terminal hostname R2 service password-encryption alias exec save copy run start enable secret 5 $1$h81C$6qczYbE/ul7.g.VH/jV7p. enable password 7 094F471A1A0A120A0E0F ip domain-name subnet192.com interface fastethernet 0/0 ip address 10.50.0.1 255.255.255.0 no shutdown speed 100 duplex full exit banner login ^C ACCESS RESTRICTED ^C banner motd ^C AUTHORIZED PERSONEL ONLY ^C line con 0 logging synchronous password 7 02050D480809 line vty 0 4 password 7 105C0C140A0317 login transport input telnet line vty 5 15 password 7 105C0C140A0317 transport input telnet end save

www.subnet192.com 47
Cis
coC
CE
NT
La
bG
uid
e
Serial Connectivity
Objectives
Configure the serial interfaces to simulate WAN connectivity between the routers.
Tasks
Verify that serial interface 0/0 on R1 is the DCE
Configure serial interface 0/0 on R1 with a clock rate of 56000.
Configure serial interface 0/1 on R2.
Verify that serial interface 0/0 on R2 is the DCE
Configure serial interface 0/0 on R2 with a clock rate of 9600.
Configure serial interface 0/1 on R3.
Display R2’s neighbors list to validate connectivity with R1 and R3.
Verify the WAN protocol used by R2 on serial interface 0/1.
Attempt to perform all the tasks listed above before going through the walkthrough.

www.subnet192.com 48
Cis
coC
CE
NT
Lab
Gu
ide
Walkthrough
Connect via the console cable or telnet using a terminal emulator (Putty, Tera-term, Hyper-Terminal …).
Verify that serial interface 0/0 on R1 is the DCE
R1#show controllers serial 0/0 Interface Serial0/0 Hardware is PowerQUICC MPC860 DCE V.35, no clock DCE or DTE status and clock rate idb at 0x8497AB4C, driver data structure at 0x84982270 SCC Registers: General [GSMR]=0x2:0x00000030, Protocol-specific [PSMR]=0x8 Events [SCCE]=0x0000, Mask [SCCM]=0x001F, Status [SCCS]=0x06 Transmit on Demand [TODR]=0x0, Data Sync [DSR]=0x7E7E Interrupt Registers: Config [CICR]=0x00367F80, Pending [CIPR]=0x00000A00 Mask [CIMR]=0x30200440, In-srv [CISR]=0x00000000 Command register [CR]=0x640 …
Configure interface S0/0 on R1 with a clock rate of 56000
R1#configure terminal Enter configuration commands, one per line. End with CNTL/Z. R1(config)# R1(config)#interface serial 0/0 R1(config-if)#ip address 172.16.0.1 255.255.255.252 R1(config-if)#no shutdown R1(config-if)#clock rate 56000 R1(config)#
Configure interface S0/1 on R2 as the DTE
R1#configure terminal Enter configuration commands, one per line. End with CNTL/Z. R2(config)# R2(config)#interface serial 0/1 R2(config-if)#ip address 172.16.0.2 255.255.255.252 R2(config-if)#no shutdown R2(config-if)#
Verify that serial interface 0/0 on R2 is the DCE
R2#show controllers serial 0/0 Interface Serial0/0 Hardware is PowerQUICC MPC860 DCE V.35, no clock DCE or DTE status and clock rate idb at 0x8497AB4C, driver data structure at 0x84982270 SCC Registers: General [GSMR]=0x2:0x00000030, Protocol-specific [PSMR]=0x8 Events [SCCE]=0x0000, Mask [SCCM]=0x001F, Status [SCCS]=0x06 Transmit on Demand [TODR]=0x0, Data Sync [DSR]=0x7E7E Interrupt Registers: Config [CICR]=0x00367F80, Pending [CIPR]=0x00000A00 Mask [CIMR]=0x30200440, In-srv [CISR]=0x00000000 Command register [CR]=0x640 …

www.subnet192.com 49
Cis
coC
CE
NT
La
bG
uid
e
Configure interface S0/0 on R2 with a clock rate of 9600
R2(config)#interface serial 0/0 R2(config-if)#ip address 172.16.1.1 255.255.255.252 R2(config-if)#clock rate 9600 R2(config-if)#no shutdown R2(config-if)#
Configure interface S0/1 on R3 as the DTE
R1#configure terminal Enter configuration commands, one per line. End with CNTL/Z. R2(config)# R2(config)#interface serial 0/1 R2(config-if)#ip address 172.16.1.2 255.255.255.252 R2(config-if)#no shutdown R2(config-if)#
Display R2’s neighbors list to validate connectivity with R1 and R3
R2#show cdp neighbors Capability Codes: R - Router, T - Trans Bridge, B - Source Route Bridge S - Switch, H - Host, I - IGMP, r - Repeater Device ID Local Intrfce Holdtme Capability Platform Port ID R3.subnet192.com Ser 0/0 150 R S I 2620XM Ser 0/1 R1.subnet192.com Ser 0/1 172 R S I 2620XM Ser 0/0 R2#
Verify the WAN protocol used by R2 on serial interface 0/1
R2#show interfaces serial 0/1 Serial0/1 is up, line protocol is up Hardware is PowerQUICC Serial Internet address is 172.16.0.2/30 MTU 1500 bytes, BW 1544 Kbit/sec, DLY 20000 usec, reliability 255/255, txload 1/255, rxload 1/255 Encapsulation HDLC, loopback not set WAN encapsulation protocol Keepalive set (10 sec) Last input 00:00:03, output 00:00:09, output hang never Last clearing of "show interface" counters never Input queue: 0/75/0/0 (size/max/drops/flushes); Total output drops: 0 Queueing strategy: weighted fair Output queue: 0/1000/64/0 (size/max total/threshold/drops) Conversations 0/2/256 (active/max active/max total) Reserved Conversations 0/0 (allocated/max allocated) Available Bandwidth 1158 kilobits/sec 5 minute input rate 0 bits/sec, 0 packets/sec 5 minute output rate 0 bits/sec, 0 packets/sec 112 packets input, 8720 bytes, 0 no buffer Received 92 broadcasts, 0 runts, 0 giants, 0 throttles 0 input errors, 0 CRC, 0 frame, 0 overrun, 0 ignored, 0 abort 137 packets output, 9981 bytes, 0 underruns 0 output errors, 0 collisions, 13 interface resets 0 unknown protocol drops 0 output buffer failures, 0 output buffers swapped out 28 carrier transitions DCD=up DSR=up DTR=up RTS=up CTS=up

www.subnet192.com 50
Cis
coC
CE
NT
Lab
Gu
ide
PPP with Authentication
Objectives
Serial connectivity defaults to HDLC encapsulation on Cisco equipment. We will change it to PPP and use
CHAP authentication.
Tasks
Enable PPP encapsulation on serial interface 0/0 of R1
o The serial link with R2 will go down.
Display the status of serial interface 0/0.
Enable PPP encapsulation on serial interface 0/1 of R2
o The serial link with R1 will come back up.
Enable CHAP on both serial interfaces of the link between R1 and R2.
o Create the security accounts on both routers
o Enable CHAP authentication on both routers
The link between R1 and R2 is now using PPP and the link between R2 and R3 will be using HDLC.
Attempt to perform all the tasks listed above before going through the walkthrough.

www.subnet192.com 51
Cis
coC
CE
NT
La
bG
uid
e
Walkthrough
Enable PPP encapsulation on serial interface 0/0 of R1
R1#configure terminal Enter configuration commands, one per line. End with CNTL/Z. R1(config)#interface serial 0/0 R1(config-if)#encapsulation ppp
Display the status of serial interface 0/0
R1#show interfaces serial 0/0
Serial0/0 is up, line protocol is down Link is down Hardware is PowerQUICC Serial Internet address is 172.16.0.1/30 MTU 1500 bytes, BW 1544 Kbit, DLY 20000 usec, reliability 252/255, txload 1/255, rxload 1/255
Encapsulation PPP, loopback not set WAN encapsulation protocol Keepalive set (10 sec) LCP Listen Closed: IPCP, CDPCP Last input 00:00:02, output 00:00:08, output hang never Last clearing of "show interface" counters 00:00:26 Queueing strategy: fifo Output queue 0/40, 0 drops; input queue 0/75, 0 drops 5 minute input rate 0 bits/sec, 0 packets/sec 5 minute output rate 0 bits/sec, 0 packets/sec 4 packets input, 423 bytes, 0 no buffer Received 0 broadcasts, 0 runts, 0 giants, 0 throttles 1 input errors, 0 CRC, 1 frame, 0 overrun, 0 ignored, 0 abort 9 packets output, 126 bytes, 0 underruns 0 output errors, 0 collisions, 1 interface resets 0 output buffer failures, 0 output buffers swapped out 0 carrier transitions DCD=up DSR=up DTR=up RTS=up CTS=up
Enable PPP encapsulation on serial interface 0/1 of R2
R2#configure terminal Enter configuration commands, one per line. End with CNTL/Z. R2(config)#interface serial 0/1 R2(config-if)#encapsulation ppp
Enable CHAP on both serial interfaces of the link between R1 and R2
On R1:
R1(config)#user R2 password subnet192 R1#configure terminal Enter configuration commands, one per line. End with CNTL/Z. R1(config)#interface serial 0/0 R1(config)#ppp authentication chap
On R2:
R2(config)#user R1 password subnet192 R2#configure terminal Enter configuration commands, one per line. End with CNTL/Z. R2(config)#interface serial 0/1 R2(config)#ppp authentication chap

www.subnet192.com 52
Cis
coC
CE
NT
Lab
Gu
ide
Routing: Static Routes
Objectives
Understanding static routes, default routes and connected routes.
Tasks
Connectivity between all devices is established but at the moment, the routers don’t know the paths to
any other routes other than the connected ones.
One way trip…
From R1:
o Display the routing table.
Note the connected routes, already known by the router as they are locally
connected to its interface.
o Create a static route to R2’s 10.50.0.0/24 network, using the IP address of R2’s interface
as the next hop.
o Test the connectivity to the 10.50.0.1 interface using ping.
From S1:
o Test the connectivity to the 10.50.0.1 interface using ping.
Round trip!
From R2:
o Display the routing table.
Note the connected routes, already known by the router as they are locally
connected to its interface.
o Create a static route to R1’s 192.168.1.0/24 network, using the IP address of R1’s
interface as the next hop.
o Test the connectivity to the 192.168.1.1 interface using ping.
From S1:
o Test the connectivity to the 10.50.0.1 interface using ping.

www.subnet192.com 53
Cis
coC
CE
NT
La
bG
uid
e
Around the world!
From R1:
o Create a static route to R3’s 69.70.16.144/29 network, using the IP address of R2’s
interface as the next hop.
o Test the connectivity to the 69.70.16.147 interface using ping.
Create all the missing routes to make the lab fully connected (use the WAN interfaces as the
next hop).
o R1 needs three routes.
69.70.16.144/29 network on R3
10.50.0.0/24 network on R2
R2-R3 WAN link
o R2 needs two routes.
69.70.16.144/29 network on R3
192.168.1.0/24 network on R1
o R3 needs three routes (use the interface ID instead of the IP address of the next hop).
192.168.1.0/24 network on R1
10.50.0.0/24 network on R2
R1-R2 WAN link
Display the routing tables on each router.
From S1, test the connectivity to any of the interfaces on the network.
From R3, do a traceroute to Switch 3.
Now that the internal network is fully operational, let’s add external connectivity (note that there is NO
protection (i.e. firewall or other) in this lab. Proceed at your own risk.)
Create a default route on all routers to reach the internet interface (FastEthernet 0/0 on R3).
Verify that the default route is now enabled on R3.
Configure name server 4.2.2.2 (DNS) on R3.
Test internet connectivity from R3 using www.google.com as the destination address.
Attempt to perform all the tasks listed above before going through the walkthrough.

www.subnet192.com 54
Cis
coC
CE
NT
Lab
Gu
ide
Walkthrough
One way trip…
On R1, display the routing table
R1#show ip route Codes: C - connected, S - static, I - IGRP, R - RIP, M - mobile, B - BGP D - EIGRP, EX - EIGRP external, O - OSPF, IA - OSPF inter area N1 - OSPF NSSA external type 1, N2 - OSPF NSSA external type 2 E1 - OSPF external type 1, E2 - OSPF external type 2, E - EGP i - IS-IS, L1 - IS-IS level-1, L2 - IS-IS level-2, ia - IS-IS inter area * - candidate default, U - per-user static route, o - ODR P - periodic downloaded static route Gateway of last resort is not set No default route 172.16.0.0/16 is variably subnetted, 2 subnets, 2 masks C 172.16.0.0/30 is directly connected, Serial0/0 Connected route
C 172.16.0.2/32 is directly connected, Serial0/0 Connected route
C 192.168.1.0/24 is directly connected, FastEthernet0/0 Connected route
On R1, create a static route to R2’s 10.50.0.0/24 network…
R1(config)#ip route 10.50.0.0 255.255.255.0 172.16.0.2 R1(config)#exit
On R1, test the connectivity to the 10.50.0.1 interface using ping
R1#ping 10.50.0.1 Type escape sequence to abort. Sending 5, 100-byte ICMP Echos to 10.50.0.1, timeout is 2 seconds: !!!!! Success rate is 100 percent (5/5), round-trip min/avg/max = 32/32/36 ms Ping success!
** This pings from interface 172.16.0.1 to 10.50.0.1 uses the static route defined on the previous step.
The R2 router already knows the route to 172.16.0.1 so the ping works.
On S1, test the connectivity to the 10.50.0.1 interface using ping
S1>ping 10.50.0.1 Type escape sequence to abort. Sending 5, 100-byte ICMP Echos to 10.50.0.1, timeout is 2 seconds: .....
Success rate is 0 percent (0/5) Ping failure!
** The ping fails! Well actually, the ping reaches the 10.50.0.1 interface but because R2 doesn’t know
the path to the 192.168.1.0/24 network, it can’t return the response to the ping.

www.subnet192.com 55
Cis
coC
CE
NT
La
bG
uid
e
Round trip!
On R2, display the routing table
R2#show ip route Codes: C - connected, S - static, R - RIP, M - mobile, B - BGP D - EIGRP, EX - EIGRP external, O - OSPF, IA - OSPF inter area N1 - OSPF NSSA external type 1, N2 - OSPF NSSA external type 2 E1 - OSPF external type 1, E2 - OSPF external type 2 i - IS-IS, su - IS-IS summary, L1 - IS-IS level-1, L2 - IS-IS level-2 ia - IS-IS inter area, * - candidate default, U - per-user static route o - ODR, P - periodic downloaded static route Gateway of last resort is not set 172.16.0.0/16 is variably subnetted, 3 subnets, 2 masks C 172.16.0.0/30 is directly connected, Serial0/1 Connected route
C 172.16.1.0/30 is directly connected, Serial0/0 Connected route
C 172.16.0.1/32 is directly connected, Serial0/1 Connected route 10.0.0.0/24 is subnetted, 1 subnets C 10.50.0.0 is directly connected, FastEthernet0/0 Connected route
On R2, create a static route to R1’s 192.168.1.0/24 network…
R2(config)#ip route 192.168.1.0 255.255.255.0 172.16.0.1 R2(config)#exit
On R2, test the connectivity to the 192.168.1.1 interface using ping
R1#ping 192.168.1.1 Type escape sequence to abort. Sending 5, 100-byte ICMP Echos to 192.168.1.1, timeout is 2 seconds: !!!!!
Success rate is 100 percent (5/5), round-trip min/avg/max = 32/32/36 ms Ping success!
** This pings from interface 172.16.0.2 to 192.168.1.1 uses the static route defined on the previous
step. The R1 router already knows the route to 172.16.0.2 so the ping works.
On S1, test the connectivity to the 10.50.0.1 interface using ping
S1>ping 10.50.0.1 Type escape sequence to abort. Sending 5, 100-byte ICMP Echos to 10.50.0.1, timeout is 2 seconds: !!!!! Success rate is 100 percent (5/5), round-trip min/avg/max = 32/33/36 ms Ping success!
** The ping works! Now that R2 knows the path to the 192.168.1.0/24 network, it is able to return the
response to the ping.

www.subnet192.com 56
Cis
coC
CE
NT
Lab
Gu
ide
Around the world!
On R1, create a static route to R3’s 69.70.16.144/29 network, using the IP address
of R2’s interface as the next hop.
R1(config)#ip route 69.70.16.144 255.255.255.248 172.16.0.2 R1(config)#exit
Test the connectivity to the 69.70.16.147 interface using ping
R1#ping 69.70.16.147 Type escape sequence to abort. Sending 5, 100-byte ICMP Echos to 69.70.16.147, timeout is 2 seconds: U.U.U Success rate is 0 percent (0/5) Ping failure!
** The ping fails! The packet is sent to R2 but R2 has no idea where to forward it to…
Create all the missing routes to make the lab fully connected
To establish full connectivity, more static routes need to be configured. These are the routes that are
missing to make the entire network fully connected.
R1 needs to know about R2-R3’s serial WAN link (the other two routes are already configured).
R1(config)#ip route 172.16.1.0 255.255.255.252 172.16.0.2
R2 needs to know about R3’s Ethernet subnet (the other route is already configured).
R2(config)#ip route 69.70.16.144 255.255.255.248 172.16.1.2
R3 needs to know about R1’s Ethernet subnet and R2’s Ethernet subnet, and about the R1-R2 serial
WAN link.
R3(config)#ip route 192.168.1.0 255.255.255.0 serial 0/1 R3(config)#ip route 10.50.0.0 255.255.255.0 serial 0/1 R3(config)#ip route 172.16.0.0 255.255.255.252 serial 0/1

www.subnet192.com 57
Cis
coC
CE
NT
La
bG
uid
e
Display the routing tables on each router
R1#show ip route Codes: C - connected, S - static, I - IGRP, R - RIP, M - mobile, B - BGP D - EIGRP, EX - EIGRP external, O - OSPF, IA - OSPF inter area N1 - OSPF NSSA external type 1, N2 - OSPF NSSA external type 2 E1 - OSPF external type 1, E2 - OSPF external type 2, E - EGP i - IS-IS, L1 - IS-IS level-1, L2 - IS-IS level-2, ia - IS-IS inter area * - candidate default, U - per-user static route, o - ODR P - periodic downloaded static route Gateway of last resort is not set 69.0.0.0/29 is subnetted, 1 subnets S 69.70.16.144 [1/0] via 172.16.0.2 Static route 172.16.0.0/16 is variably subnetted, 3 subnets, 2 masks C 172.16.0.0/30 is directly connected, Serial0/0
S 172.16.1.0/30 [1/0] via 172.16.0.2 Static route C 172.16.0.2/32 is directly connected, Serial0/0 10.0.0.0/24 is subnetted, 1 subnets S 10.50.0.0 [1/0] via 172.16.0.2 Static route C 192.168.1.0/24 is directly connected, FastEthernet0/0 R2#show ip route Codes: C - connected, S - static, R - RIP, M - mobile, B - BGP D - EIGRP, EX - EIGRP external, O - OSPF, IA - OSPF inter area N1 - OSPF NSSA external type 1, N2 - OSPF NSSA external type 2 E1 - OSPF external type 1, E2 - OSPF external type 2 i - IS-IS, su - IS-IS summary, L1 - IS-IS level-1, L2 - IS-IS level-2 ia - IS-IS inter area, * - candidate default, U - per-user static route o - ODR, P - periodic downloaded static route Gateway of last resort is not set 69.0.0.0/29 is subnetted, 1 subnets S 69.70.16.144 [1/0] via 172.16.1.2 Static route 172.16.0.0/16 is variably subnetted, 3 subnets, 2 masks C 172.16.0.0/30 is directly connected, Serial0/1 C 172.16.1.0/30 is directly connected, Serial0/0 C 172.16.0.1/32 is directly connected, Serial0/1 10.0.0.0/24 is subnetted, 1 subnets C 10.50.0.0 is directly connected, FastEthernet0/0 S 192.168.1.0/24 [1/0] via 172.16.0.1 Static route R3#show ip route Codes: C - connected, S - static, R - RIP, M - mobile, B - BGP D - EIGRP, EX - EIGRP external, O - OSPF, IA - OSPF inter area N1 - OSPF NSSA external type 1, N2 - OSPF NSSA external type 2 E1 - OSPF external type 1, E2 - OSPF external type 2 i - IS-IS, su - IS-IS summary, L1 - IS-IS level-1, L2 - IS-IS level-2 ia - IS-IS inter area, * - candidate default, U - per-user static route o - ODR, P - periodic downloaded static route Gateway of last resort is not set 69.0.0.0/29 is subnetted, 1 subnets C 69.70.16.144 is directly connected, FastEthernet0/0 172.16.0.0/30 is subnetted, 2 subnets
S 172.16.0.0 is directly connected, Serial0/1 Static route C 172.16.1.0 is directly connected, Serial0/1 10.0.0.0/24 is subnetted, 1 subnets S 10.50.0.0 is directly connected, Serial0/1 Static route
S 192.168.1.0/24 is directly connected, Serial0/1 Static route

www.subnet192.com 58
Cis
coC
CE
NT
Lab
Gu
ide
From S1, test the connectivity to any of the interfaces on the network
** Here we simply test the farthest connection available from S1 on the diagram, but all the internal
networks are now reachable from any component of the network.
S1>ping 69.70.16.147 Type escape sequence to abort. Sending 5, 100-byte ICMP Echos to 69.70.16.147, timeout is 2 seconds: !!!!! Success rate is 100 percent (5/5), round-trip min/avg/max = 216/216/216 ms
From R3, do a traceroute to Switch 3
R3#traceroute 192.168.1.7 Type escape sequence to abort. Tracing the route to 192.168.1.7 1 172.16.1.1 84 msec 84 msec 88 msec 2 172.16.0.1 100 msec 100 msec 100 msec 3 192.168.1.7 104 msec 100 msec *
Create a default route on all routers to reach the internet
R1(config)#ip route 0.0.0.0 0.0.0.0 serial 0/0 R2(config)#ip route 0.0.0.0 0.0.0.0 serial 0/0 R3(config)#ip route 0.0.0.0 0.0.0.0 FastEthernet 0/0
Verify that the default route is now enabled on R3
R3#show ip route Codes: C - connected, S - static, R - RIP, M - mobile, B - BGP D - EIGRP, EX - EIGRP external, O - OSPF, IA - OSPF inter area N1 - OSPF NSSA external type 1, N2 - OSPF NSSA external type 2 E1 - OSPF external type 1, E2 - OSPF external type 2 i - IS-IS, su - IS-IS summary, L1 - IS-IS level-1, L2 - IS-IS level-2 ia - IS-IS inter area, * - candidate default, U - per-user static route o - ODR, P - periodic downloaded static route
Gateway of last resort is 0.0.0.0 to network 0.0.0.0 Default route configured! 69.0.0.0/29 is subnetted, 1 subnets C 69.70.16.144 is directly connected, FastEthernet0/0 172.16.0.0/30 is subnetted, 2 subnets S 172.16.0.0 is directly connected, Serial0/1 C 172.16.1.0 is directly connected, Serial0/1 10.0.0.0/24 is subnetted, 1 subnets S 10.50.0.0 is directly connected, Serial0/1 S 192.168.1.0/24 is directly connected, Serial0/1 S* 0.0.0.0/0 is directly connected, FastEthernet0/0 Note the * next to the S

www.subnet192.com 59
Cis
coC
CE
NT
La
bG
uid
e
Configure name server 4.2.2.2 (DNS) on R3
R3(config)#ip name-server 4.2.2.2
Test internet connectivity from R3 using www.google.com as the destination
R3#ping www.google.com Type escape sequence to abort. Sending 5, 100-byte ICMP Echos to 74.125.95.106, timeout is 2 seconds: !!!!! Success rate is 100 percent (5/5), round-trip min/avg/max = 48/50/52 ms
** NOTE: You will not be able to ping or resolve internet addresses from any other device on the
network. Remember that everything inside the network is using NON-ROUTABLE addresses. Until NAT is
implemented on the network, no other device other than R3 can access the internet (it has a public
address!).

www.subnet192.com 60
Cis
coC
CE
NT
Lab
Gu
ide
Routing: RIP
Objectives
Creating all of the static routes was tedious work! Routing protocols allow much simpler management of
routes.
Tasks
Remove all static routes created in the previous section on all routers. Use the running
configuration to help you.
Enable RIP on all the routers and advertise all the subnets
Display the routing protocol information
From R3, ping the S3 switch.
Enable RIP debug mode to view RIP synchronization messages.
Disable all debug information.
Display the routing table.
From S1, test the connectivity to any of the interfaces on the network.
From R3, do a traceroute to Switch 3.
Now that the internal network is fully operational, let’s add external connectivity (note that there is NO
protection (i.e. firewall or other) in this lab. Proceed at your own risk.)
Create a default route on R3 for the internet interface and propagate it to other routers via RIP.
Verify that the default route is now enabled on R3.
Test internet connectivity from R3 using www.google.com as the destination address.
Verify that other routers are receiving the default route via RIP.
Attempt to perform all the tasks listed above before going through the walkthrough.
Attempt to perform all the tasks listed above before going through the walkthrough.

www.subnet192.com 61
Cis
coC
CE
NT
La
bG
uid
e
Walkthrough
Remove all static routes created in the previous section
Start by looking at the running configuration of each router
R1#show run | include ip route ip route 0.0.0.0 0.0.0.0 Serial0/0 ip route 10.50.0.0 255.255.255.0 172.16.0.2 ip route 69.70.16.144 255.255.255.248 172.16.0.2 ip route 172.16.1.0 255.255.255.252 172.16.0.2
Then issue a no command in front of the ip route statement.
S1#configure terminal Enter configuration commands, one per line. End with CNTL/Z. R1(config)#no ip route 0.0.0.0 0.0.0.0 Serial0/0 R1(config)#no ip route 10.50.0.0 255.255.255.0 172.16.0.2 R1(config)#no ip route 69.70.16.144 255.255.255.248 172.16.0.2 R1(config)#no ip route 172.16.1.0 255.255.255.252 172.16.0.2
Repeat for the other two routers.
Enable RIP on all the routers and advertise all the subnets
R1(config)#router rip R1(config-router)#network 172.16.0.0 R1(config-router)#network 192.168.1.0 R2(config)#router rip R2(config-router)#network 172.16.0.0 R2(config-router)#network 10.50.0.0 R3(config)#router rip R3(config-router)#network 172.16.0.0
Display the routing protocol information
R1#show ip protocols Routing Protocol is "rip" Sending updates every 30 seconds, next due in 11 seconds Invalid after 180 seconds, hold down 180, flushed after 240 Outgoing update filter list for all interfaces is not set Incoming update filter list for all interfaces is not set Redistributing: rip Default version control: send version 1, receive any version Interface Send Recv Triggered RIP Key-chain FastEthernet0/0 1 1 2 Serial0/0 1 1 2 Automatic network summarization is in effect Maximum path: 4 Routing for Networks: 172.16.0.0 192.168.1.0 Routing Information Sources: Gateway Distance Last Update 172.16.0.2 120 00:00:06 Distance: (default is 120)
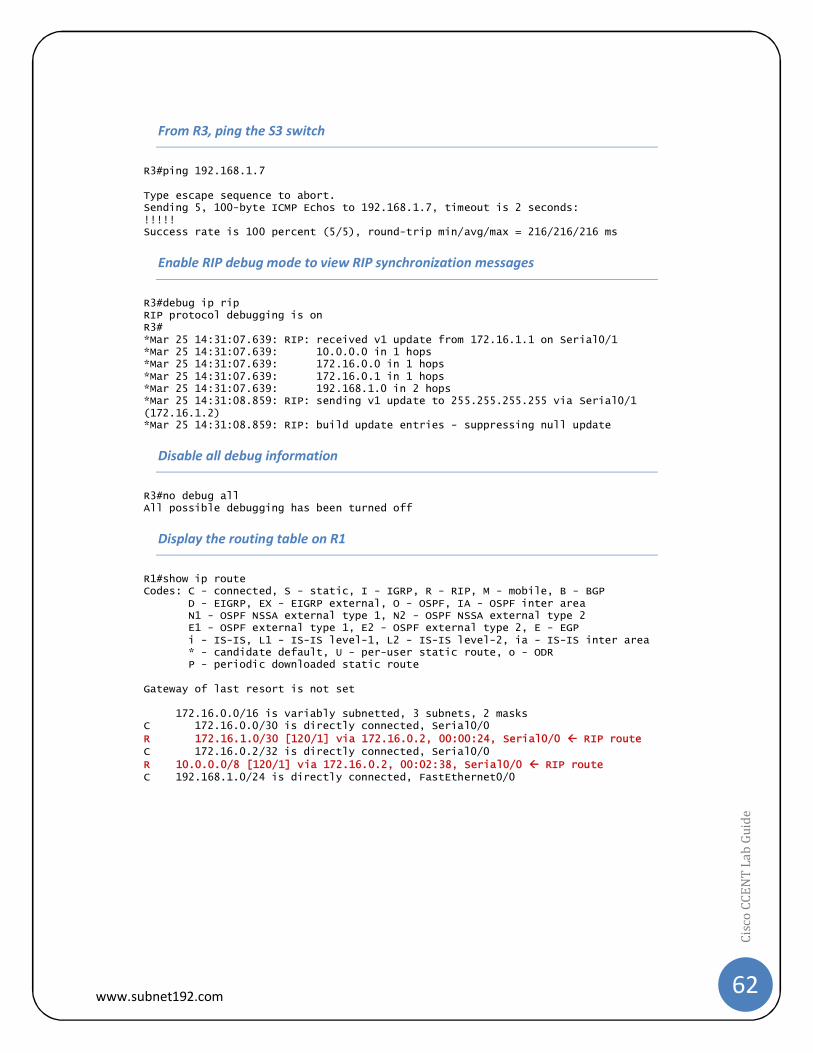
www.subnet192.com 62
Cis
coC
CE
NT
Lab
Gu
ide
From R3, ping the S3 switch
R3#ping 192.168.1.7 Type escape sequence to abort. Sending 5, 100-byte ICMP Echos to 192.168.1.7, timeout is 2 seconds: !!!!! Success rate is 100 percent (5/5), round-trip min/avg/max = 216/216/216 ms
Enable RIP debug mode to view RIP synchronization messages
R3#debug ip rip RIP protocol debugging is on R3# *Mar 25 14:31:07.639: RIP: received v1 update from 172.16.1.1 on Serial0/1 *Mar 25 14:31:07.639: 10.0.0.0 in 1 hops *Mar 25 14:31:07.639: 172.16.0.0 in 1 hops *Mar 25 14:31:07.639: 172.16.0.1 in 1 hops *Mar 25 14:31:07.639: 192.168.1.0 in 2 hops *Mar 25 14:31:08.859: RIP: sending v1 update to 255.255.255.255 via Serial0/1 (172.16.1.2) *Mar 25 14:31:08.859: RIP: build update entries - suppressing null update
Disable all debug information
R3#no debug all All possible debugging has been turned off
Display the routing table on R1
R1#show ip route Codes: C - connected, S - static, I - IGRP, R - RIP, M - mobile, B - BGP D - EIGRP, EX - EIGRP external, O - OSPF, IA - OSPF inter area N1 - OSPF NSSA external type 1, N2 - OSPF NSSA external type 2 E1 - OSPF external type 1, E2 - OSPF external type 2, E - EGP i - IS-IS, L1 - IS-IS level-1, L2 - IS-IS level-2, ia - IS-IS inter area * - candidate default, U - per-user static route, o - ODR P - periodic downloaded static route Gateway of last resort is not set 172.16.0.0/16 is variably subnetted, 3 subnets, 2 masks C 172.16.0.0/30 is directly connected, Serial0/0 R 172.16.1.0/30 [120/1] via 172.16.0.2, 00:00:24, Serial0/0 RIP route C 172.16.0.2/32 is directly connected, Serial0/0 R 10.0.0.0/8 [120/1] via 172.16.0.2, 00:02:38, Serial0/0 RIP route C 192.168.1.0/24 is directly connected, FastEthernet0/0

www.subnet192.com 63
Cis
coC
CE
NT
La
bG
uid
e
From S1, test the connectivity to any of the interfaces on the network
** Here we simply test the farthest connection available from S1 on the diagram, but all the internal
networks are now reachable from any component of the network.
S1>ping 69.70.16.147 Type escape sequence to abort. Sending 5, 100-byte ICMP Echos to 69.70.16.147, timeout is 2 seconds: !!!!! Success rate is 100 percent (5/5), round-trip min/avg/max = 216/216/216 ms
From R3, do a traceroute to Switch 3
R3#traceroute 192.168.1.7 Type escape sequence to abort. Tracing the route to 192.168.1.7 1 172.16.1.1 84 msec 84 msec 88 msec 2 172.16.0.1 100 msec 100 msec 100 msec 3 192.168.1.7 104 msec 100 msec *
Create a default route on R3 for the internet interface and propagate it to other
routers via RIP
R3(config)#ip route 0.0.0.0 0.0.0.0 fastEthernet 0/0 R3(config)#router rip R3(config-router)#default-information originate
Verify that the default route is now enabled on R3
R3#show ip route Codes: C - connected, S - static, R - RIP, M - mobile, B - BGP D - EIGRP, EX - EIGRP external, O - OSPF, IA - OSPF inter area N1 - OSPF NSSA external type 1, N2 - OSPF NSSA external type 2 E1 - OSPF external type 1, E2 - OSPF external type 2 i - IS-IS, su - IS-IS summary, L1 - IS-IS level-1, L2 - IS-IS level-2 ia - IS-IS inter area, * - candidate default, U - per-user static route o - ODR, P - periodic downloaded static route Gateway of last resort is 0.0.0.0 to network 0.0.0.0 69.0.0.0/29 is subnetted, 1 subnets C 69.70.16.144 is directly connected, FastEthernet0/0 172.16.0.0/16 is variably subnetted, 3 subnets, 2 masks
R 172.16.0.0/30 [120/1] via 172.16.1.1, 00:00:11, Serial0/1 RIP route C 172.16.1.0/30 is directly connected, Serial0/1
R 172.16.0.1/32 [120/1] via 172.16.1.1, 00:00:11, Serial0/1 RIP route
R 10.0.0.0/8 [120/1] via 172.16.1.1, 00:00:11, Serial0/1 RIP route
R 192.168.1.0/24 [120/2] via 172.16.1.1, 00:00:11, Serial0/1 RIP route
S* 0.0.0.0/0 is directly connected, FastEthernet0/0 Static route

www.subnet192.com 64
Cis
coC
CE
NT
Lab
Gu
ide
Test internet connectivity from R3 using www.google.com as the destination
R3#ping www.google.com Type escape sequence to abort. Sending 5, 100-byte ICMP Echos to 74.125.95.106, timeout is 2 seconds: !!!!! Success rate is 100 percent (5/5), round-trip min/avg/max = 48/50/52 ms
** NOTE: You will not be able to ping or resolve internet addresses from any other device on the
network. Remember that everything inside the network is using NON-ROUTABLE addresses. Until NAT is
implemented on the network, no other device other than R3 can access the internet (it has a public
address!).
Verify that other routers are receiving the default route via RIP
R1#show ip route Codes: C - connected, S - static, I - IGRP, R - RIP, M - mobile, B - BGP D - EIGRP, EX - EIGRP external, O - OSPF, IA - OSPF inter area N1 - OSPF NSSA external type 1, N2 - OSPF NSSA external type 2 E1 - OSPF external type 1, E2 - OSPF external type 2, E - EGP i - IS-IS, L1 - IS-IS level-1, L2 - IS-IS level-2, ia - IS-IS inter area * - candidate default, U - per-user static route, o - ODR P - periodic downloaded static route Gateway of last resort is 172.16.0.2 to network 0.0.0.0 Default route configured! 172.16.0.0/16 is variably subnetted, 3 subnets, 2 masks C 172.16.0.0/30 is directly connected, Serial0/0 R 172.16.1.0/30 [120/1] via 172.16.0.2, 00:00:03, Serial0/0 C 172.16.0.2/32 is directly connected, Serial0/0 R 10.0.0.0/8 [120/1] via 172.16.0.2, 00:00:03, Serial0/0 C 192.168.1.0/24 is directly connected, FastEthernet0/0
R* 0.0.0.0/0 [120/2] via 172.16.0.2, 00:00:03, Serial0/0 Note the * next to the R

www.subnet192.com 65
Cis
coC
CE
NT
La
bG
uid
e
References & Resources Cisco official certification information
http://www.cisco.com/web/learning/le3/learning_career_certifications_and_learning_paths_home.html
The Cisco Learning Network
https://learningnetwork.cisco.com/index.jspa?ciscoHome=true
Cisco Feature Navigator
http://tools.cisco.com/ITDIT/CFN/jsp/index.jsp
Wendell Odom’s CertSkills
http://www.certskills.com/
Software
Dynagen/Dynamips Cisco emulator
http://dynagen.org/
Tera Term terminal emulator
http://en.sourceforge.jp/projects/ttssh2/
TFTPD32 TFTP server
http://tftpd32.jounin.net/
Special thanks… To my wife Luz and my son Ian, for understanding my passion for technology; and to all of you who went
through this whole guide and thought…
“Wow! What a great guide, I can pass this exam easily now! This guy rocks!”
… and then went to Paypal and sent in a donation to [email protected] to thank me for all my hard
work.
Good luck with the exam!
Marc Bouchard http://www.subnet192.com