cis bind benchmark_v1.0
TRANSCRIPT

The Center for Internet Security DNS BIND Benchmark
Draft v0.16 Page 1 of 41
The Center for Internet Security DNS BIND Benchmark
Version 1.0 - January 2006
Copyright 2006, The Center for Internet Security (CIS)
http://www.CISecurity.org/
Edited by Ralph Durkee
The Center for Internet Security DNS BIND Benchmark
Draft v0.16 Page 2 of 41
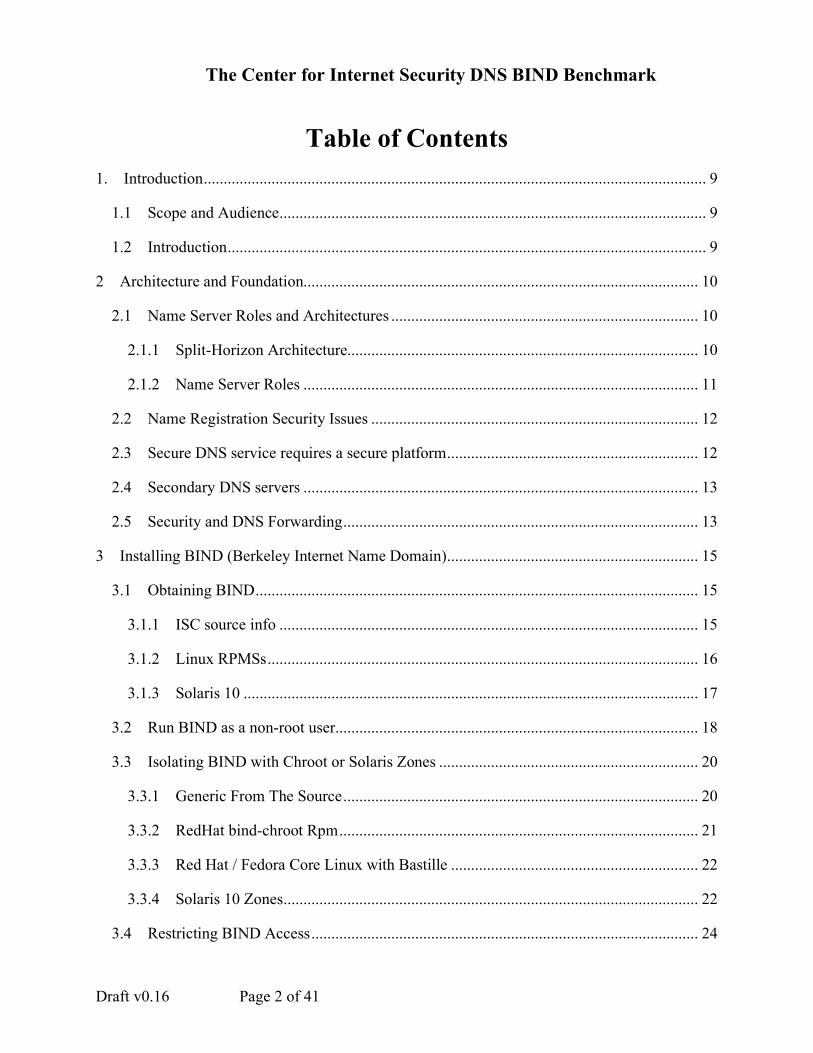
Table of Contents 1. Introduction.............................................................................................................................. 9
1.1 Scope and Audience........................................................................................................... 9
1.2 Introduction........................................................................................................................ 9
2 Architecture and Foundation................................................................................................... 10
2.1 Name Server Roles and Architectures ............................................................................. 10
2.1.1 Split-Horizon Architecture........................................................................................ 10
2.1.2 Name Server Roles ................................................................................................... 11
2.2 Name Registration Security Issues .................................................................................. 12
2.3 Secure DNS service requires a secure platform............................................................... 12
2.4 Secondary DNS servers ................................................................................................... 13
2.5 Security and DNS Forwarding......................................................................................... 13
3 Installing BIND (Berkeley Internet Name Domain)............................................................... 15
3.1 Obtaining BIND............................................................................................................... 15
3.1.1 ISC source info ......................................................................................................... 15
3.1.2 Linux RPMSs............................................................................................................ 16
3.1.3 Solaris 10 .................................................................................................................. 17
3.2 Run BIND as a non-root user........................................................................................... 18
3.3 Isolating BIND with Chroot or Solaris Zones ................................................................. 20
3.3.1 Generic From The Source......................................................................................... 20
3.3.2 RedHat bind-chroot Rpm.......................................................................................... 21
3.3.3 Red Hat / Fedora Core Linux with Bastille .............................................................. 22
3.3.4 Solaris 10 Zones........................................................................................................ 22
3.4 Restricting BIND Access................................................................................................. 24

The Center for Internet Security DNS BIND Benchmark
Draft v0.16 Page 3 of 41
3.4.1 BIND Restricted Access Goals................................................................................. 24
3.4.2 Setting Unix Permissions on BIND chroot-ed directories........................................ 26
3.4.3 SELinux .................................................................................................................... 27
3.4.4 Solaris 10 .................................................................................................................. 28
4 Security Configuration............................................................................................................ 29
4.1 Hiding the version string.................................................................................................. 29
4.2 Restricting recursive queries............................................................................................ 29
4.2.1 DNS cache poising.................................................................................................... 29
4.2.2 External & Internal Authoritative Name Server ....................................................... 30
4.2.3 Caching Only Name Servers..................................................................................... 30
4.2.4 BIND9 Views............................................................................................................ 30
4.3 Transaction Signatures -- TSIG ....................................................................................... 31
4.4 Restricting Zone-Transfers .............................................................................................. 32
4.5 Restricting Dynamic Updates .......................................................................................... 33
4.6 DNSSEC .......................................................................................................................... 35
4.7 Black-holing bogus or unwanted traffic .......................................................................... 36
5 Administration ........................................................................................................................ 37
5.1 Updating and Patching..................................................................................................... 37
5.2 Logging and Monitoring.................................................................................................. 37
5.2.1 Configure a syslog channel....................................................................................... 37
5.2.2 Configure a local file channel ................................................................................... 38
5.2.3 Restart BIND and Check log files ............................................................................ 39
5.3 Denial of Service Attacks ................................................................................................ 39
5.4 Firewalling and BIND with static src ports ..................................................................... 40
The Center for Internet Security DNS BIND Benchmark
Draft v0.16 Page 4 of 41
6 Summary and the Future of DNS............................................................................................ 40
6.1 Additional Resources....................................................................................................... 41

The Center for Internet Security DNS BIND Benchmark
Draft v0.16 Page 5 of 41
Agreed Terms of Use
Background.
CIS provides benchmarks, scoring tools, software, data, information, suggestions, ideas, and other services and materials from the CIS website or elsewhere (“Products”) as a public service to Internet users worldwide. Recommendations contained in the Products (“Recommendations”) result from a consensus-building process that involves many security experts and are generally generic in nature. The Recommendations are intended to provide helpful information to organizations attempting to evaluate or improve the security of their networks, systems and devices. Proper use of the Recommendations requires careful analysis and adaptation to specific user requirements. The Recommendations are not in any way intended to be a “quick fix” for anyone’s information security needs.
No representations, warranties and covenants.
CIS makes no representations, warranties or covenants whatsoever as to (i) the positive or negative effect of the Products or the Recommendations on the operation or the security of any particular network, computer system, network device, software, hardware, or any component of any of the foregoing or (ii) the accuracy, reliability, timeliness or completeness of any Product or Recommendation. CIS is providing the Products and the Recommendations “as is” and “as available” without representations, warranties or covenants of any kind.
User agreements.
By using the Products and/or the Recommendations, I and/or my organization (“we”) agree and acknowledge that: 1. No network, system, device, hardware, software or component can be made fully secure; 2. We are using the Products and the Recommendations solely at our own risk; 3. We are not compensating CIS to assume any liabilities associated with our use of the
Products or the Recommendations, even risks that result from CIS’s negligence or failure to perform;
4. We have the sole responsibility to evaluate the risks and benefits of the Products and Recommendations to us and to adapt the Products and the Recommendations to our particular circumstances and requirements;
5. Neither CIS, nor any CIS Party (defined below) has any responsibility to make any corrections, updates, upgrades or bug fixes or to notify us if it chooses at it sole option to do so; and
6. Neither CIS nor any CIS Party has or will have any liability to us whatsoever (whether based in contract, tort, strict liability or otherwise) for any direct, indirect, incidental, consequential, or special damages (including without limitation loss of profits, loss of sales, loss of or damage to reputation, loss of customers, loss of software, data, information or emails, loss of privacy, loss of use of any computer or other equipment, business interruption, wasted management or other staff resources or claims of any kind against us from third parties)

The Center for Internet Security DNS BIND Benchmark
Draft v0.16 Page 6 of 41
arising out of or in any way connected with our use of or our inability to use any of the Products or Recommendations (even if CIS has been advised of the possibility of such damages), including without limitation any liability associated with infringement of intellectual property, defects, bugs, errors, omissions, viruses, worms, backdoors, Trojan horses or other harmful items.
Grant of limited rights.
CIS hereby grants each user the following rights, but only so long as the user complies with all of the terms of these Agreed Terms of Use: 1. Except to the extent that we may have received additional authorization pursuant to a written
agreement with CIS, each user may download, install and use each of the Products on a single computer;
2. Each user may print one or more copies of any Product or any component of a Product that is in a .txt, .pdf, .doc, .mcw, or .rtf format, provided that all such copies are printed in full and are kept intact, including without limitation the text of this Agreed Terms of Use in its entirety.
Retention of intellectual property rights; limitations on distribution.
The Products are protected by copyright and other intellectual property laws and by international treaties. We acknowledge and agree that we are not acquiring title to any intellectual property rights in the Products and that full title and all ownership rights to the Products will remain the exclusive property of CIS or CIS Parties. CIS reserves all rights not expressly granted to users in the preceding section entitled “Grant of limited rights.” Subject to the paragraph entitled “Special Rules” (which includes a waiver, granted to some classes of CIS Members, of certain limitations in this paragraph), and except as we may have otherwise agreed in a written agreement with CIS, we agree that we will not (i) decompile, disassemble, reverse engineer, or otherwise attempt to derive the source code for any software Product that is not already in the form of source code; (ii) distribute, redistribute, encumber, sell, rent, lease, lend, sublicense, or otherwise transfer or exploit rights to any Product or any component of a Product; (iii) post any Product or any component of a Product on any website, bulletin board, ftp server, newsgroup, or other similar mechanism or device, without regard to whether such mechanism or device is internal or external, (iv) remove or alter trademark, logo, copyright or other proprietary notices, legends, symbols or labels in any Product or any component of a Product; (v) remove these Agreed Terms of Use from, or alter these Agreed Terms of Use as they appear in, any Product or any component of a Product; (vi) use any Product or any component of a Product with any derivative works based directly on a Product or any component of a Product; (vii) use any Product or any component of a Product with other products or applications that are directly and specifically dependent on such Product or any component for any part of their functionality, or (viii) represent or claim a particular level of compliance with a CIS Benchmark, scoring tool or other Product. We will not facilitate or otherwise aid other individuals or entities in any of the activities listed in this paragraph.

The Center for Internet Security DNS BIND Benchmark
Draft v0.16 Page 7 of 41
We hereby agree to indemnify, defend and hold CIS and all of its officers, directors, members, contributors, employees, authors, developers, agents, affiliates, licensors, information and service providers, software suppliers, hardware suppliers, and all other persons who aided CIS in the creation, development or maintenance of the Products or Recommendations (“CIS Parties”) harmless from and against any and all liability, losses, costs and expenses (including attorneys' fees and court costs) incurred by CIS or any CIS Party in connection with any claim arising out of any violation by us of the preceding paragraph, including without limitation CIS’s right, at our expense, to assume the exclusive defense and control of any matter subject to this indemnification, and in such case, we agree to cooperate with CIS in its defense of such claim. We further agree that all CIS Parties are third-party beneficiaries of our undertakings in these Agreed Terms of Use.
Special rules.
The distribution of the NSA Security Recommendations is subject to the terms of the NSA Legal Notice and the terms contained in the NSA Security Recommendations themselves (http://nsa2.www.conxion.com/cisco/notice.htm).
CIS has created and will from time to time create special rules for its members and for other persons and organizations with which CIS has a written contractual relationship. Those special rules will override and supersede these Agreed Terms of Use with respect to the users who are covered by the special rules. CIS hereby grants each CIS Security Consulting or Software Vendor Member and each CIS Organizational User Member, but only so long as such Member remains in good standing with CIS and complies with all of the terms of these Agreed Terms of Use, the right to distribute the Products and Recommendations within such Member’s own organization, whether by manual or electronic means. Each such Member acknowledges and agrees that the foregoing grant is subject to the terms of such Member’s membership arrangement with CIS and may, therefore, be modified or terminated by CIS at any time.
Choice of law; jurisdiction; venue.
We acknowledge and agree that these Agreed Terms of Use will be governed by and construed in accordance with the laws of the State of Maryland, that any action at law or in equity arising out of or relating to these Agreed Terms of Use shall be filed only in the courts located in the State of Maryland, that we hereby consent and submit to the personal jurisdiction of such courts for the purposes of litigating any such action. If any of these Agreed Terms of Use shall be

The Center for Internet Security DNS BIND Benchmark
Draft v0.16 Page 8 of 41
determined to be unlawful, void, or for any reason unenforceable, then such terms shall be deemed severable and shall not affect the validity and enforceability of any remaining provisions. We acknowledge and agree that we have read these Agreed Terms of Use in their entirety, understand them and agree to be bound by them in all respects.

The Center for Internet Security DNS BIND Benchmark
Draft v0.16 Page 9 of 41
1. Introduction
1.1 Scope and Audience
This benchmark is intended to assist administrators in securing the BIND (Berkeley Internet Name Domain) an openly redistributable implementation of the Domain Name Service (“DNS”) protocols. While the majority of the recommendations and steps outlined in this document apply to most Unix systems, it should be noted that specific syntax for some commands will vary for some Unix platforms so the reader is encouraged to be familiar with the differences specific to their individual platforms. The provided excerpts have been tested using BIND 9.3.1 on Red Hat Fedora Core 4 and BIND 9.2.4 on Solaris 10 03/2005. The audience for the document is at the level of an experienced system administrator, with some specific experience in administering the BIND software. The configuration and security controls provided have been developed through a consensus effort of best practices recommended by a majority of participating security experts.
1.2 Introduction
Paul Mockapetris released the original DNS RFCs in 1984, and the widespread deployment of the DNS protocols emerged in the late eighties. The Internet at that time was a relatively friendly place, and there was very little expectation that such services had to be protected from abuse. Since then, we have come a long way in recognizing the threats that exist and in raising awareness that web and mail and most Internet servers need to be carefully protected from malicious use. However awareness of protecting DNS servers and services seems to be particularly lagging behind, which is astounding given that DNS serves as the foundation on which these other Internet services depend.
It is surprising how often the importance of DNS for reliable Internet services is not well understood even by many security managers. So often, the security of DNS services is entirely overlooked or it’s importance is significantly underestimated. Consider the various Internet protocols in use by your organization today including HTTP/S, SMTP, POP, IMAP, FTP, etc. Each of these protocols and many others depend on the DNS service to translate between host names and IP addresses to connect to the correct system. Consider how easily an attacker or phisher could reroute your organizations web, e-mail or even VPN traffic to a system of their choice through carefully constructed attacks on DNS services without ever having to compromise the service being spoofed. The approach of using a DNS cache poisoning attack to redirect web users to a fake web site

The Center for Internet Security DNS BIND Benchmark
Draft v0.16 Page 10 of 41
is known as pharming.1 Given the importance of DNS to most Internet traffic, it is frustrating that many administrators, managers and even service providers do not recognize the importance of securing their DNS environment.
The following sections include recommendations and steps for securing a BIND 9 server which will be presented along with discussion of possible attacks in order to illustrate why the specific security controls are necessary. After completing the configuration changes the server should be rebooted and the CIS BIND scoring tool should be run to help verify the intended settings. In addition, internal an external testing of the security controls and correct functionality is highly recommended.
2 Architecture and Foundation
2.1 Name Server Roles and Architectures
DNS name servers are very much a foundational part of your network architecture. How many name servers you need and what roles they should play very much depends on your organization’s network architecture. For this reason it is critical that the DNS strategy be considered early on, while decisions about the network topology are being formed, Questions that should be answered include, “how is the e-mail going to be delivered?”, “are there going to be DNS sub-domains for the organization?”, and “is DHCP going to be used?”, and is Microsoft Windows Active Directory going to be used?” Providing the detailed information needed to make recommendations for every possible DNS architecture is beyond the scope of this CIS Benchmark There are however, some important DNS architectural recommendations and principles that are discussed in this sections.
2.1.1 Split-Horizon Architecture
Running a Split-Horizon DNS architecture refers to running separate authoritative DNS servers and services for external DNS queries from the internal authoritative DNS servers, which answer all queries originating from within the organization. The external servers are configured to provide only a limited amount of information for the services needed for communication with external clients and services. Typically the information published in the externally available DNS is the minimal needed for the Internet services such as mail, web and gateway systems (e.g.VPNs). While the separate internal DNS service provides a more rich information set needed by internal clients. The two goals of Split-Horizon are to:
1 Pharming: Internet Storm Center <http://isc.sans.org/diary.php?date=2005-02-07> and <http://isc.sans.org/diary.php?date=2005-03-05>

The Center for Internet Security DNS BIND Benchmark
Draft v0.16 Page 11 of 41
1. Minimize the amount and type of externally available information.
2. Physical and logical separation of external and internal DNS services.
Separating the external and internal DNS servers in this manner implements a defense-in-depth approach that limits the potential damage and impact should the external name server be compromised, since it does not service internal clients, nor does it have information on the internal systems and services.
Action: Implement Split-Horizon Architecture to separate external and internal DNS services.
2.1.2 Name Server Roles
Master Authoritative Only -- A master name server is a primary or authoritative name server for one or more domains. The master name server is the source of authority where administrators will make their DNS record changes.
Slave Authoritative Only – A slave name server is a secondary name server which is authoritative for the domains, but receives all information and updates via zone transfers from a master name server or sometimes from another slave name server.
Caching Only – A caching only name server is not authoritative for any domain, but provides DNS service for other clients and systems, and will perform recursive DNS queries on behalf of it’s clients, and will cache answers to improve performance.
Forwarder -- A forwarder name server is one that forward queries to another name server to do the work of looking up the answer. The goal is to aggregate the work in order to make better usage of large caches, or sometimes to save on network bandwidth. Usage of forwarders has multiple security implications as discussed in section 2.5 on page 13.
Mixed Roles -- There are a wide variety of mixed roles that are possible, but not necessarily recommended. Any authoritative name server will also cache answers, and caching name servers may be authoritative for domains. It is also possible to have multiple primary name servers and to mix master and slave by having a name server be a master for some domains while being a slave for others, however simplicity in your architecture should be a leading goal. Mixing name server roles is not recommended for most situations. There are specific threats and mitigating controls for each role, and by mixing these roles you may be aggregating the risks and preventing a wise separation of services. For example external slave name servers have the highest threat level, and therefore should have the least information, the least functionality, and most stringent security configuration. While the internal caching name servers should not be exposed to external traffic as a compromise or a poisoned cache on these servers would constitute an external attack on your internal clients. Likewise your internal authoritative name servers typically contain sensitive information that should not be exposed to external queries, or

The Center for Internet Security DNS BIND Benchmark
Draft v0.16 Page 12 of 41
even the external responses that the internal caching name server will be receiving. Separating the these roles significantly mitigates these threats.
Action: Design and document your DNS architecture, including the specific roles for each DNS server, the major security controls in place, and what networks will be able to query each server. Also consider what sub-domains will be used and managed, and how e-mail will be delivered, and how any updates will be performed.
2.2 Name Registration Security Issues
The security of an external, Internet-facing DNS service depends on the Domain Name registration process to direct DNS requests to your DNS servers. If an attacker can take over control of you name registration, then there is no need for them to compromise, spoof or otherwise subvert your DNS services, when they can have all of the DNS requests redirected to the DNS servers of their choice. There are of course many authorized name registration providers available now, and the security of your name registration depends on their process for authenticating registration change requests. In the past name registration changes could be easily spoofed just be sending an e-mail from the proper address. These days most registrars have raised the bar somewhat by require a response to an e-mail, or they require that an administrator log onto a web site with a password. However, most registrars have fall back processes in place for handling cases where the contact e-mail is not working. It’s highly recommended that you check with your registrar and review the authentication process, including alternative authentication options. In the balance between ease of use and reliable authentication, most of them seem to heavily favor the ease of use. Many registrars also provide stronger authentication controls that are not required by default, but can be required for those that specifically ask for them. To obtain a list of DNS registrars, see www.iana.org, the Internet Assigned numbers Authority.
Action: Verify and document what security controls are in place for changes to your DNS registration and who is authorized to make changes.
2.3 Secure DNS service requires a secure platform
Since your organizations DNS security is critical to the network services your organization depends on, it needs a dedicated security hardened system with minimal services running. If you combine your DNS server with other services running on the same system, you are aggregating the risk of compromise associated with the additional services. Recommended minimal network services besides DNS include just SSH, and NTP. Please refer to the appropriate CIS benchmark appropriate for the Unix platform, and download and run the provided scoring tool from www.cisecurity.org.
Action: Security harden the operating system, physical location and hardware according to your organization security polices, making use of the additional controls recommend in the appropriate CIS benchmark for your platform. Run the BIND scoring tool and

The Center for Internet Security DNS BIND Benchmark
Draft v0.16 Page 13 of 41
evaluate the results. All unnecessary services should be disabled, especially high risk services such as web, mail, FTP, RPC services and file shares such as NFS or SMB.
2.4 Secondary DNS servers
Every DNS architecture should have at least two name servers, a master and one or more slave name servers. There is no easy formula to calculate the number of name servers needed, as it depends on several factors, including the number of sub-domains, the volume of requests and the geographical distribution of the traffic. In particular however, for Internet-facing DNS services at least one slave name server should be geographically remote from the master and of course connected via a different Internet connection to mitigate DoS attacks, to increase reliability and to better distribute the DNS traffic. Many ISPs provide inexpensive slave name server services. Ask about the location and connectivity of the services, and look for one that is remote from your master, as well as reliable and secure. Also consider getting a remote dedicated server that can be secured and administered remotely by your staff. Also for large organizations there are several companies specializing in globally distributed and high reliability DNS services.
Likewise your internal clients and servers should be configured to query multiple caching and/or forwarding name servers for reliability. These redundant name servers should be an integral portion of your networks architecture for reliability and performance and that places a priority on the DNS security.
Action: Verify appropriate secondary DNS servers are in use for each external and internal master name server. For the external Internet DNS servers an independent Internet connection or independent ISP hosted DNS service should be used.
2.5 Security and DNS Forwarding
Forwarding queries to another name server allows the name service work to be aggregated and may help performance, if it is able to take advantage of the cache of an up-stream name server. However, for the sake of security, the question that needs to be asked is, “How secure is the name server to which queries are being forwarded?” A common recommendation is to use an ISP provided name service that is intended to help performance, and simplify network configuration. However, the down-stream name servers inherit the risk of the name server to which they forward queries. If the up-stream name server is compromised, or has its cache poisoned, then all the name servers that rely on it share the same fate. Forwarding is not necessarily bad, but you need to evaluate the security and risk of the name servers to which you are forwarding queries. If these name servers are not under your organizations control, then evaluating their security can be difficult unless the provider specifically understands security as an integral and very necessary part of it’s service.
Also you should be aware that if your forwarders are BIND version 4 or 8 servers, this may leave you vulnerable to the DNS cache poisoning attacks discussed in the next section on BIND versions Error! Reference source not found.

The Center for Internet Security DNS BIND Benchmark
Draft v0.16 Page 14 of 41
Action: Verify your DNS architecture forwards queries only to trustworthy DNS servers and verify the security of those servers against appropriate security standards such as the CIS BIND Benchmark.

The Center for Internet Security DNS BIND Benchmark
Draft v0.16 Page 15 of 41
3 Installing BIND (Berkeley Internet Name Domain)
3.1 Obtaining BIND
The three major versions of BIND available at the time this benchmark is written are 4, 8 and 9. Version 4 of BIND has been officially deprecated by ISC (“Internet Systems Consortium”) <www.isc.org>, and should not be used. In addition, BIND versions 4 and 8 are declared unsuitable for use as a forwarder, that is to forward DNS traffic forwarded to them. Using versions 4 or 8 as a forwarder allows for the classic Kashpureff-style DNS cache corruption attack. Although the usage of BIND 4 and 8 as forwarders has been problematic mostly for Windows DNS servers, it is still not recommended for BIND DNS servers. The original 1997 Cert Advisory is available from http://www.cert.org/advisories/CA-1997-22.html, More recent information on the forwarders vulnerability was posted by the SANS Internet Storm Center in April 2005 <http://isc.sans.org/diary.php?date=2005-04-07>
ISC maintains a security matrix on their website to allow quick cross-reference of vulnerabilities to various BIND versions http://www.isc.org/sw/bind/bind-security.php. BIND version 9 is recommended by this benchmark and will serve as the focus for the remainder of this document.
3.1.1 ISC source info
The latest release of the BIND software maybe downloaded from the Internet Systems Consortium at http://www.isc.org/sw/bind/. Using vendor provided packages is recommended for most situations, as it will save effort with respect to support and in getting patches and newer versions as they are released. However, building from source is suitable for those that want full control of the build process, prefer to build from source, or do not have a suitable package available for their platform. To obtain the BIND source, download the software and detached PGP signature from a suitable mirror site by following the download links on the ISC web site. After obtaining and importing and verifying the ISC PGP key from a different source, verify the detached PGP signature. Untar the source and perform the usual configure, make, test and install steps.
Action: cd /usr/local/src # <or suitable src directory>
Note that x.x.x represents the bind version number
wget http://... suitable mirror .../bind9/x.x.x/bind-x.x.x.tar.gz wget http://... suitable mirror .../bind9/x.x.x/bind-x.x.x.tar.gz.asc gpg --recv-key 0xc3755ff7 <or current key id> (and/or)

The Center for Internet Security DNS BIND Benchmark
Draft v0.16 Page 16 of 41
wget http://www.isc.org/about/openpgp/pgpkeyxxxx.txt gpg --import pgpkeyxxxx.txt gpg --verify bind-x.x.x.tar.gz.asc gpg: Signature made Mon 07 Mar 2005 10:49:12 AM EST using DSA key ID C3755FF7 gpg: Good signature from "Internet Systems Consortium, Inc. (Signing key, 2004) <[email protected]>" tar xzf bind-x.x.x.tar.gz
cd bind-x.x.x
Common options to the configure script include –with-openssl and –with-randomdev, but the configure script will detect OpenSSL and /dev/random correctly on most systems. Only the make install should be done with root privilege. Information and references for setting up sudo or the appropriate vendor-specific tool is available in the CIS benchmark for the corresponding platform.
./configure <add optional configure options> make make test <<sudo or equivalent>> make install
3.1.2 Linux RPMSs
Be careful with the vendor packages, as there are likely to be duplicate packages with different roles or architecture options. For example typical RedHat rpms include the list below. Having more than one of this installed is normal, but you need to be aware of what is installed so that they are updated properly, and minor overlaps such as with the named.conf file may lead to confusion. Installing the rpm’s is typically an option at installation time and may be done post-install with yum or up2date. The rpm –checksig option can be used to check signatures for an rpm package and –verify will verify the installed files against their original attributes.
Red Hat RPMS • bind (The vanilla flavor) • bind-sdb (with Simplified DB backend) • bind-chroot (chrooted directory environment) • caching-nameserver (a caching only configuration) • bind-libs (required shared libraries) • bind-utils (client utilities such as dig, host, nslookup, nsupdate)
Action: # yum install bind

The Center for Internet Security DNS BIND Benchmark
Draft v0.16 Page 17 of 41
(or) • # up2date bind
3.1.3 Solaris 10
BIND 9 is available and supported by default in the Solaris 10 Operating System (“Solaris 10 OS”). The software is found in the package, SUNWbind, and the Solaris 10 Service Management Facility (“SMF”) service manifest for the BIND service is available in the SUNWbindr package. Both of these packages must be installed in order to be able to configure and run the DNS server service. The SMF Fault Management Resource Identifier (“FMRI”) for the BIND service is svc:/network/dns/server:default. It is with this handle (or a suitable abbreviation such as dns/server) that one will be able to configure and manage the DNS server service using SMF. For example:
# svcs dns/server STATE STIME FMRI disabled 15:57:11 svc:/network/dns/server:default # svcadm enable dns/server #
Starting with Solaris 10, each of the ELF objects, including binaries and libraries, delivered in the core OS has been crytographically signed by Sun. Using the elfsign(1) tool, administrators can validate that individual ELF objects are genuine. For example, using the following code, an administrator can validate the ELF objects delivered in the SUNWbind package:
Action: for file in `nawk '$NF == "SUNWbind" && $2 == "f" { print $1 }' \ /var/sadm/install/contents`; do if [ `file ${file} | grep -c "ELF "` != 0 ]; then elfsign verify -e ${file} fi done
The code above should generate output such as: elfsign: verification of /usr/lib/dns/libdns.so.16.0.0 passed. elfsign: verification of /usr/lib/dns/libisc.so.7.1.5 passed. [...] elfsign: verification of /usr/sbin/host passed. elfsign: verification of /usr/sbin/named passed. elfsign: verification of /usr/sbin/nslookup passed. [...]
In addition to the use of the elfsign(1) command, administrators can also still verify the MD5 fingerprints of Sun provided programs, libraries, etc. using the Solaris Fingerprint Database available from http://sunsolve.sun.com/.

The Center for Internet Security DNS BIND Benchmark
Draft v0.16 Page 18 of 41
Action: Install BIND from your vendor provided RPMs or packages as shown above, or build from source if the default vendor-supplied build does not meet your needs.
3.2 Run BIND as a non-root user
Configure BIND to run as a non-root user, in order to limit the damage in case a future vulnerability is discovered and exploited. This is a common practice, which implements the principal of least privilege. This principle states that an entity, such as a service or user, should be granted only those specific privileges necessary to perform authorized actions. The server will still need to be started as root, but it should be configured to give up the root privilege after listening on port 53. Of course, the user named runs as needs to be created if it doesn’t already exist and needs appropriate access to the DNS configuration and data files. Many systems including Red Hat Linux will come with a named user already created. Usage of the user and group id of 53 in the examples is arbitrary but is intended to be easier to recognize as it matches the listening port number. Note that some vendors have reserved user and group identifiers with values less than 100. In those cases, use the value 53 with caution as the vendor may choose to use that value for another account or group.
Action: Create named user and group if it doesn’t already exist. Using a shell of /dev/null is best practice however on Solaris 10 the useradd will fail with a shell that is not in /etc/shells and may need to be manually edited. Also on Solaris, consider using roleadd(1M) to create the named account instead of using useradd(1M). Creating the account as a role adds protections should a password ever be installed: (1) the account still cannot be accessed remotely – even with a correct password and (2) roles can only be assumed by those users who have been given that access – so just anyone can't assume the named role – again even if they have the password. if ! id named; then groupadd -g 53 named useradd –m -u 53 –g 53 -c "BIND named" -d /var/named -s /dev/null \
named fi 2>/dev/null
Add or Verify that “-u named” option is include in the rc startup script. For example on Linux systems the rc script is /etc/rc.d/init.d/named and should contain the line “daemon /usr/sbin/$PROG -u named ${OPTIONS};”
Red Hat / Fedora Core Linux with Bastille
If you use the Bastille-Linux security hardening, the script will ask, if it detects BIND is installed, “Would you like to chroot named and set it to run as a non-root user?” Answering Yes to this question can help automate this step as well as the chroot process, however you still need to verify all of the permissions and verify that the chroot directory contains the necessary devices, directories and files.

The Center for Internet Security DNS BIND Benchmark
Draft v0.16 Page 19 of 41
Solaris 10
Solaris 10 uses a different approach to configure the BIND service to run as a non-root user. It should first be noted however, that the BIND service is Solaris 10 is already configured to run with significantly reduced privileges. This is accomplished through the use of Solaris 10 privileges(5) and configured using SMF. To see what privileges are granted to BIND at service startup, use the following command:
Action: $ svcprop -p start/privileges dns/server basic,!proc_session,!proc_info,!file_link_any,net_privaddr, file_dac_read,file_dac_search,sys_resource
Essentially, this means that even if the UID of the BIND service is still 0 (“root”), it will not start with all of root's privileges. Instead, it will only be granted the proc_fork, proc_exec, net_privaddr, file_dac_read, file_dac_search, and sys_resource privileges. proc_fork and proc_exec come from the basic privilege listed above. Certainly, this is already a significant reduction in the privilege granted to the BIND service. Further, during the testing for this article, a simple configuration was created that only used proc_fork and net_privaddr. As a rule, you may be able to further reduce the default set of privileges depending on your configuration and requirements. To see more detailed information about the privileges, see privileges(5).
To change the UID used to start the BIND service, use the svccfg(1M) command to configure the service as follows (assuming the named account and group have been created in a manner similar to that described above). Note that these steps only change the UID used by the process and does not impact the privileges that have been defined in the start/privileges property.
Action: # svccfg -s dns/server:default setprop start/user = named # svccfg -s dns/server:default setprop start/group = named # svcadm refresh dns/server
One additional step that must be taken to successfully start the server. Depending on your configuration, you may need to adjust some file paths or even file ownership or permissions to ensure that the named account can read or write files as appropriate (since the service is no longer starting as root at all). For example, an options flag must be added to the /etc/named.conf file to direct the pid-file parameter to a location writable by the named user or group. This is necessary since the named service is no longer starting as root and therefore will not be able to write to /var/run. Technically speaking the pid-file is no longer used in Solaris since SMF is used to manage service administration, including restarts. For a more detailed example describing how to configure SMF services to start with reduced privileges, see the Sun BluePrint titled “Limiting Service

The Center for Internet Security DNS BIND Benchmark
Draft v0.16 Page 20 of 41
Privileges in the Solaris 10 Operating System”, available from: http://www.sun.com/blueprints/0505/819-2680.pdf.
Once these changes may been made, the service can be started using the command: # svcadm enable dns/server
The status of the dns/server service can be verified using the following commands: # svcs dns/server STATE STIME FMRI online 18:43:01 svc:/network/dns/server:default # pcred `pgrep named` 5842: e/r/suid=53 e/r/sgid=53 # ppriv -S `pgrep named` 5842: /usr/sbin/named flags = <none E: file_dac_read,file_dac_search,net_privaddr,proc_exec,proc_fork,sys_resourc I: file_dac_read,file_dac_search,net_privaddr,proc_exec,proc_fork,sys_resourc P: file_dac_read,file_dac_search,net_privaddr,proc_exec,proc_fork,sys_resource L: zone
3.3 Isolating BIND with Chroot or Solaris Zones
To further limit potential damage from a successful exploit, the server should be running in an isolated compartment such as a chroot-ed jail or a Solaris 10 zone. This way the daemon will be restricted in terms of what it can see or do. For example, in a chroot-ed jail, the service will not have access to the full file system, but instead a minimal file system with just the necessary data, libraries and devices. Either chroot or a restricted zone are required as a defense-in-depth measure even if the systems is a dedicated DNS server as indicated section 2.3.
The good news is that BIND 9 has been improved to be significantly easier to chroot, than previous versions. With that and combined with some great vendor tools to even further simplify and improve the process, there no longer remains an excuse for any BIND implementation not to be chroot-ed. There are four solutions given below. The first, a generic chroot solution working directly with source code, should work with minor modifications for most Unix systems. The second is a simple implementation using the RedHat bind-chroot RPM, the third uses the Linux-Bastille script. Finally, the forth option leverages the Solaris 10 zones capability to implement isolation rather than through the creation of a chroot jail.
3.3.1 Generic From The Source
Description: Create the chroot directories. Details on the directories usage and permissions are important and are provided in section 3.4. It’s possible, that some systems may also be required some run time libraries within the chroot file hierarchy.

The Center for Internet Security DNS BIND Benchmark
Draft v0.16 Page 21 of 41
Typically BIND 9 does not require extra libraries as it performs the chroot(2) call later in the startup process. Check your systems dynamic linking man pages (such as ld and ldd) for additional information.
Action: mkdir -p -m 750 /var/named/chroot cd /var/named/chroot mkdir –p –m 750 etc dev var/named/data var/run var/log var/tmp
Create the necessary devices such as dev/null, dev/zero and dev/random using the proper major and minor devices numbers for your platform. A long listing of /dev/null, /dev/zero and /dev/random will provide the required major and minor device numbers for your platform. You should also need to create a syslog socket for logging by adding an option such as ”-a /var/named/chroot/dev/log” to your syslogd command line. The logging section 5.2 describes how to configure syslog. ls –al /dev/null /dev/zero /dev/random mknod dev/null c ? ? mknod dev/random c ? ? mknod dev/zero c ? ? chown root:named dev/null dev/zero dev/random chmod ug=rw,o= dev/null dev/zero dev/random cp /etc/named.conf etc/ cp /etc/localtime etc/
Edit /etc/named.conf file to match the created paths for chroot directory /var/named, /var/named/data and /var/run/. Also copy the appropriate zone files referenced in your named.conf file.
3.3.2 RedHat bind-chroot Rpm
RedHat Linux systems have a bind-chroot RPM containing a directory environment for running BIND in a chroot-ed file system. By simply installing the rpm’s below or even checking off BIND during the install process. There’s very little additional work required.
Action:
1. Verify the following RPM’s are installed. • bind • bind-chroot • bind-libs • bind-utils

The Center for Internet Security DNS BIND Benchmark
Draft v0.16 Page 22 of 41
2. Directory permissions should be hardened, as they are not secure by default; they are detailed in the section 3.4.
3. A syslog socket needs to be created, add “-a /var/named/chroot/dev/log” to SYSLOGD_OPTIONS in /etc/sysconfig/syslog. See section 5.2 for details on configuring named to use syslog. If a local log file is to be used, create a var/log directory in /var/named/chroot.
4. Verify /etc/sysconfig/named contains “ROOTDIR=/var/named/chroot”
5. If the daemon is started, verify the named process is started with the argument “-t /var/named/chroot” with “ps ax | grep named”
3.3.3 Red Hat / Fedora Core Linux with Bastille
If you use the Bastille-Linux security hardening, the script will ask, if it detects BIND is installed, “Would you like to chroot named and set it to run as a non-root user?” Answering Yes to this question can help automate the chroot process, however you still need to verify that the chroot directory contains the necessary devices, directories and files.
3.3.4 Solaris 10 Zones
While it is certainly possible to use the chroot capability as discussed previously, Solaris 10 offers an additional option. Using the Solaris 10 zones, it is possible to run the BIND service is a restricted environment (e.g. local zone) that offers significant protections from attack. In particular, services, processes and users running within local zones inherently have a reduced set of privileges. This is because a local zone is viewed as a virtualized application environment – a safe container within which services can be deployed.
For example, users, processes and services running within a zone are not able to:
• load or unload kernel modules;
• access raw memory, devices or networking;
• view or access users, services or devices that exist outside of the local zone itself;
• change system, network or resource configurations including processor sets, network interfaces, routing tables, system time, etc;
• alter files under /lib, /platform, /sbin or /usr (by default);
In addition to all of this, actions undertaken within a local zone can be monitored (e.g., kernel event auditing, application log monitoring, file integrity checks, etc.) from the global zone. This is a significant improvement over using the global zone for service
The Center for Internet Security DNS BIND Benchmark
Draft v0.16 Page 23 of 41
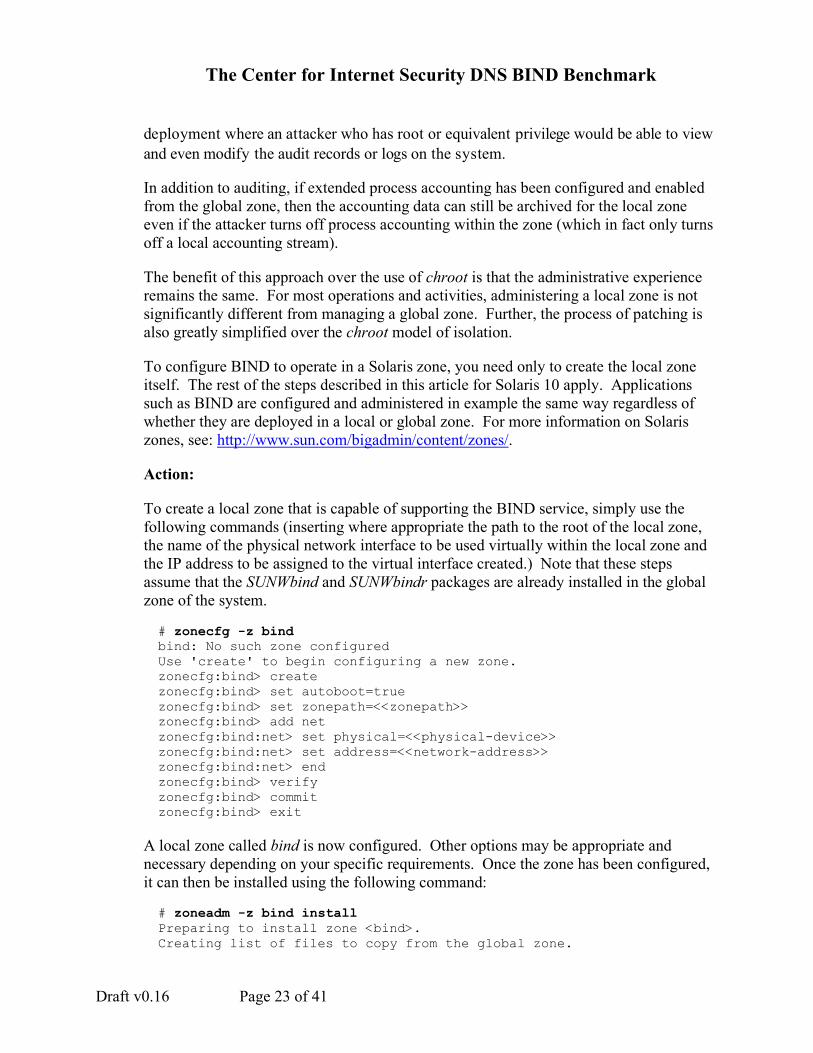
deployment where an attacker who has root or equivalent privilege would be able to view and even modify the audit records or logs on the system.
In addition to auditing, if extended process accounting has been configured and enabled from the global zone, then the accounting data can still be archived for the local zone even if the attacker turns off process accounting within the zone (which in fact only turns off a local accounting stream).
The benefit of this approach over the use of chroot is that the administrative experience remains the same. For most operations and activities, administering a local zone is not significantly different from managing a global zone. Further, the process of patching is also greatly simplified over the chroot model of isolation.
To configure BIND to operate in a Solaris zone, you need only to create the local zone itself. The rest of the steps described in this article for Solaris 10 apply. Applications such as BIND are configured and administered in example the same way regardless of whether they are deployed in a local or global zone. For more information on Solaris zones, see: http://www.sun.com/bigadmin/content/zones/.
Action:
To create a local zone that is capable of supporting the BIND service, simply use the following commands (inserting where appropriate the path to the root of the local zone, the name of the physical network interface to be used virtually within the local zone and the IP address to be assigned to the virtual interface created.) Note that these steps assume that the SUNWbind and SUNWbindr packages are already installed in the global zone of the system. # zonecfg -z bind bind: No such zone configured Use 'create' to begin configuring a new zone. zonecfg:bind> create zonecfg:bind> set autoboot=true zonecfg:bind> set zonepath=<<zonepath>> zonecfg:bind> add net zonecfg:bind:net> set physical=<<physical-device>> zonecfg:bind:net> set address=<<network-address>> zonecfg:bind:net> end zonecfg:bind> verify zonecfg:bind> commit zonecfg:bind> exit
A local zone called bind is now configured. Other options may be appropriate and necessary depending on your specific requirements. Once the zone has been configured, it can then be installed using the following command: # zoneadm -z bind install Preparing to install zone <bind>. Creating list of files to copy from the global zone.
The Center for Internet Security DNS BIND Benchmark
Draft v0.16 Page 24 of 41
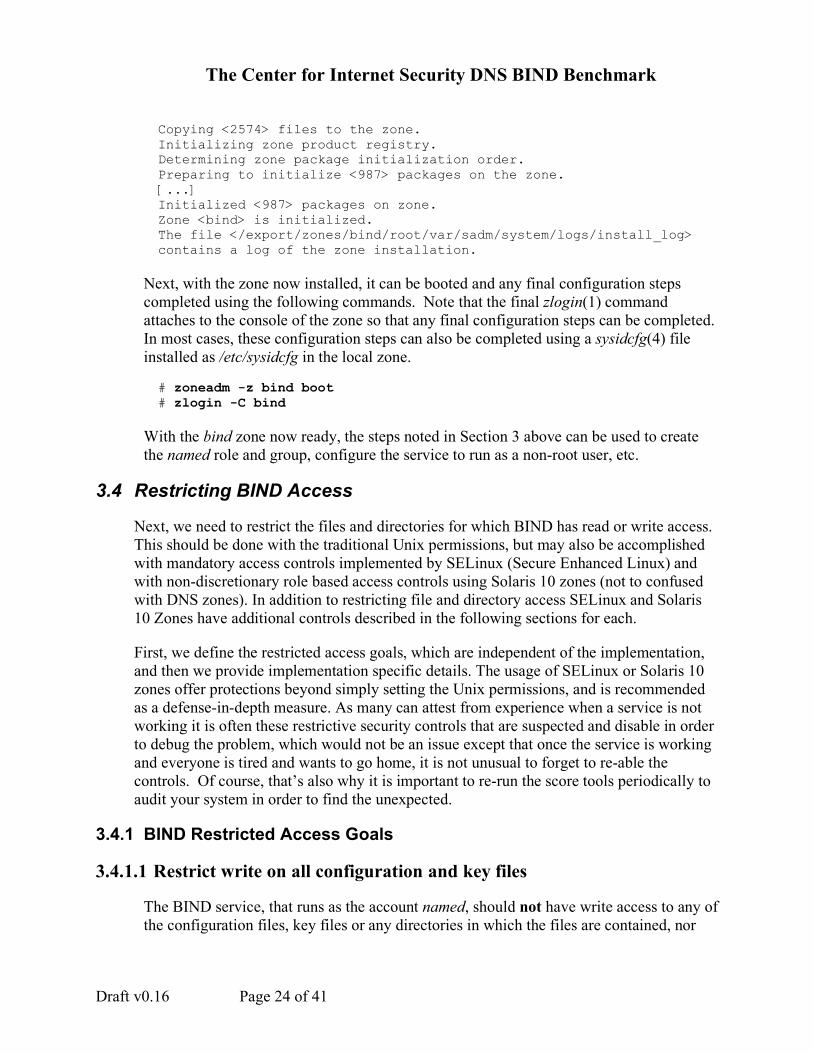
Copying <2574> files to the zone. Initializing zone product registry. Determining zone package initialization order. Preparing to initialize <987> packages on the zone. [...] Initialized <987> packages on zone. Zone <bind> is initialized. The file </export/zones/bind/root/var/sadm/system/logs/install_log> contains a log of the zone installation.
Next, with the zone now installed, it can be booted and any final configuration steps completed using the following commands. Note that the final zlogin(1) command attaches to the console of the zone so that any final configuration steps can be completed. In most cases, these configuration steps can also be completed using a sysidcfg(4) file installed as /etc/sysidcfg in the local zone.
# zoneadm -z bind boot # zlogin -C bind
With the bind zone now ready, the steps noted in Section 3 above can be used to create the named role and group, configure the service to run as a non-root user, etc.
3.4 Restricting BIND Access
Next, we need to restrict the files and directories for which BIND has read or write access. This should be done with the traditional Unix permissions, but may also be accomplished with mandatory access controls implemented by SELinux (Secure Enhanced Linux) and with non-discretionary role based access controls using Solaris 10 zones (not to confused with DNS zones). In addition to restricting file and directory access SELinux and Solaris 10 Zones have additional controls described in the following sections for each.
First, we define the restricted access goals, which are independent of the implementation, and then we provide implementation specific details. The usage of SELinux or Solaris 10 zones offer protections beyond simply setting the Unix permissions, and is recommended as a defense-in-depth measure. As many can attest from experience when a service is not working it is often these restrictive security controls that are suspected and disable in order to debug the problem, which would not be an issue except that once the service is working and everyone is tired and wants to go home, it is not unusual to forget to re-able the controls. Of course, that’s also why it is important to re-run the score tools periodically to audit your system in order to find the unexpected.
3.4.1 BIND Restricted Access Goals
3.4.1.1 Restrict write on all configuration and key files
The BIND service, that runs as the account named, should not have write access to any of the configuration files, key files or any directories in which the files are contained, nor

The Center for Internet Security DNS BIND Benchmark
Draft v0.16 Page 25 of 41
any parent directories. Write access to these directories and files needs to be restricted to authorized administrators and operators only.
3.4.1.2 Restrict other read access to all configuration and key files.
Only the BIND account, named, and administrators should have read access to the BIND configuration and keys files. Other users should have no access to these files.
3.4.1.3 Restrict write access for BIND working directory and all parents
The BIND service should only have read access to the BIND working directory, and all parent directories. It is important to check the access on parent directories, as it could allow directories names to be renamed and recreated with inadequate restrictions. To be safe, minimal access requires that the parent directories need to be checked all the way up to the actual root directory, rather than just the chroot-ed directory, if used.
3.4.1.4 Restrict write access for BIND for all master zone files
The master zone files and the directory in which they are stored should have read only access by the named account. The parents to the directory should also be included to have read only access, although they are typically the same directories checked in the previous item.
3.4.1.5 Restrict other read access for all master zone files
The master zone files should not allow read access by users other than the named account and BIND administrators.
3.4.1.6 Restrict write access for BIND to appropriate sub-directories (chroot)
All of the directories within the BIND chroot should have read-only access except the following: var/run - May be used for pid file var/log - May contain local log files data - May be used for dump files. ddns - If used for Dynamic DNS updates slave - For receiving slave zones.
If chroot is not used, the same should apply to the real root, except that standard writable directories which also have the sticky-bit set, such as /tmp and /var/tmp are also excluded.
The Unix platform CIS scoretool maybe useful in detecting inappropriate directory write permissions, or use the following two find commands to find named group writable directories, and other writable directories to check if they are appropriate.

The Center for Internet Security DNS BIND Benchmark
Draft v0.16 Page 26 of 41
find / -type d -group named -perm -020 –ls find / -type d –perm -02
3.4.2 Setting Unix Permissions on BIND chroot-ed directories
The following actions are specific to chroot-ed BIND directories, have been tested on both the build from source instructions given, and the Red Hat bind-chroot RPM. You should not assume the vendor provided permissions are secure. The permissions set for the chroot are a bit more restrictive that those outlined in beginning of this section, as other access is mostly zero (no access). However since other users have no need to read the BIND chroot-ed directories, it is a prudent application of the principle of least privilege. In the instructions $ROOTDIR refers the chroot-ed directory. Any directories beyond the expected directories (etc, dev, proc and var) should be reviewed for appropriate minimal access.
Actions:
1. Check that all parent directories to the chroot are not writable by the named user. The following command will check every parent directory except /. Any writable directories need to be corrected. If it echo’s the directory names without saying something is writable, then the permissions are ok.
cd $ROOTDIR su -m named -c 'D=$PWD; while [ "$D" != "/" ]; do echo $D;
test -w $D && echo $D is writable.; D=`dirname $D`; done'
2. First set the ownership and permissions on the chroot directory.
chown root:named $ROOTDIR chmod u=rwx,g=rx,o= $ROOTDIR
3. First change everything to owned by root, read-only by named, no access for other. cd $ROOTDIR chown –R root:named etc var chmod –R g-w,o= etc var chown root:named dev proc chmod g,o=rx dev chmod a=rx proc
4. Next add the minimal write access to the necessary directories and any files in the directories. Create and chmod the slave directory only if slave zones are configured. Likewise only create and chmod g+w the ddns directory only if dynamic updates are configured.
chmod –R g+w var/run/named var/tmp var/log var/named/data chmod –R g+w var/named/slaves

The Center for Internet Security DNS BIND Benchmark
Draft v0.16 Page 27 of 41
chmod –R g+w var/named/ddns
3.4.3 SELinux
The Security Enhanced Linux (SELinux) project started by the NSA provides targeted mandatory access controls, which may be used to restrict BIND to minimal access.
SELinux is included in the RedHat Enterprise and Fedora Core installation options. Make sure you have the latest versions of following rpm’s, or install them if needed.
libselinux-devel libselinux selinux-policy-targeted selinux-policy-targeted-sources selinux-doc checkpolicy
Action:
sudo yum install libselinux-devel libselinux selinux-policy-targeted selinux-policy-targeted-sources selinux-doc checkpolicy
sudo setenforce Enforcing
Edit the file /etc/selinux/config or use the commands below to set the values for SELINUX to enforcing and SELINUXTYPE to targeted, to ensure that SELinux is enabled, enforcing and is in targeted mode after each system reboot. See man pages setenforce(8) and sestatus(8) for details. sudo cp -p /etc/selinux/config /etc/selinux/config.orig sudo cat > /etc/selinux/config sudo echo “SELINUX=enforcing” > /etc/selinux/config sudo echo “SELINUXTYPE=targeted” >> /etc/selinux/config
There are two booleans associated with the named targeted policy, named_disable_trans which disables the named policies if set, and named_write_master_zones allows the named to write it’s master zones if set. Neither of these booleans should be set. sudo setsebool named_disable_trans=0 sudo setsebool named_write_master_zones=0
Reboot the system now to ensure that SELinux is enforced in targeted mode.

The Center for Internet Security DNS BIND Benchmark
Draft v0.16 Page 28 of 41
3.4.4 Solaris 10
The following instructions outline the changes that must be made to run the BIND service as a non-root account, named, within a Solaris 10 zone. The changes discussed below are needed in order to permit the named account to write configuration, log or other related files.
Note that when run within a Solaris 10 zone, the BIND service, by default, will not be able to write to any files or directories under /usr, /lib, /sbin, or /platform as their directory trees are mounted read-only from the global zone. Further restrictions are implemented using standard Unix permissions and ACLs. The changes noted below apply specifically to BIND directories and files.
Action:
Adjust the BIND configuration file, /etc/named.conf, to ensure that it does not refer to directories that are not writable by the named account. For example, since BIND will not start as root, even if only briefly, in Solaris 10, it will not be able to write to files such as /var/log/named.log.
It is recommended that directories be created under the /var/named hierarchy (similar to what is accomplished in the chroot case). So, references to /var/log/named.log would become /var/named/log/named.log and references to /var/log/secure.log would become /var/named/log/secure.log.
Similarly, as noted previously, the pid-file BIND option should be configured to reference a writable directory as the service will not be able to create the file under /var/run (since it is no longer running as root). It is recommended that /var/named/run be used in this case. # mkdir -p /var/named/data # mkdir -p /var/named/log
Once these directories are created, ownership and permissions can be assigned as follows: # chown -R root:named /var/named # chmod 750 /var/named # chmod 770 /var/named/data /var/named/log /var/named/tmp
Lastly, the permissions of the actual DNS zone files can be configured: # chmod 640 <<DNS Zone Files>>

The Center for Internet Security DNS BIND Benchmark
Draft v0.16 Page 29 of 41
4 Security Configuration
4.1 Hiding the version string
Additional information hiding or obscurity can be provided by preventing the version information being returned to TXT queries to the psuedo-domain “version.bind” in the chaos class.
Action:
To prevent the version information disclosure, set the version string under options in the namd.conf file to a string of your choice as shown below.
options { version “Not Available”; . . . }
Reload the configuration file, and use the dig command below to test the version string.
dig @localhost version.bind chaos txt | grep '^version.bind.' version.bind. 0 CH TXT "Not Available" version.bind. 0 CH NS version.bind.
4.2 Restricting recursive queries
A recursive DNS query is your typical DNS query from a client. It places the burden of finding the answer on the DNS server which will recursively query other DNS servers authoritative for the domains, until it gets the answer which is then returned to the client. Typically the DNS server will then cache the answer to that query until it’s time-to-live expires, in order to be able to provide a quick answer to future queries for the same name.
4.2.1 DNS cache poising
By spoofing a response to a recursive query, an attacker may be able to provide a bogus answer to the query, and get the DNS server to cache the bogus answer and provide it to future clients. This can be used to redirect of Internet traffic such as web or e-mail to the IP of the attackers choice. If the server does not restrict what networks may make recursive queries, then the attackers jobs is much easier. Although it was fairly common even a few years ago for DNS servers to be wide open for allowing anyone on the Internet to perform recursive queries, it opens up unnecessary risk for abuse and attacks

The Center for Internet Security DNS BIND Benchmark
Draft v0.16 Page 30 of 41
on your name server. Instead recursive queries should be restricted according to the DNS server role. To be successful, a bogus reply needs to have the correct 2-byte request id which was included in the request from the DNS server, however doing so is not that difficult especially when the attacker controls the client query.
4.2.2 External & Internal Authoritative Name Server
Servers that are authoritative whether internal or external should restrict recursive queries to the local server, and possibly a few local IP addresses if needed for diagnostics.
Action:
Add an allow-recursion clause similar to the following to the BIND options { } section, or to every zone section.
acl “diag_srvr” { 10.23.4.7; }; allow-recursion { 127.0.0.1; diag_srvr; };
4.2.3 Caching Only Name Servers
Servers that are caching only should limit all queries to only the expected internal networks. Add an ACL to the global BIND section to define the allowed local networks, and then restrict recursive queries in the options section, or to every zone. Note that localhost and localnets are BIND predefined ACLs, and should not be used for new ACL names.
Action:
acl “local” { 127.0.0.1; }; acl “mynets” { 10.1.2.0/24; 10.1.3.0/24; 10.1.4.0/24; }; . . . options {
. . . allow-query { local; mynets; };
. . . }
4.2.4 BIND9 Views
The new views feature of BIND 9, allows BIND to present different information and restrictions for the same zone depending on the IP address of the client. They could be used to have an internal “view” with detail information and an external “view” with minimal information presented depending on the source IP address of the request. Although this could be used to provide something similar to the split horizon

The Center for Internet Security DNS BIND Benchmark
Draft v0.16 Page 31 of 41
implementation, it would do so with out separating the server or even the BIND services, and would be implemented trusting the source IP address which could be spoofed. Therefore using views to split internal vs. external DNS is not recommended. That isn’t to say there isn’t any legitimate usage of views. Although the previous restrictions on recursion and queries could also be done with a view, using the allow-query and allow-recursion is the recommended approach.
No Action:
4.3 Transaction Signatures -- TSIG
Transaction Signature (TSIG for short) serve to authenticate the responses and update sent to our own servers. TSIG is detailed in RFC 2845, and are implemented by generating a HMAC-MD5 secure hash of the DNS data combined a shared secret. The TSIG hash is then placed in the additional data section. Since TSIG depends on a shared secret between the 2 DNS servers it is really only suitable for authenticating your organizations or possible partnering organization DNS servers. Two particular critical internal DNS communications for which TSIG works well to provide authentication are zone transfers and dynamic updates discussed next.
Action:
If zone transfers or dynamic updates are allowed generate TSIG keys to authenticate the servers, one for each host-to-host trust relationship. To start, you’ll need to generate the TSIG key with the dnssec-keygen command. This key is the shared secret to be used. Keep in mind that the key should be used for a unique host-to-host trust relationship and it is recommend that you name the key using the 2 hosts names. The only algorithms support currently is the HMAC-MD5 and the RFC recommends a 128 bit key length. Although a 128 bit key length is sufficient for most situations, a 256 bit key would be recommend for higher risk situations that warrant the additional security. The key type used is always HOST for TSIG keys. The following dnssec-keygen command will create 2 files, a key and a private file which both contain the same base64 encoded shared secret.
$ dnssec-keygen -a HMAC-MD5 -b 128 -n HOST ns1-ns2.cisecurity.org $ cat Kns1-ns2.cisecurity.org.+157+38441.key ns1-ns2.cisecurity.org. IN KEY 512 3 157 j/u7oOODAaV.d2938BuPxQ== $ cat Kns1-ns2.cisecurity.org.+157+38441.private Private-key-format: v1.2 Algorithm: 157 (HMAC_MD5) Key: j/u7oOODAaV.d2938BuPxQ==

The Center for Internet Security DNS BIND Benchmark
Draft v0.16 Page 32 of 41
Take the generated shared secret and place it in a TSIG key file, and then place the file in the appropriate chroot-ed etc directory on each system. Include the file in the named.conf of both name servers. $ cat ns1-ns2.cisecurity.org.key key ns1-ns2.cisecurity.org { algorithm hmac-md5; secret "j/u7oOODAaV.d2938BuPxQ=="; }; $ grep ns1-ns2.cisecurity named.conf include “/etc/ns1-ns2.cisecurity.org.key
Although the key configuration may be done directly in the named.conf file, it’s recommend for both convenience, and for security, as it will limit the number of times it needs to be viewed. It’s not uncommon for sysadmins to copy and past portions of the named.conf file while working out changes. Of course it essential that this secret be protected properly by have limited file permissions (same as the named,conf), and to be protected in transit to the other DNS server.
4.4 Restricting Zone-Transfers
Zone transfers are used to update the slave name servers by sending all of the information in the zone. Obviously a zone transfers is not something you’d want most systems to be able to request, as it would give out the entire list of resource records. There are a variety of DNS tools that can be used to request a zone transfer, including the ever-present dig and nslookup. You may want to check if zone transfers are in use for monitoring or administering your systems before restricting it. There should be very few systems besides the slave name servers that need to be able to perform a zone transfer for your domains. The allow-transfer may also be specified in individual zone configurations, in which case the zone allow-transfer overrides the global options setting.
Sample restriction by IP address – NOT recommended
acl slaves { 192.168.3.53; 172.17.5.53; }; options { . . . allow-transfer { slaves; }; . . . }
Zone transfers should be restricted by TSIG key.

The Center for Internet Security DNS BIND Benchmark
Draft v0.16 Page 33 of 41
Action:
Restrict zone transfers to none, if server is not used to update a slave name server. Typically only master name servers update slaves, however a tiered layer of slaves is also possible. If the server does update slave name servers, then use a specific TSIG key for each host to restrict the transfers to authenticated slave servers.
include “/etc/ns1-slave1.key”; include “/etc/ns1-slave2.key”; . . . options { . . . allow-transfer { key “ns1-slave1_key”; key “ns1-slave2_key”}; . . . }
The contents of ns1-slave1.key and ns1-slave2.key could look something like the sample below. Note that the TSIG key is a shared secret between primary and slave name servers, so that you should have a unique secret for each primary-slave relationship. If there are a large number of slaves you may want to consider DNSSEC or a multi-tiered hierarchy of slaves.
key "ns1-slave1_key" { algorithm hmac-md5; secret "4q5. . . f96=="; };
Now each slave needs to include it’s specific key and have a server statement so that it will sign it’s communications to the master name server. Something like: server 192.168.1.53 { keys { “ns1-slave1_key”; }; };
Of course the name of the key must match the name in the key file, and the key names and content must match between the master and slave servers as well.
4.5 Restricting Dynamic Updates
Allowing other systems to make permanent updates to your zones is of course not allowed by default, and needs to be carefully restricted for obvious reasons. Dynamic updates are typically used with DHCP, however updates may include deleting or adding any resource records of a zone except the SOA and NS records.

The Center for Internet Security DNS BIND Benchmark
Draft v0.16 Page 34 of 41
TIP: It’s important to separate out zones that are dynamically updated from those that will have their zone files manually edited or scripted. Manual editing of a zone data file, which is being changed and logged dynamically by the BIND server, is likely to cause conflicts and possible corruption or loss of the updates. Instead manual updates may be done of a dynamically updated zone through the nsupdate command. The nsupdate command also supports TSIG as well.
Given the risk associated with power of dynamic updates and the conflict with non-dynamic update methods, the dynamic updates should be limited to a specific sub-domain with a name suitable for the DHCP systems. Although it’s possible to restrict dynamic updates by ip address, it is not recommended as these UDP based updates are particularly easy to spoof. Instead updates should be restricted by TSIG shared secret key, or by a SIG DNSSEC public key, which is covered later. Note that a MS Windows DHCP server or client cannot be used as they use a proprietary GSS-TSIG algorithm. Instead have the clients use a TSIG compliant Unix DHCP server, and then allow the DHCP server to perform the dynamic updates to the master name server. Of course updates should be restricted to just the “A” records, so that SOA and NS records cannot be updated.
Action:
If dynamic updates are to be allowed from specific servers, add an update policy to grant “A” record updates to the dynamically updated sub-domain for the host specific TSIG key. Similar to the example below: include “ns1-dhcp_server1.key”; zone “dynamic.example.com” { type master; . . . update-policy { grant ns1-dhcp_server1_key name dynamic.example.com A; }; }
Now each server making updated needs to include it’s specific key and have a server statement so that it will sign its communications to the master name server. Something like: server 192.168.1.53 { keys { ns1-dhcp_server1_key; }; };
Of course the name of the key must match the name in the key file, and the key names and content must match between the master and updating server as well.

The Center for Internet Security DNS BIND Benchmark
Draft v0.16 Page 35 of 41
4.6 DNSSEC
DNS Security Extensions or DNSSEC for short, provides authentication of the name servers through public key cryptography. Being able to reliably authenticate DNS responses as being genuine would prevent the DNS spoofing and cache poisoning attacks discussed previously. With DNSSEC the name server signs it responses with its private key which allows other name servers which have public key of the name server to verify the integrity and authenticity of the response. DNSSEC also provides for signing of public keys so that delegated sub-domains may have their keys signed by a higher level authority. This creates a chain of trust so that any name server that trusts the public key of the higher level signing authority can trust the signed key. This is currently useful within an organization with delegated sub-domains, but there isn’t yet a process or service in place for organizations to go to the top-level domain authorities to have their keys authenticated and signed.
Use the dnssec-genkey command to create the key pair for you name server. The dnssec-genkey supports both RSA and DSA key types and a variety of key sizes. Keep in mind that signing the zone information greatly increases the information transferred; current estimates are about four to seven times larger, for the average zone. Therefore keeping the key length to a modest length of 512 bits may be helpful. The keys are generated in the current working directory. If the command seems to hang or takes a long time to run, there may not be sufficient entropy available for /dev/random. Check the random(4) man pages for solutions, or use the –r option of dnssec-keygen to provide an alternate source of entropy. See dnssec-keygen(8) for details of course. You may be tempted to rename the generated files for convenience however doing so does not work, as the generated file names are required. They may be moved to a more convenient path for the $INCLUDE.
cd /var/named dnssec-keygen -n ZONE -a RSA -b 512 example.com.
Add a line, typically at the end, to your master zone file to include the key. And then generate the sign zone file. The –o option is the origin and is required, while the second example.com is the zone file name. The generated file will be example.com.signed.
echo ‘$INCLUDE Kexample.com.+001+13453.key’ >> example.com dnssec-signzone –o example.com example.com
Next modify the named.conf to reference the signed zone file. Finally recheck the file permission, and reload or restart the named service. Check the named logs as the logs should indicate that the loaded zone was signed. Of course now each time the master example.com file is modified, the signed zone will need to be regenerated.

The Center for Internet Security DNS BIND Benchmark
Draft v0.16 Page 36 of 41
Finally, the BIND servers that need to verify the signed records will need to have the generated public key added as a trusted key. This can be done by placing the key file in the etc directory, and including the key file in a trusted-keys clause similar to below.
trusted-keys {
example.com. 256 3 1 "AQPJpW8SZjNJKgq6. . . 7/cTxpeFpmrt1"; };
No Action Required:
4.7 Black-holing bogus or unwanted traffic
The blackhole option should be used to prevent the name server from accepting traffic with a source IP address of a private or otherwise invalid or unexpected network. Of course if your clients are using private IP addresses, then don’t blackhole addresses from which you expect traffic.
Rob Thomas maintains a secure BIND template, which includes a longer list of BOGON networks, which includes net ids listed by IANA as experimental or reserved. The template is available at <http://www.cymru.com/Documents/secure-bind-template.html>
There is also a bogus configuration option, which will prevent a specific name server listed as a NS resource from being sent any queries. This is not generally needed except if you are dealing with a invalid or incorrectly configured or malicious name server.
Action:
Add a blackhole option for multicast and link local addresses, and all private RFC 1918 addresses which are not being used.
blackhole { // Private RFC 1918 addresses 10/8; 192.168/16; 172.16/12; // Multicast 224/8; // Link Local 169.254/16; };

The Center for Internet Security DNS BIND Benchmark
Draft v0.16 Page 37 of 41
5 Administration
5.1 Updating and Patching
BIND has a reputation for having a lot of security vulnerabilities, although this reputation has been earned by a number of past vulnerabilities. The current BIND 9 release has been much more stable, and it has not had a serious vulnerability in the default build in more than 3 years. However vigilance in keeping our servers patched and updated is key to keeping them secure. Subscribing to your vendor’s security announcements and usage of the vendor-supplied patches are recommended of course, while those that build from source should download the latest source as updates are available. Subscribe to <[email protected]> on the <http://www.isc.org> web site to receive announcements of BIND updates.
Action:
Subscribe to the vendor specific security announcements and/or the ISC BIND announce list, and verify that a patch process is in place to ensure that security updates will be timely applied within 30 day or less is possible.
5.2 Logging and Monitoring
Logging is key to monitoring the health and security of the name server and for detecting potential abuse and malicious attacks. Most requests that are invalid or violate an ACL will be logged, so it is important for such logs to come to the attention of the appropriate system administer. BIND provide for the configuration of log channels, which are the recipients of the log messages. The name server should be configured with at least 2 channels, a syslog channel to receive majority of the messages, and a local file to log with duplicates of logs that may be of interest for security and possibly a second log file to be used for debugging.
5.2.1 Configure a syslog channel
The syslog channel needs to be configured in the named.conf similar to what’s shown below, but also must be configured in the syslog.conf configuration file, so that the facility is captured to the appropriate system log file and to the central logging host. If your channel configuration doesn’t require any customization, and matches the daemon facility and info setting below, then the default_syslog channel, which is predefined by BIND, may be used instead. If you use the default_syslog channel, you will still need to configure the categories as shown below.
Action:

The Center for Internet Security DNS BIND Benchmark
Draft v0.16 Page 38 of 41
Configure the default and general categories to log to the local syslog. logging {
channel local_syslog { // Specifies the syslog facility to use, check your syslog.conf // Some prefer usage of a local<N> facility specific to BIND.
syslog daemon; // debug messages can’t be sent to syslog, info is the lowest. severity info; };
// Default in BIND 9 includes everything except general category default { local_syslog; }; category general { local_syslog; };
};
5.2.2 Configure a local file channel
To capture logs to a local file, setup a channel for the file. You may want to consider one log file for security related logs, and a second one with a dynamic severity level to be used as needed for debugging. Of course system log rotation needs to be configured as well.
Action:
Configure a channel for a local security log file with the categories config, dnssec, network, security, updates, xfer-in and xfer-out. The local log file will be within the chroot directory if chroot is used. Configure your platform specific log rotation or use the versions and size limits available with BIND as shown below.
logging { . . .
channel local_security_log { file "/var/run/named/secure.log" versions 10 size 20m; severity debug; print-time yes; }; // Config file processing category config { local_security_log; }; // Processing signed responses category dnssec { local_security_log; }; // Network Operations category network { local_security_log; }; // Approved or unapproved requests

The Center for Internet Security DNS BIND Benchmark
Draft v0.16 Page 39 of 41
category security { local_security_log; }; // dynamic updates category update { local_security_log; }; // transfers to the name server category xfer-in { local_security_log; }; // transfers from the name server category xfer-out { local_security_log; }; // Optional debug log file, may be enabled dynamically. channel local_debug_log { file "/var/run/named/debug.log"; severity dynamic; print-time yes; }; category default { local_debug_log; }; category general { local_debug_log; };
};
5.2.3 Restart BIND and Check log files
Action:
Restart BIND and check the appropriate syslog and local log file such as /var/log/messages for named logs.
On RedHat Linux this can be done as: # service named restart # grep named /var/log/messages | more
On the Solaris 10 OS, this can be accomplished and verified using the commands: # svcadm restart dns/server # svcs dns/server STATE STIME FMRI online 18:11:07 svc:/network/dns/server:default
5.3 Denial of Service Attacks
DNS servers have been prime targets in the past for DoS attacks, although the effect is not as immediate as DoS attacks against a Web server, DNS server are often easier to attack. Also the DoS attack can have a wider affect by denying effective usage of a wide range of services that depend on DNS. Attacks cover the normal spectrum of everything from crashing the server, exhausting resources on the server, to flooding the network with bogus traffic. Although there are no 100% solutions for DoS attacks the usual risk mitigations also apply. Security hardening of the server, including DoS mitigation configurations recommended in the appropriate Unix or Linux CIS benchmark. Having redundant distributed DNS servers externally and internally will raise the bar

The Center for Internet Security DNS BIND Benchmark
Draft v0.16 Page 40 of 41
significantly. Filtering controls on the firewalls and routers in front of the DNS servers can eliminate many forms of unwanted traffic.
Action:
For DNS server answering Internet queries, deploy redundant servers on different networks. Even smaller companies can afford redundant DNS servers by using inexpensive ISP hosted DNS services. Review your vendor specific security documentation for additional DoS mitigations provided by the operating system, along with the appropriate CIS benchmark for your platform.
5.4 Firewalling and BIND with static src ports
The older BIND versions always used a source port of 53 for sending name server to name server traffic, which was convenient for firewall configuration. You should prohibit your clients and most servers from sending outbound DNS queries directly to the Internet, and force all the Internet DNS queries to come from your caching DNS server(s) instead. By having your internal BIND name server use port 53 as a source port, it may add a slight advantage of making the internal firewall rule that much more specific, rather than allowing any high port from the DNS server. The query-source line below causes port 53 to be used as a source port. This is NOT recommended for most situations!
options { . . .
query-source address * port 53;
Do not configure your external (Internet facing) DNS server to use a source port of 53, as this may simplify the work of DNS cache poisoning, by removing the need to guess the source port or to sniff the DNS traffic.
Action:
For an Internet facing DNS server, or one open to a fairly high threat network such as a large global corporate networks, do NOT configure the query source port as 53. For internal DNS servers available to a relatively small network and a low threat environment the source port of 53 may be configured if it benefits the firewall rules. If doubt, leave it out.
6 Summary and the Future of DNS Historically DNS continues to be a problematic service with regard to security in that it is unauthenticated and fairly easily spoofed. By its globally distributed nature it is a protocol that cannot change rapidly with changes requiring extensive coordination.
The Center for Internet Security DNS BIND Benchmark
Draft v0.16 Page 41 of 41
However there are secure solutions such as DNSSEC, which have been widely available and widely discussed for more than 5 years. In fact it seems that the initial momentum for deployment of DNSSEC had been dwindling. The more recently DNS cache poisoning attacks in 2005 have raised the awareness of the security issues. However it’s unlikely there is yet enough motivation and awareness to make progress toward widespread DNSSEC deployment.
6.1 Additional Resources
• http://www.isc.org/sw/bind/ • NIST draft Secure Domain Name System (DNS) Deployment Guide
<http://csrc.nist.gov/publications/drafts/DRAFT-SP800-81.pdf> • DNS & BIND 4th Edition O’Reilly <http://www.oreilly.com/catalog/dns4/> • http://www.bind9.net/ • http://www.menandmice.com/docs/DNS&BIND_security.pdf • http://docs.hp.com/en/B2355-90775/ch02s15.html • http://www.whitehats.ca/main/members/Jeff/jeff_dns_security/jeff_dns_security.html • http://ops.ietf.org/dns/dynupd/secure-ddns-howto.html • DNSSEC Information http://www.dnssec.net/ • NSA SELinux site http://www.nsa.gov/selinux/ • RedHat SELinux article http://www.redhat.com/magazine/006apr05/features/selinux/
• RFC 2136 - Dynamic Updates in the Domain Name System (DNS UPDATE) • RFC 2845 - Secret Key Transaction Authentication for DNS (TSIG) • RFC 2137 - Secure Domain Name System Dynamic Update • RFC 4033 - DNS Security Introduction and Requirements • RFC 4034 - Resource Records for the DNS Security Extensions • RFC 4035 - Protocol Modifications for the DNS Security Extensions