chapter 6 jam! implementing audio in android apps
TRANSCRIPT
Chapter 6
Jam! Implementing Audio in Android Apps
ObjectivesCreate an Android project using a splash screenDesign a TextView control with a background imagePause the execution of an Activity with a timerUnderstand the Activity life cycleOpen an Activity with onCreate( )End an Activity with finish( )Assign class variablesCreate a raw folder for music files
ObjectivesPlay music with a MediaPlayer methodStart and resume music playback using the start and pause methodsChange the Text property of a controlChange the visibility of a control
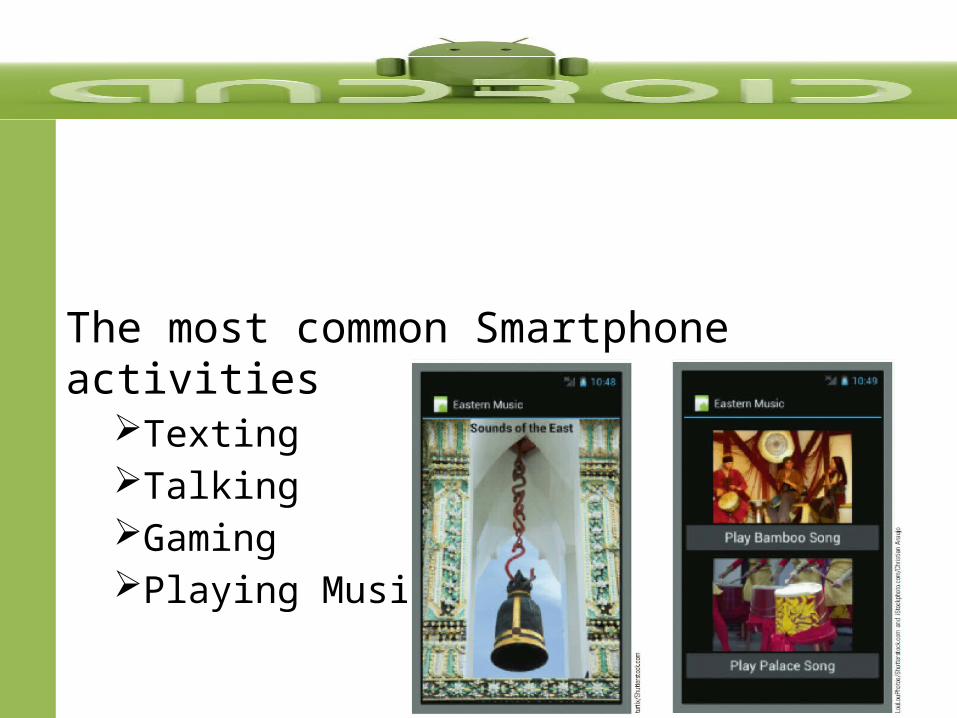
The most common Smartphone activitiesTextingTalkingGamingPlaying Music
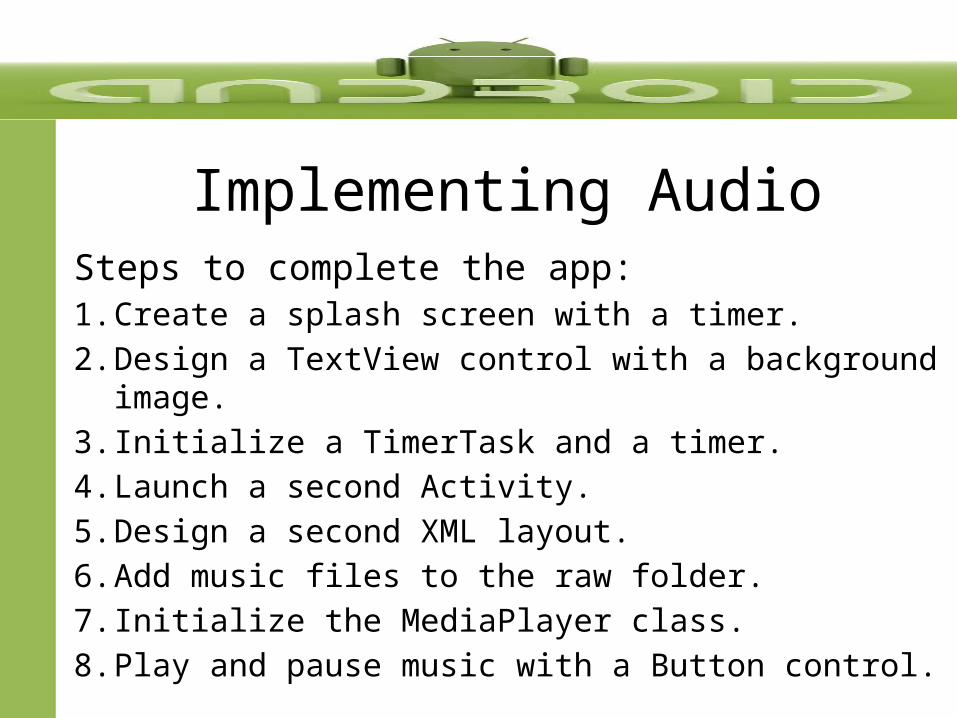
Implementing AudioSteps to complete the app:1. Create a splash screen with a timer.2. Design a TextView control with a background image.3. Initialize a TimerTask and a timer.4. Launch a second Activity.5. Design a second XML layout.6. Add music files to the raw folder.7. Initialize the MediaPlayer class.8. Play and pause music with a Button control.
Creating a Splash Screen
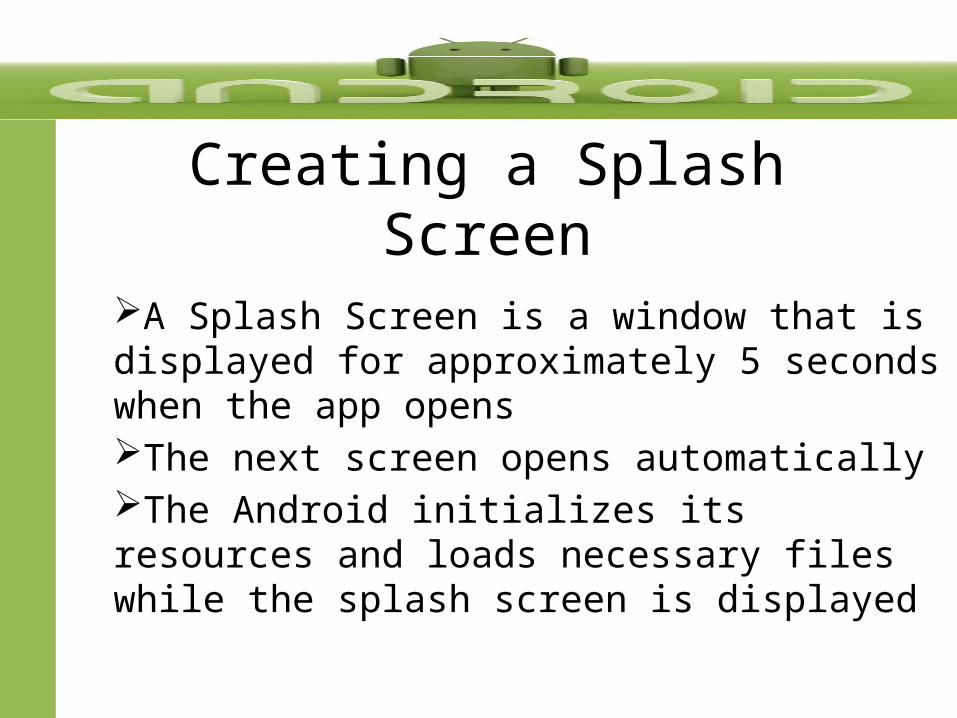
A Splash Screen is a window that is displayed for approximately 5 seconds when the app opensThe next screen opens automaticallyThe Android initializes its resources and loads necessary files while the splash screen is displayed
Creating a Splash Screen
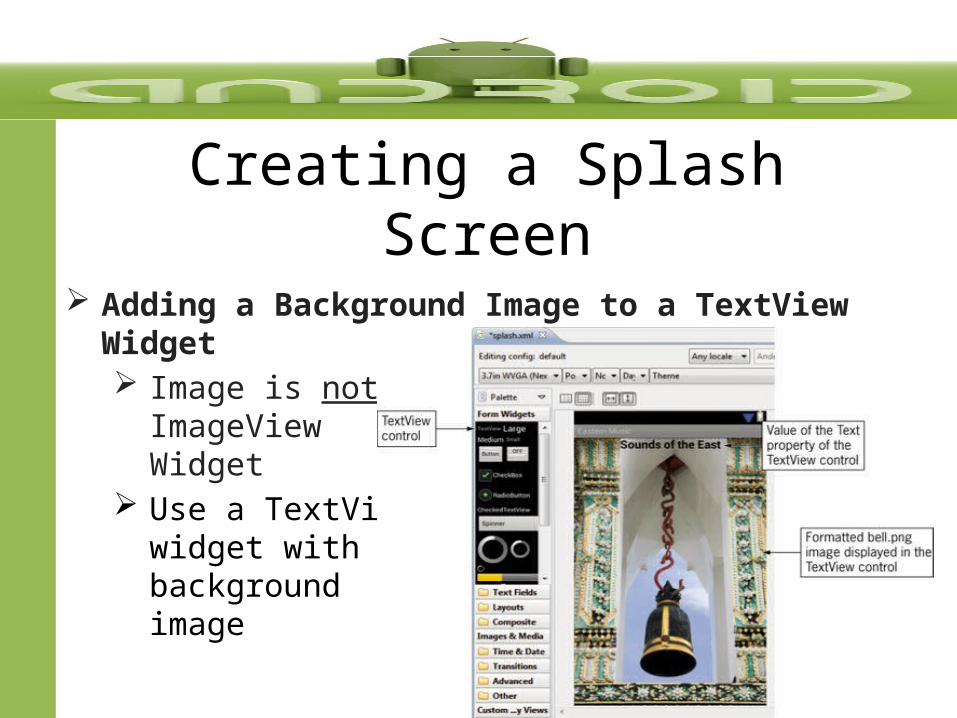
Adding a Background Image to a TextView Widget Image is not an
ImageView Widget
Use a TextViewwidget with a background image
Creating a ListCreating an Timer
A timer in Java can:Execute a one-time task like displaying a splash screenPerform a continuous process such as a morning wake-up call set to run at regular intervals
Use two Java classes, named TimerTask and TimerEach time a timer runs it runs in a single thread
A thread is a single sequential flow of control within a program
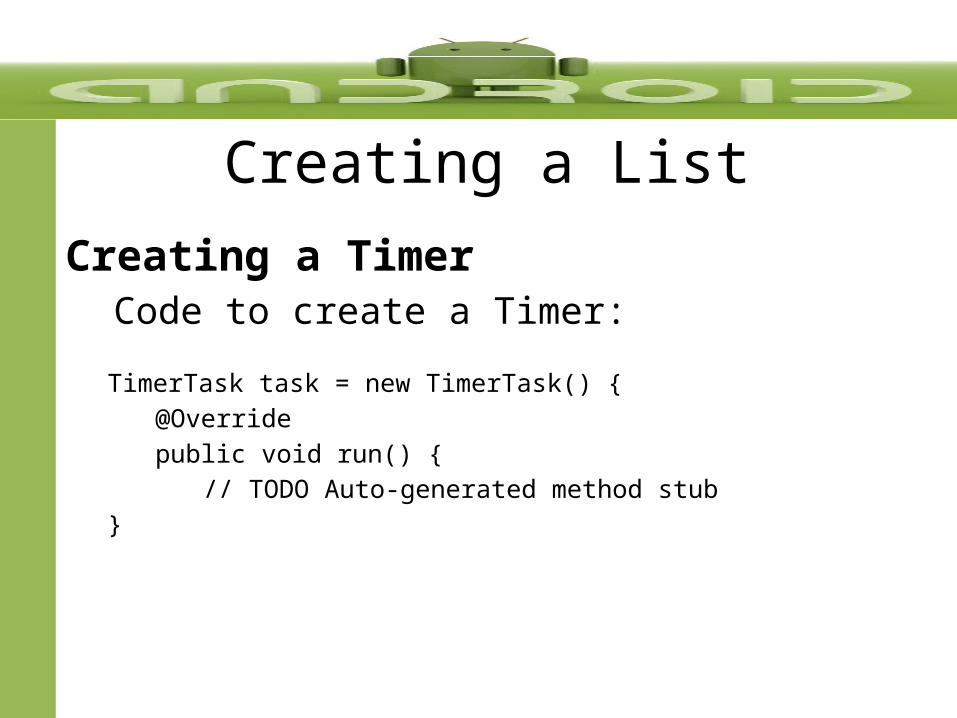
Creating a ListCreating a Timer
Code to create a Timer:
TimerTask task = new TimerTask() {@Overridepublic void run() {
// TODO Auto-generated method stub}
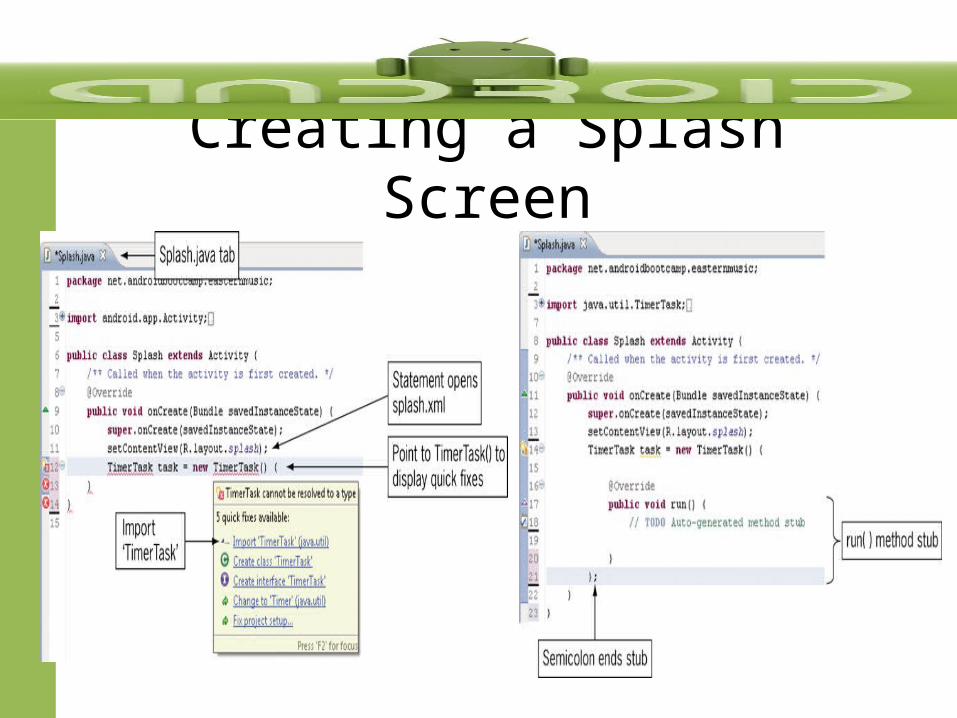
Creating a Splash Screen
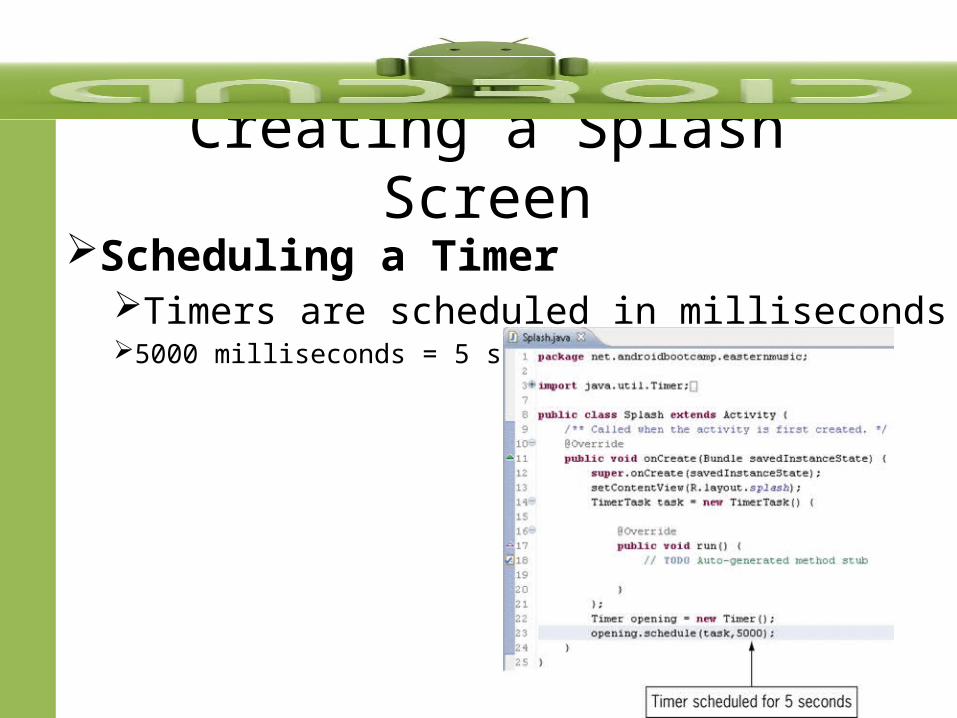
Creating a Splash ScreenScheduling a Timer
Timers are scheduled in milliseconds 5000 milliseconds = 5 seconds
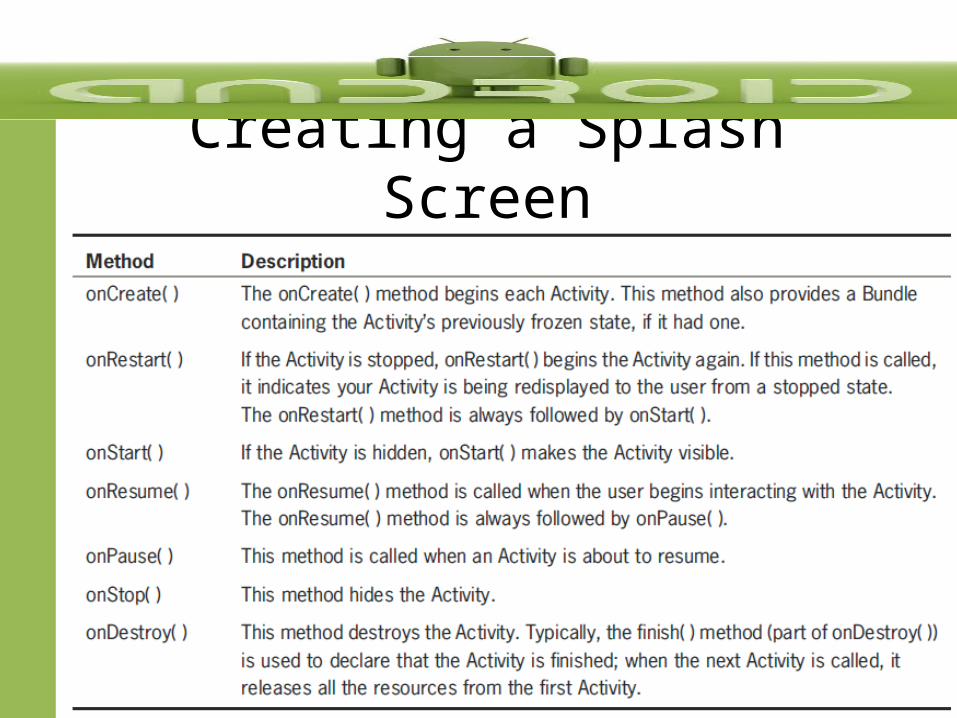
Creating a Splash ScreenLife and Death of an Activity
Each activity has a life cycle – a series of actions from the beginning of an Activity until its endWhen the activity begins, we use an onCreate() method to load it into memoryWhen the activity ends, we use an onDestroy() method to remove it from memoryFour states of an Activity:
ActivePauseStoppedDead
Creating a Splash Screen
Creating a Splash Screen
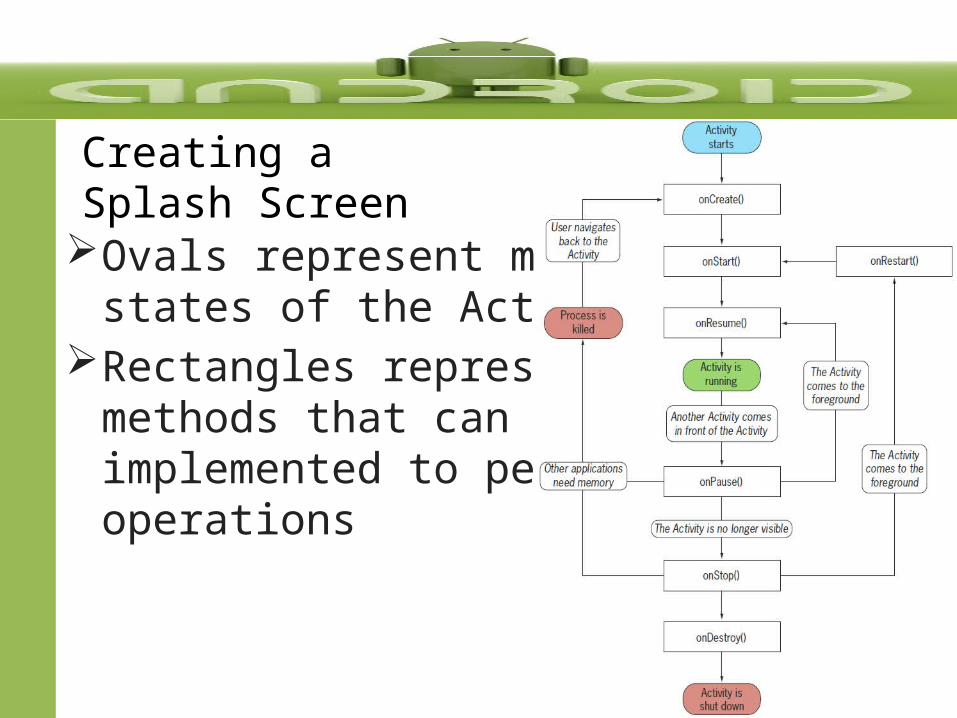
Ovals represent majorstates of the Activity
Rectangles representmethods that can be implemented to performoperations
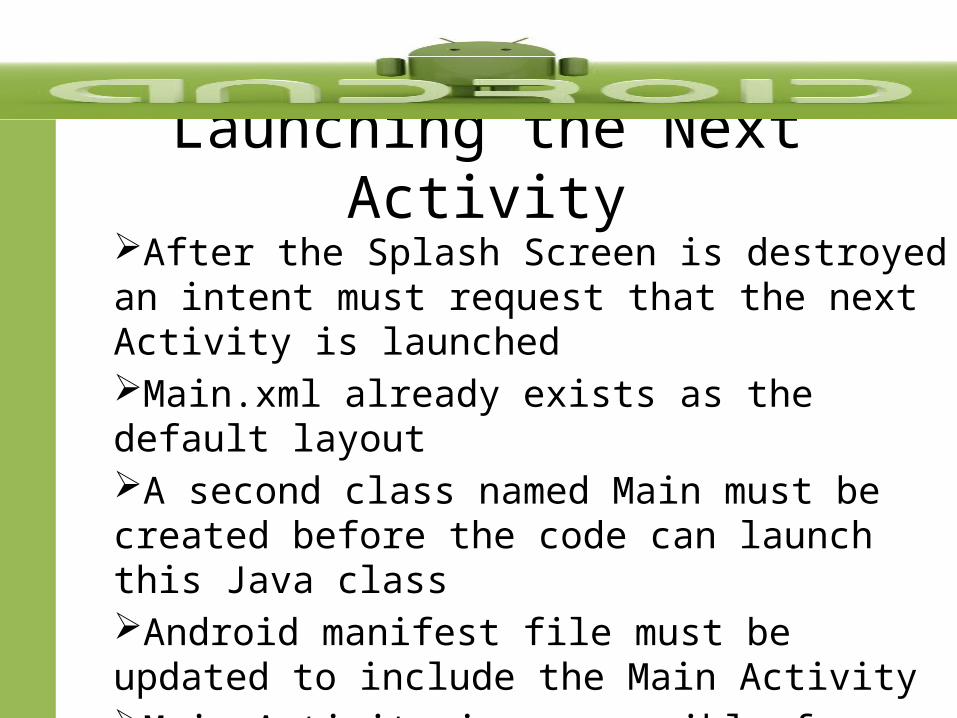
Launching the Next ActivityAfter the Splash Screen is destroyed an intent must request that the next Activity is launchedMain.xml already exists as the default layoutA second class named Main must be created before the code can launch this Java classAndroid manifest file must be updated to include the Main ActivityMain Activity is responsible for playing music
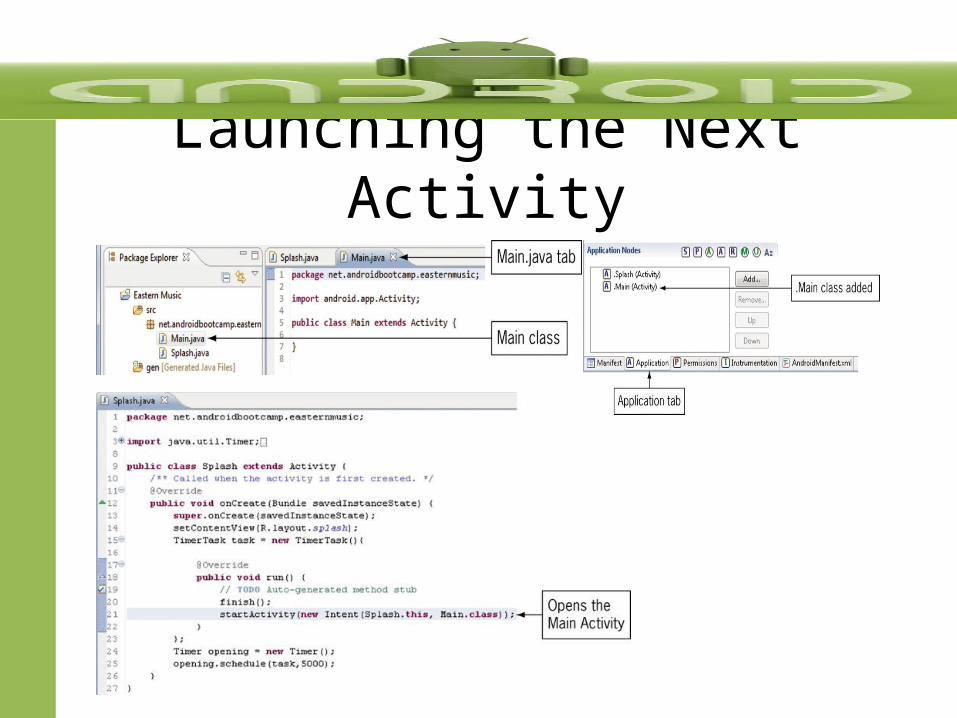
Launching the Next Activity
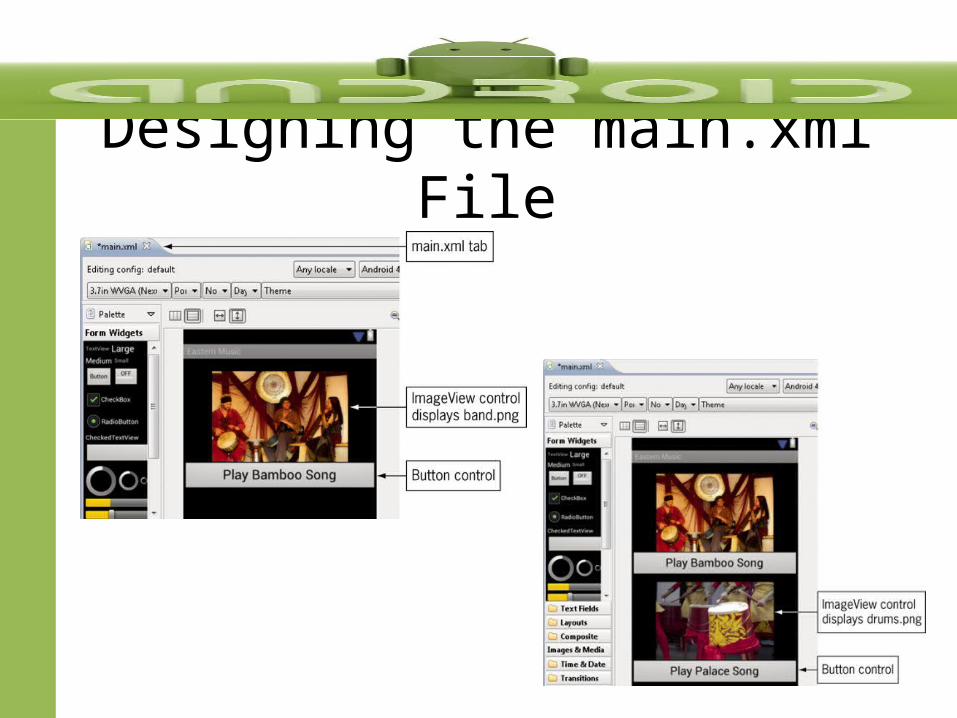
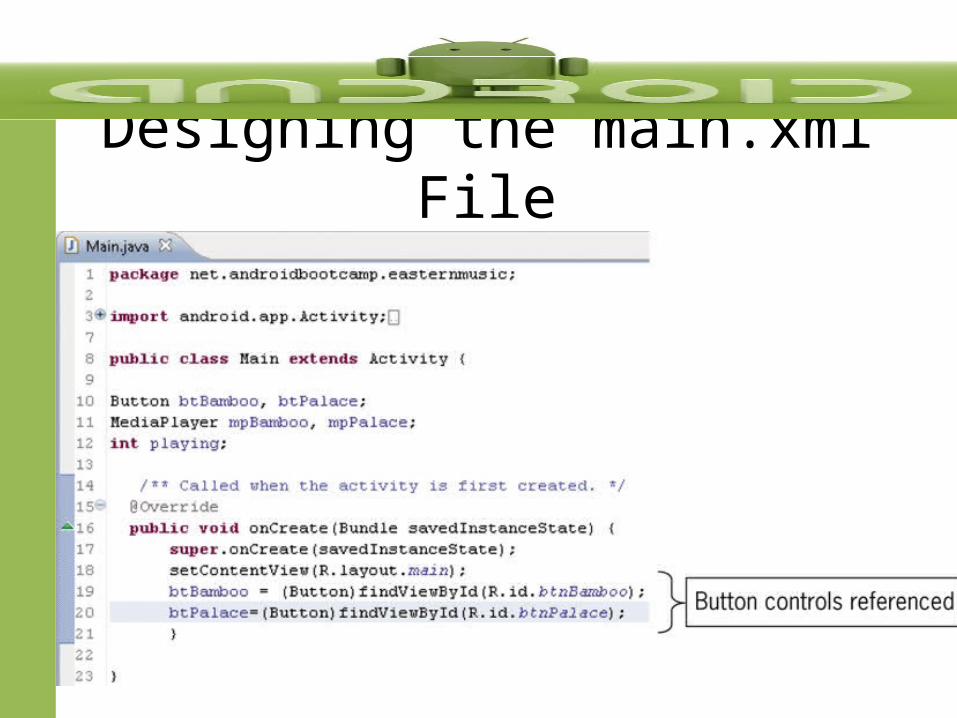
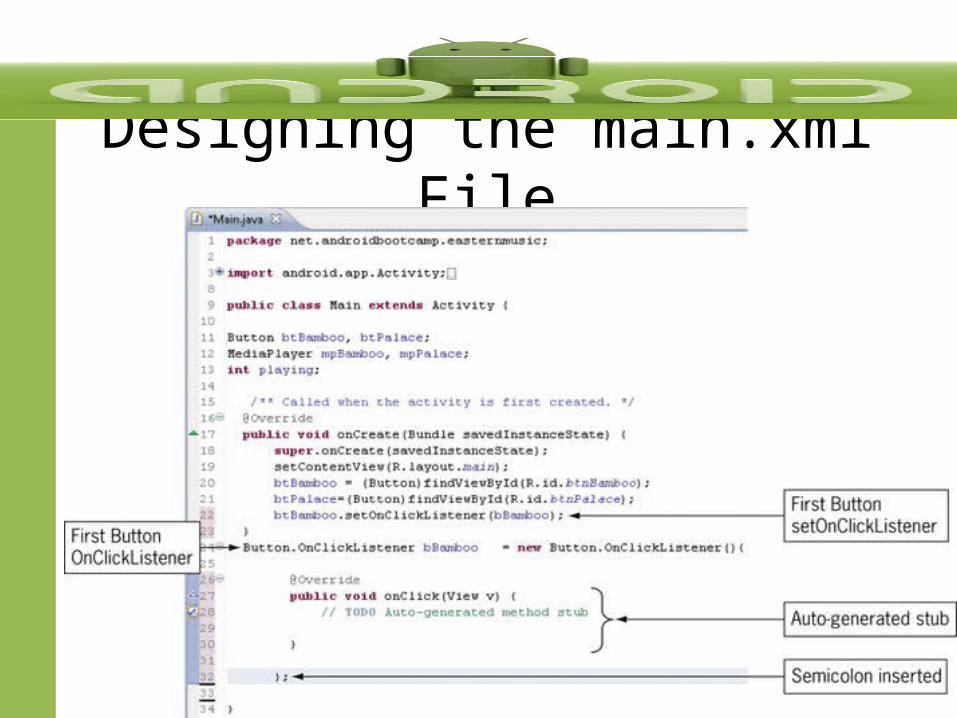
Designing the main.xml File
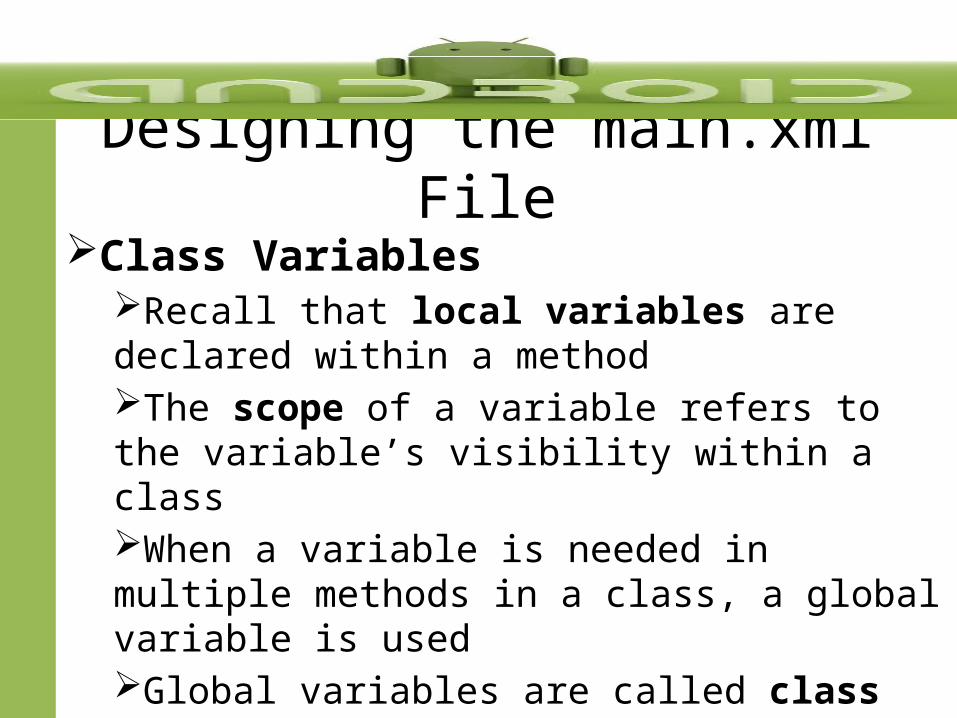
Designing the main.xml FileClass Variables
Recall that local variables are declared within a methodThe scope of a variable refers to the variable’s visibility within a classWhen a variable is needed in multiple methods in a class, a global variable is usedGlobal variables are called class variables

Designing the main.xml File
Designing the main.xml File
Designing the main.xml File
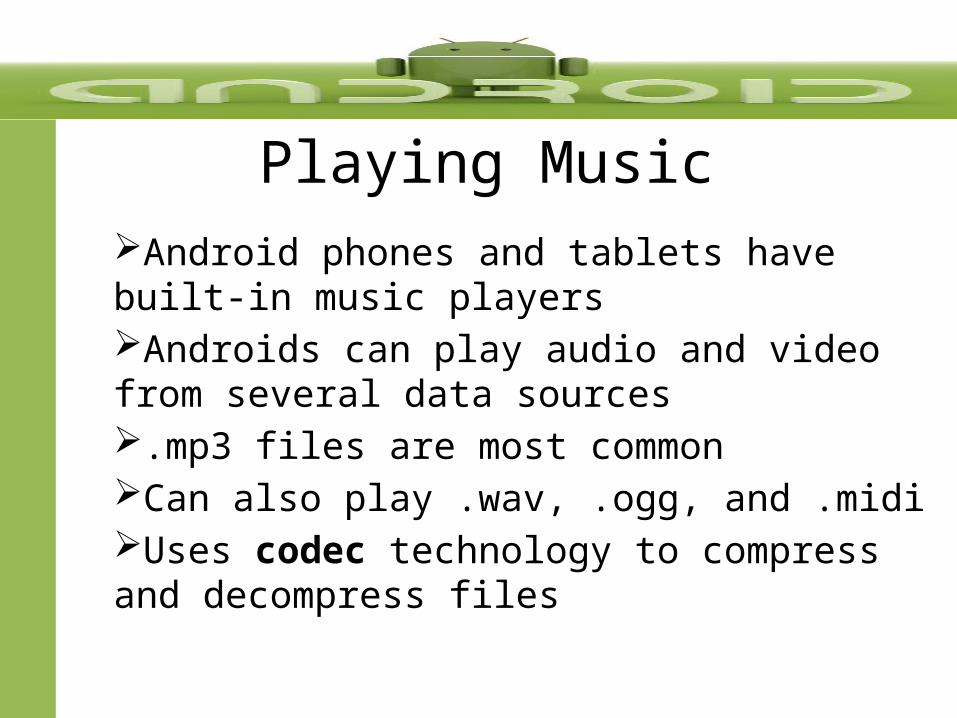
Playing MusicAndroid phones and tablets have built-in music playersAndroids can play audio and video from several data sources.mp3 files are most commonCan also play .wav, .ogg, and .midiUses codec technology to compress and decompress files
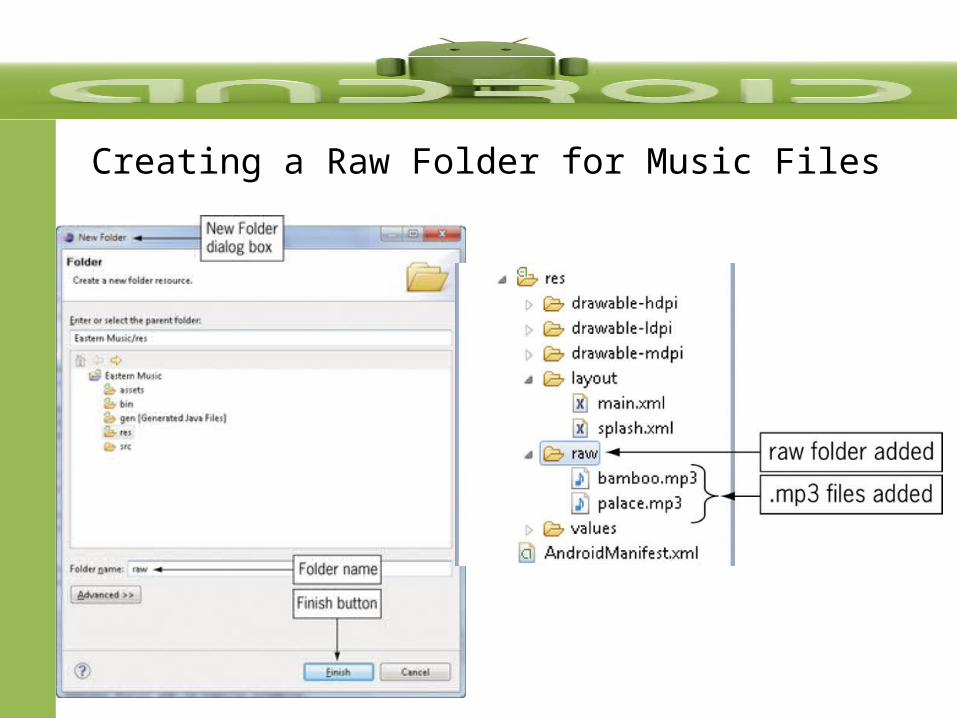
Creating a Raw Folder for Music Files
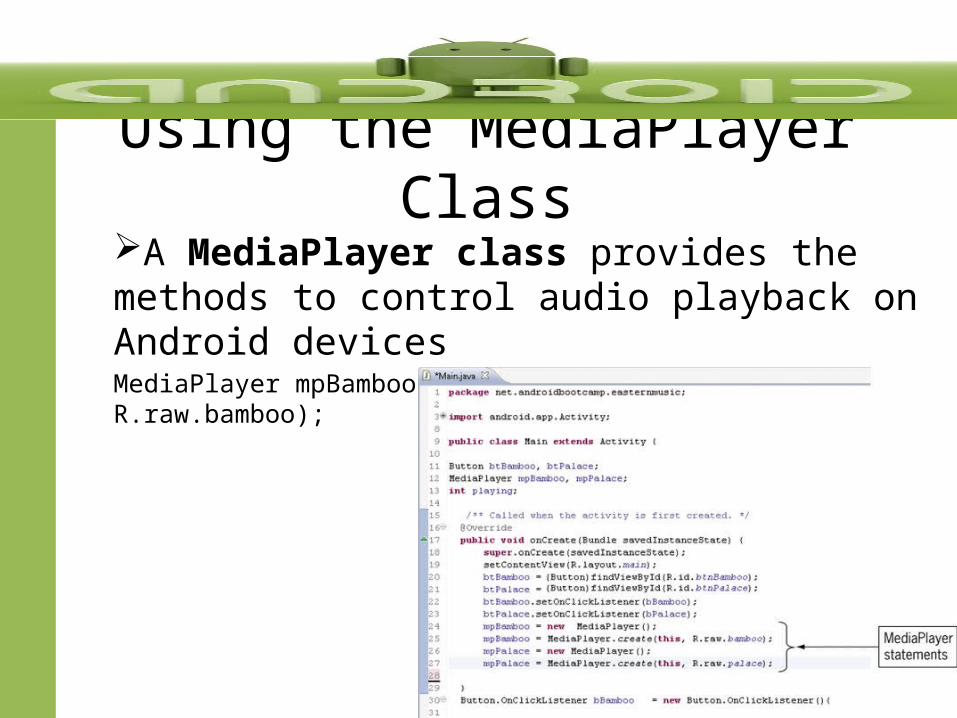
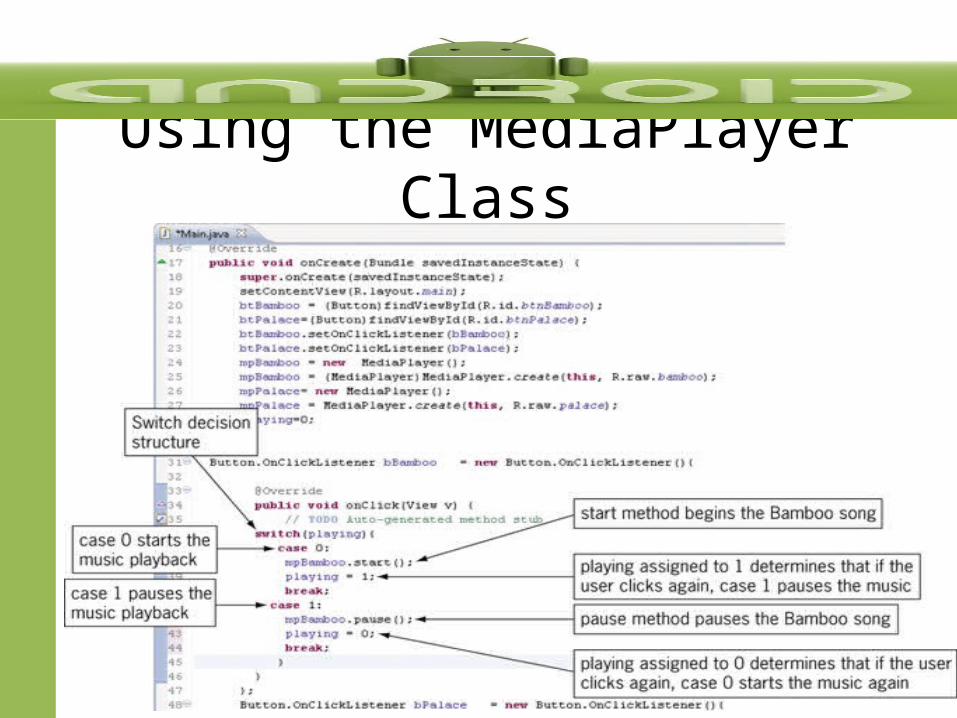
Using the MediaPlayer ClassA MediaPlayer class provides the methods to control audio playback on Android devicesMediaPlayer mpBamboo = MediaPlayer.create(this, R.raw.bamboo);
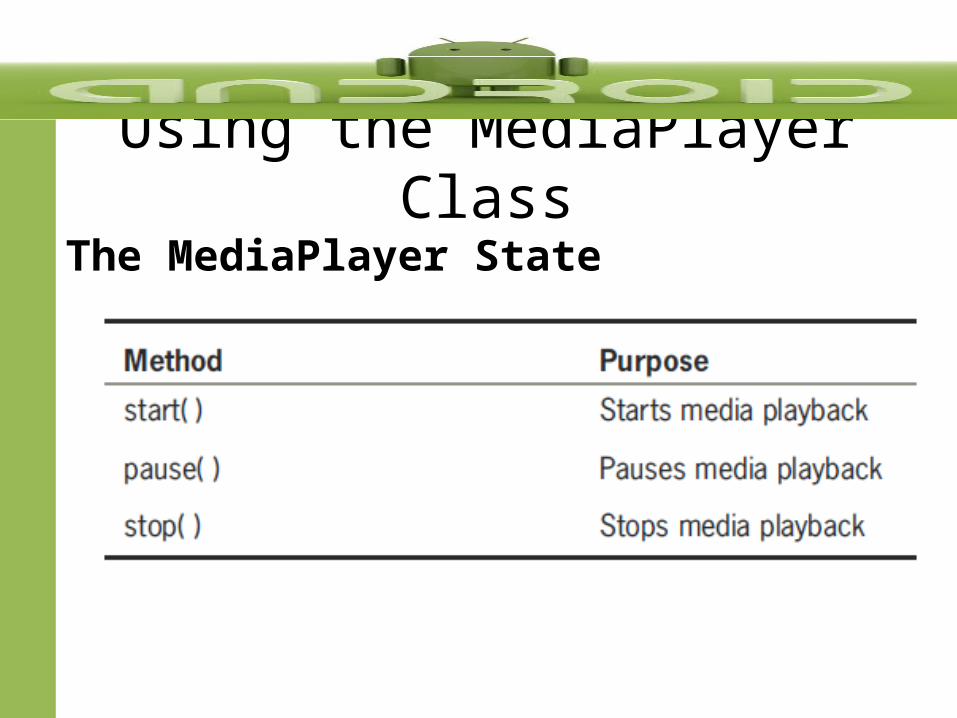
Using the MediaPlayer ClassThe MediaPlayer State
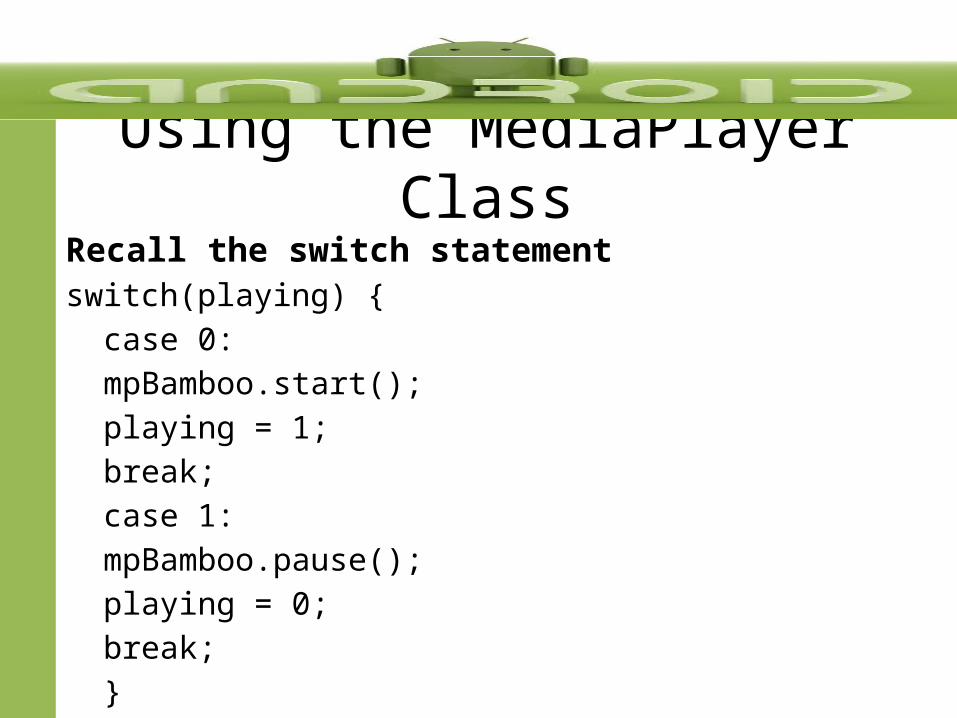
Using the MediaPlayer ClassRecall the switch statementswitch(playing) {
case 0:mpBamboo.start();playing = 1;break;
case 1:mpBamboo.pause();playing = 0;break;
}
Using the MediaPlayer Class
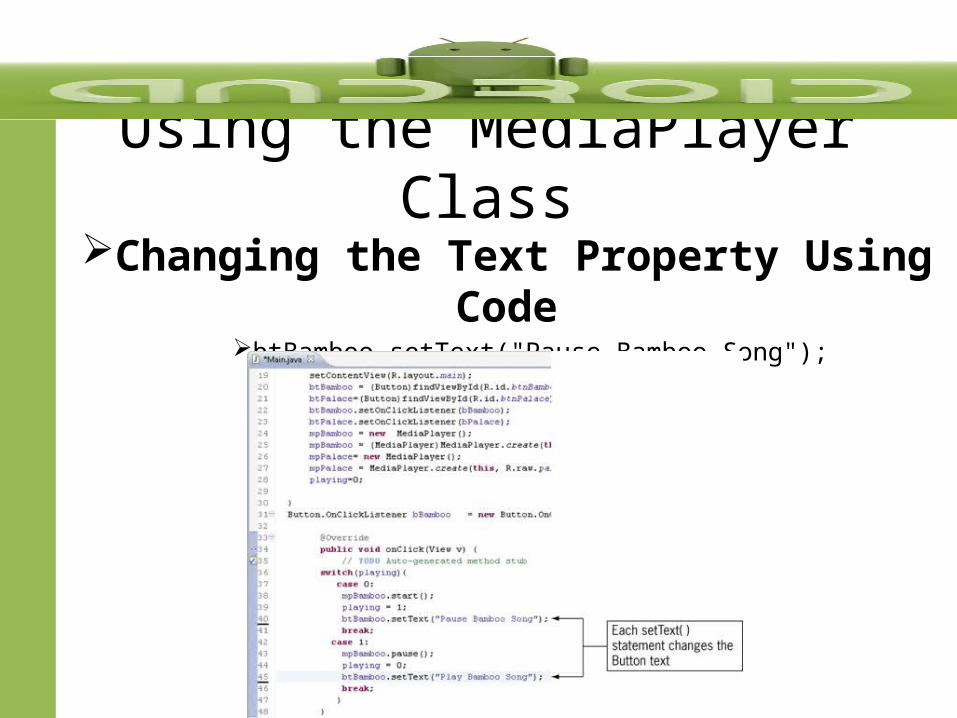
Using the MediaPlayer ClassChanging the Text Property Using Code
btBamboo.setText("Pause Bamboo Song");
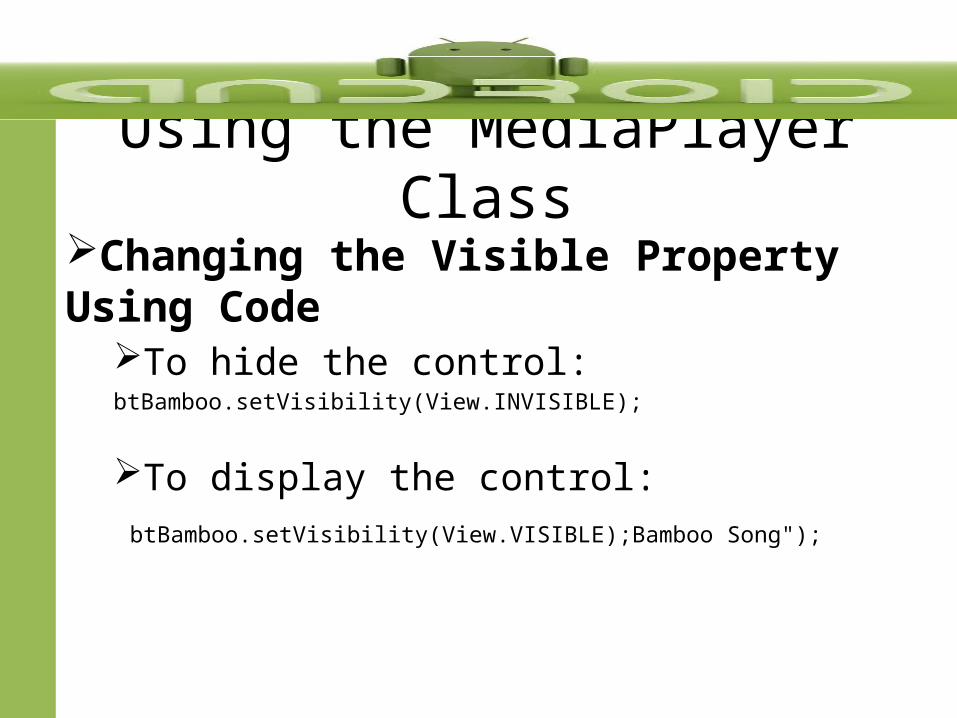
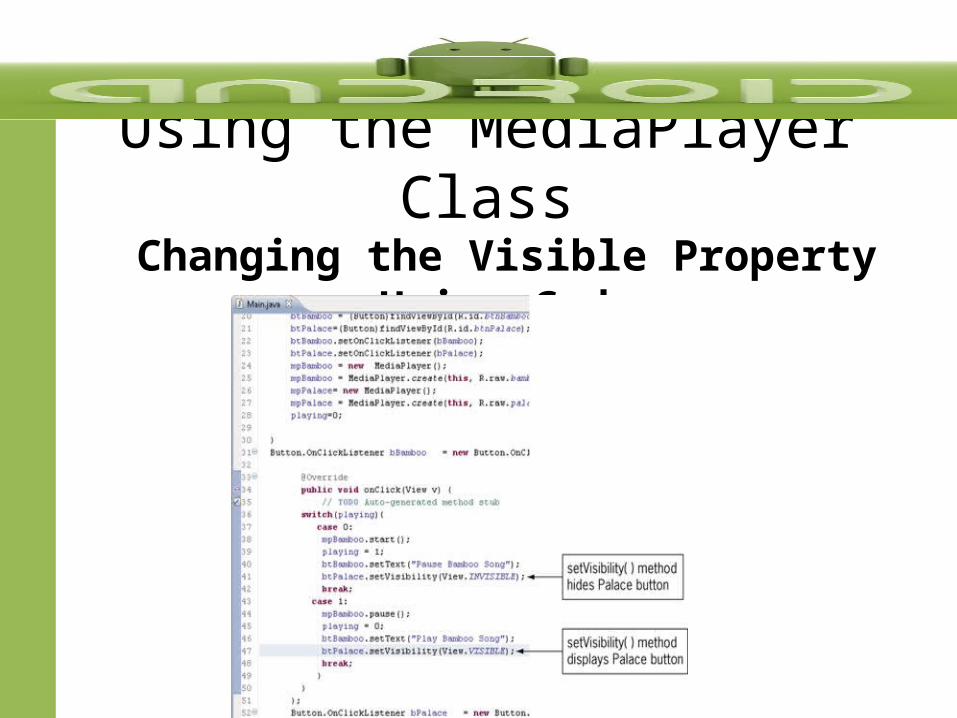
Using the MediaPlayer ClassChanging the Visible Property Using Code
To hide the control: btBamboo.setVisibility(View.INVISIBLE);
To display the control: btBamboo.setVisibility(View.VISIBLE);Bamboo Song");
Using the MediaPlayer ClassChanging the Visible Property Using Code
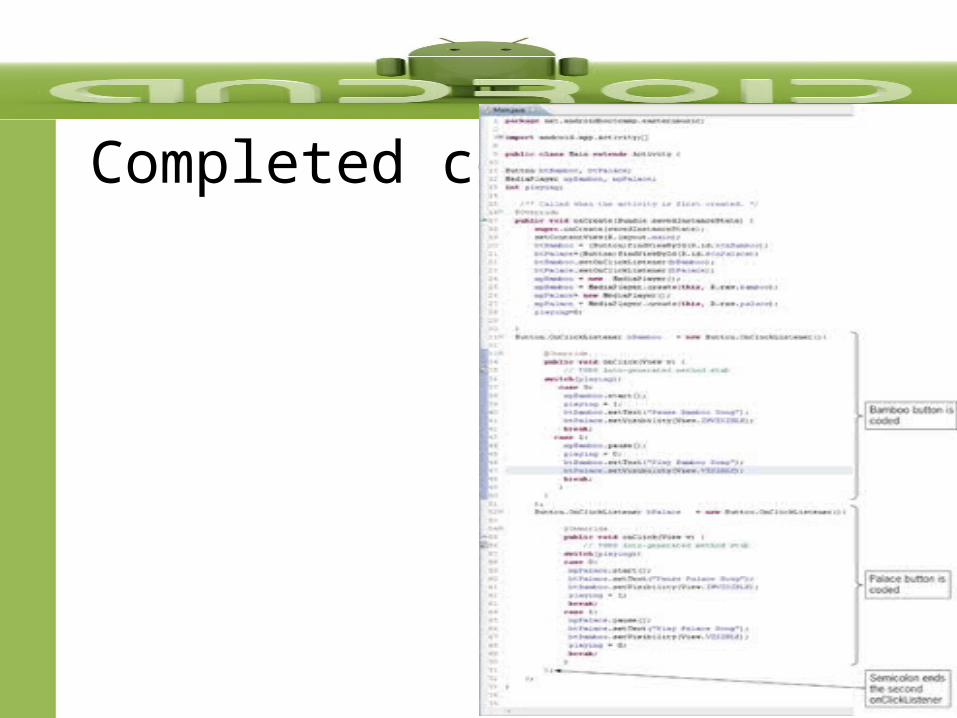
Completed code
SummaryAndroid apps can show a splash screen that displays program name, brand logo, or author nameSplash screens open when an app launchesTextView widgets display a background color or imageTimers in Java execute a one-time task or perform a continuous processTimers must be scheduled to run – timed in milliseconds
SummaryEach Activity has a life cycle – a series of actions from the beginning of the activity to its endLocal variables exist within a method and cease to exist when the method is finishedVariable scope refers to a variable’s visibility within a classEvery Android phone and tablet has a built-in music playerMusic files are typically stored in the res\raw subfolder
SummaryThe MediaPlayer class provides the methods to control audio playback on an Android deviceThe Java property that controls whether a control is displayed on the emulator is the Visible property