cercei dovleci
DESCRIPTION
Cum sa-ti faci singura cercei de HalloweenTRANSCRIPT

Ghostly pumpkin earringsGet into the Halloween spirit with easy-to-make pumpkin earrings.By Julia GerlachRELATED TOPICS: EARRINGS
Photo a

Photo b
Materials
Earrings 1 in. (2.5 cm)
16 two-hole crescent beads (opaque luster Picasso)
4 3 x 4 mm rondelles (Champagne opal)
2 2 x 3 mm rondelles (French vanilla AB)
48 11/0 seed beads (Miyuki 592, antique ivory pearl Ceylon)
2 13 mm bead caps
2 3-in. (7.6 cm) head pins
pair of earring findings
beading needles, #11
Fireline 6 lb. test
chainnose pliers
roundnose pliers

wire cutters
1 On 1 yd. (.9 m) of thread, pick up a repeating pattern of an 11/0 seed bead and a
crescent bead eight times, making sure all the crescents point the same way (photo
a). Leaving a 6-in. (15 cm) tail, tie the beads into a ring (photo b), and then retrace
the thread path through all the beads. Exit a crescent.
Photo c
2 Sew through the other hole of the same crescent. Pick up an 11/0, and sew through
the open hole of the next crescent (photo c). Repeat this step seven times to
complete the round, and retrace the thread path through all the beads in this round.
Exit a crescent.


Photo i
3 Pick up an 11/0, and sew back through the other hole of the same crescent (photo
d). Pick up an 11/0, sew back through the first hole of the crescent (photo e), and
continue through the first 11/0 added in this step (photo f), the adjacent hole of the
crescent (photo g), the second 11/0 added in this step (photo h), and the adjacent
hole of the next crescent (photo i).
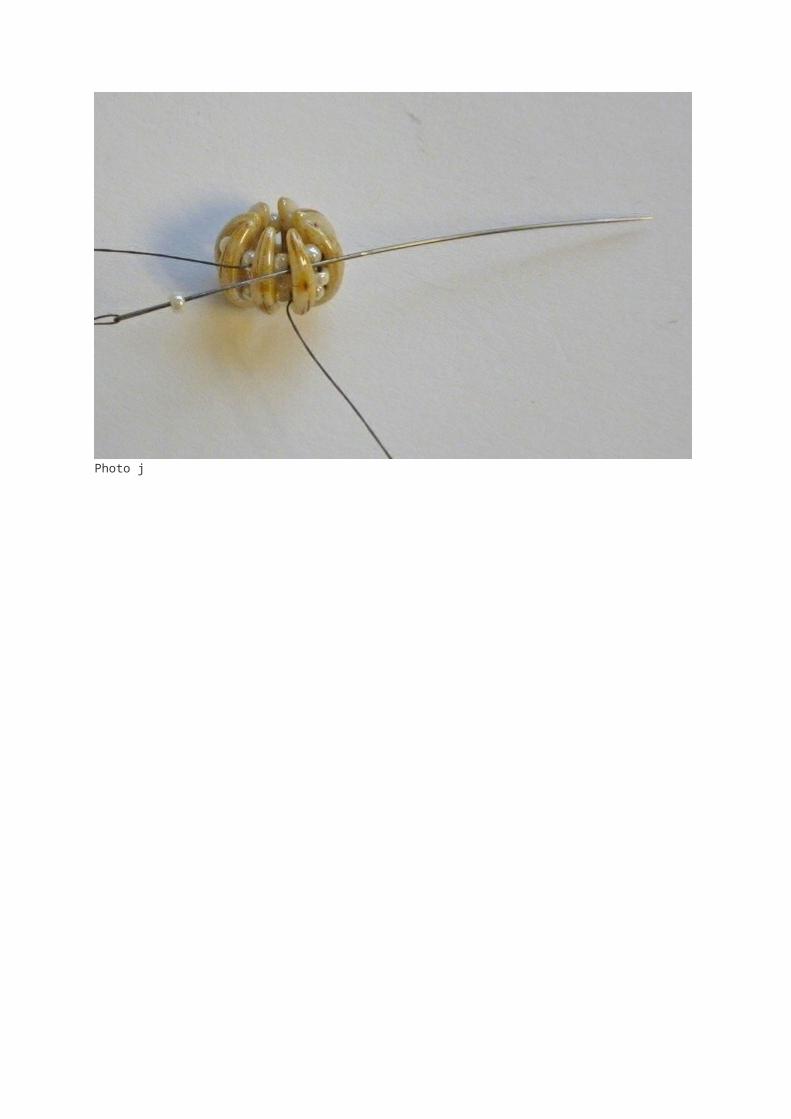


Photo n
4 Pick up an 11/0, and sew back through the other hole of the same crescent (photo
j). Sew through the adjacent center 11/0 (photo k), the first hole of the crescent
your thread exited at the start of this step (photo l), the 11/0 just added (photo m),
and the adjacent hole of the next crescent(photo n). Repeat this step five times to
complete the round. You will be working in a figure-8 pattern, changing direction with
each stitch. After adding the final 11/0, make sure to secure it in place by working a
final thread path through the first crescent and center 11/0. End the working thread
and tail.

Photo o
5 On a head pin, string a 2 x 3 mm rondelle and two 3 x 4 mm rondelles, the beaded
bead, and a bead cap (photo o). Slide the beaded bead over the rondelles. You may
need to apply a little pressure to get the 3 x 4 mm rondelles inside the beaded bead.
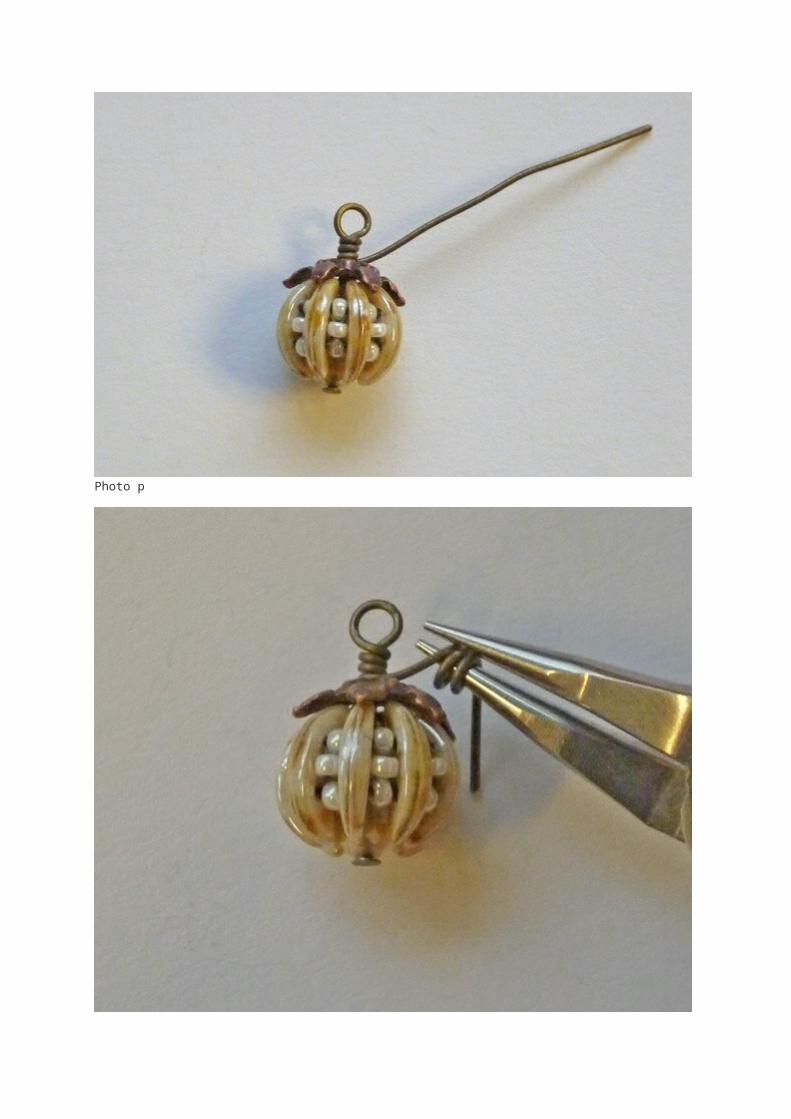
Photo p
Photo q

Photo r
6 Make a wrapped loop above the beaded bead, but don’t trim the end of the wire.
Instead, angle the wire upwards (photo p). Grasp the wire tail with roundnose pliers
about 1/8 in. (3 mm) from the wrapped loop, and coil the wire around the jaw of the
pliers two or three times (photo q). With the roundnose pliers, create a curve at the
end of the wire (photo r).
7 Open the loop of an earwire, and attach the pumpkin dangle.
8 Repeat steps 1-7 to make another earring.
http://bnb.jewelrymakingmagazines.com/projects/free-projects/2015/10/ghostly-pumpkin-earrings?utm_source=SilverpopMailing&utm_medium=email&utm_campaign=BNB_News_151019_Final&utm_content=