bmw e46 key door lock cylinder repair diyregulatorfix.com/docs/bmw_e46_door_lock_repair.pdfkey door...
TRANSCRIPT

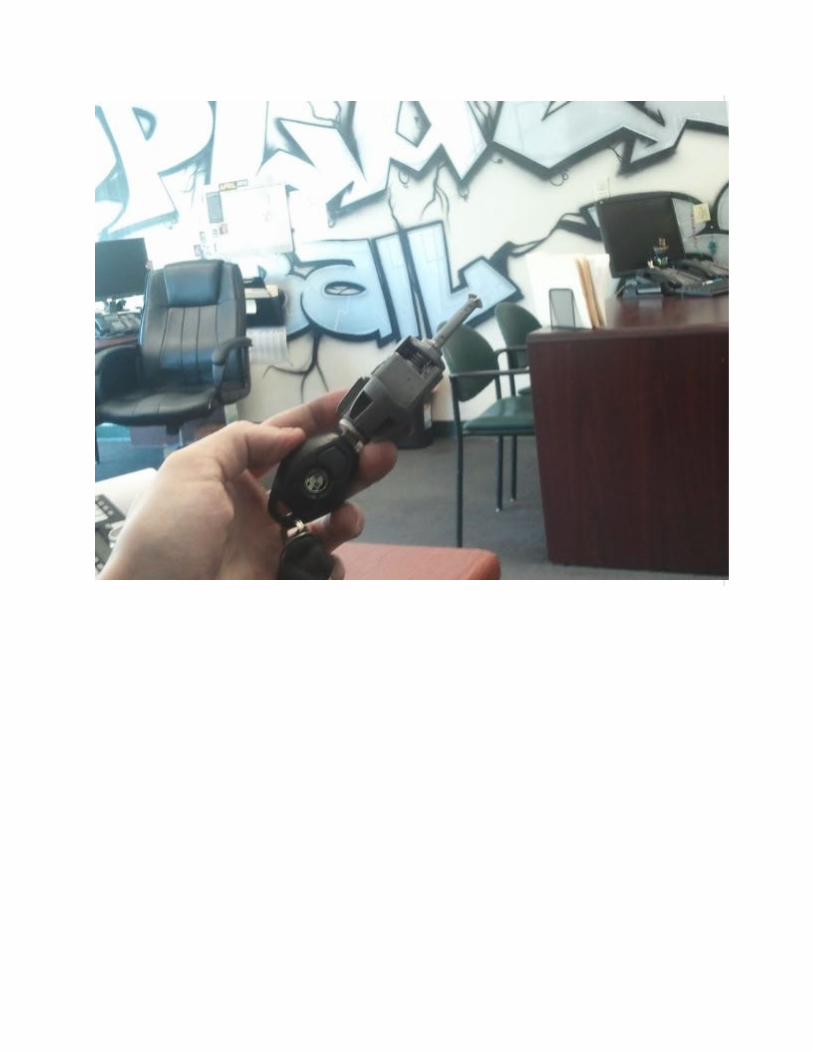
Key door lock cylinder repair W/ Pics
Ok, Im making this DIY because there is no other one that i could use help ful except that 30
second long youtube video. This should give you more of an understanding on how the
mechanism works and what parts go where. Any questions just hit me up on here.
Difficulty level 4
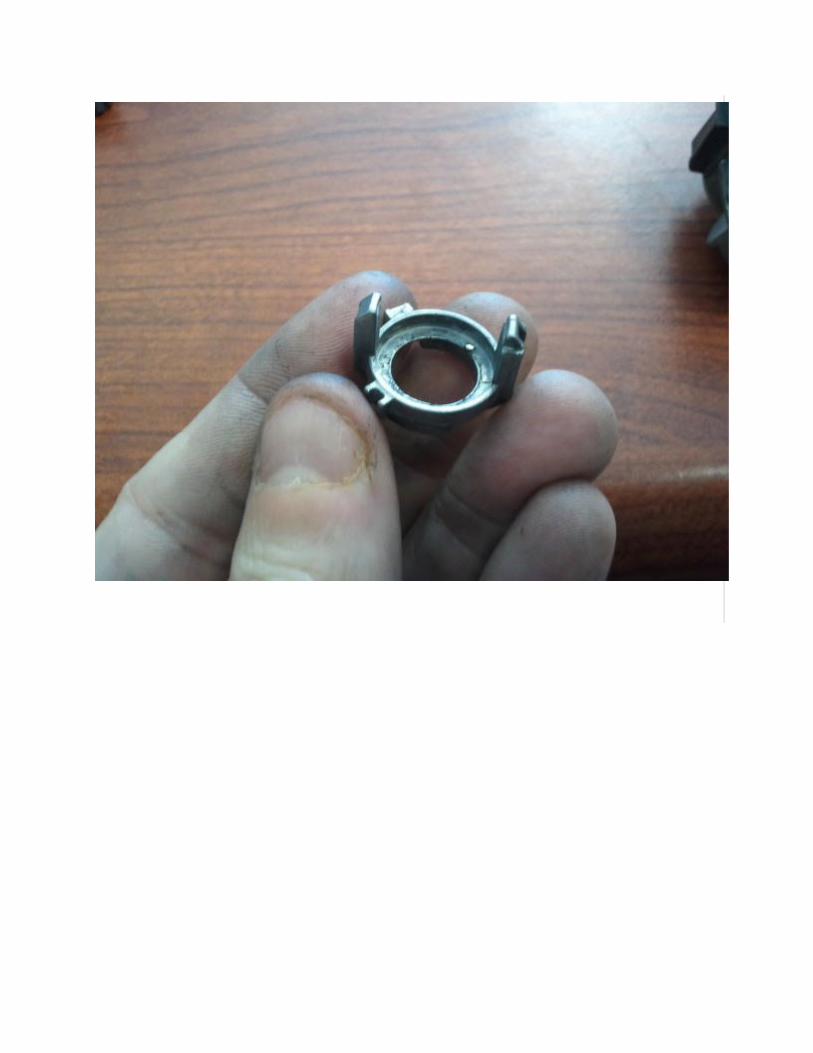
This is the lock assembly with the every part removed except for the inner sleeve in the barrel
and the cylinder itself. IT sounds confusing but when you take it apart and look at the inside you
will know what i mean. When you are putting this back together, it is very important to have the
grooved slots of the inner barrel on the horizontal sides inside the barrel not top and bottom
because if you have is top and bottom then you would put your key in side ways and turn vertical
and thats just weird imo. lol
step 2
Place this piece in as follows and make sure it goes all the way in and sits flush on the previous
piece. The grooved edges will let you know you have placed the piece in correctly.
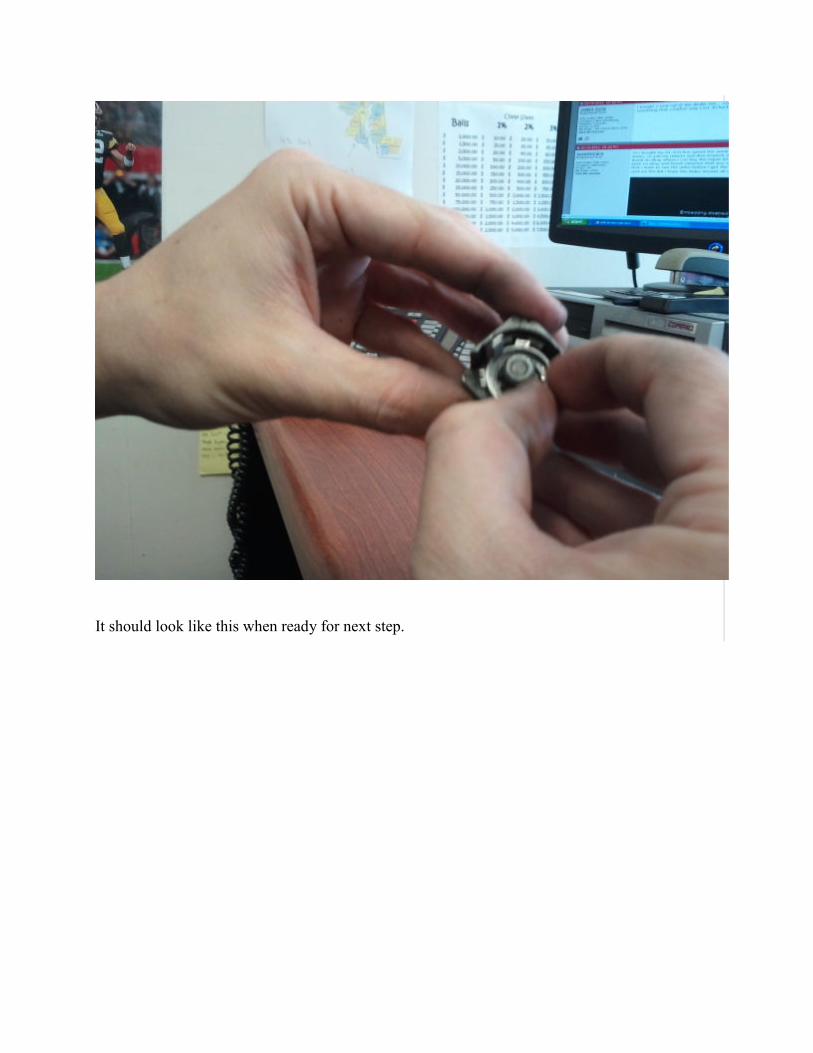
It should look like this when ready for next step.
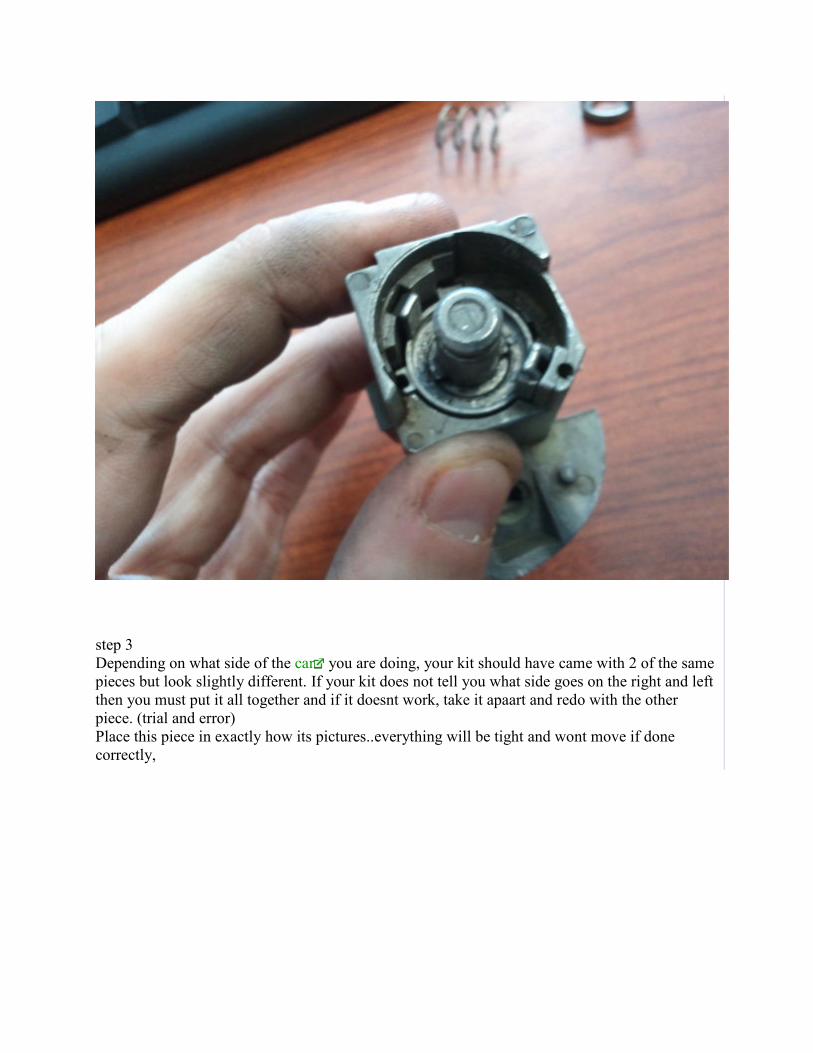
step 3
Depending on what side of the car you are doing, your kit should have came with 2 of the same
pieces but look slightly different. If your kit does not tell you what side goes on the right and left
then you must put it all together and if it doesnt work, take it apaart and redo with the other
piece. (trial and error)
Place this piece in exactly how its pictures..everything will be tight and wont move if done
correctly,
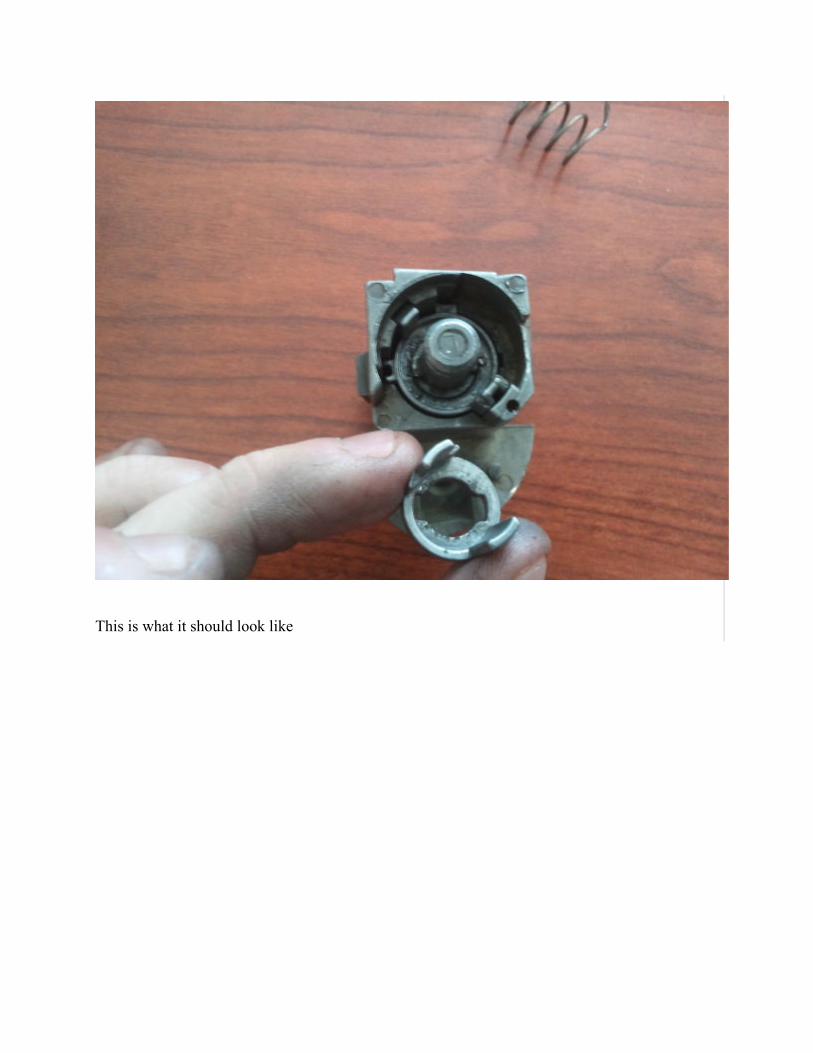
This is what it should look like

step 4
Place spring in just like i did in this photo. I re used my old spring because i did not feel like
messing with the new spring since it was a tad bit tighter spring.
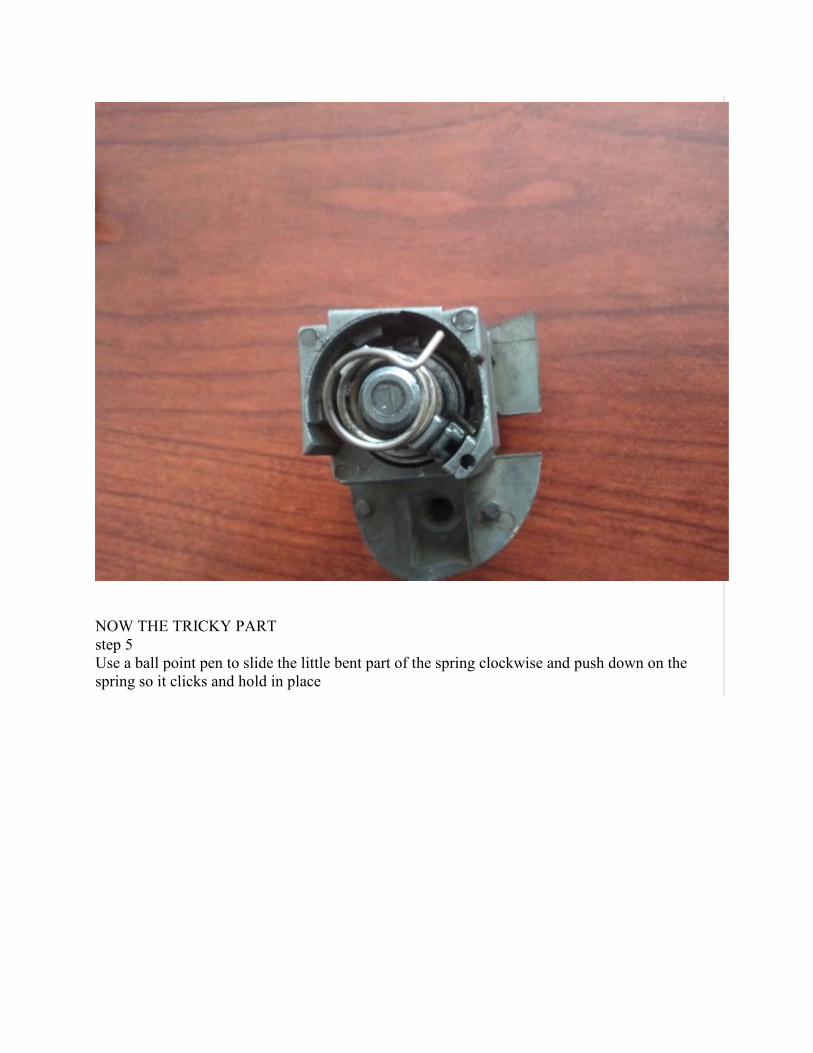
NOW THE TRICKY PART
step 5
Use a ball point pen to slide the little bent part of the spring clockwise and push down on the
spring so it clicks and hold in place

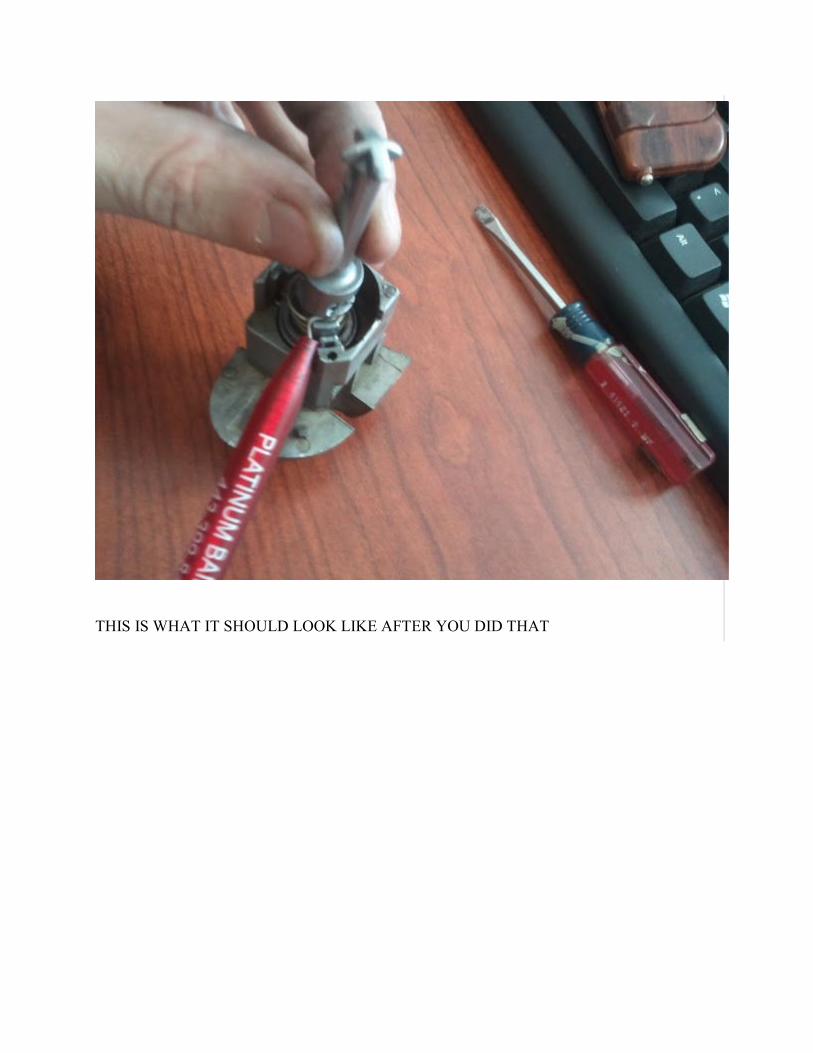
THIS IS WHAT IT SHOULD LOOK LIKE AFTER YOU DID THAT

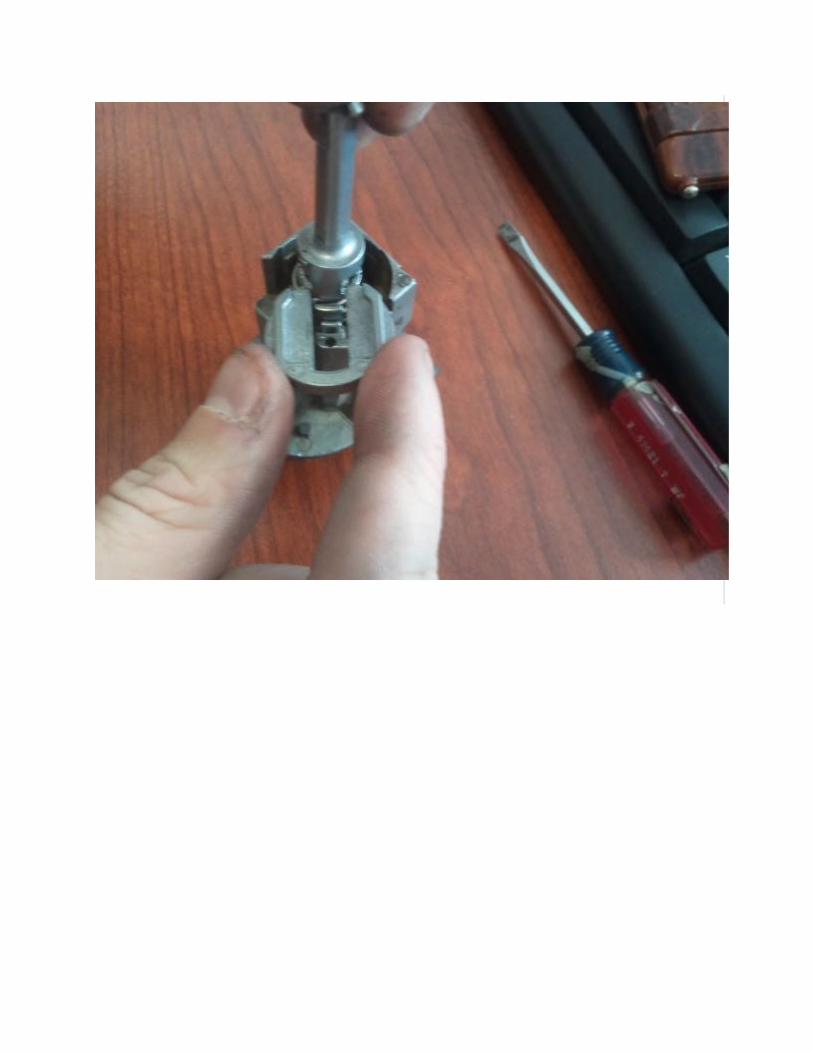
step 6
Take the 3 inch rod and press down on the spring pretty hard and slide the retaining clip on
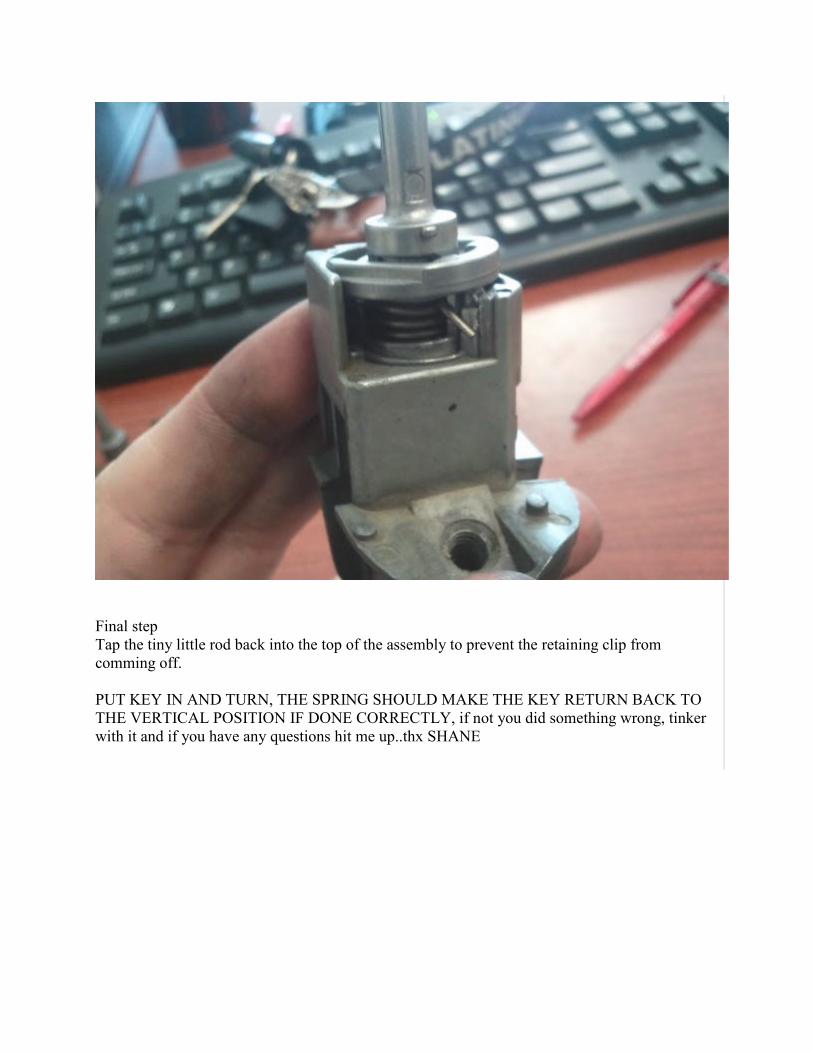
Final step
Tap the tiny little rod back into the top of the assembly to prevent the retaining clip from
comming off.
PUT KEY IN AND TURN, THE SPRING SHOULD MAKE THE KEY RETURN BACK TO
THE VERTICAL POSITION IF DONE CORRECTLY, if not you did something wrong, tinker
with it and if you have any questions hit me up..thx SHANE