beaweblogic event server - oracle help center · wlevs_home\samples\domains\algotrading_domain....
TRANSCRIPT

BEAWebLogic® Event Server
Creating WebLogic Event Server Applications
Version 2.0July 2007


Creating WebLogic Event Server Applications iii
Contents
1. Introduction and RoadmapDocument Scope and Audience . . . . . . . . . . . . . . . . . . . . . . . . . . . . . . . . . . . . . . . . . . . . . 1-1
WebLogic Event Server Documentation Set . . . . . . . . . . . . . . . . . . . . . . . . . . . . . . . . . . . 1-2
Guide to This Document . . . . . . . . . . . . . . . . . . . . . . . . . . . . . . . . . . . . . . . . . . . . . . . . . . 1-2
Samples for the WebLogic Event Server Application Developer . . . . . . . . . . . . . . . . . . . 1-3
2. Overview of Creating WebLogic Event Server ApplicationsOverview of the WebLogic Event Server Programming Model . . . . . . . . . . . . . . . . . . . . 2-1
WebLogic Event Server Components . . . . . . . . . . . . . . . . . . . . . . . . . . . . . . . . . . . . . 2-2
Component Configuration Files . . . . . . . . . . . . . . . . . . . . . . . . . . . . . . . . . . . . . . . . . 2-2
How Components Fit Together. . . . . . . . . . . . . . . . . . . . . . . . . . . . . . . . . . . . . . . . . . 2-3
WebLogic Event Server APIs . . . . . . . . . . . . . . . . . . . . . . . . . . . . . . . . . . . . . . . . . . . 2-4
Creating WebLogic Event Server Applications: Typical Steps. . . . . . . . . . . . . . . . . . . . . 2-5
Creating the EPN Assembly File . . . . . . . . . . . . . . . . . . . . . . . . . . . . . . . . . . . . . . . . . . . . 2-7
Creating the Event Types . . . . . . . . . . . . . . . . . . . . . . . . . . . . . . . . . . . . . . . . . . . . . . . . . 2-10
Next Steps . . . . . . . . . . . . . . . . . . . . . . . . . . . . . . . . . . . . . . . . . . . . . . . . . . . . . . . . . . . . 2-13
3. Creating AdaptersOverview of Adapters . . . . . . . . . . . . . . . . . . . . . . . . . . . . . . . . . . . . . . . . . . . . . . . . . . . . 3-1
Creating Adapters: Typical Steps . . . . . . . . . . . . . . . . . . . . . . . . . . . . . . . . . . . . . . . . . . . 3-2
Programming the Adapter Class: Guidelines. . . . . . . . . . . . . . . . . . . . . . . . . . . . . . . . . . . 3-3
Programming the Adapter Factory Class . . . . . . . . . . . . . . . . . . . . . . . . . . . . . . . . . . . . . . 3-7
Updating the EPN Assembly File . . . . . . . . . . . . . . . . . . . . . . . . . . . . . . . . . . . . . . . . . . . 3-8

iv Creating WebLogic Event Server Applications
Registering the Adapter Factory as an OSGI Service . . . . . . . . . . . . . . . . . . . . . . . . 3-8
Declaring the Adapter Components in your Application. . . . . . . . . . . . . . . . . . . . . . 3-9
Configuring the Adapter . . . . . . . . . . . . . . . . . . . . . . . . . . . . . . . . . . . . . . . . . . . . . . . . . . 3-9
Example of an Adapter Configuration File . . . . . . . . . . . . . . . . . . . . . . . . . . . . . . . 3-11
Creating an Adapter in Its Own Bundle . . . . . . . . . . . . . . . . . . . . . . . . . . . . . . . . . . . . . 3-12
Extending the Configuration of an Adapter . . . . . . . . . . . . . . . . . . . . . . . . . . . . . . . . . . 3-13
Creating the XSD Schema File . . . . . . . . . . . . . . . . . . . . . . . . . . . . . . . . . . . . . . . . 3-15
Complete Example of an Extended XSD Schema File . . . . . . . . . . . . . . . . . . . . . . 3-17
Programming Access to the Configuration of an Adapter . . . . . . . . . . . . . . . . . . . . 3-18
Passing Login Credentials from an Adapter to the Data Feed Provider . . . . . . . . . . . . . 3-19
Updating the Adapter Code to Access the Login Credential Properties . . . . . . . . . 3-22
4. Using Java Message Service (JMS) in Your ApplicationsOverview of Using JMS in WebLogic Event Server Applications. . . . . . . . . . . . . . . . . . 4-1
Additional Programming Guidelines for JMS Adapters . . . . . . . . . . . . . . . . . . . . . . . . . . 4-2
Additional Configuration for JMS Adapters . . . . . . . . . . . . . . . . . . . . . . . . . . . . . . . . . . . 4-3
Using WebLogic Event Server AsyncBeans. . . . . . . . . . . . . . . . . . . . . . . . . . . . . . . . . . . 4-4
Configuring AsyncBeans using Configuration Objects. . . . . . . . . . . . . . . . . . . . . . . 4-5
Common AsyncBean Tasks . . . . . . . . . . . . . . . . . . . . . . . . . . . . . . . . . . . . . . . . . . . . 4-5
Asynchronous Message Reception . . . . . . . . . . . . . . . . . . . . . . . . . . . . . . . . . . . 4-6
Message Driven POJO . . . . . . . . . . . . . . . . . . . . . . . . . . . . . . . . . . . . . . . . . . . . 4-6
Transactions . . . . . . . . . . . . . . . . . . . . . . . . . . . . . . . . . . . . . . . . . . . . . . . . . . . . 4-7
Retrieving JMS objects from JNDI . . . . . . . . . . . . . . . . . . . . . . . . . . . . . . . . . . 4-7
Using WorkManager with Transactions . . . . . . . . . . . . . . . . . . . . . . . . . . . . . . . 4-8
Dependency Injection Using Simple Declaritive Services.......... 4-8Dependency Injection Using Spring............................................ 4-9
5. Configuring the Stream ComponentOverview of the Stream Configuration File . . . . . . . . . . . . . . . . . . . . . . . . . . . . . . . . . . . 5-1

Creating WebLogic Event Server Applications v
Creating the Stream Configuration File: Main Steps . . . . . . . . . . . . . . . . . . . . . . . . . . . . 5-2
Example of an Stream Configuration File . . . . . . . . . . . . . . . . . . . . . . . . . . . . . . . . . . . . . 5-4
6. Configuring the Complex Event ProcessorOverview of the Complex Event Processer Configuration File . . . . . . . . . . . . . . . . . . . . 6-1
Configuring the Complex Event Processor: Main Steps . . . . . . . . . . . . . . . . . . . . . . . . . . 6-2
Example of a Processor Configuration File. . . . . . . . . . . . . . . . . . . . . . . . . . . . . . . . . . . . 6-5
7. Programming the Business Logic ComponentOverview of Programming the Business Logic Component . . . . . . . . . . . . . . . . . . . . . . . 7-1
Programming Business Logic: Guidelines . . . . . . . . . . . . . . . . . . . . . . . . . . . . . . . . . . . . 7-1
Accessing a Relational Database . . . . . . . . . . . . . . . . . . . . . . . . . . . . . . . . . . . . . . . . . . . . 7-3
8. Assembling and Deploying WebLogic Event Server ApplicationsOverview of Application Assembly and Deployment. . . . . . . . . . . . . . . . . . . . . . . . . . . . 8-1
Assembling a WebLogic Event Server Application: Main Steps . . . . . . . . . . . . . . . . . . . 8-2
Creating the MANIFEST.MF File . . . . . . . . . . . . . . . . . . . . . . . . . . . . . . . . . . . . . . . 8-4
Accessing Third-Party JAR Files From Your Application. . . . . . . . . . . . . . . . . . . . . 8-6
Deploying WebLogic Event Server Applications: Main Steps . . . . . . . . . . . . . . . . . . . . . 8-8
9. Using the Load Generator to Test Your ApplicationOverview of the Load Generator Utility . . . . . . . . . . . . . . . . . . . . . . . . . . . . . . . . . . . . . . 9-1
Creating a Load Generator Property File. . . . . . . . . . . . . . . . . . . . . . . . . . . . . . . . . . . . . . 9-2
Creating a Data Feed File . . . . . . . . . . . . . . . . . . . . . . . . . . . . . . . . . . . . . . . . . . . . . . . . . 9-4
Configuring the csvgen Adapter in Your Application. . . . . . . . . . . . . . . . . . . . . . . . . . . . 9-4
A. Additional Information about Spring and OSGi

vi Creating WebLogic Event Server Applications

Creating WebLogic Event Server Applications 1-1
C H A P T E R 1
Introduction and Roadmap
This section describes the contents and organization of this guide—Creating WebLogic Event Server Applications.
“Document Scope and Audience” on page 1-1
“WebLogic Event Server Documentation Set” on page 1-2
“Guide to This Document” on page 1-2
“Samples for the WebLogic Event Server Application Developer” on page 1-3
Document Scope and AudienceThis document is a resource for software developers who develop event driven real-time applications. It also contains information that is useful for business analysts and system architects who are evaluating WebLogic Event Server or considering the use of WebLogic Event Server for a particular application.
The topics in this document are relevant during the design, development, configuration, deployment, and performance tuning phases of event driven applications. The document also includes topics that are useful in solving application problems that are discovered during test and pre-production phases of a project.
It is assumed that the reader is familiar with the Java programming language and Spring.

I n t roduct i on and Roadmap
1-2 Creating WebLogic Event Server Applications
WebLogic Event Server Documentation SetThis document is part of a larger WebLogic Event Server documentation set that covers a comprehensive list of topics. The full documentation set includes the following documents:
Getting Started With WebLogic Event Server
Creating WebLogic Event Server Applications
WebLogic Event Server Administration and Configuration Guide
EPL Reference Guide
WebLogic Event Server Reference Guide
WebLogic Event Server Release Notes
See the main WebLogic Event Server documentation page for further details.
Guide to This DocumentThis document is organized as follows:
This chapter, Chapter 1, “Introduction and Roadmap,” introduces the organization of this guide and the WebLogic Event Server documentation set and samples.
Chapter 2, “Overview of Creating WebLogic Event Server Applications,” describes at a high-level the programming model used to create WebLogic Event Server applications. It provides a procedure that lists the typical steps a programmer goes through to create an application.
Chapter 3, “Creating Adapters,” describes how to create and configure the adapter components of a WebLogic Event Server application.
Chapter 4, “Using Java Message Service (JMS) in Your Applications,” describes additional programming and configuration guidelines if you are developing a JMS adapter or using a JMS client in your business POJO.
Chapter 5, “Configuring the Stream Component,” describes how to optionally configure the stream components of a WebLogic Event Server.
Chapter 6, “Configuring the Complex Event Processor,” describes how to configure the complex event processor component of a WebLogic Event Server application.

Samples fo r the WebLog ic Event Se rve r App l i cat ion Deve loper
Creating WebLogic Event Server Applications 1-3
Chapter 7, “Programming the Business Logic Component,” describes how to program the business logic POJO component of a WebLogic Event Server application.
Chapter 8, “Assembling and Deploying WebLogic Event Server Applications,” describes how to assemble all the components of an application into a deployable bundle, and then how to deploy the bundle to WebLogic Event Server. After you have deployed the application you can start executing it.
Chapter 9, “Using the Load Generator to Test Your Application,” provides detailed information for using the load generator, a WebLogic Event Server testing tool.
Appendix A, “Additional Information about Spring and OSGi,” provides links to additional non-BEA information about Spring and OSGI.
Samples for the WebLogic Event Server Application Developer
In addition to this document, BEA Systems provides a variety of code samples for WebLogic Event Server application developers. The examples illustrate WebLogic Event Server in action, and provide practical instructions on how to perform key development tasks.
BEA recommends that you run some or all of the examples before programming and configuring your own event driven application.
The examples are distributed in two ways:
Pre-packaged and compiled in their own domain so you can immediately run them after you install the product.
Separately in a Java source directory so you can see a typical development environment setup.
The following two examples are provided in both their own domain and as Java source in this release of WebLogic Event Server:
HelloWorld—Example that shows the basic elements of a WebLogic Event Server application. See Hello World Example for additional information.
The HelloWorld domain is located in WLEVS_HOME\samples\domains\helloworld_domain, where WLEVS_HOME refers to the top-level WebLogic Event Server directory, such as c:\beahome\wlevs20.
The HelloWorld Java source code is located in WLEVS_HOME\samples\source\applications\helloworld.
I n t roduct i on and Roadmap
1-4 Creating WebLogic Event Server Applications
ForeignExchange (FX)—Example that includes multiple adapters, streams, and complex event processor with a variety of EPL rules, all packaged in the same WebLogic Event Server application. See Foreign Exchange (FX) Example for additional information.
The ForeignExchange domain is located in WLEVS_HOME\samples\domains\fx_domain, where WLEVS_HOME refers to the top-level WebLogic Event Server directory, such as c:\beahome\wlevs20.
The ForeignExchange Java source code is located in WLEVS_HOME\samples\source\applications\fx.
WebLogic Event Server also includes an algorithmic trading application, pre-assembled and deployed in its own sample domain; the source code for the example, however, is not provided. The algorithmic trading domain is located in WLEVS_HOME\samples\domains\algotrading_domain.

Creating WebLogic Event Server Applications 2-1
C H A P T E R 2
Overview of Creating WebLogic Event Server Applications
This section contains information on the following subjects:
“Overview of the WebLogic Event Server Programming Model” on page 2-1
“Creating WebLogic Event Server Applications: Typical Steps” on page 2-5
“Creating the EPN Assembly File” on page 2-7
“Creating the Event Types” on page 2-10
“Next Steps” on page 2-13
Overview of the WebLogic Event Server Programming Model
Because WebLogic Event Server applications are low latency high-performance driven applications, they run on a lightweight container and are developed using a POJO-based programming model. In POJO (Plain Old Java Object) programming, business logic is implemented in the form of POJOs, and then injected with the services they need. This is popularly called dependency injection. The injected services can range from those provided by WebLogic Event Services, such as configuration management, to those provided by another BEA product such as BEA Kodo, to those provided by a third party.
WebLogic Event Server defines a set of core services or components used together to assemble event-driven applications; these services are adapters, streams, and processors. In addition to

Overv iew o f Creat i ng WebLogic Event Se rve r App l i cat i ons
2-2 Creating WebLogic Event Server Applications
these, WebLogic Event Server includes other infrastructure services, such as configuration, monitoring, logging, and so on.
All services are deployed on the underlying BEA’s microServices Architecture (mSA) technology. BEA mSA is based upon the OSGi Service Platform defined by the OSGi Alliance.
WebLogic Event Server ComponentsWebLogic Event Server applications are made up of the following components:
Adapters—Components that provide an interface to incoming data feeds and convert the data into event types that the WebLogic Event Server application understands.
Streams—Components that function as virtual pipes or channels, connecting event sources to event sinks.
Complex Event Processors—Components that execute user-defined event processing rules against streams.
The user-defined rules are written using the Event Processing Language (EPL).
Business Logic POJO—User-coded POJO that receives events from the complex event processor, after the EPL rules have fired.
Component Configuration FilesEach component in your event processing network (adapter, processor, or stream) can have an associated configuration file, although only processors are required to have a configuration file. Component configuration files in WebLogic Event Server are XML documents whose structure is defined using standard XML Schema. The following two schema documents define the default structure of application configuration files:
wlevs_base_config.xsd: Defines common elements that are shared between application configuration files and the server configuration file.
wlevs_application_config.xsd: Defines elements that are specific to application configuration files.
The structure of application configuration files is as follows. There is a top-level root element named <config> that contains a sequence of sub-elements. Each individual sub element contains the configuration data for a WebLogic Event Server component (processor, stream, or adapter). For example:
<?xml version="1.0" encoding="UTF-8"?>

Ove rv i ew o f the WebLog ic Event Se rver P rog ramming Mode l
Creating WebLogic Event Server Applications 2-3
<helloworld:config
xmlns:helloworld="http://www.bea.com/ns/wlevs/example/helloworld">
<processor>
<name>helloworldProcessor</name>
<rules>
<rule id="helloworldRule"><![CDATA[ select * from HelloWorldEvent
retain 1 event ]]></rule>
</rules>
</processor>
<adapter>
<name>helloworldAdapter</name>
<message>HelloWorld - the current time is:</message>
</adapter>
<stream monitoring="true" >
<name>helloworldOutstream</name>
<max-size>10000</max-size>
<max-threads>2</max-threads>
</stream>
</helloworld:config>
How Components Fit TogetherWebLogic Event Server applications are made of services that are assembled together to form an Event Processing Network (EPN).
The server uses the Spring framework as its assembly mechanism due to Spring’s popularity and simplicity. WebLogic Event Server has extended the Spring framework to further simplify the process of assembling applications. This approach allows WebLogic Event Server applications to be easily integrated with existing Spring-beans, and other light-weight programming frameworks that are based upon a dependency injection mechanism.
A common approach for dependency injection is the usage of XML configuration files to declaritively specify the dependencies and assembly of an application. You assemble a WebLogic Event Server application an EPN assembly file before deploying it to the server; this EPN assembly file is an extension of the Spring framework XML configuration file.
After an application is assembled, it must be package so that it can be deployed into WebLogic Event Server. This is a simple process. The deployment unit of an application is a plain JAR file, which must contain, at a minimum, the following artifacts:

Overv iew o f Creat i ng WebLogic Event Se rve r App l i cat i ons
2-4 Creating WebLogic Event Server Applications
The compiled application Java code of the business logic POJO.
Component configuration files. Each processor is required to have a configuration file, although adapters and streams do not need to have a configuration file if the default configuration is adequate and you do not plan to monitor these components.
The EPN assembly file.
A MANIFEST.MF file with some additional OSGi entries.
After you assemble the artifacts into a JAR file, you deploy this bundle to WebLogic Event Server so it can immediately start receving incoming data.
WebLogic Event Server APIsWebLogic Event Server provides a variety of Java APIs that you use in your adapter implementation or business logic POJO. These APIs are all packaged in the com.bea.wlevs.api package.
This section describes the APIs that you will most typically use in your adapters and POJOs; see the Javadoc for the full reference documentation for all classes and interfaces. See “Creating Adapters” on page 3-1 and “Programming the Business Logic Component” on page 7-1, as well as the HelloWorld and FX examples in the installed product, for sample Java code that uses these APIs.
EventSink—Components that receive events from an EventSource, such as the business logic POJO, must implement this interface. The interface has a callback method, onEvent(), in which programmers put the code that handles the received events.
EventSource—Components that send events, such as adapters, must implement this interface. The interface has a setEventSender() method for setting the EventSender, which actually sends the event to the next component in the network.
EventSender—The interface that actually sends the events to the next component in the network.
Component lifecycle interfaces—If you want some control over the lifecycle of the component you are programming, then your component should implement one or more of the following interfaces:
– DisposableBean—Use if you want to release resources when the application is undeployed. Implement the destroy() method in your component code.

Creat ing WebLog ic Event Se rve r App l icat ions : Typ i ca l S teps
Creating WebLogic Event Server Applications 2-5
– InitializingBean—Use if you require custom initialization after WebLogic Event Server has set all the properties of the component. Implement the afterPropertiesSet() method.
– ActivatableBean—Use if you want to run some code after all dynamic configuration has been set and the event processing network has been activated. Implement the afterConfigurationActive() method.
– SuspendableBean—Use if you want to suspend resources or stop processing events when the event processing network is suspended. Implement the suspend() method.
The Spring framework implements similar bean lifecycle interfaces; however, the equivalent Spring interfaces do not allow you to manipulate beans that were created by factories, while the WebLogic Event Server interfaces do.
Adapter, AdapterFactory—Adapters and adapter factories must implement these interfaces respectively.
EventBuilder—Use to create events whose Java representation does not expose the necessary setter and getter methods for its properties. If your event type is represented with a JavaBean with all required getter and setter methods, then you do not need to create an EventBuilder.
EventBuilder.Factory—Factory for creating EventBuilders.
Creating WebLogic Event Server Applications: Typical Steps
The following procedure shows the suggested start-to-finish steps to create a WebLogic Event Server application. Although it is not required to program and configure the various components in the order shown, the procedure shows a typical and logical flow recommended by BEA.
It is assumed in the procedure that you are using an IDE, although it is not required and the one you use is your choice.
1. Set up your environment as described in Setting Up Your Development Environment.
2. Design your event processing network (EPN).
This step involves creating the EPN assembly file, adding the full list of components that make up the application and how they are connected to each other, as well as registering the event types used in your application.

Overv iew o f Creat i ng WebLogic Event Se rve r App l i cat i ons
2-6 Creating WebLogic Event Server Applications
This step combines both designing of your application, in particular determining the components that you need to configure and code, as well as creating the actual XML file that specifies all the components. You will likely be constantly updating this XML file as you implement your application, but BEA recommends you start with this step so you have a high-level view of your application.
For details, see “Creating the EPN Assembly File” on page 2-7.
3. Design the EPL rules that the processors are going to use to select events from the stream.
See the EPL Reference Guide.
4. Determine the event types that your application is going to use, and, if creating your own JavaBean, program the Java file.
See “Creating the Event Types” on page 2-10.
5. Program, and optionally configure, the adapters that listen to the data feed data.
See “Creating Adapters” on page 3-1.
6. Configure the processors by creating their configuration XML files; the most important part of this step is designing and declaring the initial EPL rules that are associated with each processor.
See “Configuring the Complex Event Processor” on page 6-1.
7. Optionally configure the streams that stream data between adapters, processors, and the business logic POJO by creating their configuration XML files.
See “Configuring the Stream Component” on page 5-1.
8. Program the business object POJO that receives the set of events that were selected with the EPL query and contains the application business logic.
See “Programming the Business Logic Component” on page 7-1.
WebLogic Event Server provides a load generator testing tool that you can use to test your application, in particular the EPL rules. This testing tool can temporarily replace the adapter component in your application, for testing purposes only of course. For details, see “Using the Load Generator to Test Your Application” on page 9-1.
See “Next Steps” on page 2-13 for the list of steps you should follow after you have completed programming your application, such as packaging and deploying.

Creat ing the EPN Assembly F i l e
Creating WebLogic Event Server Applications 2-7
Creating the EPN Assembly FileYou use the EPN assembly file to declare the components that make up your WebLogic Event Server application and how they are connected to each other. You also use the file to register event types of your application, as well as the Java classes that implement the adapter and POJO components of your application.
For an example of an EPN assembly file, see the foreign exchange (FX) example. For additional information about Spring and OSGi, see “Additional Information about Spring and OSGi” on page A-1.
As is often true with Spring, there are different ways to use the tags to define your event network. This section shows one way. See WebLogic Event Server Spring Tag Reference or the XSD Schema for the full reference information on the other tags and attributes you can use.
For a typical way to create the EPN assembly file for your application, follow these steps:
1. Using your favorite XML or plain text editor, create an XML file with the <beans> root element and namespace declarations as follows
<?xml version="1.0" encoding="UTF-8"?><beans xmlns="http://www.springframework.org/schema/beans" xmlns:xsi="http://www.w3.org/2001/XMLSchema-instance" xmlns:osgi="http://www.springframework.org/schema/osgi" xmlns:wlevs="http://www.bea.com/ns/wlevs/spring" xsi:schemaLocation=" http://www.springframework.org/schema/beans http://www.springframework.org/schema/beans/spring-beans.xsd http://www.springframework.org/schema/osgi http://www.springframework.org/schema/osgi/spring-osgi.xsd http://www.bea.com/ns/wlevs/spring http://www.bea.com/ns/wlevs/spring/spring-wlevs.xsd">
...
</beans>
If you are not going to use any of the Spring-OSGI tags in the XMLfile, then their corresponding namespace declarations, shown in bold in the preceding example, are not required.
2. If you have programmed an adapter factory, add an <osgi:service ...> Spring tag to register the factory as an OSGi service. For example:
<osgi:service interface="com.bea.wlevs.ede.api.AdapterFactory"> <osgi:service-properties> <prop key="type">hellomsgs</prop> </osgi:service-properties>

Overv iew o f Creat i ng WebLogic Event Se rve r App l i cat i ons
2-8 Creating WebLogic Event Server Applications
<bean class="com.bea.wlevs.adapter.example.helloworld.HelloWorldAdapterFactory" /></osgi:service>
Specify the WebLogic Event Server-provided adapter factory (com.bea.wlevs.ede.api.AdapterFactory) for the interface attribute. Use the <osgi-service-properties> tag to give the OSGI service a type name, in the example above the name is hellomsgs; you will reference this label later when you declare the adapter components of your application. Finally, use the <bean> Spring tag to register the your adapter factory bean in the Spring application context; this class generates instances of the adapter.
WARNING: Be sure the type name (hellomsgs in the preceding example) is unique across all applications deployed to a particular WebLogic Event Server. The OSGI service registry is per server, not per application, so if two different adapter factory services have been registered with the same type name, it is undefined which adapter factory a particular application will use. To avoid this confusion, be sure that the value of the <prop key="type"> entry for each OSGI-registered adapter factory in each EPN assembly file for a server is unique.
3. Add a <wlevs:event-type-repository> tag to register the event types that you use throughout your application, such as in the adapter implementations, business logic POJO, and the EPL rules associated with the processor components. For each event type in your application, add a <wlevs:event-type> child tag.
Event types are simple JavaBeans that you either code yourself (recommended) or let WebLogic Event Server automatically generate from the meta data you provide in the <wlevs:event-type> tag. If you code the JavaBean yourself, use a <wlevs:class> tag to specify your JavaBean class. You can optionally use the <wlevs:property name="builderFactory"> tag to specify the Spring bean that acts as a builder factory for the event type, if you have programmed a factory. If you want WebLogic Event Server to automatically generate the JavaBean class, use the <wlevs:metadata> tag to list each property of the event type. The following example is taken from the FX sample:
<wlevs:event-type-repository> <wlevs:event-type type-name="ForeignExchangeEvent"> <wlevs:class> com.bea.wlevs.example.fx.OutputBean$ForeignExchangeEvent </wlevs:class> <wlevs:property name="builderFactory"> <bean id="builderFactory" class="com.bea.wlevs.example.fx.ForeignExchangeBuilderFactory"/> </wlevs:property>

Creat ing the EPN Assembly F i l e
Creating WebLogic Event Server Applications 2-9
</wlevs:event-type></wlevs:event-type-repository>
See wlevs:event-type-repository for reference information about this tag. See “Creating the Event Types” on page 2-10 for additional information about creating event types.
4. For each adapter component in your application, add a <wlevs:adapter> tag to declare that the component is part of the event processing network. Use the required id attribute to give it a unique ID and the provider attribute to specify the type of data feed to which the adapter will be listening. Use the <wlevs:instance-property> child tag to pass the adapter the properties it expects. For example, the csvgen adapter, provided by WebLogic Event Server to test your EPL rules with a simulated data feed, defines a setPort() method and thus expects a port property, among other properties. Use the provider attribute to specify the adapter factory, typically registered as an OSGi service; you can also use the csvgen keyword to specify the csvgen adapter.
The following example declares the helloWorldAdapter of the HelloWorld example:
<wlevs:adapter id="helloworldAdapter" provider="hellomsgs" manageable="true"> <wlevs:instance-property name="message" value="HelloWorld - the currenttime is:"/> </wlevs:adapter>
In the example, the property message is passed to the adapter. The adapter factory provider is hellomsgs, which refers to the type name of the adapter factory OSGI service. The manageable attribute, common to all components, enables monitoring for the adapter; by default, manageability of the component is disabled due to possible performance impacts.
See wlevs:adapter for reference information about this tag, in particular additional optional attributes and child tags.
5. For each processor component in your application, add a <wlevs:processor> tag. Use the id attribute to give it a unique ID. Use either the listeners attribute or <wlevs:listener> child tag to specify the components that listen to the processor. The following two examples are equivalent:
<wlevs:processor id="preprocessorAmer" listeners="spreaderIn"/>
<wlevs:processor id="preprocessorAmer"> <wlevs:listener ref="spreaderIn"/></wlevs:processor>
In the examples, the spreaderIn stream component listens to the preprocessorAmer processor.

Overv iew o f Creat i ng WebLogic Event Se rve r App l i cat i ons
2-10 Creating WebLogic Event Server Applications
See wlevs:processor for reference information about this tag, in particular additional optional attributes, such as manageable for enabling monitoring of the component.
6. For each stream component in your application, add a <wlevs:stream> tag to declare that the component is part of the event processing network. Use the id attribute to give it a unique ID. Use the <wlevs:listener> and <wlevs:source> child tags to specify the components that act as listeners and sources for the stream. For example:
<wlevs:stream id="fxMarketAmerOut"> <wlevs:listener ref="preprocessorAmer"/> <wlevs:source ref="fxMarketAmer"/></wlevs:stream>
In the example, the fxMarketAmerOut stream listens to the fxMarketAmer component, and the preprocessorAmer component in turn listens to the fxMarketAmerOut stream.
Nest the declaration of the business logic POJO, called outputBean in the example, using a standard Spring <bean> tag inside a <wlevs:listener> tag, as shown:
<wlevs:stream id="spreaderOut" advertise="true"> <wlevs:listener> <!-- Create business object --> <bean id="outputBean" class="com.bea.wlevs.example.fx.OutputBean" autowire="byName"/> </wlevs:listener></wlevs:stream>
The advertise attribute is common to all WebLogic Event Server tags and is used to register the component as a service in the OSGI registry.
See wlevs:stream for reference information about this tag, in particular additional optional attributes, such as manageable for enabling monitoring of the component.
Creating the Event TypesEvent types define the properties of the events that are handled by WebLogic Event Server applications. Adapters receiving incoming events from different event sources, such as JMS, or financial market data feeds. You must define these events by an event type before a processor is able to handle them. An event type can be created either programmatically using the EventTypeRepository class or declaratively in the EPN assembly file.
You then use these event types in the adapter and POJO Java code, as well as in the EPL rules associated with the processors.

Creat ing the Event Types
Creating WebLogic Event Server Applications 2-11
Events are JavaBean instances in which each property represents a data item from the feed. BEA recommends that you create your own JavaBean class that represents the event type and register the class in the EPN assembly file. By creating your own JavaBean, you can reuse it and you have complete control over what the event looks like. Alternatively, you can specify the properties of the event type in the EPN assembly file using <wlevs:metadata> tags and let WebLogic Event Server automatically create JavaBean instances for you; this method is best used for quick prototyping.
Each WebLogic Event Server application gets its own Java classloader and loads application classes using that classloader. This means that, by default, one application cannot access the classes in another application. If an application (the provider) wants to share its classes, the provider must explicitly export the classes in its MANIFEST.MF file, and the consumer of the classes must import them. For details, see “Assembling a WebLogic Event Server Application: Main Steps” on page 8-2.
The following simple example shows the JavaBean that implements the HelloWorldEvent:
package com.bea.wlevs.event.example.helloworld;
public class HelloWorldEvent
private String message;
public String getMessage()
return message;
public void setMessage (String message)
this.message = message;
The preceding Java class follows standard JavaBeans programming guidelines. See the JavaBeans Tutorial for additional details.
In addition, BEA recommends that, if possible, you make your JavaBeans immutable for performance reasons because immutable beans help the garbage collection work much better. Immutable beans are read only (only getters) and have public constructors with arguments that satisfy immutability.
Once you have programmed and compiled the JavaBean that represents your event type, you register it in the EPN assembly file using the <wlevs:event-type> child tag of <wlevs:event-type-repository>. Use the <wlevs:class> tag to point to your JavaBean class, and then optionally use the <wlevs:property name="builderFactory"> tag to specify

Overv iew o f Creat i ng WebLogic Event Se rve r App l i cat i ons
2-12 Creating WebLogic Event Server Applications
the Spring bean that acts as a builder factory for the event type, if you have programmed a factory. If want WebLogic Event Server to generate the bean instance for you, use the <wlevs:metadata> tag to group standard Spring <entry> tags for each property. The following example shows both ways:
<wlevs:event-type-repository>
<wlevs:event-type type-name="ForeignExchangeEvent">
<wlevs:class>
com.bea.wlevs.example.fx.OutputBean$ForeignExchangeEvent
</wlevs:class>
<wlevs:property name="builderFactory">
<bean id="builderFactory"
class="com.bea.wlevs.example.fx.ForeignExchangeBuilderFactory"/>
</wlevs:property>
</wlevs:event-type>
<wlevs:event-type type-name="AnotherEvent">
<wlevs:metadata>
<entry key="name" value="java.lang.String"/>
<entry key="age" value="java.lang.Integer"/>
<entry key="address" value="java.lang.String"/>
</wlevs:metadata>
</wlevs:event-type>
</wlevs:event-type-repository>
In the example, ForeignExchangeEvent is implemented by the ForeignExchangeEvent inner class of com.bea.wlevs.example.fx.OutputBean. Instances of AnotherEvent will be generated by WebLogic Event Server. The AnotherEvent has three properties: name, age, and address.
You can now reference the event types as standard JavaBeans in the Java code of the adapters and business logic POJO in your application. The following snippet from the business logic POJO HelloWorldBean.java of the HelloWorld application shows an example:
public void onEvent(List newEvents)
throws RejectEventException
for (Object event : newEvents)
HelloWorldEvent helloWorldEvent = (HelloWorldEvent) event;
System.out.println("Message: " + helloWorldEvent.getMessage());

Next S teps
Creating WebLogic Event Server Applications 2-13
The following EPL rule shows how you can reference the HelloWorldEvent in a SELECT statement:
SELECT * FROM HelloWorldEvent RETAIN 1 event
Next StepsAfter you have programmed all components of your application and created their configuration XML files:
Assemble all the components into a deployable OSGi bundle. This step also includes creating the MANIFEST.MF file that describes the bundle.
See “Assembling a WebLogic Event Server Application: Main Steps” on page 8-2.
Optionally configure the server in your domain to enable logging, debugging, and other services.
See Configuring WebLogic Event Server.
Deploy the application to WebLogic Event Server.
See “Deploying WebLogic Event Server Applications: Main Steps” on page 8-8.
Start WebLogic Event Server.
See Stopping and Starting the Server.
Optionally start test clients, such as the load generator.
See “Using the Load Generator to Test Your Application” on page 9-1.

Overv iew o f Creat i ng WebLogic Event Se rve r App l i cat i ons
2-14 Creating WebLogic Event Server Applications

Creating WebLogic Event Server Applications 3-1
C H A P T E R 3
Creating Adapters
This section contains information on the following subjects:
“Creating Adapters: Typical Steps” on page 3-2
“Programming the Adapter Class: Guidelines” on page 3-3
“Programming the Adapter Factory Class” on page 3-7
“Updating the EPN Assembly File” on page 3-8
“Configuring the Adapter” on page 3-9
“Creating an Adapter in Its Own Bundle” on page 3-12
“Extending the Configuration of an Adapter” on page 3-13
“Passing Login Credentials from an Adapter to the Data Feed Provider” on page 3-19
Overview of AdaptersThe role of an adapter is to convert data coming from some stream, such as a market data feed, into WebLogic Event Server events. These events are then passed to other components in the application, such as processors. An adapter is usually the entry point to a WebLogic Event Server application.
The FX example description shows three adapters that read in data from currency data feeds and then pass the data, in the form of a specific event type, to the processors, which are the next components in the network.

Creat ing Adapte rs
3-2 Creating WebLogic Event Server Applications
You can create adapters of different types, depending on the format of incoming data and the technology you use in the adapter code to do the conversion. The most typical types of adapters are those that:
Use a data vendor API, such as Reuters, Wombat, or Bloomberg.
Convert incoming JMS messages using standard JMS APIs.
Use other messaging systems, such as TIBCO Rendezvous.
Use a socket connection to the customer’s own data protocol.
Adapters are Java classes that implement specific WebLogic Event Server interfaces. You must also program adapter factories that create instances of the adapters. Finally, you must register both the adapter classes, and the adapter factories, in the EPN assembly file that describes your entire application.
You can optionally change the default configuration of the adapter, or even extend the configuration and add new configuration elements and attributes. There are two ways to pass configuration data to the adapter; the method you chose depends on whether you want to dynamically change the configuration after deployment. If you are not going to change the configuration data after the adapter is deployed, then you can configure the adapter in the EPN assembly file. If, however, you do want to be able to dynamically change the configuration elements, then you should put this configuration in the adapter-specific configuration files. Both methods are discussed below.
Creating Adapters: Typical StepsThe following procedure describes the typical steps for creating an adapter:
1. Program the adapter Java class.
See “Programming the Adapter Class: Guidelines” on page 3-3.
2. Program the adapter factory class.
See “Programming the Adapter Factory Class” on page 3-7.
3. Update the EPN assembly file with adapter and adapter factory registration info.
See “Updating the EPN Assembly File” on page 3-8
4. Optionally change the default configuration of the adapter.
See “Configuring the Adapter” on page 3-9.

Programming the Adapter C lass : Gu ide l ines
Creating WebLogic Event Server Applications 3-3
5. Optionally extend the configuration of the adapter if its basic one is not adequate.
See “Extending the Configuration of an Adapter” on page 3-13.
In the preceding procedure, it is assumed that the adapter is bundled in the same application JAR file that contains the other components of the event network, such as the processor, streams, and business logic POJO. If you want to bundle the adapter in its own JAR file so that it can be shared among many applications, see “Creating an Adapter in Its Own Bundle” on page 3-12.
Programming the Adapter Class: GuidelinesThe adapter class reads the stream of incoming data, such as from a market data feed, converts it into a WebLogic Event Server event type that is understood by the rest of the application, and sends the event to the next component in the network.
The following example shows the adapter class of the HelloWorld sample; see the explanation after the example for coding guidelines that correspond to the Java code in bold.
Note: If you are creating an adapter that listens to JMS-type data, see “Additional Programming Guidelines for JMS Adapters” on page 4-2 for additional guidelines.
package com.bea.wlevs.adapter.example.helloworld;
import java.text.DateFormat;import java.util.ArrayList;import java.util.Date;import java.util.List;
import com.bea.wlevs.configuration.Activate;import com.bea.wlevs.configuration.Prepare;import com.bea.wlevs.configuration.Rollback;import com.bea.wlevs.ede.api.Adapter;import com.bea.wlevs.ede.api.EventSender;import com.bea.wlevs.ede.api.EventSource;import com.bea.wlevs.ede.api.SuspendableBean;import com.bea.wlevs.event.example.helloworld.HelloWorldEvent;import com.bea.wlevs.adapter.example.helloworld.HelloWorldAdapterConfig;
public class HelloWorldAdapter implements Runnable, Adapter, EventSource, SuspendableBean
private static final int SLEEP_MILLIS = 300;
private DateFormat dateFormat;
private String message; private EventSender eventSender; private boolean stopped;

Creat ing Adapte rs
3-4 Creating WebLogic Event Server Applications
public HelloWorldAdapter() super(); dateFormat = DateFormat.getTimeInstance();
public void run() stopped = false; while (!isStopped()) // Generate messages forever... generateHelloMessage(); try synchronized (this) wait(SLEEP_MILLIS); catch (InterruptedException e) e.printStackTrace();
public void setMessage(String message) this.message = message;
private void generateHelloMessage() List eventCollection = new ArrayList(); String message = this.message + dateFormat.format(new Date()); HelloWorldEvent event = new HelloWorldEvent(); event.setMessage(message); eventCollection.add(event); eventSender.sendEvent(eventCollection, null);
@Prepare public void checkConfiguration(HelloWorldAdapterConfig adapterConfig) if (adapterConfig.getMessage() == null || adapterConfig.getMessage().length() == 0) throw new RuntimeException("invalid message: " + message);
@Activate public void activateAdapter(HelloWorldAdapterConfig adapterConfig) this.message = adapterConfig.getMessage();
@Rollback public void rejectConfigurationChange(HelloWorldAdapterConfig adapterConfig)

Programming the Adapter C lass : Gu ide l ines
Creating WebLogic Event Server Applications 3-5
public void setEventSender(EventSender sender) eventSender = sender;
public synchronized void suspend() throws Exception stopped = true;
private synchronized boolean isStopped() return stopped;
Follow these guidelines when programming the adapter Java class; code snippets of the guidelines are shown in bold in the preceding example:
Import the required interfaces and classes of the WebLogic Event Server API:
import com.bea.wlevs.ede.api.Adapter;import com.bea.wlevs.ede.api.EventSender;import com.bea.wlevs.ede.api.EventSource;import com.bea.wlevs.ede.api.SuspendableBean;
Your adapter is required to implement the Adapter and EventSource interfaces; typically, your adapter will also implement the java.lang.Runnable and SuspendableBean interfaces to control the starting and stopping of the adapter. The EventSender interface sends event types to the next component in your application network. For full details of these APIs, see the Javadoc.
Import the application-specific classes that represent the event types and adapter configuration:
import com.bea.wlevs.event.example.helloworld.HelloWorldEventimport com.bea.wlevs.adapter.example.helloworld.HelloWorldAdapterConfig;
The com.bea.wlevs.event.example.helloworld.HelloWorldEvent class is a JavaBean that represents the event type used in the application.
The com.bea.wlevs.adapter.example.helloworld.HelloWorldAdapterConfig class represents an intance of the runtime adapter configuration. For details, see “Programming Access to the Configuration of an Adapter” on page 3-18.
Optionally import the metadata annotations that allow you to access configuration information about your adapter once the application is deployed to WebLogic Event Server:

Creat ing Adapte rs
3-6 Creating WebLogic Event Server Applications
import com.bea.wlevs.configuration.Activate;import com.bea.wlevs.configuration.Prepare;import com.bea.wlevs.configuration.Rollback;
See “Programming Access to the Configuration of an Adapter” on page 3-18 for details.
The adapter class must implement the Adapter and EventSource interfaces. Typically, your adapter will also implement the SuspendableBean and java.lang.Runnable interfaces:
public class HelloWorldAdapter implements Runnable, Adapter, EventSource, SuspendableBean
The Adapter interface specifies that your Java class is an adapter. The EventSource interface provides the EventSender that you use to send events.
The Runnable and SuspendableBean interfaces enable WebLogic Event Server to manage the running of the adapter code. An adapter that implements Runnable should always also implement SuspendableBean. In the SuspendableBean.suspend() method, you should put whatever code is needed to stop the running of your adapter. For example, you may set a flag that is checked by the main loop of the Runnable.run() method which will cause the loop to be exited. You must implement SuspendableBean in order for your application to be properly stopped when it is undeployed.
If, as is typical, your adapter implements the java.lang.Runnable interface, your adapter must then implement the run() method:
public void run() ...
This is where you should put the code that reads the incoming data, such as from a market feed, and convert it into a WebLogic Event Server event type, and then send the event to the next component in the network. Refer to the documentation of your data feed provider for details on how to read the incoming data. See “Accessing Third-Party JAR Files From Your Application” on page 8-6 for information about ensuring you can access the vendor APIs if they are packaged in a third-party JAR file.
In the HelloWorld example, the adapter itself generates the incoming data using the generateHelloMessage() private method. This is just for illustrative purposes and is not a real-world scenario. The generateHelloMessage() method also includes the other typical event type programming tasks: HelloWorldEvent event = new HelloWorldEvent(); event.setMessage(message); eventCollection.add(event); eventSender.sendEvent(eventCollection, null);

Programming the Adapte r Fac to r y C lass
Creating WebLogic Event Server Applications 3-7
The HelloWorldEvent is the event type used by the HelloWorld example; the event type is implemented with a JavaBean and is registered in the EPN assembly file using the <wlevs:event-type-repository> tag. See “Creating the Event Types” on page 2-10 for details. The setMessage() method sets the properties of the event; in typical adapter implementations this is how you convert a particular property of the incoming data into an event type property. Finally, the EventSender.sendEvent() method sends this new event to the next component in the network.
The methods annotated with the @Prepare, @Activate, and @Rollback annotations specify the methods that WebLogic Event Server invokes when the server prepares, activates, or rolls back the adapter’s configuration. For details, see “Programming Access to the Configuration of an Adapter” on page 3-18.
Because your adapter implements EventSource, you must implement the setEventSender() method, which passes in the EventSender that you use to send events:
public void setEventSender(EventSender sender) ...
If, as is typically the case, your adapter implements SuspendableBean, you must implement the suspend() method that stops the adapter when, for example, the application is undeployed:
public synchronized void suspend() throws Exception ...
Programming the Adapter Factory ClassYour adapter factory class must implement the com.bea.wlevs.ede.api.AdapterFactory interface, which has a single method, create(), in which you code the creation of your specific adapter class.
The following is the adapter factory class for the HelloWorld example:
package com.bea.adapter.wlevs.example.helloworld;
import com.bea.wlevs.ede.api.Adapter;
import com.bea.wlevs.ede.api.AdapterFactory;
public class HelloWorldAdapterFactory implements AdapterFactory
public HelloWorldAdapterFactory()
public synchronized Adapter create() throws IllegalArgumentException
return new HelloWorldAdapter();

Creat ing Adapte rs
3-8 Creating WebLogic Event Server Applications
For full details of these APIs, see the Javadoc
Updating the EPN Assembly FileThe adapters and adapter factory must be registered in the EPN assembly file, as discussed in the following sections. If you are using JMS, additional configuration is also required.
For a complete description of the configuration file, including registration of other components of your application, see “Creating the EPN Assembly File” on page 2-7.
Note: If you are creating an adapter that listens to JMS-type data, see “Additional Configuration for JMS Adapters” on page 4-3 for additional configuration.
Registering the Adapter Factory as an OSGI ServiceThe adapter factory must be registered as an OSGI service in the EPN assembly file. The scope of the OSGI service registry is the entire WebLogic Event Server. This means that if more than one application deployed to a given server is going to use the same adapter factory, be sure to register the adapter factory only once as an OSGI service.
Add an entry to register the service as an implementation of the com.bea.wlevs.ede.api.AdapterFactory interface. Provide a property, with the key attribute equal to type, and the name by which this adapter provider will be referenced. Finally, add a nested standard Spring <bean> tag to register the your specific adapter class in the Spring application context
For example, the following segment of the EPN assembly file registers the HelloWorldAdapterFactory as the provider for type hellomsgs:
<osgi:service interface="com.bea.wlevs.ede.api.AdapterFactory">
<osgi:service-properties>
<prop key="type">hellomsgs</prop>
</osgi:service-properties>
<bean
class="com.bea.adapter.wlevs.example.helloworld.HelloWorldAdapterFactory"
/>
</osgi:service>

Conf igur ing the Adapte r
Creating WebLogic Event Server Applications 3-9
Declaring the Adapter Components in your ApplicationIn the EPN assembly file, you use the wlevs:adapter tag to declare an adapter as a component in the event processor network. You can declare one or more adapters in your network. Use the provider attribute to point to the name you specified as the type in your osgi:service entry; for example:
<wlevs:adapter id="helloworldAdapter" provider="hellomsgs"/>
This means that an adapter will be instantiated by the factory registered for the type hellomsgs.
You can also use a <wlevs:instance-property> child tag of <wlevs:adapter> to set any static properties in the adapter bean. Static properties are those that you will not dynamically change after the adapter is deployed.
For example, if your adapter class has a setPort() method, you can pass it the port number as shown:
<wlevs:adapter id="myAdapter" provider="myProvider">
<wlevs:instance-property name="port" value="9001" />
</wlevs:adapter>
Configuring the AdapterEach adapter in your application has a default configuration. In particular:
Monitoring is enabled.
The default adapter configuration is typically adequate for most applications. However, if you want to change this configuration, you must create an XML file that is deployed as part of the WebLogic Event Server application bundle. You can later update this configuration at runtime using the wlevs.Admin utility or manipulating the appropriate JMX Mbeans directly.
If your application has more than one adapter, you can create separate XML files for each adapter, or create a single XML file that contains the configuration for all adapters, or even all components of your application (adapters, processors, and streams). Choose the method that best suits your development environment.
The following procedure describes the main steps to create the adapter configuration file. For simplicity, it is assumed in the procedure that you are going to configure all components of an application in a single XML file
See XSD Schema Reference for Component Configuration Files for the complete XSD Schema that describes the adapter configuration file.

Creat ing Adapte rs
3-10 Creating WebLogic Event Server Applications
1. Create an XML file using your favorite XML editor.You can name this XML file anything you want, provided it ends with the .xml extension.
The root element of the configuration file is <config>, with namespace definitions shown in the next step.
2. For each adapter in your application, add an <adapter> child element of <config>. Uniquely identify each adapter with the <name> child element. This name must be the same as the value of the id attribute in the <wlevs:adapter> tag of the EPN assembly file that defines the event processing network of your application. This is how WebLogic Event Server knows to which particular adapter component in the EPN assembly file this adapter configuration applies. See “Creating the EPN Assembly File” on page 2-7 for details.
For example, if your application has two adapters, the configuration file might initially look like:
<?xml version="1.0" encoding="UTF-8"?>
<helloworld:config xmlns:helloworld="http://www.bea.com/xml/ns/wlevs/example/helloworld"> <processor> ... </processor>
<adapter> <name>firstAdapter</name> ... </adapter>
<adapter> <name>secondAdapter</name> ... </adapter>
</helloworld:config>
In the example, the configuration file includes two adapters called firstAdapter and secondAdapter. This means that the EPN assembly file must include at least two adapter registrations with the same identifiers:
<wlevs:adapter id="firstAdapter" ...> ...</wlevs:adapter>
<wlevs:adapter id="secondAdapter" ...> ...</wlevs:adapter>

Conf igur ing the Adapte r
Creating WebLogic Event Server Applications 3-11
WARNING: Identifiers and names in XML files are case sensitive, so be sure you specify the same case when referencing the component’s identifier in the EPN assembly file.
3. Optionally use the monitoring Boolean attribute of the <adapter> element to enable or disable monitoring of the adapter; by default monitoring is enabled. When monitoring is enabled, the adapter gathers runtime statistics and forwards this information to an Mbean:
<adapter monitoring="true"> <name>firstAdapter</name></adapter>
To truly enable monitoring, you must have also enabled the manageability of the component, otherwise setting the monitoring attribute to true has no effect. You enable manageability by setting the manageable attribute of the corresponding adapter component registration in the EPN assembly file to true, as shown in bold in the following example:
<wlevs:adapter id="firstAdapter" provider="hellomsgs" manageable="true">
Example of an Adapter Configuration FileThe following sample XML file shows how to configure two adapters, firstAdapter and secondAdapter.
<?xml version="1.0" encoding="UTF-8"?>
<sample:config
xmlns:sample="http://www.bea.com/xml/ns/wlevs/example/sample">
<adapter>
<name>firstAdapter</name>
</adapter>
<adapter monitoring="true">
<name>secondAdapter</name>
</adapter>
</sample:config>

Creat ing Adapte rs
3-12 Creating WebLogic Event Server Applications
Creating an Adapter in Its Own BundleIn the procedure described in “Creating Adapters: Typical Steps” on page 3-2, it is assumed that the adapter and adapter factory are bundled in the same application JAR file that contains the other components of the event network, such as the processor, streams, and business logic POJO.
However, you might sometimes want to bundle the adapter in its own JAR file and then reference the adapter in other application bundles. This is useful if, for example, two different applications read data coming from the same data feed provider and both applications use the same event types. In this case, it makes sense to share a single adapter and event type implementations rather than duplicate the implementation in two different applications.
There is no real difference in how you configure an adapter and an application that uses it in separate bundles; the difference lies in where you put the configuration, as described in the following guidelines:
Create an OSGI bundle that contains only the adapter Java class, the adapter factory Java class, and optionally, the event type Java class into which the adapter converts incoming data. For simplicity, it is assumed that this bundle is called GlobalAdapter.
In the EPN assembly file of the GlobalAdapter bundle:
– Register the adapter factory as an OSGI service as usual, as described in “Registering the Adapter Factory as an OSGI Service” on page 3-8.
– If you are also including the event type in the bundle, register it as described in “Creating the Event Types” on page 2-10.
– Do not declare the adapter component using the <wlevs:adapter> tag. You will use this tag in the EPN assembly file of the application bundle that actually uses the adapter.
If you want to further configure the adapter, follow the usual procedure as described in “Configuring the Adapter” on page 3-9.
If you are including the event type in the GlobalAdapter bundle, export the JavaBean class in the MANIFEST.MF file of the GlobalAdapter bundle. Use the Export-Package header, as described in “Creating the MANIFEST.MF File” on page 8-4.
Assemble and deploy the GlobalAdapter bundle in the usual way, as described in “Assembling and Deploying WebLogic Event Server Applications” on page 8-1.
In the EPN assembly file of the application that is going to use the adapter, declare the adapter component in the usual way, as described in “Declaring the Adapter Components

Ex tending the Conf igurat i on o f an Adapte r
Creating WebLogic Event Server Applications 3-13
in your Application” on page 3-9. You still use the provider attribute to specify the OSGI-registered adapter factory, although in this case the OSGI registration happens in a different EPN assembly file (of the GlobalAdapter bundle) from the EPN assembly file that actually uses the adapter.
If you have exported the event type in the GlobalAdapter bundle, you must explicitly import it into the application that is going to use it. You do this by adding the package to the Import-Package header of the MANIFEST.MF file of the application bundle, as described in “Creating the MANIFEST.MF File” on page 8-4.
Extending the Configuration of an AdapterAdapters have default configuration data, as described in “Configuring the Adapter” on page 3-9 and XSD Schema Reference for Component Configuration Files. This default configuration is typically adequate for simple and basic applications.
However, you can also extend this configuration by using XSD Schema to specifying a new XML format of an adapter configuration file that extends the built-in XML type provided by WebLogic Event Server. By extending the XSD Schema, you can add as many new elements to the adapter configuration as you want, with few restrictions other than each new element must have a name attribute. This feature is based on standard technologies, such as XSD Schema and Java Architecture for XML Binding (JAXB).
The following procedure describes how to extend the adapter configuration:
1. Create the new XSD Schema file that describes the extended adapter configuration. This XSD file must also include the description of the other components in your application (processors and streams), although you typically use built-in XSD types, defined by WebLogic Event Server, to describe them.
See “Creating the XSD Schema File” on page 3-15 for details.
2. As part of your application build process, generate the Java representation of the XSD schema types using a JAXB binding compiler, such as the com.sun.tools.xjc.XJCTask Ant task from Sun’s GlassFish reference implementation. This Ant task is included in the WebLogic Event Server distribution for your convenience.
For example, the HelloWorld sample build.xml file includes the following (only relevant sections shown):
<property name="base.dir" value="." /><property name="output.dir" value="output" /><property name="sharedlib.dir"

Creat ing Adapte rs
3-14 Creating WebLogic Event Server Applications
value="$base.dir/../../../../../modules" /><property name="wlrtlib.dir" value="$base.dir/../../../../modules"/>
<path id="classpath"> <pathelement location="$output.dir" /> <fileset dir="$sharedlib.dir"> <include name="*.jar" /> </fileset> <fileset dir="$wlrtlib.dir"> <include name="*.jar"/> </fileset></path>
<taskdef name="xjc" classname="com.sun.tools.xjc.XJCTask"> <classpath refid="classpath" /></taskdef>
<target name="generate" depends="clean, init">
<copy file="../../../../xsd/wlevs_base_config.xsd" todir="src/main/resources/extension" /> <copy file="../../../../xsd/wlevs_application_config.xsd" todir="src/main/resources/extension" /> <xjc extension="true" destdir="$generated.dir"> <schema dir="src/main/resources/extension" includes="helloworld.xsd"/> <produces dir="$generated.dir" includes="**/*.java" /> </xjc>
</target>
In the example, the extended XSD file is called helloworld.xsd. The build process copies the WebLogic Event Server XSD files (wlevs_base_config.xsd and wlevs_application_config.xsd) to the same directory as the helloworld.xsd file because helloworld.xsd imports the WebLogic Event Server XSD files.
3. Compile these generated Java files into classes.
4. Package the compiled Java class files in your application bundle.
See “Assembling a WebLogic Event Server Application: Main Steps” on page 8-2 for details.
5. Program your adapter as described in “Programming the Adapter Class: Guidelines” on page 3-3. Within your adapter code, you access the extended configuration as usual, as described in “Programming Access to the Configuration of an Adapter” on page 3-18.
6. When you create the configuration XML file that describes the components of your application, be sure you use the extended XSD file as its description. In addition, be sure you

Ex tending the Conf igurat i on o f an Adapte r
Creating WebLogic Event Server Applications 3-15
identify the namespace for this schema rather than the default schema. For example, in the HelloWorld configuration file:
<?xml version="1.0" encoding="UTF-8"?>
<helloworld:config xmlns:helloworld="http://www.bea.com/xml/ns/wlevs/example/helloworld">
<adapter> <name>helloworldAdapter</name> <message>HelloWorld - the current time is:</message> </adapter>
</helloworld:config>
Creating the XSD Schema FileThe new XSD schema file extends the wlevs_application_config.xsd XSD schema and then adds new custom information, such as new configuration elements for an adapter. Use standard XSD schema syntax for your custom information.
BEA recommends that you use the XSD schema from the HelloWorld example as a basic template, and modify the content to suit your needs. In addition to adding new configuration elements, other modifications include changing the package name of the generated Java code and the element name for the custom adapter. You can control whether the schema allows just your custom adapter or other components like processors.
Follow these steps when creating the XSD Schema file that describes your extended adapter configuration; see “Complete Example of an Extended XSD Schema File” on page 3-17 for the HelloWorld example:
1. Using your favorite XML Editor, create the basic XSD file with the required namespaces, in particular those for JAXB. For example:
<?xml version="1.0" encoding="UTF-8"?><xs:schema targetNamespace="http://www.bea.com/xml/ns/wlevs/example/helloworld" xmlns="http://www.bea.com/xml/ns/wlevs/example/helloworld" xmlns:xs="http://www.w3.org/2001/XMLSchema" xmlns:jxb="http://java.sun.com/xml/ns/jaxb" xmlns:xjc="http://java.sun.com/xml/ns/jaxb/xjc" xmlns:wlevs="http://www.bea.com/xml/ns/wlevs/config/application" jxb:extensionBindingPrefixes="xjc" jxb:version="1.0" elementFormDefault="unqualified" attributeFormDefault="unqualified">
...

Creat ing Adapte rs
3-16 Creating WebLogic Event Server Applications
</xs:schema>
2. Import the wlevs_application_config.xsd XSD schema:
<xs:import namespace="http://www.bea.com/xml/ns/wlevs/config/application" schemaLocation="wlevs_application_config.xsd"/>
The wlevs_application_config.xsd in turn imports the wlevs_base_config.xsd XSD file.
3. Use the <complexType> XSD element to describe the XML type of the extended adapter configuration.
The new type must extend the AdapterConfig type, defined in wlevs_application_config.xsd. AdapterConfig extends ConfigurationObject. You can then add new elements or attributes to the basic adapter configuration as needed. For example, the following type called HelloWorldAdapterConfig adds a <message> element to the basic adapter configuration:
<xs:complexType name="HelloWorldAdapterConfig"> <xs:complexContent> <xs:extension base="wlevs:AdapterConfig"> <xs:sequence> <xs:element name="message" type="xs:string"/> </xs:sequence> </xs:extension> </xs:complexContent> </xs:complexType>
4. Define a top-level element that must be named <config>.
In the definition of the config element, define a sequence of child elements that correspond to the components in your application. Typically the name of the elements should indicate what component they configure (adapter, processor, stream) although you can name then anything you want.
Each element must extend the ConfigurationObject XML type, either explicitly using the <xs:extension base="base:ConfigurationObject"/> XSD tag or by specifying an XML type that itself extends ConfigurationObject. The ConfigurationObject XML type, defined in wlevs_base_config.xsd, defines a single attribute: name.
The type of your adapter element should be the custom one you created in a preceding step of this procedure.
You can use the following built-in XML types, described in wlevs_application_config.xsd, for the child elements of <config> that correspond to processors or streams:

Ex tending the Conf igurat i on o f an Adapte r
Creating WebLogic Event Server Applications 3-17
– DefaultProcessorConfig—See “Overview of the Complex Event Processer Configuration File” on page 6-1 for a description of the default processor configuration.
– DefaultStreamConfig—See “Overview of the Stream Configuration File” on page 5-1 for a description of the default stream configuration.
For example:
<xs:element name="config"> <xs:complexType> <xs:choice maxOccurs="unbounded"> <xs:element name="adapter" type="HelloWorldAdapterConfig"/> <xs:element name="processor" type="wlevs:DefaultProcessorConfig"/> </xs:choice> </xs:complexType></xs:element>
5. Optionally use the <jxb:package> child element of <jxb:schemaBindings> to specify the package name of the generated Java code:
<xs:annotation> <xs:appinfo> <jxb:schemaBindings> <jxb:package name="com.bea.adapter.wlevs.example.helloworld"/> </jxb:schemaBindings> </xs:appinfo></xs:annotation>
Complete Example of an Extended XSD Schema FileThe following extended XSD file is used in the HelloWorld sample application:
<?xml version="1.0" encoding="UTF-8"?><xs:schema targetNamespace="http://www.bea.com/xml/ns/wlevs/example/helloworld" xmlns="http://www.bea.com/xml/ns/wlevs/example/helloworld" xmlns:xs="http://www.w3.org/2001/XMLSchema" xmlns:jxb="http://java.sun.com/xml/ns/jaxb" xmlns:xjc="http://java.sun.com/xml/ns/jaxb/xjc" xmlns:wlevs="http://www.bea.com/xml/ns/wlevs/config/application" jxb:extensionBindingPrefixes="xjc" jxb:version="1.0" elementFormDefault="unqualified" attributeFormDefault="unqualified">
<xs:annotation> <xs:appinfo> <jxb:schemaBindings> <jxb:package name="com.bea.adapter.wlevs.example.helloworld"/>

Creat ing Adapte rs
3-18 Creating WebLogic Event Server Applications
</jxb:schemaBindings> </xs:appinfo> </xs:annotation>
<xs:import namespace="http://www.bea.com/xml/ns/wlevs/config/application" schemaLocation="wlevs_application_config.xsd"/>
<xs:element name="config"> <xs:complexType> <xs:choice maxOccurs="unbounded"> <xs:element name="adapter" type="HelloWorldAdapterConfig"/> <xs:element name="processor" type="wlevs:DefaultProcessorConfig"/> <xs:element name="stream" type="wlevs:DefaultStreamConfig"/> </xs:choice> </xs:complexType> </xs:element>
<xs:complexType name="HelloWorldAdapterConfig"> <xs:complexContent> <xs:extension base="wlevs:AdapterConfig"> <xs:sequence> <xs:element name="message" type="xs:string"/> </xs:sequence> </xs:extension> </xs:complexContent> </xs:complexType></xs:schema>
Programming Access to the Configuration of an AdapterWhen you deploy your application, WebLogic Event Server maps the configuration of each component (specified in the component configuration XML files) into Java objects using the Java Architecture for XML Binding (JAXB) standard. Because there is a single XML element that contains the configuration data for each component, JAXB in turn also produces a single Java class that represents this configuration data. WebLogic Event Server passes an instance of this Java class to the component (processor, stream, or adapter) at runtime when the component is initialized, and also whenever there is a dynamic change to the component’s configuration.
In your adapter implementation, you can use metadata annotations to specify the Java methods that are invoked by WebLogic Event Server at runtime. WebLogic Event Server passes an instance of the configuration Java class to the specified methods; you can then program these methods to get specific runtime configuration information about the adapter. The following

Pass ing Log in Credent ia ls f rom an Adapte r t o the Data Feed Prov ider
Creating WebLogic Event Server Applications 3-19
example shows how to annotate the activateAdapter() method with the @Activate annotation to specify the method invoked when the adapter configuration is first activated:
@Activate
public void activateAdapter(HelloWorldAdapterConfig adapterConfig)
this.message = adapterConfig.getMessage();
By default, the date type of the adapter configuration Java class is com.bea.wlevs.configuration.application.DefaultAdapterConfig. If, however, you have extended the configuration of your adapter by creating your own XSD file that describes the configuration XMLfile, then you specify the type in the XSD file. In the preceding example, because the HelloWorld sample extends the configuration of its adapter, the data type of the Java configuration object is com.bea.wlevs.example.helloworld.HelloWorldAdapterConfig.
The metadata annotations provided are as follows:
com.bea.wlevs.management.Activate—Specifies the method invoked when the configuration is activated.
See Activate for additional details about using this annotation in your adapter code.
com.bea.wlevs.management.Prepare—Specifies the method invoked when the configuration is prepared.
See Prepare for additional details about using this annotation in your adapter code.
com.bea.wlevs.management.Rollback—Specifies the method invoked when the adapter is terminated due to an exception.
See Rollback for additional details about using this annotation in your adapter code.
Passing Login Credentials from an Adapter to the Data Feed Provider
If your adapter accesses an external data feed, the adapter might need to pass login credentials (username and password) to the data feed for user authentication.
The simplest, and least secure, way to do this is to hard-code the non-encrypted login credentials in your adapter Java code. However, this method does not allow you to encrypt the password or later change the login credentials without recompiling the adapter Java code.

Creat ing Adapte rs
3-20 Creating WebLogic Event Server Applications
The following procedure describes a different method that takes these two issues into account. In the procedure, it is assumed that the username to access the data feed is juliet and the password is superSecret.
1. Decide whether you want the login credentials to be configured statically in the EPN assembly file, or dynamically by extending the configuration of the adapter.
Configuring the credentials statically in the EPN assembly file is easier, but if the credentials later change you must restart the application for the update to the EPN assembly file to take place. Extending the adapter configuration allows you to change the credentials dynamically without restarting the application, but extending the configuration involves additional steps, such as creating an XSD file and compiling it into a JAXB object.
2. If you decide to configure the login credentials statically, follow these steps:
a. Open a command window and set your environment as described in Setting Up Your Development Environment.
b. Change to the directory that contains the EPN assembly file for your application.
c. Using your favorite XML editor, edit the EPN assembly file by updating the <wlevs:adapter> tag that declares your adapter. In particular, add two instance properties that correspond to the username and password of the login credentials. For now, specify the cleartext password value; you will encrypt it in a later step. Also add a temporary <password> element whose value is the cleartext password. For example:
<wlevs:adapter id="myAdapter" provider="myProvider"> <wlevs:instance-property name="user" value="juliet"/> <wlevs:instance-property name="password" value="superSecret"/> <password>superSecret</password></wlevs:adapter>
d. Save the EPN assembly file.
e. Execute the following java command to encrypt the value of the <password> element in the EPN assembly file:
prompt> java -jar BEA_HOME/modules/com.bea.core.bootbundle_3.0.1.0.jar . epn_assembly_file
where BEA_HOME refers to the main BEA directory into which you installed WebLogic Event Server, such as d:\beahome. The second argument refers to the directory that contains the EPN assembly file; because this procedure directs you to change to the

Pass ing Log in Credent ia ls f rom an Adapte r t o the Data Feed Prov ider
Creating WebLogic Event Server Applications 3-21
directory, the example shows ".". The epn_assembly_file parameter refers to the name of your EPN assembly file.
After you run the command, the value of the <password> element of the EPN assembly file will be encrypted.
f. Edit the EPN assembly file. Copy the encrypted value of the <password> element to the value attribute of the password instance property. Remove the <password> element from the XML file. For example:
<wlevs:adapter id="myAdapter" provider="myProvider"> <wlevs:instance-property name="user" value="juliet"/> <wlevs:instance-property name="password" value="Salted-3DESB7L6nehu7dgPtJJTnTJWRA=="/> </wlevs:adapter>
3. If you decide to configure the login credentials dynamically, follow these steps:
a. Extend the configuration of your adapter by adding two new elements: <user> and <password>, both of type string.
For example, if you were extending the adapter in the HelloWorld example, the XSD file might look like the following:
<xs:complexType name="HelloWorldAdapterConfig"> <xs:complexContent> <xs:extension base="wlevs:AdapterConfig"> <xs:sequence> <xs:element name="message" type="xs:string"/> <xs:element name="user" type="xs:string"/> <xs:element name="password" type="xs:string"/> </xs:sequence> </xs:extension> </xs:complexContent> </xs:complexType>
See “Extending the Configuration of an Adapter” on page 3-13 for detailed instructions.
b. Open a command window and set your environment as described in Setting Up Your Development Environment.
c. Change to the directory that contains the component configuration XML file for your adapter.
d. Using your favorite XML editor, update this component configuration XML file by adding the required login credentials using the <user> and <password> elements. For now, specify the cleartext password value; you will encrypt it in a later step. For example:
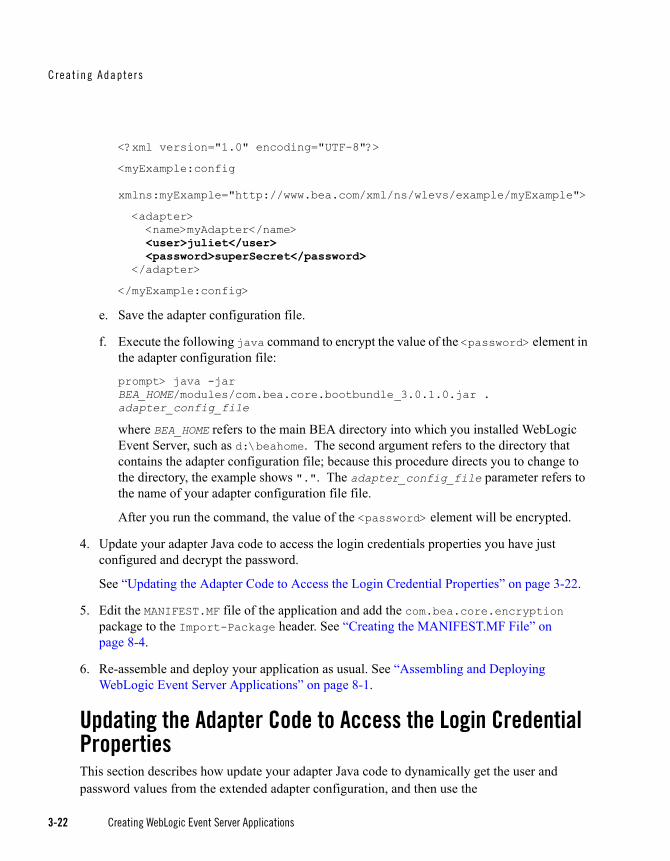
Creat ing Adapte rs
3-22 Creating WebLogic Event Server Applications
<?xml version="1.0" encoding="UTF-8"?>
<myExample:config xmlns:myExample="http://www.bea.com/xml/ns/wlevs/example/myExample">
<adapter> <name>myAdapter</name> <user>juliet</user> <password>superSecret</password> </adapter>
</myExample:config>
e. Save the adapter configuration file.
f. Execute the following java command to encrypt the value of the <password> element in the adapter configuration file:
prompt> java -jar BEA_HOME/modules/com.bea.core.bootbundle_3.0.1.0.jar . adapter_config_file
where BEA_HOME refers to the main BEA directory into which you installed WebLogic Event Server, such as d:\beahome. The second argument refers to the directory that contains the adapter configuration file; because this procedure directs you to change to the directory, the example shows ".". The adapter_config_file parameter refers to the name of your adapter configuration file file.
After you run the command, the value of the <password> element will be encrypted.
4. Update your adapter Java code to access the login credentials properties you have just configured and decrypt the password.
See “Updating the Adapter Code to Access the Login Credential Properties” on page 3-22.
5. Edit the MANIFEST.MF file of the application and add the com.bea.core.encryption package to the Import-Package header. See “Creating the MANIFEST.MF File” on page 8-4.
6. Re-assemble and deploy your application as usual. See “Assembling and Deploying WebLogic Event Server Applications” on page 8-1.
Updating the Adapter Code to Access the Login Credential PropertiesThis section describes how update your adapter Java code to dynamically get the user and password values from the extended adapter configuration, and then use the

Pass ing Log in Credent ia ls f rom an Adapte r t o the Data Feed Prov ider
Creating WebLogic Event Server Applications 3-23
com.bea.core.encryption.EncryptionService API to decrypt the encrypted password. The code snippets below build on the HelloWorld adapter Java code, shown in “Programming the Adapter Class: Guidelines” on page 3-3.
Import the additional APIs that you will need to decrypt the encrypted password:
import com.bea.core.encryption.EncryptionService;import com.bea.core.encryption.EncryptionServiceException;import com.bea.wlevs.util.Service;
Use the @Service annotation to get a reference to the EncryptionService:
private EncryptionService encryptionService;
...
@Servicepublic void setEncryptionService(EncryptionService encryptionService) this.encryptionService = encryptionService;
In the @Prepare callback method, get the values of the user and password properties of the extended adapter configuration as usual (only code for the password value is shown):
private String password;
...
public String getPassword() return password;
public void setPassword(String password) this.password = password;
...
@Preparepublic void checkConfiguration(HelloWorldAdapterConfig adapterConfig) if (adapterConfig.getMessage() == null || adapterConfig.getMessage().length() == 0) throw new RuntimeException("invalid message: " + message); this.password= adapterConfig.getPassword(); ...
See “Programming Access to the Configuration of an Adapter” on page 3-18 for information about accessing the extended adapter configuration.
Use the EncryptionService.decryptStringAsCharArray() method in the @Prepare callback method to decrypt the encrypted password:

Creat ing Adapte rs
3-24 Creating WebLogic Event Server Applications
@Preparepublic void checkConfiguration(HelloWorldAdapterConfig adapterConfig) if (adapterConfig.getMessage() == null || adapterConfig.getMessage().length() == 0) throw new RuntimeException("invalid message: " + message); this.password= adapterConfig.getPassword(); try char[] decrypted = encryptionService.decryptStringAsCharArray(password); System.out.println("DECRYPTED PASSWORD is "+ new String(decrypted)); catch (EncryptionServiceException e) throw new RuntimeException(e);
The signature of the decryptStringAsCharArray() method is as follows:
char[] decryptStringAsCharArray(String encryptedString) throws EncryptionServiceException
Pass these credentials to the data feed provider using the vendor API.

Creating WebLogic Event Server Applications 4-1
C H A P T E R 4
Using Java Message Service (JMS) in Your Applications
This section contains information on the following subjects:
“Overview of Using JMS in WebLogic Event Server Applications” on page 4-1
“Additional Programming Guidelines for JMS Adapters” on page 4-2
“Additional Configuration for JMS Adapters” on page 4-3
“Using WebLogic Event Server AsyncBeans” on page 4-4
Overview of Using JMS in WebLogic Event Server Applications
Java Message Service (JMS) can be used in a variety of places in a WebLogic Event Server appliation. In particular:
An adapter can read incoming JMS objects.
The business logic POJO can be a JMS client to a JMS server.
This section builds on the existing adapter and business logic POJO chapters, so be sure you read them before reading this section:
“Creating Adapters” on page 3-1
“Programming the Business Logic Component” on page 7-1
For general information about JMS, see Java Message Service on the Sun Developer Network.

Using Java Message Serv ice ( JMS) in Your App l i ca t ions
4-2 Creating WebLogic Event Server Applications
Additional Programming Guidelines for JMS AdaptersThe section “Programming the Adapter Class: Guidelines” on page 3-3 describes how to generally program an adapter that reads incoming data using the APIs provided by the data feed provider. This section describes additional guidelines you should follow if your adapter reads data from a Java Message Service (JMS) object. Read the general guidelines before you read these JMS guidelines.
For the complete example of how to read JMS data in an adapter, parts of which are described in this section, see the JMS Adapter example located in the WLEVS_HOME/samples/source/adapters/jms-adapter directory, where WLEVS_HOME refers to the main WebLogic Event Server installation, such as /beahome/wlevs20.
Follow these additional guidelines when programming a JMS adapter:
Your adapter class must implement the standard javax.jms.MessageListener JMS interface, as well as the com.bea.wlevs.ede.api.Adapter and com.bea.wlevs.ede.api.EventSource WebLogic Event Server interfaces:
public class InboundJMSAdapter implements Adapter, EventSource, MessageListener, ActivatableBean ...
When you register this adapter class using the <wlevs:adapter> tag in the EPN assembly file, it will then be referenced by a asyncbean:messgeListener tag.
The com.bea.wlevs.ede.api.ActivatableBean interface is optional and allows adapters to react when the dynamic adapter configuration has been set and the event processing network (EPN) of which the adapter is a member is activated. Activation is the last thing that happens during EPN creation
Implement the MessageListener.onMessage() method, adding the code which extracts the event data from the incoming JMS message and puts the data into a WebLogic Event Server event. For example:
public void onMessage(Message message)
List eventCollection = new ArrayList(); try Map<String, Object> content = converter.fromMessage(eventType, null, message); EventType eventType1 = getEventTypeRepository().getEventType(eventType); EventBuilder eventBuilder = eventType1.getEventBuilderFactory().createBuilder(); for (Map.Entry<String, Object> entry : content.entrySet()) eventBuilder.put(entry.getKey(), entry.getValue());

Add i t i ona l Conf igura t i on fo r JMS Adapte rs
Creating WebLogic Event Server Applications 4-3
Object event = eventBuilder.createEvent(); eventCollection.add(event); eventSender.sendEvent(eventCollection, null); catch (Exception e)
In the example, eventType is an instance property of the adapter which points to the actual event type of the application, jmsEvent. The content variable contains the result of converting the incoming JMS message into a WebLogic Event Server event type. The EventBuilder then builds the WebLogic Event Server event from the message. The EventSender.sendEvent() method passes the event on to the next component in the network.
See the JMS Adapter example in the product distribution (WLEVS_HOME/samples/source/adapters/jms-adapter directory) for the full Java code of the adapter, as well as code for additional classes of the example. In particular, the PassThroughConverter class parses the incoming javax.jms.Message, introspects the registered event definition (jmsEvent), creates events in accordance with the event definition and populates the event property values with data read from the javax.jms.Message.
Additional Configuration for JMS AdaptersThis section describes the additional entries you must add to the EPN assembly file when implementing a JMS adapter. See “Updating the EPN Assembly File” on page 3-8 for general information about configuring adapters in the EPN assembly file.
As with any adapter, you register a JMS adapter as usual using the <wlevs:adapter> tag in the EPN assembly file:
<wlevs:adapter id="inboundJmsAdapter" provider="wl-jms" manageable="true">
<wlevs:instance-property name="eventType" value="jmsEvent" />
</wlevs:adapter>
In the preceding example, provider="wl-jms" refers to an OSGI-registered adapter factory.
In addition to the standard <wlevs:adapter> tag, you must add additional entries to the EPN assembly file. In particular, you must configure:
A JNDI lookup for a JMS connection using standard Spring tags, as shown in the following example:

Using Java Message Serv ice ( JMS) in Your App l i ca t ions
4-4 Creating WebLogic Event Server Applications
<bean id="wlsjndiTemplate" class="org.springframework.jndi.JndiTemplate"> <property name="environment"> <props> <prop key="java.naming.factory.initial"> weblogic.jndi.WLInitialContextFactory </prop> <prop key="java.naming.provider.url"> t3://localhost:7001 </prop> </props> </property></bean>
<bean id="wlsjmsQueueConnectionFactory" class="org.springframework.jndi.JndiObjectFactoryBean"> <property name="jndiTemplate"> <ref bean="wlsjndiTemplate"/> </property> <property name="jndiName"> <value>JMSConnectionQueueFactory01</value> </property></bean>
A WebLogic Event Server AsyncBean which forwards the JMS messages to your adapter. In the following example, the <asyncbeans:connectionFactory> tag references the connection factory wlsjmsQueueConnectionFactory that was created in the entry above, and the <asyncbeans:messageListener> references the adapter called inboundJmsAdapter, registered with the <wlevs:adapter> tag:
<asyncbeans:asyncbean id="asyncBean"> <asyncbeans:destinationName> JMSServer01/com.bea.wlrt.jmsmodule!JMSRequestQueue01 </asyncbeans:destinationName> <asyncbeans:transactional>false</asyncbeans:transactional> <asyncbeans:connectionFactory ref="wlsjmsQueueConnectionFactory"/> <asyncbeans:messageListener ref="inboundJmsAdapter" /></asyncbeans:asyncbean>
For additional information about configuring WebLogic Event Server AsyncBeans, see “Using WebLogic Event Server AsyncBeans” on page 4-4.
Using WebLogic Event Server AsyncBeansAsyncBeans provide a WebLogic Event Server alternative to J2EE message driven beans. It uses Spring's Message Driven POJO (MDP) support to allow a Plain Old Java Object (POJO) to act as a message listener on a JMS queue or topic.

Using WebLogic Event Se rve r AsyncBeans
Creating WebLogic Event Server Applications 4-5
AsyncBeans provide:
The ability to receive JMS messages from queues and topics asynchronously, including BEA Weblogic JMS and other 3rd-party JMS providers.
Transaction support
Automatic reconnecton to JMS servers
Scalability by allowing an application to utilize multiple WebLogic Event Server instances across multiple machines
JMS resource pooling
Thread pool integration through the WorkManager, see “</config>” on page 6-9.
Automatic Transaction Enlistment for foreign JMS vendors.
Configuring AsyncBeans using Configuration ObjectsIn order to use AsyncBeans declaratively, you must add appropriate tags to the EPN assembly file, located in the META-INF/spring directory of your application bundle. You can configure multiple asynchronous beans per WebLogic Event Server instance.
See the XSD Schema for the full Schema description of the <asyncbean> element you can add to the EPN assembly file.
Common AsyncBean TasksThe following sections provide information on how to program and configure common tasks using AsyncBeans:
“Asynchronous Message Reception” on page 4-6
“Message Driven POJO” on page 4-6
“Transactions” on page 4-7
“Retrieving JMS objects from JNDI” on page 4-7
“Using WorkManager with Transactions” on page 4-8

Using Java Message Serv ice ( JMS) in Your App l i ca t ions
4-6 Creating WebLogic Event Server Applications
Asynchronous Message ReceptionYou can receive messages asynchronously by implementing the javax.jms.MessageListener interface.
For example:
public class MyMessageListener implements MessageListener
public void onMessage(Message msg)
System.err.println("RECEIVED: " + msg);
Use the following tags in your EPN assembly file to connect this listener to a JMS queue:
<bean id="connectionFactory"
class="org.apache.activemq.ActiveMQConnectionFactory">
<property name="brokerURL" value="tcp://localhost:61616"/>
</bean>
<asyncbean>
<destinationName>TEST.FOO</destinationName>
<connectionFactory>connectionFactory</connectionFactory>
<messageListener>messageListener</messageListener>
</asyncbean>
Message Driven POJOThis section provides an example of a simple message-driven POJO:
public class MyPOJO
public void deliver(String msg)
System.err.println("RECEIVED: " + msg);
Note: This class has no dependencies on JMS, Spring, or any other container code.
In your EPN assembly file, you must configure a MessageListenerAdapter that adapts the POJO to the javax.jms.MessageListener interface. For example:

Using WebLogic Event Se rve r AsyncBeans
Creating WebLogic Event Server Applications 4-7
<bean id="messageListener"
class="org.springframework.jms.listener.adapter.MessageListenerAdapter">
<constructor-arg><bean class="test.MyPOJO" /></constructor-arg>
<property name="defaultListenerMethod" value="deliver"/>
</bean>
<asyncbean>
<destinationName>TEST.FOO</destinationName>
<connectionFactory>connectionFactory</connectionFactory>
<messageListener>messageListener</messageListener>
</asyncbean>
TransactionsYou enable transactions setting the optional transactional property to true in your EPN assembly file:
For example:
<asyncbean>
<destinationName>TEST.FOO</destinationName>
<transactional>true</transactional>
<connectionFactory>connectionFactory</connectionFactory>
<messageListener>messageListener</messageListener>
</asyncbean>
Retrieving JMS objects from JNDIUse the Spring JNDI lookup mechanism to lookup ConnectionFactorys and destinations from JNDI.
For example:
<jee:jndi-lookup id="myConnectionFactory"
jndi-name="my.connection.Factory">
<jee:environment>
java.naming.factory.initial=weblogic.jndi.WLInitialContextFactory
java.naming.provider.url=t3://localhost:10001
</jee:environment>
</jee:jndi-lookup>

Using Java Message Serv ice ( JMS) in Your App l i ca t ions
4-8 Creating WebLogic Event Server Applications
<jee:jndi-lookup id="myDestination" jndi-name="my.connection.Factory">
<jee:environment>
java.naming.factory.initial=weblogic.jndi.WLInitialContextFactory
java.naming.provider.url=t3://localhost:10001
</jee:environment>
</jee:jndi-lookup>
<asyncbean>
<destination>myDestination</destination>
<connectionFactory>myConnectionFactory</connectionFactory>
<messageListener>messageListener</messageListener>
</asyncbean>
Using WorkManager with TransactionsWhen using transactions, the AsyncBean framework performs a blocking receive to get messages from the underlying destination. These messages are then dispatched to the AsyncBean using a WorkManager. The following sections describe two methods to dispatch messages to an AsyncBean:
“Dependency Injection Using Simple Declaritive Services” on page 4-8
“Dependency Injection Using Spring” on page 4-9
Dependency Injection Using Simple Declaritive ServicesRetrieve the WorkManager from the OSGi service registry. Use this method when the WorkManager is configured in the config.xml file that describes your domain.
For example, the AsyncBean configuration object may look like:
<asyncbean>
<destinationName>TEST.FOO</destinationName>
<transactional>true</transactional>
<connectionFactory>connectionFactory</connectionFactory>
<messageListener>messageListener</messageListener>
<workManager>
<osgi:reference interface="commonj.work.WorkManager"
filter="(name=MyWorkManager"/>
</workManager>
</asyncbean>

Using WebLogic Event Se rve r AsyncBeans
Creating WebLogic Event Server Applications 4-9
Dependency Injection Using SpringUse Spring to access the WorkManager.
For example, the AsyncBean configuration object may look like:
<asyncbean>
<destinationName>TEST.FOO</destinationName>
<transactional>true</transactional>
<connectionFactory>connectionFactory</connectionFactory>
| <messageListener>messageListener</messageListener>
<workManager>
<bean class="com.bea.core.workmanager.WorkManagerFactory"
factory-method="findOrCreate">
<constructor-arg value="MyWorkManager"/><!-- name parameter -->
<constructor-arg value="5"/><!-- min threads constraint -->
<constructor-arg value="10"/><!-- max threads constraint -->
</bean>
</workManager>
</asyncbean>

Using Java Message Serv ice ( JMS) in Your App l i ca t ions
4-10 Creating WebLogic Event Server Applications

Creating WebLogic Event Server Applications 5-1
C H A P T E R 5
Configuring the Stream Component
This section contains information on the following subjects:
“Overview of the Stream Configuration File” on page 5-1
“Creating the Stream Configuration File: Main Steps” on page 5-2
“Example of an Stream Configuration File” on page 5-4
Overview of the Stream Configuration FileYour WebLogic Event Server application contains one or more stream components, or streams for short. The streams stream data between other types of components, such as between adapters and processors, and between processors and the business logic POJO.
Each stream in your application has a default configuration. In particular:
The maximum number of events on the stream is 1048.
There is one thread assigned to the stream.
Monitoring is enabled.
The default stream configuration is typically adequate for most applications. However, if you want to change this configuration, you must create an XML file that is deployed as part of the WebLogic Event Server application bundle. You can later update this configuration at runtime using the wlevs.Admin utility or manipulating the appropriate JMX Mbeans directly.

Conf igur ing the S t ream Component
5-2 Creating WebLogic Event Server Applications
If your application has more than one stream, you can create separate XML files for each stream, or create a single XML file that contains the configuration for all streams, or even all components of your application (adapters, processors, and streams). Choose the method that best suits your development environment.
Creating the Stream Configuration File: Main StepsThe following procedure describes the main steps to create the stream configuration file. For simplicity, it is assumed in the procedure that you are going to configure all components of an application in a single XML file
See XSD Schema Reference for Component Configuration Files for the complete XSD Schema that describes the stream configuration file.
1. Create an XML file using your favorite XML editor.You can name this XML file anything you want, provided it ends with the .xml extension.
The root element of the configuration file is <config>, with namespace definitions shown in the next step.
2. For each stream in your application, add a <stream> child element of <config>. Uniquely identify each stream with the <name> child element. This name must be the same as the value of the id attribute in the <wlevs:stream> tag of the EPN assembly file that defines the event processing network of your application. This is how WebLogic Event Server knows to which particular stream component in the EPN assembly file this stream configuration applies. See “Creating the EPN Assembly File” on page 2-7 for details.
For example, if your application has two streams, the configuration file might initially look like:
<?xml version="1.0" encoding="UTF-8"?>
<helloworld:config xmlns:helloworld="http://www.bea.com/xml/ns/wlevs/example/helloworld"> <processor> ... </processor>
<stream> <name>firstStream</name> ... </stream>
<stream> <name>secondStream</name>

Creat ing the St ream Conf igurat ion F i l e : Ma in Steps
Creating WebLogic Event Server Applications 5-3
... </stream>
</helloworld:config>
In the example, the configuration file includes two streams called firstStream and secondStream. This means that the EPN assembly file must include at least two stream registrations with the same identifiers:
<wlevs:stream id="firstStream" ...> ...</wlevs:stream>
<wlevs:stream id="secondStream" ...> ...</wlevs:stream>
WARNING: Identifiers and names in XML files are case sensitive, so be sure you specify the same case when referencing the component’s identifier in the EPN assembly file.
3. Optionally add a <max-size> child element of the <stream> element to specify the maximum size of the stream. Zero-size streams synchronously pass-through events. Streams with non-zero size process events asynchronously, buffering events by the requested size. The default value is 1024 .
<stream> <name>firstStream</name> <max-size>10000</size></stream>
4. Optionally add a <max-threads> child element of the <stream> element to specify the maximum number of threads that will be used to process events for this stream. Setting this value has no effect when <max-size> is 0. The default value is 1.
<stream> <name>firstStream</name> <max-threads>2</size></stream>
5. Optionally use the monitoring Boolean attribute of the <stream> element to enable or disable monitoring of the stream; by default monitoring is enabled. When monitoring is enabled, the stream gathers runtime statistics, such as the number of events inbound and outbound on it, and forwards this information to an Mbean:
<stream monitoring="true"> <name>firstStream</name> ...</stream>

Conf igur ing the S t ream Component
5-4 Creating WebLogic Event Server Applications
To truly enable monitoring, you must have also enabled the manageability of the stream, otherwise setting the monitoring attribute to true has no effect. You enable manageability by setting the manageable attribute of the corresponding component registration in the EPN assembly file to true, as shown in bold in the following example:
<wlevs:stream id="firstStream" manageable="true"> <wlevs:listener ref="helloworldProcessor"/> <wlevs:source ref="helloworldAdapter"/></wlevs:stream>
Example of an Stream Configuration FileThe following sample XML file shows how to configure two streamss, firstStream and secondStream.
<?xml version="1.0" encoding="UTF-8"?>
<sample:config xmlns:sample="http://www.bea.com/xml/ns/wlevs/example/sample">
<stream> <name>firstStream</name> <max-size>10</max-size> </stream>
<stream> <name>secondStream</name> <max-threads>4</max-threads> </stream>
</sample:config>

Creating WebLogic Event Server Applications 6-1
C H A P T E R 6
Configuring the Complex Event Processor
This section contains information on the following subjects:
“Overview of the Complex Event Processer Configuration File” on page 6-1
“Configuring the Complex Event Processor: Main Steps” on page 6-2
“Example of a Processor Configuration File” on page 6-5
Overview of the Complex Event Processer Configuration File
Your WebLogic Event Server application contains one or more complex event processors, or processors for short. Each processor takes as input events from one or more adapters; these adapters in turn listen to data feeds that send a continuous stream of data from a source. The source could be anything, from a financial data feed to the WebLogic Event Server load generator. The main feature of a processor is its associated Event Processing Language (EPL) rules that select a subset of the incoming events to then pass on to the component that is listening to the processor. The listening component could be another processor, or the business object POJO that typically defines the end of the event processing network, and thus does something with the events, such as publish them to a client application.
Each processor in your application must have an associated XML file that defines its initial configuration. This XML file is deployed as part of the WebLogic Event Server application bundle. You can later update this configuration at runtime using the wlevs.Admin utility or manipulating the appropriate JMX Mbeans directly.

Conf igur ing the Complex Event P rocesso r
6-2 Creating WebLogic Event Server Applications
In addition to configuring the initial set of EPL rules of the processor, you can configure the following in the processor XML file:
JDBC datasources if your WebLogic Event Server application requires a connection to a relational database.
Enable monitoring of the processor.
You are required to create a configuration XML file for each processor in your application. If your application has more than one processor, you can create separate XML files for each processor, or create a single XML file that contains the configuration for all processors. Choose the method that best suits your development environment.
You can optionally create configuration files for the other components in your application (adapters and streams), although if their default configuration is adequate you do not need to change it. If you do create configuration files for these components, you can create separate files or combine them with the processor configuration file(s).
Configuring the Complex Event Processor: Main StepsThis section describes the main steps to create the processor configuration file. For simplicity, it is assumed in the procedure that you are going to configure all processors in a single XML file, although you can also create separate files for each processor.
See “Example of a Processor Configuration File” on page 6-5 for a complete example of a processor configuration file.
See XSD Schema Reference for Component Configuration Files for the complete XSD Schema that describes the processor configuration file.
1. Design the set of EPL rules that the processor executes. These rules can be as simple as selecting all incoming events to restricting the set based on time, property values, and so on, as shown in the following two examples:
SELECT * from Withdrawal RETAIN ALL
SELECT symbol, AVG(price) FROM (SELECT * FROM MarketTrade WHERE blockSize > 10)RETAIN 100 EVENTS PARTITION BY symbol WITH LARGEST priceGROUP BY symbolHAVING AVG(price) >= 100ORDER BY symbol
EPL is similar in many ways to Structure Query Language (SQL), the language used to query relational database tables, although the syntax between the two differs in many ways.

Conf igur ing the Complex Event P rocesso r : Ma in S teps
Creating WebLogic Event Server Applications 6-3
The other big difference is that EPL queries take another dimension into account (time), and the processor executes the EPL continually, rather than SQL queries that are static.
For additional conceptual information about EPL, and examples and reference information to help you design and write your own EPL rules, see the EPL Reference Guide.
2. Create the processor configuration XML file that will contain the EPL rules you designed in the preceding step, as well as other optional features, for each processor in your application.
You can name this XML file anything you want, provided it ends with the .xml extension.
The root element of the processor configuration file is <config>, with namespace definitions shown in the next step.
3. For each processor in your application, add a <processor> child element of <config>. Uniquely identify each processor with the <name> child element. This name must be the same as the value of the id attribute in the <wlevs:processor> tag of the EPN assembly file that defines the event processing network of your application. This is how WebLogic Event Server knows to which particular processor component in the EPN assembly file this processor configuration applies. See “Creating the EPN Assembly File” on page 2-7 for details.
For example, if your application has two processors, the configuration file might initially look like:
<?xml version="1.0" encoding="UTF-8"?>
<n1:config xsi:schemaLocation="http://www.bea.com/xml/ns/wlevs/config/application wlevs_application_config.xsd" xmlns:n1="http://www.bea.com/xml/ns/wlevs/config/application" xmlns:xsi="http://www.w3.org/2001/XMLSchema-instance">
<processor> <name>firstProcessor</name> ... </processor>
<processor> <name>secondProcessor</name> ... </processor>
</n1:config>
In the example, the configuration file includes two processors called myFirstProcessor and mySecondProcessor. This means that the EPN assembly file must include at least two processor registrations with the same identifiers:

Conf igur ing the Complex Event P rocesso r
6-4 Creating WebLogic Event Server Applications
<wlevs:processor id="firstProcessor" ...> ...</wlevs:processor>
<wlevs:processor id="secondProcessor" ...> ...</wlevs:processor>
WARNING: Identifiers and names in XML files are case sensitive, so be sure you specify the same case when referencing the component’s identifier in the EPN assembly file.
4. Add a <rules> child element to each <processor> to group together one or more <rule> elements that correspond to the set of EPL rules you have designed for this processor.
Use the required id attribute of the <rule> element to uniquely identify each rule. Use the XML CDATA type to input the actual EPL rule. For example:
<processor> <name>firstProcessor</name> <rules> <rule id="myFirstRule"><![CDATA[ SELECT * from Withdrawal RETAIN ALL ]]></rule>
<rule id="mySecondRule"><![CDATA[ SELECT * from Checking RETAIN ALL ]]></rule> </rules></processor>
5. Optionally add a <database> child element of the <processor> element to define a JDBC data source for your application. This is required if your EPL rules joing a stream of events with an actual relational database table.
Use the <name> child element of <database> to uniquely identify the datasource.
Use the <data-source-name> child element of <database> to specify the actual name of the data source; this name corresponds to the <name> child element of the <data-source> configuration object in the config.xml file of your domain. For details about configuring the server, see Configuring Access to a Relational Database.
For example:
<processor> <name>firstProcessor</name> <rules> .... </rules>

Example o f a P rocessor Conf igurat ion F i l e
Creating WebLogic Event Server Applications 6-5
<database> <name>myDataSource</name> <data-source-name>rdbmsDataSource</data-source-name> </database></processor>
6. Optionally use the monitoring Boolean attribute of the <processor> element to enable or disable monitoring of the processor; by default monitoring is enabled. When monitoring is enabled, the processor gathers runtime statistics, such as the number of events inbound and outbound on it, and forwards this information to an Mbean:
<processor monitoring="true"> <name>firstProcessor</name> <rules> .... </rules></processor>
To truly enable monitoring, you must have also enabled the manageability of the processor, otherwise setting the monitoring attribute to true has no effect. You enable manageability by setting the manageable attribute of the corresponding component registration in the EPN assembly file to true, as shown in bold in the following example:
<wlevs:processor id="firstProcessor" manageable="true" />
Example of a Processor Configuration FileThe following example shows how to configure one of the sample EPL queries shown in “Configuring the Complex Event Processor: Main Steps” on page 6-2 for the myProcessor processor:
<?xml version="1.0" encoding="UTF-8"?>
<n1:config
xsi:schemaLocation="http://www.bea.com/xml/ns/wlevs/config/application
wlevs_application_config.xsd"
xmlns:n1="http://www.bea.com/xml/ns/wlevs/config/application"
xmlns:xsi="http://www.w3.org/2001/XMLSchema-instance">
<processor>
<name>myProcessor</name>
<rules>
<rule id="myRule"><
Conf igur ing the Complex Event P rocesso r
6-6 Creating WebLogic Event Server Applications
RETAIN 100 EVENTS PARTITION BY symbol WITH LARGEST price
GROUP BY symbol
HAVING AVG(price) >= 100
ORDER BY symbol
]]></rule>
</rules>
</processor>
</n1:config>
In the example, the <name> element specifies that the processor for which the single EPL rule is being configured is called myProcessor. This in turn implies that the EPN assembly file that defines your application must include a corresponding <wlevs:processor id="myProcessor" /> tag to link this EPL rules with an actual myProcessor processor instance.

Creating WebLogic Event Server Applications 7-1
C H A P T E R 7
Programming the Business Logic Component
This section contains information on the following subjects:
“Overview of Programming the Business Logic Component” on page 7-1
“Programming Business Logic: Guidelines” on page 7-1
“Accessing a Relational Database” on page 7-3
Overview of Programming the Business Logic ComponentThe business logic component is typically the last component in your event network, the one that receives results from the EPL queries associated with the processor components. This is also the component in which you program your application business code. For example, the business logic component might publish the events to a Web site, pass the events on to a legacy application, and so on.
This component is a plain old Java object, or POJO. Programming the component is very simple with few required guidelines. You can also use the JDBC API to access data in a relational database, as described in “Accessing a Relational Database” on page 7-3
Programming Business Logic: GuidelinesThe simplest way to describe the guidelines to programming the business POJO is to show an example.
The following sample code shows the business logic POJO for the HelloWorld application; see the explanation after the example for the code shown in bold:
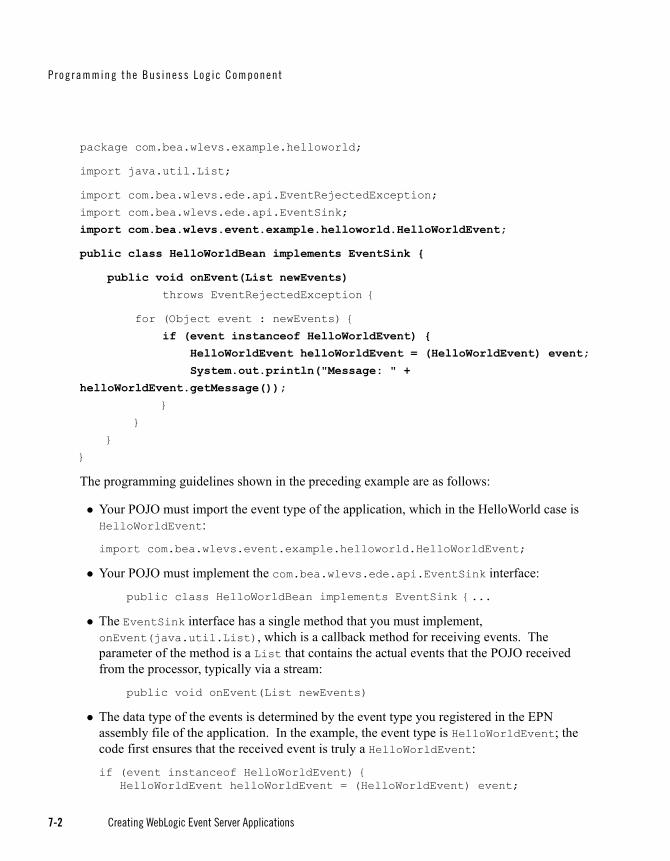
Programming the Bus iness Log ic Component
7-2 Creating WebLogic Event Server Applications
package com.bea.wlevs.example.helloworld;
import java.util.List;
import com.bea.wlevs.ede.api.EventRejectedException;
import com.bea.wlevs.ede.api.EventSink;
import com.bea.wlevs.event.example.helloworld.HelloWorldEvent;
public class HelloWorldBean implements EventSink
public void onEvent(List newEvents)
throws EventRejectedException
for (Object event : newEvents)
if (event instanceof HelloWorldEvent)
HelloWorldEvent helloWorldEvent = (HelloWorldEvent) event;
System.out.println("Message: " +
helloWorldEvent.getMessage());
The programming guidelines shown in the preceding example are as follows:
Your POJO must import the event type of the application, which in the HelloWorld case is HelloWorldEvent:
import com.bea.wlevs.event.example.helloworld.HelloWorldEvent;
Your POJO must implement the com.bea.wlevs.ede.api.EventSink interface:
public class HelloWorldBean implements EventSink ...
The EventSink interface has a single method that you must implement, onEvent(java.util.List), which is a callback method for receiving events. The parameter of the method is a List that contains the actual events that the POJO received from the processor, typically via a stream:
public void onEvent(List newEvents)
The data type of the events is determined by the event type you registered in the EPN assembly file of the application. In the example, the event type is HelloWorldEvent; the code first ensures that the received event is truly a HelloWorldEvent:
if (event instanceof HelloWorldEvent) HelloWorldEvent helloWorldEvent = (HelloWorldEvent) event;

Access ing a Re lat iona l Database
Creating WebLogic Event Server Applications 7-3
This event type is a JavaBean that was configured in the EPN assembly file as shown:
<wlevs:event-type-repository> <wlevs:event-type type-name="HelloWorldEvent"> <wlevs:class> com.bea.wlevs.event.example.helloworld.HelloWorldEvent </wlevs:class> </wlevs:event-type></wlevs:event-type-repository>
See “Creating the EPN Assembly File” on page 2-7 for procedural information about creating the EPN assembly file, and WebLogic Event Server Spring Tag Reference for reference information.
Events are instances of the appropriate JavaBean, so you access the individual properties using the standard getXXX() methods. In the example, the HelloWorldEvent has a property called message:
System.out.println("Message: " + helloWorldEvent.getMessage());
For complete API reference information about the WebLogic Event Server APIs described in this section, see the Javadocs.
Accessing a Relational DatabaseYou can use the Java Database Connectivity (JDBC) APIs in your business logic POJO to access data contained in a relational database. WebLogic Event Server supports JDBC 3.0.
Follow these steps to use JDBC in your business logic POJO:
1. Configure JDBC for WebLogic Event Server.
For details, see Configuring Access to a Relational Database.
2. In your business logic POJO Java code, you can start using the JDBC APIs as usual, by using a DataSource or instantiating a DriverManager. For example:
OracleDataSource ods = new OracleDataSource(); ods.setURL("jdbc:oracle:thin:user/passwd@localhost:1521/XE"); Connection conn = ods.getConnection();
See Getting Started with the JDBC API for additional programming information.

Programming the Bus iness Log ic Component
7-4 Creating WebLogic Event Server Applications

Creating WebLogic Event Server Applications 8-1
C H A P T E R 8
Assembling and Deploying WebLogic Event Server Applications
This section contains information on the following subjects:
“Overview of Application Assembly and Deployment” on page 8-1
“Assembling a WebLogic Event Server Application: Main Steps” on page 8-2
“Deploying WebLogic Event Server Applications: Main Steps” on page 8-8
Overview of Application Assembly and DeploymentThe term application assembly refers to the process of packaging the components of an application, such as the Java files and XML configuration files, into an OSGI bundle that can be deployed to WebLogic Event Server. The term application deployment refers to the process of making an application available for processing client requests in a WebLogic Event Server domain.
In the context of WebLogic Event Server assembly and deployment, an application is defined as an OSGi bundle JAR file that contains the following artifacts:
The compiled Java class files that implement some of the components of the application, such as the adapters, adapter factory, and POJO that contains the business logic. T
One or more WebLogic Event Server configuration XML files that configure the components of the application. The only type of component that is required to have a configuration file is the complex event processor; all other components (adapters and streams) do not require configuration files if the default configuration of the component is

Assembl ing and Dep loy ing WebLogic Event Se rve r App l i ca t i ons
8-2 Creating WebLogic Event Server Applications
adequate. You can combine all configuration files into a single file, or separate the configuration for individual components in their own files.
The configuration files must be located in the META-INF/wlevs directory of the OSGi bundle JAR file if you plan to dynamically deploy the bundle. If you have an application already present in the domain directory, then the configuration files need to be extracted in the same directory.
An EPN assembly file that describes all the components of the application and how they are connected to each other.
The EPN assembly file must be located in the META-INF/spring directory of the OSGi bundle JAR file.
A MANIFEST.MF file that describes the contents of the JAR.
The OSGI bundle declares dependencies by specifying imported and required packages. It also provides functionality to other bundles by exporting packages. If a bundle is required to provide functionality to other bundles, you must use Export-Package to allow other bundles to reference named packages. All packages not exported are not available outside the bundle.
See “Assembling a WebLogic Event Server Application: Main Steps” on page 8-2 for detailed instructions on creating this deployment bundle.
After you have assembled the application, you deploy it by making it known to the WebLogic Event Server domain using the Deployer utility (com.bea.wlevs.deployment.Deployer). For detailed instructions, see “Deploying WebLogic Event Server Applications: Main Steps” on page 8-8.
Once the application is deployed to WebLogic Event Server, the configured adapters immediately start listening for events for which they are configured, such as financial data feeds and so on.
Note: WebLogic Event Server applications are built on top of the Spring Framework and OSGi Service Platform and make extensive use of their technologies and services. See “Additional Information about Spring and OSGi” on page A-1 for links to reference and conceptual information about Spring and OSGi.
Assembling a WebLogic Event Server Application: Main Steps
Assembling a WebLogic Event Server application refers to bundling the artifacts that make up the application into an OSGi bundle JAR file. These artifacts include compiled Java classes, the

Assembl ing a WebLog ic Event Se rve r App l icat i on : Main S teps
Creating WebLogic Event Server Applications 8-3
XML files that configure the components of the application (such as the processors or adapters), the EPN assembly file, and the MANIFEST.MF file.
For simplicity, the following procedure creates a temporary directory that contains the required artifacts, and then jars up the contents of this temporary directory. This is just a suggestions and you are not required, of course, to assemble the application using this method.
See “Additional Information about Spring and OSGi” on page A-1 for links to reference and conceptual information about Spring and OSGi.
Note: See the HelloWorld example source directory for a sample build.xml Ant file that performs many of the steps described below. The build.xml file is located in WLEVS_HOME\samples\source\applications\helloworld, where WLEVS_HOME refers to the main installation directory, such as d:\beahome\wlevs20.
To assemble a WebLogic Event Server application:
1. Open a command window and set your environment as described in Setting Up Your Development Environment
2. Create an empty directory, such as output:
prompt> mkdir output
3. Compile all application Java files into the output directory.
4. Create an output/META-INF/spring directory.
5. Copy the EPN assembly file that describes the components of your application and how they are connected into the output/META-INF/spring directory.
See “Creating the EPN Assembly File” on page 2-7 for details about this file.
6. Create an output/META-INF/wlevs directory.
7. Copy the XML files that configure the components of your application (such as the processors or adapters) into the output/META-INF/wlevs directory. You create these XML files during the course of creating your application, as described in “Overview of the WebLogic Event Server Programming Model” on page 2-1.
8. Create a MANIFEST.MF file that contains descriptive information about the bundle.
See “Creating the MANIFEST.MF File” on page 8-4.
9. If you need to access third-party JAR files from your WebLogic Event Server application, see “Accessing Third-Party JAR Files From Your Application” on page 8-6.

Assembl ing and Dep loy ing WebLogic Event Se rve r App l i ca t i ons
8-4 Creating WebLogic Event Server Applications
10. Create a JAR file that contains the contents of the output directory. Be sure you specify the MANIFEST.MF file you created in the previous step rather than the default manifest file.
You can name the JAR file anything you want. In the WebLogic Event Server examples, the name of the JAR file is a combination of Java package name and version, such as:
com.bea.wlevs.example.helloworld_1.0.0.0.jar
Consider using a similar naming convention to clarify which bundles are deployed to the server.
See the Apache Ant documentation for information on using the jar task or the J2SE documentation for information on using the jar command-line tool.
Creating the MANIFEST.MF FileThe structure and contents of the MANIFEST.MF file is specified by the OSGi Framework. Although the value of many of the headers in the file is specific to your application or business, many of the headers are required by WebLogic Event Server. In particular, the MANIFEST.MF file defines the following:
Application name—Specified with the Bundle-Name header.
Symbolic application name—Specified with the Bundle-SymbolicName header. Many of the WebLogic Event Server tools, such as the wlevs.Admin utility and JMX subsystem, use the symbolic name of the bundle when referring to the application.
Application version—Specified with the Bundle-Version header.
Imported packages—Specified with the Import-Package header. WebLogic Event Server requires that you import the following packages at a minimum:
Import-Package: com.bea.wlevs.adapter.defaultprovider;version="2.0.0.0", com.bea.wlevs.ede;version="2.0.0.0", com.bea.wlevs.ede.api;version="2.0.0.0", com.bea.wlevs.ede.impl;version="2.0.0.0", org.osgi.framework;version="1.3.0", org.springframework.beans.factory;version="2.0.5", org.apache.commons.logging;version="1.1.0", com.bea.wlevs.spring;version="2.0.0.0", com.bea.wlevs.util;version="2.0.0.0", org.springframework.beans;version="2.0.5", org.springframework.util;version="2.0", org.springframework.core.annotation;version="2.0.5", org.springframework.beans.factory;version="2.0.5", org.springframework.beans.factory.config;version="2.0.5",

Assembl ing a WebLog ic Event Se rve r App l icat i on : Main S teps
Creating WebLogic Event Server Applications 8-5
org.springframework.osgi.context;version="1.0.0", org.springframework.osgi.service;version="1.0.0"
If you have extended the configuration of an adapter, then you must also import the following packages:
javax.xml.bind;version="2.0", javax.xml.bind.annotation;version=2.0, javax.xml.bind.annotation.adapters;version=2.0, javax.xml.bind.attachment;version=2.0, javax.xml.bind.helpers;version=2.0, javax.xml.bind.util;version=2.0, com.bea.wlevs.configuration;version="2.0.0.0", com.bea.wlevs.configuration.application;version="2.0.0.0", com.sun.xml.bind.v2;version="2.0.2"
Exported packages—Specified with the Export-Package header. You should specify this header only if you need to share one or more application classes with other deployed applications. A typical example is sharing an event type JavaBean.
If possible, you should export packages that include only the interfaces, and not the implementation classes themselves. If othere applications are using the exported classes, you will be unable to fully undeploy the application that is exporting the classes.
Exported packages are server-wide, so be sure their names are unique across the server.
The following complete MANIFEST.MF file is from the HelloWorld example, which extends the configuration of its adapter:
Manifest-Version: 1.0
Archiver-Version:
Build-Jdk: 1.5.0_06
Extension-Name: example.helloworld
Specification-Title: 1.0.0.0
Specification-Vendor: BEA Systems, Inc.
Implementation-Vendor: BEA Systems, Inc.
Implementation-Title: example.helloworld
Implementation-Version: 1.0.0.0
Bundle-Version: 2.0.0.0
Bundle-ManifestVersion: 1
Bundle-Vendor: BEA Systems, Inc.
Bundle-Copyright: Copyright (c) 2006 by BEA Systems, Inc.
Import-Package: com.bea.wlevs.adapter.defaultprovider;version="2.0.0.0",

Assembl ing and Dep loy ing WebLogic Event Se rve r App l i ca t i ons
8-6 Creating WebLogic Event Server Applications
com.bea.wlevs.ede;version="2.0.0.0",
com.bea.wlevs.ede.impl;version="2.0.0.0",
com.bea.wlevs.ede.api;version="2.0.0.0",
org.osgi.framework;version="1.3.0",
org.apache.commons.logging;version="1.1.0",
com.bea.wlevs.spring;version="2.0.0.0",
com.bea.wlevs.util;version="2.0.0.0",
net.sf.cglib.proxy,
net.sf.cglib.core,
net.sf.cglib.reflect,
org.aopalliance.aop,
org.springframework.aop.framework;version="2.0.5",
org.springframework.aop;version="2.0.5",
org.springframework.beans;version="2.0.5",
org.springframework.util;version="2.0",
org.springframework.core.annotation;version="2.0.5",
org.springframework.beans.factory;version="2.0.5",
org.springframework.beans.factory.config;version="2.0.5",
org.springframework.osgi.context;version="1.0.0",
org.springframework.osgi.service;version="1.0.0",
javax.xml.bind;version="2.0",
javax.xml.bind.annotation;version=2.0,
javax.xml.bind.annotation.adapters;version=2.0,
javax.xml.bind.attachment;version=2.0,
javax.xml.bind.helpers;version=2.0,
javax.xml.bind.util;version=2.0,
com.bea.wlevs.configuration;version="2.0.0.0",
com.bea.wlevs.configuration.application;version="2.0.0.0",
com.sun.xml.bind.v2;version="2.0.2"
Bundle-Name: example.helloworld
Bundle-Description: WLEvS example helloworld
Bundle-SymbolicName: helloworld
Accessing Third-Party JAR Files From Your ApplicationWhen creating your WebLogic Event Server applications, you might need to access legacy libraries within existing third-party JAR files. There are two ways to ensure access to this legacy code:

Assembl ing a WebLog ic Event Se rve r App l icat i on : Main S teps
Creating WebLogic Event Server Applications 8-7
Recommended. Package the third-party JAR files in your WebLogic Event Server application JAR file. You can put the JAR files anywhere you want.
However, to ensure that your WebLogic Event Server application finds the classes in the third-party JAR file, you must update the application classpath by adding the Bundle-Classpath header to the MANIFEST.MF file. Set Bundle-Classpath to a comma-separate list of the JAR file path names that should be searched for classes and resources. Use a period (.) to specify the bundle itself. For example:
Bundle-Classpath: ., commons-logging.jar, myExcitingJar.jar, myOtherExcitingJar.jar
If you need to access native libraries, you must also package them in your JAR file and use the Bundle-NativeCode header of the MANIFEST.MF file to specify their location in the JAR.
If the JAR files include libraries used by all applications deployed to WebLogic Event Server, such as JDBC drivers, you can add the JAR file to the server’s bootclasspath by specifying the -Xbootclasspath/a option to the java command in the scripts used to start up an instance of the server.
The name of the server start script is startwlevs.cmd (Windows) or startwlevs.sh (UNIX), and the script is located in the main domain directory. The out-of-the-box sample domains are located in WLEVS_HOME/samples/domains, and the user domains are located in BEA_HOME/user_projects/domains, where WLEVS_HOME refers to the main WebLogic Event Server installation directory, such as d:\beahome\wlevs20, and BEA_HOME refers to the directory above WLEVS_HOME, such as d:\beahome.
Update the start script by adding the -Xbootclasspath/a option to the java command that executes the wlevs_2.0.jar file. Set the -Xbootclasspath/a option to the full pathname of the third-party JAR files you want to access system-wide.
For example, if you want all deployed applications to be able to access a JAR file called e:\jars\myExcitingJAR.jar, update the java command in the start script as follows (updated section shown in bold):
%JAVA_HOME%\bin\java -Dwlevs.home=%USER_INSTALL_DIR% -Dbea.home=%BEA_HOME% -Xbootclasspath/a:e:\jars\myExcitingJAR.jar -jar "%USER_INSTALL_DIR%\bin\wlevs_2.0.jar" -disablesecurity %1 %2 %3 %4 %5 %6

Assembl ing and Dep loy ing WebLogic Event Se rve r App l i ca t i ons
8-8 Creating WebLogic Event Server Applications
Deploying WebLogic Event Server Applications: Main Steps
The following procedure describes how to deploy an application to WebLogic Event Server using the Deployer utility. It is assumed in the procedure that you have assembled your application as described in “Assembling a WebLogic Event Server Application: Main Steps” on page 8-2.
See Deployer Command-Line Reference for complete reference information about the Deployer utility, in particular options to the utility that are supported in addition to the ones described in this section. See “Additional Information about Spring and OSGi” on page A-1 for links to reference and conceptual information about Spring and OSGi.
1. Open a command window and set your environment as described in Setting Up Your Development Environment.
2. Update your CLASSPATH variable to include the com.bea.wlevs.deployment.client_2.0.jar JAR file, located in the WLEVS_HOME/bin directory where, WLEVS_HOME refers to the main WebLogic Event Server installation directory, such as /beahome/wlevs20.
Alternatively, you can use the -jar option at the command line to call this JAR file, such as:
prompt> java -jar /beahome/wlevs20/bin/com.bea.wlevs.deployment.client_2.0.jar -url ...
It is assumed in the remainder of this section that you have updated your CLASSPATH and are going to call the com.bea.wlevs.deployment.Deployer class directly.
Note: If you are running the deployer utility on a remote computer, see Running the Deployer Utility Remotely for instructions.
3. Be sure you have configured Jetty for the WebLogic Event Server instance to which you are deploying your application.
See Configuring WebLogic Event Server.
4. In the command window, run the com.bea.wlevs.deployment.Deployer utility using the following syntax to install your application:
prompt> java com.bea.wlevs.deployment.Deployer -url http://host:port/wlevsdeployer -user user -password password -install application_jar_file
where

Deplo y ing WebLog ic Event Serve r App l i cat ions : Ma in Steps
Creating WebLogic Event Server Applications 8-9
– host refers to the hostname of the computer on which WebLogic Event Server is running.
– port refers to the port number to which WebLogic Event Server listens; its value is 9002 by default. This port is specified in the config.xml file that describes your WebLogic Event Server domain, located in the DOMAIN_DIR/config directory, where DOMAIN_DIR refers to your domain directory. The port number is the value of the <Port> child element of the <Netio> element:
<Netio> <Name>NetIO</Name> <Port>9002</Port></Netio>
– user refers to the username of the WebLogic Event Server administrator.
– password refers to the password of the WebLogic Event Server administrator.
– application_jar_file refers to your application JAR file, assembled into an OSGi bundle as described in “Assembling a WebLogic Event Server Application: Main Steps” on page 8-2.
For example, if WebLogic Event Server is running on host ariel, listening at port 9002, username and password of the administrator is wlevs/wlevs, and your application JAR file is called myapp_1.0.0.0.jar and is located in the /applications directory, then the command is:
prompt> java com.bea.wlevs.deployment.Deployer -url http://ariel:9002/wlevsdeployer -user wlevs -password wlevs -install /applications/myapp_1.0.0.0.jar
5. After the application JAR file has been successfully installed, start the application using the following syntax:
prompt> java com.bea.wlevs.deployment.Deployer -url http://host:port/wlevsdeployer -user user -password password -start name
where name refers to the symbolic name of the application. The symbolic name is the value of the Bundle-SymbolicName header in the bundle’s MANIFEST.MF file.
For example:
prompt> java com.bea.wlevs.deployment.Deployer -url http://ariel:9002/wlevsdeployer -user wlevs -password wlevs -start myapp
As soon as you start the application, the adapter component(s) will immediately start listening for incoming events.
Assembl ing and Dep loy ing WebLogic Event Se rve r App l i ca t i ons
8-10 Creating WebLogic Event Server Applications
The Deployer utility provides additional options to stop, update, and uninstall an application JAR file. For details, see Deployer Command-Line Reference.
WebLogic Event Server uses the deployments.xml file to internally maintain its list of deployed application OSGi bundles. This file is located in in the DOMAIN_DIR directory, where DOMAIN_DIR refers to the main domain directory correspoding to the server instance to which you are deploying your application. See XSD Schema For the Deployment File for information about this file. This information is provided for your information only; BEA does not recommend updating the deployments.xml file manually.

Creating WebLogic Event Server Applications 9-1
C H A P T E R 9
Using the Load Generator to Test Your Application
This section contains information on the following subjects:
“Overview of the Load Generator Utility” on page 9-1
“Creating a Load Generator Property File” on page 9-2
“Creating a Data Feed File” on page 9-4
“Configuring the csvgen Adapter in Your Application” on page 9-4
Overview of the Load Generator UtilityThe load generator is a simple utility provided by WebLogic Event Server to simulate a data feed. The utility is useful for testing the EPL rules in your application without needing to connect to a real-world data feed.
The load generator reads an ASCII file that contains the sample data feed information and sends each data item to the configured port. The load generator reads items from the sample data file in order and inserts them into the stream, looping around to the beginning of the data file when it reaches the end; this ensures that a continuous stream of data is available, regardless of the number of data items in the file. You can configure the rate of sent data, from the rate at which it starts, the final rate, and how long it takes the load generator to ramp up to the final rate.
In your application, you must use the WebLogic Event Server-provided csvgen adapter, rather than your own adapter, to read the incoming data; this is because the csvgen adapter is specifically coded to decipher the data packets generated by the load generator.
To use the load generator, follow these steps:

Using the Load Generato r t o Test Your App l ica t i on
9-2 Creating WebLogic Event Server Applications
1. Optionally create a property file that contains configuration properties for particular run of the load generator; these properties specify the location of the file that contains simulated data, the port to which the generator feeds the data, and so on.
WebLogic Event Server provides a default property file you can use if the default property values are adequate.
See “Creating a Load Generator Property File” on page 9-2.
2. Create a file that contains the actual data feed values.
See “Creating a Data Feed File” on page 9-4.
3. Configure the csvgen adapter so that it correctly reads the data feed generated by the load generator. You configure the adapter in the EPN assembly file that describes your WebLogic Event Server application.
See “Configuring the csvgen Adapter in Your Application” on page 9-4.
4. 0pen a new command window and set your environment as described in Setting Up Your Development Environment.
5. Change to the WLEVS_HOME\utils\load-generator directory, where WLEVS_HOME refers to the main WebLogic Event Server installation directory, such as d:\beahome\wlevs20.
6. Run the load generator specifying the properties file you created in step 1 to begin the simulated data feed. For example, if the name of your properties file is c:\loadgen\myDataFeed.prop, execute the following command:
prompt> runloadgen.cmd c:\loadgen\myDataFeed.prop
If you redploy your application, you must also restart the load generator.
Creating a Load Generator Property FileThe load generator uses an ASCII properties file for its configuration purposes. Properties include the location of the file that contains the sample data feed values, the port to which the utility should send the data feed, and so on.
WebLogic Event Server provides a default properties file called csvgen.prop, located in the WLEVS_HOME\utils\load-generator directory, where WLEVS_HOME refers to the main WebLogic Event Server installation directory, such as d:\beahome\wlevs20.
The format of the file is simple: each property-value pair is on its own line. The following example shows the default csvgen.prop file; BEA recommends you use this file as template for your own property file:

Creat ing a Load Genera to r P rope r t y F i l e
Creating WebLogic Event Server Applications 9-3
test.csvDataFile=test.csv
test.port=9001
test.packetType=CSV
test.mode=client
test.senders=1
test.latencyStats=false
test.statInterval=2000
WARNING: If you create your own properties file, you must include the test.packetType, test.mode, test.senders, test.latencyStats, and test.statInterval properties exactly as shown above.
In the preceding sample properties file, the file that contains the sample data is called test.csv and is located in the same directory as the properties file. The load generator will send the data feed to port 9001.
The following table lists the additional properties you can set in your properties file.
Table 9-1 Load Generator Properties
Property Description Data Type
Required?
test.csvDataFile Specifies the file that contains the data feed values. String Yes.
test.port The port number to which the load generator should send the data feed.
Integer Yes.
test.secs Total duration of the load generator run, in seconds.
The default value is 30.
Integer No.
test.rate Final data rate, in messages per second.
The default value is 1.
Integer No.
test.startRate Initial data rate, in messages per second.
The default value is 1.
Integer No.
test.rampUpSecs Number of seconds to ramp up from test.startRate to test.rate.
The default value is 0.
Integer No.

Using the Load Generato r t o Test Your App l ica t i on
9-4 Creating WebLogic Event Server Applications
Creating a Data Feed FileThe file that contains the sample data feed values correspond to the event type registered for your WebLogic Event Server application. The file follows a simple format:
Each item of a particular data feed is on its own line.
Separate the fields of a data feed item with commas.
Do not include extraneous spaces before or after the commas, unless the space is literally part of the field value.
Include only string and numerical (integer, long, double, float, etc) data in a data feed file.
The following example shows a sample data feed file where each item corresponds to a person with name, age, and birthplace fields:
Lucy,23,Madagascar
Nick,44,Canada
Amanda,12,Malaysia
Juliet,43,Spain
Horatio,80,Argentina
Configuring the csvgen Adapter in Your ApplicationYou must use the csvgen adapter in your application because this WebLogic Event Server-provided adapter is specifically coded to read the data packets generated by the load generator.
You register the csvgen adapter using the <wlevs:adapter> tag in the EPN assembly file of your application, as with all adapters. Use the provider="csvgen" attribute to specify that the provider is the csvgen adapter, rather than your own adapter. Additionally, you must specify the following child tags:
<wlevs:instance-property name="port" value=configured_port>, where configured_port corresponds to the value of the test.port property in the load generator property file. See “Creating a Load Generator Property File” on page 9-2.
<wlevs:instance-property name="eventTypeName" value=event_type_name>, where event_type_name corresponds to the name of the event type that represents an item from the load-generated feed.

Conf igur ing the csvgen Adapter i n Your App l i cat ion
Creating WebLogic Event Server Applications 9-5
<wlevs:instance-property name="eventPropertyNames" value=ordered_list_of_properties>, where ordered_list_of_properties lists the names of the properties in the order that the load generator sends them, and consequently the csvgen adapter receives them.
Before showing an example of how to configure the adapter, first assume that your application registers an event type called PersonType in the EPN assembly file using the <wlevs:metada> method as shown:
<wlevs:event-type-repository>
<wlevs:event-type type-name="PersonType">
<wlevs:metadata>
<entry key="name" value="java.lang.String"/>
<entry key="age" value="java.lang.Integer"/>
<entry key="birthplace" value="java.lang.String"/>
</wlevs:metadata>
</wlevs:event-type>
</wlevs:event-type-repository>
This event type corresponds to the data feed file shown in “Creating a Data Feed File” on page 9-4.
To configure the csvgen adapter that receives this data, use the following <wlevs:adapter> tag:
<wlevs:adapter id="csvgenAdapter" provider="csvgen">
<wlevs:instance-property name="port" value="9001"/>
<wlevs:instance-property name="eventTypeName" value="PersonType"/>
<wlevs:instance-property name="eventPropertyNames"
value="name,age,birthplace"/>
</wlevs:adapter>
Note how the bolded values in the adapter configuration example correspond to the PersonType event type registration.
If you use <wlevs:class> to specify your own JavaBean when registering the event type, then the eventPropertyNames value corresponds to the JavaBean properties. For example, if your JavaBean has a getName() method, then one of the properties of your JavaBean is name.

Using the Load Generato r t o Test Your App l ica t i on
9-6 Creating WebLogic Event Server Applications
Creating WebLogic Event Server Applications A-1
A P P E N D I X A
Additional Information about Spring and OSGi
WebLogic Event Server applications are built on top of the Spring Framework and OSGi Service Platform. Therefore, it is assumed that you are familiar with these technologies and how to program within the frameworks.
For additional information about Spring and OSGi, see:
Spring Framework API 2.0
The Spring Framework - Reference Documentation (from Interface21)
Spring-OSGi Project
OSGi Service Platform Javadoc (Release 4)
OSGi Release 4 Core Specification

Addi t iona l I n fo rmat ion about Sp r ing and OSGi
A-2 Creating WebLogic Event Server Applications