basic suturing techniques aansa inaugural conference and agm sat 29-8-15
TRANSCRIPT


Basic Suturing Techniques
AANSA Inaugural Conference and AGM
Sat 29-8-15

Holding the needle
• Hold the needle 1/3 to 2/3 ratio in needle holder
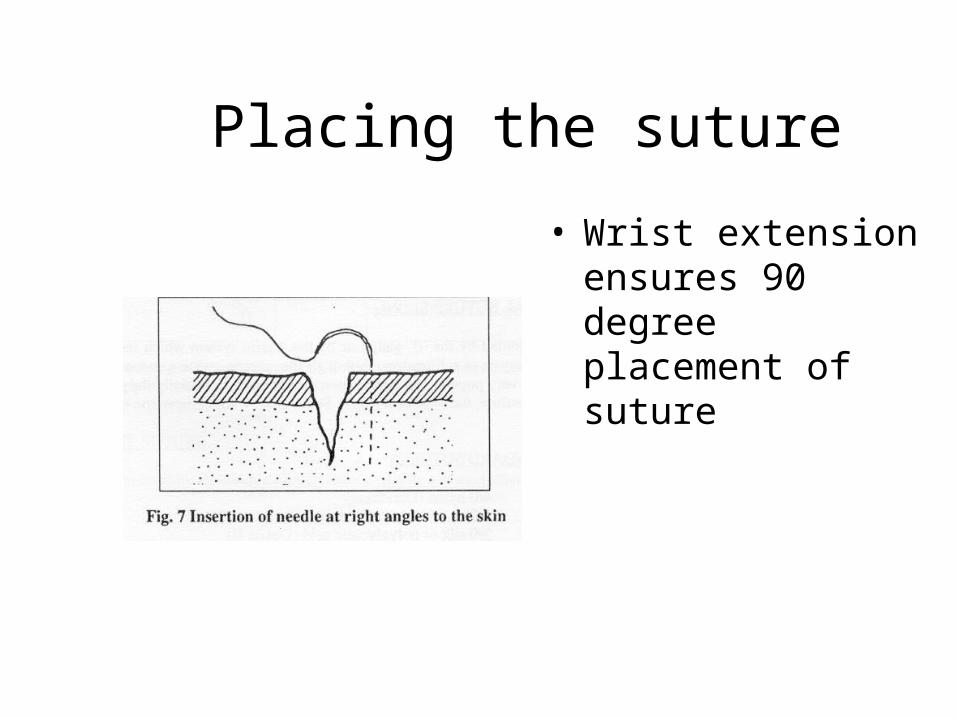
Placing the suture
• Wrist extension ensures 90 degree placement of suture


Placing the suture cont.
• Perpendicular exit through skin on second side
• Pull needle through in curve of needle

Ensure wound eversion

Eversion cont.


Tying the knot

The first throw

Sliding the first knot

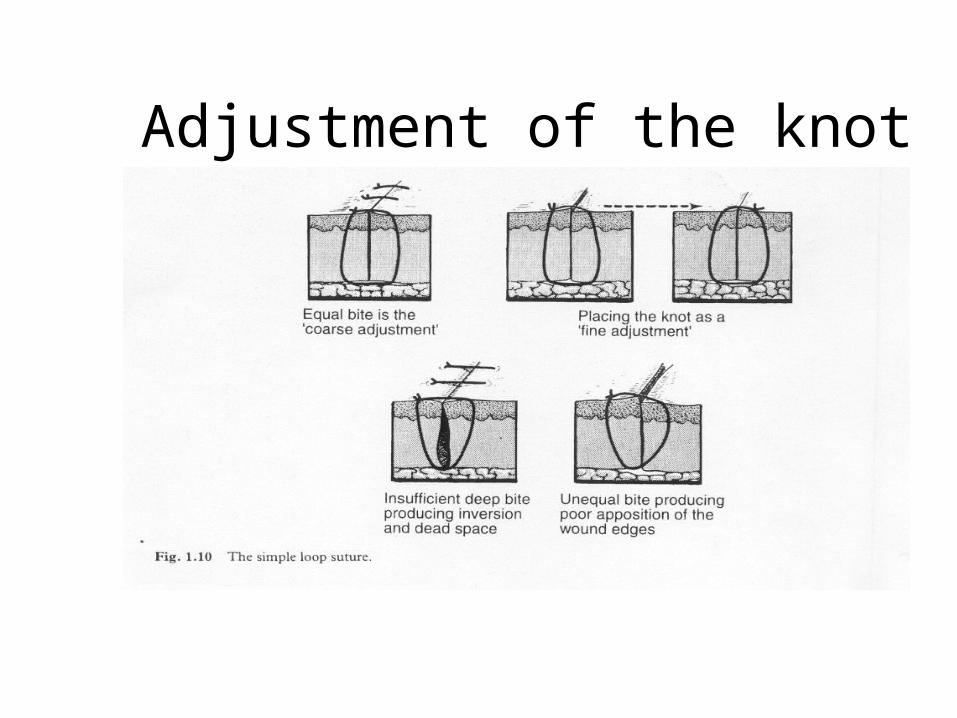
Adjustment of the knot


Limitations of superficial sutures

Buried absorbable suture with buried knot

Buried subdermal

Buried subdermal cont.

Buried suture and epidermal suture


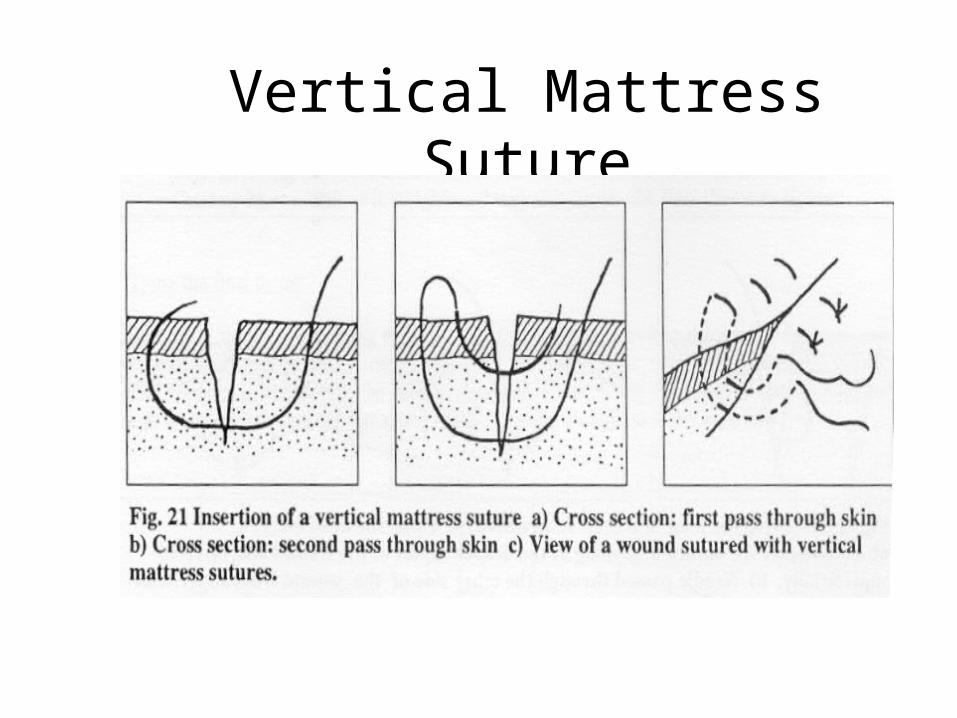
Vertical Mattress Suture

Vertical Mattress Suture
• Used if skin eversion is required and not possible with simple sutures
• Leaves obvious cross hatching
• Remove early


Horizontal Mattress Suture
• Good eversion
• Useful in thick glaborous skin (feet and hand)
• More ischaemia of wound edges

Subcuticular Suture
• Interrupted or running
• Superficial Dermis
• Place all sutures at same level
• No Suture marks
• Absorbable or non absorbable


Half buried Horizontal Mattress Suture
• Less Strangulation of flap edges
• Leave Knots on one side of wound only (eg. On areola for nipple suturing)


Other Closure Techniques
• Over and Over suture
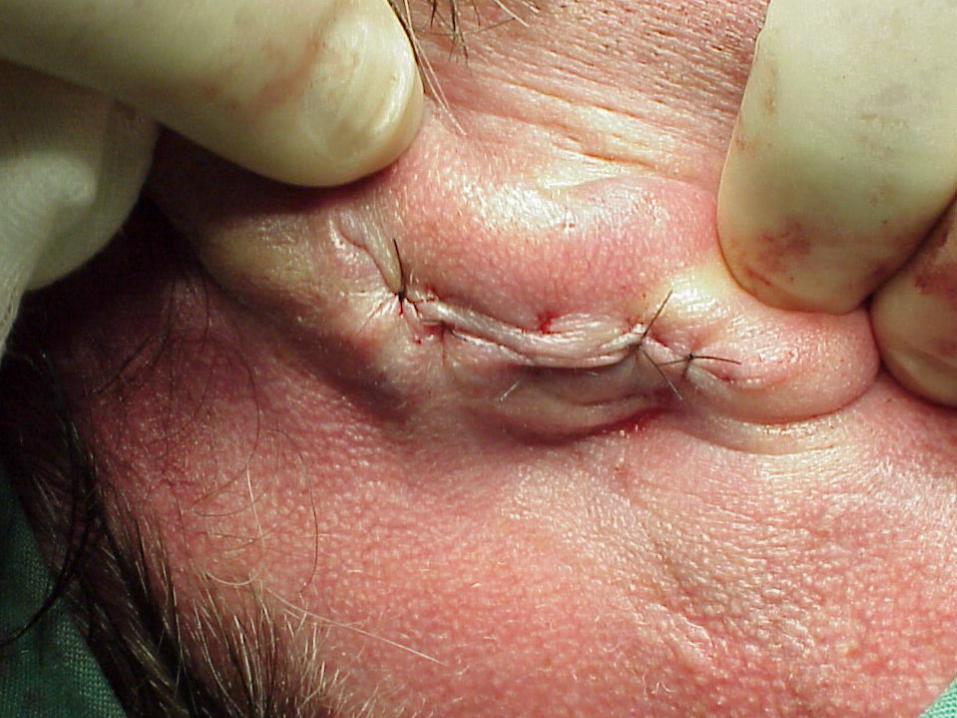
• Quick• Haemostatic• Useful on scalp• Beware ischaemia

Other Closure Techniques
• Skin staples– Quick
– Temporary use to approximate skin
– Use forceps to evert edges and prevent inversion
– Remove early to prevent skin marks

Other Closure Techniques
• Skin tapes– Approximate
wound edges
– Use dermal sutures to take tension & prevent wound inversion

Questions

THANK YOU
