basic forms, input/output, numbers, strings, dates
TRANSCRIPT
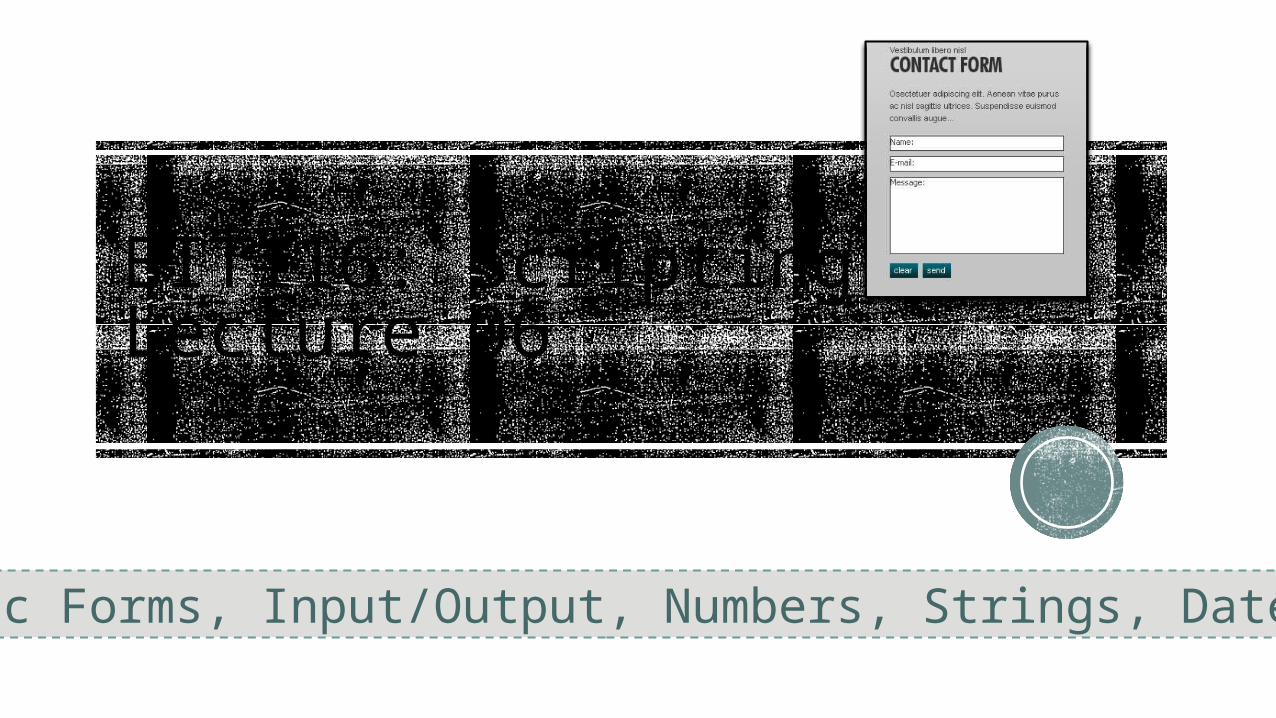
BIT116: ScriptingLecture 06
Basic Forms, Input/Output, Numbers, Strings, Dates
2
REMEMBER…
This BIT116 class is called Scripting and not Programming
One pithy way I've heard the difference between scripting and programming described is:
Scripting languages are for getting things done fast.
Programing languages are for getting something fast done ...like the ability to do scripting without having to know the intricacies of the backend programming!

3
Looking Ahead …
The Forms class is pretty HTML heavy today, because using JavaScript with HTML forms is FOUNDATIONAL to the use of JavaScript. It is one of the primary reasons that JavaScript is used out in the "real world."
With that said, this will be the last lecture for the next eight lectures (yes, eight!) that will be dealing with HTML/CSS beyond a most basic way.
Starting with our next lecture (Lecture 7) we will be spending most of our time working with straight JavaScript (and a little jQuery) and hardly touching HTML whatsoever. In fact, with Lecture 8, there is no HTML code being used in the <body> at all beyond an onLoad event in the <body> tag that points to a JavaScript function. We still need the HTML to hang the JavaScript on, but beyond this we'll be spending very little time dealing with HTML
So, this means we will be working almost exclusively with JavaScript alone from Lecture 7 all the way to Lecture 16.

4
A Return to JavaScript…
With today's class we'll be returning to JavaScript and a look at input and output, numbers, strings, and dates, as well as using JavaScript to validate input on some basic forms.
Occasionally we'll be including some jQuery code in the various examples from the lectures, and it will continue this way for the rest of the quarter. In the 'real world' most of the JavaScript you'll be doing will more than likely include jQuery (or some other JavaScript library, or combination of libraries).

5
Input/Output

6
Alerts and the If/Else Conditional Statement
One of the main uses of JavaScript is to provide feedback to people browsing your site. You can create an alert window that pops up and gives users the vitally important information that they need to know about your page.
We've already been working with the alert()method in some of the example pages and ICEs, but now is the time to "officially" discuss them, as well as a quick once over of the if…else conditional statement.

7
Alerts and the If/Else Conditional Statement CONTINUED
To Alert a User
This is all there is to it! Just put the text that you want to have appear within the alert() method in straight quotes.
alert("Welcome to my JavaScript page!");
In most JavaScript alert boxes, you’ll see some indication telling the user that the alert box was put up by a JavaScript command. This is a security feature to keep unscrupulous scripters from fooling hapless users. You can’t code around this. On Safari for Mac OS X, for example, it shows the URL of the site that opened the alert
8
Alerts and the If/Else Conditional Statement CONTINUED
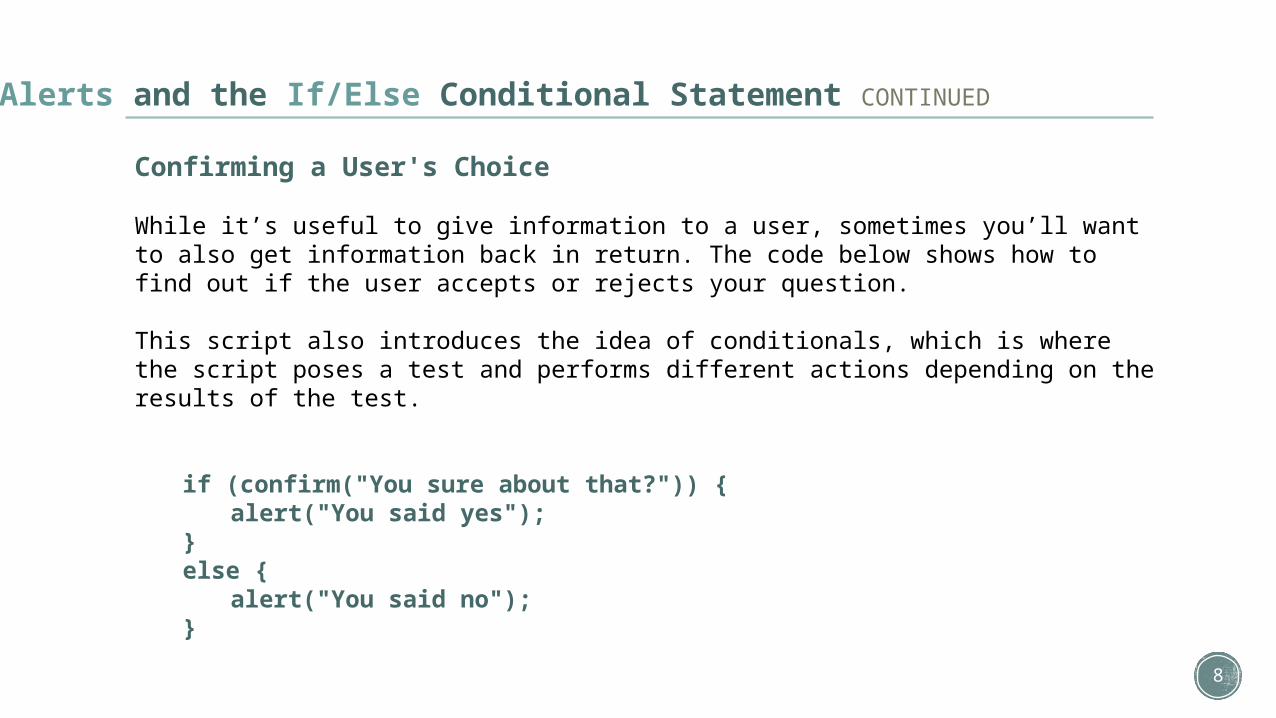
Confirming a User's Choice
While it’s useful to give information to a user, sometimes you’ll want to also get information back in return. The code below shows how to find out if the user accepts or rejects your question.
This script also introduces the idea of conditionals, which is where the script poses a test and performs different actions depending on the results of the test.
if (confirm("You sure about that?")) {alert("You said yes");
}else {
alert("You said no");}
9
Alerts and the If/Else Conditional Statement CONTINUED
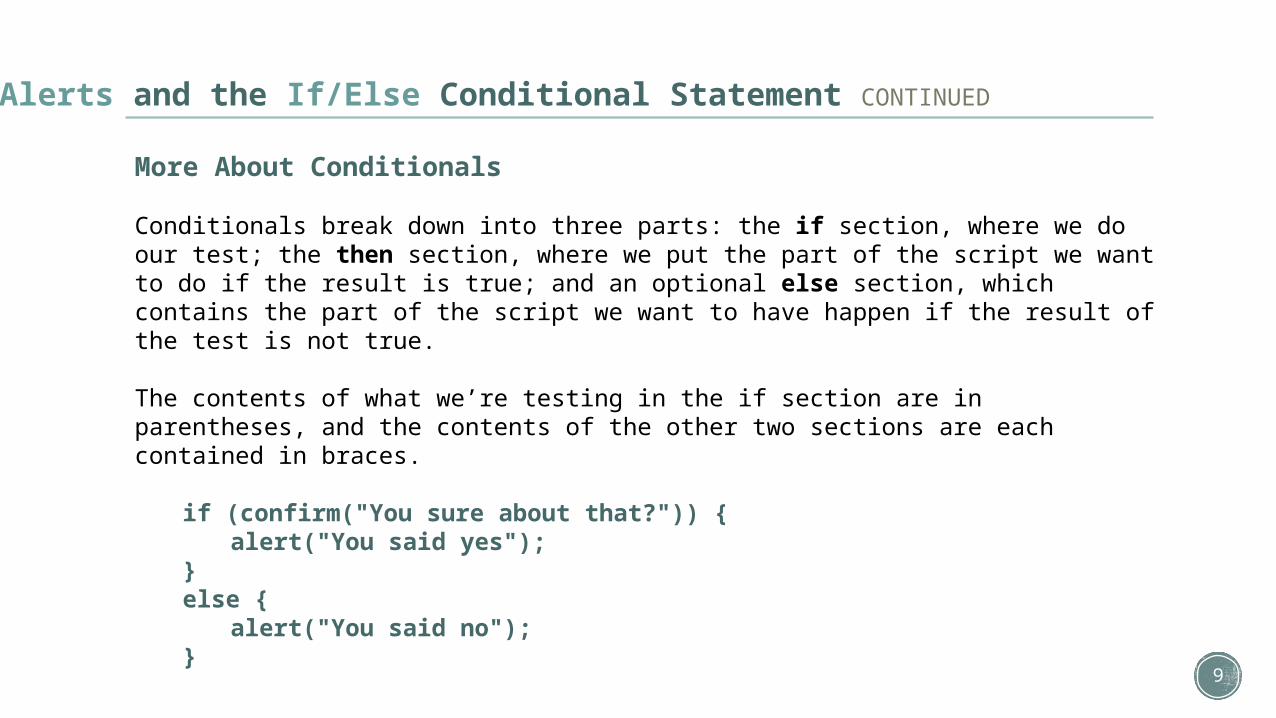
More About Conditionals
Conditionals break down into three parts: the if section, where we do our test; the then section, where we put the part of the script we want to do if the result is true; and an optional else section, which contains the part of the script we want to have happen if the result of the test is not true.
The contents of what we’re testing in the if section are in parentheses, and the contents of the other two sections are each contained in braces.
if (confirm("You sure about that?")) {alert("You said yes");
}else {
alert("You said no");}

10
Alerts and the If/Else Conditional Statement CONTINUED
To Confirm a Choice:
1. if (confirm("Are you sure you want to do that?")) {
The confirm() method takes one parameter (the question we want to ask the user) and returns either true or false, depending on the user’s response.
2. alert("You said yes");
If the user clicked the OK button, confirm() returns true, and an alert displays, saying, “You said yes”. As you can see, this is the then section of the code, even though there’s no then operator in JavaScript. The braces serve as the delineation of the then area.
3. }
This brace ends the part that occurs when confirm() returned a value of true.

11
Alerts and the If/Else Conditional Statement CONTINUED
To Confirm a Choice: CONTINUED
4. else {
Here, we begin the section that only happens when the user hits the Cancel button.
5. alert("You said no");
If the user clicked the Cancel button, confirm() returns false, and the message “You said no” is displayed.
6. }
This curly brace ends the entire if/else conditional statement.
Like Java, you can put as many statements as you wish inside the then and else braces.TIP

12
Prompts
Sometimes, instead of just asking a Yes/No question, you’ll want to get a more specific response. In that case, the example below allows you to ask a question (with a default answer) and receive the reply in turn.
To Prompt for a Response
1. var ans = prompt("Are you sure you want to do that?","");
Here, we’re declaring a variable (as discussed in Lecture 4). We use the var keyword to declare variables. In this case, the variable is called ans and assigned the result of the prompt(), i.e., whatever the user types into the prompt dialog.
The prompt() method is passed two pieces of information (officially called parameters), separated by a comma: the question for the user and the default answer. It returns either the user’s response or null; “null” occurs when the user hits Cancel, when there is no default and the user hits OK, or when the user clears the default answer and hits OK. For those browsers where a prompt shows a close box control, using that also returns a null result.
13
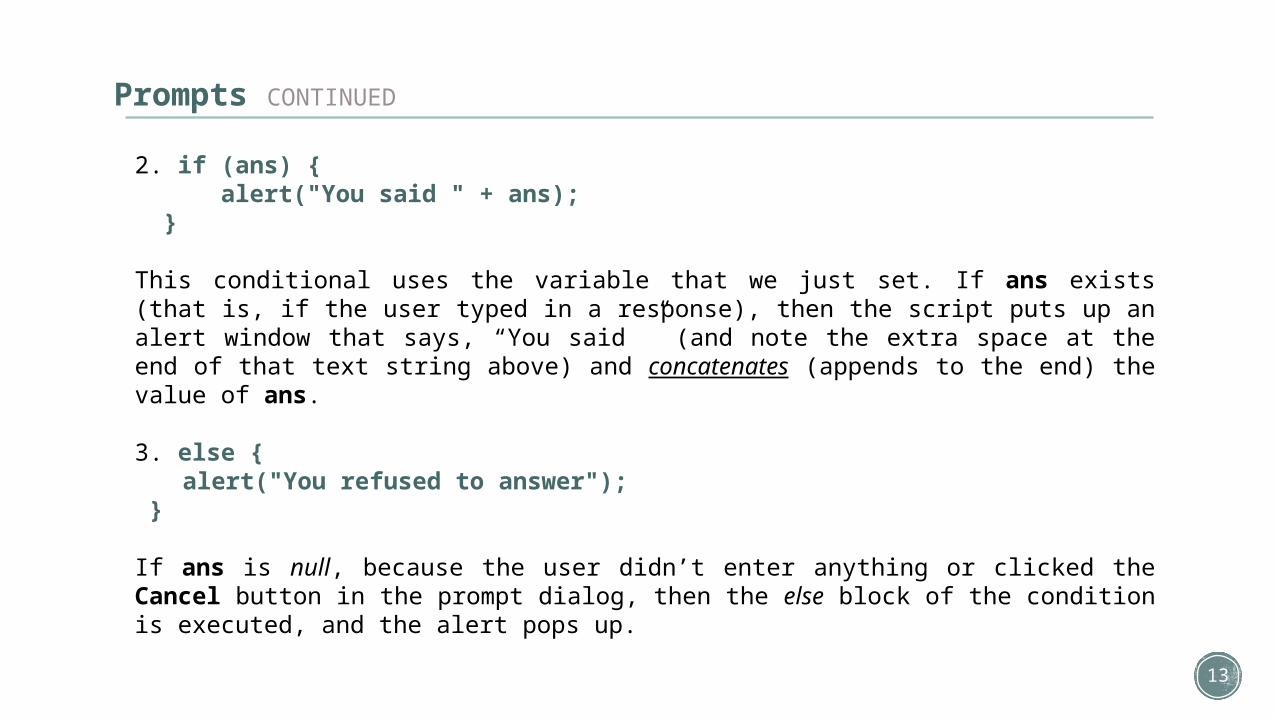
Prompts CONTINUED
2. if (ans) { alert("You said " + ans); }
This conditional uses the variable that we just set. If ans exists (that is, if the user typed in a response), then the script puts up an alert window that says, “You said ” (and note the extra space at the end of that text string above) and concatenates (appends to the end) the value of ans.
3. else {alert("You refused to answer");
}
If ans is null, because the user didn’t enter anything or clicked the Cancel button in the prompt dialog, then the else block of the condition is executed, and the alert pops up.
14
Var and Scope
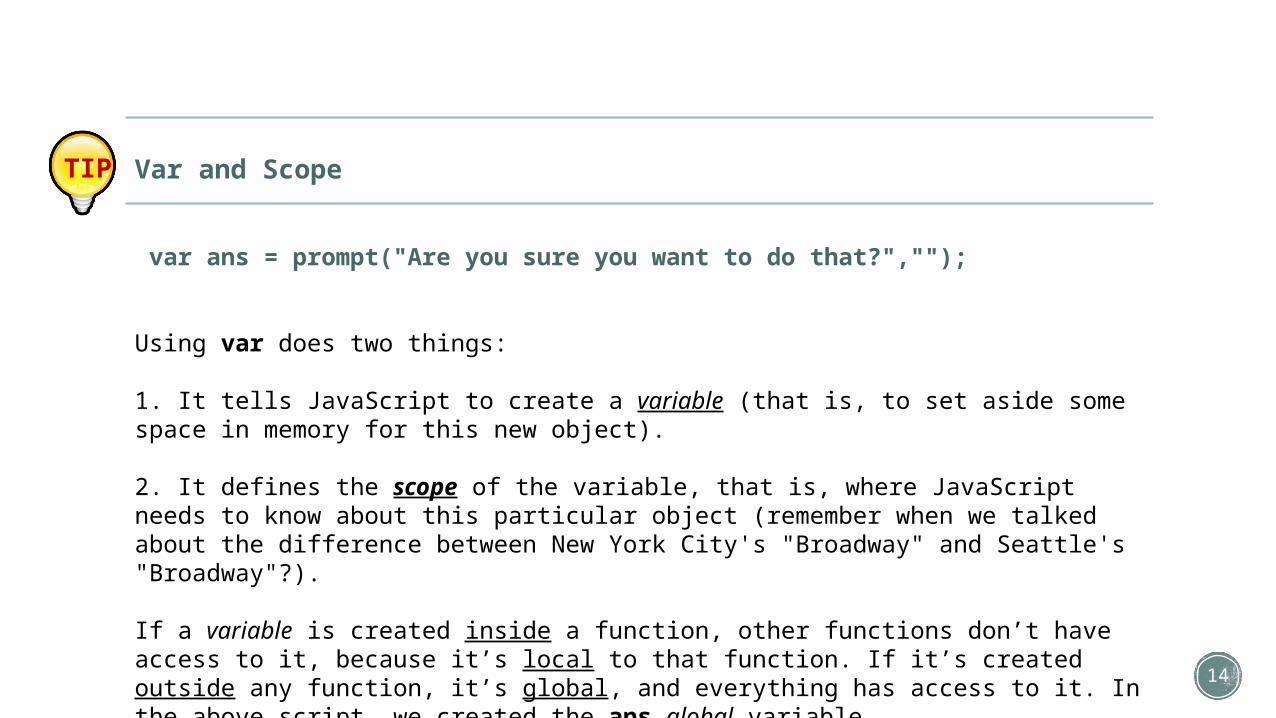
var ans = prompt("Are you sure you want to do that?","");
Using var does two things:
1. It tells JavaScript to create a variable (that is, to set aside some space in memory for this new object).
2. It defines the scope of the variable, that is, where JavaScript needs to know about this particular object (remember when we talked about the difference between New York City's "Broadway" and Seattle's "Broadway"?).
If a variable is created inside a function, other functions don’t have access to it, because it’s local to that function. If it’s created outside any function, it’s global, and everything has access to it. In the above script, we created the ans global variable.
TIP
15
Basic Forms
16
Basic Forms
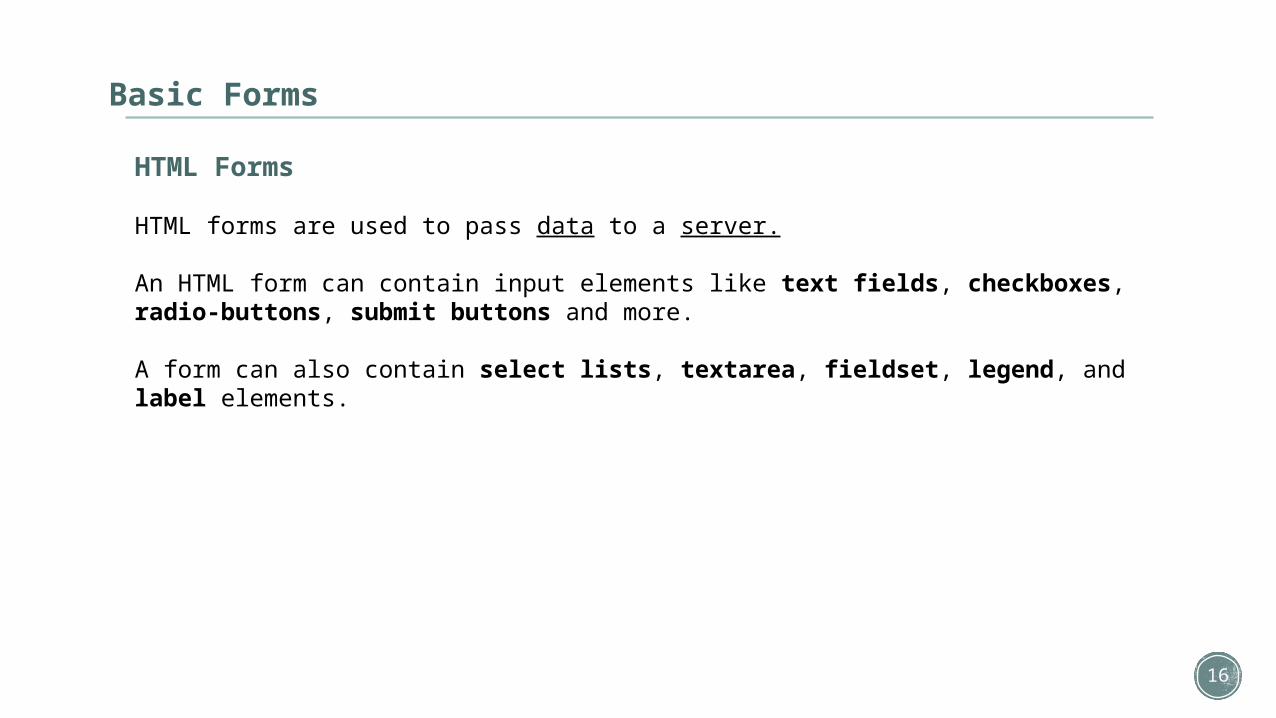
HTML Forms
HTML forms are used to pass data to a server.
An HTML form can contain input elements like text fields, checkboxes, radio-buttons, submit buttons and more.
A form can also contain select lists, textarea, fieldset, legend, and label elements.
17
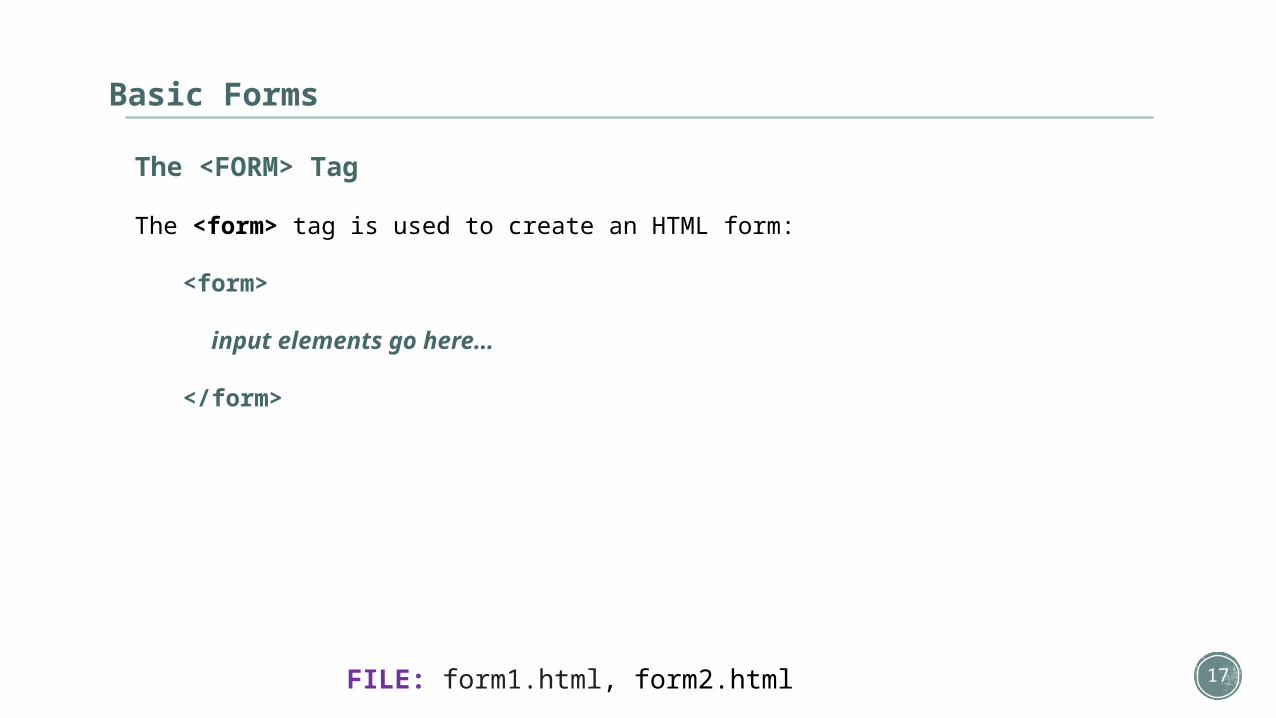
Basic Forms
The <FORM> Tag
The <form> tag is used to create an HTML form:
<form>
input elements go here…
</form>
FILE: form1.html, form2.html
18
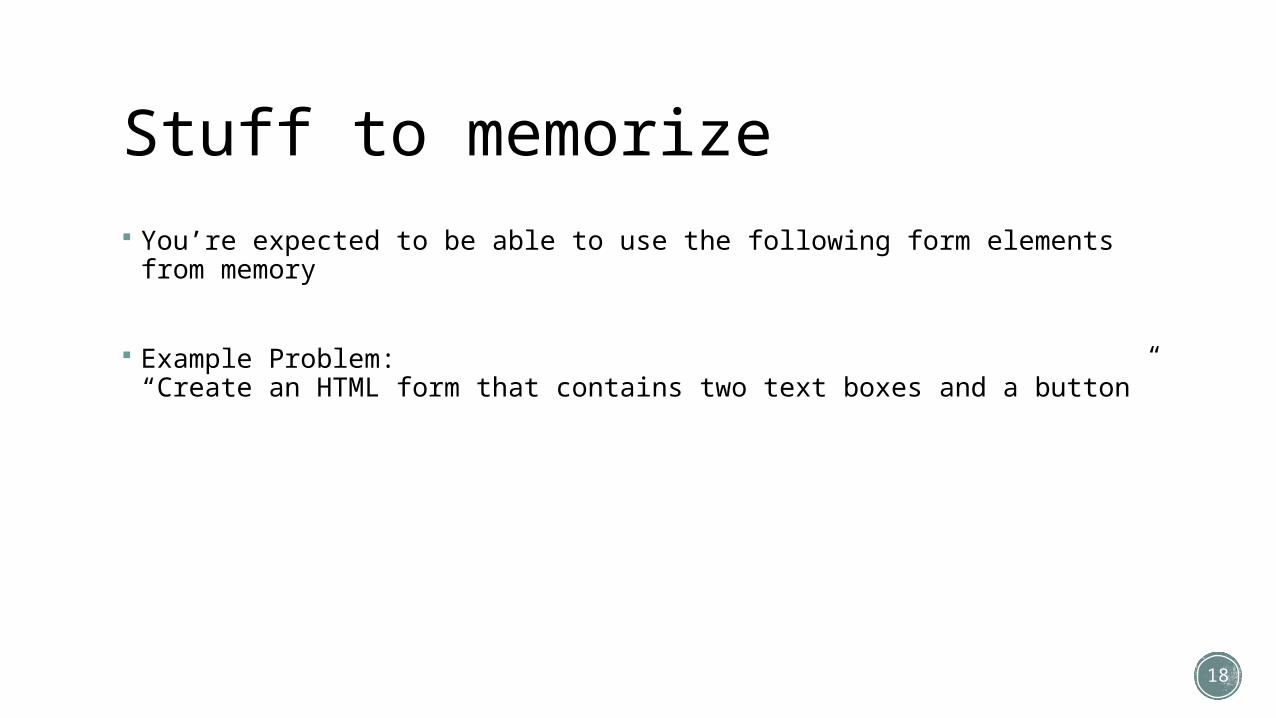
Stuff to memorize You’re expected to be able to use the following form elements from memory
Example Problem:“Create an HTML form that contains two text boxes and a button”
19
Basic Forms
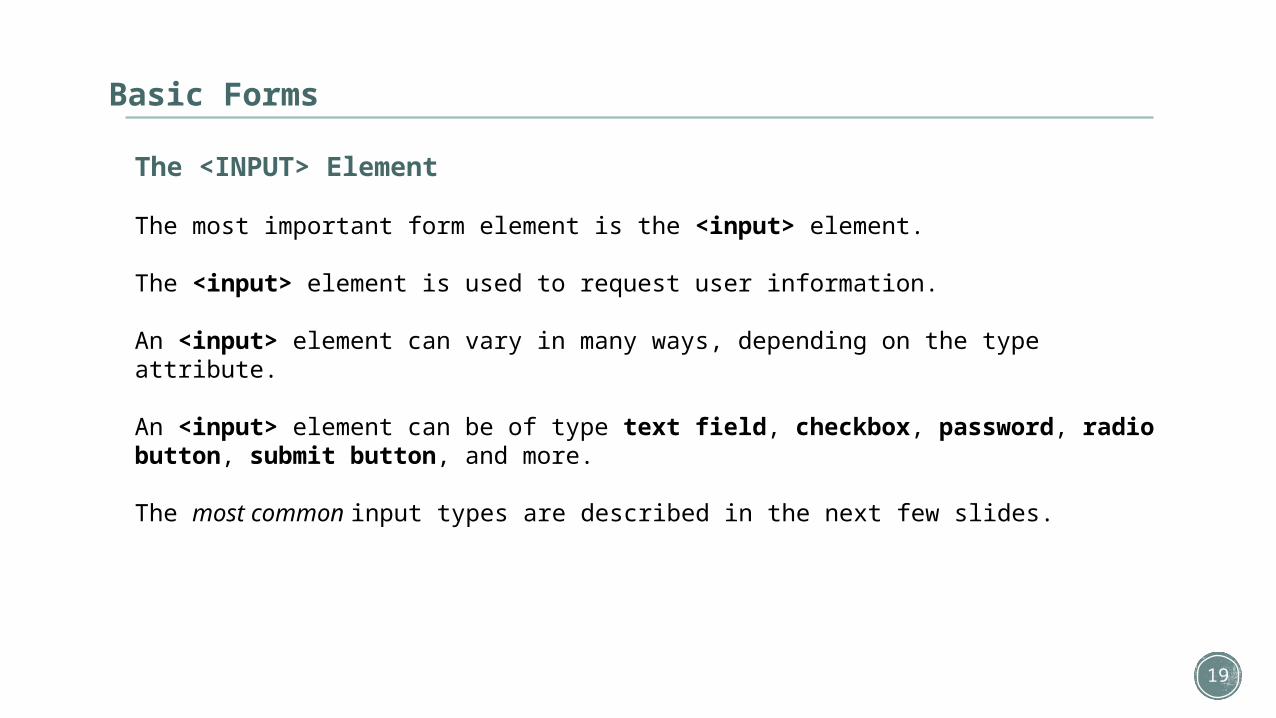
The <INPUT> Element
The most important form element is the <input> element.
The <input> element is used to request user information.
An <input> element can vary in many ways, depending on the type attribute.
An <input> element can be of type text field, checkbox, password, radio button, submit button, and more.
The most common input types are described in the next few slides.

20
Basic Forms
Text Fields
<input type="text"> defines a one-line input field into which a user can enter text.
<form> First name: <input type="text" name="firstname"><br> Last name: <input type="text" name="lastname"></form>
How the HTML code above looks in a browser:
Note: The form element itself is not visible. Also note that the default width of a text field is 20 characters. If you want to make it longer you can do so using the size element (e.g., size="30").
Note
21
Basic Forms
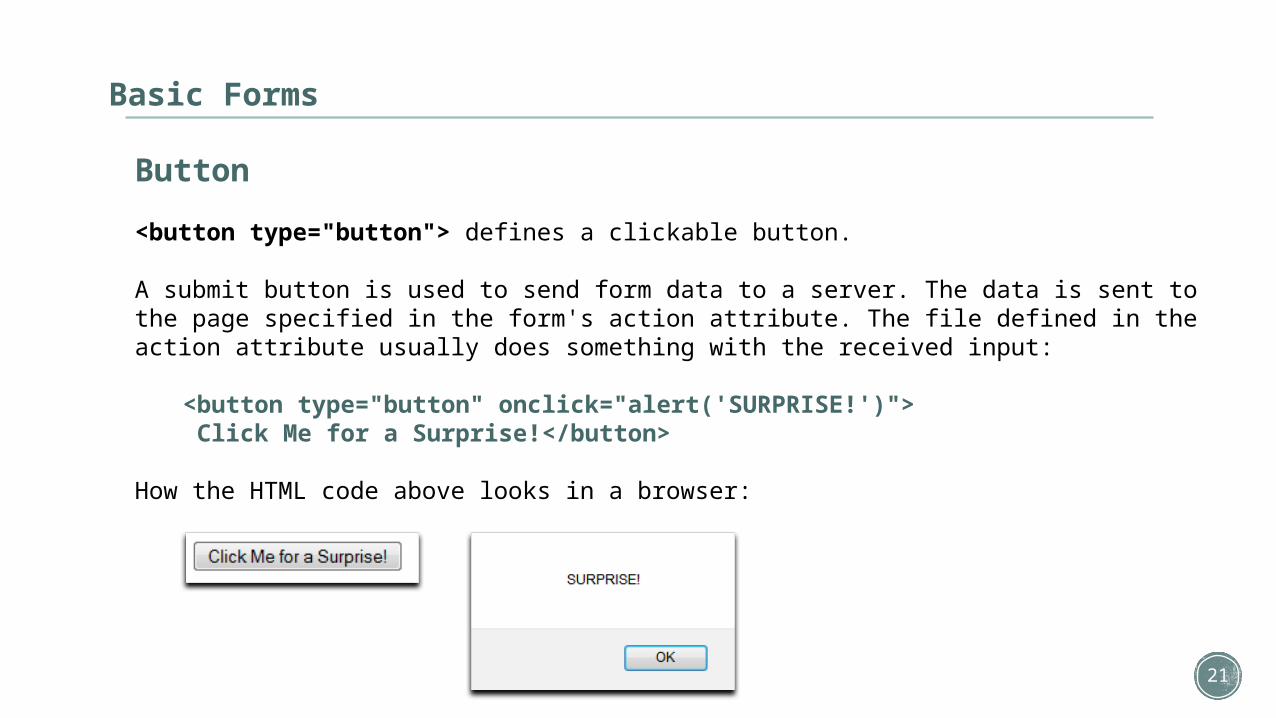
Button
<button type="button"> defines a clickable button.
A submit button is used to send form data to a server. The data is sent to the page specified in the form's action attribute. The file defined in the action attribute usually does something with the received input:
<button type="button" onclick="alert('SURPRISE!')"> Click Me for a Surprise!</button>
How the HTML code above looks in a browser:
22
Basic Forms
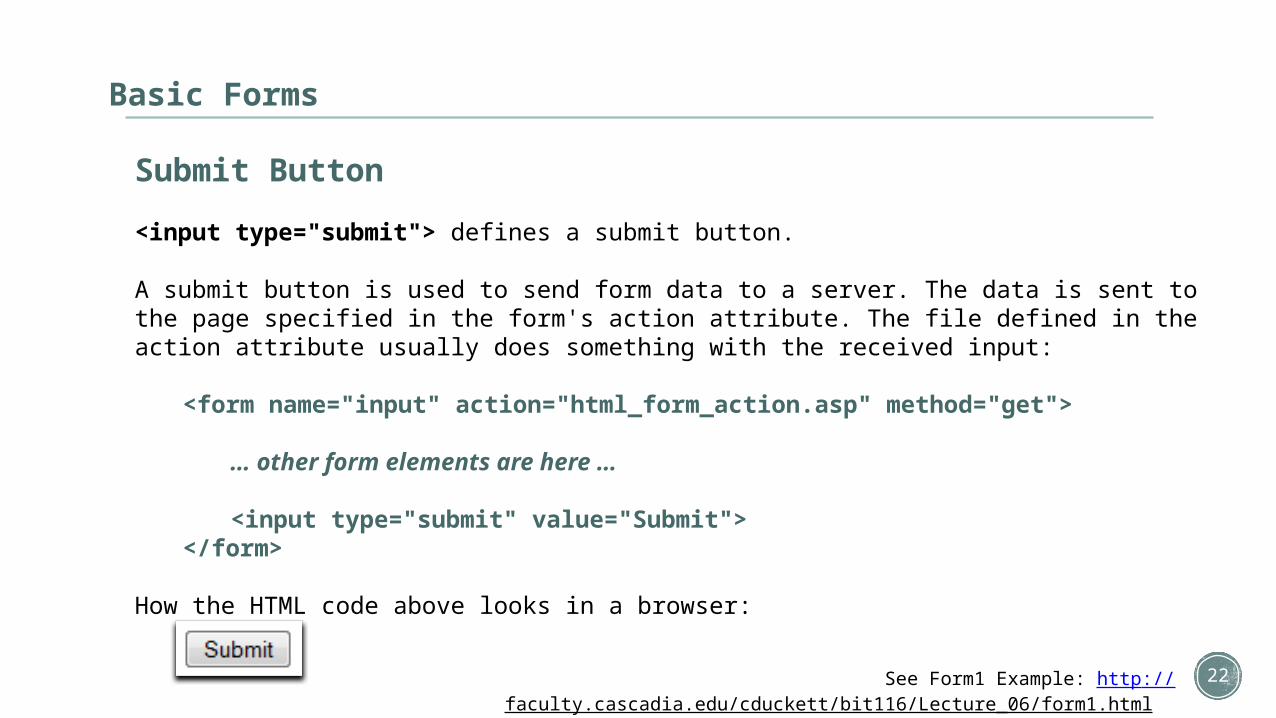
Submit Button
<input type="submit"> defines a submit button.
A submit button is used to send form data to a server. The data is sent to the page specified in the form's action attribute. The file defined in the action attribute usually does something with the received input:
<form name="input" action="html_form_action.asp" method="get">
… other form elements are here …
<input type="submit" value="Submit"></form>
How the HTML code above looks in a browser:
See Form1 Example: http://faculty.cascadia.edu/cduckett/bit116/Lecture_06/form1.html

23
Stuff to recognize You’re expected to know what the following elements are if you saw them, but you’re
not expected to be able to write these on paper from memory
Examples:1. Quiz (or exam) problem contains a password element in the HTML that’s given to you. You
remember that they’re basically textboxes that hide what you’re typing, and so have no problem getting what the user typed using jQuery
2. On a homework assignment you’re asked to create 3 checkboxes. You don’t remember how to do this off the top of your head but you kinda remember these slides and/or you Google for more information to remind yourself how to write the HTML.

24
Basic Forms
The Password Field
<input type="password"> defines a password field.
<form> Password: <input type="password" name="pw"></form>
How the HTML code above looks in a browser:
Note: The characters in a password field are masked (shown as asterisks or dots).Note

25
Basic Forms
Checkboxes
<input type="checkbox"> defines a checkbox.
Checkboxes allow a user select zero (0) or more options of a limited number of choices.
<form> <input type="checkbox" name="vehicle" value="Bike">I have a bike<br> <input type="checkbox" name="vehicle" value="Car">I have a car</form>
How the HTML code above looks in a browser:

26
Basic Forms
Radio Buttons
<input type="radio"> defines a radio button.
Radio buttons let a user select only one option of a limited number of choices:
<form> <input type="radio" name="sex" value="male">Male<br> <input type="radio" name="sex" value="female">Female</form>
How the HTML code above looks in a browser:
27
Basic Forms
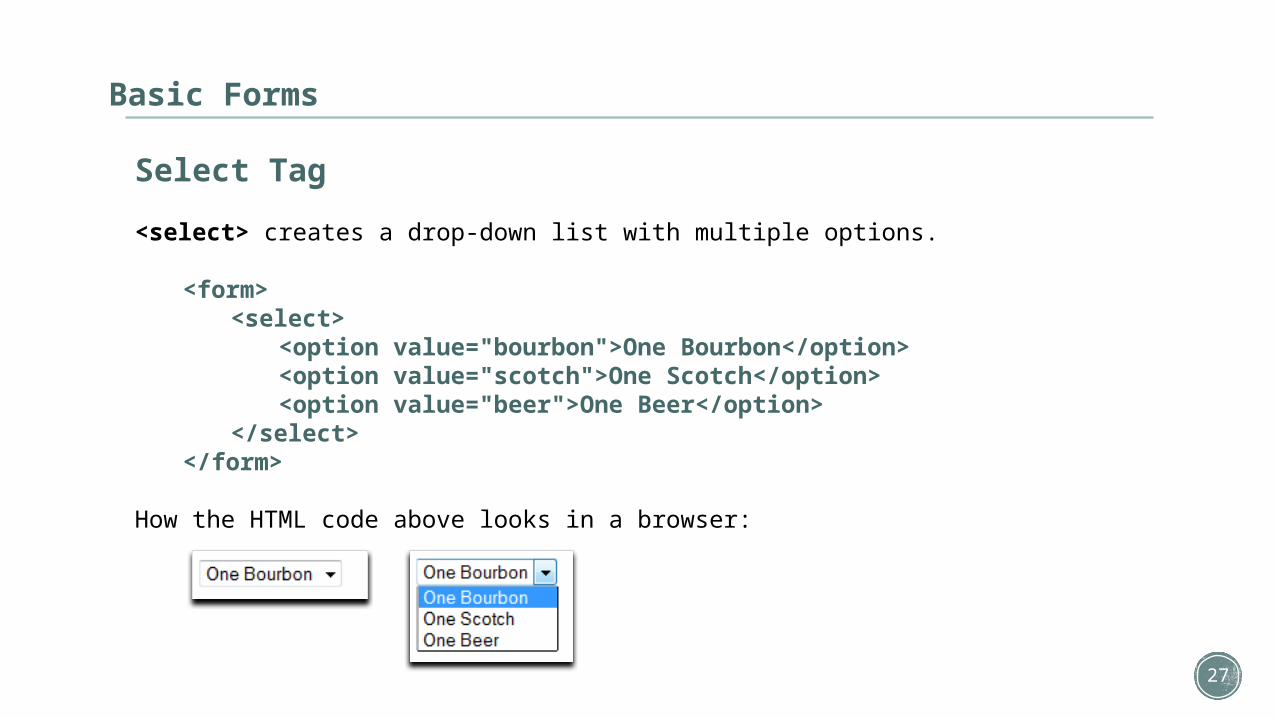
Select Tag
<select> creates a drop-down list with multiple options.
<form><select>
<option value="bourbon">One Bourbon</option> <option value="scotch">One Scotch</option> <option value="beer">One Beer</option>
</select></form>
How the HTML code above looks in a browser:
28
Basic Forms
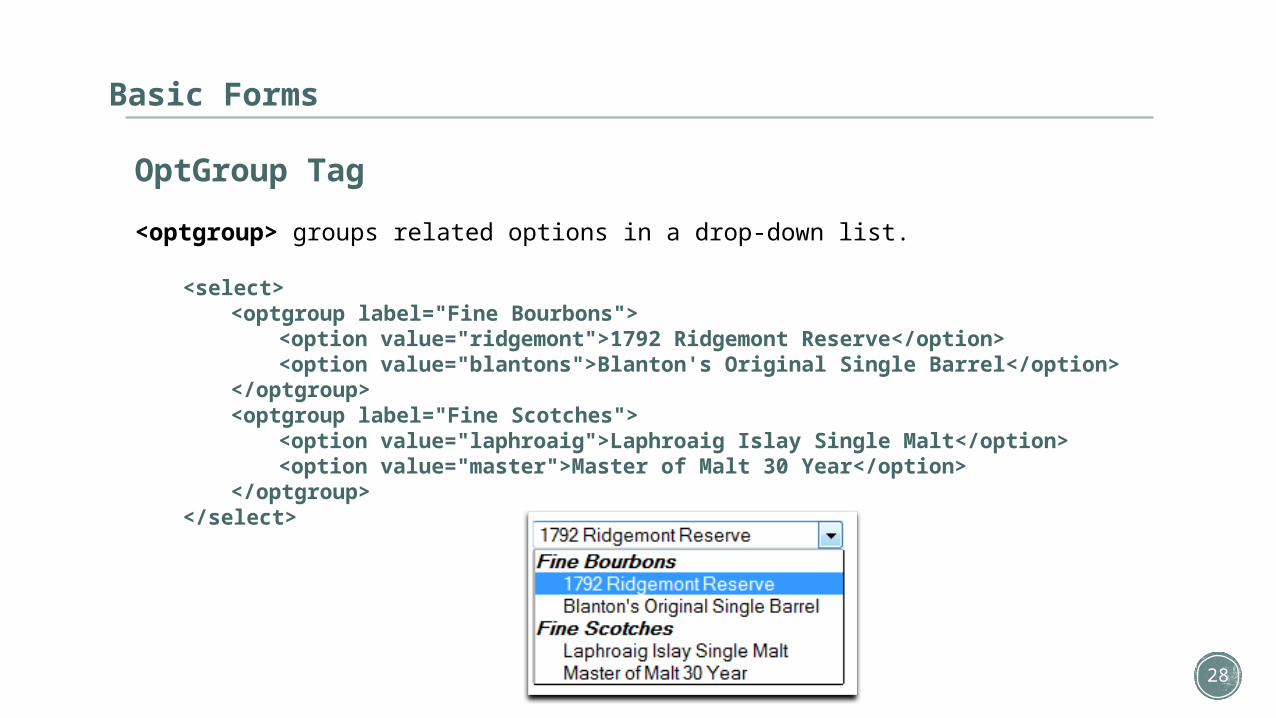
OptGroup Tag
<optgroup> groups related options in a drop-down list.
<select><optgroup label="Fine Bourbons">
<option value="ridgemont">1792 Ridgemont Reserve</option> <option value="blantons">Blanton's Original Single Barrel</option> </optgroup> <optgroup label="Fine Scotches"> <option value="laphroaig">Laphroaig Islay Single Malt</option> <option value="master">Master of Malt 30 Year</option> </optgroup></select>

29
Basic Forms
Textarea
The <textarea> tag defines a multi-line text input control. A text area can hold an unlimited number of characters, and the text renders in a fixed-width font (usually Courier). The size of a text area can be specified by the cols and rows attributes, or even better, through CSS' height and width properties.
<form> <textarea rows="4" cols="50"> </textarea></form>
How the HTML code above looks in a browser:

30
Basic Forms
Fieldset Tag
<fieldset> groups related elements in a form, allows for an (optional) legend, and draws a box around the group.
<form> <fieldset> <legend>Your Groovy Info</legend> Groovy Name <input type="text"><br> Groovy Email <input type="text"> </fieldset></form>
How the HTML code above looks in a browser:

31
Ultra Basic Example: Prompt() and Alert() Data Types

32
Ultra Basic Example: Prompt() and Alert() with Data Types
Now that we've learned the basics of HTML form construction, we're going to backtrack for a bit and demonstrate how to use prompt() and alert() with some data types.
Afterward we'll go on to see how JavaScript can interact with some basic HTML forms (we'll return to some more advanced forms at the end of the quarter)
FILES:• Basic Number Conversion Without jQuery:
1. Data1.html2. Data1.js
• Basic Number Conversion With (Minimal) jQuery:1. Data2.html2. Data2.js
33
Ultra Basic Example: Prompt() and Alert() with Data Types
Strict Mode
Starting with ECMAScript 5, developers are able to place their code into a more constrained form of execution known as strict mode. Strict mode improves JavaScript code by enforcing better programming practices and eliminating some of the language’s insecure and ill-advised features. Strict mode is enabled by adding the following directive to your code:
"use strict";
The “use strict”; directive can be used in two ways.
The first method of invoking strict mode is at the file level. By adding the directive at the beginning of a file (the directive may only be preceded by comments and whitespace), strict mode is enabled in a global context. This means that all of your code will be evaluated in strict mode. Caution must be taken when concatenating strict and non-strict scripts together. Placing a strict script first will force the non-strict script to be evaluated in strict mode. Placing a non-strict script first will cause the opposite behavior. This caused some problems for Amazon.

34
Ultra Basic Example: Prompt() and Alert() with Data Types
Strict Mode CONTINUED
The second way to enable strict mode is at the function level. To enable this level of strict mode, place the “use strict”; directive at the beginning of the function body. As with global strict mode, the directive may only be preceded by whitespace and comments. Using strict mode at the function level allows a programmer to mix and match strict and non-strict functions in the same file. This is useful when some legacy code relies on features that have been deprecated in strict mode. The following example shows how strict and non-strict functions can coexist in a single file.
function foo() { "use strict"; // this function is executed in strict mode}
function bar() { // this function is executed in non-strict mode}
One of the nice things about strict mode is its backward compatibility. Older versions of JavaScript will treat the “use strict”; directive as a meaningless string literal and ignore it. However, newer versions of JavaScript will give the statement special treatment and switch to strict mode.

35
Ultra Basic Example: Prompt() and Alert() with Data Types
Strict Mode CONTINUED
JavaScript has an interesting way of handling variable declarations. Variables that are not declared using the var keyword are implied to be global variables. The following piece of code uses three variables: x, y, and z.
function foo() { var x; var z;
x = 1; y = 2; z = x + y;}
Notice that only the variables ‘x’ and ‘z’ are declared using the var keyword. There is a good chance that the programmer also meant to declare ‘y’, but mistakenly did not. The code will execute properly, but with the side effect of creating a global variable named ‘y’ with the value 2. Since window is the global object, this is equivalent to writing: window.y = 2;

36
Ultra Basic Example: Prompt() and Alert() with Data Types
Strict Mode CONTINUED
This behavior can be problematic if ‘y’ is already defined elsewhere and is expected to have a different value.
This leads to code that doesn’t scale well and is difficult to debug. Enabling strict mode will catch this problem.
Instead of making ‘y’ a global variable, an exception will occur.
The exception shown in the browser might look like this:
ReferenceError: y is not defined
37
Ultra Basic Example: Prompt() and Alert() with Data Types
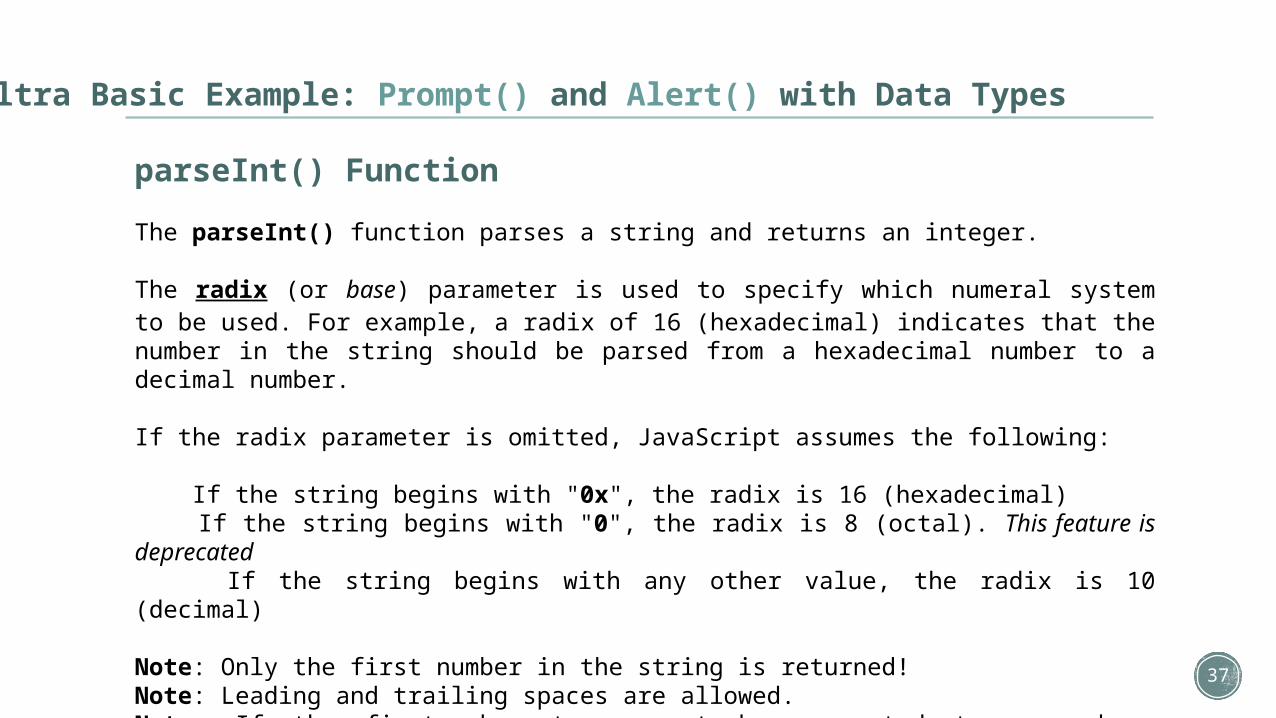
parseInt() Function
The parseInt() function parses a string and returns an integer.
The radix (or base) parameter is used to specify which numeral system to be used. For example, a radix of 16 (hexadecimal) indicates that the number in the string should be parsed from a hexadecimal number to a decimal number.
If the radix parameter is omitted, JavaScript assumes the following:
If the string begins with "0x", the radix is 16 (hexadecimal) If the string begins with "0", the radix is 8 (octal). This feature is deprecated If the string begins with any other value, the radix is 10 (decimal)
Note: Only the first number in the string is returned!Note: Leading and trailing spaces are allowed.Note: If the first character cannot be converted to a number, parseInt() returns NaN.
38
Ultra Basic Example: Prompt() and Alert() with Data Types
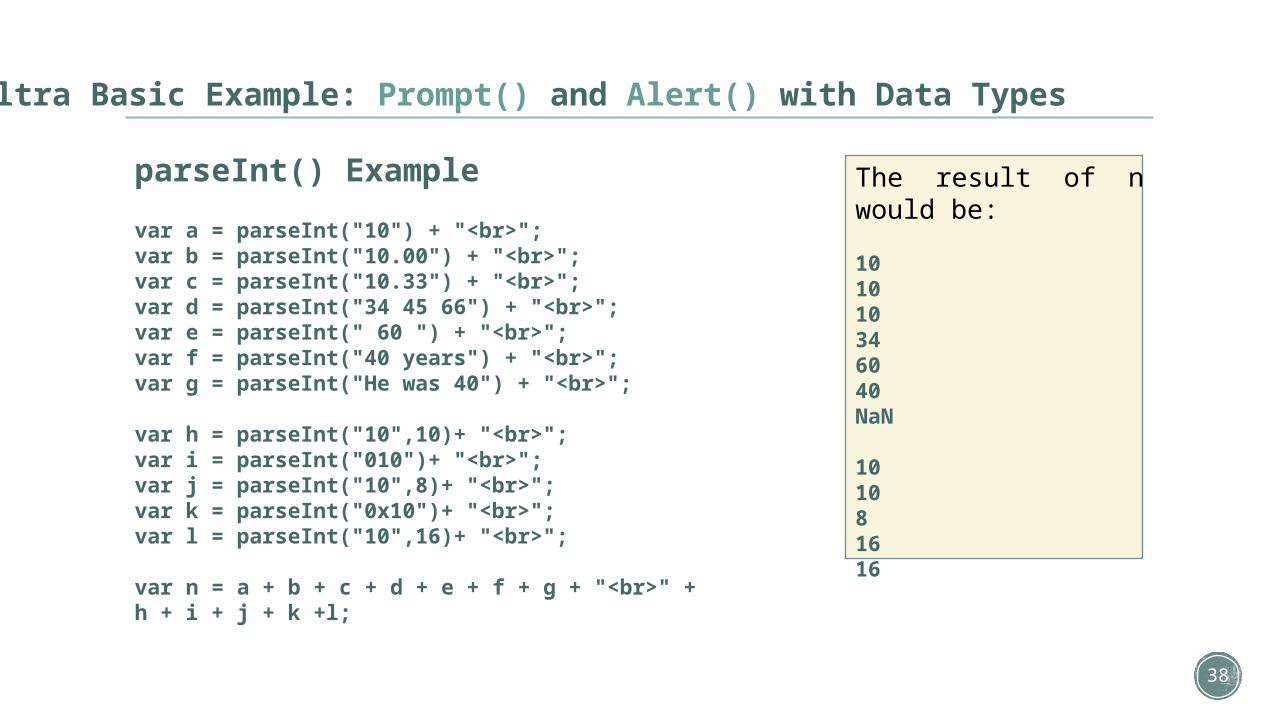
parseInt() Example
var a = parseInt("10") + "<br>";var b = parseInt("10.00") + "<br>";var c = parseInt("10.33") + "<br>";var d = parseInt("34 45 66") + "<br>";var e = parseInt(" 60 ") + "<br>";var f = parseInt("40 years") + "<br>";var g = parseInt("He was 40") + "<br>";
var h = parseInt("10",10)+ "<br>";var i = parseInt("010")+ "<br>";var j = parseInt("10",8)+ "<br>";var k = parseInt("0x10")+ "<br>";var l = parseInt("10",16)+ "<br>";
var n = a + b + c + d + e + f + g + "<br>" + h + i + j + k +l;
The result of n would be:
101010346040NaN
101081616
39
Ultra Basic Example: Prompt() and Alert() with Data Types
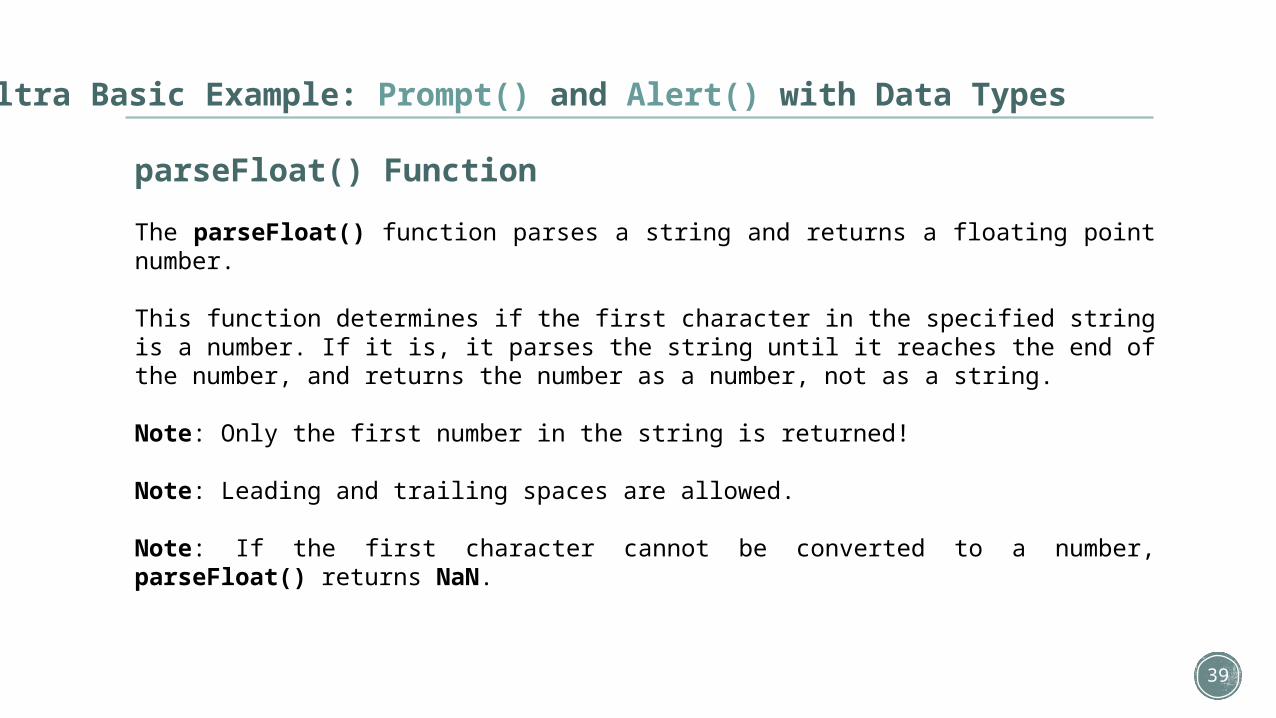
parseFloat() Function
The parseFloat() function parses a string and returns a floating point number.
This function determines if the first character in the specified string is a number. If it is, it parses the string until it reaches the end of the number, and returns the number as a number, not as a string.
Note: Only the first number in the string is returned!
Note: Leading and trailing spaces are allowed.
Note: If the first character cannot be converted to a number, parseFloat() returns NaN.
40
Ultra Basic Example: Prompt() and Alert() with Data Types
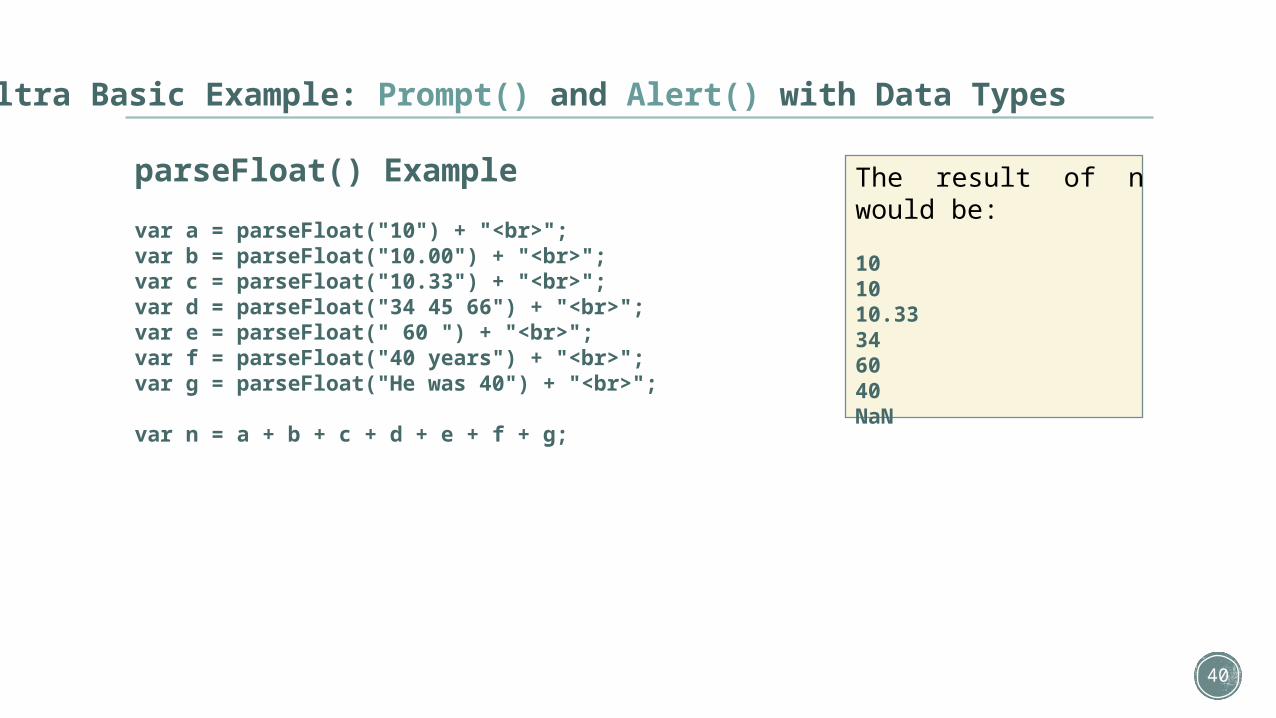
parseFloat() Example
var a = parseFloat("10") + "<br>";var b = parseFloat("10.00") + "<br>";var c = parseFloat("10.33") + "<br>";var d = parseFloat("34 45 66") + "<br>";var e = parseFloat(" 60 ") + "<br>";var f = parseFloat("40 years") + "<br>";var g = parseFloat("He was 40") + "<br>";
var n = a + b + c + d + e + f + g;
The result of n would be:
101010.33346040NaN
41
Ultra Basic Example: Prompt() and Alert() with Data Types
NaN
The NaN property represents "Not-a-Number" value. This property indicates that a value is not a legal number.
Tip: Use the isNaN() global function to check if a value is a NaN value.TIP

42
Ultra Basic Example: Prompt() and Alert() with Data Types
isNaN()
The isNaN() function is Boolean and checks whether a number is an illegal number.
This function returns true if the value is NaN (Not a Number), and false if not (i.e., it is a legal number).
Example
var a = isNaN(123) + "<br>"; var b = isNaN(-1.23) + "<br>"; var c = isNaN(5-2) + "<br>"; var d = isNaN(0) + "<br>"; var e = isNaN("Hello") + "<br>"; var f = isNaN("2005/12/12") + "<br>";
var res = a + b + c + d + e + f;
43
Ultra Basic Example: Prompt() and Alert() with Data Types
Number() Function
The Number() function converts the object argument to a number that represents the object's value.
If the value cannot be converted to a legal number, NaN is returned.
Note: If the parameter is a Date object, the Number() function returns the number of milliseconds (a thousandth of a second) since midnight January 1, 1970 UTC ("Universal Time Coordinated").

44
Ultra Basic Example: Prompt() and Alert() with Data Types
Number() Example
Convert different object values to their numbers:
var test1 = new Boolean(true);var test2 = new Boolean(false);var test3 = new Date();var test4 = new String("999");var test5 = new String("999 888");
var n = Number(test1) + "<br>" + Number(test2) + "<br>" + Number(test3) + "<br>" + Number(test4) + "<br>" + Number(test5);
The result of n would be:
101382704503079999NaN
45
Ultra Basic Form Validation with JavaScript
46
Ultra Basic Form Validation with JavaScript
Form validation used to occur at the server, after the client had entered all necessary data and then pressed the Submit button. If some of the data that had been entered by the client had been in the wrong form or was simply missing, the server would have to send all the data back to the client and request that the form be resubmitted with correct information. This was really a lengthy process and over burdening server.
JavaScript, provides a way to validate form's data on the client's computer before sending it to the web server.
Form validation generally performs two functions.
• Basic Validation - First of all, the form must be checked to make sure data was entered into each form field that required it. This would need just loop through each field in the form and check for data.
• Data Format Validation - Secondly, the data that is entered must be checked for correct form and value. This would need to put more logic to test correctness of data.
47
Ultra Basic Form Validation with JavaScript
jQuery Val() Method
The val() method has two (2) uses: it returns or sets the value attribute of the selected elements.
When used to return value:
SYNTAX: $(selector).val()
This method returns the value of the value attribute of the FIRST matched element.
When used to set value:
SYNTAX: $(selector).val(value)
This method sets the value of the value attribute for ALL matched elements.
Note: The val() method is mostly used with HTML form elements.Files: data3.html & data3.js
48
Ultra Basic Form Validation with JavaScript
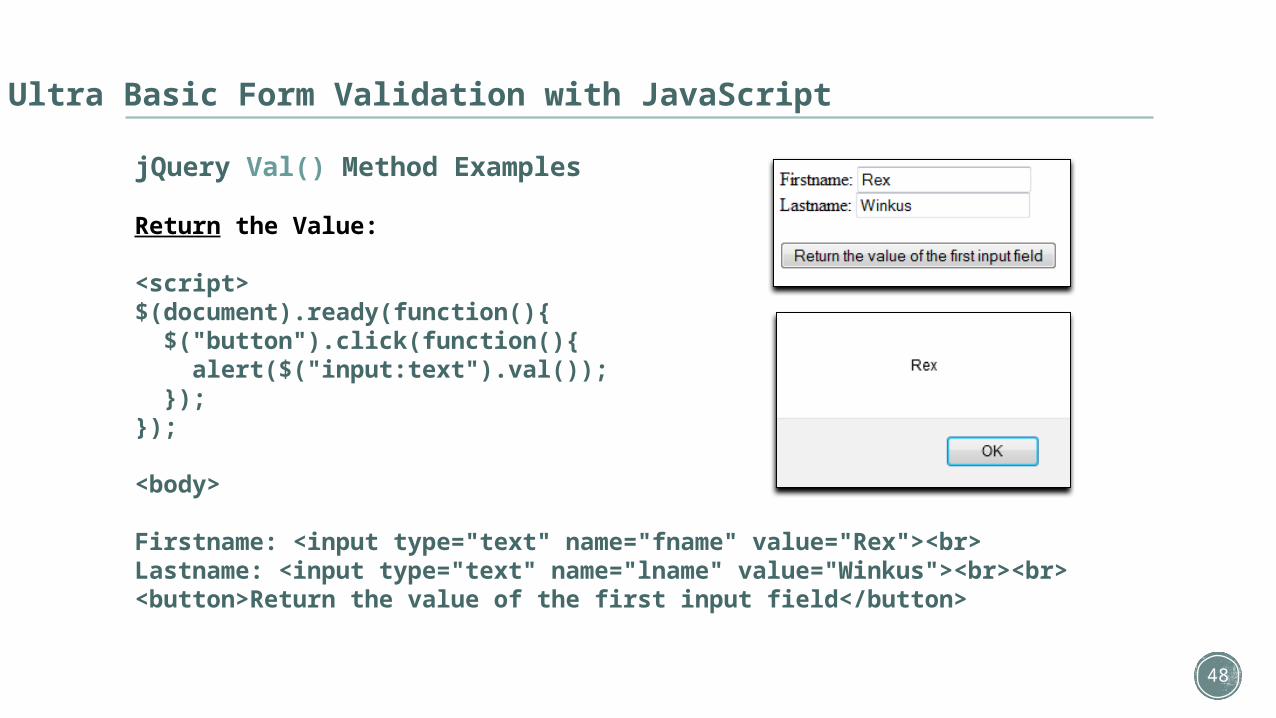
jQuery Val() Method Examples
Return the Value:
<script>$(document).ready(function(){ $("button").click(function(){ alert($("input:text").val()); });});
<body>
Firstname: <input type="text" name="fname" value="Rex"><br>Lastname: <input type="text" name="lname" value="Winkus"><br><br><button>Return the value of the first input field</button>
49
Ultra Basic Form Validation with JavaScript
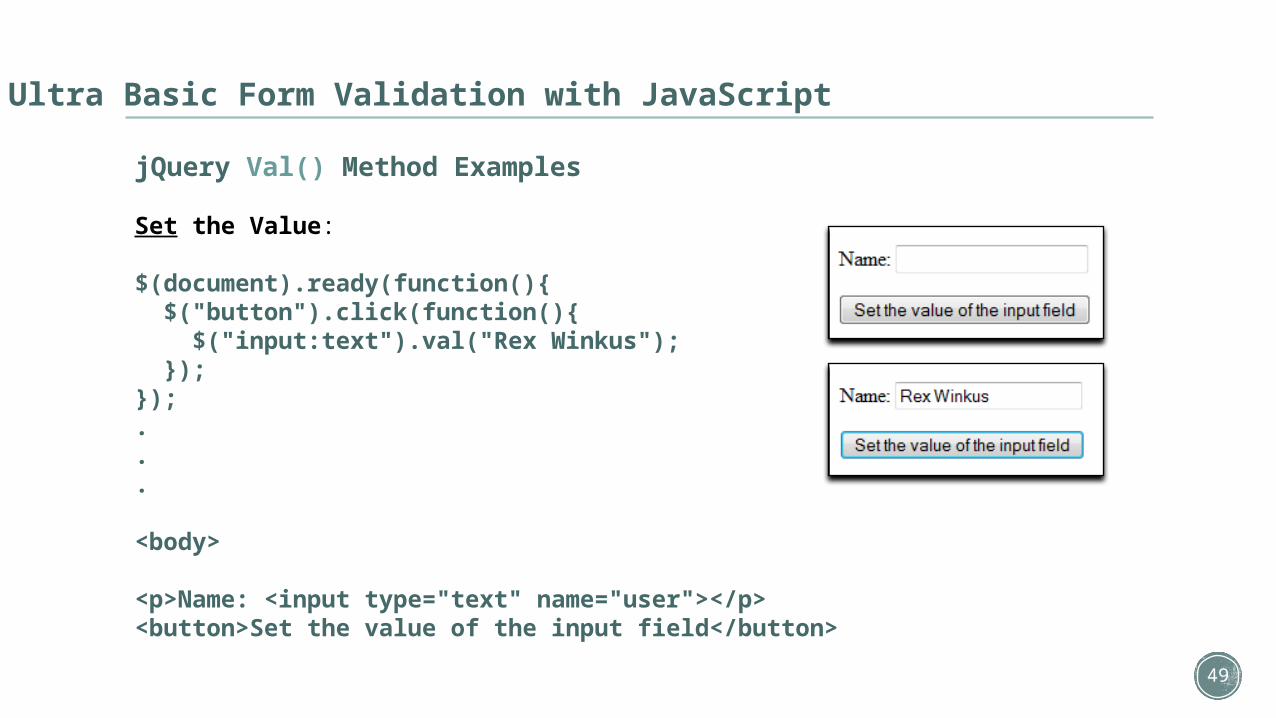
jQuery Val() Method Examples
Set the Value:
$(document).ready(function(){ $("button").click(function(){ $("input:text").val("Rex Winkus"); });});...
<body>
<p>Name: <input type="text" name="user"></p><button>Set the value of the input field</button>
50 Do Exercises Here
Except for #6, which we’re going to talk about next
51
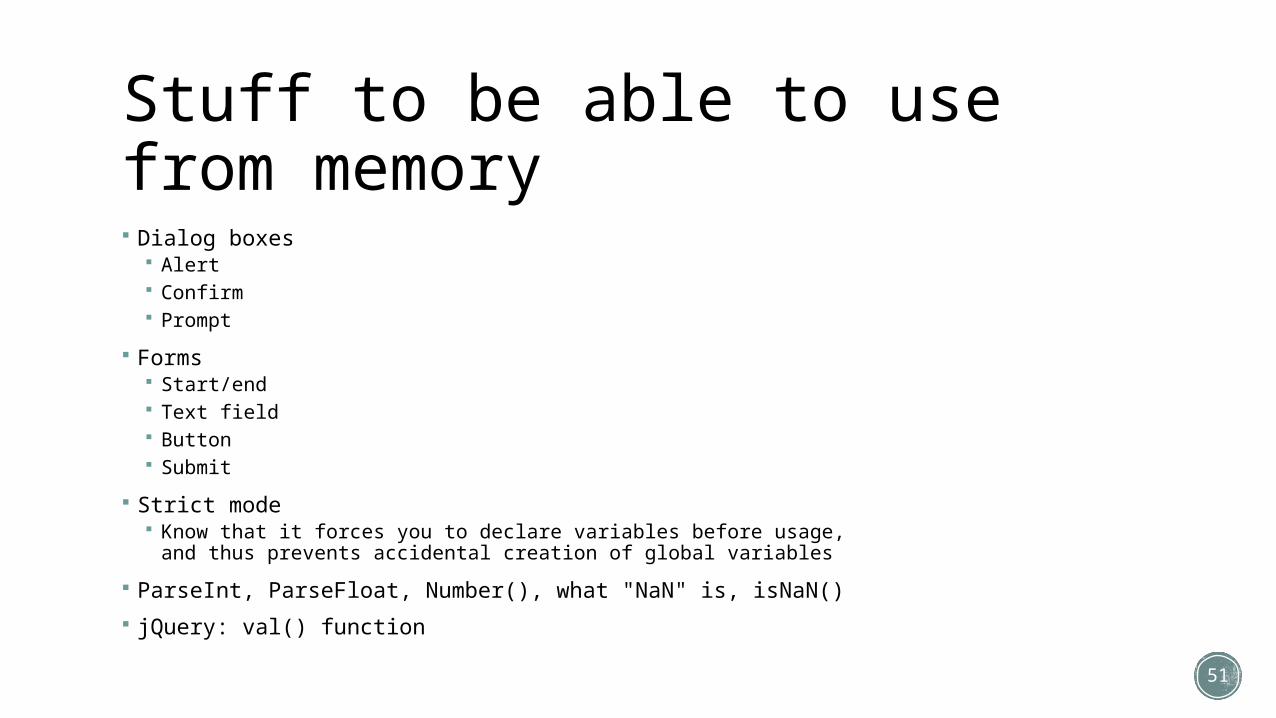
Stuff to be able to use from memory Dialog boxes
Alert Confirm Prompt
Forms Start/end Text field Button Submit
Strict mode Know that it forces you to declare variables before usage,
and thus prevents accidental creation of global variables
ParseInt, ParseFloat, Number(), what "NaN" is, isNaN()
jQuery: val() function
52
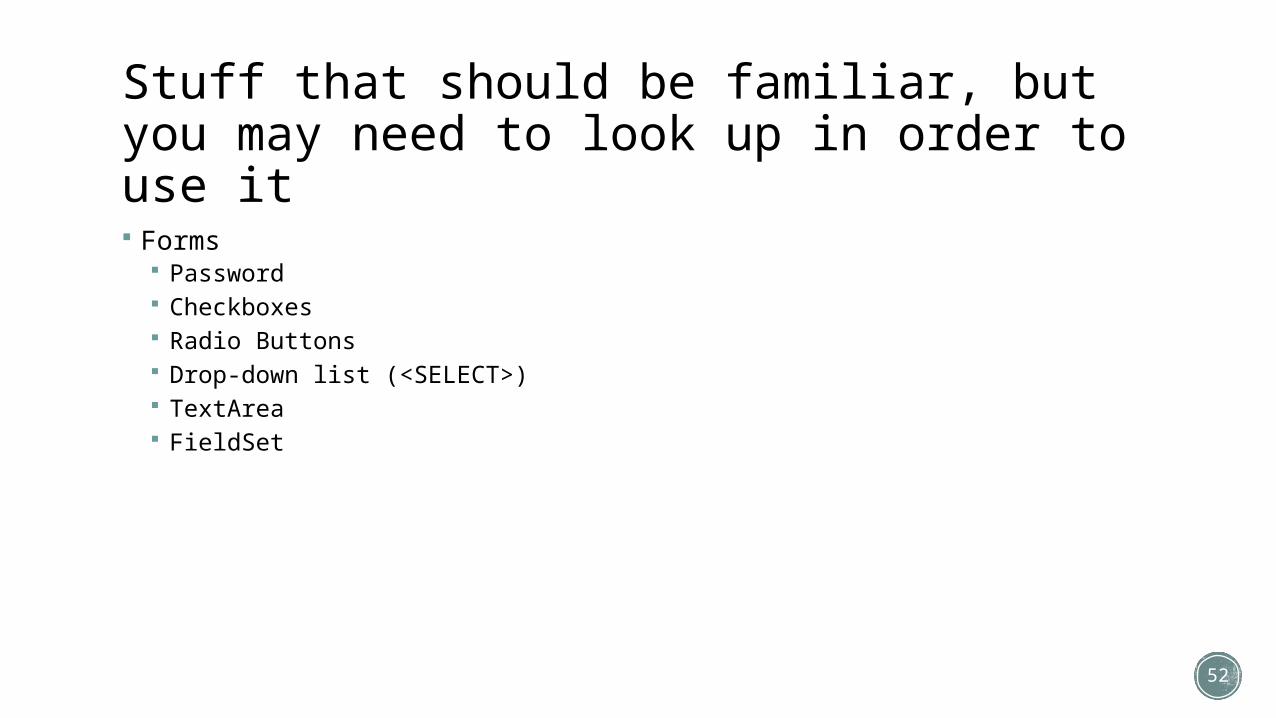
Stuff that should be familiar, but you may need to look up in order to use it Forms
Password Checkboxes Radio Buttons Drop-down list (<SELECT>) TextArea FieldSet

53
Please begin working on the LECTURE 6 In-Class Exercises.
When you have completed your ICE, call the Instructor over to verify your work. If you have questions about your work, please call over the Instructor to clarify.
Once you have completed your ICEs, you are free to go for the day.
If you don't finish your ICEs by the end of class, you will still get full credit for actively doing the work, but it is greatly recommended you finish any outstanding ICEs outside of class.
Lecture 6