balloon twisting from scratch 2 - the sword · balloon twisting from scratch 2 - the sword...
TRANSCRIPT
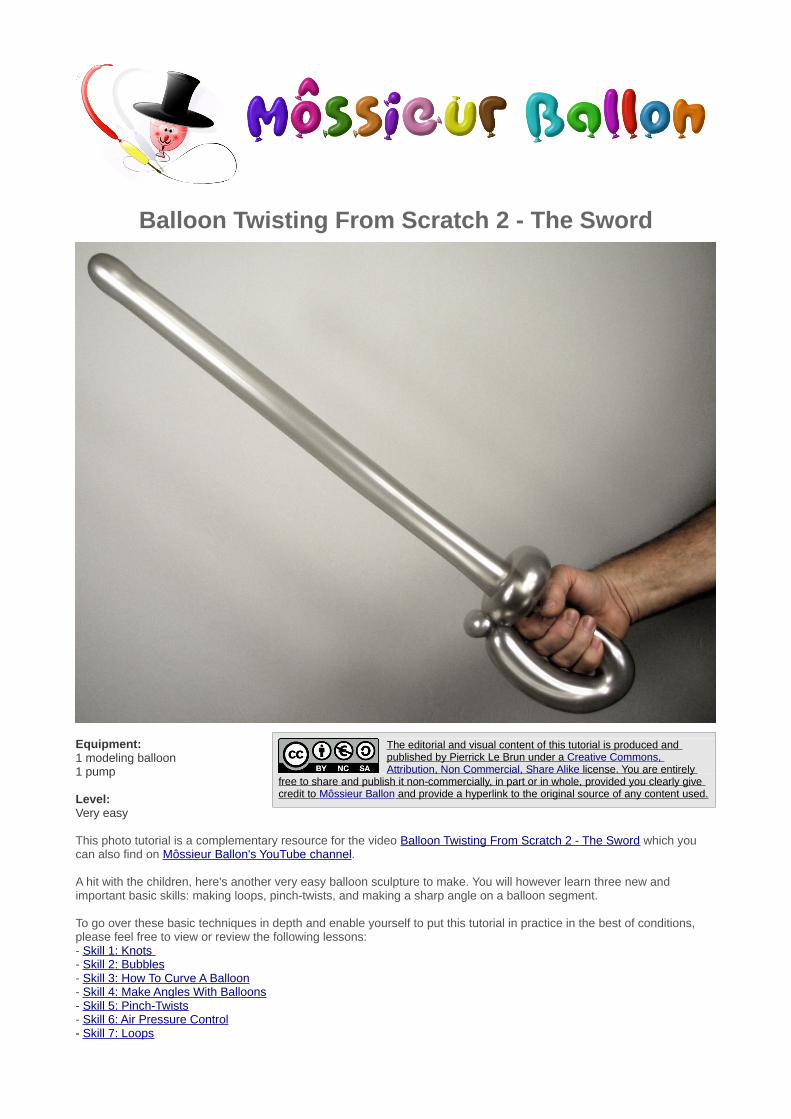
Balloon Twisting From Scratch 2 - The Sword
Equipment: 1 modeling balloon1 pump
Level: Very easy
This photo tutorial is a complementary resource for the video Balloon Twisting From Scratch 2 - The Sword which you can also find on Môssieur Ballon's YouTube channel.
A hit with the children, here's another very easy balloon sculpture to make. You will however learn three new and important basic skills: making loops, pinch-twists, and making a sharp angle on a balloon segment.
To go over these basic techniques in depth and enable yourself to put this tutorial in practice in the best of conditions, please feel free to view or review the following lessons:- Skill 1: Knots - Skill 2: Bubbles- Skill 3: How To Curve A Balloon- Skill 4: Make Angles With Balloons- Skill 5: Pinch-Twists- Skill 6: Air Pressure Control- Skill 7: Loops
The editorial and visual content of this tutorial is produced and published by Pierrick Le Brun under a Creative Commons, Attribution, Non Commercial, Share Alike license. You are entirely
free to share and publish it non-commercially, in part or in whole, provided you clearly give credit to Môssieur Ballon and provide a hyperlink to the original source of any content used.
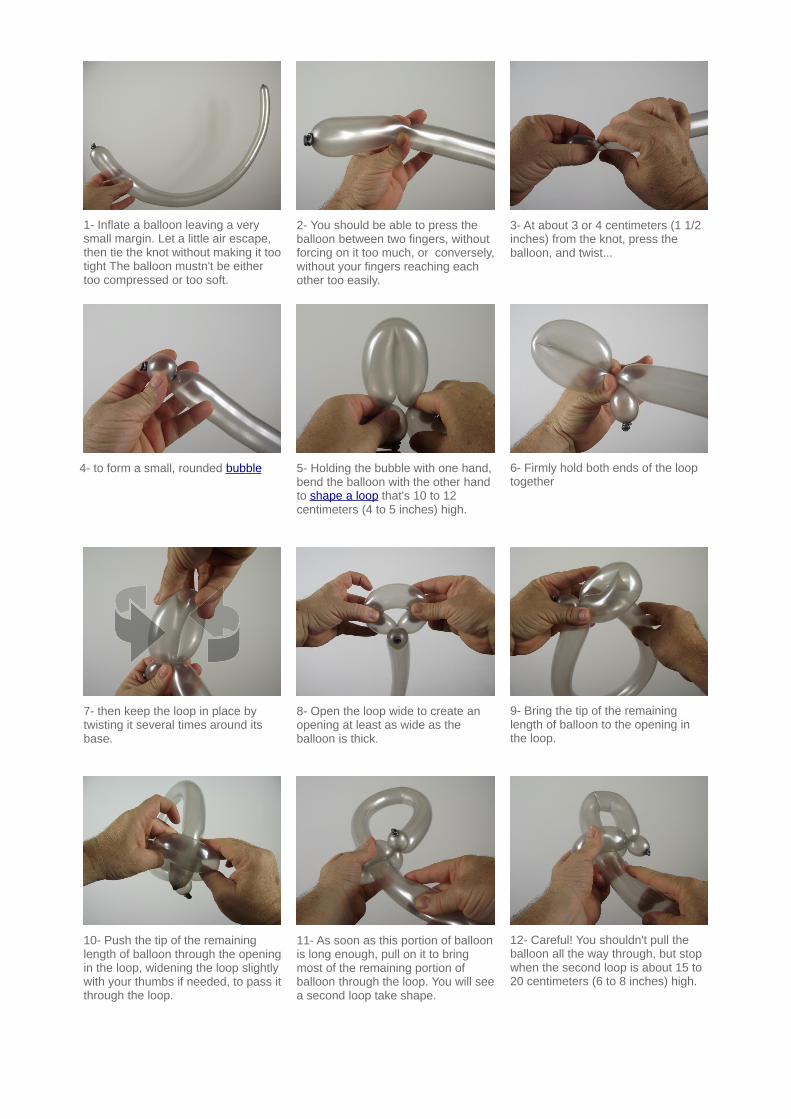
1- Inflate a balloon leaving a very small margin. Let a little air escape, then tie the knot without making it tootight The balloon mustn't be either too compressed or too soft.
2- You should be able to press the balloon between two fingers, without forcing on it too much, or conversely,without your fingers reaching each other too easily.
3- At about 3 or 4 centimeters (1 1/2 inches) from the knot, press the balloon, and twist...
4- to form a small, rounded bubble 5- Holding the bubble with one hand, bend the balloon with the other hand to shape a loop that's 10 to 12 centimeters (4 to 5 inches) high.
6- Firmly hold both ends of the loop together
7- then keep the loop in place by twisting it several times around its base.
8- Open the loop wide to create an opening at least as wide as the balloon is thick.
9- Bring the tip of the remaining length of balloon to the opening in the loop.
10- Push the tip of the remaining length of balloon through the openingin the loop, widening the loop slightlywith your thumbs if needed, to pass itthrough the loop.
11- As soon as this portion of balloonis long enough, pull on it to bring most of the remaining portion of balloon through the loop. You will seea second loop take shape.
12- Careful! You shouldn't pull the balloon all the way through, but stop when the second loop is about 15 to 20 centimeters (6 to 8 inches) high.
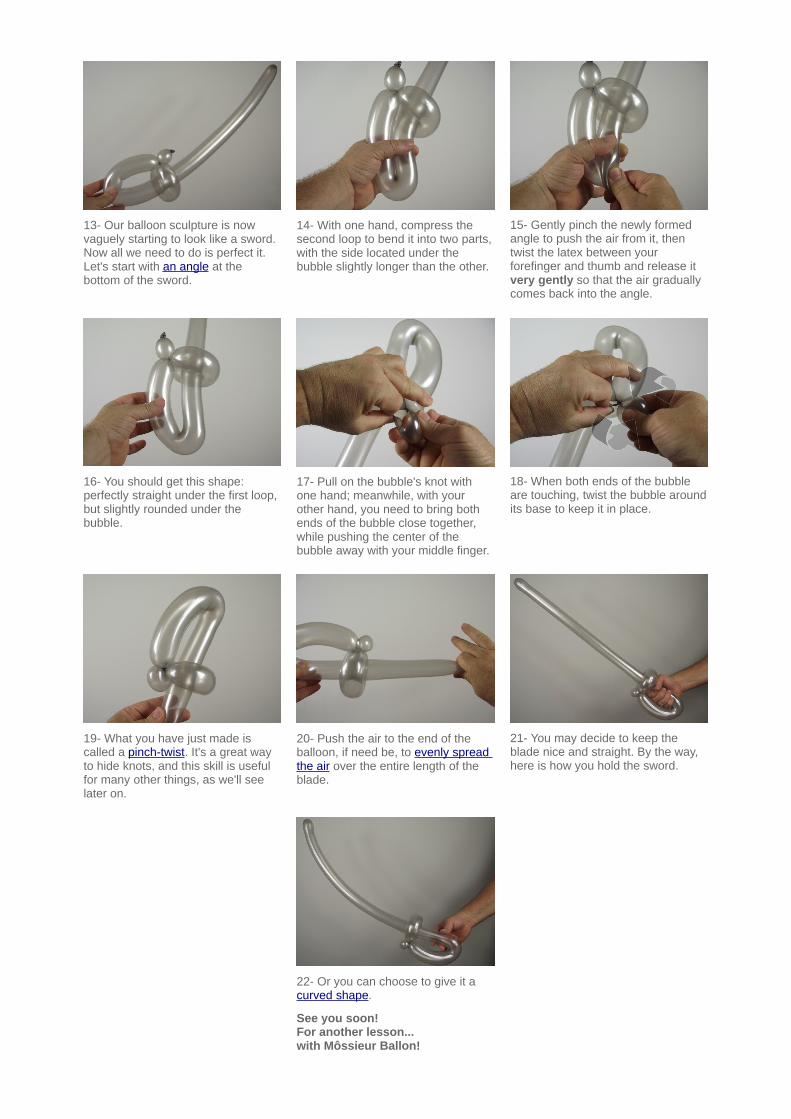
13- Our balloon sculpture is now vaguely starting to look like a sword. Now all we need to do is perfect it. Let's start with an angle at the bottom of the sword.
14- With one hand, compress the second loop to bend it into two parts, with the side located under the bubble slightly longer than the other.
15- Gently pinch the newly formed angle to push the air from it, then twist the latex between your forefinger and thumb and release it very gently so that the air gradually comes back into the angle.
16- You should get this shape: perfectly straight under the first loop, but slightly rounded under the bubble.
17- Pull on the bubble's knot with one hand; meanwhile, with your other hand, you need to bring both ends of the bubble close together, while pushing the center of the bubble away with your middle finger.
18- When both ends of the bubble are touching, twist the bubble aroundits base to keep it in place.
19- What you have just made is called a pinch-twist. It's a great way to hide knots, and this skill is useful for many other things, as we'll see later on.
20- Push the air to the end of the balloon, if need be, to evenly spread the air over the entire length of the blade.
21- You may decide to keep the blade nice and straight. By the way, here is how you hold the sword.
22- Or you can choose to give it a curved shape.
See you soon!For another lesson... with Môssieur Ballon!