ansible overview - people.freebsd.orgbcr/talks/ansible_tutorial_handout.pdf · ansible rial...
TRANSCRIPT
Managing BSD systems with AnsibleAsiaBSDcon 2017 Tutorial
Benedict [email protected]
March 10, 2017
Tokyo University of Science,Tokyo, Japan
1 / 71
Infrastructure As Code
When the number of machines to manage increases, it is neither efficientnor practical to manually configure each one by hand. Deploying systemconfiguration settings, installing new software, or querying the systemsfor certain information are just a few of the tasks that can be automatedand controlled from a central point. These configuration managementsystems work by describing how the target system should look like ratherthan listing individual commands to get to that desired state. It is the jobof the configuration management system to compare the desired with thecurrent state of the system and perform the necessary tasks to get there.The actions to take on the target systems are often described in adomain specific language, so that individual differences betweenoperating systems are abstracted away. This infrastructure as code canbe shared, reused, and extended to fit the individual requirements ofsystems and company policies. Administrators can deploy a large numberof changes over the network in a short amount of time as parallel jobs tobe executed.
2 / 71
Overview
Introduction to AnsibleRequirementsSSH Setup
Ansible CommandsFile TransfersPackage ManagementFile Modifications
PlaybooksWriting PlaybooksYAMLVariablesLoops
A Complete Example
3 / 71
Introduction to Ansible
This chapter will cover Ansible as an example on how to manage multiplemachines in a reliable and consistent way. We will look at how Ansibleworks, what kind of jobs it can do (machine configuration, softwaredeployment, etc.), and how it can be used.Although there are many other software packages with the same featuressuch as Ansible, it has some distinct features. One of them is theclientless execution on target machines (only SSH is required) and that itis relatively simple to get started. A command-line client is available forad-hoc commands, while so called playbooks allow for more complicatedsets of changes to be made to target machines.
4 / 71
Idempotency
An important concept in this area is the so called idempotency. Itdescribes the property of certain actions or operations. An operation issaid to be idempotent when the result is the same regardless of whetherthe operation was executed once or multiple times. This is importantwhen changing the state of a machine and the target may already havethe desired state.For example, a configuration change might add a user to the system. If itdoes not exist, it will be added. When that same action is run again andsuch a user is already present, no action is taken. The result (a user isadded) is the same and when that action is run multiple times, it will stillnot change.Another example would be adding a line to a configuration file. Someconfiguration files require that each line is unique and does not appearmultiple times. Hence, the system adding that line needs to checkwhether that line is already present before adding it to the file. If not, itwould not be an idempotent operation.Idempotency appears in many other computer science (and math) fieldsof study, though the basic principle always stays the same.
5 / 71
Overview
Introduction to AnsibleRequirementsSSH Setup
Ansible CommandsFile TransfersPackage ManagementFile Modifications
PlaybooksWriting PlaybooksYAMLVariablesLoops
A Complete Example
6 / 71
Requirements
Ansible needs to be installed on at least one control machine, whichsends the commands to a target system (could be the same machine).This is typically done over the network to a set of hosts. The targetmachines only have to run the SSH daemon and the control machinemust be able to log in via SSH and perform actions (sudo privileges).At the time of this writing, Ansible is using Python version 2.6 or aboveinstalled on the control machine and the managed systems. Somemodules may have additional requirements listed in the module specificdocumentation.The target nodes are typically managed by SSH (secure shell), so arunning SSH client is needed (there is also a raw module that does notrequire SSH). File transfers are supported via SFTP or SCP. The controlmachine does not require anything special (no database or daemonsrunning). Ansible can be installed using package managers (apt, pkg, pip,etc).
7 / 71
Setting up the Inventory File
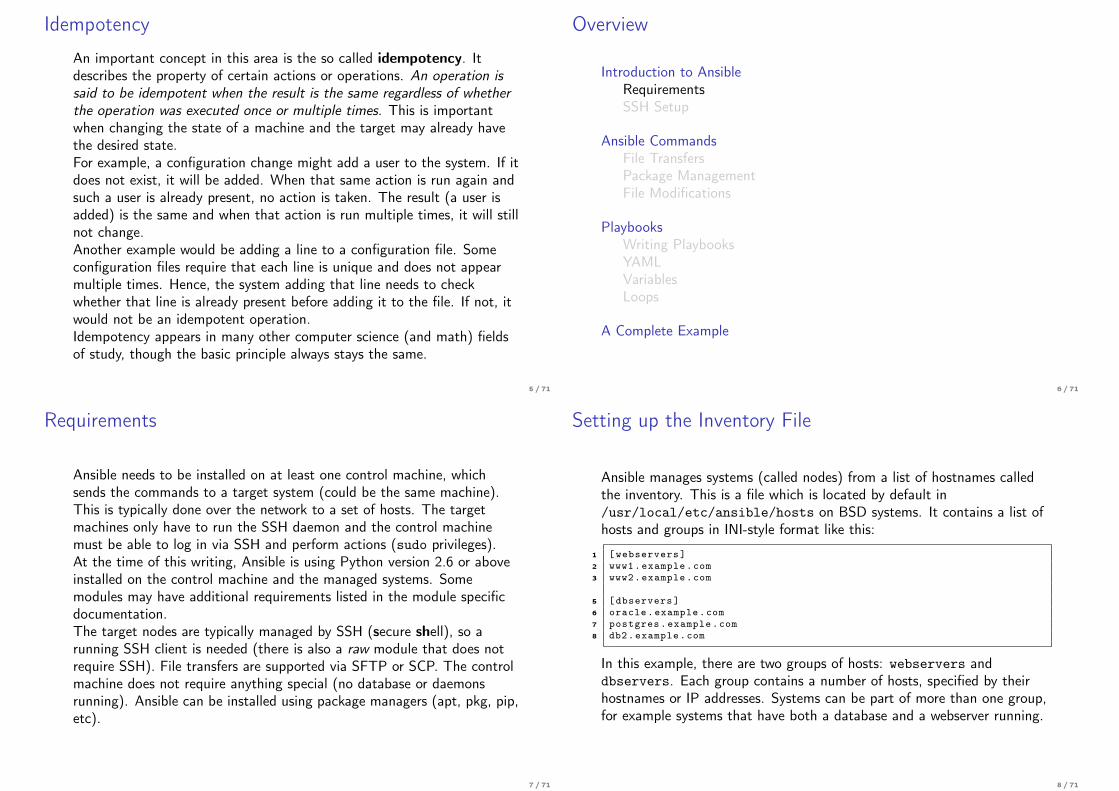
Ansible manages systems (called nodes) from a list of hostnames calledthe inventory. This is a file which is located by default in/usr/local/etc/ansible/hosts on BSD systems. It contains a list ofhosts and groups in INI-style format like this:
1 [webservers]2 www1.example.com3 www2.example.com
5 [dbservers]6 oracle.example.com7 postgres.example.com8 db2.example.com
In this example, there are two groups of hosts: webservers anddbservers. Each group contains a number of hosts, specified by theirhostnames or IP addresses. Systems can be part of more than one group,for example systems that have both a database and a webserver running.
8 / 71
Settings in the Inventory FileMultiple hosts with a numeric or alphanumeric naming scheme can bespecified like this:
1 [computenodes]2 compute [1:30]. mycompany.com
4 [alphabetsoup]5 host -[a:z]. mycompany.com
This will include hosts named compute1.mycompany.com,compute2.mycompany.com, . . . compute30.mycompany.com andhost-a.mycompany.com, host-b.mycompany.com, . . .host-z.mycompany.com, respectively.Host-specific variables can be set by listing them after the hostname. Forexample, the BSDs are using a different path to the ansible executable,so we list it in the inventory file:
1 [freebsdhost]2 myhost ansible_python_interpreter =/usr/local/bin/python
A complete list of inventory settings can be found athttp://docs.ansible.com/ansible/intro_inventory.html.
9 / 71
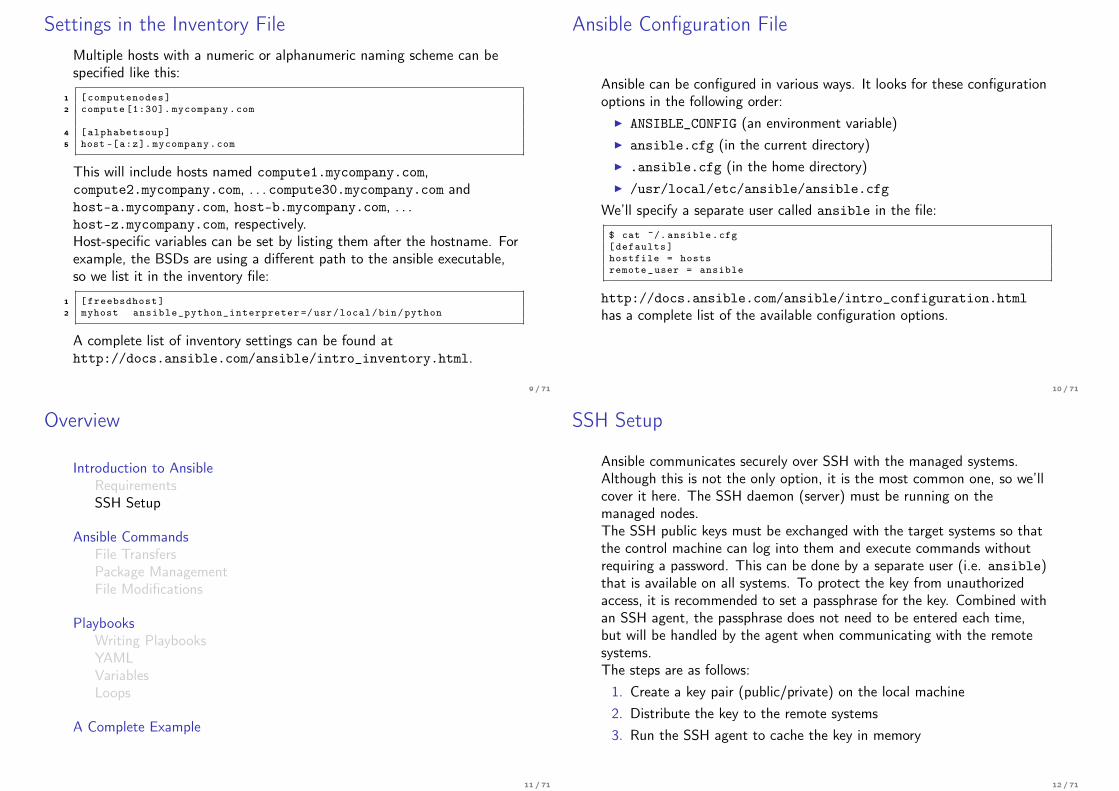
Ansible Configuration File
Ansible can be configured in various ways. It looks for these configurationoptions in the following order:
I ANSIBLE_CONFIG (an environment variable)I ansible.cfg (in the current directory)I .ansible.cfg (in the home directory)I /usr/local/etc/ansible/ansible.cfg
We’ll specify a separate user called ansible in the file:
$ cat ~/. ansible.cfg[defaults]hostfile = hostsremote_user = ansible
http://docs.ansible.com/ansible/intro_configuration.htmlhas a complete list of the available configuration options.
10 / 71
Overview
Introduction to AnsibleRequirementsSSH Setup
Ansible CommandsFile TransfersPackage ManagementFile Modifications
PlaybooksWriting PlaybooksYAMLVariablesLoops
A Complete Example
11 / 71
SSH Setup
Ansible communicates securely over SSH with the managed systems.Although this is not the only option, it is the most common one, so we’llcover it here. The SSH daemon (server) must be running on themanaged nodes.The SSH public keys must be exchanged with the target systems so thatthe control machine can log into them and execute commands withoutrequiring a password. This can be done by a separate user (i.e. ansible)that is available on all systems. To protect the key from unauthorizedaccess, it is recommended to set a passphrase for the key. Combined withan SSH agent, the passphrase does not need to be entered each time,but will be handled by the agent when communicating with the remotesystems.The steps are as follows:1. Create a key pair (public/private) on the local machine2. Distribute the key to the remote systems3. Run the SSH agent to cache the key in memory
12 / 71
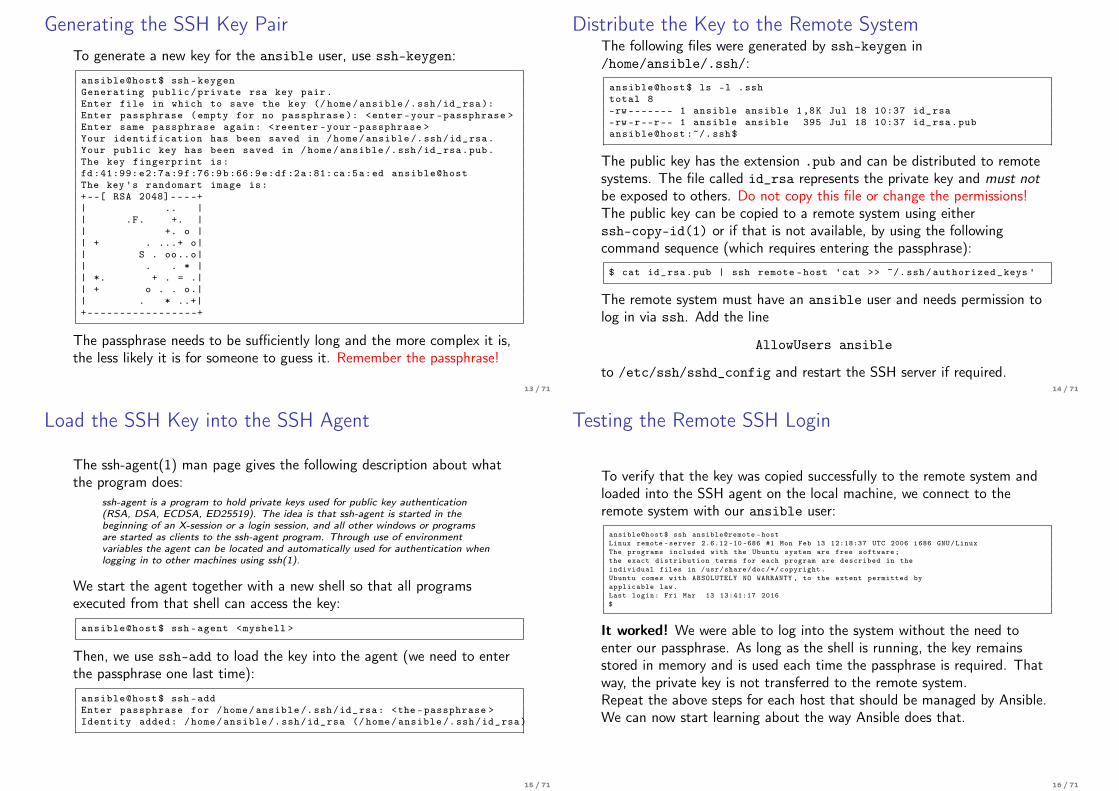
Generating the SSH Key PairTo generate a new key for the ansible user, use ssh-keygen:
ansible@host$ ssh -keygenGenerating public/private rsa key pair.Enter file in which to save the key (/home/ansible /.ssh/id_rsa):Enter passphrase (empty for no passphrase ): <enter -your -passphrase >Enter same passphrase again: <reenter -your -passphrase >Your identification has been saved in /home/ansible /.ssh/id_rsa.Your public key has been saved in /home/ansible /.ssh/id_rsa.pub.The key fingerprint is:fd :41:99:e2:7a:9f:76:9b:66:9e:df:2a:81:ca:5a:ed ansible@hostThe key 's randomart image is:+--[ RSA 2048]----+| .. || .F. +. || +. o || + . ...+ o|| S . oo..o|| . . * || *. + . = .|| + o . . o.|| . * ..+|+-----------------+
The passphrase needs to be sufficiently long and the more complex it is,the less likely it is for someone to guess it. Remember the passphrase!
13 / 71
Distribute the Key to the Remote SystemThe following files were generated by ssh-keygen in/home/ansible/.ssh/:
ansible@host$ ls -l .sshtotal 8-rw------- 1 ansible ansible 1,8K Jul 18 10:37 id_rsa-rw-r--r-- 1 ansible ansible 395 Jul 18 10:37 id_rsa.pubansible@host :~/. ssh$
The public key has the extension .pub and can be distributed to remotesystems. The file called id_rsa represents the private key and must notbe exposed to others. Do not copy this file or change the permissions!The public key can be copied to a remote system using eitherssh-copy-id(1) or if that is not available, by using the followingcommand sequence (which requires entering the passphrase):
$ cat id_rsa.pub | ssh remote -host 'cat >> ~/. ssh/authorized_keys '
The remote system must have an ansible user and needs permission tolog in via ssh. Add the line
AllowUsers ansible
to /etc/ssh/sshd_config and restart the SSH server if required.14 / 71
Load the SSH Key into the SSH Agent
The ssh-agent(1) man page gives the following description about whatthe program does:
ssh-agent is a program to hold private keys used for public key authentication(RSA, DSA, ECDSA, ED25519). The idea is that ssh-agent is started in thebeginning of an X-session or a login session, and all other windows or programsare started as clients to the ssh-agent program. Through use of environmentvariables the agent can be located and automatically used for authentication whenlogging in to other machines using ssh(1).
We start the agent together with a new shell so that all programsexecuted from that shell can access the key:
ansible@host$ ssh -agent <myshell >
Then, we use ssh-add to load the key into the agent (we need to enterthe passphrase one last time):
ansible@host$ ssh -addEnter passphrase for /home/ansible /.ssh/id_rsa: <the -passphrase >Identity added: /home/ansible /.ssh/id_rsa (/home/ansible /.ssh/id_rsa)
15 / 71
Testing the Remote SSH Login
To verify that the key was copied successfully to the remote system andloaded into the SSH agent on the local machine, we connect to theremote system with our ansible user:
ansible@host$ ssh ansible@remote -hostLinux remote -server 2.6.12 -10 -686 #1 Mon Feb 13 12:18:37 UTC 2006 i686 GNU/LinuxThe programs included with the Ubuntu system are free software;the exact distribution terms for each program are described in theindividual files in /usr/share/doc/*/ copyright.Ubuntu comes with ABSOLUTELY NO WARRANTY , to the extent permitted byapplicable law.Last login: Fri Mar 13 13:41:17 2016$
It worked! We were able to log into the system without the need toenter our passphrase. As long as the shell is running, the key remainsstored in memory and is used each time the passphrase is required. Thatway, the private key is not transferred to the remote system.Repeat the above steps for each host that should be managed by Ansible.We can now start learning about the way Ansible does that.
16 / 71
Overview
Introduction to AnsibleRequirementsSSH Setup
Ansible CommandsFile TransfersPackage ManagementFile Modifications
PlaybooksWriting PlaybooksYAMLVariablesLoops
A Complete Example
17 / 71
Ansible Management from the Command-Line
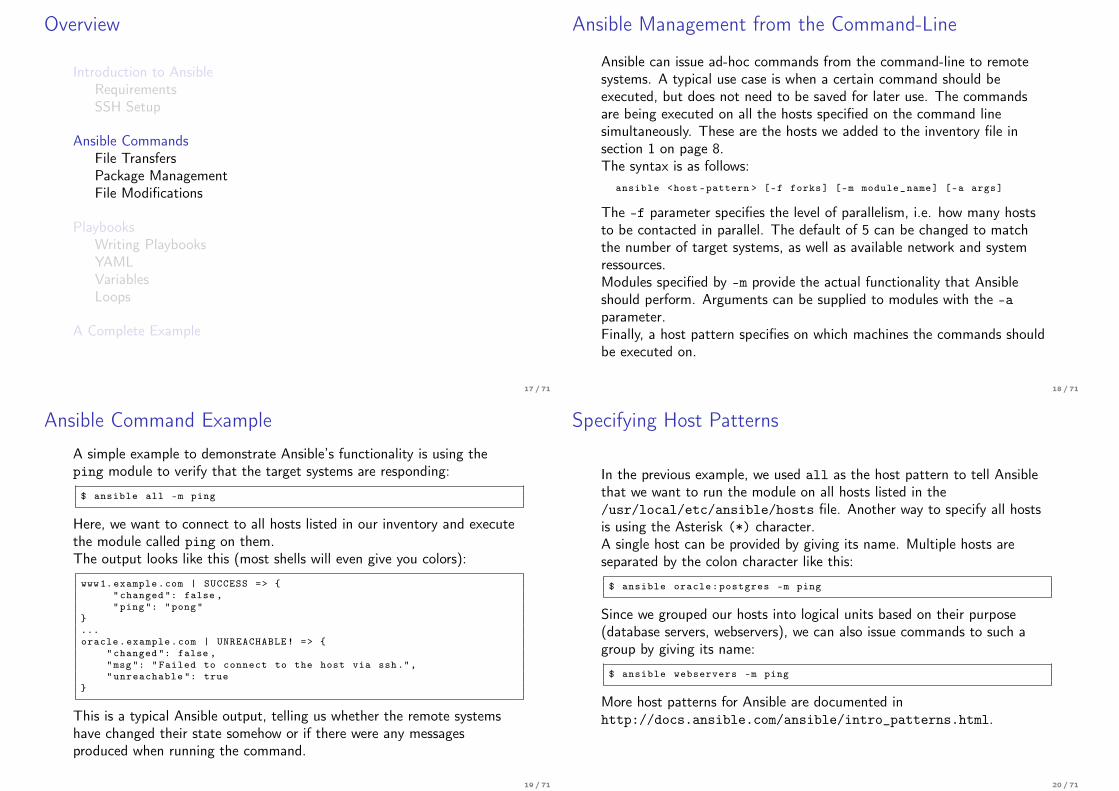
Ansible can issue ad-hoc commands from the command-line to remotesystems. A typical use case is when a certain command should beexecuted, but does not need to be saved for later use. The commandsare being executed on all the hosts specified on the command linesimultaneously. These are the hosts we added to the inventory file insection 1 on page 8.The syntax is as follows:
ansible <host -pattern > [-f forks] [-m module_name] [-a args]
The -f parameter specifies the level of parallelism, i.e. how many hoststo be contacted in parallel. The default of 5 can be changed to matchthe number of target systems, as well as available network and systemressources.Modules specified by -m provide the actual functionality that Ansibleshould perform. Arguments can be supplied to modules with the -aparameter.Finally, a host pattern specifies on which machines the commands shouldbe executed on.
18 / 71
Ansible Command Example
A simple example to demonstrate Ansible’s functionality is using theping module to verify that the target systems are responding:
$ ansible all -m ping
Here, we want to connect to all hosts listed in our inventory and executethe module called ping on them.The output looks like this (most shells will even give you colors):
www1. example.com | SUCCESS => {"changed ": false ,"ping": "pong"
}...oracle.example.com | UNREACHABLE! => {
"changed ": false ,"msg": "Failed to connect to the host via ssh.","unreachable ": true
}
This is a typical Ansible output, telling us whether the remote systemshave changed their state somehow or if there were any messagesproduced when running the command.
19 / 71
Specifying Host Patterns
In the previous example, we used all as the host pattern to tell Ansiblethat we want to run the module on all hosts listed in the/usr/local/etc/ansible/hosts file. Another way to specify all hostsis using the Asterisk (*) character.A single host can be provided by giving its name. Multiple hosts areseparated by the colon character like this:
$ ansible oracle:postgres -m ping
Since we grouped our hosts into logical units based on their purpose(database servers, webservers), we can also issue commands to such agroup by giving its name:
$ ansible webservers -m ping
More host patterns for Ansible are documented inhttp://docs.ansible.com/ansible/intro_patterns.html.
20 / 71
Overview
Introduction to AnsibleRequirementsSSH Setup
Ansible CommandsFile TransfersPackage ManagementFile Modifications
PlaybooksWriting PlaybooksYAMLVariablesLoops
A Complete Example
21 / 71
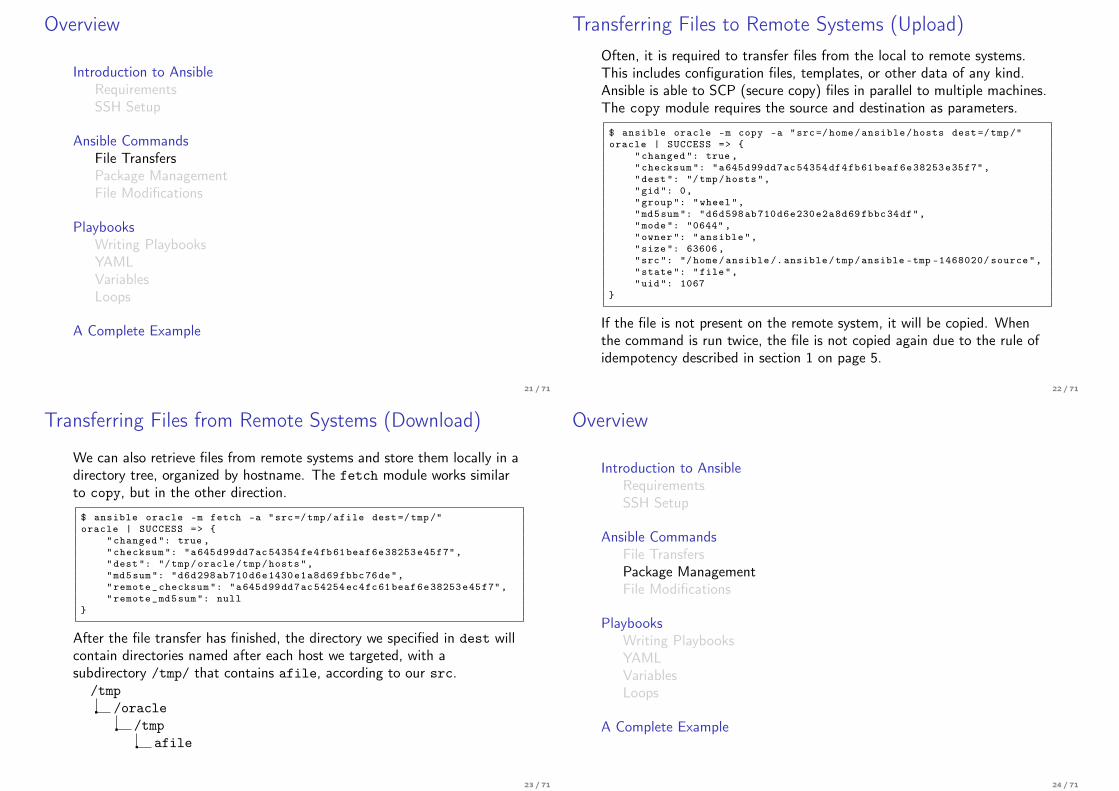
Transferring Files to Remote Systems (Upload)Often, it is required to transfer files from the local to remote systems.This includes configuration files, templates, or other data of any kind.Ansible is able to SCP (secure copy) files in parallel to multiple machines.The copy module requires the source and destination as parameters.
$ ansible oracle -m copy -a "src=/home/ansible/hosts dest=/tmp/"oracle | SUCCESS => {
"changed ": true ,"checksum ": "a645d99dd7ac 54354df4fb61beaf6e38253e35f7","dest": "/tmp/hosts","gid": 0,"group": "wheel","md5sum": "d6d598ab710d6e230e2a8d69fbbc34df","mode": "0644" ,"owner": "ansible","size": 63606 ,"src": "/home/ansible /. ansible/tmp/ansible -tmp -1468020/ source","state": "file","uid": 1067
}
If the file is not present on the remote system, it will be copied. Whenthe command is run twice, the file is not copied again due to the rule ofidempotency described in section 1 on page 5.
22 / 71
Transferring Files from Remote Systems (Download)
We can also retrieve files from remote systems and store them locally in adirectory tree, organized by hostname. The fetch module works similarto copy, but in the other direction.
$ ansible oracle -m fetch -a "src=/tmp/afile dest=/tmp/"oracle | SUCCESS => {
"changed ": true ,"checksum ": "a645d99dd7ac 54354fe4fb61beaf6e38253e45f7","dest": "/tmp/oracle/tmp/hosts","md5sum": "d6d298ab710d6e1430e1a8d69fbbc76de","remote_checksum ": "a645d99dd7ac 54254ec4fc61beaf6e38253e45f7","remote_md5sum": null
}
After the file transfer has finished, the directory we specified in dest willcontain directories named after each host we targeted, with asubdirectory /tmp/ that contains afile, according to our src.
/tmp/oracle
/tmpafile
23 / 71
Overview
Introduction to AnsibleRequirementsSSH Setup
Ansible CommandsFile TransfersPackage ManagementFile Modifications
PlaybooksWriting PlaybooksYAMLVariablesLoops
A Complete Example
24 / 71
Package Management
A common task for configuration management systems is to install,update, delete, and configure application software on the target operatingsystem. Usually, package managers are provided by the OS vendor or bythe application or programming language when there is a lot of optionalor third-party software available. Ansible provides the same functionalityand can sometimes abstract away the complexities of using the packagemanager directly.Making changes to packages usually involves administrative permissions,so we’ll look at what kind of options Ansible offers here as well.
25 / 71
Basic Package Management Command
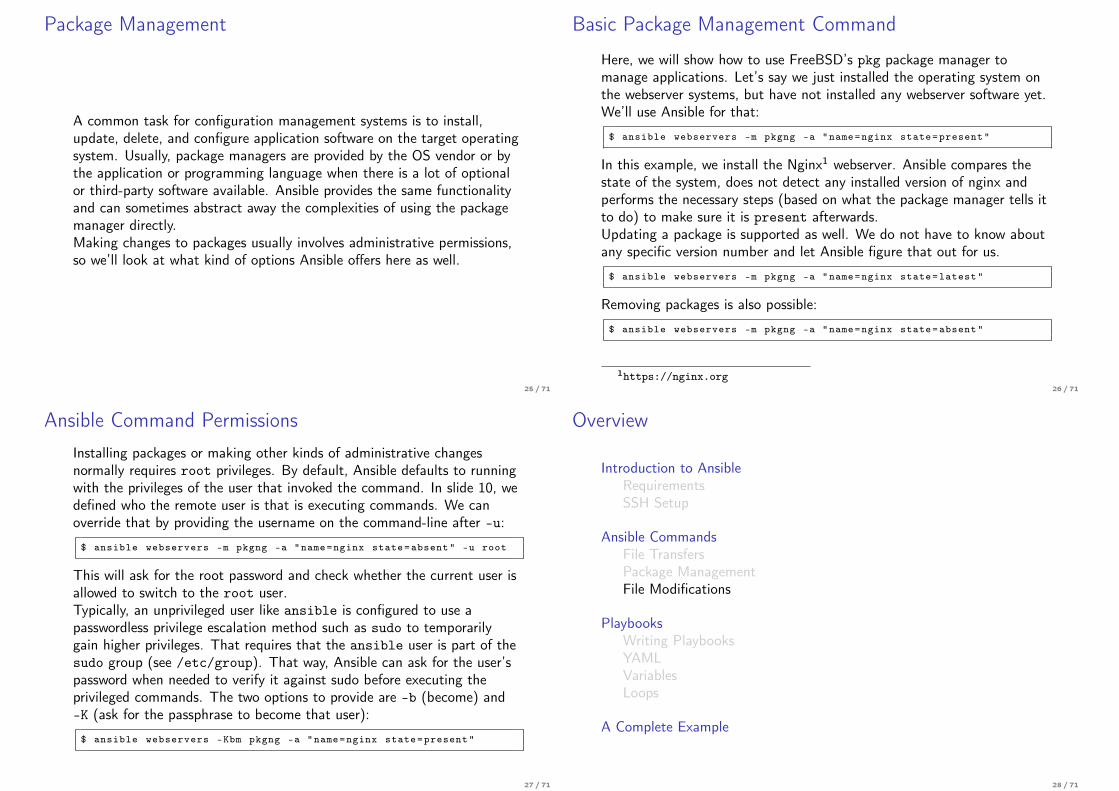
Here, we will show how to use FreeBSD’s pkg package manager tomanage applications. Let’s say we just installed the operating system onthe webserver systems, but have not installed any webserver software yet.We’ll use Ansible for that:
$ ansible webservers -m pkgng -a "name=nginx state=present"
In this example, we install the Nginx1 webserver. Ansible compares thestate of the system, does not detect any installed version of nginx andperforms the necessary steps (based on what the package manager tells itto do) to make sure it is present afterwards.Updating a package is supported as well. We do not have to know aboutany specific version number and let Ansible figure that out for us.
$ ansible webservers -m pkgng -a "name=nginx state=latest"
Removing packages is also possible:
$ ansible webservers -m pkgng -a "name=nginx state=absent"
1https://nginx.org26 / 71
Ansible Command PermissionsInstalling packages or making other kinds of administrative changesnormally requires root privileges. By default, Ansible defaults to runningwith the privileges of the user that invoked the command. In slide 10, wedefined who the remote user is that is executing commands. We canoverride that by providing the username on the command-line after -u:
$ ansible webservers -m pkgng -a "name=nginx state=absent" -u root
This will ask for the root password and check whether the current user isallowed to switch to the root user.Typically, an unprivileged user like ansible is configured to use apasswordless privilege escalation method such as sudo to temporarilygain higher privileges. That requires that the ansible user is part of thesudo group (see /etc/group). That way, Ansible can ask for the user’spassword when needed to verify it against sudo before executing theprivileged commands. The two options to provide are -b (become) and-K (ask for the passphrase to become that user):
$ ansible webservers -Kbm pkgng -a "name=nginx state=present"
27 / 71
Overview
Introduction to AnsibleRequirementsSSH Setup
Ansible CommandsFile TransfersPackage ManagementFile Modifications
PlaybooksWriting PlaybooksYAMLVariablesLoops
A Complete Example
28 / 71

File Modifications
Ansible can perform actions on files like changing their permissions andownership. It can also make changes to the file contents such as addinglines at a specific location or replacing certain strings. This is especiallyhelpful with configuration files that are installed as part of a package orthe operating system.
$ ansible dbservers -Kbm file -a "src=/tmp dest=/var/tmp state=link"
This will create a symbolic link in the directory /var/tmp to /tmp.
$ ansible db2 -Kbm file -a "path=/opt/db2 state=directory mode =775"
Creates a directory /opt/db2 with rwxrwxr-x on the host (or group)called db2.
29 / 71
Editing Files
A common problem for system administrators is to edit configurationfiles, without adding a certain string multiple times. Although this isusually checked by the configuration file parser, it is better to avoid inthe first place. This is where idempotency can help maintain order andavoid clutter.For example, we might be dealing with a configuration file with a similarstyle as our Ansible inventory.
[general]setting1 = truesetting2 = "a string"
[special]option1 = 123option2 = abc
30 / 71
Changing the Configuration File
The module lineinfile searches for a line in a file based on a regularexpression that is either absent or present.
$ ansible postgres -m lineinfile -a "dest=/tmp/file.inistate=absent regexp =^ setting 2"
postgres | SUCCESS => {"backup ": "","changed ": true ,"found": 1,"msg": "1 line(s) removed"
}
Afterwards, the file looks like this:
[general]setting1 = true
[special]option1 = 123option2 = abc
31 / 71
Inserting Lines into the Configuration File
When a match is found by lineinfile, a parameter insertafter orinsertbefore determines where a new line should be placed.
$ ansible postgres -m lineinfile -a "dest=/tmp/file.iniinsertafter ='^setting1' line='setting2 = false '"
postgres | SUCCESS => {"backup ": "","changed ": true ,"msg": "line added"
}
Now, the file contains these lines:
[general]setting1 = truesetting2 = false
[special]option1 = 123option2 = abc
32 / 71
Replacing Strings in a file
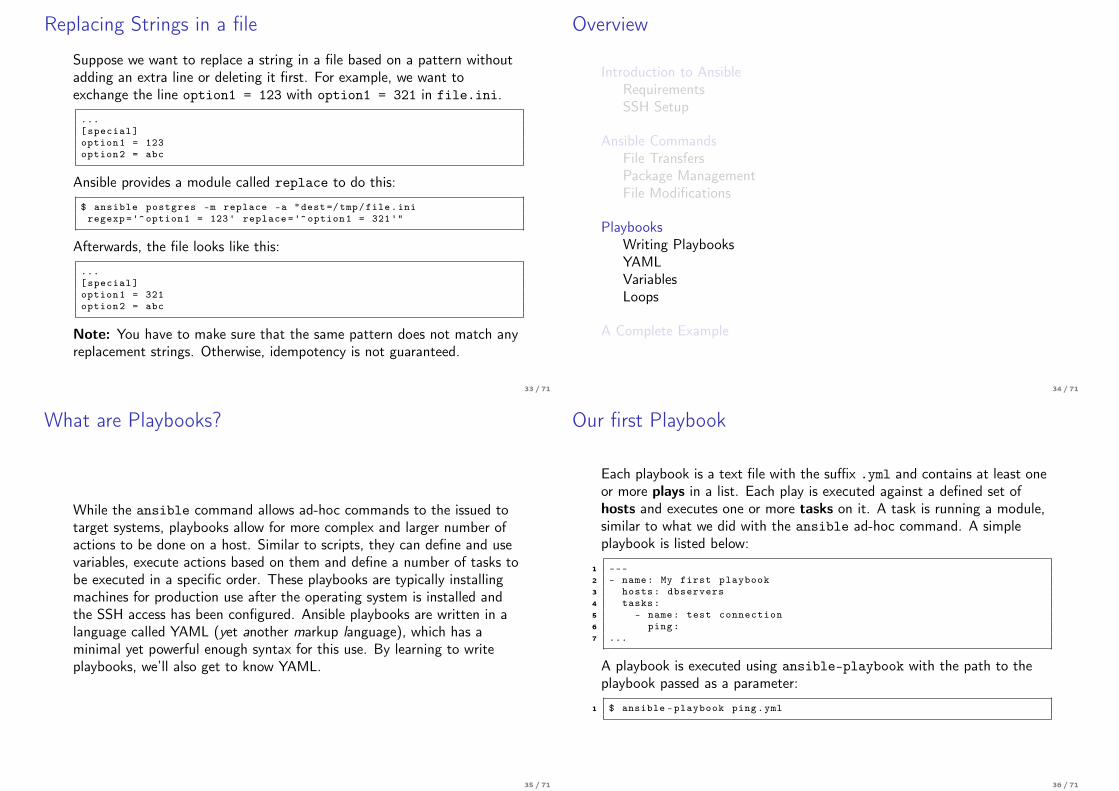
Suppose we want to replace a string in a file based on a pattern withoutadding an extra line or deleting it first. For example, we want toexchange the line option1 = 123 with option1 = 321 in file.ini.
...[special]option1 = 123option2 = abc
Ansible provides a module called replace to do this:
$ ansible postgres -m replace -a "dest=/tmp/file.iniregexp='^option1 = 123' replace='^option1 = 321'"
Afterwards, the file looks like this:
...[special]option1 = 321option2 = abc
Note: You have to make sure that the same pattern does not match anyreplacement strings. Otherwise, idempotency is not guaranteed.
33 / 71
Overview
Introduction to AnsibleRequirementsSSH Setup
Ansible CommandsFile TransfersPackage ManagementFile Modifications
PlaybooksWriting PlaybooksYAMLVariablesLoops
A Complete Example
34 / 71
What are Playbooks?
While the ansible command allows ad-hoc commands to the issued totarget systems, playbooks allow for more complex and larger number ofactions to be done on a host. Similar to scripts, they can define and usevariables, execute actions based on them and define a number of tasks tobe executed in a specific order. These playbooks are typically installingmachines for production use after the operating system is installed andthe SSH access has been configured. Ansible playbooks are written in alanguage called YAML (yet another markup language), which has aminimal yet powerful enough syntax for this use. By learning to writeplaybooks, we’ll also get to know YAML.
35 / 71
Our first Playbook
Each playbook is a text file with the suffix .yml and contains at least oneor more plays in a list. Each play is executed against a defined set ofhosts and executes one or more tasks on it. A task is running a module,similar to what we did with the ansible ad-hoc command. A simpleplaybook is listed below:
1 ---2 - name: My first playbook3 hosts: dbservers4 tasks:5 - name: test connection6 ping:7 ...
A playbook is executed using ansible-playbook with the path to theplaybook passed as a parameter:
1 $ ansible -playbook ping.yml
36 / 71
Executing our First Playbook
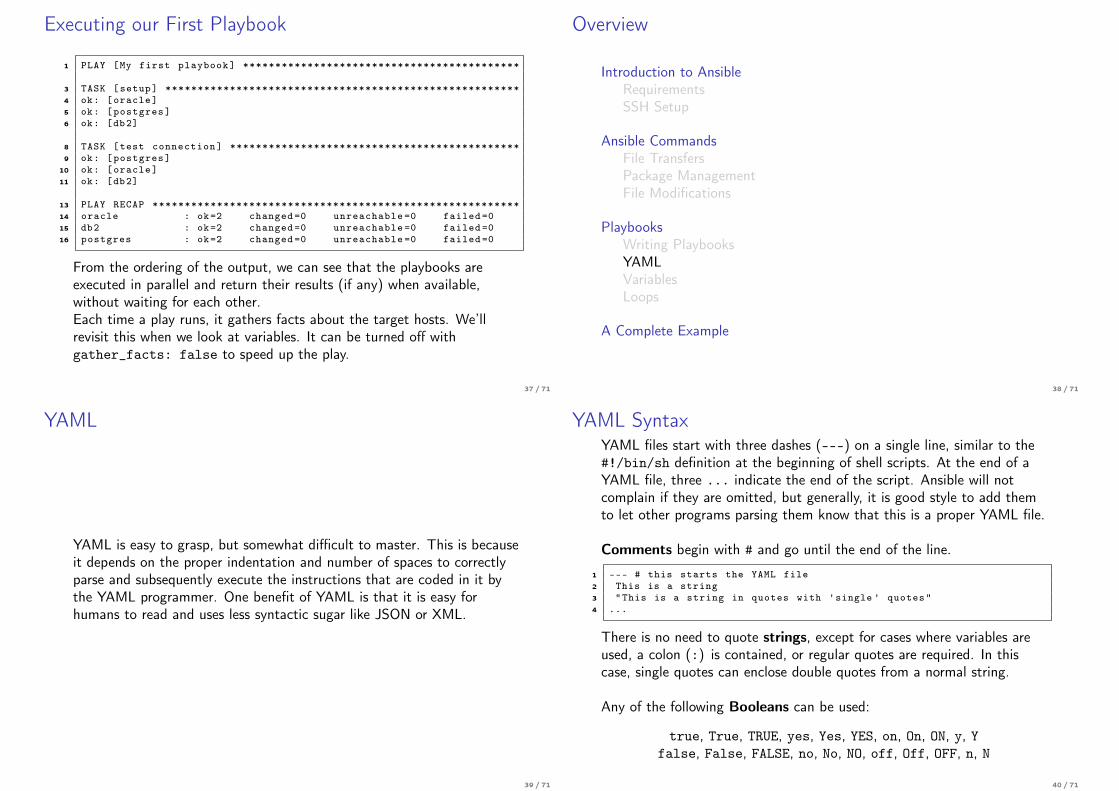
1 PLAY [My first playbook] *******************************************
3 TASK [setup] *******************************************************4 ok: [oracle]5 ok: [postgres]6 ok: [db2]
8 TASK [test connection] *********************************************9 ok: [postgres]
10 ok: [oracle]11 ok: [db2]
13 PLAY RECAP *********************************************************14 oracle : ok=2 changed =0 unreachable =0 failed =015 db2 : ok=2 changed =0 unreachable =0 failed =016 postgres : ok=2 changed =0 unreachable =0 failed =0
From the ordering of the output, we can see that the playbooks areexecuted in parallel and return their results (if any) when available,without waiting for each other.Each time a play runs, it gathers facts about the target hosts. We’llrevisit this when we look at variables. It can be turned off withgather_facts: false to speed up the play.
37 / 71
Overview
Introduction to AnsibleRequirementsSSH Setup
Ansible CommandsFile TransfersPackage ManagementFile Modifications
PlaybooksWriting PlaybooksYAMLVariablesLoops
A Complete Example
38 / 71
YAML
YAML is easy to grasp, but somewhat difficult to master. This is becauseit depends on the proper indentation and number of spaces to correctlyparse and subsequently execute the instructions that are coded in it bythe YAML programmer. One benefit of YAML is that it is easy forhumans to read and uses less syntactic sugar like JSON or XML.
39 / 71
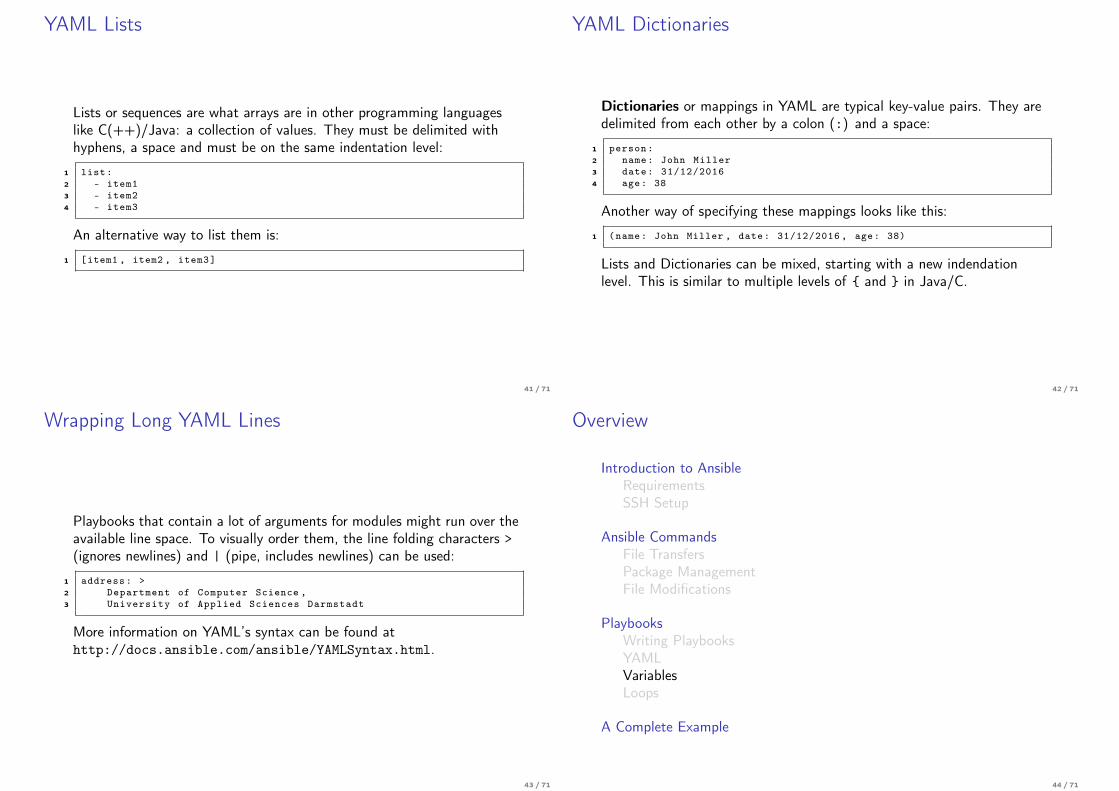
YAML SyntaxYAML files start with three dashes (---) on a single line, similar to the#!/bin/sh definition at the beginning of shell scripts. At the end of aYAML file, three ... indicate the end of the script. Ansible will notcomplain if they are omitted, but generally, it is good style to add themto let other programs parsing them know that this is a proper YAML file.
Comments begin with # and go until the end of the line.
1 --- # this starts the YAML file2 This is a string3 "This is a string in quotes with 'single ' quotes"4 ...
There is no need to quote strings, except for cases where variables areused, a colon (:) is contained, or regular quotes are required. In thiscase, single quotes can enclose double quotes from a normal string.
Any of the following Booleans can be used:
true, True, TRUE, yes, Yes, YES, on, On, ON, y, Yfalse, False, FALSE, no, No, NO, off, Off, OFF, n, N
40 / 71
YAML Lists
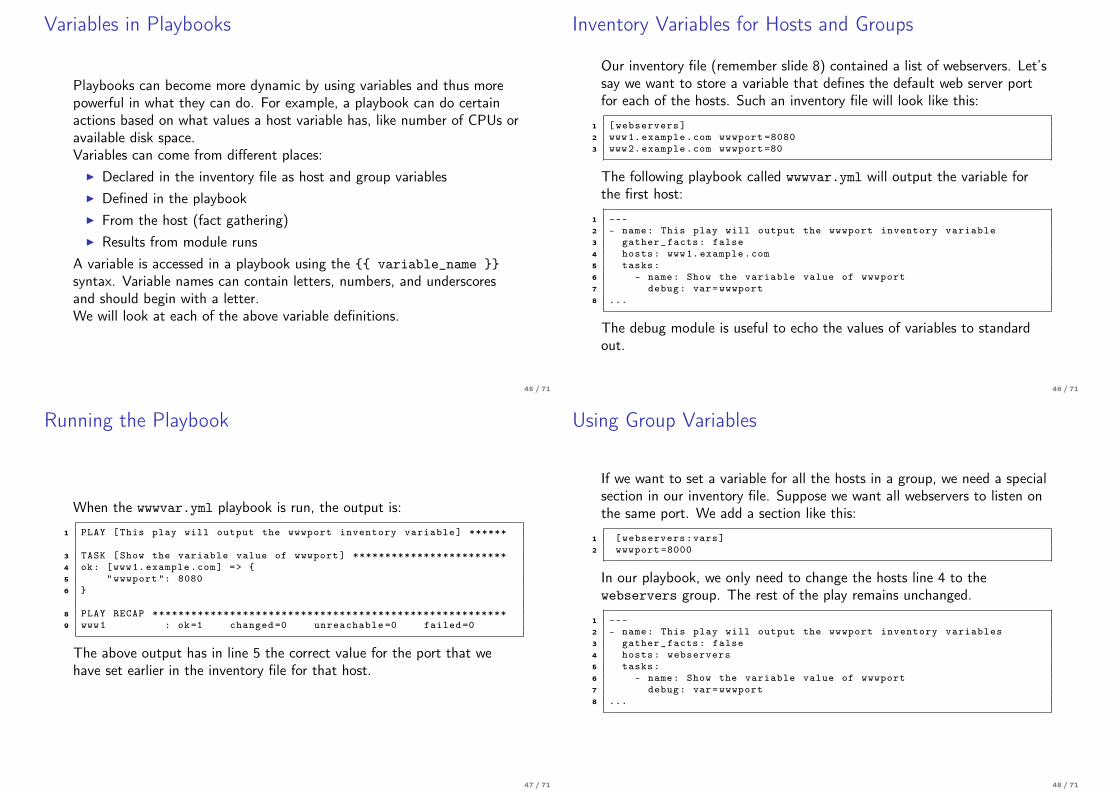
Lists or sequences are what arrays are in other programming languageslike C(++)/Java: a collection of values. They must be delimited withhyphens, a space and must be on the same indentation level:
1 list:2 - item13 - item24 - item3
An alternative way to list them is:
1 [item1 , item2 , item3]
41 / 71
YAML Dictionaries
Dictionaries or mappings in YAML are typical key-value pairs. They aredelimited from each other by a colon (:) and a space:
1 person:2 name: John Miller3 date: 31/12/20164 age: 38
Another way of specifying these mappings looks like this:
1 (name: John Miller , date: 31/12/2016 , age: 38)
Lists and Dictionaries can be mixed, starting with a new indendationlevel. This is similar to multiple levels of { and } in Java/C.
42 / 71
Wrapping Long YAML Lines
Playbooks that contain a lot of arguments for modules might run over theavailable line space. To visually order them, the line folding characters >(ignores newlines) and | (pipe, includes newlines) can be used:
1 address: >2 Department of Computer Science ,3 University of Applied Sciences Darmstadt
More information on YAML’s syntax can be found athttp://docs.ansible.com/ansible/YAMLSyntax.html.
43 / 71
Overview
Introduction to AnsibleRequirementsSSH Setup
Ansible CommandsFile TransfersPackage ManagementFile Modifications
PlaybooksWriting PlaybooksYAMLVariablesLoops
A Complete Example
44 / 71
Variables in Playbooks
Playbooks can become more dynamic by using variables and thus morepowerful in what they can do. For example, a playbook can do certainactions based on what values a host variable has, like number of CPUs oravailable disk space.Variables can come from different places:
I Declared in the inventory file as host and group variablesI Defined in the playbookI From the host (fact gathering)I Results from module runs
A variable is accessed in a playbook using the {{ variable_name }}syntax. Variable names can contain letters, numbers, and underscoresand should begin with a letter.We will look at each of the above variable definitions.
45 / 71
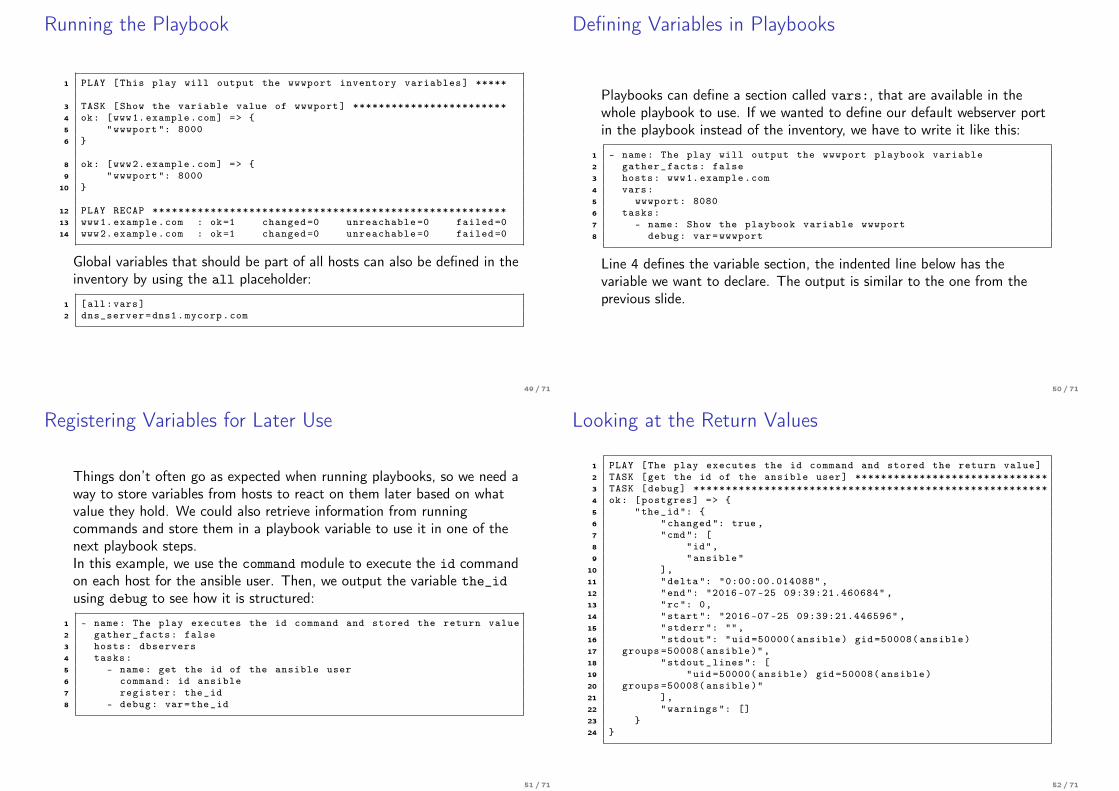
Inventory Variables for Hosts and Groups
Our inventory file (remember slide 8) contained a list of webservers. Let’ssay we want to store a variable that defines the default web server portfor each of the hosts. Such an inventory file will look like this:
1 [webservers]2 www1. example.com wwwport =80803 www2. example.com wwwport =80
The following playbook called wwwvar.yml will output the variable forthe first host:
1 ---2 - name: This play will output the wwwport inventory variable3 gather_facts: false4 hosts: www1. example.com5 tasks:6 - name: Show the variable value of wwwport7 debug: var=wwwport8 ...
The debug module is useful to echo the values of variables to standardout.
46 / 71
Running the Playbook
When the wwwvar.yml playbook is run, the output is:
1 PLAY [This play will output the wwwport inventory variable] ******
3 TASK [Show the variable value of wwwport] ************************4 ok: [www1. example.com] => {5 "wwwport ": 80806 }
8 PLAY RECAP *******************************************************9 www1 : ok=1 changed =0 unreachable =0 failed =0
The above output has in line 5 the correct value for the port that wehave set earlier in the inventory file for that host.
47 / 71
Using Group Variables
If we want to set a variable for all the hosts in a group, we need a specialsection in our inventory file. Suppose we want all webservers to listen onthe same port. We add a section like this:
1 [webservers:vars]2 wwwport =8000
In our playbook, we only need to change the hosts line 4 to thewebservers group. The rest of the play remains unchanged.
1 ---2 - name: This play will output the wwwport inventory variables3 gather_facts: false4 hosts: webservers5 tasks:6 - name: Show the variable value of wwwport7 debug: var=wwwport8 ...
48 / 71
Running the Playbook
1 PLAY [This play will output the wwwport inventory variables] *****
3 TASK [Show the variable value of wwwport] ************************4 ok: [www1. example.com] => {5 "wwwport ": 80006 }
8 ok: [www2. example.com] => {9 "wwwport ": 8000
10 }
12 PLAY RECAP *******************************************************13 www1. example.com : ok=1 changed =0 unreachable =0 failed =014 www2. example.com : ok=1 changed =0 unreachable =0 failed =0
Global variables that should be part of all hosts can also be defined in theinventory by using the all placeholder:
1 [all:vars]2 dns_server=dns1.mycorp.com
49 / 71
Defining Variables in Playbooks
Playbooks can define a section called vars:, that are available in thewhole playbook to use. If we wanted to define our default webserver portin the playbook instead of the inventory, we have to write it like this:
1 - name: The play will output the wwwport playbook variable2 gather_facts: false3 hosts: www1. example.com4 vars:5 wwwport: 80806 tasks:7 - name: Show the playbook variable wwwport8 debug: var=wwwport
Line 4 defines the variable section, the indented line below has thevariable we want to declare. The output is similar to the one from theprevious slide.
50 / 71
Registering Variables for Later Use
Things don’t often go as expected when running playbooks, so we need away to store variables from hosts to react on them later based on whatvalue they hold. We could also retrieve information from runningcommands and store them in a playbook variable to use it in one of thenext playbook steps.In this example, we use the command module to execute the id commandon each host for the ansible user. Then, we output the variable the_idusing debug to see how it is structured:
1 - name: The play executes the id command and stored the return value2 gather_facts: false3 hosts: dbservers4 tasks:5 - name: get the id of the ansible user6 command: id ansible7 register: the_id8 - debug: var=the_id
51 / 71
Looking at the Return Values
1 PLAY [The play executes the id command and stored the return value]2 TASK [get the id of the ansible user] ******************************3 TASK [debug] *******************************************************4 ok: [postgres] => {5 "the_id": {6 "changed ": true ,7 "cmd": [8 "id",9 "ansible"
10 ],11 "delta": "0:00:00.014088" ,12 "end": "2016 -07 -25 09:39:21.460684" ,13 "rc": 0,14 "start": "2016 -07 -25 09:39:21.446596" ,15 "stderr ": "",16 "stdout ": "uid =50000( ansible) gid =50008( ansible)17 groups =50008( ansible)",18 "stdout_lines": [19 "uid =50000( ansible) gid =50008( ansible)20 groups =50008( ansible )"21 ],22 "warnings ": []23 }24 }
52 / 71

Using the Return Value’s Variables
We can access individual members of the the_id array using the variablewe defined (the_id) and the dot operator followed by the member name.In this example, we use the returned value in the text of the new name:section below our original playbook content to see the value.
1 - name: The play executes the id command and stores the return value2 gather_facts: false3 hosts: dbservers4 tasks:5 - name: get the id of the ansible user6 command: id ansible7 register: the_id8 - debug: var=the_id9 name: The command returned {{ the_id.stdout_lines }}
The relevant section of the output looks like this:
1 TASK [The command returned [u'uid =50000( ansible) gid =50008( ansible)2 groups =50008( ansible )']] ***
53 / 71
Gathering Facts from the Host as Variables
Ansible inserts an implicit task into each playbook that begins to gathervarious facts from the targer host. This can be suppressed (and has beenso far) using the line gather_facts: false in the playbook.All variables from a single host can be accessed using the setup module:
1 $ ansible db2 -m setup
Typical facts include:
Network information: IPv4/v6 addressses, gateway, DNS, interface, etc.Operating System: Distribution release, versions, environment variablesHardware information: CPU, RAM, disk space, devices, available swapDate and time: day, month, year (in various formats), weekday, timeAnsible information: Ansible user, version, nodename, package manager
54 / 71
Variables from the Command Line
Playbook variables can be overridden on the command line in case thevariables in the playbook should not be used for the current run.
1 - name: Echo the message from the command line2 gather_facts: false3 hosts: www1. example.com4 vars:5 message: "empty message"6 tasks:7 - name: echo the message8 debug: msg ="{{ message }}"
The variable message can be passed on the command line with the -eoption to override the variable from the playbook:
1 $ ansible -playbook message.yml -e "message=Hello"2 ok: [www1. example.com] => {3 "msg": "Hello"4 }
When spaces are part of the variable value, single quotes need to be used:
1 $ ansible -playbook message.yml -e '"message=Hello world!"'
55 / 71
Overview
Introduction to AnsibleRequirementsSSH Setup
Ansible CommandsFile TransfersPackage ManagementFile Modifications
PlaybooksWriting PlaybooksYAMLVariablesLoops
A Complete Example
56 / 71
Loops in Playbooks
Loops can help a great deal when a certain action should be repeatedmultiple times. Who wants to create 100 users from the command linemanually when we can solve this problem with a short loop statement?To start with a simple example, consider adding two users, which isalready good to automate to not repeat yourself. Here, we create twousers userA and userB based on the list we provide.
1 - name: add two users2 user: name ={{ item }} state=present groups=wheel3 with_items:4 - userA5 - userB
57 / 71
Loops over a sequence
In this example, we want to create 100 users (user1, user2, . . . ,user100) without listing them all in the with_items list one by one(tedious to type). To do that, we can make use of the with_sequenceconstruct, which acts as a for loop in languages like C and Java.
1 - user: name ={{ item }} state=present groups=wheel2 with_sequence: start=1 end =100 format=user %02x
The format= definition specifies what kind of numerical value should beused (decimal, hexadecimal (0x3f8), or octal (0775)).We can also define a different increment with the stride option. We usethis to create only even-numbered users:
1 - user: name ={{ item }} state=present groups=wheel2 with_sequence: start=0 end =100 stride =2 format=user %02x
58 / 71
Nested LoopsSo far, we only created users that got added to the same group wheel. Ifwe want to specify which user should be added to which group, we maketwo options. We can define the group together with the user as subkeys:
1 - name: add several users and add them to their group2 user: name ={{ item.name }} state=present groups ={{ item.groups }}3 with_items:4 - { name: 'userA ', groups: 'wheel ' }5 - { name: 'userB ', groups: 'operator ' }
We can access the name we gave to the key-value pair simply by addingit to the end of the item keyword, separated by a dot (item.groups).The second way we can solve this is to use a nested loop. This isespecially useful when the user should be added to multiple groups:
1 - name: add several users and add them to multiple groups2 user: name ={{ item [0] }} state=present groups ={{ item [1] }}3 with_nested:4 - [ 'userA ', 'userB ' ]5 - [ 'wheel ', 'operator ', 'www ' ]
This represents a two-dimensional array and to access an element fromeither list, we provide the number in brackets. Thus, item[0] representsuserA first and after all nested elements (item[1] = wheel,operator, www) were processed, we do the same with userB.
59 / 71
Overview
Introduction to AnsibleRequirementsSSH Setup
Ansible CommandsFile TransfersPackage ManagementFile Modifications
PlaybooksWriting PlaybooksYAMLVariablesLoops
A Complete Example
60 / 71
A Complete Example - Deploying a Webserver
We’ll sum up what we’ve learned so far in a scenario for deploying awebserver on a target system. The following steps are typically necessaryto deploy a webserver in production:1. Install the webserver application binaries2. Configure the webserver (document root, ports to listen on, etc.)3. Copy webpages or web applications to the document root directory4. Start the service for the webserver
We will create a playbook that will cover all these steps, so that we willhave a fully functional webserver. The use of variables in our playbookwill be based on what we’ve covered so far.Of course, a webserver does usually require a secure environment to runin, SSL certificates, a database for application data storage, and manyother things to run in production. However, we’ll omit most of these tokeep the example focused enough to not run out of proportions.
61 / 71
Installing the Webserver Application Binaries
We will be using Nginx as the webserver for our little project. Ourdocument root is located under /var/www and has subdirectories foreach webpage hosted on the server. We will run the webserver under thewww user and group, which may or may not be installed as part of thewebserver installation. The web application is split into several HTMLfiles for now, so we don’t need any fancy web application software likePHP, Python, or Ruby on Rails.Already, we can define the following variables in our playbook:
1 vars:2 server: nginx3 user: www4 group: {{ user }}5 docroot: /var/www6 project: demo7 projectdir: /home /{{ project }}/web8 projectfiles:9 - index.html
10 - impressum.html11 - about.html
62 / 71
Writing the Playbook, Part I
Using our variables, we start by writing the tasks for installing thewebserver on a Ubuntu system using the apt package manager. We alsocreate a user and group (www), ensure the document root directory iscreated, and set permissions for that user on it:
1 ---2 - name: The webserver playbook3 hosts: www3.example.com4 vars:5 ...6 tasks:7 - name: Install {{ server }} from packages8 apt: pkg={{ server }} state=present
63 / 71
Writing the Playbook, Part II
In this step, we configure the webserver. This can be solved usingtemplates, where variables from the playbook are replaced with theactual values. These are the webserver IP address, the port to listen onand the document root directory. To keep this example easy, we will usethe following file as a template for nginx.conf:
64 / 71
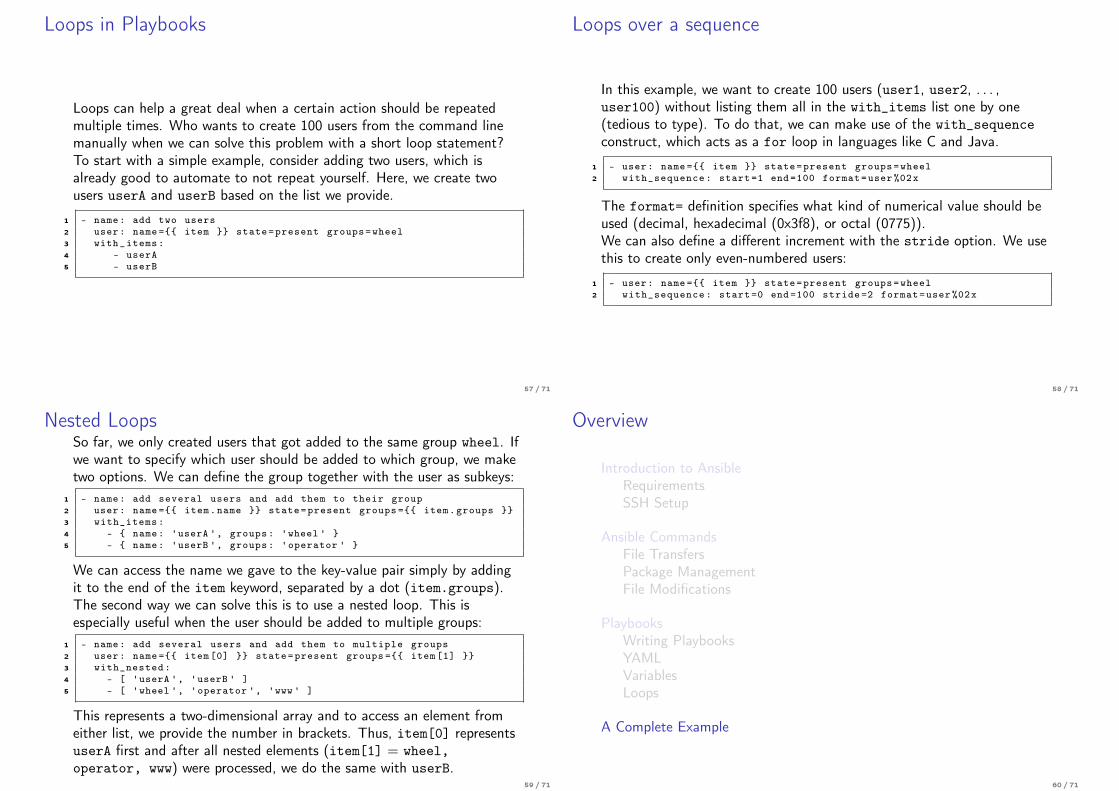
Nginx Configuration Template
1 user nobody;2 worker_processes 1;
4 #error_log logs/error.log;5 #pid /run/nginx.pid;
7 events {8 worker_connections 1024;9 }
11 http {12 include /usr/local/etc/nginx/mime.types;
14 server {15 listen 80;16 server_name localhost;17 location / {18 root /var/www/;19 index index.html index.htm;20 }21 include /usr/local/etc/nginx/sites -enabled /*;22 }23 }
65 / 71
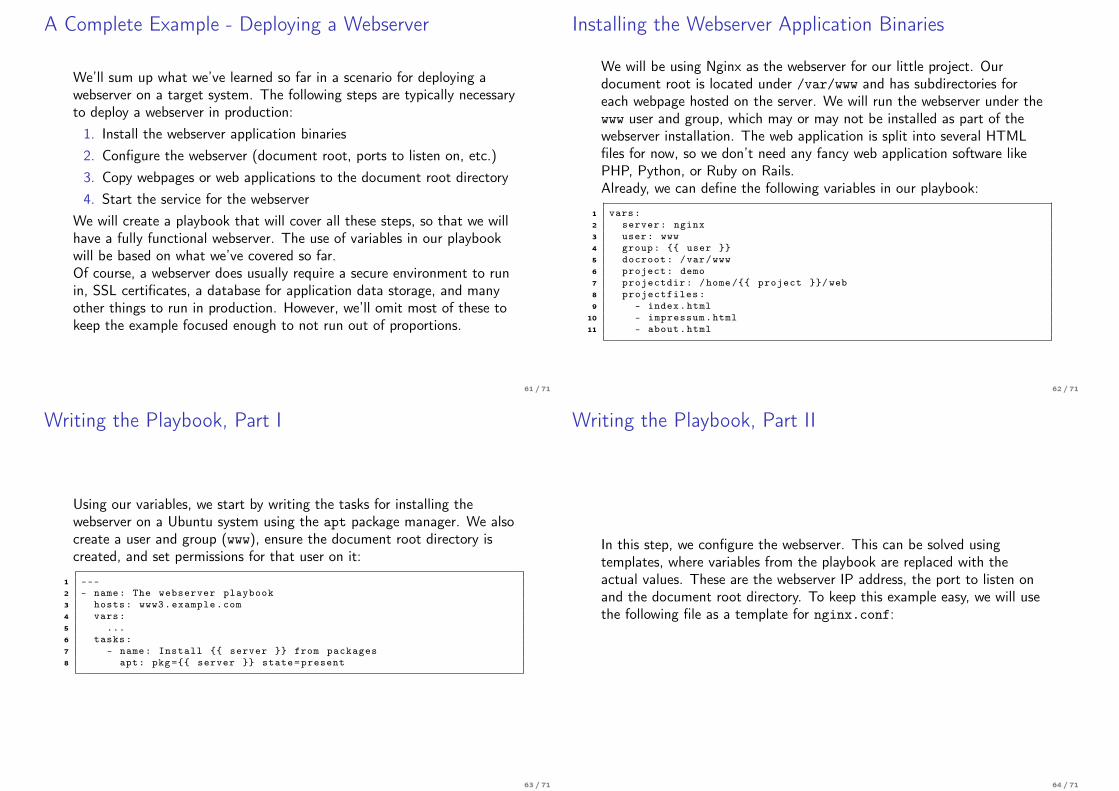
Creating the template
1 user {{ user }};2 worker_processes 1;
4 #error_log logs/error.log;5 #pid /run/nginx.pid;
7 events {8 worker_connections 1024;9 }
11 http {12 include /usr/local/etc/nginx/mime.types;
14 server {15 listen 80;16 server_name localhost;17 location / {18 root {{ docroot }};19 index index.html index.htm;20 }21 include /usr/local/etc/nginx/sites -enabled /*;22 }23 }
66 / 71
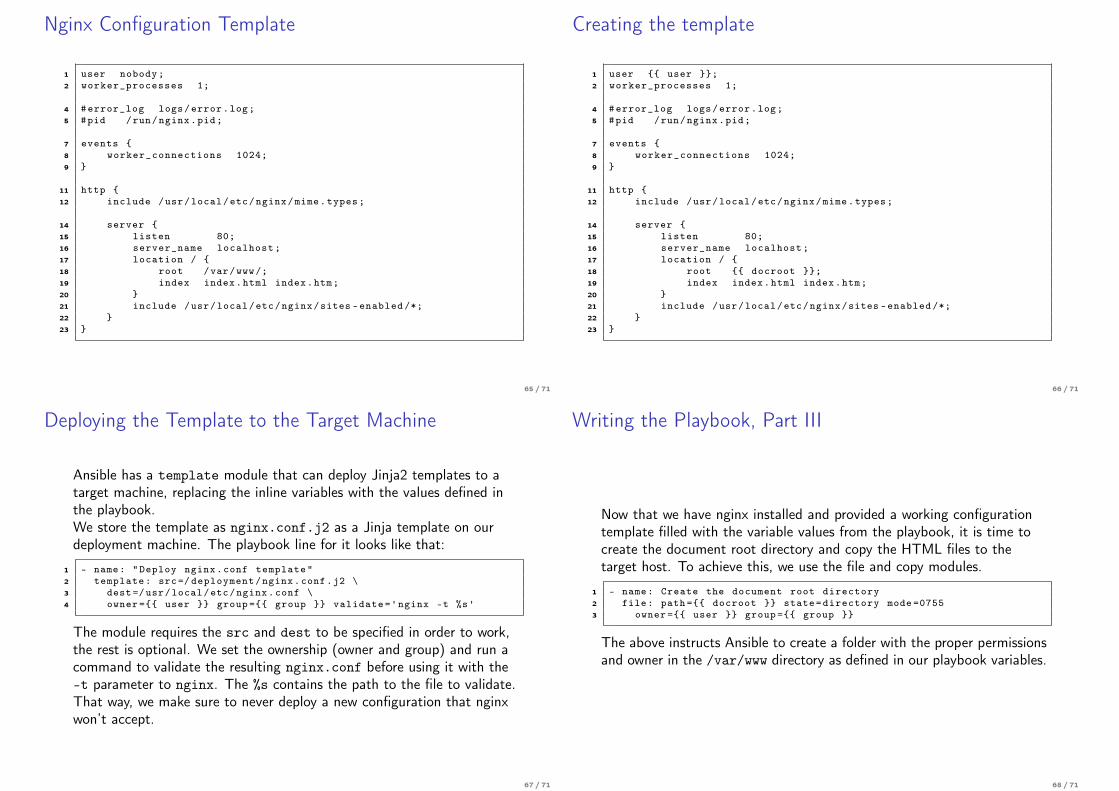
Deploying the Template to the Target Machine
Ansible has a template module that can deploy Jinja2 templates to atarget machine, replacing the inline variables with the values defined inthe playbook.We store the template as nginx.conf.j2 as a Jinja template on ourdeployment machine. The playbook line for it looks like that:
1 - name: "Deploy nginx.conf template"2 template: src=/ deployment/nginx.conf.j2 \3 dest=/usr/local/etc/nginx.conf \4 owner ={{ user }} group ={{ group }} validate='nginx -t %s'
The module requires the src and dest to be specified in order to work,the rest is optional. We set the ownership (owner and group) and run acommand to validate the resulting nginx.conf before using it with the-t parameter to nginx. The %s contains the path to the file to validate.That way, we make sure to never deploy a new configuration that nginxwon’t accept.
67 / 71
Writing the Playbook, Part III
Now that we have nginx installed and provided a working configurationtemplate filled with the variable values from the playbook, it is time tocreate the document root directory and copy the HTML files to thetarget host. To achieve this, we use the file and copy modules.
1 - name: Create the document root directory2 file: path ={{ docroot }} state=directory mode =07553 owner ={{ user }} group ={{ group }}
The above instructs Ansible to create a folder with the proper permissionsand owner in the /var/www directory as defined in our playbook variables.
68 / 71
Copying the files to the document root directory
The copy module will transfer the files to the directory we just created.Since we have multiple HTML files, we will use a list in our taskspecification like this:
1 - name: copy files to the document root2 file: src='{{ projectdir }}/{{ projectfiles }}' dest ={{ docroot }}3 owner ={{ user }} group ={{ group }}
The copy modules requires a src and destination directory to work withand can optionally set owner and permissions.
69 / 71
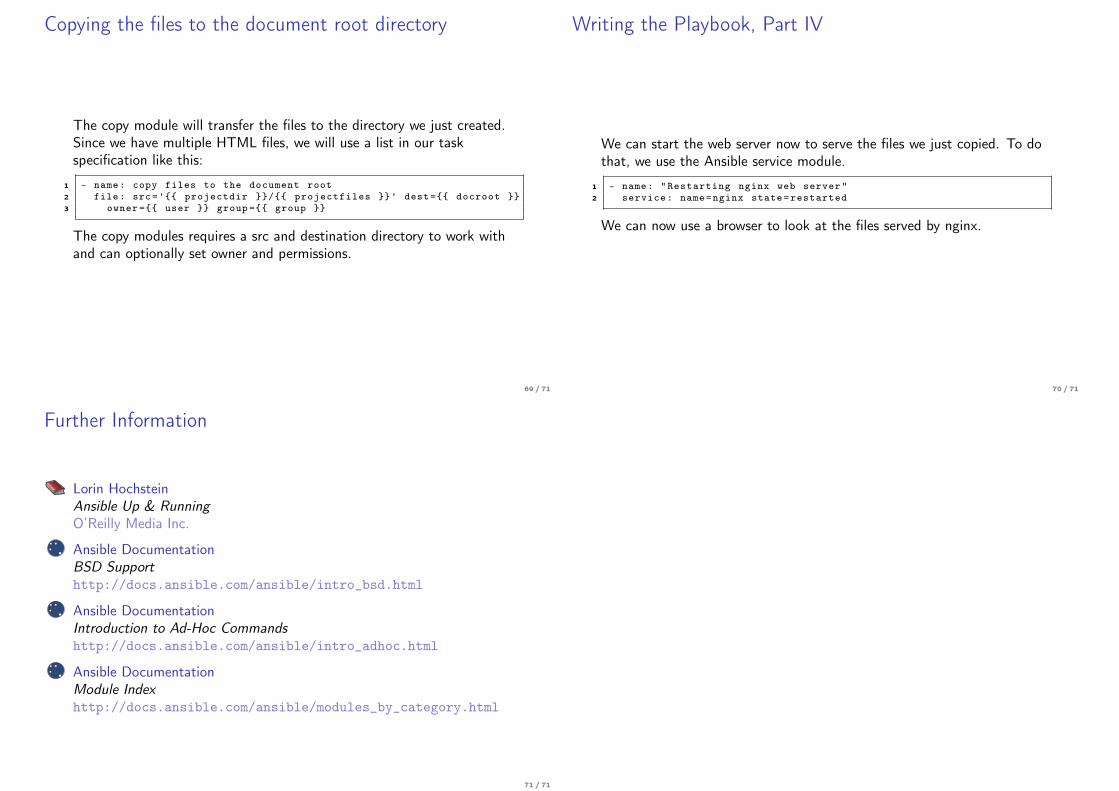
Writing the Playbook, Part IV
We can start the web server now to serve the files we just copied. To dothat, we use the Ansible service module.
1 - name: "Restarting nginx web server"2 service: name=nginx state=restarted
We can now use a browser to look at the files served by nginx.
70 / 71
Further Information
Lorin HochsteinAnsible Up & RunningO’Reilly Media Inc.
Ansible DocumentationBSD Supporthttp://docs.ansible.com/ansible/intro_bsd.html
Ansible DocumentationIntroduction to Ad-Hoc Commandshttp://docs.ansible.com/ansible/intro_adhoc.html
Ansible DocumentationModule Indexhttp://docs.ansible.com/ansible/modules_by_category.html
71 / 71