ad51602(1653909)archery game manual eng span … · manual. contents parts list ... menores de...
TRANSCRIPT

English... 3Español... 11
ARCHERY GAMEJUEGO DE TIRO CON ARCO
User Manual
del usuarioManual

Contents
Parts List...............................................................................................Safety Instructions................................................................................Assembly ..............................................................................................Electronic Scoreboard Instructions........................................................
3458

3
Parts List
51602 PARTS LIST
2 31
x2 x2 x4
4
x4
6 75
x1 x6 x2
8
x2
109
x1 x1
21-1/8” Tube - 1 14-3/4” Tube - 2
Electronic Scorer Bow
11
x3
Safety Stick Arrow
21-1/2” Tube - 3 23-3/4” Tube - 4
Inflatable Bag with Sensors “L” Connector 2 Way Connector Straight Connector
Note: Inflatable bag with sensors (#5) is not available as a replacement part.
WARNING: CHOKING HAZARD - This item contains small parts. Not suitable for children under 3 years.

Safety Instructions
4
SAFETY INSTRUCTIONSWARNING● Product must be assembled by adults before use.● Do not over-inflate.● Not to be used as a floating device.● This product is for youth use only, it is not intended for adult training.Child Safety ● Not for use by children without adult supervision.● To reduce the risk of suffocation, or serious personal injury, - Always stay within reach of children while playing. - Keep the product away from small children when it is not inflated.Product Protection● Play only in open areas away from sharp objects.● Avoid contacting the inflatable bag with sharp objects or hot surfaces which could cause injury to your hands.● Remove sharp objects from your body which could damage the product, such as rings, watches etc.● Make sure that there are no sharp objects on your shoes which could damage the product.
WARNING: This product may be mistaken for an actual weapon by law enforcement officers and others. Altering state or federal required markings or coloration in order to make the product appear more realistic and/or brandishing or displaying the product in public is dangerous and may be a crime. Displaying, exhibiting or brandishing in a threatening manner and possession, storage or keeping on school property are prohibited activities. The Criminal Penalties may be imprisonment and/or fines.
WARNING: 1. DO NOT MODIFY THE PRODUCTS IN ANY WAY.2. DO NOT AIM AT EYES OR FACE.3. DO NOT POINT THE SAFETY STICK ARROW AT PEOPLE OR ANIMALS.4. THIS IS NOT A CHILD’S TOY, ADULT SUPERVISION IS REQUIRED FOR CHILDREN PLAYING THIS GAME.

Assembly
5
FIG. 22 X 2
3 X 2
6 X 2
7 X 2
FIG.22. Attach the tubes (#2, #3) with connectors (#6, #7) as shown in FIG. 2.3. Connect the Sensor Wire from the Inflatable bag with sensors (#5) to the
Electronic Scorer (#9) as shown in FIG. 2A.
FIG.1
FIG. 11 X 2
4 X 2
5 X 1
8 X 1
9 X 1
1. Attach the Tubes (#4), Connector (#8) and the Electronic Scorer (#9) with the Inflatable bag with sensors (#5) as shown in FIG. 1.
4
8
5
1
9
1
4
2
2
3
6
6
9
7
7
3
Target Sensor Wire5
FIG. 2

Assembly
6
FIG.4
FIG. 44 X 2
6 X 2
8 X 1
5. Connect the Tubes (#4), the Straight Connector (#8) and the 'L' Connectors (#6). See FIG. 4A.
6. Attach the FIG. 4A Assembly to the FIG. 3 Assembly as shown in FIG. 4.
6
6 8
FIG. 4A
4
4
FIG. 3 Assembly
FIG. 4A Assembly
FIG.34. Attach the Tubes (#3) and the “L” Connectors (#6) to the FIG. 2 Assembly
as shown in FIG. 3.
FIG. 33 X 2
6 X 2 3 6
6
3
FIG. 2 Assembly

Assembly
7
8. Inflate the Inflatable bag with sensors (#5) using an air pump (not included). See FIG.5 .
FIG.5
Inflation
DO NOT OVER INFLATECover Nozzles
5
FIG. 5

Electronic Scoreboard Instructions
8
WARNING:!1) Requires 3 “AAA” batteries (Included).2) Do not mix old and new batteries.3) Do not mix alkaline, standard (carbon inc), or rechargeable (nickel-cadmium) batteries.
Battery InstallationBattery Box: Unscrew the bolt using a screwdriver and open the battery box. Insert 3 “AAA” batteries (Included) in the order of polarity as shown on the inside cover. Then close the cover using a screwdriver. Turn the power ON using the ON/OFF switch.
Reminder:
a. Batteries must be installed according to the correct polarization (+ and -) required.
b. Please clean the battery contacts and also those of the device prior to battery installation.
c. If the game will not be used for a long period of time, we recommend that the batteries should be removed.
ELECTRONIC SCORER OPERATION
99
WARNING:!Please pull and remove the insulation sheet from the back of the electronic scorer before using the product.
Insulating Sheet

Electronic Scoreboard Instructions
9
A. When the game is switched on, you will hear some sound effects. The electronic scorer will display 2P. The sound effects will continue until a button is pressed. You can choose the button of one or two players. If you press the button for 2P, the timer will start to count down 5.4.3.2.1. After the countdown, you will hear the PLAYER sound effect and see the time display of one minute and thirty seconds.
B. After the countdown, you will see one of the LEDs light up for 5 seconds to shoot. (There are 3 sets of LEDs which will light up randomly during the game.) Once you get a shot on target, you will hear the scoring sound and the scorer will display 01. If you succeed on shooting the next target within the next 5 seconds, you will hear the scoring sound and the scorer will display 02. After a 2 second display of your score, the scorer will switch back to the countdown. If no score is made, the time display will not switch to show the score.
C. After one minute and thirty seconds, the Next Player sound effect will be heard and the countdown will begin. After the countdown, you will see one of the LEDs light up for 5 seconds to shoot. (There are 3 sets of LEDs which will light up randomly during the game.) Once you get a shot on target, you will hear the scoring sound and the scorer will display 01. If you succeed on shooting the next target within the next 5 seconds, you will hear the scoring sound and the scorer will display 02. After a 2 second display of your score, the scorer will switch back to the countdown. If no score is made, the time display will not switch to show the score.
D. Before the time is up, you will hear the sound effect for the 5 second countdown, and then the GAME OVER! and TRY AGAIN! sound effects. You can only start a new game after the sound effects have finished. The scores will flash for the winning player.
E. When one chooses 1P, press the ON/OFF button to start. After hearing the countdown 5. 4. 3. 2. 1, the game of one minute and thirty seconds begins.
F. After the countdown, you will see one of the LEDs light up for 5 seconds to shoot. (There are 3 sets of LEDs which will light up randomly during the game.) Once you get a shot on target, you will hear the scoring sound and the scorer will display 01. If you succeed on shooting the next target within the next 5 seconds, you will hear the scoring sound and the scorer will display 02. After a 2 second display, the scorer will switch back to the countdown. If no score is made, the time display will not switch to show the score. Before the time is up, you will hear the sound effect for the 5 second countdown, and then the GAME OVER! and TRY AGAIN! sound effects. You can only start a new game after the sound effects have finished. The scores will flash for the winning player.
G. The game will enter SLEEP MODE if there are no operations within a 5 minute period.
Game InstructionsWhen the game is plugged in, it automatically sets the game for two players with a time duration of one minute and thirty seconds.(To switch off the product, press the ON/OFF button for two seconds.)

Electronic Scoreboard Instructions
10
WARNING: Changes or modifications not expressly approved by the party responsible for compliance could void the user’s authority to operate the equipment.
NOTE: This equipment has been tested and found to comply with the limits for a Class B digital device, pursuant to Part 15 of the FCC Rules. These limits are designed to provide reasonable protection against harmful interference in a residential installation. This equipment generates, uses and can radiate radio frequency energy and, if not installed and used in accordance with theinstructions, may cause harmful interference to radio communications. However, there is no guarantee that interference will not occur in a particular installation. If this equipment does cause harmful interference to radio or television reception, which can be determined by turning the equipment off and on, the user is encouraged to try to correct the interference by one or more of the following measures:-- Reorient or relocate the receiving antenna.-- Increase the separation between the equipment and receiver.-- Connect the equipment into an outlet on a circuit different from that to which the receiver is connected.-- Consult the dealer or an experienced radio/TV technician for help.
CAUTION !1) To avoid injury, do not pull the bowstring without Safety Stick Arrows, and use only Safety Stick Arrows designed for this product.
2) Do not aim at eyes or face
3) Please wipe the sucker with a dry cloth to increase stickiness.
Bowstring
Arrow Shaft
To place the nock of the Safety Stick Arrow onto the
bowstring closely.
Safety Stick Arrow
YOU ARE NOW READY TO PLAY!

Contenido
Lista de piezas .......................................................................................Instrucciones de seguridad....................................................................Ensamblaje ...........................................................................................Instrucciones del marcador electrónico.................................................
1213
11
16

11
Lista de piezas
51602 LISTA DE PIEZAS
2 31
x2 x2 x4
4
x4
6 75
x1 x6 x2
8
x2
9
x1
Nota: La bolsa inflable con sensores (#5) no está disponible como pieza de repuesto.
Tubo de 21-1/8” – 1 Tubo de 14-3/4” – 2
Marcador electrónico
Tubo de 21-1/2” – 3 Tubo de 23-3/4” – 4
Bolsa inflable con sensores Conector en “L” Conector doble Conector recto
ADVERTENCIA:RIESGO DE ASFIXIA - Este artículo contiene piezas pequeñas. No es apto para niñosmenores de 3 años de edad.
10
x1
Arco
11
x3Flecha con ventosa
de seguridad

Instrucciones de seguridad
12
INSTRUCCIONES DE SEGURIDADADVERTENCIA:● El producto debe ser ensamblado por personas adultas antes de usarse.● No inflar en exceso.● No utilizar como dispositivo de flotación.● Este producto está diseñado para uso infantil, no para el entrenamiento de personas adultas.Seguridad de los niños● Este producto no debe ser usado por niños sin la supervisión de un adulto.● Para reducir el riesgo de asfixia o lesiones personales graves: - Permanecer al alcance de los niños en todo momento mientras juegan. - El producto debe guardarse fuera del alcance de los niños cuando no esté inflado.Protección del producto● Jugar sólo en áreas abiertas lejos de objetos afilados.● Evitar que la bolsa inflable entre en contacto con objetos afilados o superficies calientes que puedan provocar lesiones en las manos.● Desprenderse de los objetos afilados que podrían dañar el producto, como anillos, relojes, etc.● Asegurarse de que no haya objetos afilados en los zapatos que puedan dañar el producto.
ADVERTENCIA:1. NO MODIFICAR EL PRODUCTO DE NINGUNA MANERA.2. NO APUNTARLO A LOS OJOS O LA CARA.3. NO APUNTAR LA FLECHA CON VENTOSA DE SEGURIDAD A PERSONAS NI ANIMALES.4. ESTE PRODUCTO NO ES UN JUGUETE INFANTIL, SE REQUIERE LA SUPERVISIÓN DE UN ADULTO MIENTRAS LOS NIÑOS JUEGAN CON EL MISMO.
ADVERTENCIA:Los agentes de policía y otras fuerzas del orden público podrían confundir este producto por un arma real. Modificar las marcas o los distintivos de color requeridos por la legislación estatal o federal para hacer que el producto tenga un aspecto más realista y/o blandir o mostrar el producto en público puede ser peligroso y podría ser delito. Mostrar, exhibir o blandir el producto de forma amenazante e introducirlo, guardarlo o mantenerlo en los terrenos de una escuela es ilegal. Las sanciones penales por infringir estas normas pueden incluir penas de prisión y/o multas.

Ensamblaje
13
2 X 2
3 X 2
6 X 2
7 X 2
FIGURA 22. Acoplar los tubos (#2, #3) con los conectores (#6, #7) como se muestra en
la FIGURA 2.3. Conectar el cable del sensor de la bolsa inflable con sensores (#5) al
marcador electrónico (#9) como se muestra en la FIGURA 2A.
FIGURA 1
FIGURA 11 X 2
4 X 2
5 X 1
8 X 1
9 X 1
1. Acoplar los tubos (#4), el conector (#8) y el marcador electrónico (#9) con la bolsa inflable con sensores (#5) como se muestra en la FIGURA 1.
4
8
5
1
9
1
4
2
2
3
6
6
9
7
7
3
Cable del sensor de diana5
FIGURA 2A
FIGURA 2

Ensamblaje
14
FIGURA 4
4 X 2
6 X 2
8 X 1
5. Conectar los tubos (#4), el conector recto (#8) y los conectores en “L” (#6). Ver FIGURA 4A.6. Acoplar el conjunto de la FIGURA 4A con el conjunto de la FIGURA 3 como se
muestra en la FIGURA 4.
6
6 8
4
4
FIGURA 4A
Conjunto FIG. 3
Conjunto FIG. 4A
FIGURA 34. Acoplar los tubos (#3) y los conectores en “L” (#6) al conjunto de la
FIGURA 2 como se muestra en la FIGURA 3.
3 X 2
6 X 23
6
6
3
Conjunto FIG. 2
FIGURA 3
FIGURA 4

Ensamblaje
15
7. Inflar la bolsa inflable con sensores (#5) con una bomba de aire (no incluida). Ver FIGURA 5.
FIGURA 5
Inflado
NO INFLAR EN EXCESOCubrir las boquillas
5
FIGURA 5

Instrucciones del marcador electrónico
16
Instalación de las pilasCompartimento de las pilas: Desatornille el perno con un destornillador y abra el compartimento de las pilas. Inserte 3 pilas “AAA” (no incluidas) respetando la polaridad que se muestra en el interior de la tapa. A continuación, cierre la tapa con un destornillador. Encienda el dispositivo con el botón ON/OFF (encendido/apagado).
Recuerde:
a. Las pilas deben instalarse respetando la polaridad correcta (+ y -).
b. Limpie los contactos de las pilas y del compartimento antes de instalar las pilas.
c. Se recomienda extraer las pilas si el juego no se va a utilizar durante un periodo de tiempo prolongado.
FUNCIONAMIENTO DEL MARCADOR ELECTRÓNICO
ADVERTENCIA:!1) Requiere 3 pilas “AAA” (incluidas).2) No mezclar pilas nuevas y viejas.3) No mezclar pilas alcalinas, estándar
(carbón-zinc) o recargables (níquel-cadmio).
99
ADVERTENCIA:!Quite la hoja protectora de plástico de la parte posterior del marcador electrónico antes de usar el producto.
Hoja protectora

Instrucciones del marcador electrónico
16
Instrucciones del juegoAl encender el juego, se configura automáticamente para dos jugadores con una duración de un minuto y treinta segundos.(Para apagar el producto, presione el botón ON/OFF [encendido/apagado] durante dos segundos.)A. Al encender el juego, escuchará algunos efectos de sonido. El marcador electrónico mostrará 2P. Los efectos de sonido continuarán hasta que se presione un botón. Puede seleccionar el botón de uno o dos jugadores. Si presiona el botón de dos jugadores (2P), el contador comenzará la cuenta atrás 5, 4, 3, 2, 1. Una vez acabada la cuenta atrás, escuchará el efecto de sonido de JUGADOR y la pantalla mostrará un tiempo de un minuto y treinta segundos.
B. Después de la cuenta atrás, uno de los LED se iluminará por 5 segundos para efectuar el disparo. (Hay 3 grupos de LED que se iluminarán aleatoriamente durante la partida.) Una vez que dé en la diana, escuchará el sonido de puntuación y el marcador indicará 01. Si alcanza con éxito la siguiente diana en los 5 segundos siguientes, escuchará el sonido de puntuación y el marcador indicará 02. Tras mostrar la puntuación durante 2 segundos, el marcador volverá a la cuenta atrás. Si no se puntúa, el marcador de tiempo no cambiará para mostrar la puntuación.
C. Después de un minuto y treinta segundos, se escuchará el efecto de sonido de siguiente jugador y comenzará la cuenta atrás. Después de la cuenta atrás, uno de los LED se iluminará por 5 segundos para efectuar el disparo. (Hay 3 grupos de LED que se iluminarán aleatoriamente durante la partida.) Una vez que dé en la diana, escuchará el sonido de puntuación y el marcador indicará 01. Si alcanza con éxito la siguiente diana en los 5 segundos siguientes, escuchará el sonido de puntuación y el marcador indicará 02. Tras mostrar la puntuación durante 2 segundos, el marcador volverá a la cuenta atrás. Si no se puntúa, el marcador de tiempo no cambiará para mostrar la puntuación.
D. Antes de que acabe el tiempo, escuchará el efecto de sonido de la cuenta atrás de 5 segundos, tras lo cual se escuchará el de final de la partida y de volver a intentarlo. Sólo se podrá empezar una nueva partida una vez que los efectos de sonido hayan acabado. La puntuación del ganador parpadeará en la pantalla.
E. Al elegir un jugador (1P), presionar el botón ON/OFF (encendido/apagado) para comenzar. Tras escuchar la cuenta atrás 5, 4, 3, 2, 1, comenzará una partida de un minuto y treinta segundos.
F. Después de la cuenta atrás, uno de los LED se iluminará por 5 segundos para efectuar el disparo. (Hay 3 grupos de LED que se iluminarán aleatoriamente durante la partida.) Una vez que dé en la diana, escuchará el sonido de puntuación y el marcador indicará 01. Si alcanza con éxito la siguiente diana en los 5 segundos siguientes, escuchará el sonido de puntuación y el marcador indicará 02. Tras 2 segundos, el marcador volverá a la cuenta atrás. Si no se puntúa, el marcador de tiempo no cambiará para mostrar la puntuación. Antes de que acabe el tiempo, escuchará el efecto de sonido de la cuenta atrás de 5 segundos, tras lo cual se escuchará el de final de la partida y de volver a intentarlo. Sólo se podrá empezar una nueva partida una vez que los efectos de sonido hayan acabado. La puntuación del ganador parpadeará en la pantalla.
G. El juego se pondrá en MODO DE AHORRO DE ENERGÍA si no hay actividad en un período de 5 minutos.

Instrucciones del marcador electrónico
16
¡PRECAUCIÓN!1) Para evitar lesiones, no tire de la cuerda del arco sin las flechas con ventosa de seguridad, y use sólo flechas con ventosa de seguridad diseñadas para este producto.
2) No apunte a los ojos o la cara.
3) Limpie la ventosa con un paño seco para facilitar la adhesión.
Cuerda del arco
Brazo para las flechas
Insertar la cuerda del arco en el culatín de la flecha
con ventosa de seguridad.
Flecha con ventosa de seguridad
ADVERTENCIA: Los cambios o modificaciones no aprobados expresamente por la parte responsable del cumplimiento podrían anular la autoridad del usuario para operar el equipo.
AVISO: Este equipo ha sido probado y cumple con los límites establecidos para los dispositivos digitales de Clase B, de acuerdo con la Parte 15 de las Normas de la FCC. Estos límites están diseñados para proporcionar una protección razonable contra interferencias perjudiciales en una instalación residencial. Este equipo genera, utiliza y puede irradiar energía de radiofrecuencia y, si no se instala y utiliza de acuerdo con las instrucciones, puede causar interferencias molestas en las comunicaciones de radio. Sin embargo, no hay garantía de que no se produzcan interferencias en una instalación en particular. Si este equipo causa interferencias molestas en la recepción de radio o televisión, lo cual puede determinarse apagando y encendiendo el equipo, se recomienda intentar corregir la interferencia por medio de una o más de las siguientes medidas:-- Reorientar o reubicar la antena receptora.-- Aumentar la separación entre el equipo y el receptor.-- Conectar el equipo a una toma de corriente en un circuito distinto de aquel al que está conectado el receptor.-- Consultar al distribuidor o un técnico experimentado de radio y TV.
¡YA ESTÁ LISTO PARA JUGAR!

2 YEARS WARRANTY
WARRANTY CARD
ARCHERY GAME
Your details :
Date of purchase
*We recommend you keep the receipt with this warranty card
Name
Address
Description of malfunction:
Location of purchase
Return your completed warranty cardtogether with the faulty product to:
Medal Sports Inc.7407 WashingtonAvenue South,Edina, MN 55439E-mail:[email protected] 51602 11/2016
877-852-8164
51602
MODEL:
AFTER SALES SUPPORT

2

11/2016
2
AÑOS DE GARANTÍA
TARJETA DE GARANTÍA
JUEGO DE TIRO CON ARCO
877-852-8164
51602
MODELO:
SERVICIO POSVENTA
51602
Sus datos:
Fecha de la compra
*Recomendamos que guarde el recibo con esta tarjeta de garantía
Nombre
Dirección
Correo electrónico
Descripción de la avería:
Lugar de la compra
Devuelva su tarjeta de garantía completada junto con el producto defectuoso a:
Medal Sports (B.V.I.) Ltd.7407 Washington Avenue S.,Edina,MN 55439,USA.E-mail: [email protected]
2
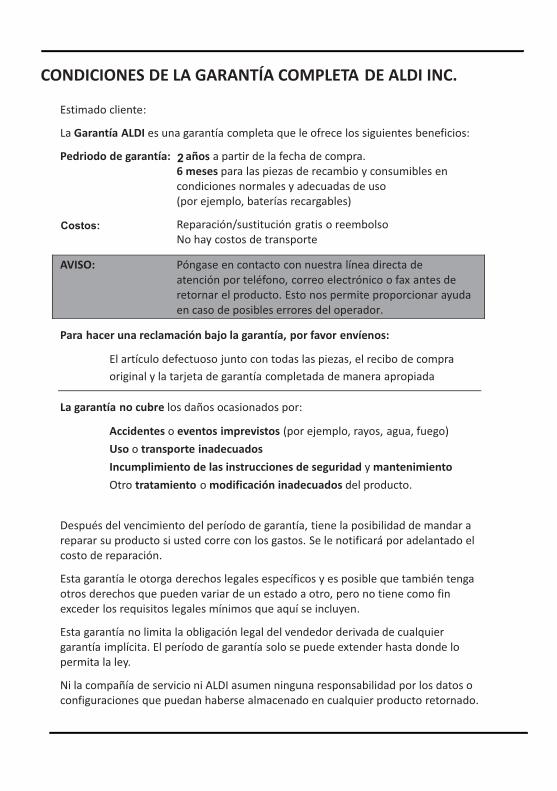
Costos:

2 YEARS WARRANTYAÑOS DE GARANTÍA
DISTRIBUTED BY DISTRIBUIDO POR:ALDI INC., BATAVIA, IL 60510WWW.ALDI.US
•
877-852-8164
51602
51602MODEL / MODELO:
11/2016
AFTER SALES SUPPORTSERVICIO POSVENTA
INCLUDED
3x
INCLUIDO