3d printing 101: an intro -...
TRANSCRIPT

3D PRINTING 101:
AN INTRO
This facilitator guide is a companion to the step-by-step
directions for 3D Printing 101. It is intended to guide the facil-
itator through setting up, introducing some basic concepts
of 3D design, guiding participants through the project, and
debriefing the experience at the end. This is the first lesson in
The Additive Project’s 3D curriculum. As such, it can be of-
fered as a stand alone immersion in 3D printing or immedi-
ately preceding The Keychain Project lesson also available
on TheAdditiveProject.org.
3D Printing 101 familiarizes participants with working in 3D space and introduces some
online resources and printer software. Some fundamental tools and techniques necessary
for creating objects are also introduced.
LEARNING
OBJECTIVES
Understand How 3D Printing Works
Learn Basic Components of a 3D Model
Learn the File Types Required for 3D Printing
Learn How to Navigate Thingiverse + Download Objects
Learn How Import + Prep Models in MakerWare
Learn How to Prep + Print with a MakerBot Machine
Introduction
Overview of Prototyping and Uses of Customization (Optional)
Skills Lesson
Project Work Round
OR Tool Lessons
Guided Project Work Round
Debrief + Class Summary
PROJECT
OVERVIEW

PROGRAM BASICS
OPENING MAKERWARE
OPENING AN STL FILE
ADDING FILES
EXPORTING FILES
VIEWING + MOVING
CAMERA ROTATION TOOL
ZOOM
MOVING OBJECTS
ROTATING OBJECTS
SCALING OBJECTS
Open and explore MakerWare
Accessing a saved STL file for print
Import files to the print space
Export files for Print Preview + Print
Making adjustments in the camera view.
View objects close up or at a distance.
Changing the placement of objects on the printer bed.
Adjusting the orientation of objects on the print bed
Adjusting the size of objects with regard to print time
SKILLS OVERVIEW This project was developed for use with MakerWare software and MakerBot printers. The fol-
lowing skills will be learned through the introduction and/or repeated use of the relevant
tools, available for view in the Tutorials included in the step-by-step.

PREP + MATERIALS CLASSROOM RESOURCES
COMPUTER ACCESS:
Each participant should have his or her own computer for the duration of the project.
PRESENTATION + LECTURING:
Ideally, you should be able to play the Tutorials videos and walk the class through each
Module by demonstration on a projector that all participants can see.
SOFTWARE REQUIREMENTS:
This project requires each computer to have MakerWare installed and available.
ACCESS REQUIREMENT:
This projects requires each student to have the ability to access the internet and download
files. This can be done via the internet from The Additive Project site if access is available.
Alternatively, you may download the file and preload it onto computers where the partici-
pants will have access.
PRINTING REQUIREMENT:
Currently, this project outlines the process for printing using the MakerBot Printer.
TIME
The lesson is designed to take 30-45m, depending on:
The inclusion of the introduction
Time spent on going over skills training
Time spent debriefing
PRINT TIME
The objects in the Additive Collection on Thingiverse have been tested to create a viable
object with possible print times of 20m or less (after scaling). This can be done at the end of
the lesson or during another class period. The size and duration of the print is flexible and
based on your access to printers.
3D PRINTING: AN INTRO WHAT EXACTLY IS 3D PRINTING, ANYWAY?
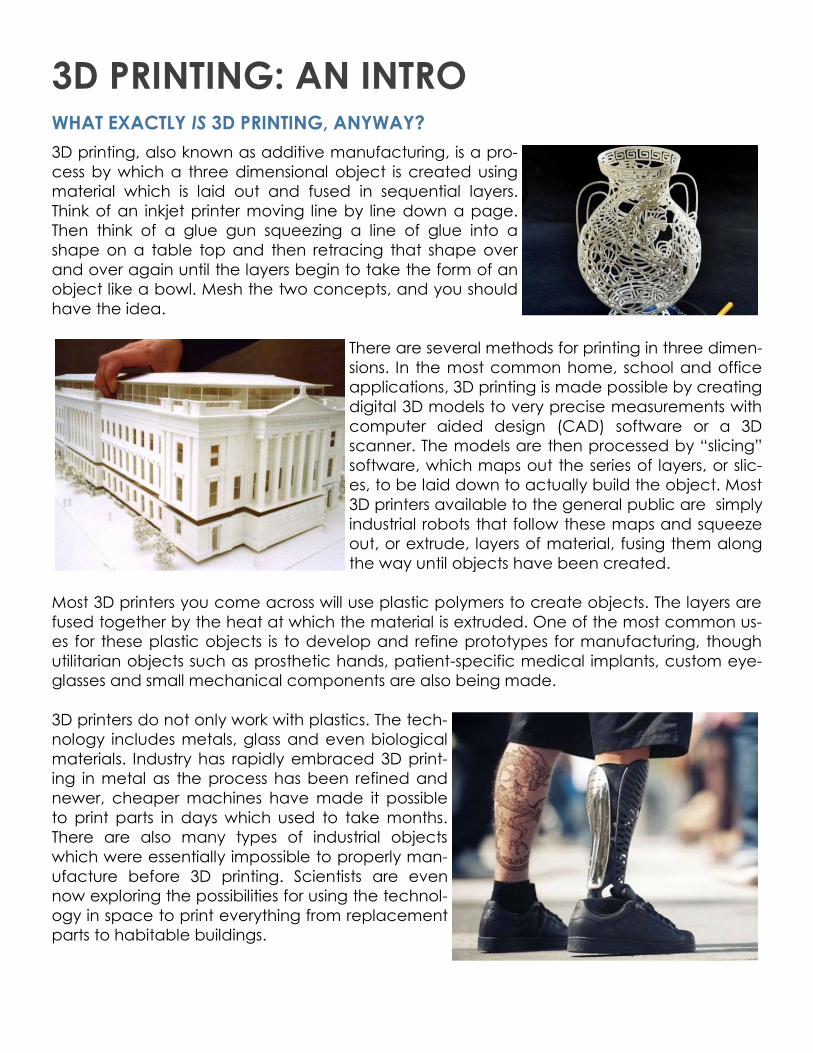
3D printing, also known as additive manufacturing, is a pro-
cess by which a three dimensional object is created using
material which is laid out and fused in sequential layers.
Think of an inkjet printer moving line by line down a page.
Then think of a glue gun squeezing a line of glue into a
shape on a table top and then retracing that shape over
and over again until the layers begin to take the form of an
object like a bowl. Mesh the two concepts, and you should
have the idea.
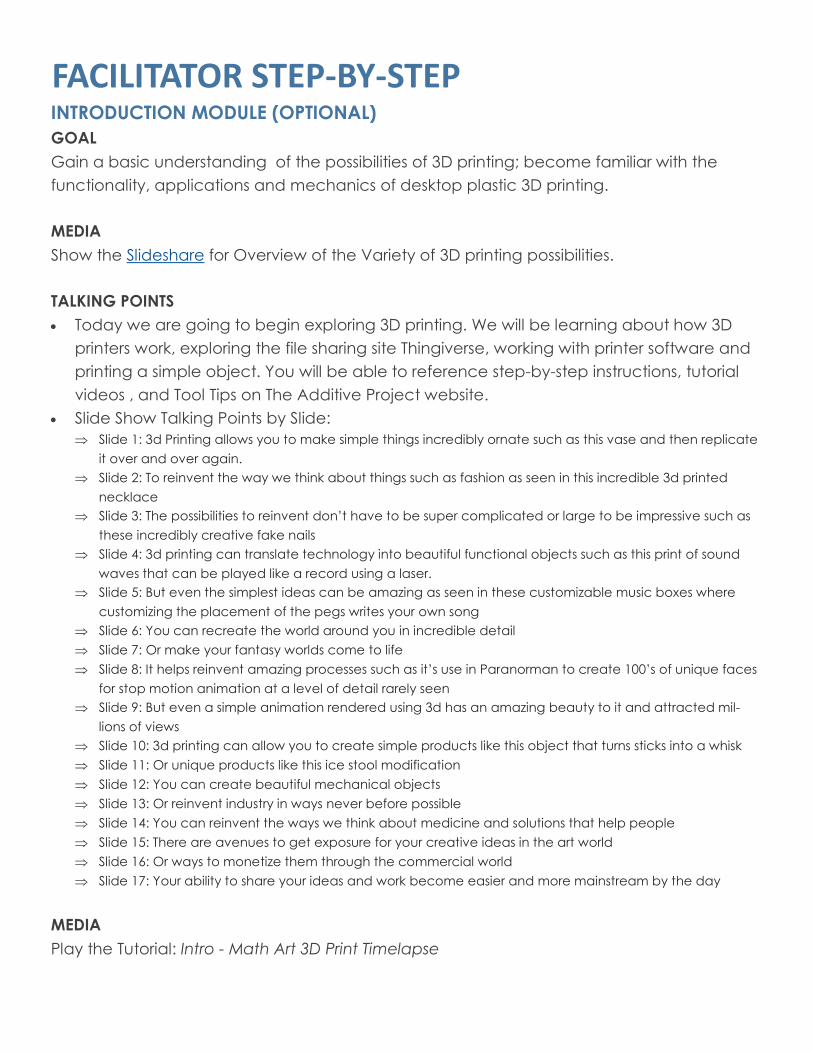
There are several methods for printing in three dimen-
sions. In the most common home, school and office
applications, 3D printing is made possible by creating
digital 3D models to very precise measurements with
computer aided design (CAD) software or a 3D
scanner. The models are then processed by “slicing”
software, which maps out the series of layers, or slic-
es, to be laid down to actually build the object. Most
3D printers available to the general public are simply
industrial robots that follow these maps and squeeze
out, or extrude, layers of material, fusing them along
the way until objects have been created.
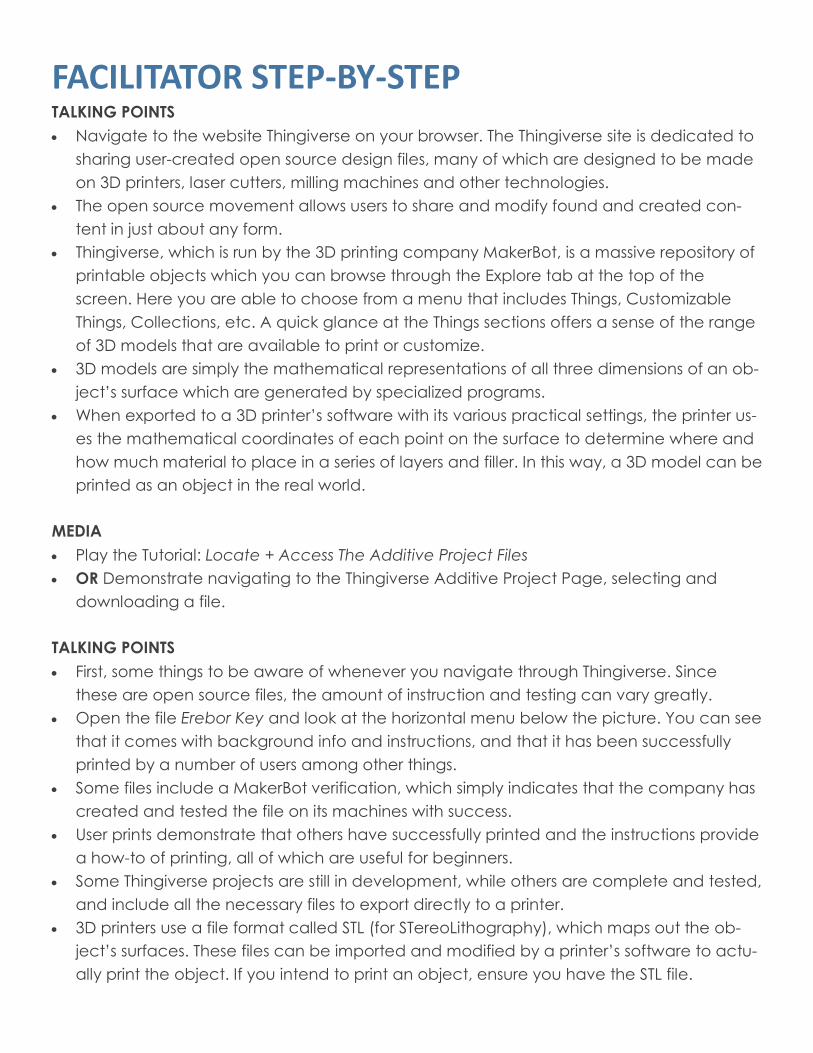
Most 3D printers you come across will use plastic polymers to create objects. The layers are
fused together by the heat at which the material is extruded. One of the most common us-
es for these plastic objects is to develop and refine prototypes for manufacturing, though
utilitarian objects such as prosthetic hands, patient-specific medical implants, custom eye-
glasses and small mechanical components are also being made.
3D printers do not only work with plastics. The tech-
nology includes metals, glass and even biological
materials. Industry has rapidly embraced 3D print-
ing in metal as the process has been refined and
newer, cheaper machines have made it possible
to print parts in days which used to take months.
There are also many types of industrial objects
which were essentially impossible to properly man-
ufacture before 3D printing. Scientists are even
now exploring the possibilities for using the technol-
ogy in space to print everything from replacement
parts to habitable buildings.

SUGGESTED PROCESS
INTRODUCTION MODULE: OVERVIEW OF 3D PRINTING (OPTIONAL)
Show the “Overview of the Variety of 3D Printing” slidshare to show examples of exciting 3D
printed objects. Play the introductory video of the 3D printing process. Pass around a print-
ed object and present the associated talking points.
PROJECT FACILITATION
Direct participants to the project website. Introduce or review the project page compo-
nents they can use as reference, showing them the step-by-step instructions, the location of
the Required Files (refer them to their desktops if previously installed), and point out the Tool
Tips + Tutorials section.
OPTION 1: With groups that do well independently, you may choose to begin the session by
giving an overview of the learning objectives, as well as the tools needed to complete the
project. Additionally, you might identify the goals, play the Tutorials videos, and let partici-
pants follow the step-by-step on the site.
OPTION 2: Alternatively, you may also break the session up into smaller segments or Mod-
ules, which each include several steps involving particular skills and allow for break points to
check in with participants and teach the following Module’s new skills before progressing.
Play Tool Tips videos and allow participants to follow the steps on the Additive site, play Tu-
torials videos, or demonstrate the steps to the class using projection.
MODULE 1: THINGIVERSE + OPEN SOURCE FILE SHARING
Step 1. Introduction to Thingiverse; the concept of open source object files; the bredth +
scope of available files and their features.
MODULE 2: IMPORTING + MANIPULATING FILES; EXPORTING TO PRINT
Steps 2-7. Importing files; manipulating objects in the print space; scaling; exporting to
print. Ensure all participants have completed this step before proceeding.
MODULE 3: PRINTING
Steps 8-11. Familiarization with the printer; STL cards; printer safety.
MODULE 4: DEBRIEF
Discussion questions.
FACILITATOR STEP-BY-STEP INTRODUCTION MODULE (OPTIONAL)
GOAL
Gain a basic understanding of the possibilities of 3D printing; become familiar with the
functionality, applications and mechanics of desktop plastic 3D printing.
MEDIA
Show the Slideshare for Overview of the Variety of 3D printing possibilities.
TALKING POINTS
Today we are going to begin exploring 3D printing. We will be learning about how 3D
printers work, exploring the file sharing site Thingiverse, working with printer software and
printing a simple object. You will be able to reference step-by-step instructions, tutorial
videos , and Tool Tips on The Additive Project website.
Slide Show Talking Points by Slide:
Slide 1: 3d Printing allows you to make simple things incredibly ornate such as this vase and then replicate
it over and over again.
Slide 2: To reinvent the way we think about things such as fashion as seen in this incredible 3d printed
necklace
Slide 3: The possibilities to reinvent don’t have to be super complicated or large to be impressive such as
these incredibly creative fake nails
Slide 4: 3d printing can translate technology into beautiful functional objects such as this print of sound
waves that can be played like a record using a laser.
Slide 5: But even the simplest ideas can be amazing as seen in these customizable music boxes where
customizing the placement of the pegs writes your own song
Slide 6: You can recreate the world around you in incredible detail
Slide 7: Or make your fantasy worlds come to life
Slide 8: It helps reinvent amazing processes such as it’s use in Paranorman to create 100’s of unique faces
for stop motion animation at a level of detail rarely seen
Slide 9: But even a simple animation rendered using 3d has an amazing beauty to it and attracted mil-
lions of views
Slide 10: 3d printing can allow you to create simple products like this object that turns sticks into a whisk
Slide 11: Or unique products like this ice stool modification
Slide 12: You can create beautiful mechanical objects
Slide 13: Or reinvent industry in ways never before possible
Slide 14: You can reinvent the ways we think about medicine and solutions that help people
Slide 15: There are avenues to get exposure for your creative ideas in the art world
Slide 16: Or ways to monetize them through the commercial world
Slide 17: Your ability to share your ideas and work become easier and more mainstream by the day
MEDIA
Play the Tutorial: Intro - Math Art 3D Print Timelapse

TALKING POINTS
In the video you can see the the object being created one layer at a time as the print
bed lowers down away from the print nozzles.
As the video progresses you can see material at the base of the object being re-
moved. What you are seeing being removed is the support material that the printer
needs to create to hold up the object when it is hanging over empty space
The final object is an intricate sculpture that would be very difficult to sculpt and create
a mold for that you can see was easily created using 3D printing.
MEDIA
Pass around a few printed objects and allow the participants to come up and view the
printer. Optionally have the printer start to print an object.
TALKING POINTS
3D printing, also known as additive manufacturing, is a process by which a three dimen-
sional object is created using material which is laid out and fused in sequential layers.
Think of an inkjet printer moving line by line down a page. Then think of a glue gun
squeezing a line of glue into a shape on a table top and then retracing that shape over
and over again until the layers begin to take the form of an object like a bowl. Mesh the
two concepts, and you should have the idea.
Looking closely at the object, you should be able to identify the layers created by the 3D
printer. Once an object is designed in 3D space, the printer creates coordinates for the
surface area and then lays down layers of filament to build the object.
To create large solid spaces, the printer is usually set to create a honeycomb pattern of
material to serve as infill.
As you can see on the object, the printer first lays down a thin, flat layer of material to
print on. This is called the Raft.
For parts of the object that are suspended in space, the printer first creates thin supports
which are later cut away, or dissolved if using the appropriate filament.
MODULE 1: THINGIVERSE + OPEN SOURCE FILE SHARING
GOAL
Navigate Thingiverse and Download a File
MEDIA
Play the Tutorial: Open Browser + Navigate to Thingiverse
OR Demonstrate opening Thingiverse and navigating through collections
FACILITATOR STEP-BY-STEP
TALKING POINTS
Navigate to the website Thingiverse on your browser. The Thingiverse site is dedicated to
sharing user-created open source design files, many of which are designed to be made
on 3D printers, laser cutters, milling machines and other technologies.
The open source movement allows users to share and modify found and created con-
tent in just about any form.
Thingiverse, which is run by the 3D printing company MakerBot, is a massive repository of
printable objects which you can browse through the Explore tab at the top of the
screen. Here you are able to choose from a menu that includes Things, Customizable
Things, Collections, etc. A quick glance at the Things sections offers a sense of the range
of 3D models that are available to print or customize.
3D models are simply the mathematical representations of all three dimensions of an ob-
ject’s surface which are generated by specialized programs.
When exported to a 3D printer’s software with its various practical settings, the printer us-
es the mathematical coordinates of each point on the surface to determine where and
how much material to place in a series of layers and filler. In this way, a 3D model can be
printed as an object in the real world.
MEDIA
Play the Tutorial: Locate + Access The Additive Project Files
OR Demonstrate navigating to the Thingiverse Additive Project Page, selecting and
downloading a file.
TALKING POINTS
First, some things to be aware of whenever you navigate through Thingiverse. Since
these are open source files, the amount of instruction and testing can vary greatly.
Open the file Erebor Key and look at the horizontal menu below the picture. You can see
that it comes with background info and instructions, and that it has been successfully
printed by a number of users among other things.
Some files include a MakerBot verification, which simply indicates that the company has
created and tested the file on its machines with success.
User prints demonstrate that others have successfully printed and the instructions provide
a how-to of printing, all of which are useful for beginners.
Some Thingiverse projects are still in development, while others are complete and tested,
and include all the necessary files to export directly to a printer.
3D printers use a file format called STL (for STereoLithography), which maps out the ob-
ject’s surfaces. These files can be imported and modified by a printer’s software to actu-
ally print the object. If you intend to print an object, ensure you have the STL file.
FACILITATOR STEP-BY-STEP
Once you have investigated the page’s properties, download the Erebor Key STL file
and save it in a convenient place on your computer.
MODULE 3: IMPORTING + MANIPULATING FILES; EXPORTING TO PRINT
GOAL
Working with a File in MakerWare + Preparing it for Print
MEDIA
Play the Tutorial: Place the Object in the Printspace
OR Demonstrate using the Text Tool to create text on the grid plane
TALKING POINTS
Open MakerWare, select Add File and navigate to the saved STL file of the object you
chose from Thingiverse. The object will appear in the MakerWare print space.
Once the file in in the print space, accept the prompt to lay the object on the platform.
If the object is in mid air in the print space, the printer will print on the exact coordinates,
but will construct physical supports to get it there, increasing the print time and amount
of material used.
MakerWare attempts to give you an accurate representation of how the object will ac-
tually be placed and printed in the printer. The dark grey plane represents the print bed
and the outlines of the box represent the limits of the printing space.
In the Settings tab, you can see that Raft is checked. The raft is a flat piece of filament
laid down as a base by the printer to print on. In settings, you can also check Supports,
which will show you all supports. With these two selected, you have an accurate picture
of exactly what will be printed.
Think about the best way to orient the object for print, with fewer supports being prefera-
ble.
Reference the demonstration object to show how different orientations would require
more or less support material.
MEDIA
Play the Tutorials: Camera Manipulation; Moving; Rotating
OR Demonstrate the different views, moving and rotating.
TALKING POINTS
MakerWare allows you to move and manipulate the object in the print space.
Find and double click the View icon over to the left side of the screen. With this selected,
you can drag the object along the print bed for a different placement to open a sub
FACILITATOR STEP-BY-STEP

menu that has options for some of the cardinal views.
The Home view icon in the top left gives you the default view, which is useful if you ever
get lost.
Beside Home, there are also Zoom buttons.
With View still selected and the sub menu closed, you can left click and hold your mouse
to manually change the view.
You can also zoom in and out with your mouse roller.
By selecting the Move icon, you can select and drag the object on the print bed with
your mouse.
A second click will bring you to the sub menu in which you can move the object on all
three axes by exact measurements, ensure the object is on the bed, and center the ob-
ject.
Similarly, the Turn icon and sub menu allow you to change the object’s orientation on
the print bed manually or by typing into the axis fields.
MEDIA
Play the Tutorial: Printing Time
OR Demonstrate exporting and scaling
TALKING POINTS
To make final adjustments before printing, select the Export tab in the top menu. A pop
up will appear showing the file being prepared for print. When this is complete, the file is
ready for export. The window will expand to include a Print Preview option and will indi-
cate the estimated time to print and amount of filament used.
For our purposes, a 20 minute print time is ideal.
If the print time of your object is longer than 20 minutes or so, cancel out of Export and
return to Scale.
Based on the print time the object had at the current size, fill in a percentage that might
correspond to 20 minute print time. E.g. if the original print time was 1.5 hours as in the
Tutorial, try a scale of 20% or lower for the object.
Keep in mind that every time you scale the object, you create a new 100%. If you scaled
it down to 20%, as in the Tutorial, and that is too small, you use the new size to base the
percentage on (250% worked in our case). Alternatively, you can start from the original
size by first selecting Reset Scale.
MODULE 4: PRINTING
GOAL
Successfully print an object
FACILITATOR STEP-BY-STEP

MEDIA
Play the Tutorial: Printer Preparation
OR Demonstrate Exporting to the Printer or SD Card
TALKING POINTS
Once you have the right print time, click Export Now and save the file.
Power on the printer to preheat it. The printer must be hot for the filament to adhere to
itself during printing. Keep the door closed as much as possible and always when print-
ing.
Preheating before you are ready to print allows you to save time when you are
ready. Preheating can take up to 10 mins so if you do this while you are working on or
preparing your model you will save time. If you do not preheat your printer before you
print it will begin this process when you select the model to print.
On the MakerBot Replicator 2X, scroll down the initial menu and select Preheat. On the
next screen, you will see the option Start Preheat! Check that the Right + Left Tools and
the Platform are all ON. Select Start Preheat! You will see that the Platform heats up to
110 degrees while the L + R Extruders wait. When the Platform is close to the right temper-
ature, the extruders will begin to heat.
Depending on the generation, MakerBot printers have a variety of control panel config-
urations. Where there’s a D pad (directional control pad), the M button in the center will
select whatever option is highlighted, left goes back through the options, while up and
down scroll through the menus. Others, such as the Replicator, have an LCD display and
a dial.
The SD card allows you to easily and securely move the large 3D print file to the printer.
The card has a notched corner on the end that is inserted into the computer and printer.
Make sure you insert it with the arrow pointing in and facing you.
Once it is inserted, Select Build From SD, scroll down to select the file you wish to print.
MEDIA
Play the Tutorials: When Things Go Wrong; Cancelling a Print
OR Demonstrate canceling a print
TALKING POINTS
It is always important to monitor your machine while it is printing in order to catch any er-
rors or malfunctions as quickly as possible. Should a problem occur, remember that the
printer plate is very hot, so do not touch it until it has cooled down. In general, keep the
door closed until the printer is fully cooled. Opening the door while printing will disrupt
the job and drop the temperature, possibly leading to print failure.
FACILITATOR STEP-BY-STEP

MakerBots are great machines, but sometimes things go wrong. More common malfunc-
tions include obstructed or non-working extruders, where the filament is not flowing to
the print properly or at all; the printer head sticking on a piece of extruded filament and
dragging the piece; extruders getting off alignment. Patience is key when printing ob-
jects.
Should anything go wrong with your print job, hit the left arrow key to bring up a menu of
print options and choose cancel print.
MODULE 5: DEBRIEF (OPTIONAL)
GOAL
Make sure any work in progress is saved. Discuss and answer any questions related to the
project.
TALKING POINTS
What do you think about 3d printing?
What is the most interesting thing you learned today?
What was the most challenging part of this project?
FACILITATOR STEP-BY-STEP