1 di erent document classes - university of tennessee di erent document classes there are several di...
TRANSCRIPT

1 Different Document Classes
There are several different document classes that can format just about anytype of document. This is the very first line of your LATEX code. It will definewhat kind of document you are working on. For example, there are documentclasses for articles, presentations, resume/cv, exams, posters, books, etc. Todefine a document class, simply type
\documentclass{}
with the appropriate document class inside the braces. We will talk about someof the most common:
1.1 Article
Arguably the most used document class is “article”. Not surprisingly, this istypically the document class used for journal articles, but it also is a basic classthat allows for lots of customization of the formatting of your page. For thisreason, it is typically used as a “catch all” document class to do things likehomework, notes, handouts, worksheets, etc. In fact, this document is using thearticle class.
1.2 Beamer
If you want to generate a presentation, “beamer” is the best class to use. Itintroduces the command
\begin{frame}
\end{frame}
This separates each slide of your presentation (each frame being one slide). Wewill discuss more about beamer at a later workshop.
1.3 Resume/CV
There are several different resume and CV styles and formats. Each of themcould call a different document class. The great advantage of LATEX is thatit is extremely customizable, and that is perhaps the most recognizable in theresume/CV category. Many people have developed their own resume class tomake their resume look exactly the way they want it, and then published theclass for the public to use. A simple Google search will bring up plenty ofoptions for your resume or CV.
1.4 Exam
A great document class for teaching is the “exam” class. It always you to cre-ate exams using a new environment “questions”. It has many features. In fact, alengthy manual is available at http://www-math.mit.edu/ psh/exam/examdoc.pdf.We encourage you to skim through it to see all it can do.
1

1.5 Poster
This document class (“a0poster”) is perfect for creating posters. It has a sleeklayout, yet still allows for customization. It can generate a pdf that is perfectfor taking to a professional printing company to have printed on professionalpaper.
2 Packages
LATEX has many different packages that you may include at the top of your doc-ument. These packages allow you to do many things, such as include graphicsinto your document, include special symbols, or help with citations. The pack-ages which are commonly used in many documents are amssymb and amsmath.
amssymb is a package which allows you to use many different symbols in yourLATEX document. You may not run into any problems if you aren’t using sym-bols that are too exotic, but you’re better off including this package to be safe.Here are some symbols included in amssymb: Z,�,�,�,�,e,d, .One of the most useful options added by the amssymb package is the ability towrite letters in blackboard bold. For example, the real numbers R, the rationalsQ, or the integers Z.
Like amssymb, amsmath is another package you definitely want to includein your documents. This package includes many options for equation arrays,allows you to define your own math operators (for example, lim and sin aremath operators), and introduced the
\text{}
command, which allows you to write plaintext inside math mode.For example, compare the following two:⋂
AasubgroupofZA
⋂A a subgroup of Z
A
3 Basic Coding
In order to write any sort of mathematical symbol in LATEX you need to be in“math mode”. We put things that we want to be in math mode in dollar signs.For example, the command for the Greek letter δ is \delta, so in our tex filewe would need to type $\delta$. Go ahead and try this. If you put two dollar
2

signs on each side, it will put it in “display mode”, which puts it on its ownline. So $$\delta$$ would give us
δ
One thing we need to be careful not to do is put regular text into math mode.You only use math mode for symbols.This is what happens if I try to write $The limit evaluates to \alpha$:
Thelimitevaluatestoα.
This is definitely not what we wanted! So instead we type The limit evaluates to $\alpha$:
The limit evaluates to α.
This is much better. There are ways around this, like using the \text commandmentioned above. So we could type $\text{The limit evaluates to } \alpha$
to get:
The limit evaluates to α.
But usually it is easily to just put dollar signs around your symbols.There are many good resources for looking up commands for symbols. Justsearch for “Latex symbol list” or similar in your favorite search engine.Here’s a url to a list of The Art of Problem Solving’s Website:http://www.artofproblemsolving.com/Wiki/index.php/LaTeX:SymbolsAnother very useful site is called “Detexify”: http://detexify.kirelabs.org/classify.htmlThis website allows you to draw the symbol you want, and it will try to giveyou the command for it.
Let’s go through some common commands you will probably use and how toformat some of them.
Exponents and subscripts work as you would expect them to, just using the^ or _ command. So for example, $x^2 + 5$ , $x_1 + 2$ produces:
x2 + 5 , x1 + 2
Remember to use math mode. But what if you wanted to write ex2+y2
orx2k+1? Whenever you have more than one thing in your exponent/subscript,wrap it with {} curly brackets. These will not show up in the output. So$e^{x^2+y^2}$, $x_{2k+1}$ gives:
ex2+y2
, x2k+1
Next let’s look at summation symbols. We can write∑
by \sum. Usuallywe want to specify what our sum is summing over. For example, if we wanted
3
to sum from n = 1 to infinity, we type \sum_{n=1}^\infty. Note that $\infty$is the command for infinity:∑∞
n=1
This is good, but sometimes we want to have the n = 1 and the ∞ below andabove our sum. We do this by the following: $\sum\limits_{n=1}^\infty$ or$\displaystyle\sum_{n=1}^\infty$.
∞∑n=1
or
∞∑n=1
. Notice that display style changes the size. Display style treats
things as if they are in double dollar signs.
The same sort of formatting works for products∞∏
n=1$\prod\limits_{n=1}^\infty$
and unions∞⋃
n=1$\bigcup\limits_{n=1}^\infty$
and intersections
∞⋂n=1
$\displaystyle\bigcap_{n=1}^\infty$.
4 Itemizing
LATEX recognizes three different listing environments: itemization, enumeration,and description. Each of these environments can be nested up to four times.
4.1 Itemize
Itemization is just like bullet points, in fact, that is the default. You use it justlike you would for regular bullet points when you are not needing to numbereach line item. Since we are dealing with environments, we must remember tobegin and end the specific environment we are using.
The basic itemization environment looks like this in TEX:
\begin{itemize}
\item This is one item
\item This is the next item
\end{itemize}
It will yield this output:
• This is one item
• This is the next item
Again, notice that we must begin and end the environment “itemize”, andwe use the command \item to separate our bullet points.
We don’t have to use bullet points ($\bullet$). There are also $\cdot$ (·),$-$ (−), $\ast$ (∗), $\circ$ (◦), and $\diamond$ (�). To use these alternativepoints, we can use the following:
4

\begin{itemize}
\item[$\cdot$] This is a \verb|$\cdot$| item.
\item[$-$] This is a \verb|$-$| item
\item[$\ast$] This is an asterisk item.
\item[$\circ$] This is a \verb|$\circ$| item.
\item[$\diamond$] This is a \verb|$\diamond$| item.
\end{itemize}
To give you the output:
· This is a $\cdot$ item.
− This is a $-$ item
∗ This is an asterisk item.
◦ This is a $\circ$ item.
� This is a $\diamond$ item.
This can be tedious if you are wanting to use a specific bullet point for everyline item. If you want all the points to be the same and be something other than$\bullet$, then we can use the command \renewcommand{\labelitemi}{$\cdot$}
before we begin the “itemize” environment (you could also put it in the pream-ble, i.e. the part before the \begin{document}). In fact, since we can have upto four nested listing environments, we can use
\renewcommand{\labelitemi}{$\cdot$}
\renewcommand{\labelitemii}{$-$}
\renewcommand{\labelitemiii}{$\ast$}
\renewcommand{\labelitemiv}{$\circ$}
which will give items in the first level a ·, items in the second level a −, itemsin the third level a ∗, and items in the fourth level a ◦. So the input:
\begin{itemize}
\item First level
\begin{itemize}
\item Second level
\begin{itemize}
\item Third level
\begin{itemize}
\item Fourth level
\item Fourth level again
\end{itemize}
\item Third level again
\end{itemize}
\item Second level again
5

\end{itemize}
\item First level again
\end{itemize}
will give:
· First level
− Second level
∗ Third level
◦ Fourth level
◦ Fourth level again
∗ Third level again
− Second level again
· First level again
4.2 Enumerate
If you want your lists to be numbered, then you will need to use the “enumerate”environment. A basic example from the code:
\begin{enumerate}
\item The first item
\item The second item
\item The third item
\end{enumerate}
will look like this:
1. The first item
2. The second item
3. The third item
You can also use different ways of counting, including letters, roman numer-als, and lower case roman numerals, as well as different ways to separate thenumber from the line item. We just need to add the package “enumerate” inthe preamble. We give a few examples:
\begin{enumerate}[a)]
\item Item 1
\item Item 2
\item Item 3
\item Item 4
\end{enumerate}
a) Item 1
b) Item 2
c) Item 3
d) Item 4
6

\begin{enumerate}[(i)]
\item Item 1
\item Item 2
\item Item 3
\item Item 4
\end{enumerate}
(i) Item 1
(ii) Item 2
(iii) Item 3
(iv) Item 4
\begin{enumerate}[I-]
\item Item 1
\item Item 2
\item Item 3
\item Item 4
\end{enumerate}
I- Item 1
II- Item 2
III- Item 3
IV- Item 4
4.3 Description
The “description” environment allows you to use words instead of symbols foreach line item. It can be useful for defining terms, giving basic ideas about aterm, or explaining a step-by-step process. So we have the following:
\begin{description}
\item[Injective] For all $a\neq b$ in your domain, $f$ is injective if $f(a)\neq f(b)$.
\item[Limit] What value is the function getting close to.
\item[Step 1] This is your first step.
\item[Step 2] This is your second step.
\end{description}
which will produce:
Injective For all a 6= b in your domain, f is injective if f(a) 6= f(b).
Limit What value is the function getting close to.
Step 1 This is your first step.
Step 2 This is your second step.
5 Sections
Just as this document is formatted, you can use sections to separate key parts ofyour document. For example, each of these section titles have used the command\section{Section Title goes here}. LATEX takes care of the numbering foryou. You can even have subsections and subsubsections. So for section 1 of thisdocument, the following commands gave the section and subsection titles.
7

\section{Different Document Classes}
\subsection{Article}
As another example, we can give the subsection \subsection{A Subsection}
5.1 A Subsection
And then we can look at the subsubsection \subsubsection{A Subsubsection}
5.1.1 A Subsubsection
You can also suppress the numbering by adding an asterisk to the end of thecommand. So \section*{Section Title Goes Here} yields
Section Title Goes Here
This also works with subsections and subsubsections.
6 Matrices
Because LATEX is open source, some things can be done using multiple differ-ent commands and approaches. And that becomes quite apparent with matri-ces. There are specific commands (e.g. \begin{matrix}, \begin{pmatrix},\begin{bmatrix}, etc.) that allow you to do certain types of matrices. If youare interested in them, a simple search will bring up lots of information. Wewill discuss another method because of its versatility.
The command \begin{array}{} allows you to create a matrix, but it reallyis designed for any array type structure (hence the name). So, since an arrayis an environment, we will need to “begin” and “end” the array environment.Also, since the array environment is meant to type math, we must put it inmath mode, which means putting $ around it. Note above that we have anextra parameter inside the braces {}, which we need to specify. This will tellthe document how many columns our array will have (indicated by how manyparameters we use). The basic commands are r (right), c (center), and l (left).For example,
$\begin{array}{cc}
-1 & 4 \\
2 & -3
\end{array}$
−1 42 −3
$\begin{array}{rr}
-1 & 4 \\
2 & -3
\end{array}$
−1 42 −3
8

$\begin{array}{ll}
-1 & 4 \\
2 & -3
\end{array}$
−1 42 −3
$\begin{array}{rl}
-1 & 4 \\
2 & -3
\end{array}$
−1 42 −3
Now, let’s look at the structure. The number of column parameters (i.e. r,c, or l) we use will specify the number of columns. When inputting the entries,we separate the columns by &. To end a row and go on to the next one we usedouble backslashes (\\). We don’t need the double backslashes for the last row,since we won’t have another row.
Notice that none of our matrices have braces or parentheses. To put thisin, we can simply put a ( or [ at the beginning and ) or ] at the end. However,this will only produce a small parenthesis or brace. To make them fit the sizeof the matrix we need to use the commands \left and \right. Now, like anenvironment (of which you have to “begin” and “end”), if you use \left, youhave to use \right. So we have the following:
$\left(\begin{array}{cc}
-1 & 4 \\
2 & -3
\end{array}\right)$
(−1 42 −3
)
$\left[\begin{array}{cc}
-1 & 4 \\
2 & -3
\end{array}\right]$
[−1 42 −3
]
$\left|\begin{array}{cc}
-1 & 4 \\
2 & -3
\end{array}\right|$
∣∣∣∣ −1 42 −3
∣∣∣∣
$\left(\begin{array}{ccc}
-1 & 4 & 2 \\
2 & -3 & -3 \\
0 & 2 & -1
\end{array}\right)$
−1 4 22 −3 −30 2 −1
Now, to show the versatility of the array environment, we can do piecewisefunctions by looking at a 2 column array. (Note that to get the brace {, we haveto include a backslash, i.e. \{). We give an example:
9

$f(x)=\left\{\begin{array}{ll}
x^2-1 & \text{if } x\leq 0 \\
\sqrt{x} & \text{if} x > 0
\end{array}\right.$
f(x) =
{x2 − 1 if x ≤ 0√x if x > 0
Notice that since we use \left\{ to begin the piecewise function, we neededto end that environment with a \right, but we don’t want another } at the end.So we simply use a period (\right.) in order to end the environment withouthaving to actually put any symbol on the right.
7 Defining own commands
If you find yourself using the same command over and over again, you can definea new shorter command to make typing in TEX much easier. For example, ifwe will be looking at the integers, Z, you may use its symbol frequently. Toprevent you from having to type $\mathbb{Z}$ over and over again, you can add\newcommand{Your new command you will use here}{What you want your
new command to look like} to the preamble of your document. So for exam-ple, let’s say we want to be able to type \Z instead of $\mathbb{Z}$. We wouldadd the command \newcommand{\Z}{$\mathbb{Z}$}.
We can also define new commands that take inputs. For example, if we aretaking lots of integrals, possibly even with limits, then we might be typing in
$\displaystyle\int_{0}^{1}\! f(x) \:\,dx$ a lot to produce
∫ 1
0
f(x) dx
(Note that the \! and \:\, are for spacing purposes to make a better look-ing integral and are not necessary). Instead, let’s define a new command\newcommand{\dintlim}[3]{\displayst yle\int_{#1}^{#2}\! #3 \:\,dx}
The first [] (in this case [3]) tells the command \dintlim to expect 3 inputs,which will be placed in the #1, #2, and #3 spots, respectively. So, we have
$\dintlim{0}{1}{f(x)}$ will yield
∫ 1
0
f(x) dx.
For even more complicated commands, we can use a “default” input. Usingthe integral example, let’s say we wanted to be able to change the variable of inte-gration. We could use \newcommand{\dint}[4][x]{\displaystyle\int_{#2}
^{#3}\! #4 \:\,d #1}. Here, the second [] refers to the default setting. Here,we have set it to be x. So the first input will be the variable of integration (notethat it is in square brackets [ ]). Then the second and third inputs will be thelimits of integration, and the last input will be the integrand. So the command
$\dint[t]{0}{1}{f(t)}$ will produce
∫ 1
0
f(t) dt. However, since we have set
a default parameter, if we don’t specify a first input in the square brackets,then the default x will be used. So the command $\dint{0}{1}{g(x)}$ will
produce
∫ 1
0
g(x) dx.
10

8 Graphics
We can also include and embed graphs in LATEX files.There are basically twoways to do it. First way is to create graph using LATEX commands. The otherway is to produce graphs using other graphing tools such as matlab and thenembed the graph in the LATEX document. We will mainly talk about the secondway. The supported formats are JPG, PNG, PDF, EPS if you are compilingwith pdflatex to generate a PDF file. Generally, the preferred formats of graphsare PDF or EPS because they are displayed clearly.
To include graphs in LATEX document, we need to include a package calledgraphicx. On the top of the document, type
\usepackage{graphix}
With this package, we are ready to include graphs in the document. For ex-ample, I can include a JPG and PDF pictures by using the following command(you do not have to specify the suffix)
\includegraphics{bob}
\includegraphics{marley}
11

12

Apparently, Dylan is too small and Marley is too big. We can adjust the sizeof the graph using the scale parameter. The following command will generatea bigger Dylan
\includegraphics[scale=2]{bob}
A smaller Marley is produced by the following command
\includegraphics[scale=.2]{marley}
13

We can also tune the angle of a graph. For example, the following commandwill generate the photo below\includegraphics[scale=.2,angle=90]{marley}
We can also use width, height parameters to adjust the displayed size ofthe graph. They are similar as scale. The difference is that we need the unit(cm,in) for width parameter.
\includegraphics[width=3cm]{marley}
However, it turns out that sometimes we have to crop the figure instead ofjust including the whole figure. This happens when we generate PDF picturesfrom matlab. The PDF figures generated by matlab generally contain a lot ofmargin. To crop the graphs, we need to tune the trim parameter. The com-mand is as following
\includegraphics[trim = 10mm 50mm 20mm 60mm, clip,width=4cm]{marley}
14
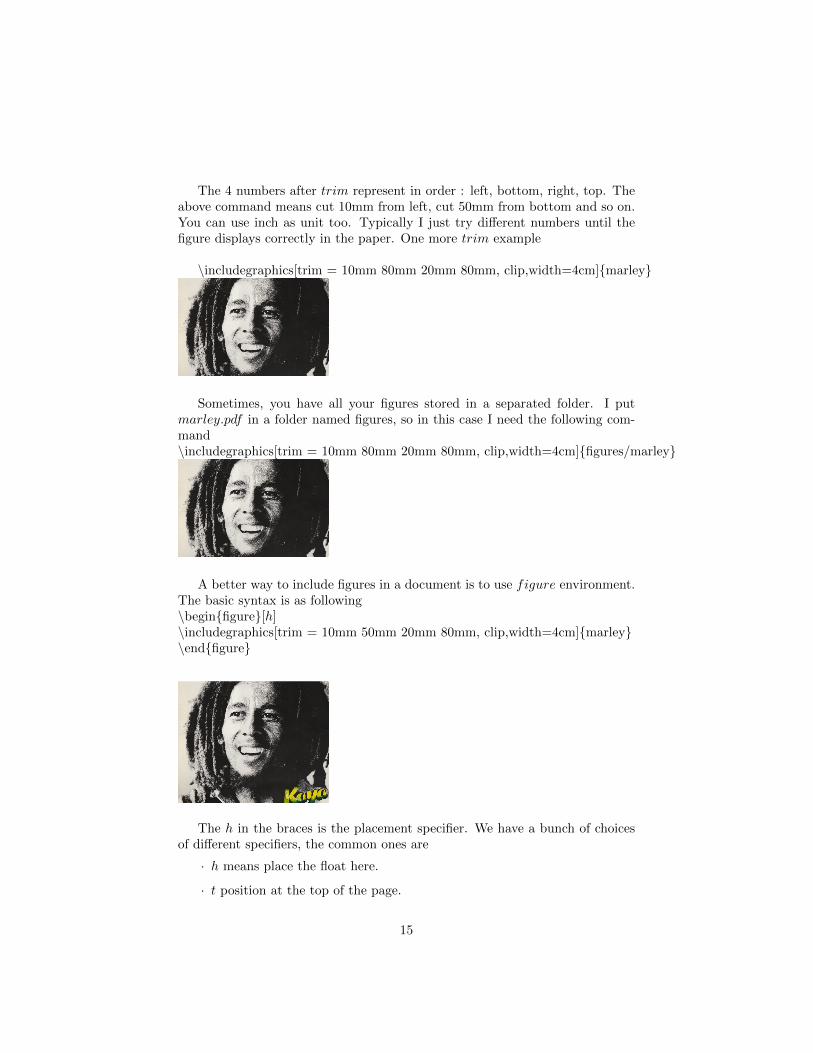
The 4 numbers after trim represent in order : left, bottom, right, top. Theabove command means cut 10mm from left, cut 50mm from bottom and so on.You can use inch as unit too. Typically I just try different numbers until thefigure displays correctly in the paper. One more trim example
\includegraphics[trim = 10mm 80mm 20mm 80mm, clip,width=4cm]{marley}
Sometimes, you have all your figures stored in a separated folder. I putmarley.pdf in a folder named figures, so in this case I need the following com-mand\includegraphics[trim = 10mm 80mm 20mm 80mm, clip,width=4cm]{figures/marley}
A better way to include figures in a document is to use figure environment.The basic syntax is as following\begin{figure}[h]\includegraphics[trim = 10mm 50mm 20mm 80mm, clip,width=4cm]{marley}\end{figure}
The h in the braces is the placement specifier. We have a bunch of choicesof different specifiers, the common ones are
· h means place the float here.
· t position at the top of the page.
15

Figure 1: he sings ”no woman no cry”
· b position at the bottom of the page.
· ! force latex to do what you want it to do.
Most of the time, we need to add caption to the figures in a document. It’seasy to do in LATEX. The syntax is as following\begin{figure}[t]\centering\includegraphics[trim = 10mm 50mm 20mm 80mm, clip,width=4cm]{marley}\caption{he sings ”no woman no cry”}\end{figure}
16