08b image upload - cricutcontent.cricut.com/b/pdfs/design-space-manual/08b_image_upload... · and...
TRANSCRIPT
Uploading images
Section 8B Page 1
Section 8BImage Upload
Cricut Design Space™ gives you the ability to upload most .jpg, .gif, .png, .bmp, .svg, and .dxf files for free, and converts them into cuttable shapes.
There are two di�erent types of uploaded images: Basic and Vector.• Basic images – include .jpg, .gif, .png, and .bmp file types. These files are uploaded as a single layer, and you have the ability to edit the image during the upload process.• Vector images – include .svg and .dxf file types. These files are uploaded as previously designed and will automatically be separated into layers after uploading and saving.
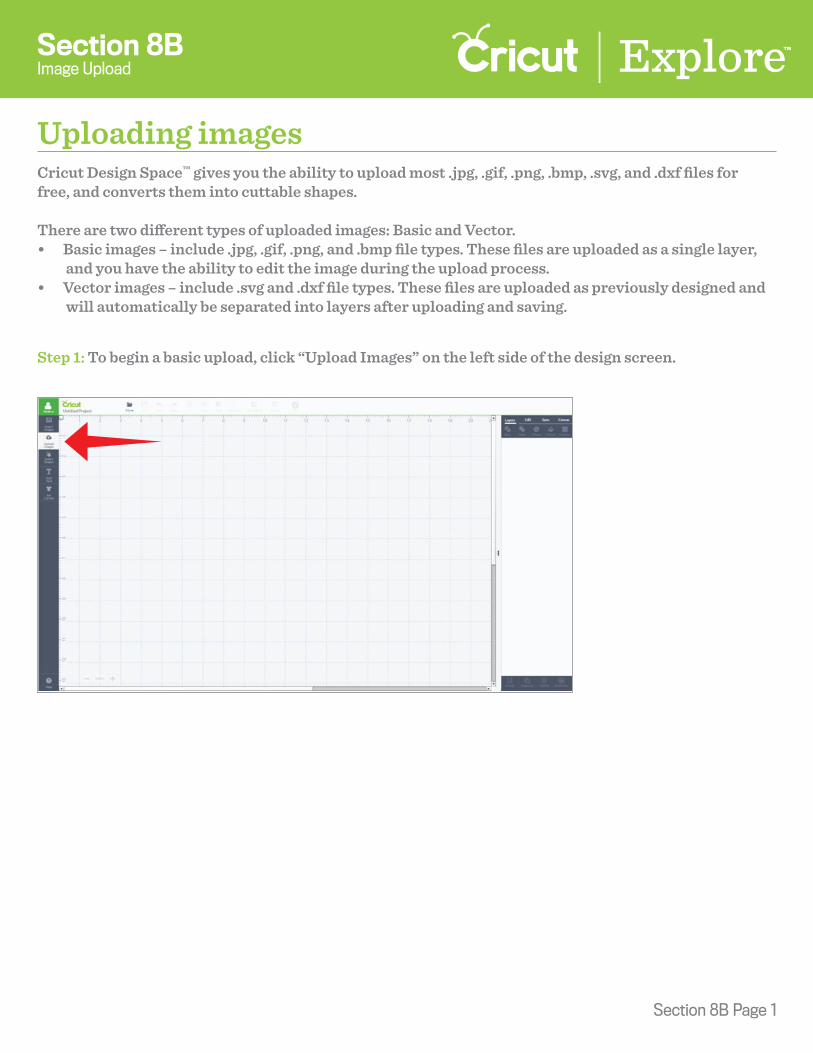
Step 1: To begin a basic upload, click “Upload Images” on the left side of the design screen.
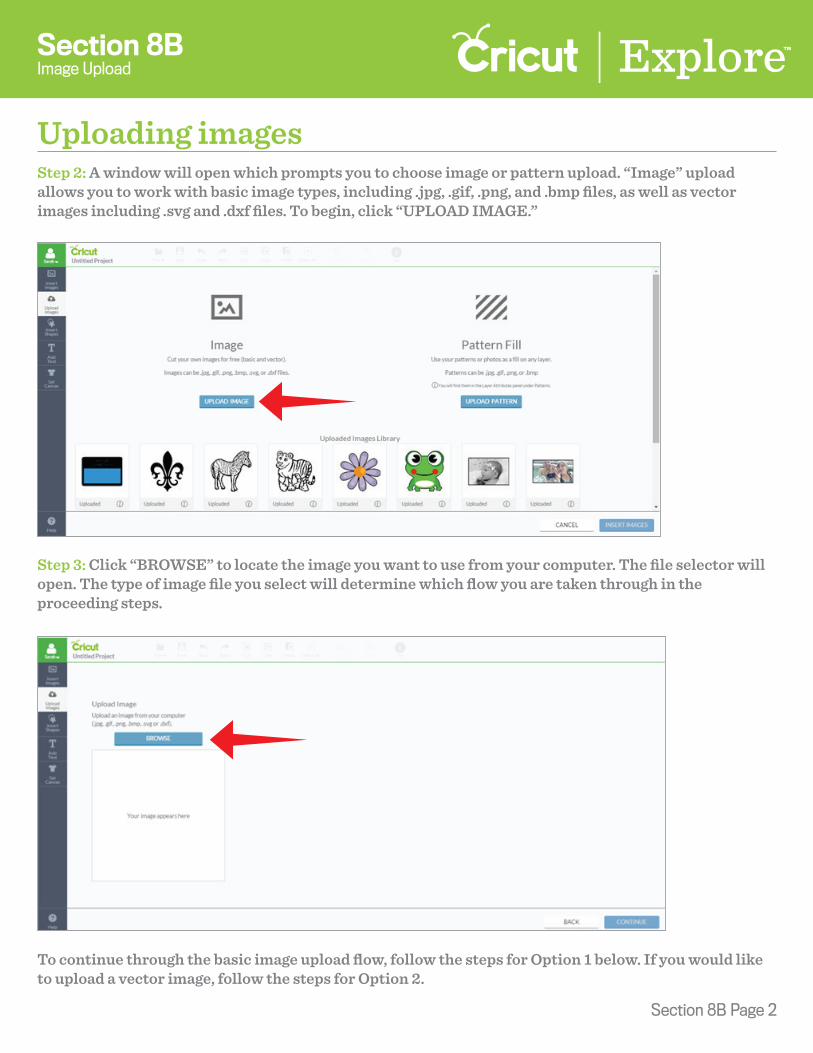
Step 3: Click “BROWSE” to locate the image you want to use from your computer. The file selector will open. The type of image file you select will determine which flow you are taken through in the proceeding steps.
To continue through the basic image upload flow, follow the steps for Option 1 below. If you would like to upload a vector image, follow the steps for Option 2.
Step 2: A window will open which prompts you to choose image or pattern upload. “Image” upload allows you to work with basic image types, including .jpg, .gif, .png, and .bmp files, as well as vector images including .svg and .dxf files. To begin, click “UPLOAD IMAGE.”
Section 8B Page 2
Section 8BImage Upload
Uploading images
Uploading images
Section 8B Page 3
Option 1 – Basic image upload
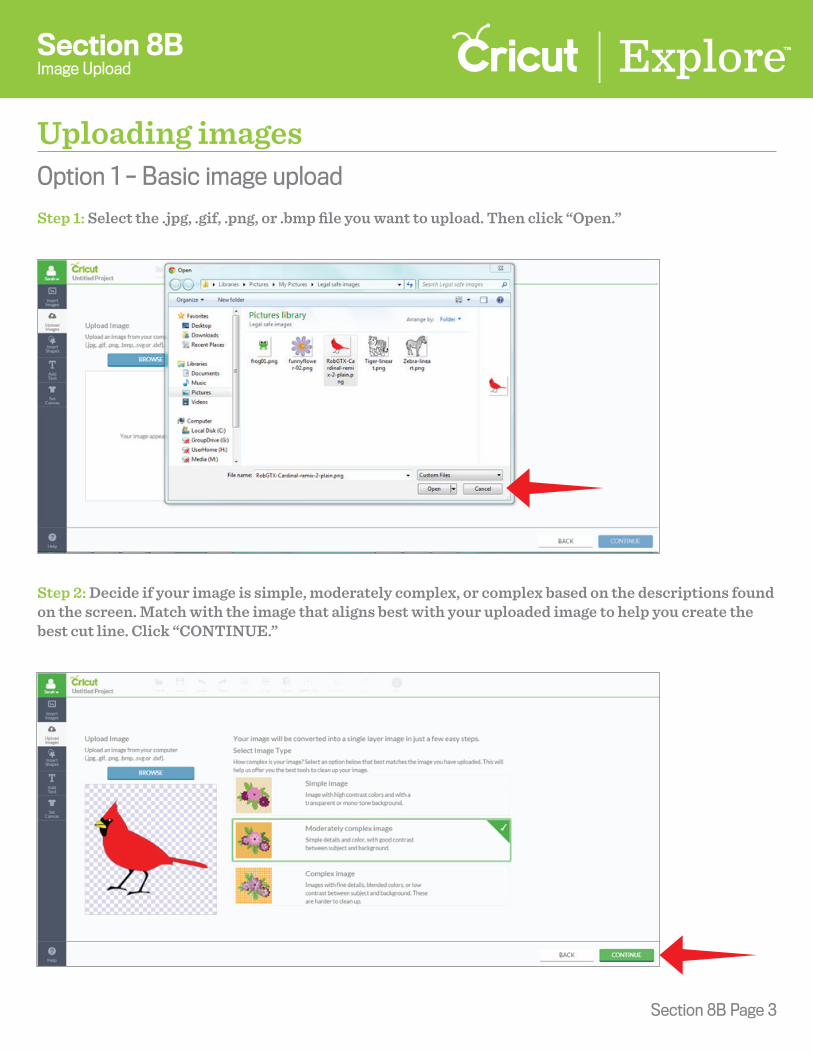
Step 1: Select the .jpg, .gif, .png, or .bmp file you want to upload. Then click “Open.”
Step 2: Decide if your image is simple, moderately complex, or complex based on the descriptions found on the screen. Match with the image that aligns best with your uploaded image to help you create the best cut line. Click “CONTINUE.”
Section 8BImage Upload

Step 3: In this step, you’ll define the cut lines of your image. Use the Crop, Select & Erase, and Erase tools to remove the unwanted background from your image. The checkerboard background indicates the areas that have been removed and will not cut. The solid areas represent the image you will use on the design screen.
Several tools help you clean up your images by deleting unwanted areas.
In this example, the Cricut® machine will cut around the edges of the bird image.
Uploading images
Section 8B Page 4
Section 8BImage Upload
Crop – Delete all areas that are not selected when you drag the box over the image.
Erase – Delete areas by clicking and dragging the circle over the image. Use the slider to size the eraser for better control.
Select & Erase – Erase the areas with similar colors when you click on them.

Uploading images
Section 8B Page 5
Section 8BImage Upload
Step 4: Once you have removed the unwanted areas, select “PREVIEW” to show the cut lines of your image.
If the image doesn’t appear as desired, click “PREVIEW” again to return to the editing view and continue removing portions of the image until you are satisfied with the preview.
Step 5: Once the image is how you want it, click “CONTINUE.”

Uploading images
Section 8B Page 6
Section 8BImage Upload
Step 6: Name your image and tag it (if desired) for easy searching. Decide if you want to save your image as a Print then Cut or as a Cut image. Select one of the two choices and a green check will appear, indicating it is selected.
Step 7: When you are done, click “SAVE.”
Saving as a Print then Cut image will preserve the entire image and add it to the design screen as a Print then Cut image. Saving as a Cut image will save only the outside silhouette as the image cut path.
Uploading images
Section 8B Page 7
Section 8BImage Upload
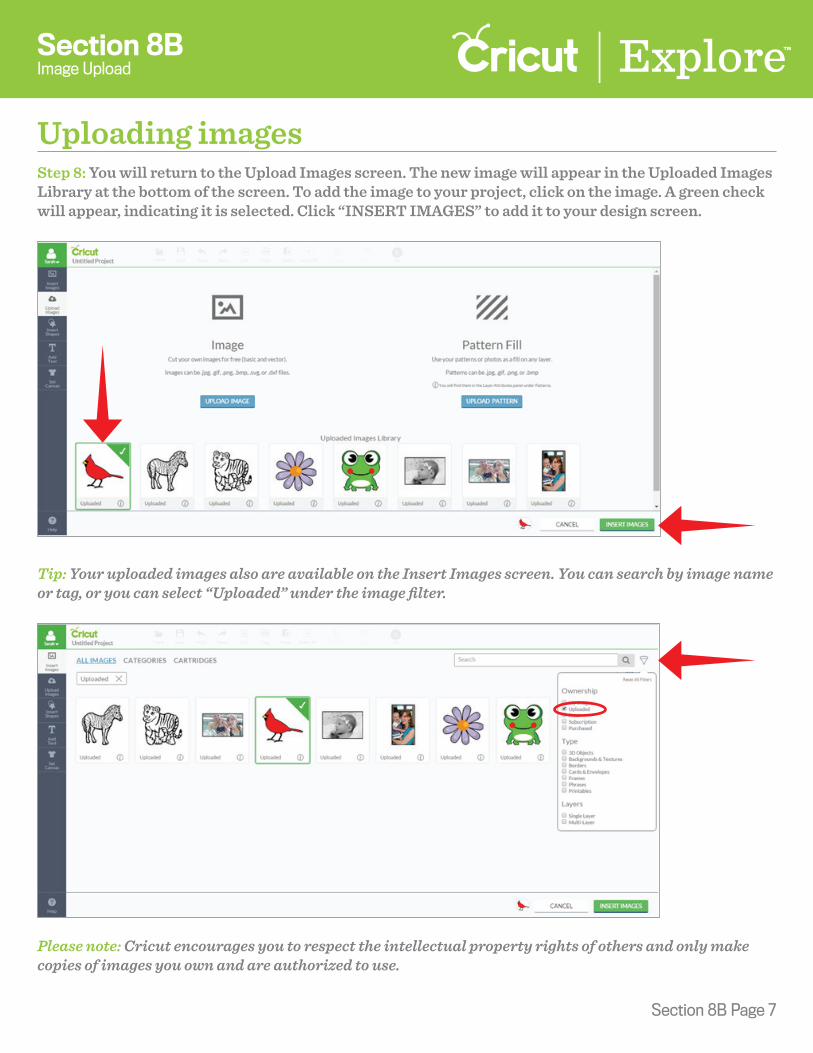
Step 8: You will return to the Upload Images screen. The new image will appear in the Uploaded Images Library at the bottom of the screen. To add the image to your project, click on the image. A green check will appear, indicating it is selected. Click “INSERT IMAGES” to add it to your design screen.
Tip: Your uploaded images also are available on the Insert Images screen. You can search by image name or tag, or you can select “Uploaded” under the image filter.
Please note: Cricut encourages you to respect the intellectual property rights of others and only make copies of images you own and are authorized to use.

Step 1: Select the .svg, or .dxf file you want to upload. Then click “Open.”
Step 2: Name your image and tag it (if desired) for easier searching and click “SAVE.”
Tip: Cricut Design Space™ can work with files created from other design software. The files can include solid colors or solid color fills, outlined text, or layers. However, if you use a layered image, you should ensure that in the original file the layers are ungrouped.
Uploading images
Section 8B Page 8
Section 8BImage Upload
Option 2 – Vector image upload
Uploading images
Section 8B Page 9
Section 8BImage Upload
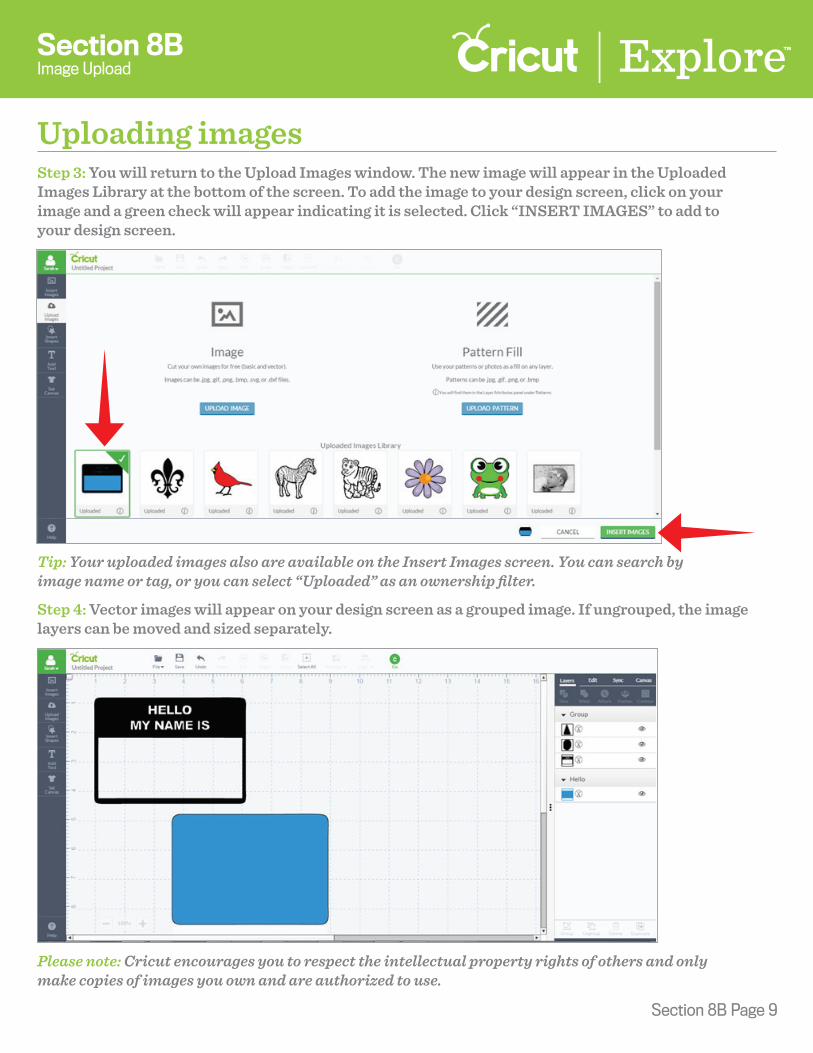
Step 3: You will return to the Upload Images window. The new image will appear in the Uploaded Images Library at the bottom of the screen. To add the image to your design screen, click on your image and a green check will appear indicating it is selected. Click “INSERT IMAGES” to add to your design screen.
Step 4: Vector images will appear on your design screen as a grouped image. If ungrouped, the image layers can be moved and sized separately.
Tip: Your uploaded images also are available on the Insert Images screen. You can search by image name or tag, or you can select “Uploaded” as an ownership filter.
Please note: Cricut encourages you to respect the intellectual property rights of others and only make copies of images you own and are authorized to use.