- the curriculum place - general · web viewcore content elements principles medium processes...
TRANSCRIPT

Subject DANCE DRAMA MEDIA MUSIC VISUAL ARTS
Unit Title: Taking a Line for a Walk Prep Yr1 Yr2 Yr3 Yr4 Yr5 Yr6
Achievement Standard
By the end of Year 2 Students describe artworks they make and view and where and why artworks are made and presented. Students make artworks in different forms to express their ideas, observations and imagination, using different techniques and processes.
Learning Intention● Learners will develop an interest in lines and how they can be used to enhance their artwork.● Learners will increase their vocabulary by developing a language of line.● Learners will see lines, feel lines and interpret lines through their developed awareness and practical experiences.
Success Criteria
● Learners are able to transfer their understandings of line to the medium of paper, eg. smooth, curved/zig-zag, angled● Learners are able to construct lines with paper using effective techniques.● Learners are able to give a title to their artwork and articulate why they chose that title.● Learners are able to make inferences about the type of music Kandinsky and Klee may have used to influence their paintings.
Core Content Elements Principles Medium Processes Materials Viewpoints Display
Selecting and Combining
LineShapeColourTextureForm
BalanceEmphasisMovementPatternRepetition
ProportionRhythmVarietyUnity
DrawingPaintingFibreSculpturePhotographyCollageCeramicsPrintmakingDesign
ArrangeAssembleIdentifyInterpretManipulate
Dry & wet media What story is the art telling?Who is telling the story?
PersonalAudience
Learning Framework Community Contributor Active Investigator Designer and Creator
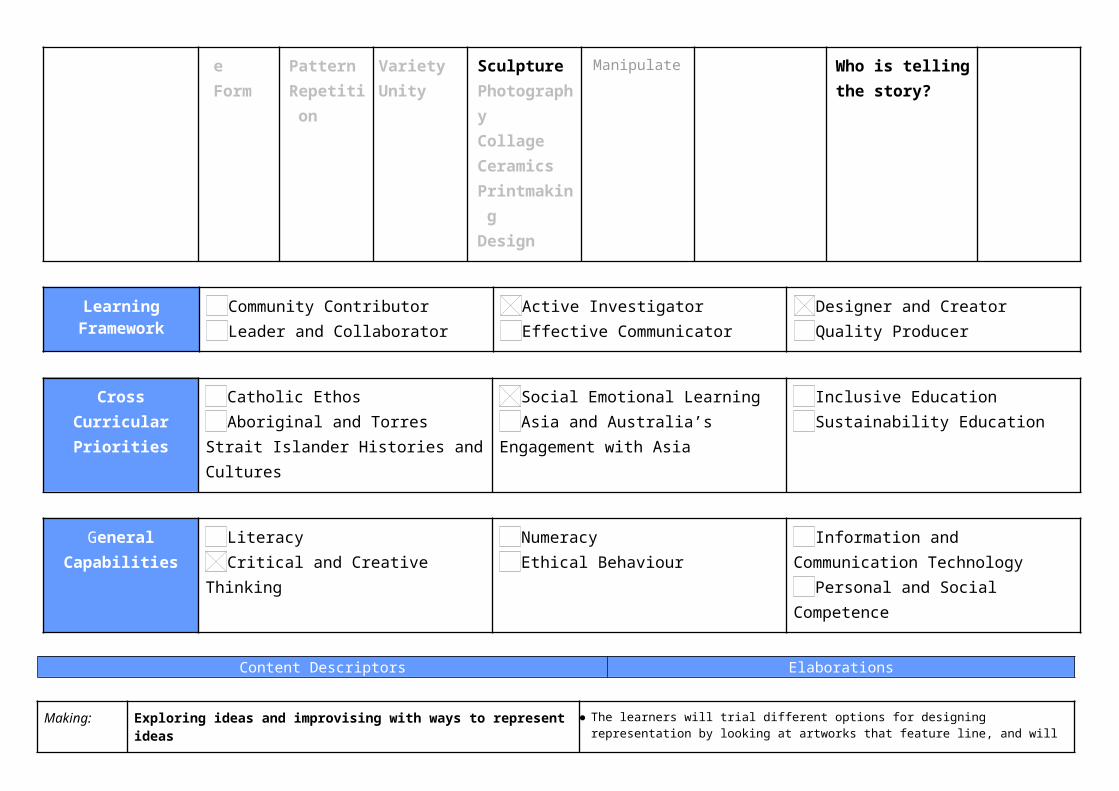
Leader and Collaborator Effective Communicator Quality Producer
Cross Curricular Priorities
Catholic EthosAboriginal and Torres Strait Islander
Histories and Cultures
Social Emotional LearningAsia and Australia’s Engagement with
Asia
Inclusive EducationSustainability Education
General Capabilities LiteracyCritical and Creative Thinking
NumeracyEthical Behaviour
Information and Communication Technology
Personal and Social Competence
Content Descriptors Elaborations
Making: Exploring ideas and improvising with ways to represent ideas2.1 Explore ideas, experiences, observations and imagination to create visual artworks and design, including considering ideas in artworks by Aboriginal and Torres Strait Islander artists (ACAVAM106)
● The learners will trial different options for designing representation by looking at artworks that feature line, and will make their own interpretations based on their ideas, experiences, observations and/or imagination.
(Lesson 2: Line Sculpture)
Making: Developing understanding of practice2.2 Use and experiment with different materials, techniques, technologies and processes to make artworks (ACAVAM107)
● The learners will explore a range of natural and man made technologies to visually express their experiences.
(Lesson 2: Line Sculpture)
Responding: Sharing artworks through performance, presentation or display2.3 Create and display artworks to communicate ideas to an audience (ACAVAM108)
● The learners will share ideas with their classmates about the representational choices they make in an artwork. Art Talk
(Lesson 1: A Dot Goes for a Walk, Lesson 2: Line Sculpture)
Responding: Responding to and interpreting artworks2.4 Respond to visual artworks and consider where and why people make visual artworks, starting with visual artworks from Australia, including visual artworks of Aboriginal and Torres Strait Islander Peoples (ACAVAR109)
● The learners will identify how the design element line is used in their artworks and in the artwork of others, in both two-dimensional work and three-dimensional form. (Lesson 4: Blending of the Senses)
Knowledge and Skills Learning and Teaching Activities Resources Vocab Assessment
1-2 Focus:The learners explore a variety of lines they are familiar with and create a collaborative Line Chart. They follow the story of A Dot That Went for a Walk and create their own drawings using a variety of lines and patterns and give their work a suitable title.
Representation:●Techniques: Pattern●Visual Conventions: LinePractices:●Observational skills:
seeing, noticing line in their environment
●Spaces: recognising the meaning of studio for visual artists and adopting appropriate behaviour in the studio as a specialised space, for example, cleaning up, organising materials, naming work and exhibiting work.
Viewpoints:●Contexts - recognising
A Dot goes for a WalkWarm Up:Creating Lines with the Body● Ask learners to demonstrate how they would make their body into a
dot (curled into a ball). Have them also make a straight line with their bodies and then various other lines eg. curved, wavy, zigzag.
Making:Slideshow - Guided Drawing● Hand each child an A3 piece of paper and an oil pastel. Ask each of
them to put one small dot on their paper, anywhere they like and then put their pastel down. Have them think of a name for their dot and tell it to the student next to them. Explain that their dot is going to be the star of their story today, then show the slideshow story of A Dot That Went for a Walk. Have children add examples of each type of line to their paper at intervals throughout the slideshow, explaining that they can position their line anywhere on the page: ie. top, bottom, middle, side; and that they can place it however they like: ie. horizontally, vertically, or diagonally.
Collaborative Line Chart● After the slideshow, tell the children they are going to record what
they have learned about lines so far on a Line Chart. Recap the different lines they have just discovered on a collaborative chart with paint and a brush and add any others they may think of eg. spiral. (Teacher tip: A large sheet of cardboard cut from the side of a fridge box works very well for this.)
● Explain how lines can also be drawn to make patterns, eg. parallel lines and cross hatching, and add these to the chart.
● Show the children the examples of line work used in aboriginal paintings and compare with those they have recorded.
● Children return to their A3 artwork started during the slideshow and finish it using a variety of patterns and lines, encourage them to incorporate curved lines, spirals, parallel lines and cross hatching.
❏ A3 paper❏ oil pastels❏ paint❏ brushes❏ large sheet of paper/card
Slideshow:A Line is a Dot That Went Out for a Walk
NB. Slideshow must be downloaded and opened with Microsoft Powerpoint in order for animations to work.
Slideshow adapted from:http://www.slideshare.net/PHrbacek/a-line-is-a-dot-that-went-for-a-walk
Symbols used in Aboriginal Art:
http://www.new-guinea-tribal-art.com/wp/index.php/2011/09/24/australian-
Lines:longshortthickthincurvedstraightdotted
Position:topbottommiddleside
Direction:horizontalverticaldiagonaloblique
Descriptive:jaggedsmoothbumpytangledfatskinny
Teacher resource for vocab:http://www.incredibleart.org/files/vocab.htm
Formative :Review learner’s understanding of line by having them create examples on a collaborative chart.
Summative:Anecdotal Checklist
Learners are able to give a title to their artwork and articulate why they chose that title.
artworks from different cultures - Aboriginal and Torres Strait Islander Peoples
Responding:Art TalkLearners individually title their own creations and share with class.
aboriginal-art/
https://www.flickr.com/photos/69768675@N05/6356349409/
3-4 Focus:The learners discover the difference between two-dimensional and three-dimensional art. They explore different ways to represent various lines using strips of paper. They then create a relief sculpture showing a variety of lines, choosing to use either warm or cool coloured paper strips.
Representation:●Forms: Sculpture●Techniques: Pattern●Visual Conventions:
identifying, using & interpreting line
●Materials:
Line SculpturesWarm Up:What is a Sculpture?● The learners consider that artists make sculptures as well as
paintings and that sculptures are viewed differently from paintings. Talk about the difference between flat, two-dimensional art and three-dimensional artworks. Look at some images of sculptures and talk about any sculptures the children are familiar with, especially those seen locally. Explain that a sculpture can be seen from lots of positions all the way around it.
Developing Techniques● Tell the learners that they are going to make some sculptures using
lines. Show them the square that will be their base and some paper strips of various colours and widths. Ask them how they might be able to make the paper strips stand up and elicit that they can create ‘feet’ by bending the paper and then using glue to attach it to the base. Demonstrate how to bend and glue the paper and then hold for about 10 seconds.
● Outline that the sculpture could be made using all the strips in the same way but because they have learned all about different lines they could make their sculpture really interesting using lots of different types of lines. Have different learners demonstrate how different types of lines could be made, including longer or shorter
Strips of paper in a variety of colours and widthsSquares of black cardglue
Line Chart (lesson one)
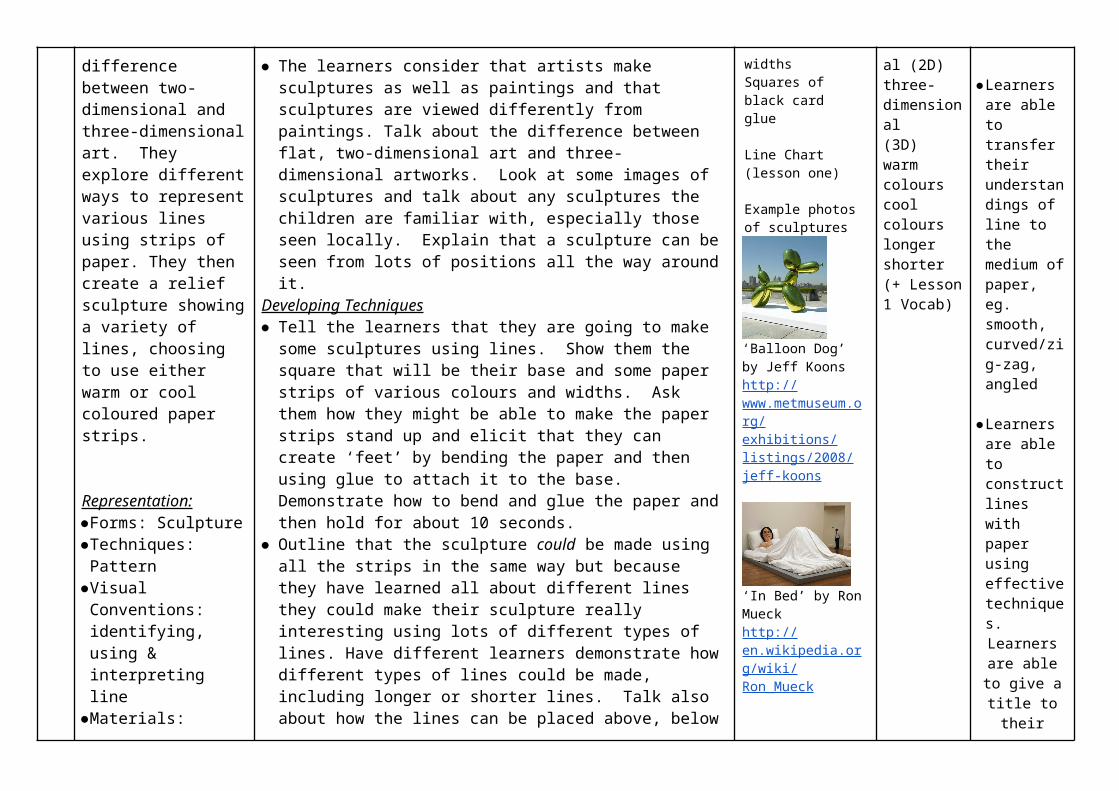
Example photos of sculptures
‘Balloon Dog’ by Jeff Koonshttp://www.metmuseum.org/exhibitions/listings/2008/jeff-koons
sculpturetwo-dimensional (2D)three-dimensional(3D)warm colourscool colourslongershorter(+ Lesson 1 Vocab)
Summative:Anecdotal Checklist
●Learners are able to transfer their understandings of line to the medium of paper, eg. smooth, curved/zig-zag, angled
●Learners are able to construct lines with paper using effective techniques.
Learners are able to give a title to their artwork and
understanding the qualities and properties of a range of materials
Practices:●Processes: exploring,
experimenting, constructing
Spaces: recognising the meaning of studio for visual artists and adopting appropriate behaviour in the studio as a specialised space, for example, cleaning up, organising materials, naming work and exhibiting work.
lines. Talk also about how the lines can be placed above, below or beside each other on the square base.
Making:Construction of Line Sculpture● Have the coloured strips divided into warm colours (red, orange,
yellow) and cool colours (blue, green, purple). Explain to the learners that colours can be divided up into ‘warm colours’ and ‘cool colours’. Ask them which colours they think would be the cool colours, or those that most make them feel like walking through snow, and which colours they think would be the warm colours, or those that make them feel like walking through the desert. Hand out the black square bases and allow the children to choose either the warm colour combinations or the cool colour combinations for their paper strips.
● Allow children to create their sculptures, encouraging them to refer to the Line Chart (Lesson 1) to incorporate a variety of line styles.
Responding:Art TalkChildren individually title their own creations trying to reflect their use of either warm or cool colours and share with class.
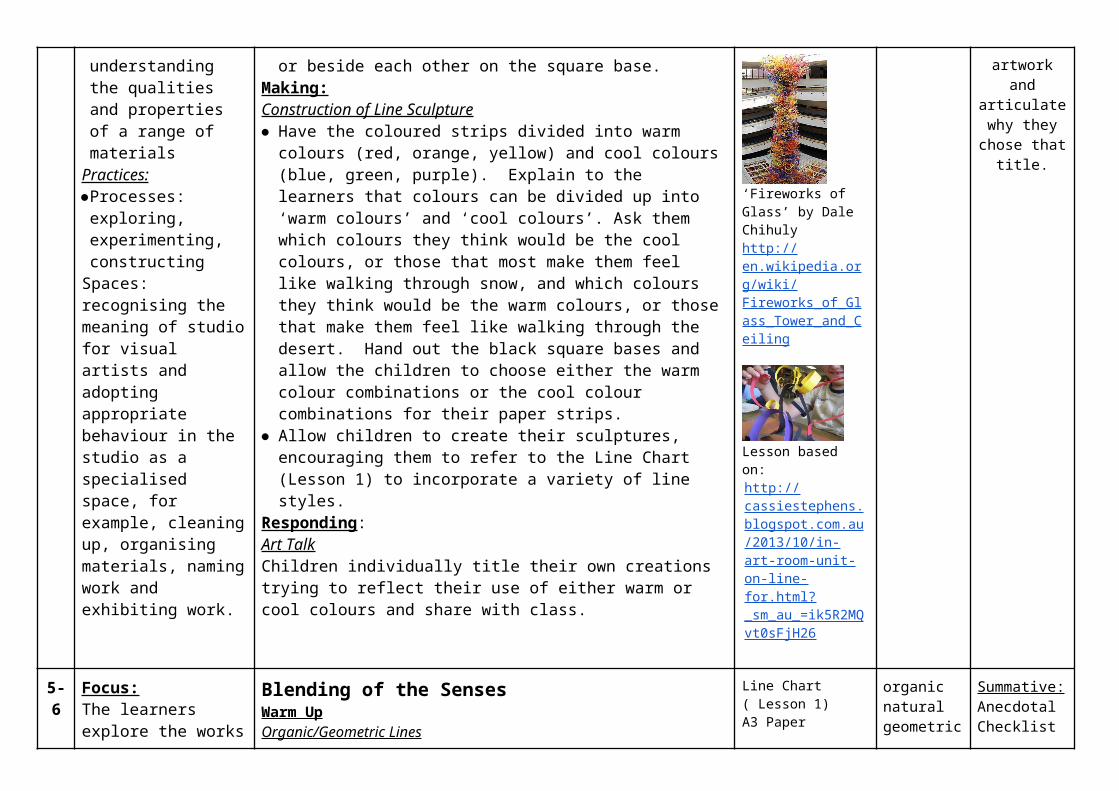
‘In Bed’ by Ron Mueckhttp://en.wikipedia.org/wiki/Ron_Mueck
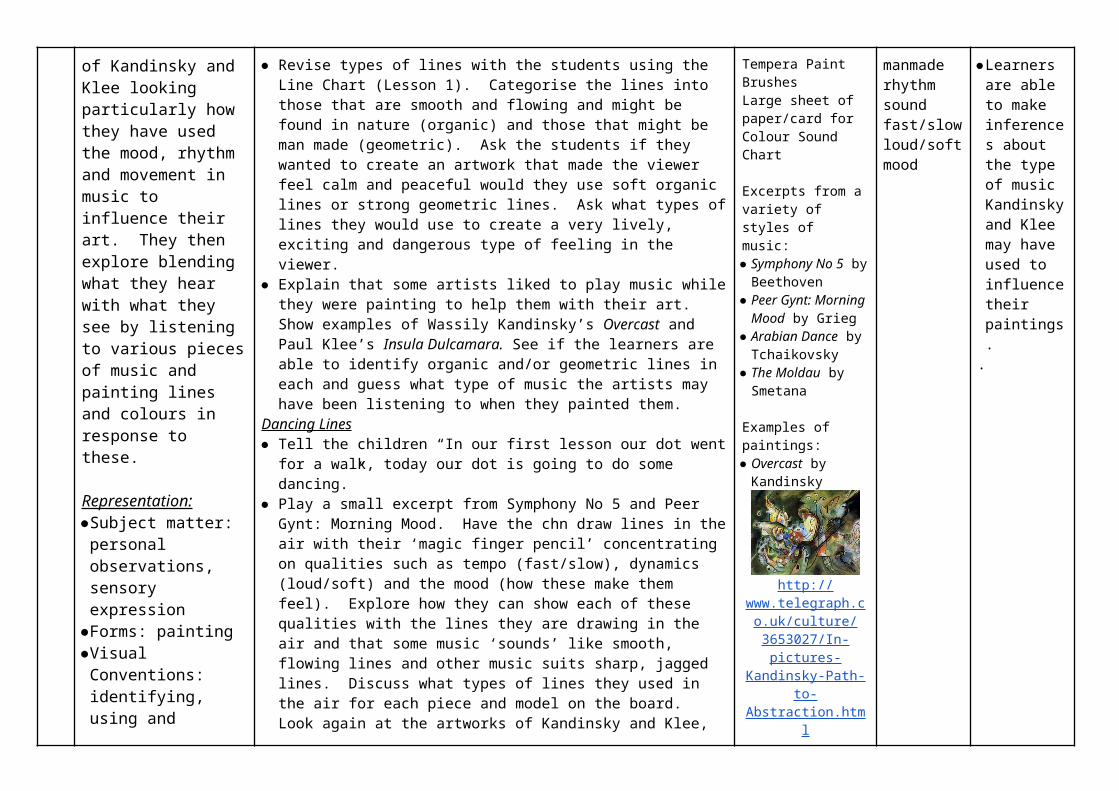
‘Fireworks of Glass’ by Dale Chihulyhttp://en.wikipedia.org/wiki/Fireworks_of_Glass_Tower_and_Ceiling
Lesson based on:http://cassiestephens.blogspot.com.au/2013/10/in-art-room-unit-on-line-for.html?_sm_au_=ik5R2MQvt0sFjH26
articulate why they chose that title.
5-6 Focus: Blending of the Senses Line Chart organic Summative:
The learners explore the works of Kandinsky and Klee looking particularly how they have used the mood, rhythm and movement in music to influence their art. They then explore blending what they hear with what they see by listening to various pieces of music and painting lines and colours in response to these.
Representation:●Subject matter:
personal observations, sensory expression
●Forms: painting●Visual Conventions:
identifying, using and interpreting line
Practices:●Observational skills:
seeing, noticing and viewing critically
●Processes: describing, explaining, questioning, interpreting
●Spaces: recognising the meaning of studio for visual artists and adopting appropriate behaviour in the studio
Warm UpOrganic/Geometric Lines● Revise types of lines with the students using the Line Chart (Lesson
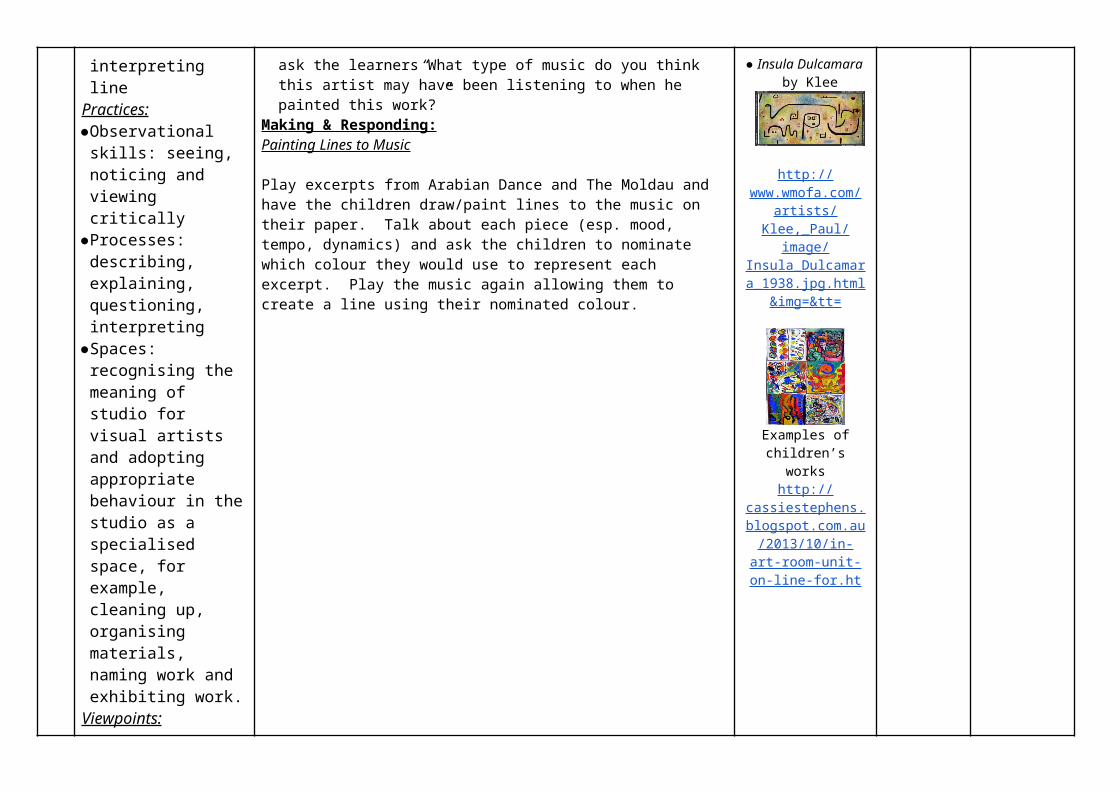
1). Categorise the lines into those that are smooth and flowing and might be found in nature (organic) and those that might be man made (geometric). Ask the students if they wanted to create an artwork that made the viewer feel calm and peaceful would they use soft organic lines or strong geometric lines. Ask what types of lines they would use to create a very lively, exciting and dangerous type of feeling in the viewer.
● Explain that some artists liked to play music while they were painting to help them with their art. Show examples of Wassily Kandinsky’s Overcast and Paul Klee’s Insula Dulcamara. See if the learners are able to identify organic and/or geometric lines in each and guess what type of music the artists may have been listening to when they painted them.
Dancing Lines● Tell the children “In our first lesson our dot went for a walk, today our
dot is going to do some dancing.”● Play a small excerpt from Symphony No 5 and Peer Gynt: Morning
Mood. Have the chn draw lines in the air with their ‘magic finger pencil’ concentrating on qualities such as tempo (fast/slow), dynamics (loud/soft) and the mood (how these make them feel). Explore how they can show each of these qualities with the lines they are drawing in the air and that some music ‘sounds’ like smooth, flowing lines and other music suits sharp, jagged lines. Discuss what types of lines they used in the air for each piece and model on the board. Look again at the artworks of Kandinsky and Klee, ask the learners “What type of music do you think this artist may have been listening to when he painted this work?”
Making & Responding:Painting Lines to Music
Play excerpts from Arabian Dance and The Moldau and have the children draw/paint lines to the music on their paper. Talk about each piece (esp. mood, tempo, dynamics) and ask the children to nominate which colour they would use to represent each excerpt. Play the music again allowing them to create a line using their nominated colour.
( Lesson 1)A3 PaperTempera PaintBrushesLarge sheet of paper/card for Colour Sound Chart
Excerpts from a variety of styles of music:● Symphony No 5 by
Beethoven● Peer Gynt: Morning
Mood by Grieg● Arabian Dance by
Tchaikovsky● The Moldau by
Smetana
Examples of paintings:● Overcast by
Kandinsky
http://www.telegraph.co.uk/culture/3653027/In-pictures-Kandinsky-
Path-to-Abstraction.html
● Insula Dulcamara by Klee
http://www.wmofa.com/
naturalgeometricmanmaderhythmsoundfast/slowloud/softmood
Anecdotal Checklist●Learners
are able to make inferences about the type of music Kandinsky and Klee may have used to influence their paintings.
.
as a specialised space, for example, cleaning up, organising materials, naming work and exhibiting work.
Viewpoints:●Contexts - recognising
artworks from different times
What are the characteristics of line/direction and quality?1. line directiona. horizontal lines seem placidb. vertical lines give stability and upward thrust.c. diagonal lines imply action2. line quality influences the overall emotional impact of the artwork - they can be thick, thin, straight, curved or angular - these are the emotional qualities of the line itself.
artists/Klee,_Paul/image/
Insula_Dulcamara_1938.jpg.html&img=&tt=
Examples of children’s workshttp://
cassiestephens.blogspot.com.au/2013/10/in-art-room-unit-on-line-
for.ht
7-8 Focus:The learners paint lines in response to various characters as depicted in
Peter and the WolfWarm UpColours, Lines and Sounds● Collect a variety of musical instruments and draw a simple picture of
Line Chart(Lesson 1)
Black paintTempera Paint
darklightstrongintenseweak
Formative:Assess the learner’s understanding of the
Prokofiev’s Peter and the Wolf. They then add colours to their work that represent their experience of each of the instruments used.
Representation:●Subject matter:
personal observations, sensory expression
●Forms: painting●Visual Conventions:
identifying, using and interpreting line
Practices:●Observational skills:
engaging critically●Processes: describing,
explaining, interpreting●Spaces: recognising the
meaning of studio for visual artists and adopting appropriate behaviour in the studio as a specialised space, for example, cleaning up, organising materials, naming work and exhibiting work.
Viewpoints:Contexts - recognising artworks from different times
each down the left hand side of a large piece of paper/card. Ask the children to think about what colour best matches each instrument as you play them one by one. Ask Is this sound dark or light? Does it sound strong and intense or weak and gentle? What colour would you match up to the sound you are hearing? Record their colour choices on the chart next to each diagram.
● Repeat the activity and have the children fill in their own sheet asking them to show what colours they think match to each instrument.
● Review the different lines on the Line Chart (Lesson 1), add any new lines they may have discovered and discuss which lines might be used to show what each of the instruments sound like.
Making & Responding:Peter and the Wolf Line Story● Tell the children how Sergei Prokofiev used lots of different
instruments to tell a story about Peter and the Wolf. Explain that just as Kandinsky created some of his paintings in response to music, they will be listening to all the different parts of ‘Peter and the Wolf’ to make their own art work.
● Play a piece of music that represents each character and have the children paint a line from one side of their paper to the other that represents each person or animal. At this point allow the children to use black paint only.
Characters and the instrument usedCounter position refers to the recording of Peter and the Wolf listed in the resources column.
● Bird: flute (0:13)
● Duck: oboe (0:28)
● Cat: clarinet (0:42)
● Grandfather: bassoon (0:55)
Brushes
Variety of instruments - eg. drum, maracas, triangle, tambourine.
Peter and The Wolf by Prokofiev
https://www.youtube.com/watch?v=JQ57EuLRTO8
What Colour Does it Sound Like?’ sheet
Listening Map:http://www.classicsforkids.com/teachers/lessonplans/prokofiev/CSO%20Peter%20and%20the%20Wolf%20Lesson%20Plan%20Music%20Language%20Arts%201-3.pdf
Suggested links with Music, Science, Language Arts - Telling a Story, Language Arts -
Research, Sequencing.
http://
gentlegracefulpeacefulvibrantbright
relationship between sound and colour byhaving them create a collaborative chart as a class.
Summative:Review the learner’s understanding of the relationship between sound and colour byhaving them individuallycomplete the ‘What Colour Does it Sound Like?’ sheet.
What Colour Does it
Sound Like
● Wolf: French horns (1:10)
● Peter: string instruments (including violin, viola, cello, and bass)
(1:27)
● Hunters: woodwind theme, with gunshots on kettle and bass drum
(1:50)
(http://en.wikipedia.org/wiki/Peter_and_the_Wolf)
Once the black paint has dried, (perhaps the children could listen to more of the story whilst the paint is drying) go back and replay the sections in the same order to allow the children to add a colour for each person/animal by painting the area between their lines using tempera paint.
www.classicsforkids.com/teachers/
lessonplans_prokofiev.asp
Lesson based on:http://cassiestephens.blogspot.com.au/2013/10/in-art-room-unit-on-linefor.html?_sm_au_=ik5R2MQvt0sFjH26
Class Assessment
Learning PointsExploring ideas and improvising with ways to represent ideas
Developing understanding of practice
Sharing artworks through performance, presentation or display
Responding to and interpreting artworks
Success criteria
Learners are able to transfer their understandings of line to the medium of paper, eg. smooth/curved,zig-zag/angled
Learners are able to construct lines with paper using effective techniques.
Learners are able to give a title to their artwork and articulate why they chose that title.
Learners are able to make inferences about the type of music Kandinsky and Klee may have used to influence their paintings.
Relevant lessons Line Sculpture Line Sculpture A Dot Goes for a Walk Line Sculpture
Blending of the Senses
Learner’s Name:
Summative Assessment Criteria Name: Date: Teacher:
CONTENT DESCRIPTORS
LEARNINGPOINTS
Working atBecoming
an artist
Working atDeveloping
the processes of an artist
Working atAttempting expressive
artistic ideas
TEACHER’SNOTES:
Success Criteria
Exploring ideas and improvising with ways to represent ideas2.1 Explore ideas, experiences, observations and imagination to create visual artworks and design, including considering ideas in artworks by Aboriginal and Torres Strait Islander artists(ACAVAM106)
Line Sculpture● The learners have tried different options for
designing representation by looking at artworks that feature line, and have made their own interpretations based on their ideas, experiences, observations and/or imagination.
Learners are able to transfer their understandings of line to the medium of paper, eg. smooth, curved/zig-zag, angled
Developing understanding of practice2.2 Use and experiment with different materials, techniques, technologies and processes to make artworks(ACAVAM107)
Line Sculpture● The learners have explored a range of
natural and man made technologies to visually express their experiences.
Learners are able to construct lines with paper using effective techniques.
Sharing artworks through performance, presentation or display2.3 Create and display artworks to communicate ideas to an audience(ACAVAM108)
A Dot Goes for a WalkLine Sculpture
● The children have shared ideas with their classmates about the representational choices they made in their artwork.
(Art Talk)
Learners are able to give a title to their artwork and articulate why they chose that title.
Responding to and interpreting artworks2.4 Respond to visual artworks and consider where and why people make visual artworks, starting with visual artworks from Australia, including visual artworks of Aboriginal and Torres Strait Islander Peoples(ACAVAR109)
Blending of the Senses● The children have identified how the design
element line is used in their artworks and in the artwork of others, in two-dimensional and three-dimensional works.
Learners are able to make inferences about the type of music Kandinsky and Klee may have used to influence their paintings.
Planning for Differently Abled Students
Student/s Different Ability Australian Curriculum addressed
Learning and Teaching Strategies Assessment Strategies
Reflection on Unit Identify what worked and how it worked during the unit
● Learning activities that worked well and why● Learning activities that could be improved and how● For, Of and As assessment that was effective and why● For, Of and As assessment that could be improved and
how● Common student misconceptions that need, or needed, to

be clarified.